WordPress Rest API Authentication
By miniOrange
WordPress REST API Authentication plugin provides the security from unauthorized access to your WordPress REST APIs.
Search Results :
×This method of WordPress REST API endpoints authentication involves the REST APIs access on validation based on the JWT(JSON Web Token), Each time a request to access the WordPress REST API endpoint will be made, the authentication will be done against that JWT token, and on the basis of the verification of that JWT token, the resources for that API request will be allowed to access. The JWT token is generated based on WordPress user credentials and is highly encrypted, hence security is not compromised.
WordPress REST API Authentication plugin provides the security from unauthorized access to your WordPress REST APIs.
 Use
Case: Secure/Protect or authentication of WordPress REST API Endpoints using the JWT (JSON Web Token).
Use
Case: Secure/Protect or authentication of WordPress REST API Endpoints using the JWT (JSON Web Token).
Suppose you have a mobile/web application and want to allow access to the WordPress REST API endpoints based on the user capabilities such that only users with that particular capability should perform create/update operations while users with other roles can only view that. Then in such cases, you can authenticate the REST API endpoints using the JWT(JSON Web Tokens) obtained in accordance with user credentials and WordPress JWT authentication allows you to do it very securely. So, making the REST API request with this JWT passed in the Authorization header allows access to the resource/data or provides the capability/authorization to perform WordPress operation that requires particular user capability. JWT Authentication for WordPress REST API provides the encryption of the token using 2 methods- HSA or RSA and is valid for a limited time. Hence security is not a concern.
The JWT token generated for the JWT authentication consists of WordPress user information and hence this token can be decoded using the valid secret key/public certificate on another application to create a user there or sync updated user information. The JWT token is also a time based token meaning it expires after a certain period of time which can be set as per the requirements and hence after its expiration, the APIs will not be allowed to access and neither the user information can be decoded which makes JWT Authentication for WordPress REST API a secured authentication method.
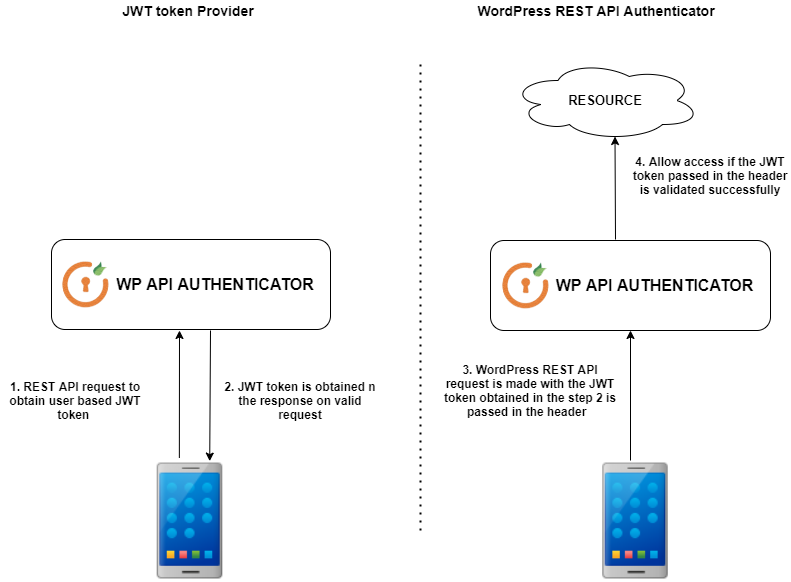
1. The WordPress REST API request is made with all the required parameters to obtain the JWT token. The obtained JWT token is provided in encrypted format using the HSA or RSA algorithm hence there will be utmost security.
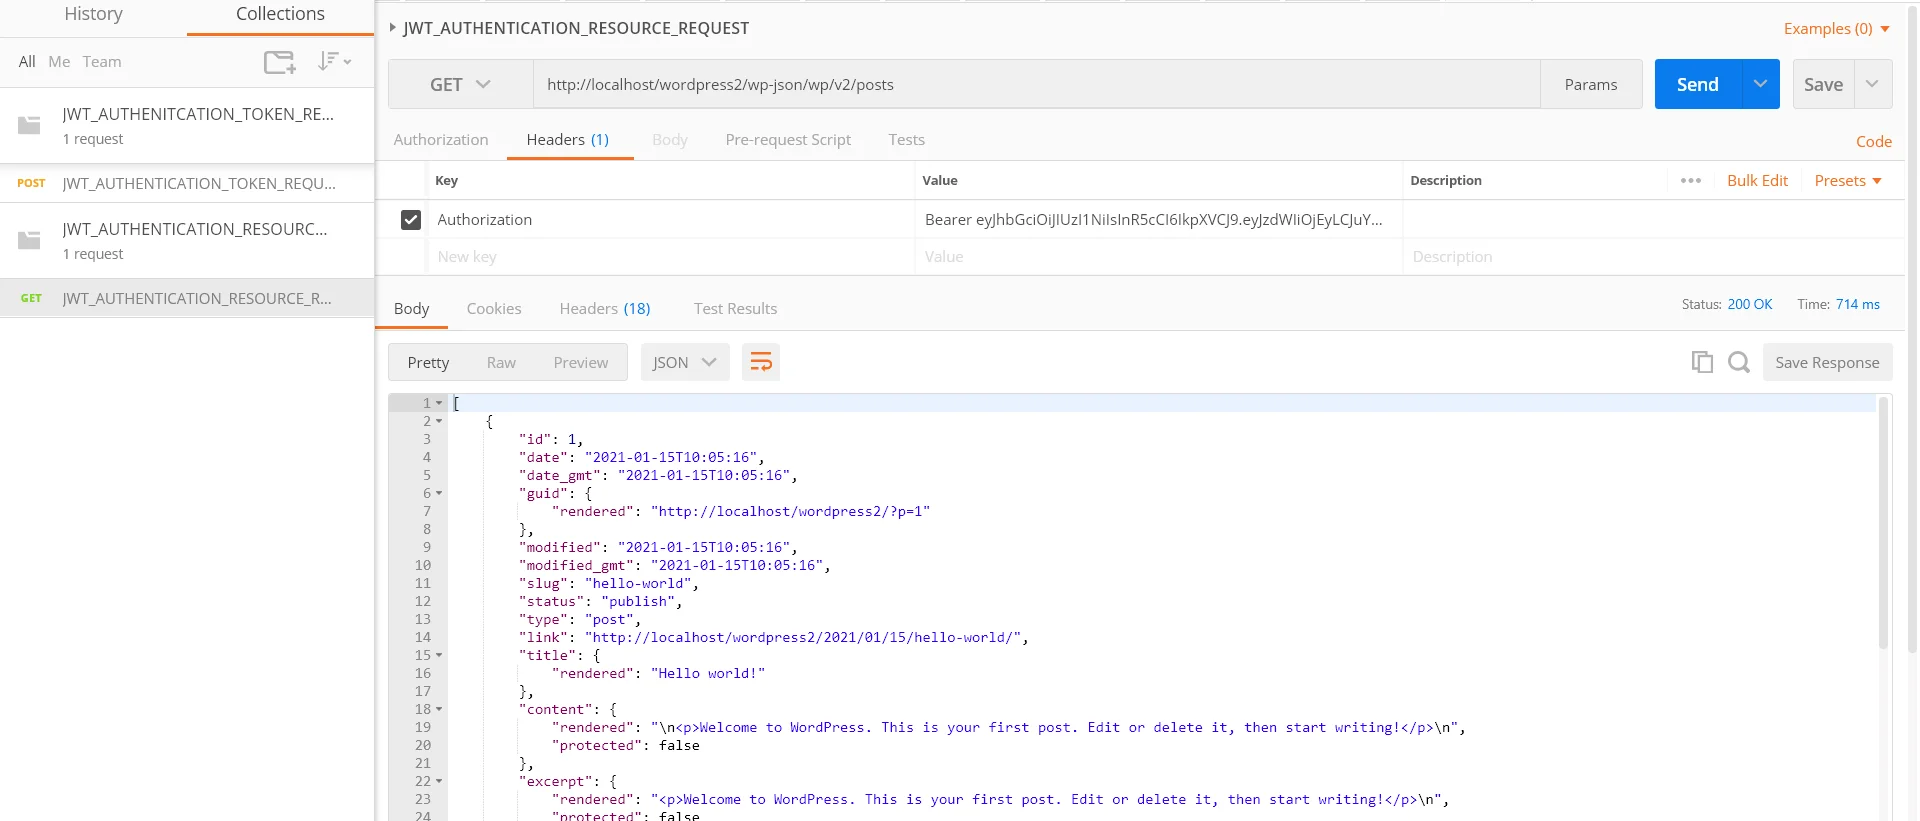
2. Then the actual WordPress REST API request to access the resource/data or to perform operations with the WordPress database is made with the JWT token obtained in the last step is passed in the Authorization header with the token types as Bearer and our plugin will validate that JWT token and if the validation or authentication is successful then the API requester will be provided with the resource else an error response will be returned. So our plugin will act both as the JWT token provider and the JWT token validator.
Related Usecase:
Read Use
Cases for the following Rest API Authentication Methods:
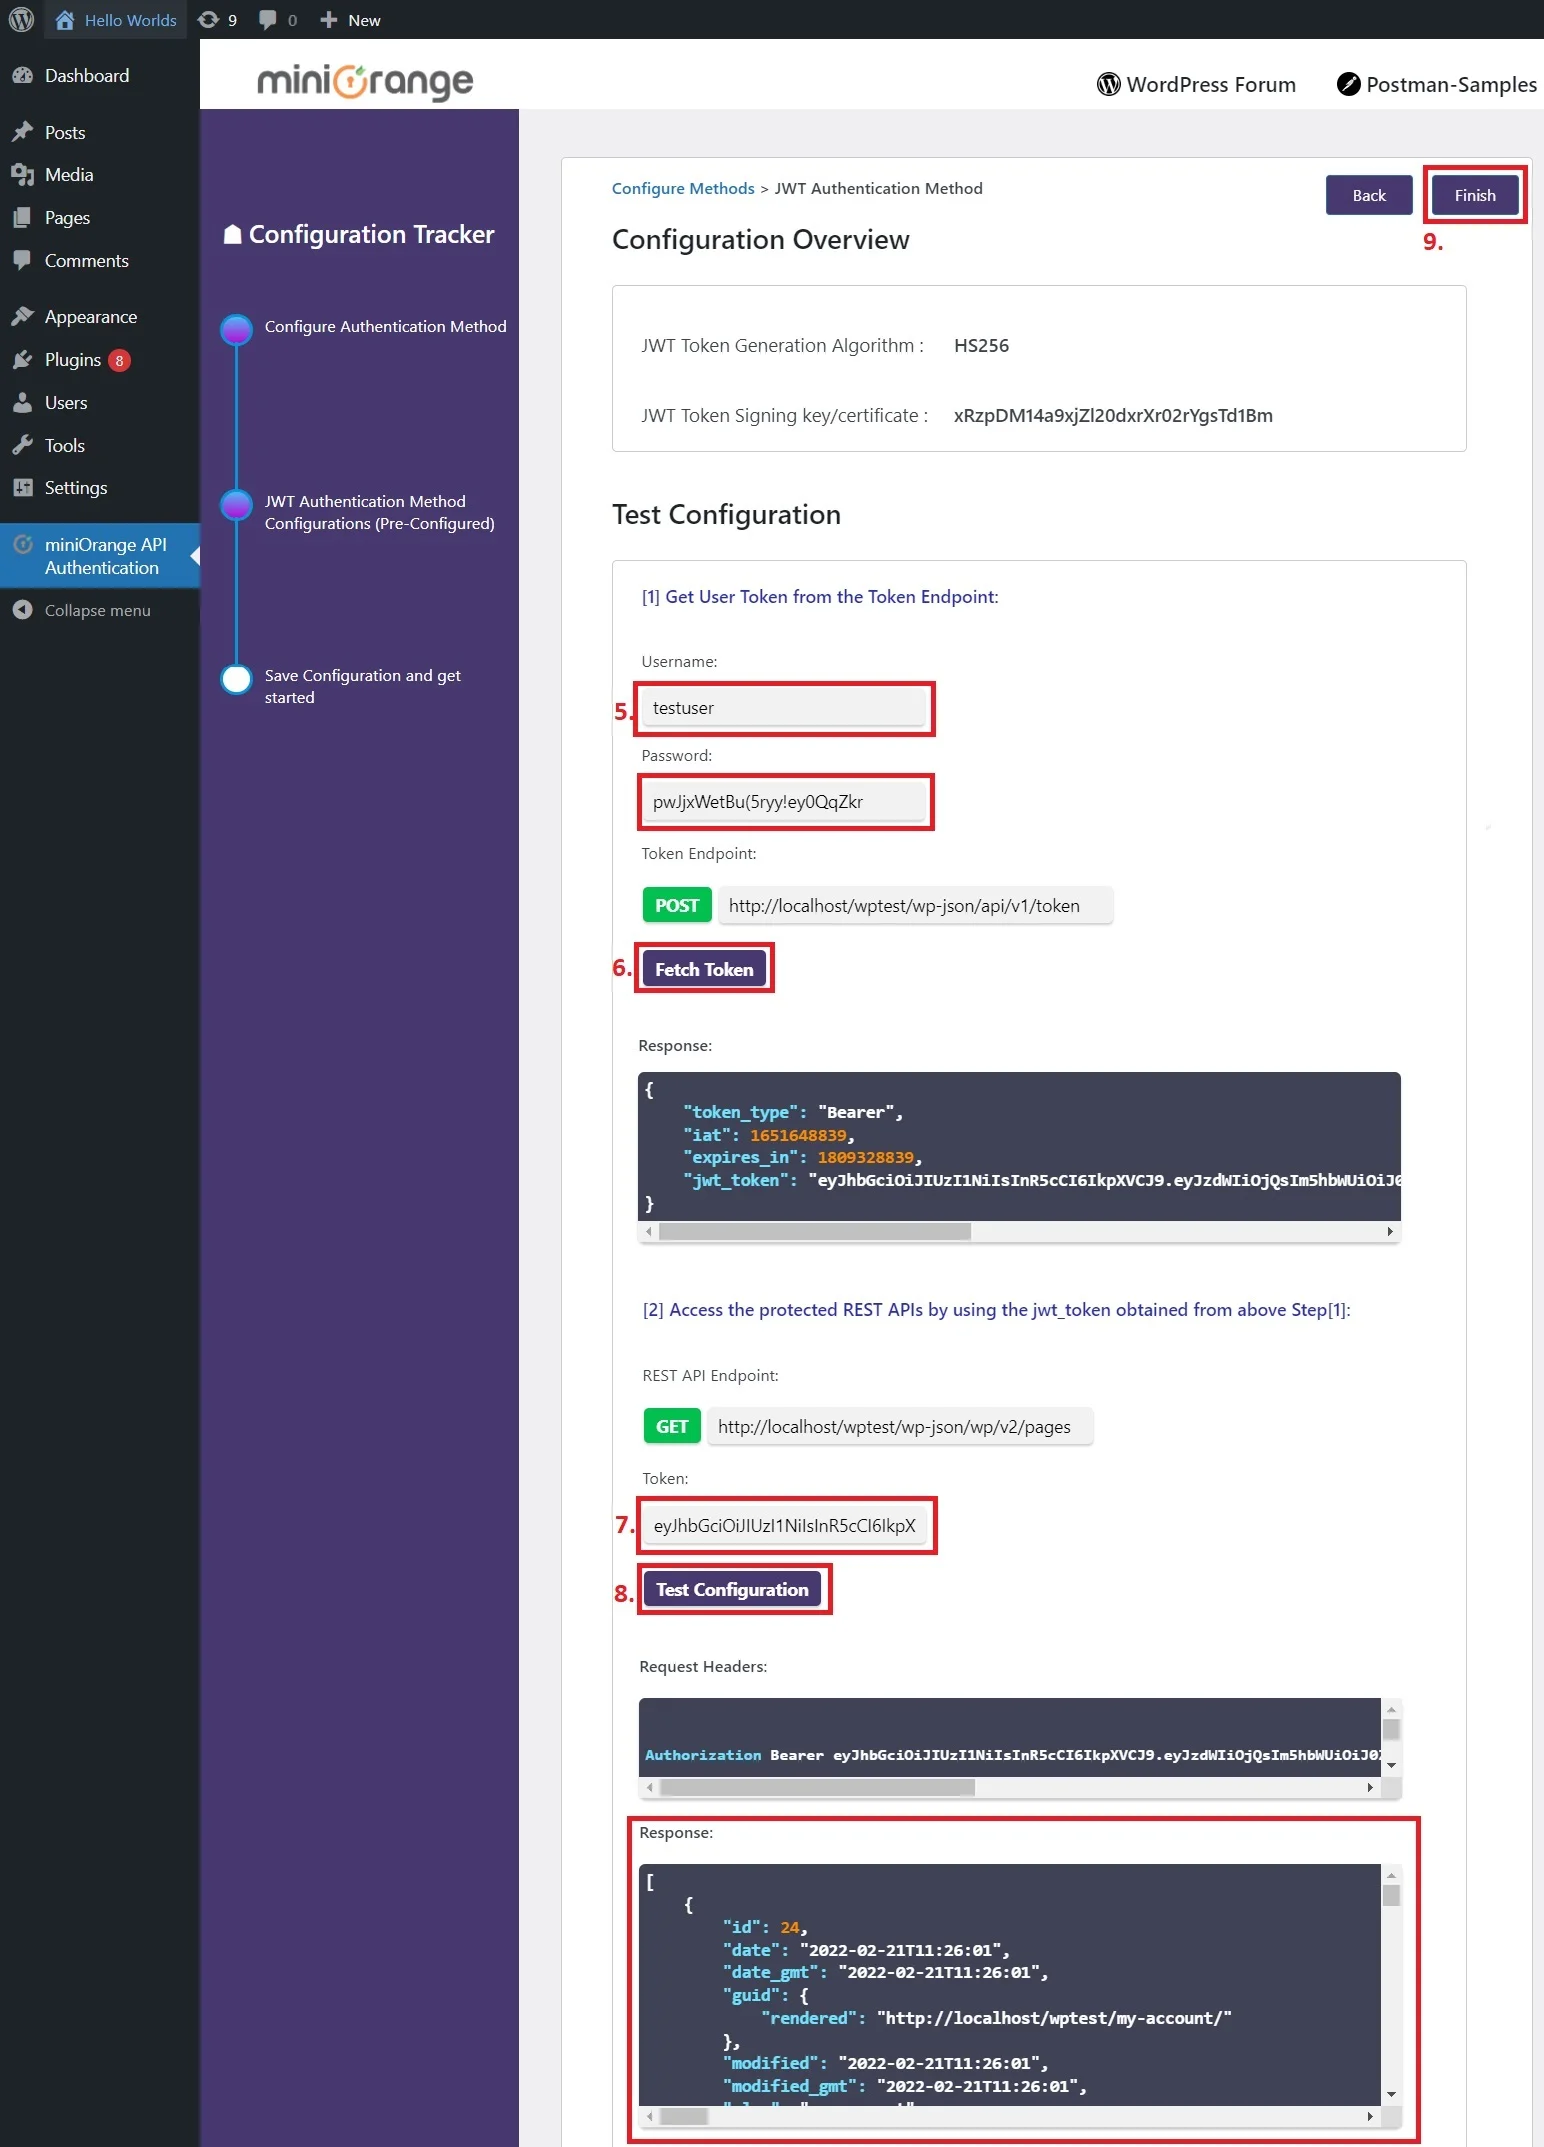
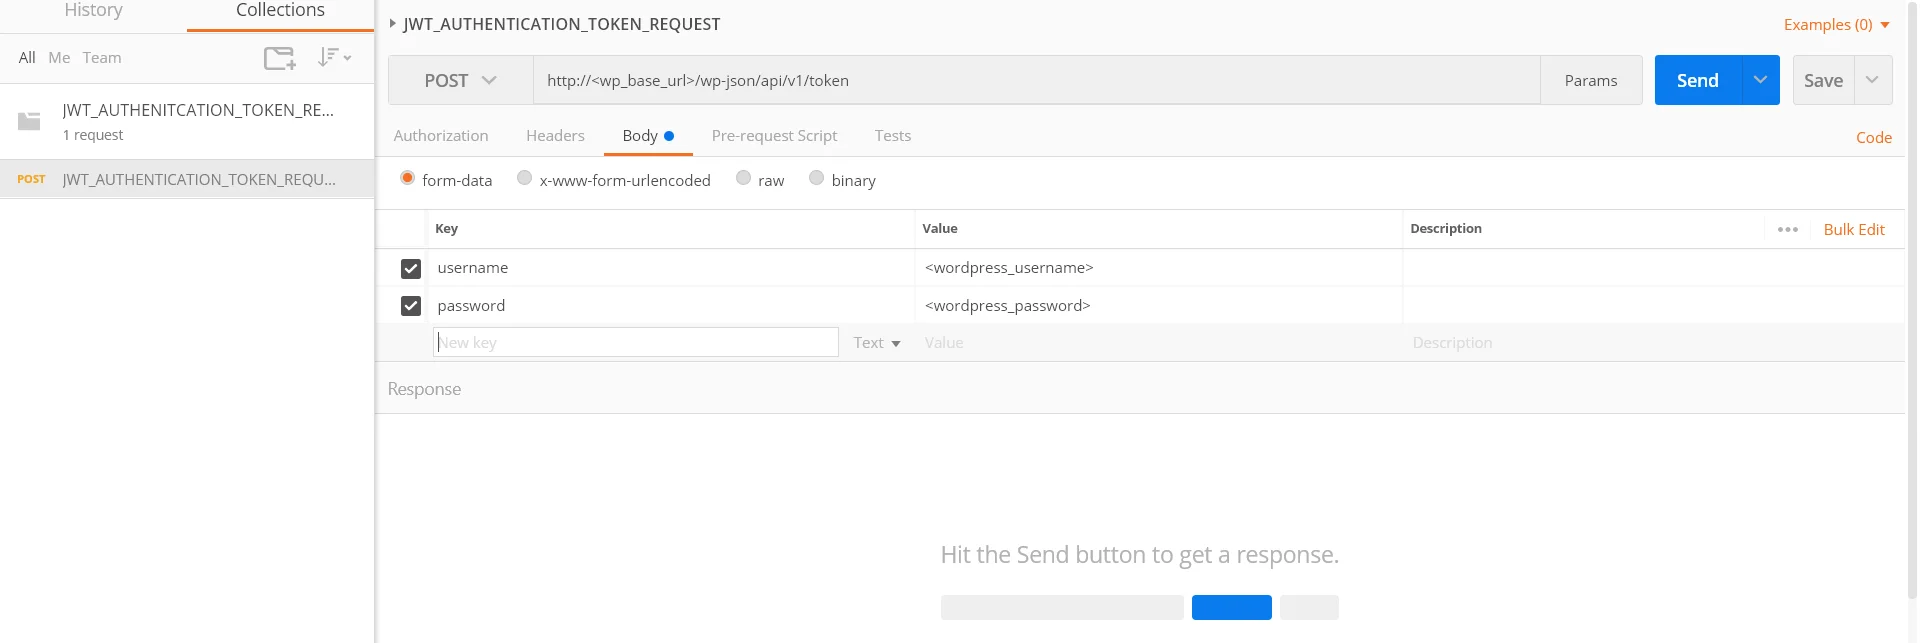
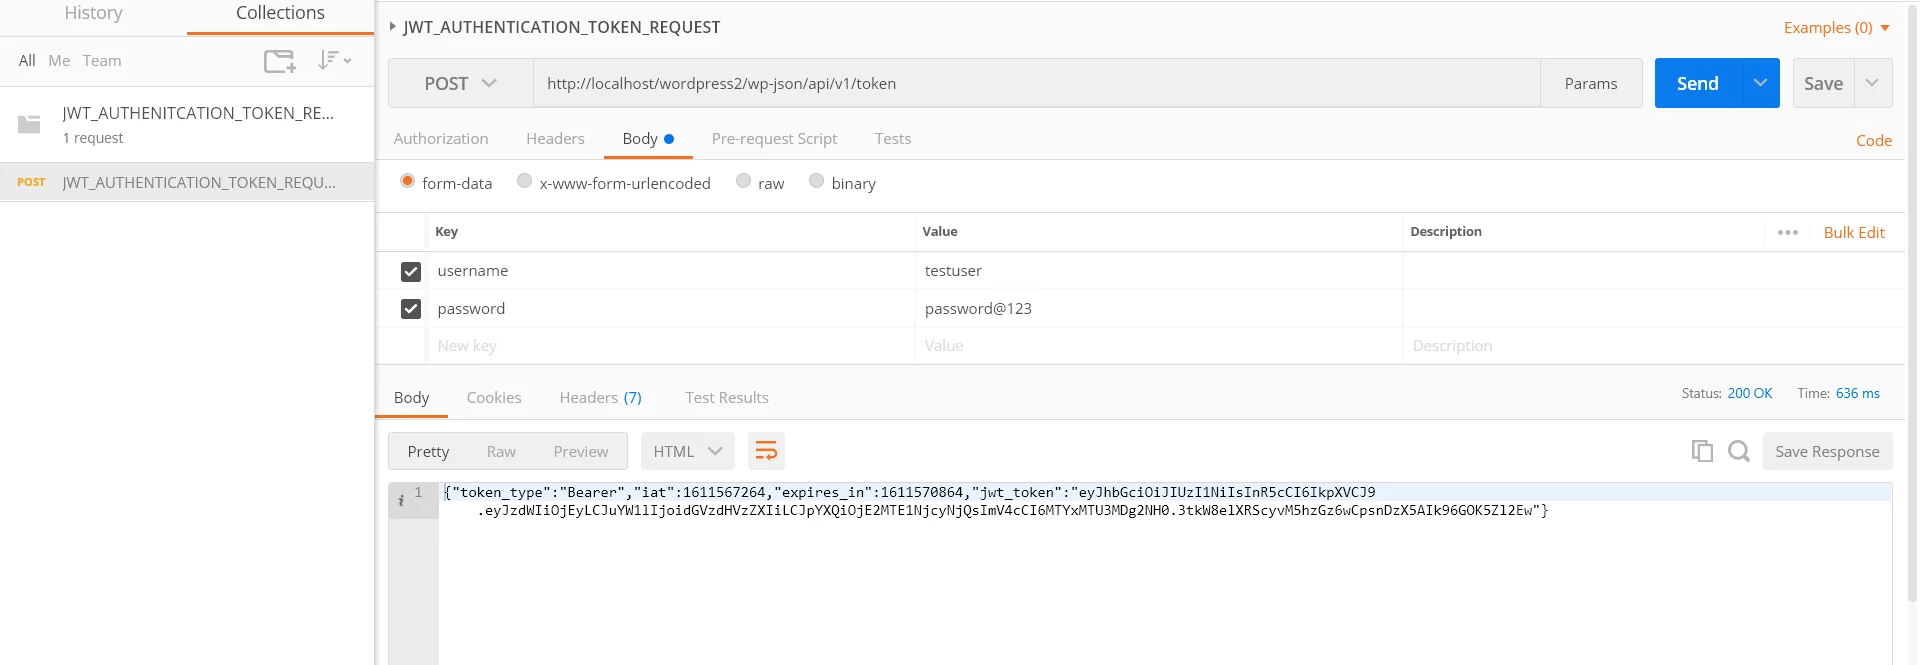
Request:POST https://<domain-name>/wp-json/api/v1/token
Body:username = <wordpress username>
password = <wordpress password>
Sample curl Request Format-
curl -d "username=<wordpress_username>&password=<wordpress_password>"
-X POST http://<wp_base_url>/wp-json/api/v1/token
This API endpoints is also called as user authentication API or WordPress login API endpoint such that if we make a request to this endpoint with the WordPress user credentials and if credentials are valid, the successful response will return containing JWT token, else the error response will be shown accordingly.
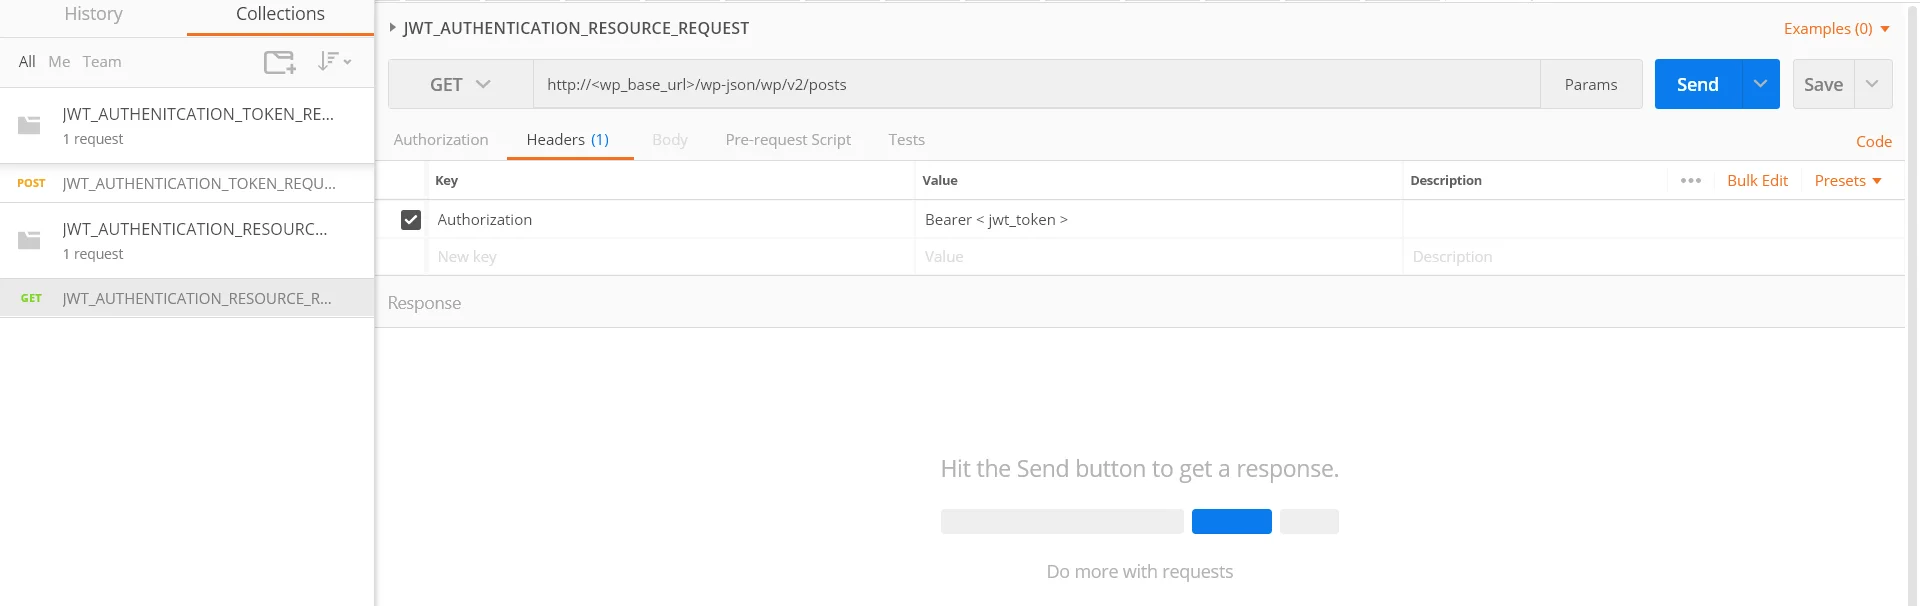
Request: GET  https://<domain-name>/wp-json/wp/v2/posts
Header: Authorization : Bearer <JWT token>
Sample curl Request Format-
curl -H "Authorization:Bearer <jwt_token >"
-X GET http://<wp_base_url>/wp-json/wp/v2/posts
Congratulations! You have successfully configured JWT Authentication method for REST API calls using miniOrange WordPress REST API Authentication method.
Code samples
in programming languages
  var client = new RestClient("http://<wp_base_url>/wp-json/wp/v2/posts ");
client.Timeout = -1;
var request = new RestRequest(Method.GET);
request.AddHeader("Authorization", "Bearer < jwt_token >");
IRestResponse response = client.Execute(request);
Console.WriteLine(response.Content);
  OkHttpClient client  = new OkHttpClient().newBuilder().build();
  Request request  = new Request.Builder()
  .url("http://<wp_base_url>/wp-json/wp/v2/posts ")
  .method("GET", null)
  .addHeader = ("Authorization", "Bearer < jwt_token >")
   .build();
  Response response= client.newCall(request).execute();
  var settings  = {
      "url": "http://<wp_base_url>/wp-json/wp/v2/posts ",
      "method": "GET",
      "timeout": 0,
      "headers": {
          "Authorization": "Bearer < jwt_token >"
        },
    };

    $.ajax(settings).done(function (response)  {
      console.log(response);
    });
 <?php
   $curl = curl_init();
  curl_setopt_array($curl, array
      (
          CURLOPT_URL => 'http://%3Cwp_base_url%3E/wp-json/wp/v2/posts%20',
          CURLOPT_RETURNTRANSFER => true,
          CURLOPT_ENCODING => '',
          CURLOPT_MAXREDIRS => 10,
          CURLOPT_TIMEOUT => 0,
          CURLOPT_FOLLOWLOCATION => true,
          CURLOPT_HTTP_VERSION => CURL_HTTP_VERSION_1_1,
          CURLOPT_CUSTOMREQUEST => 'GET',
          CURLOPT_HTTPHEADER => array(
            'Authorization: Bearer < jwt_token >'
          ),
          ));

  $response = curl_exec($curl);
  curl_close($curl);
  echo $response;
  import http.client

  conn = http.client.HTTPSConnection("<wp_base_url>")
  payload= "
  headers = {
      'Authorization': 'Bearer < jwt_token >'
  }
  conn.request("GET", "/wp-json/wp/v2/posts ", payload, headers)
  res= conn.getresponse()
  data = res.read()
  print (data.decode("utf-8"))
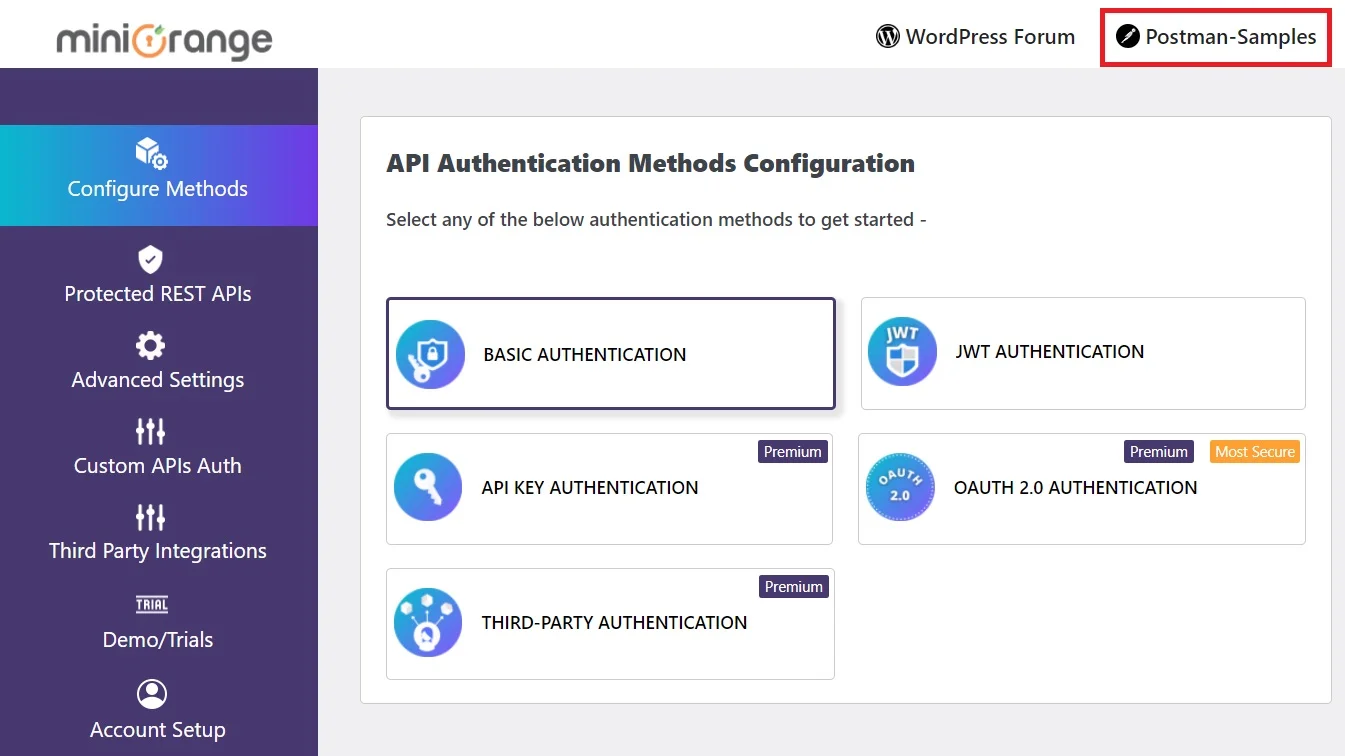
Follow the steps below to make REST API request using Postman:

 Feature
Description
Feature
Description1. Role Based REST API restriction:
This feature allows restricting the REST API access based on the user roles. You can whitelist the roles for which you want to allow access to the requested resource for the REST APIs. So whenever a REST API request is made by a user, his role will be fetched and only allowed to access the resource if his role is whitelisted.
How to configure it?
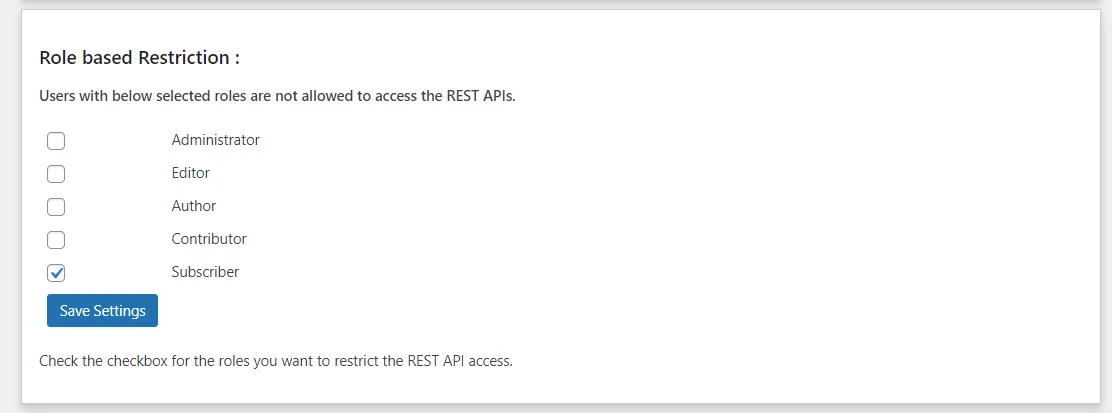
Note: The Role based restriction feature is valid for Basic authentication (Username: password), JWT method, and OAuth 2.0 (Password grant).
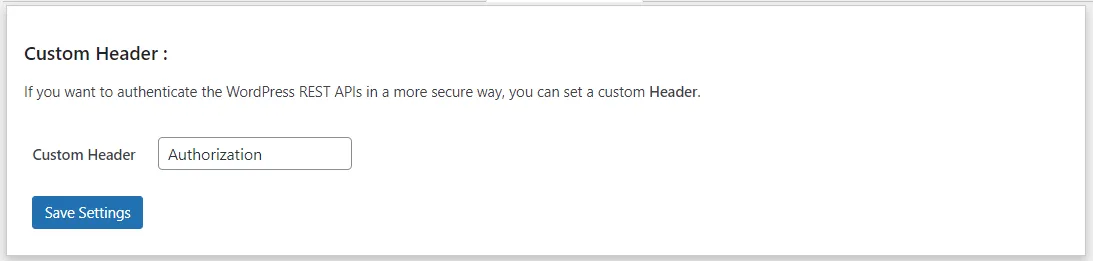
2. Custom Header
This feature provides an option to choose a custom header rather than the default ‘Authorization’ header.
It will increase the security as you have the header named with your ‘custom name’, so if someone makes the REST API request with a header as ‘Authorization’ then he won’t be able to access the APIs.
How to configure it?
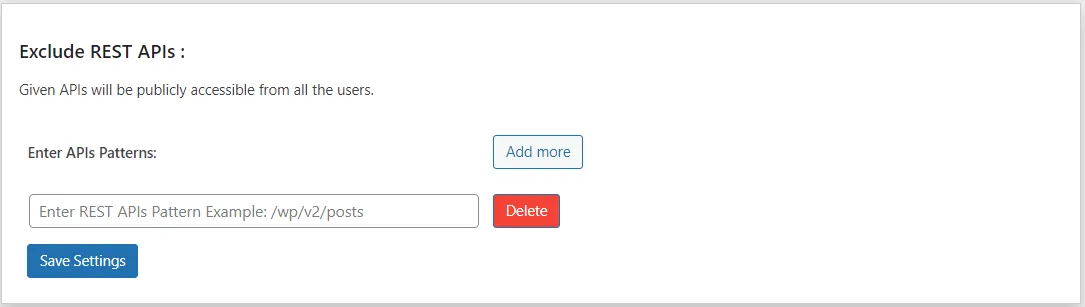
3. Exclude REST APIs
This feature allows you to whitelist your REST APIs so these can be accessed directly without any authentication. Hence all these whitelisted REST APIs are publicly available.
How to configure it?
4. Custom Token Expiry
This feature is applicable for JWT and OAuth 2.0 methods which uses time based tokens to authenticate the WordPress REST API endpoints. This feature allows you to set the custom expiry for the tokens such that the token will no longer be valid once the token expires.
How to configure it?
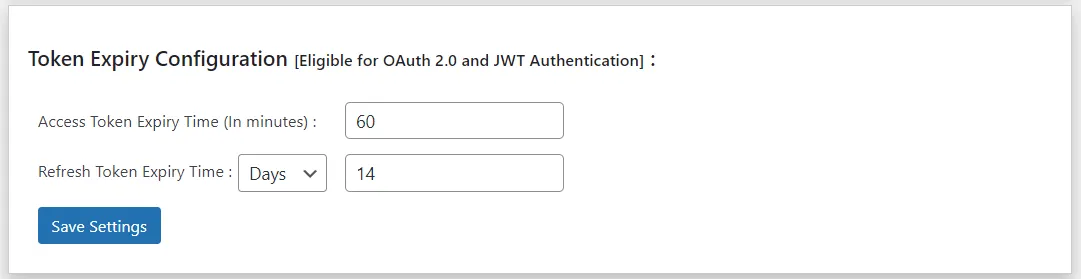
Hence, with this custom token expiry feature, the security is increased furthermore.
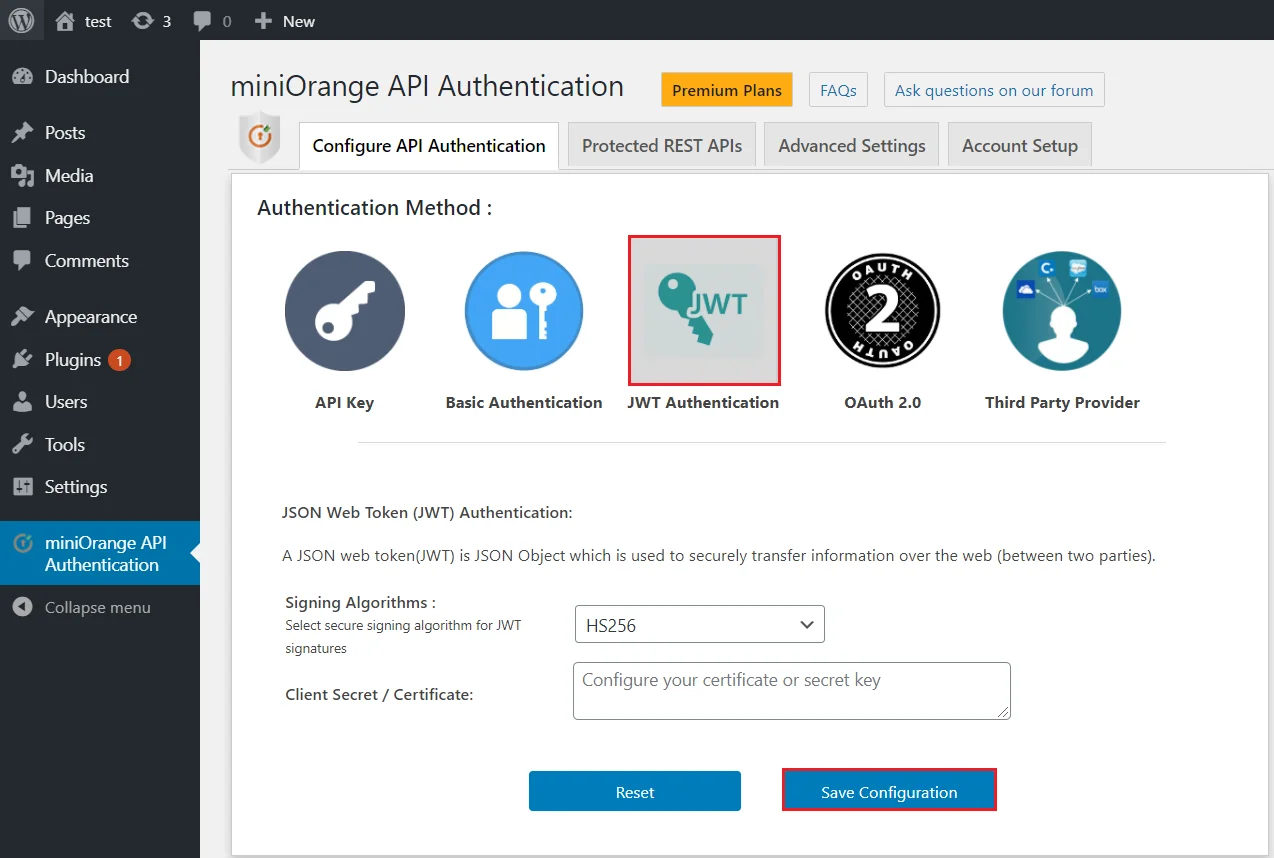
5. Signature Validation for JWT based tokens
This feature allows a secure signing of the JWT signature for the JWT token such that your JWT token is much more secure and the signature can only be decoded using the client secret/certificate. It means your signature is private and can not be seen by others.
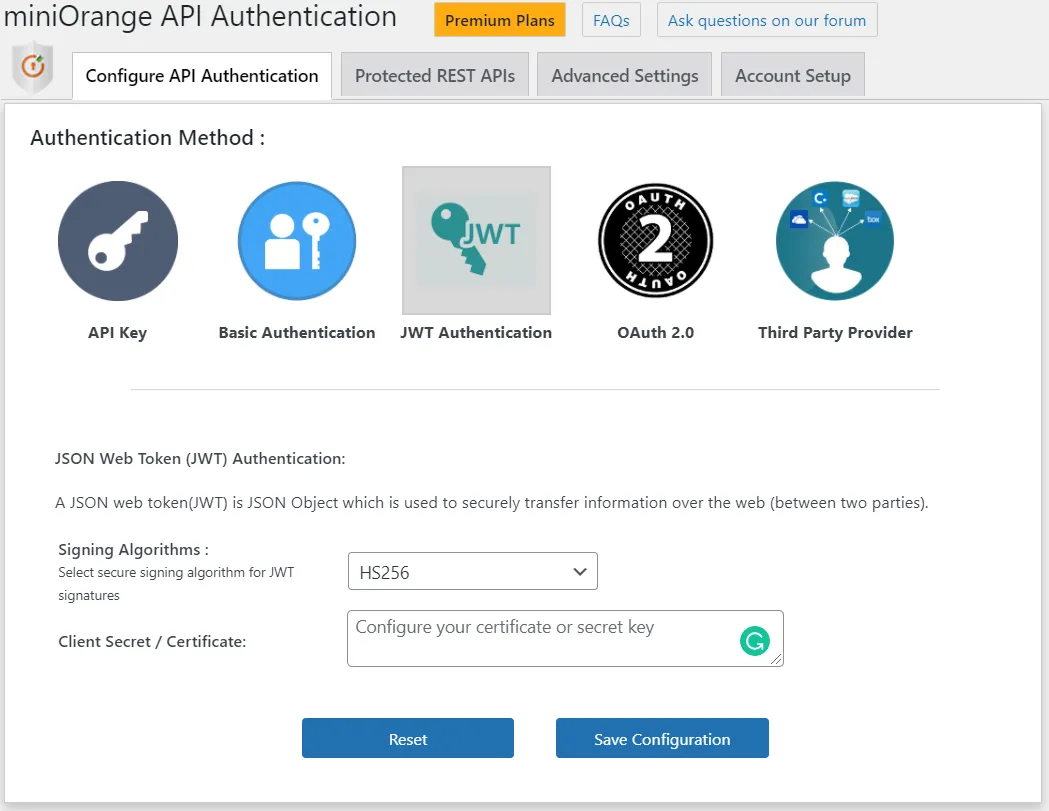
We provide the support for 2 Signing algorithms: HS256 and RS256.So, any of the signing algorithms can be chosen from the dropdown as shown in the above image.
Also, you need to add your client secret or certificate from which is used to sign the signature of the JWT.
Mail us on apisupport@xecurify.com for quick guidance(via email/meeting) on your requirement and our team will help you to select the best suitable solution/plan as per your requirement.
Need Help? We are right here!