Connect your Shopify Store to using Login with Discord | Discord SSO
With the Shopify Discord Social Login App, you can improve the user experience of your Shopify
store by allowing customers to log in and create accounts using their Discord credentials. Social login
options, such as Discord integration, make it easier and more convenient for users to access your store,
potentially increasing conversions and customer satisfaction.
For some users, traditional account creation can be difficult, resulting in cart abandonment. You remove the need
for users to remember yet another set of credentials with Shopify Discord social login, making the login
process smoother and more accessible.
Role Mapping from Shopify to Discord and vice-versa
The Discord Social Login app for Shopify includes Role Mapping, a tool that allows you to automate the process of assigning roles to members in your Discord server based on the role they were assigned when they signed up for your Shopify store. If the person who signed up for your shopify store isn't already a member of your discord server, you can add them. Roles are assigned to users at the time of registration. When you update a role in your Shopify store, the corresponding role in the Discord server is also updated. We can also tailor the feature to your specifications. For more information, please contact us at shopifysupport@xecurify.com.
Pre-requisite : Discord Social Login Application
To configure SSO into Shopify with Discord as IDP, you will need to install the miniOrange Discord Social Login Application on your store:

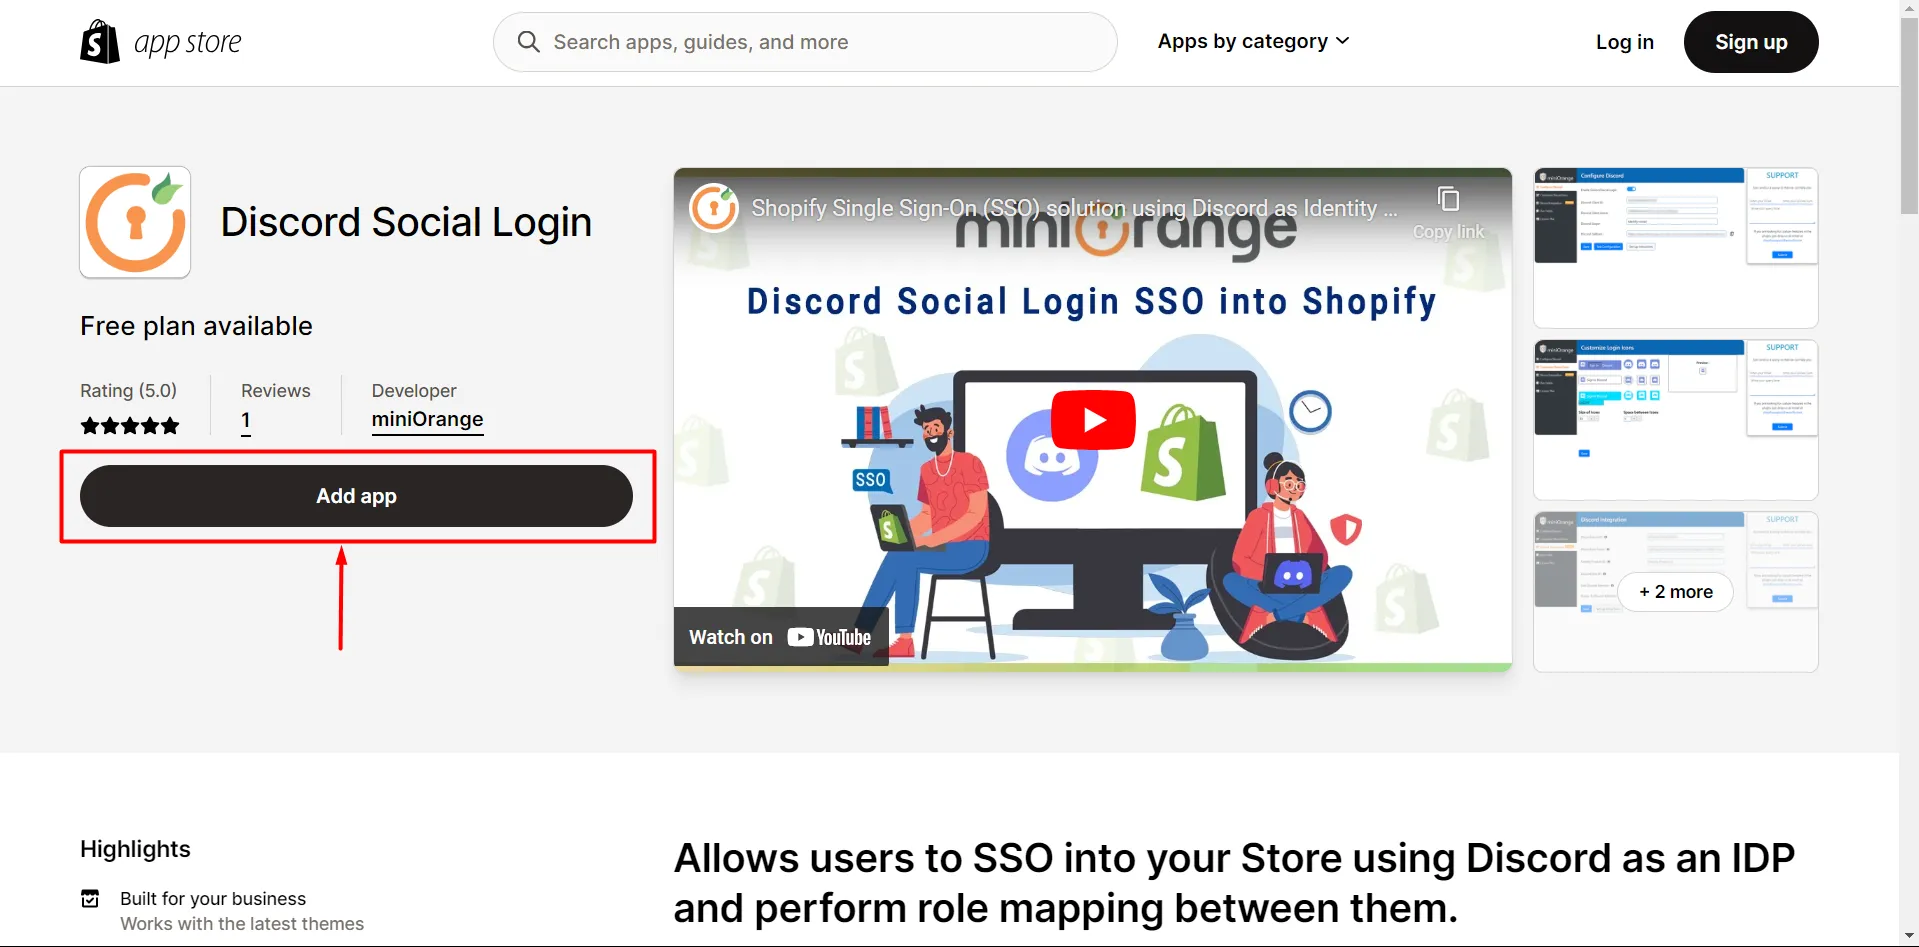
Allows users to SSO into your Store using Discord as an IDP and perform role mapping between them.
Follow the steps below to configure Discord Social Login in Shopify
1. Add Discord Social Login App and get Callback URL
- Click here to download the Discord Social Login app from the Shopify Marketplace.
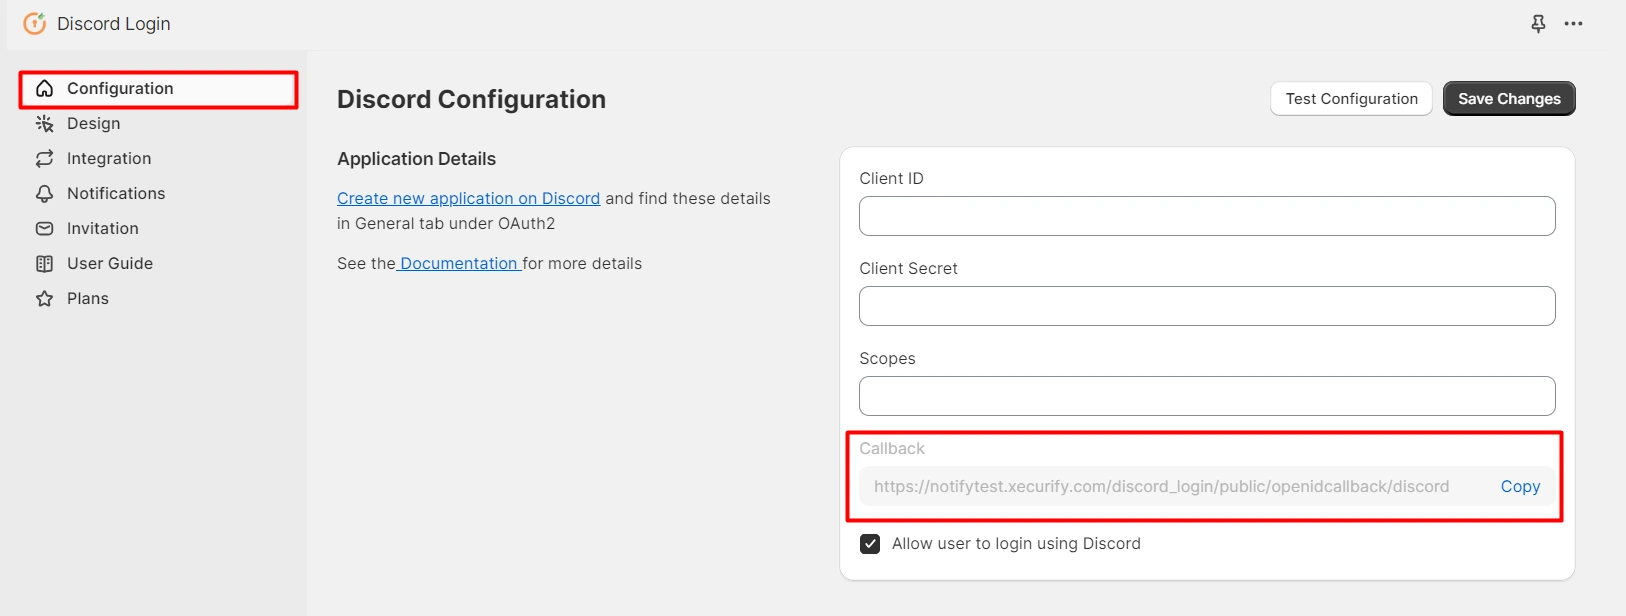
- Once you have installed it, it will take you to the Discord Social Login application Dashboard. Copy the Discord Callback URL and keep it handy as it will be used in furthur step.
2. Configure Shopify Discord Social Login application in Discord
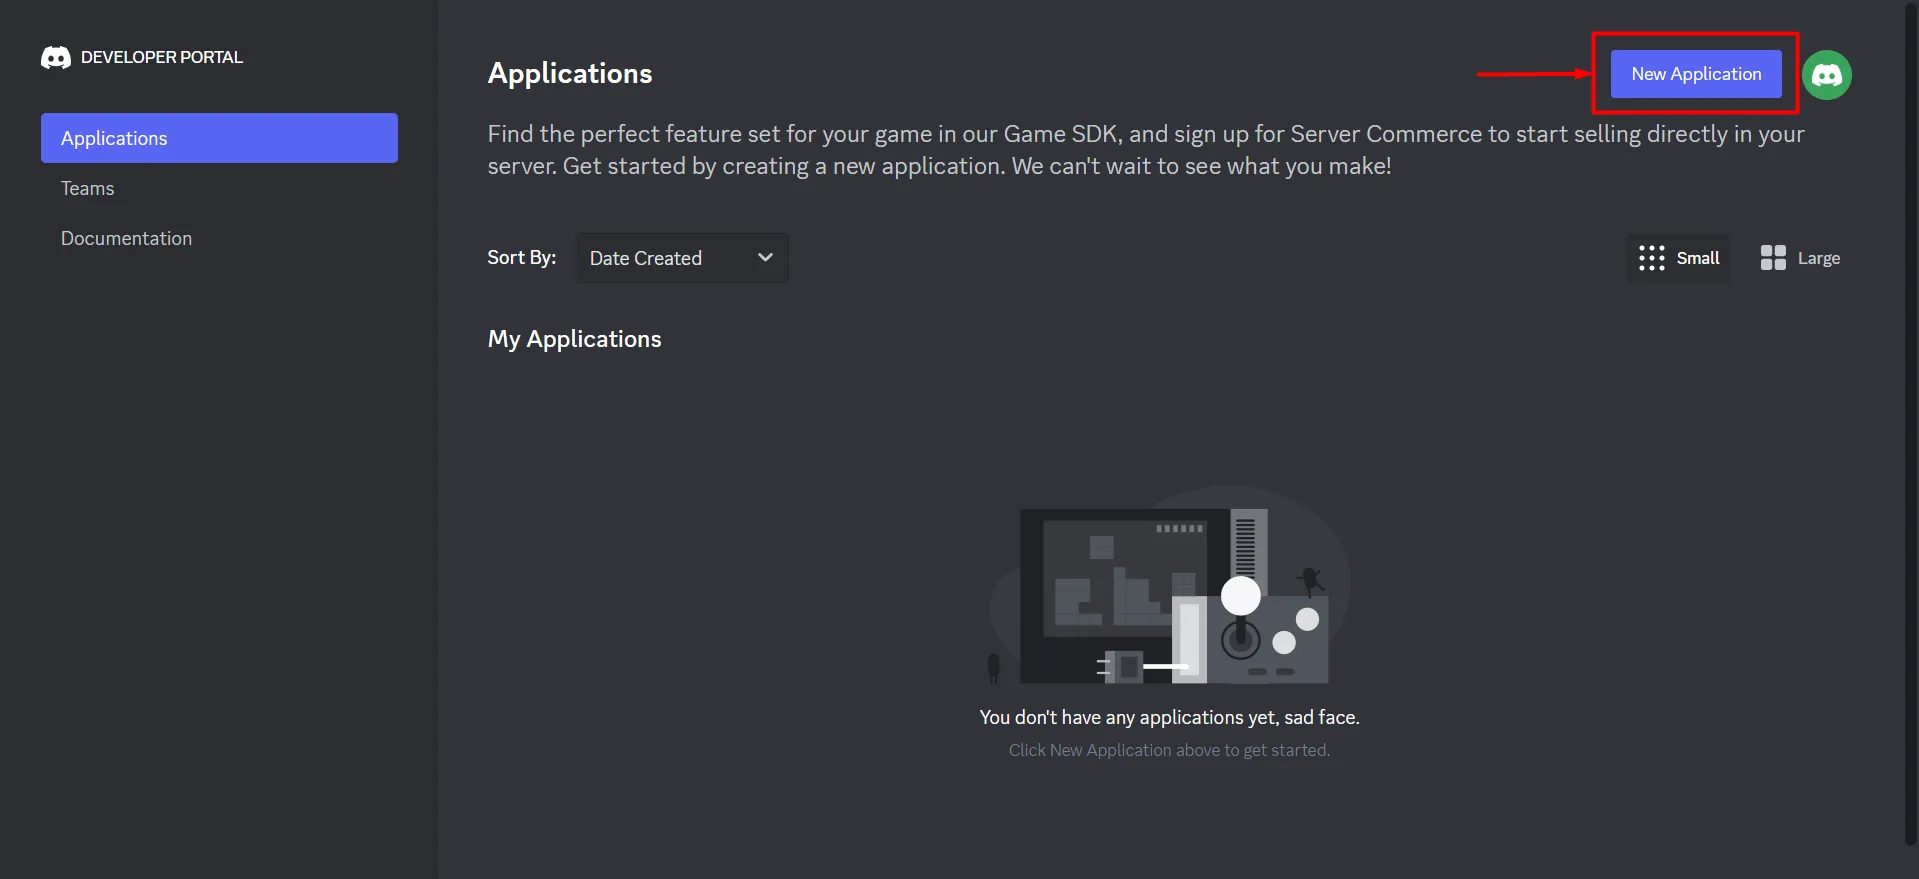
- Click here to go to Discord Developer Portal and Sign-in with your Account.
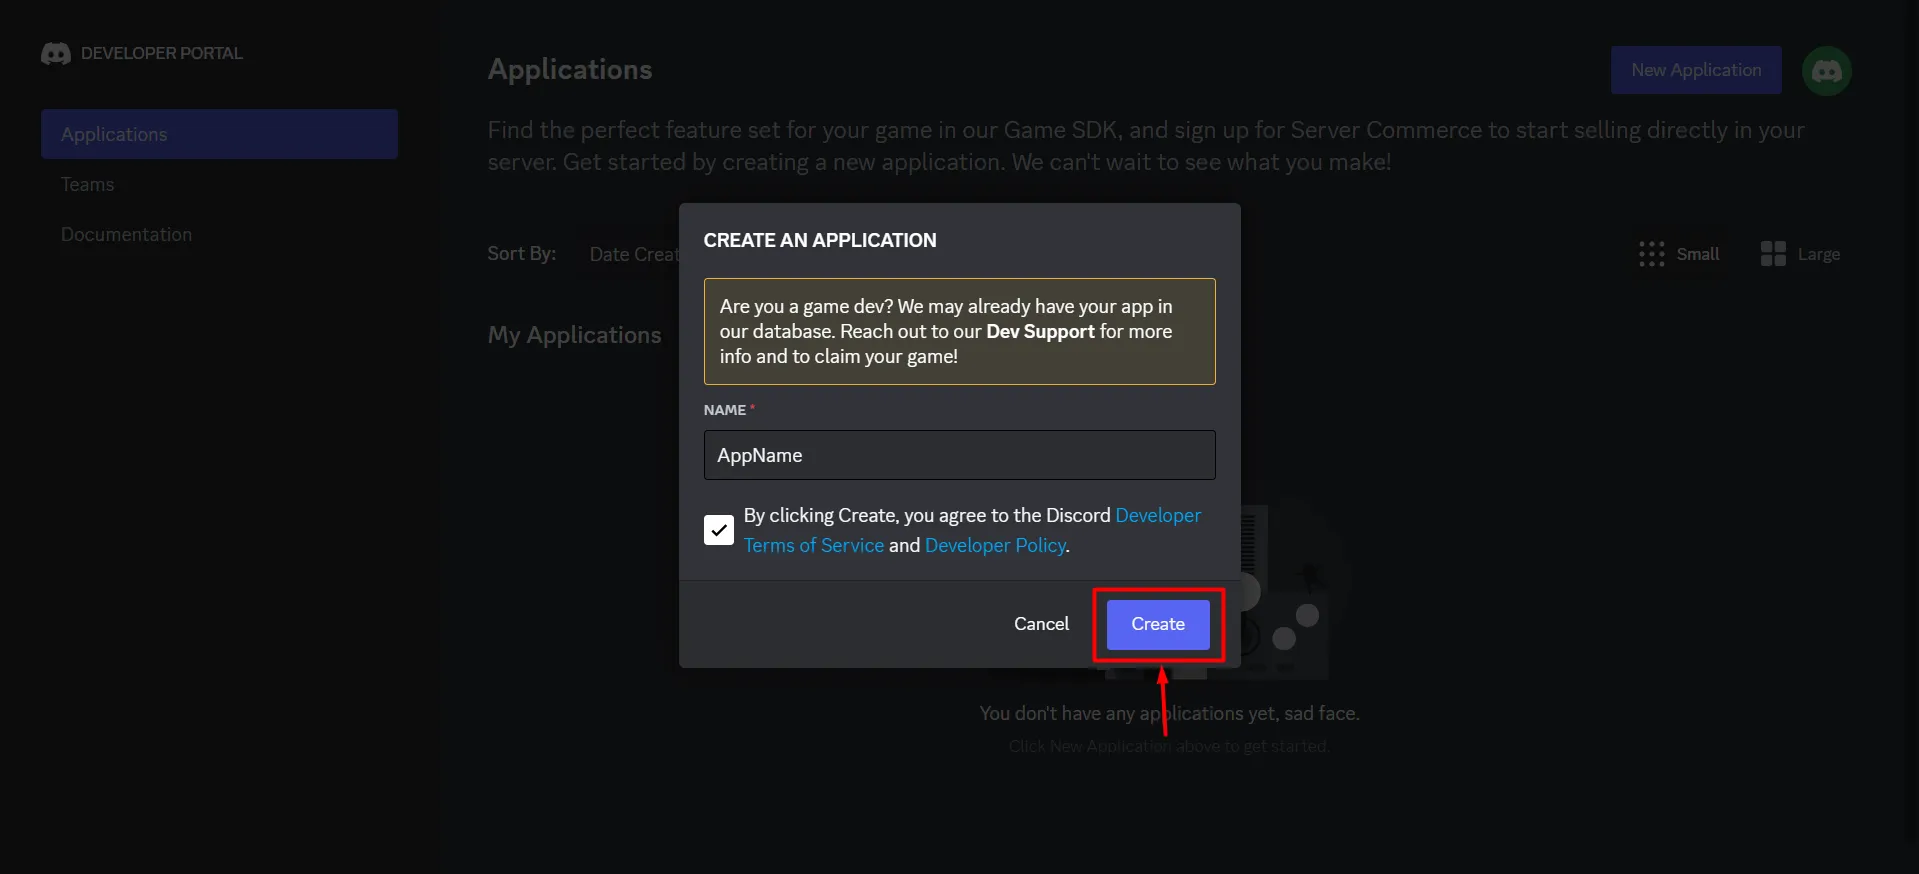
- After logging in, click on New Application > Enter the Application Name > Click on Create.
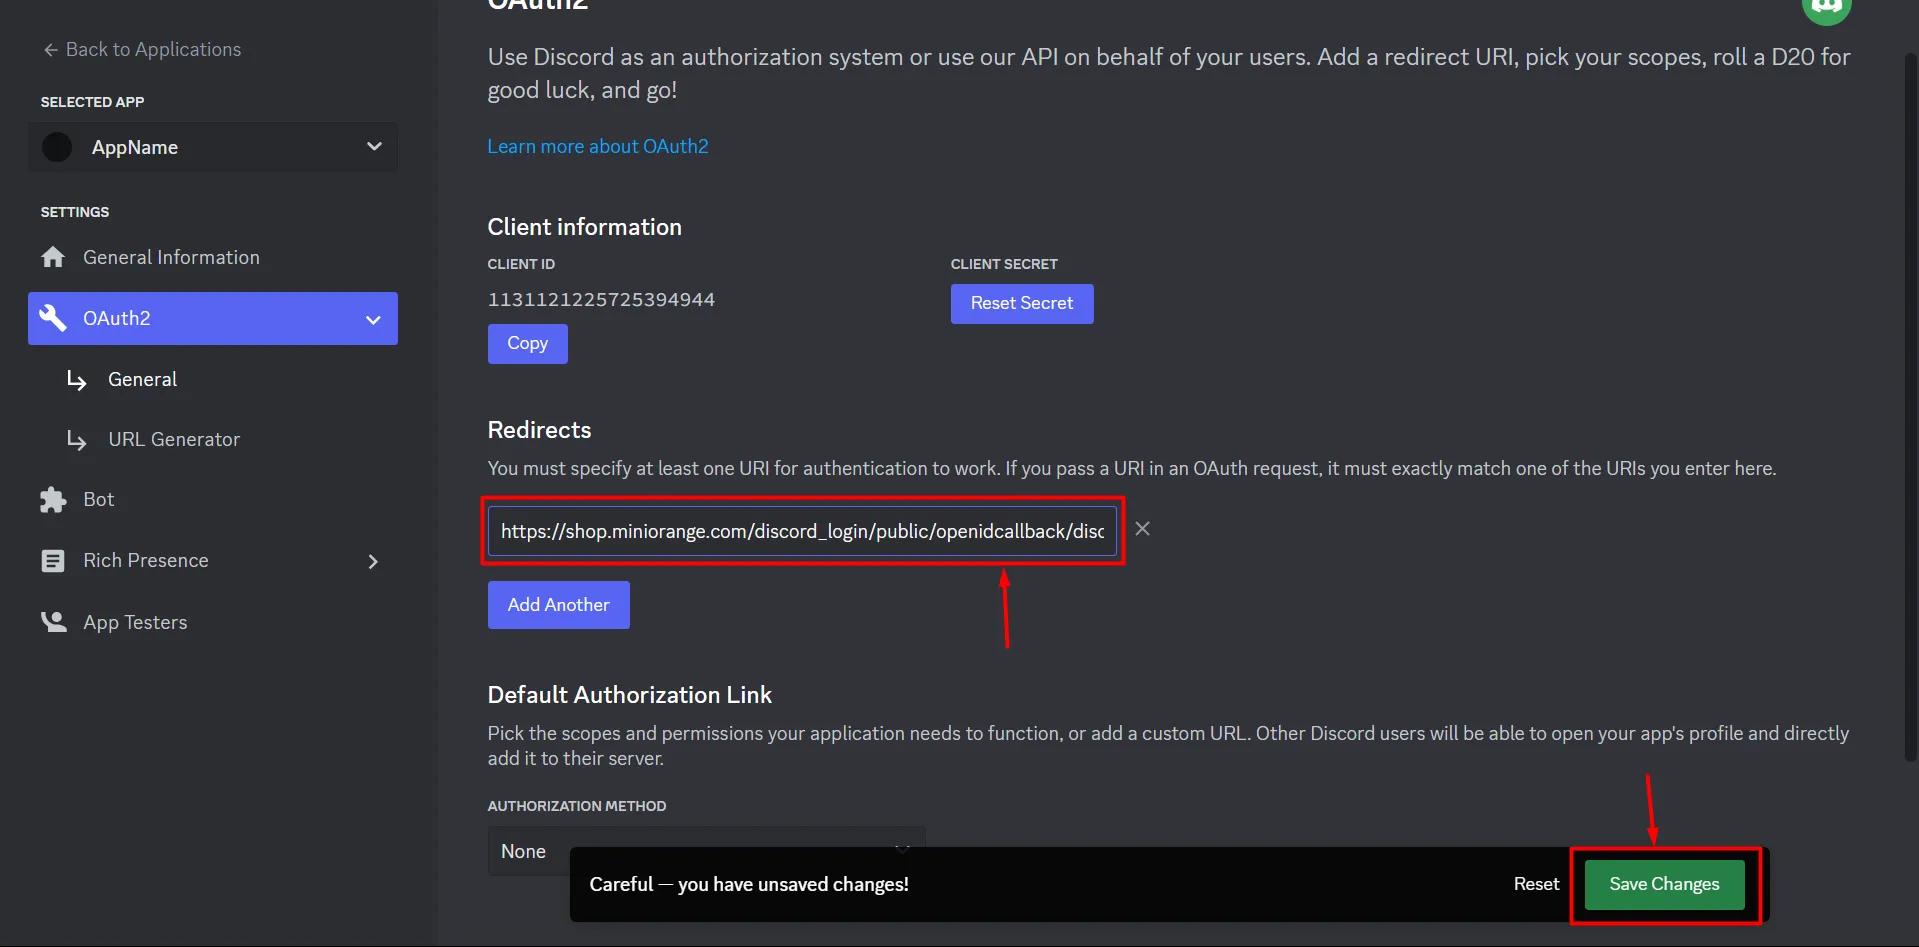
- Once the application is created, go to OAuth2 > General > Add Redirect.
- Enter the Discord Callback URL copied from Step 1 and Click on Save Changes.
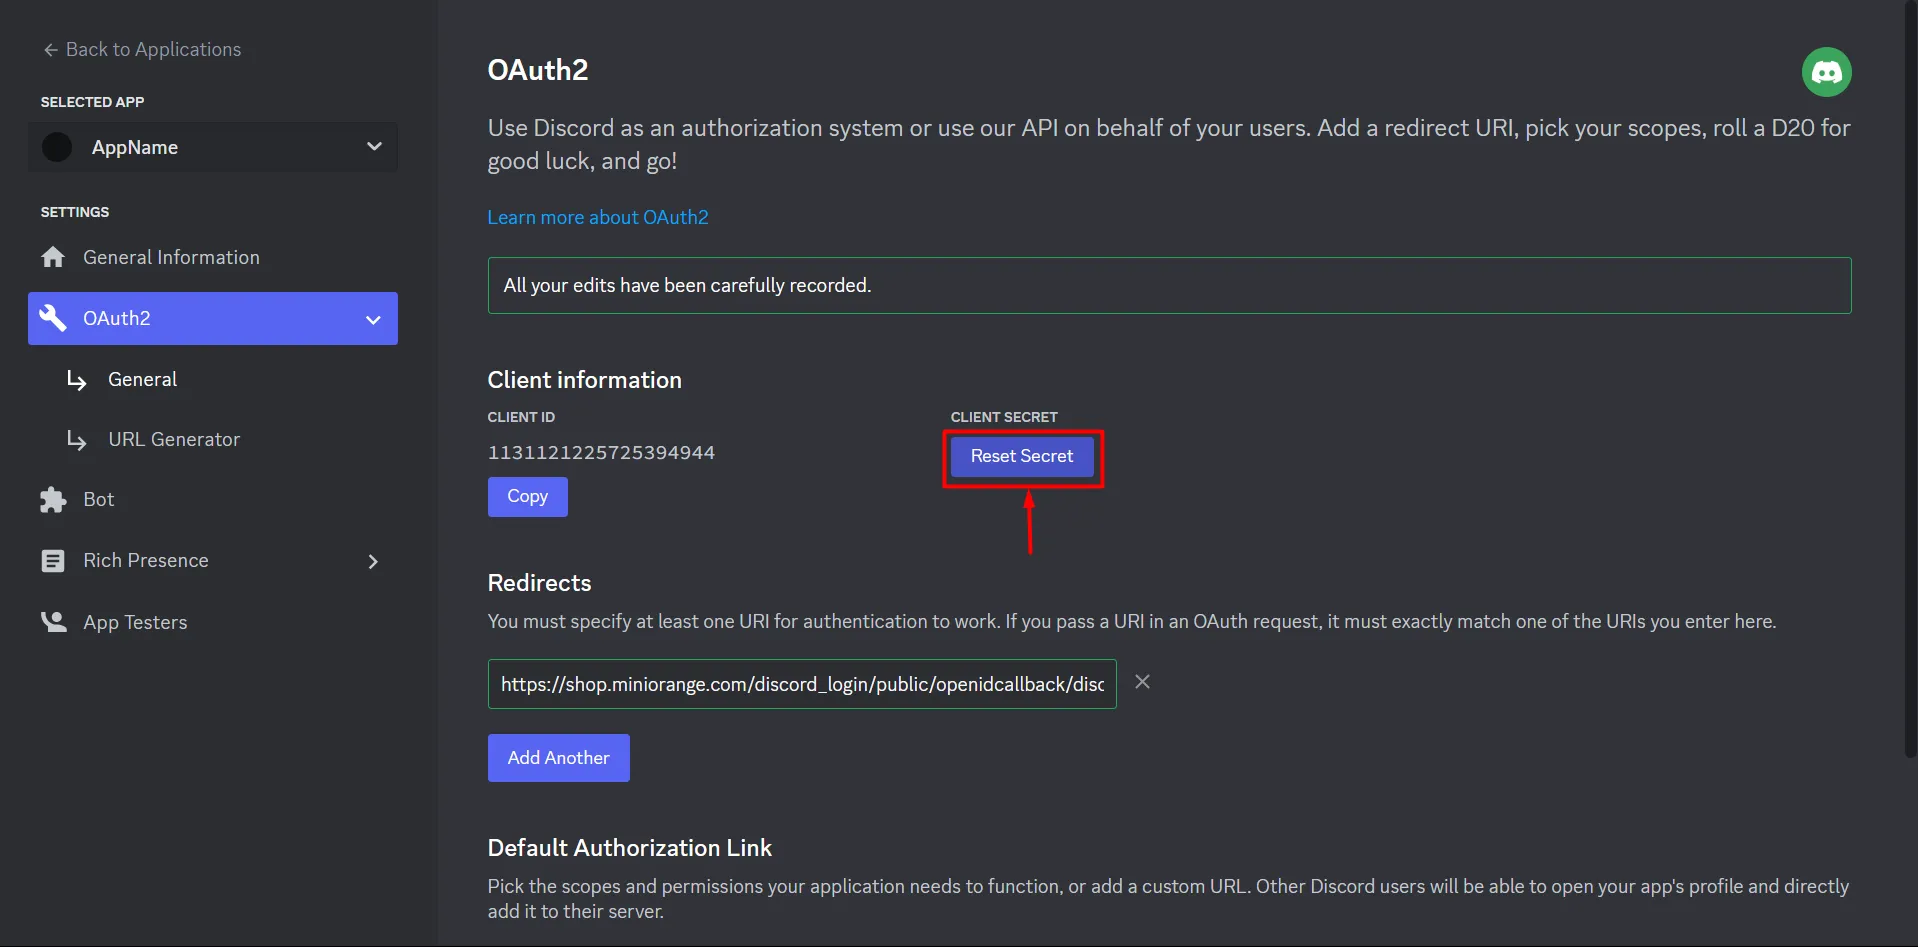
- Click on Reset Secret to reveal the Client Secret.
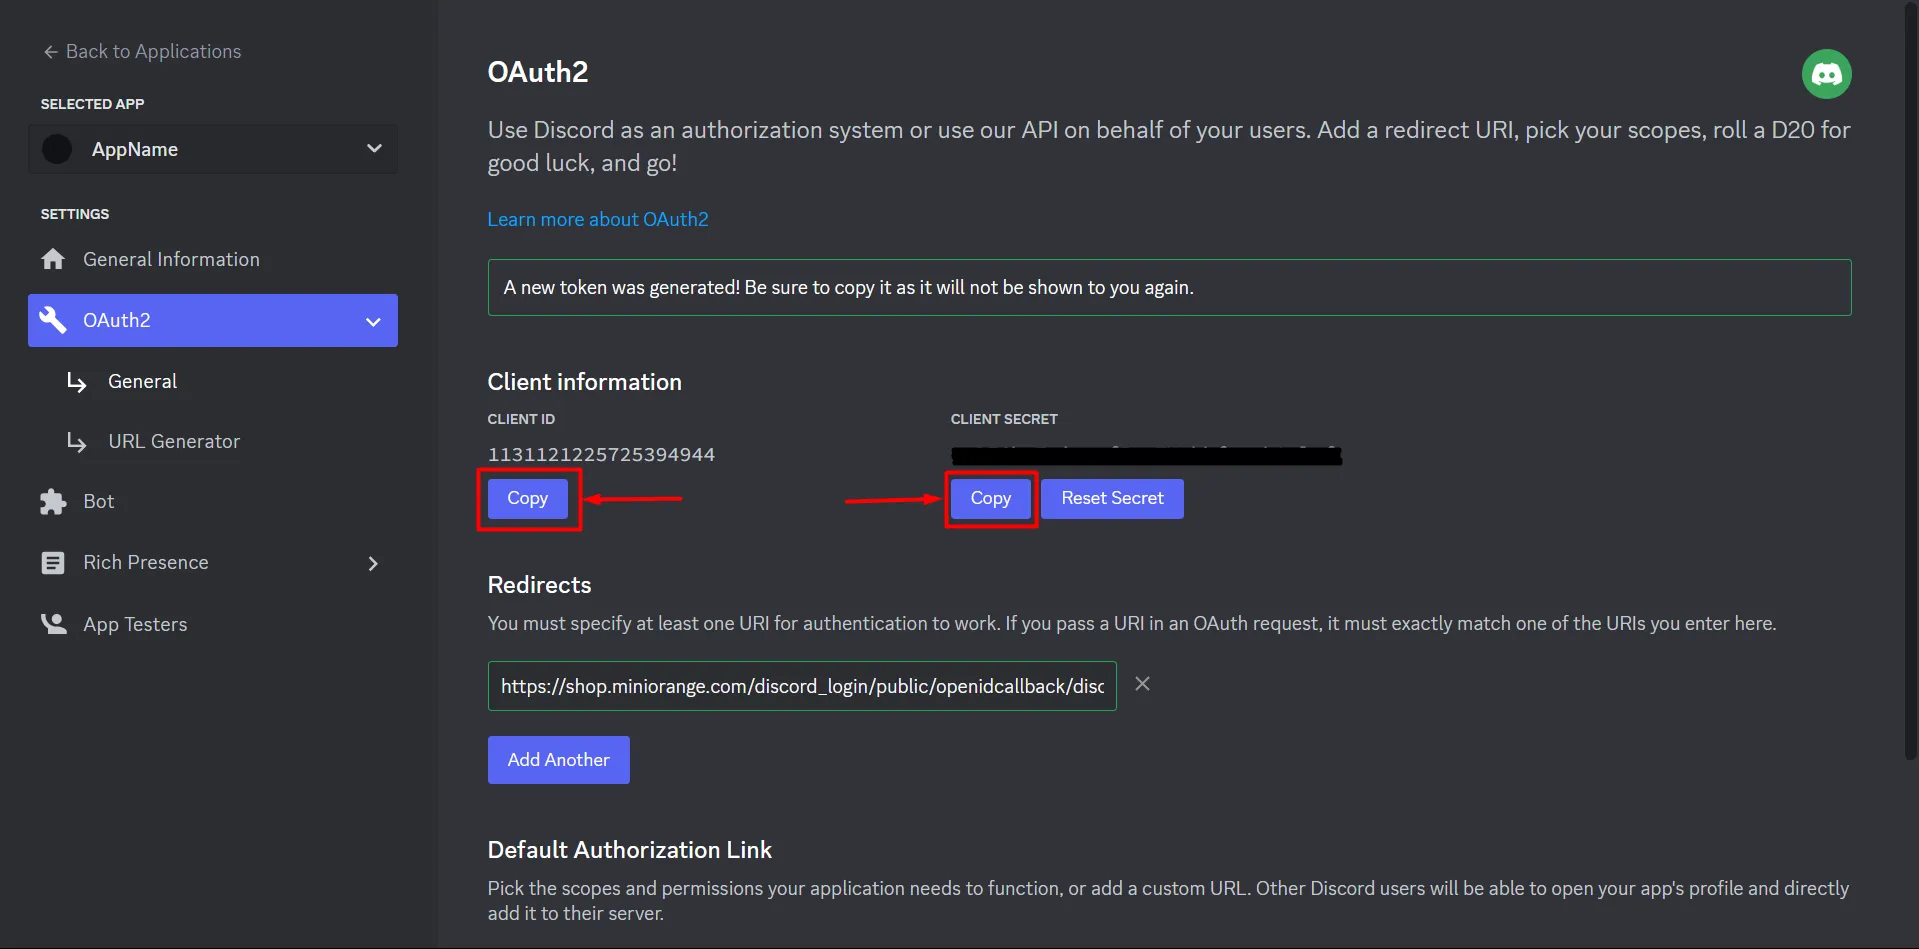
- Once the Client Secret is revealed, copy the Client ID and Client Secret. Keep them handy as they will be used in furthur step.

You have successfully completed Discord Side SSO Configuration.
3. Configure Discord in Shopify Social Login App
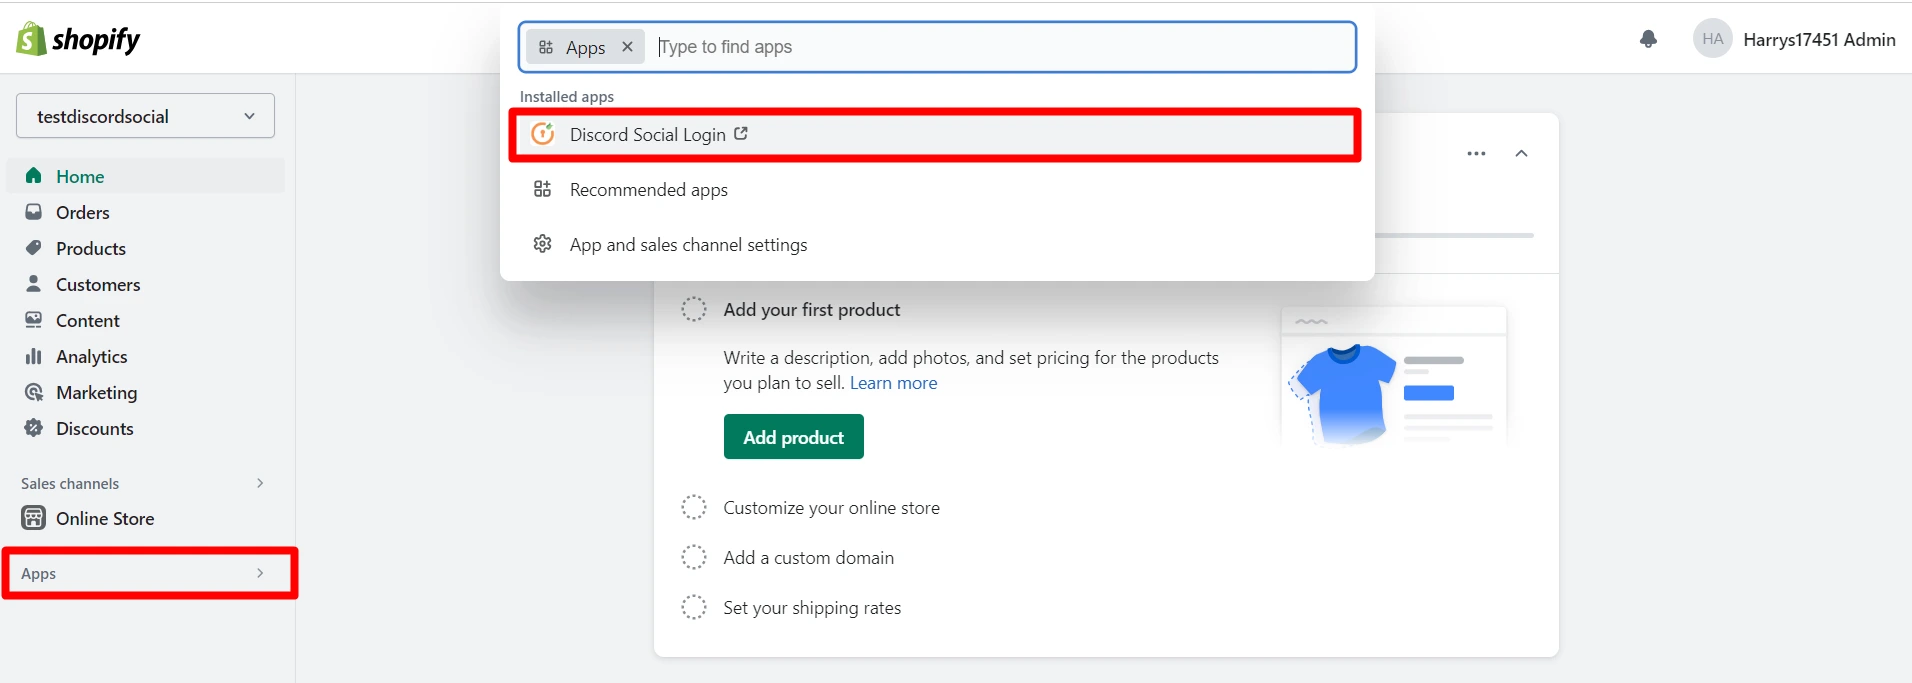
- Again navigate to the App section of Shopify store and click on Discord Social Login application.
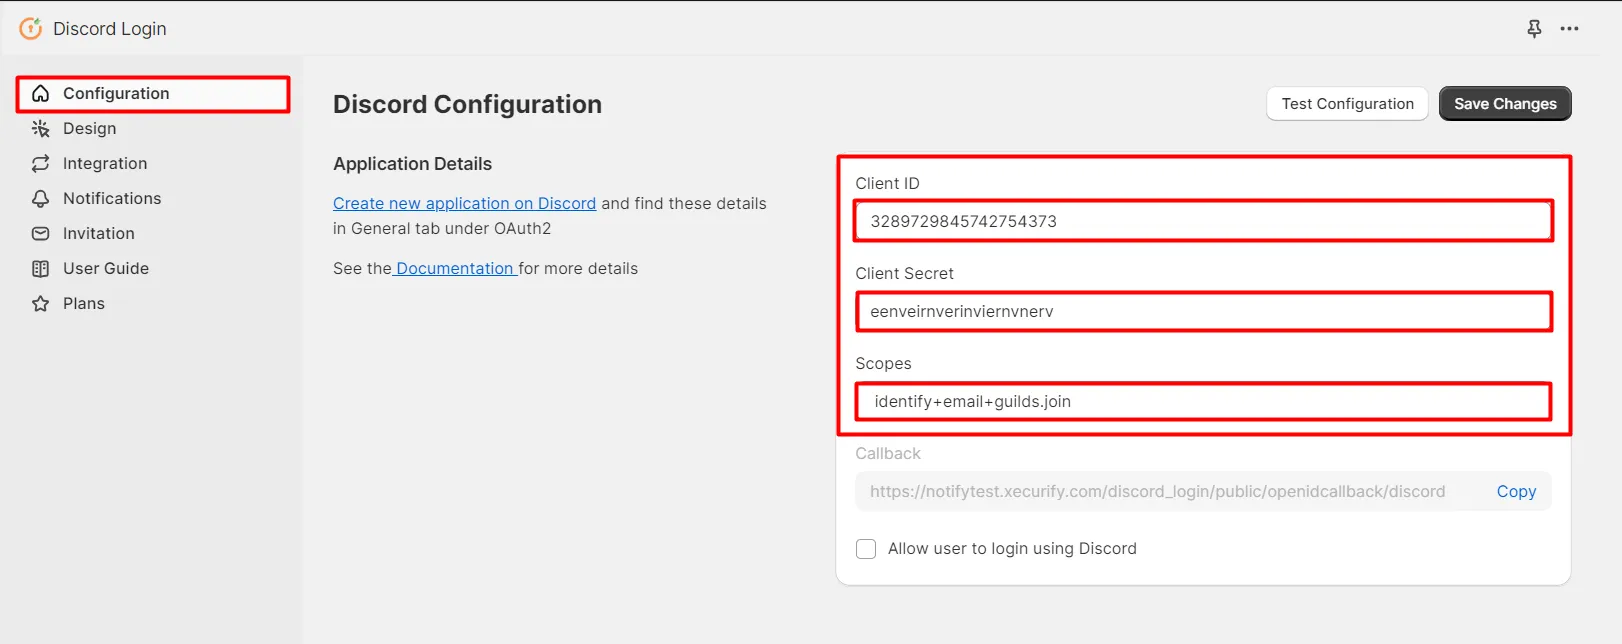
- You will be redirected to the application dashboard. Paste the Client ID and Client Secret from Step 2 in the Discord Social Login app on Shopify and enter scopes as identify+email+guilds.join
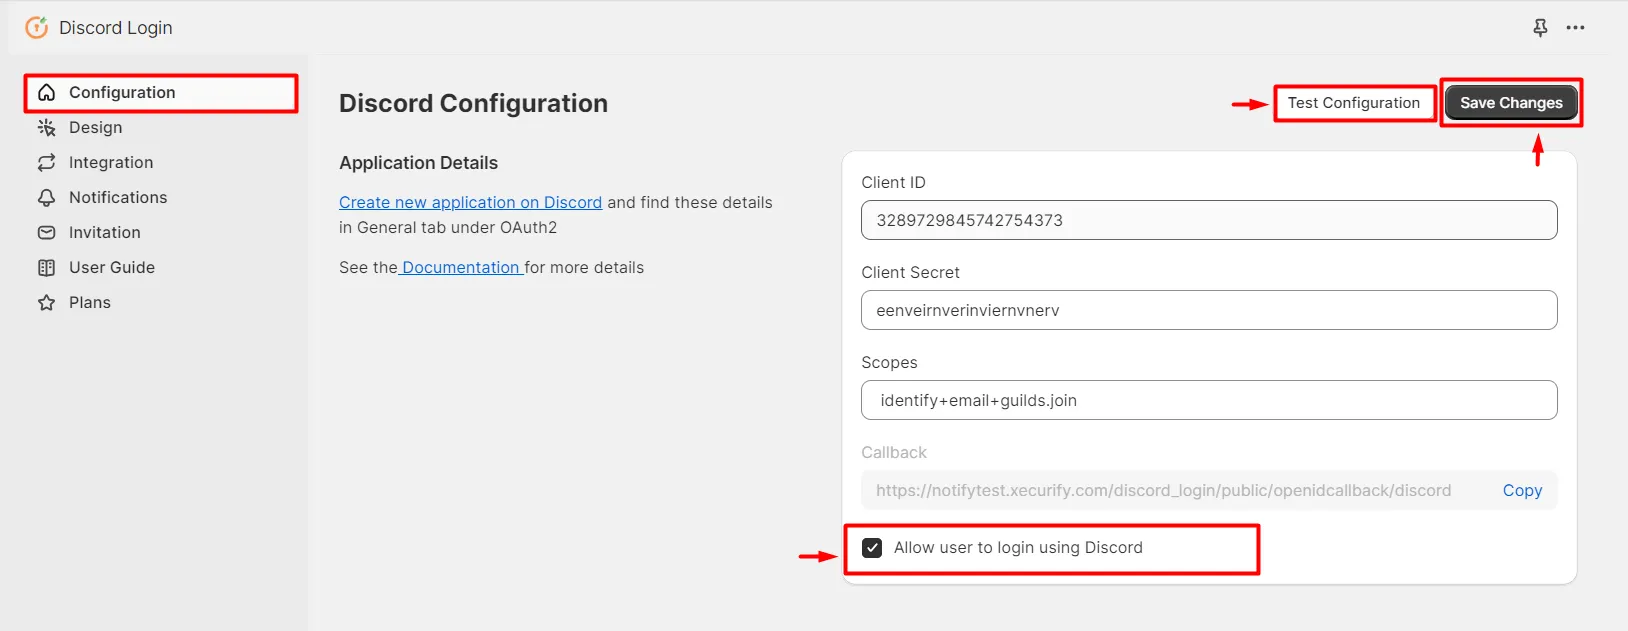
- Check Allow user to login using Discord option and click on Save Changes button. Click on Test Configuration button.
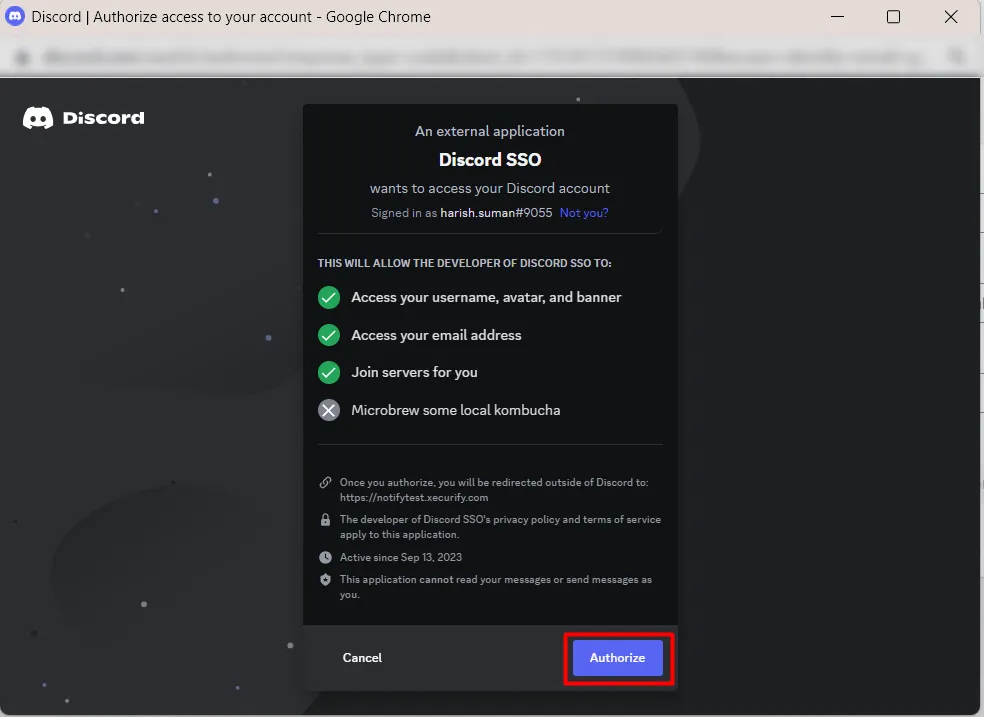
- Click on the Authorize button.
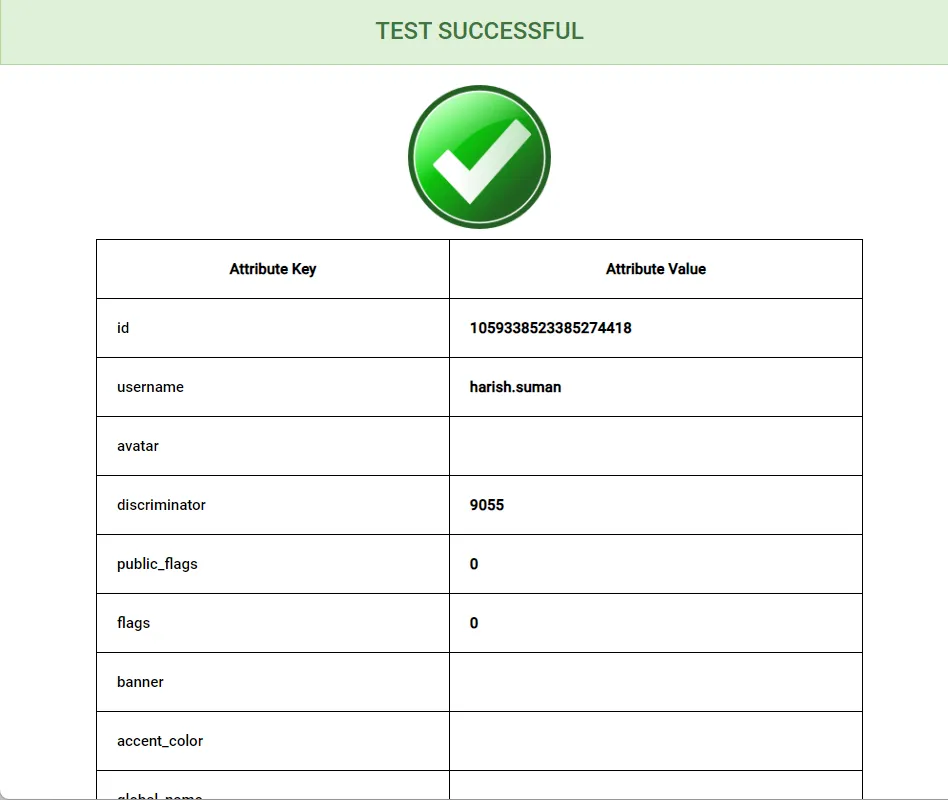
- You should see a popup as shown below, if the test was successful.
You have successfully completed Shopify side SSO Configurations.
4. Adding the Discord Login Button on the storefront
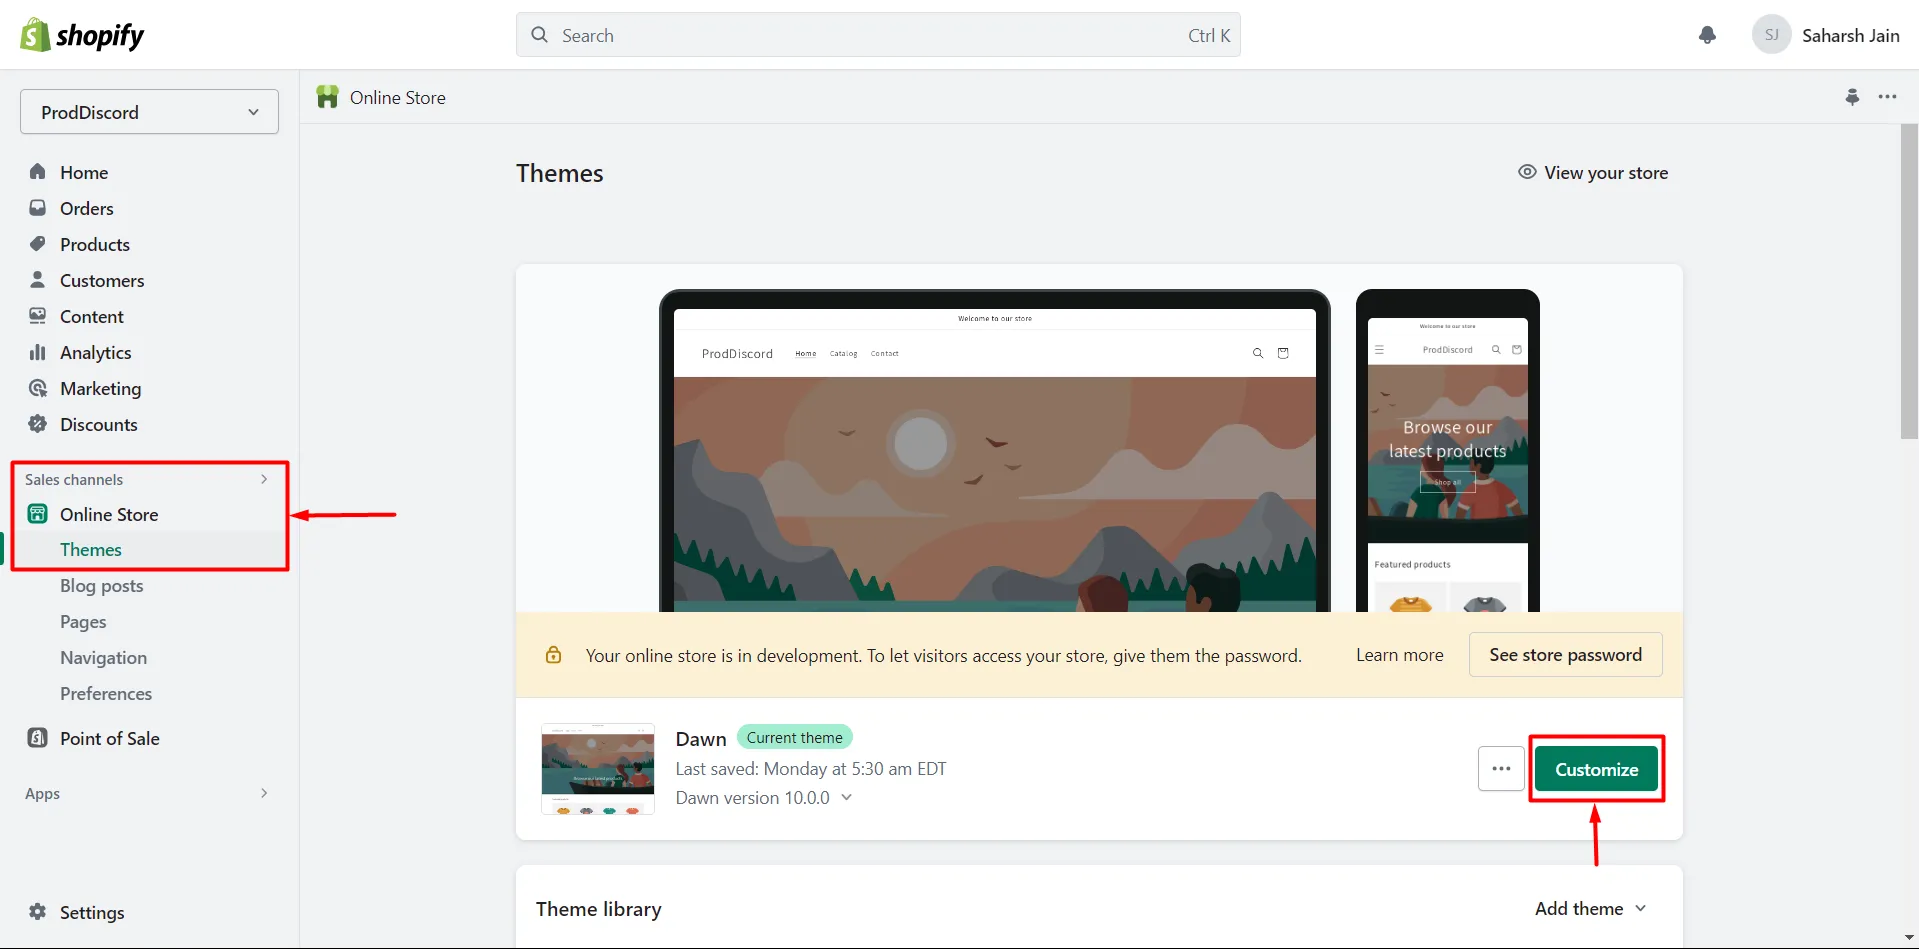
- To enable the Discord Login Button, navigate back to your Shopify admin dashboard and then go to Sales Channel > Online Store > Theme > Customize.
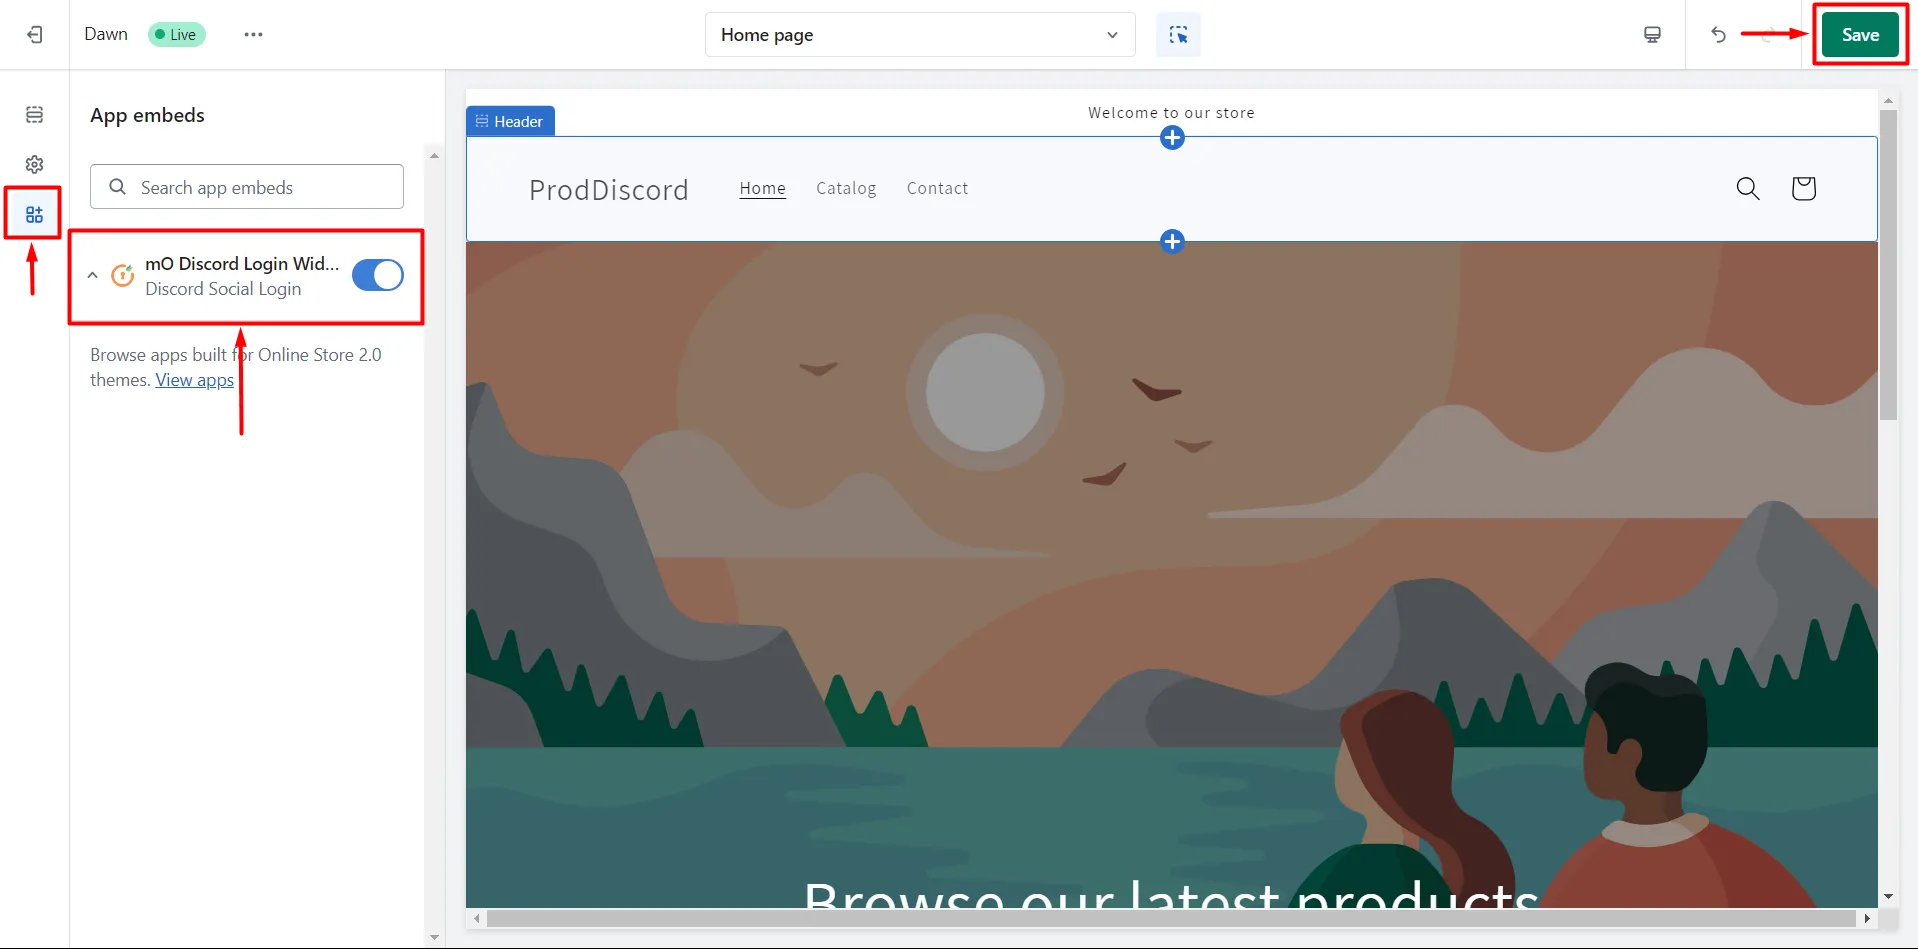
- Go to App Embeds > Turn On Discord Social Login Toggle > Save.
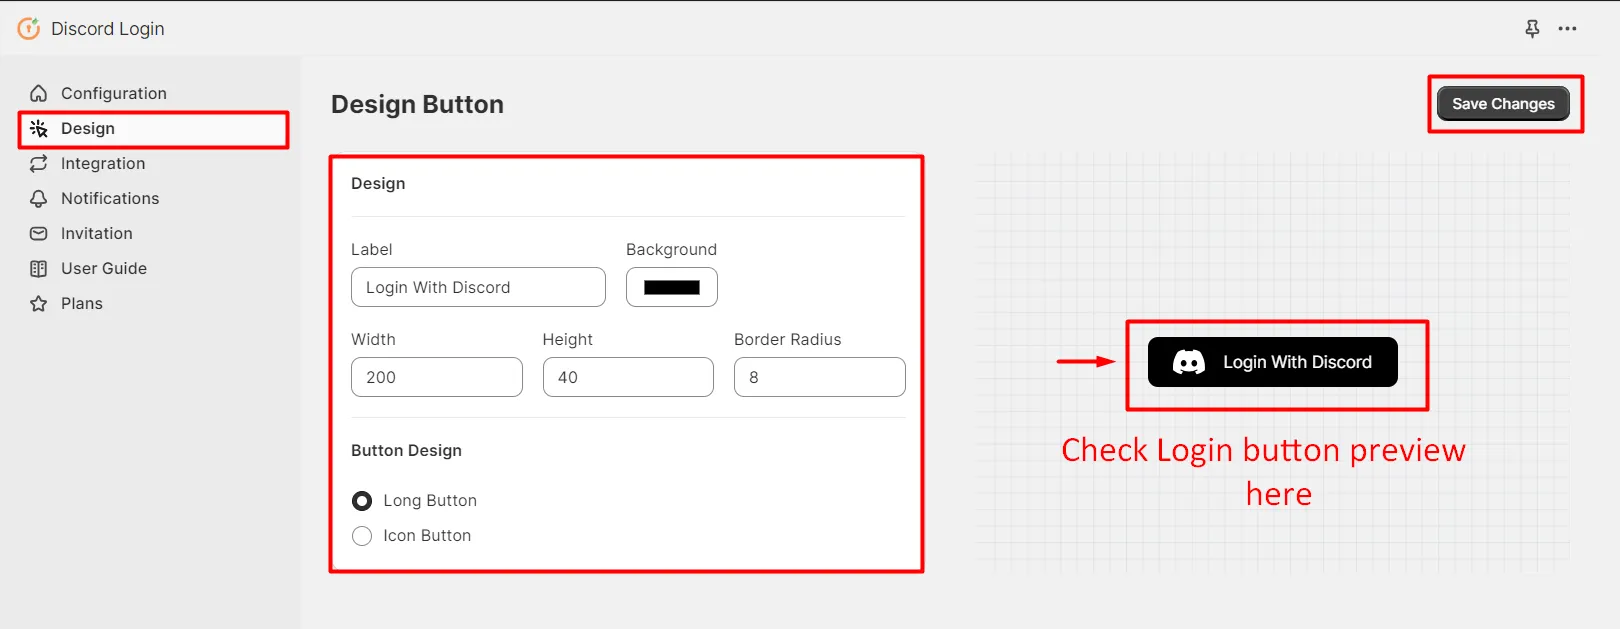
- Now navigate to Design section of the Discord Social Login application to customize the Login button. Click on Save Changes.
5. Integrate Discord with Shopify
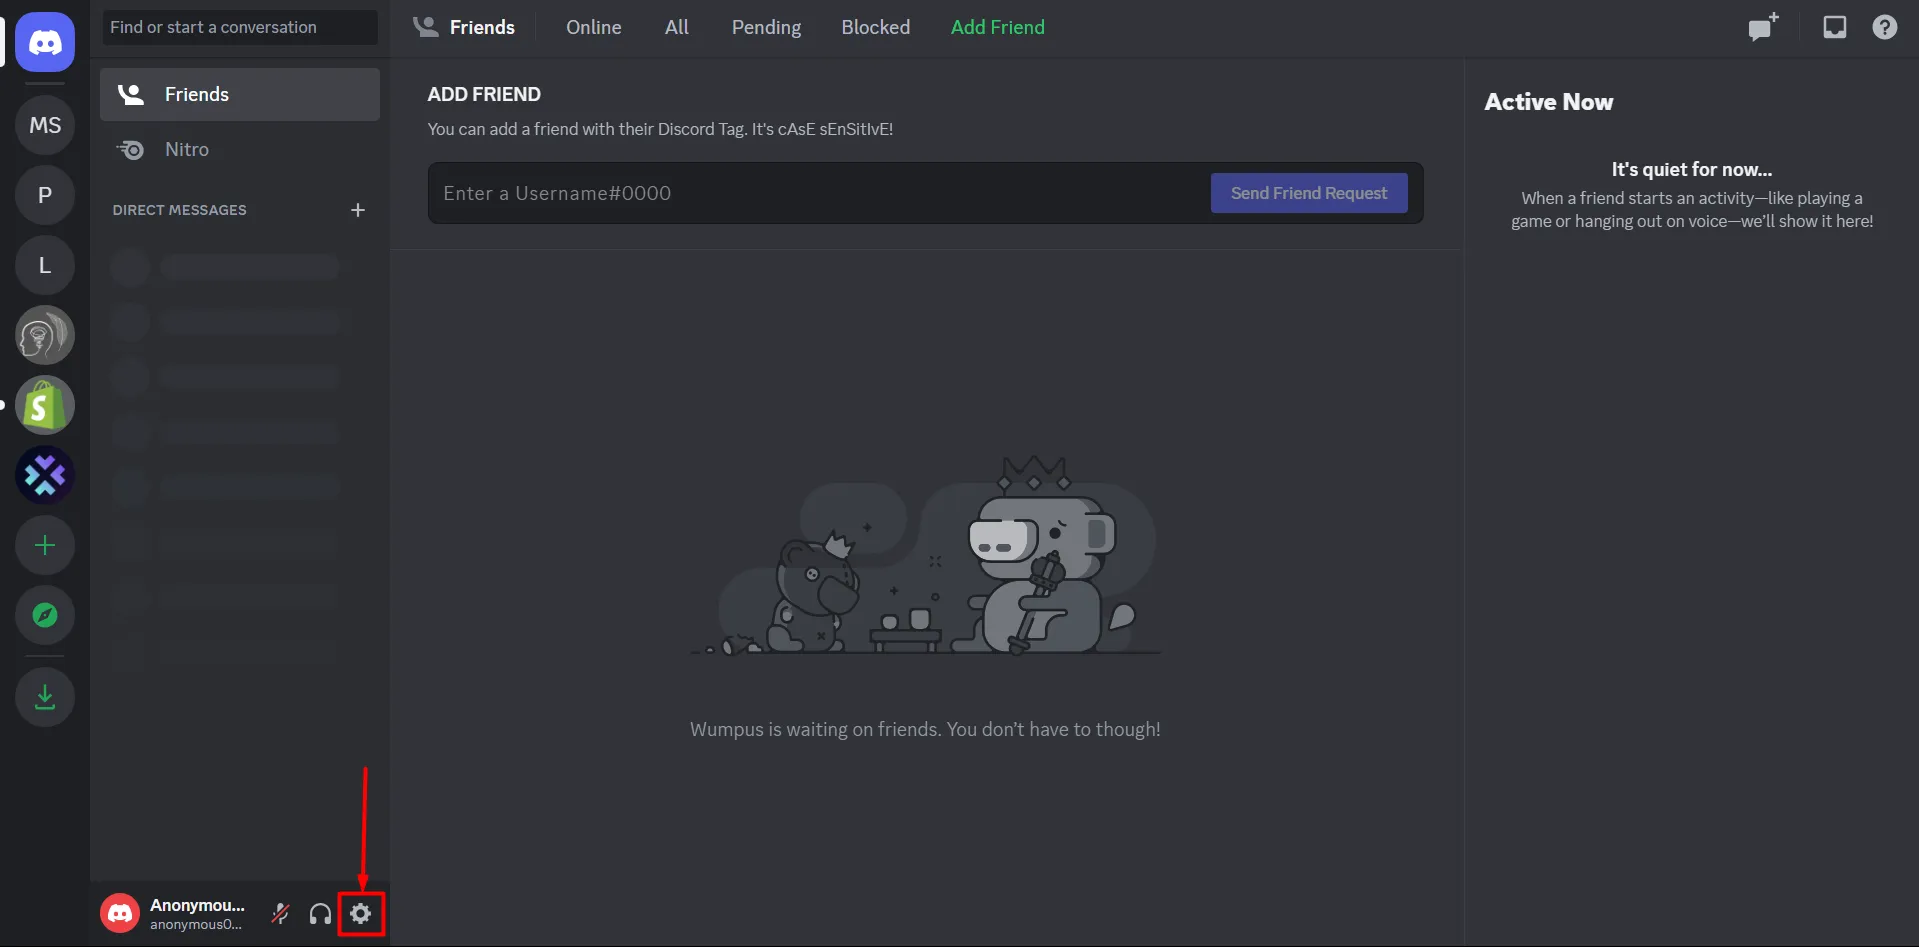
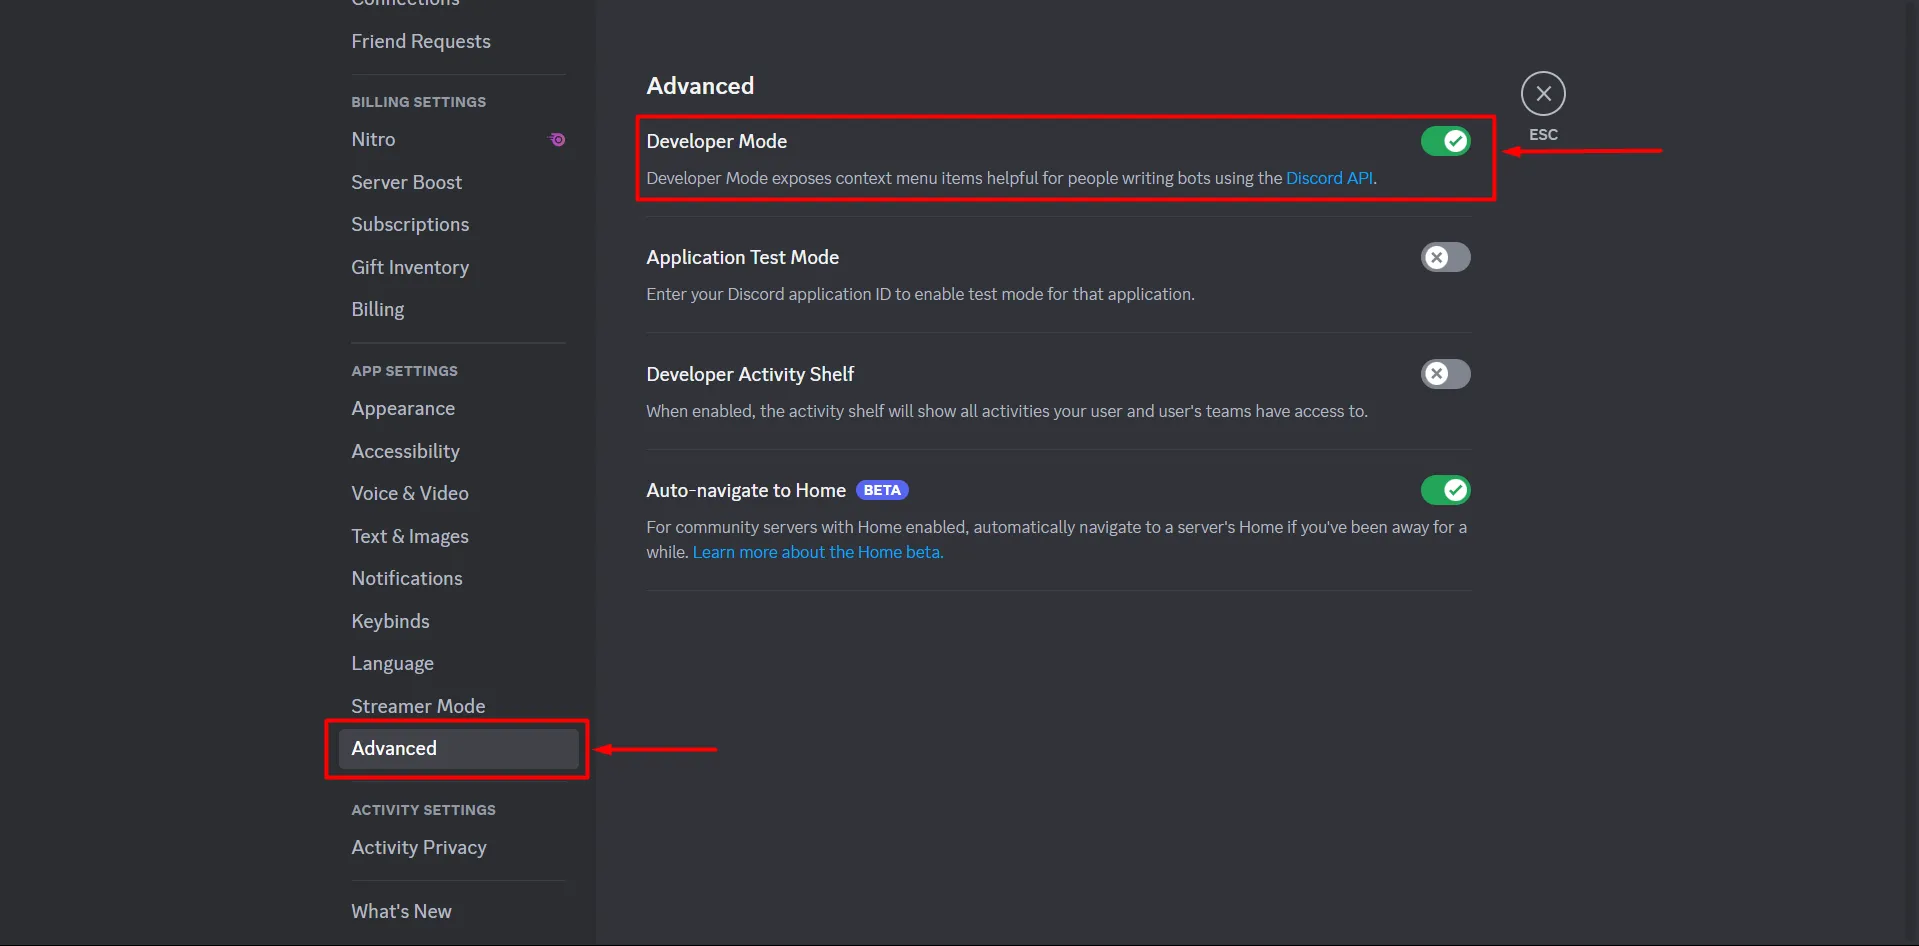
- To Integrate Discord with Shopify, navigate here and then go to the user settings.
- Under Advanced settings, enable Developer Mode.
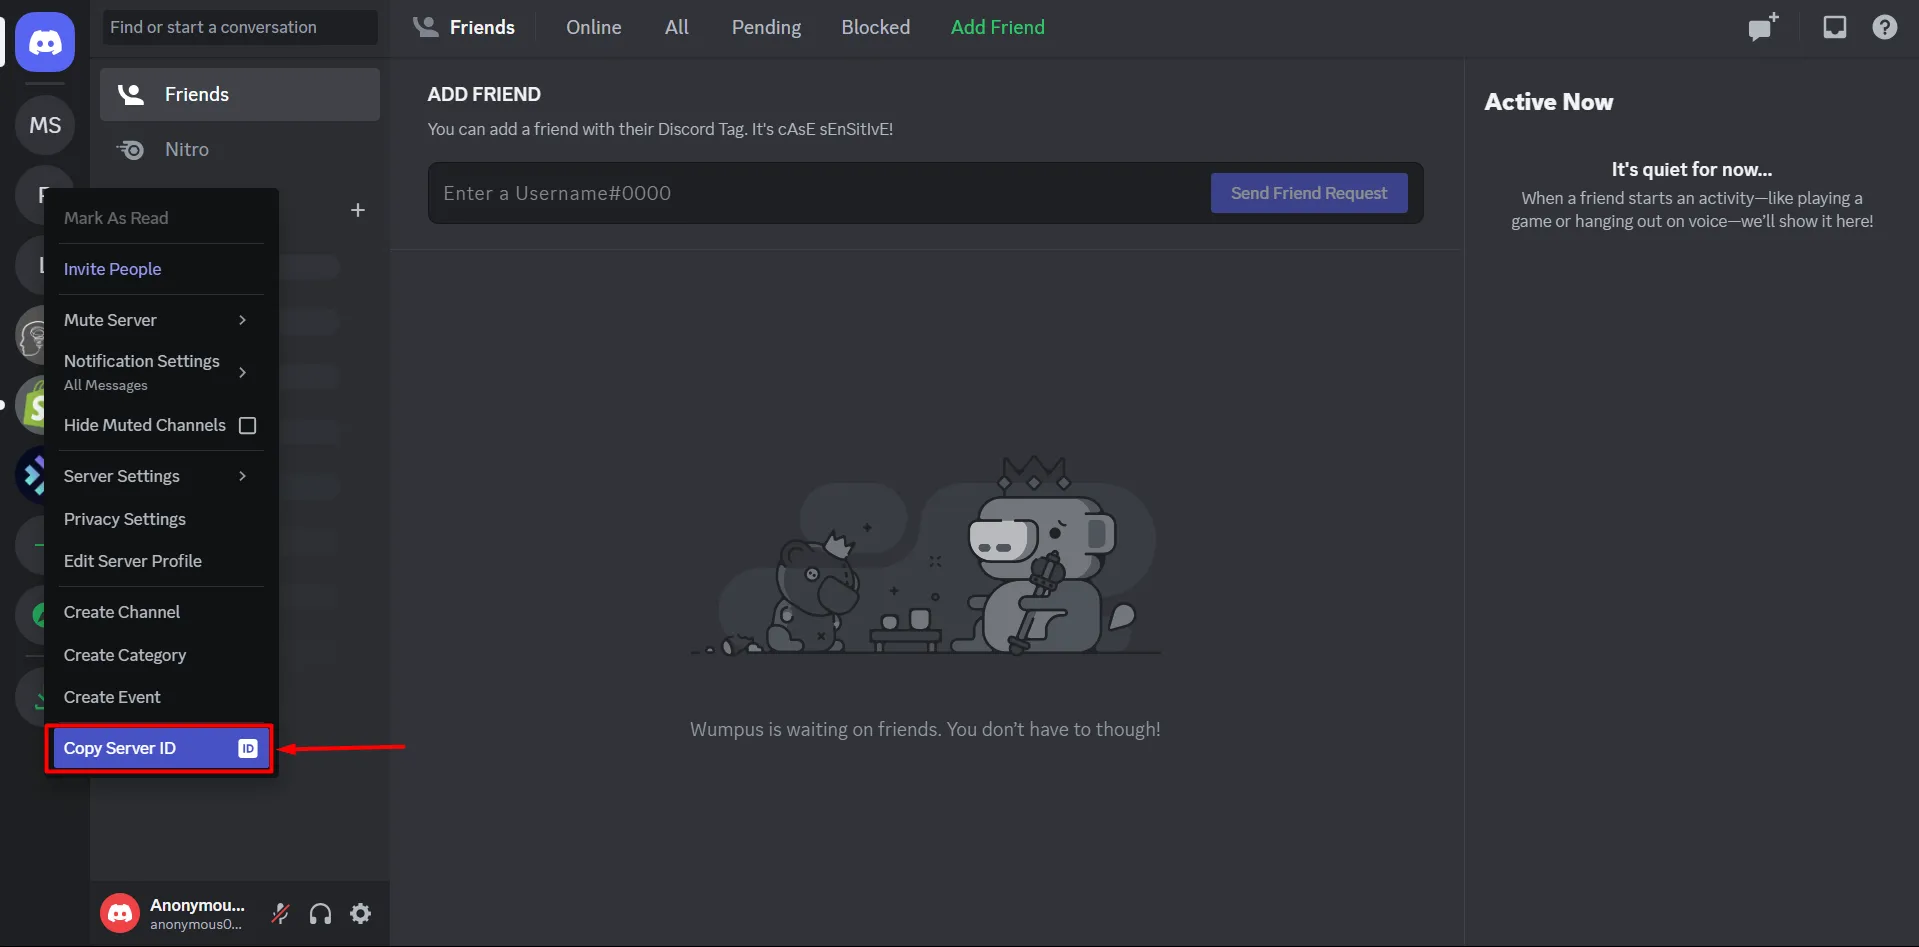
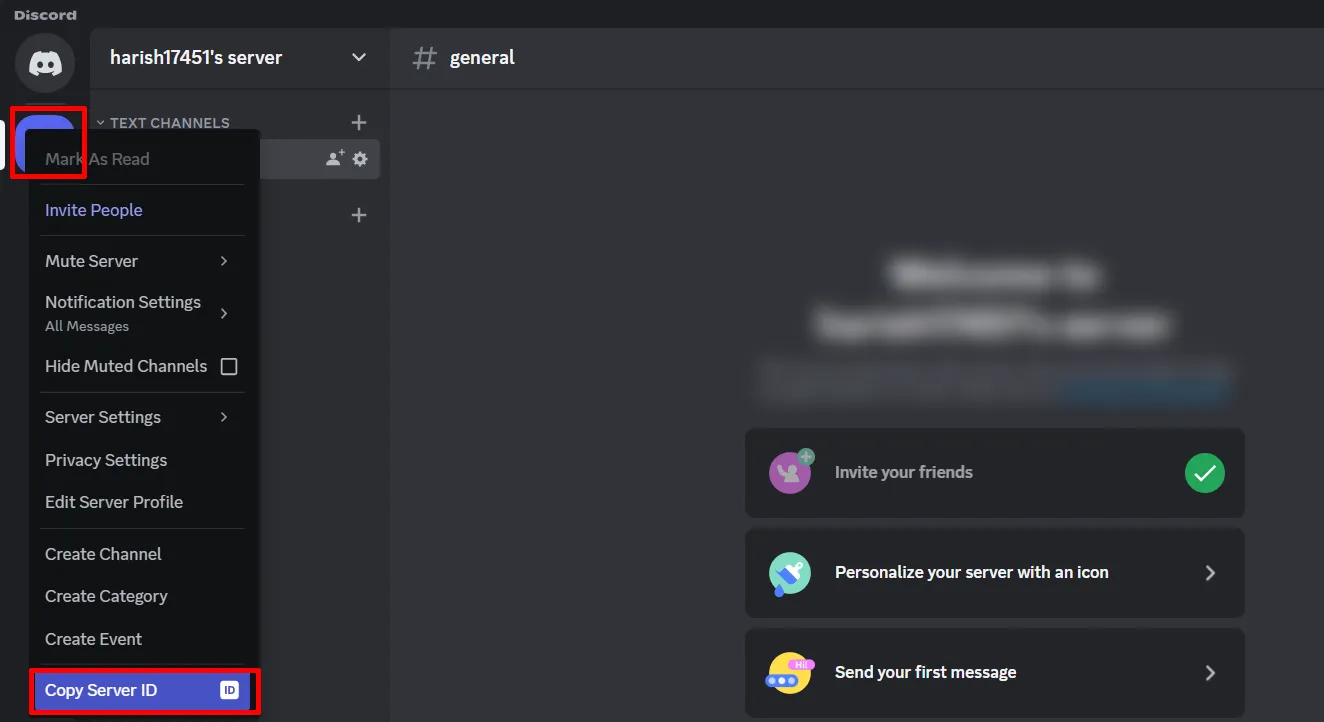
- Now right click on the Discord server you want to integrate with Shopify and copy the Server ID.
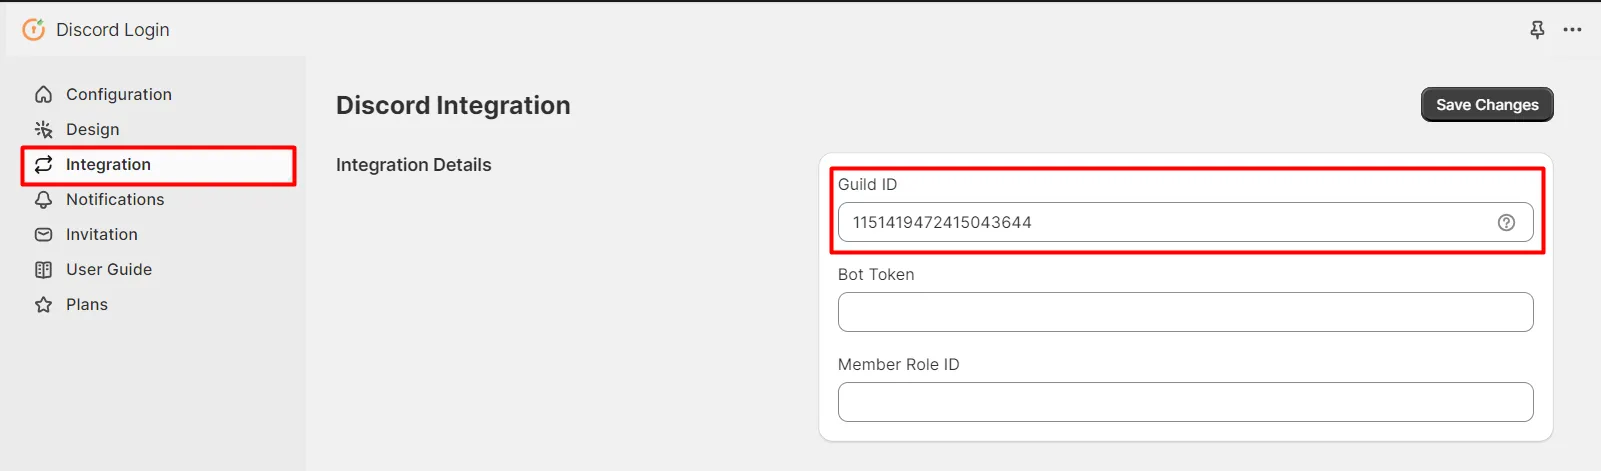
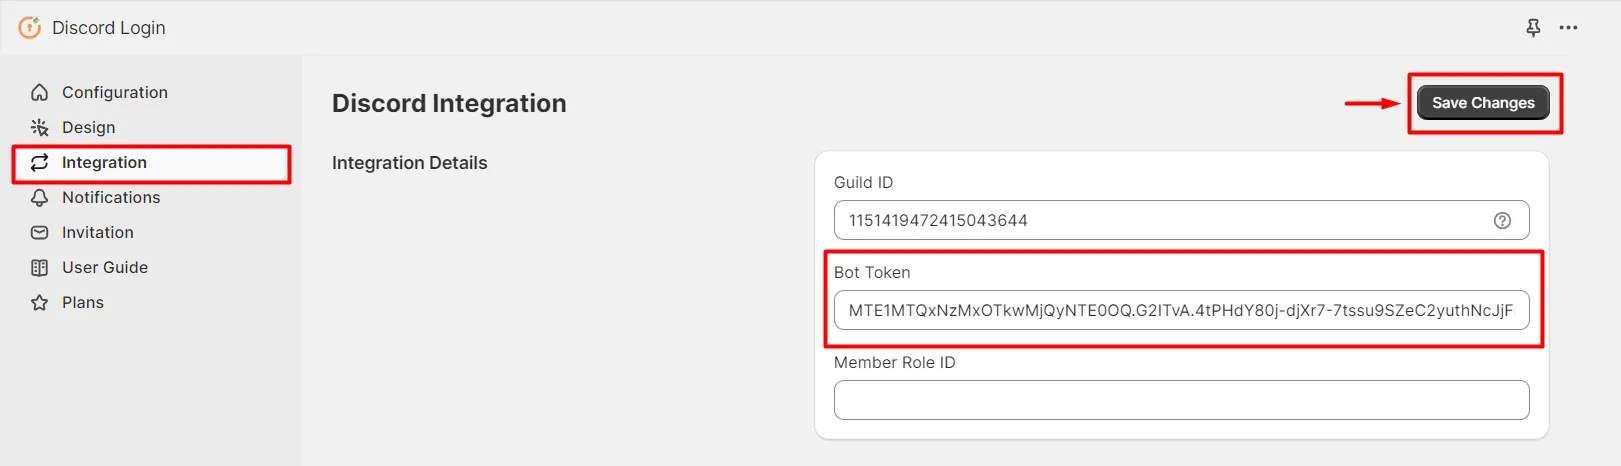
- Navigate to the Discord Social Login application and under Integration section, paste the copied Server ID as Discord Guild ID.
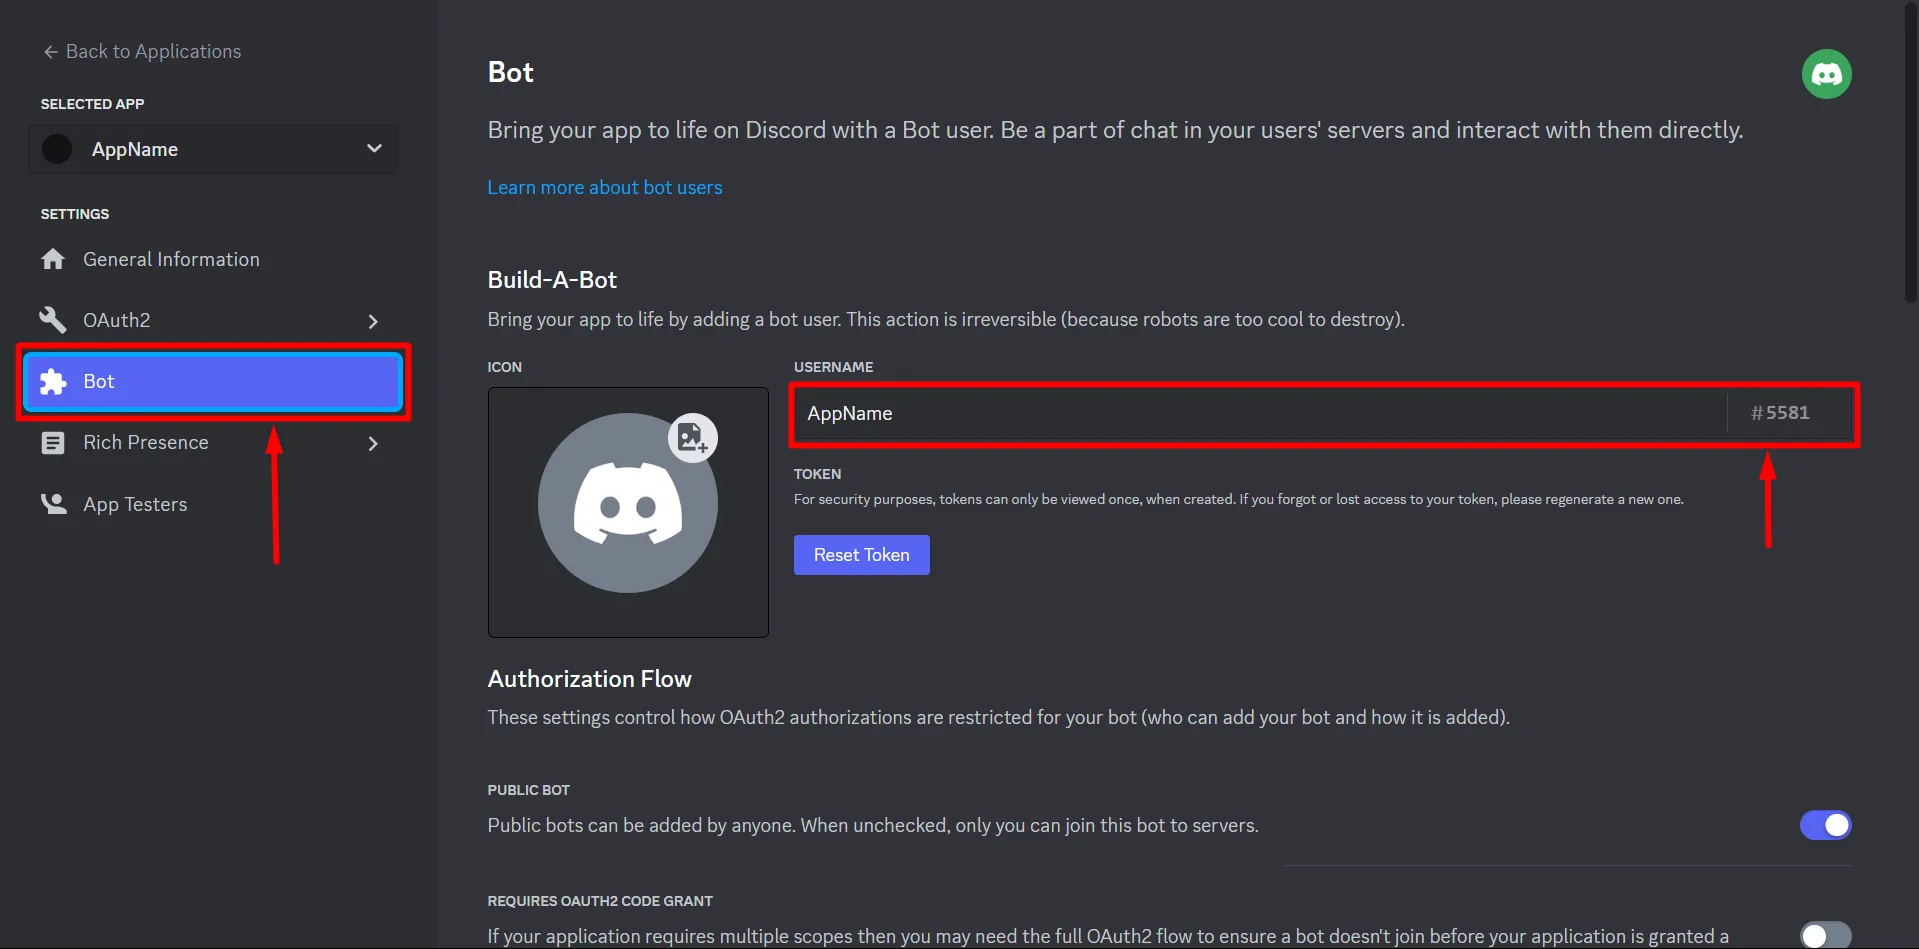
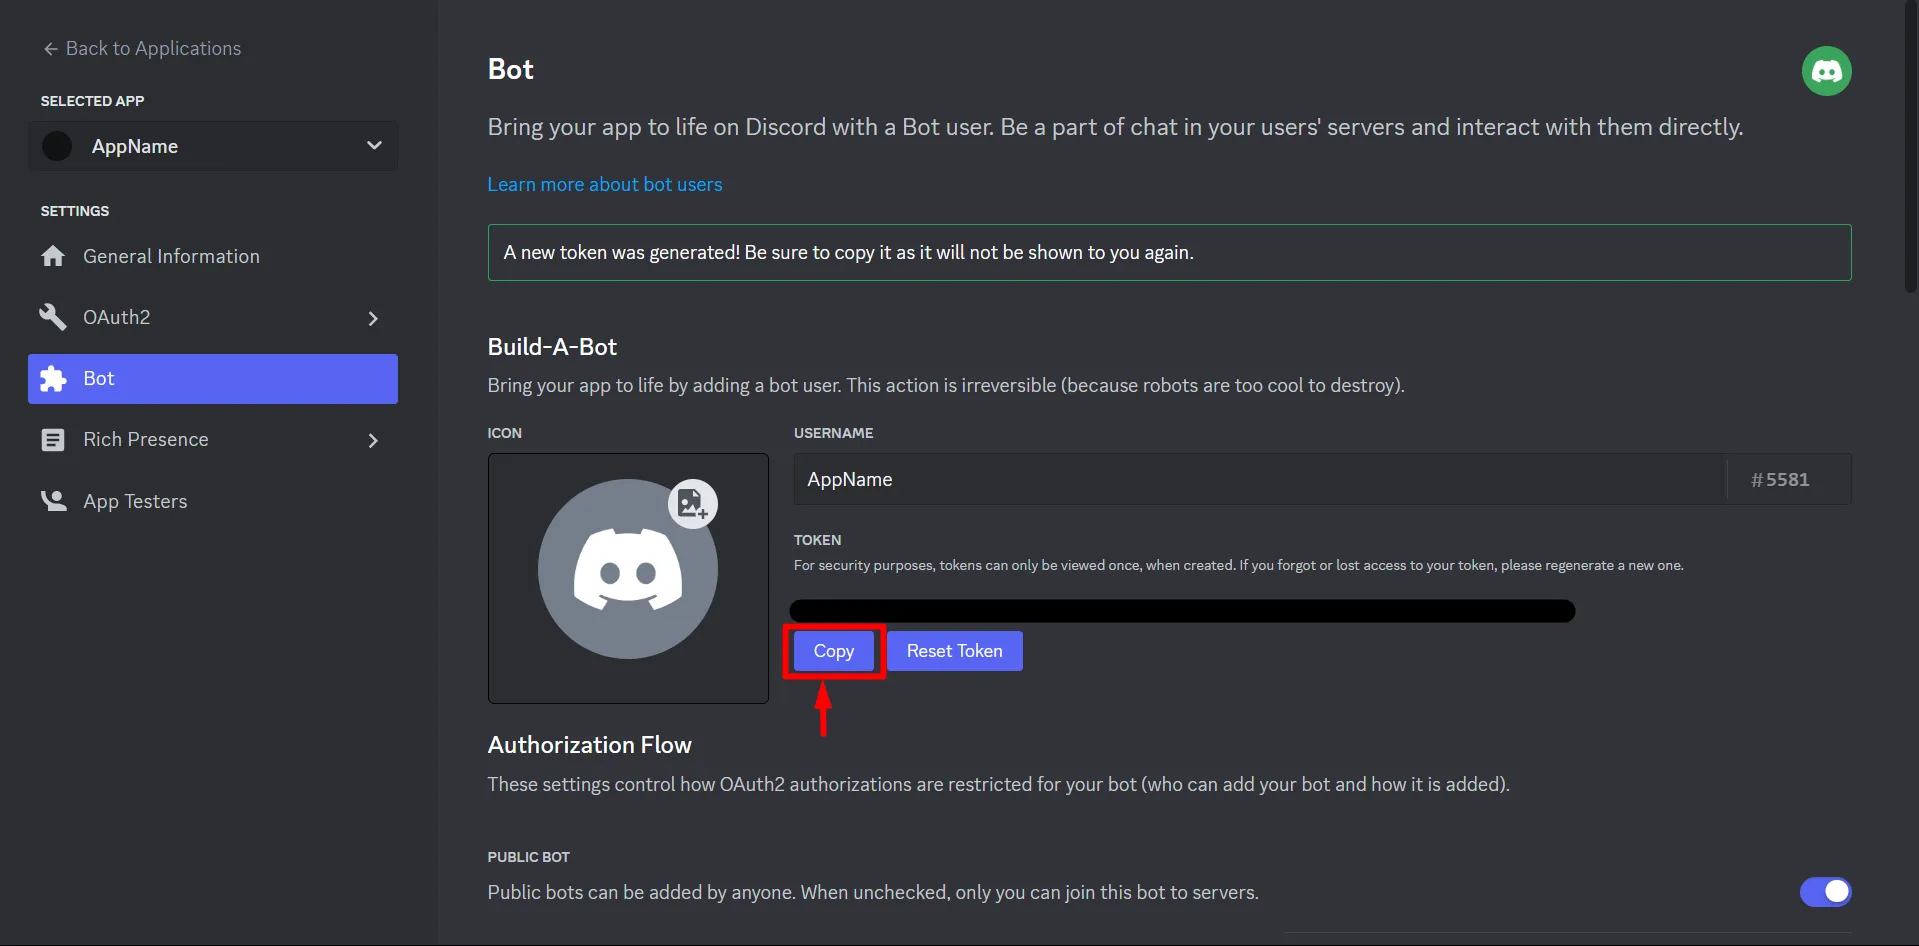
- Go to the application you created in Step 2 and Go to Bot and enter a name for the Bot.
- Now click on Reset Token below the Bot Name and copy the Bot Token.
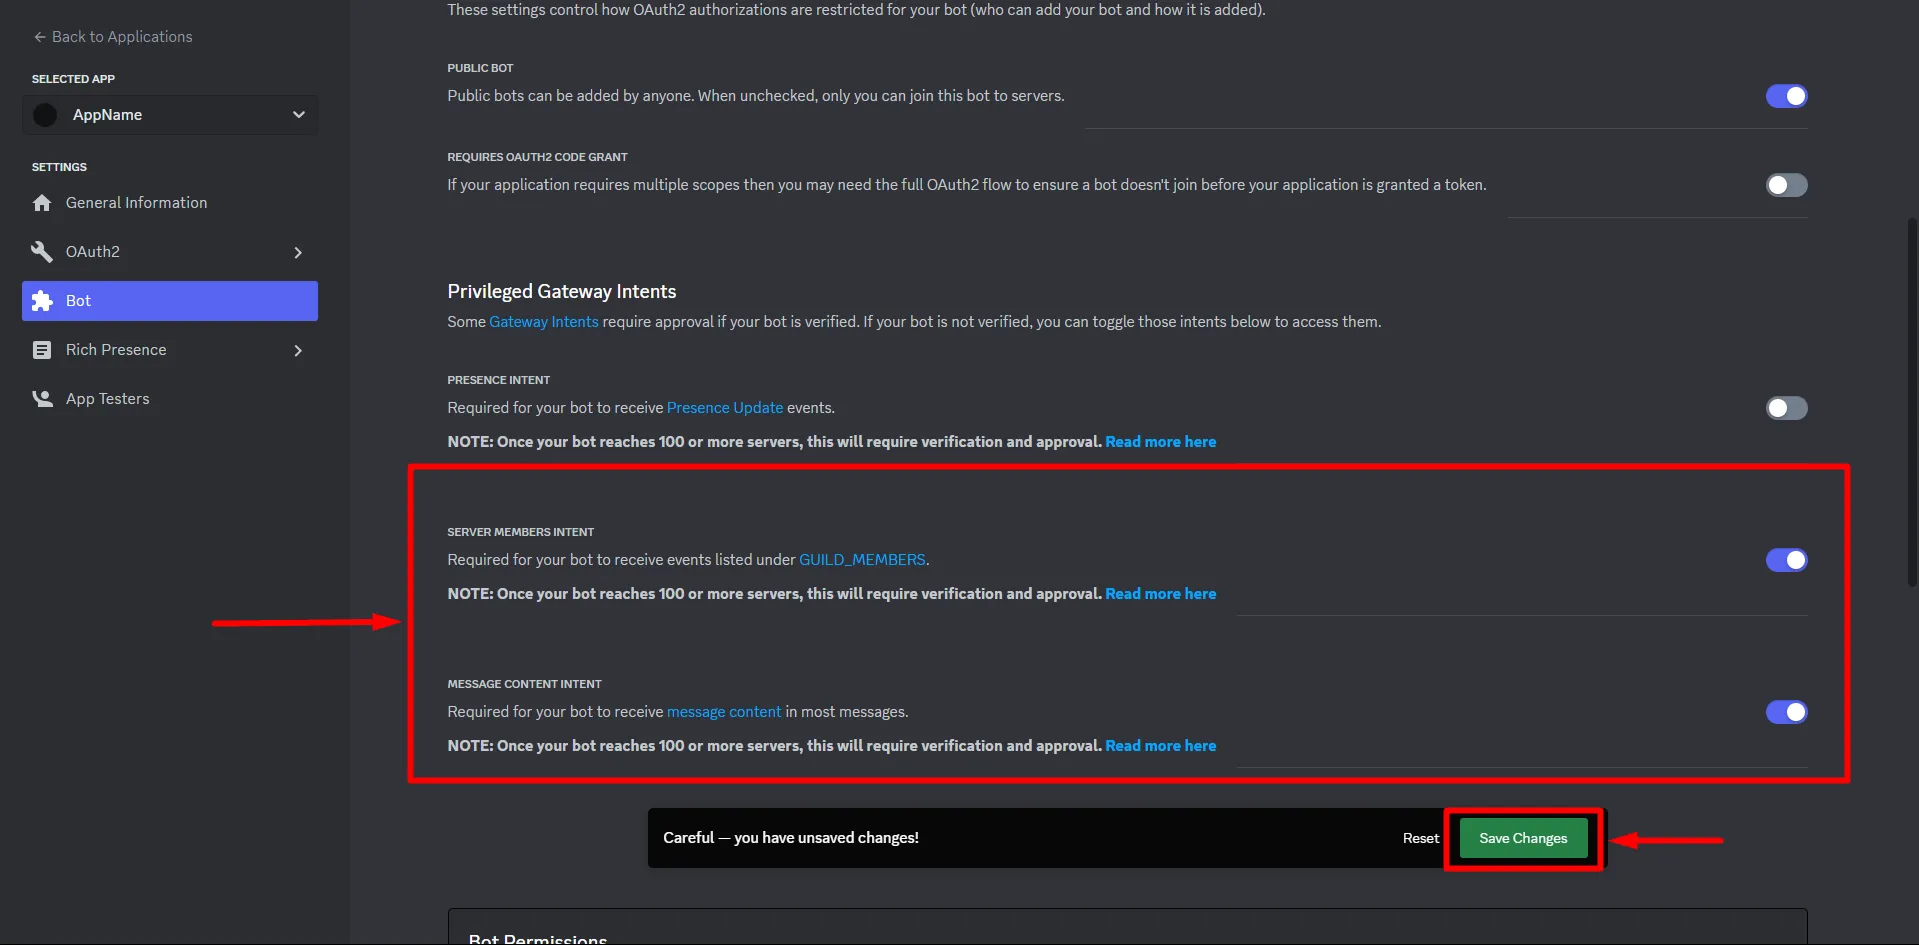
- Enable these Authorization Flows and click on Save Changes.
- Now paste the copied BOT token under the Bot Token section in the Discord Social Login application and click on Save.
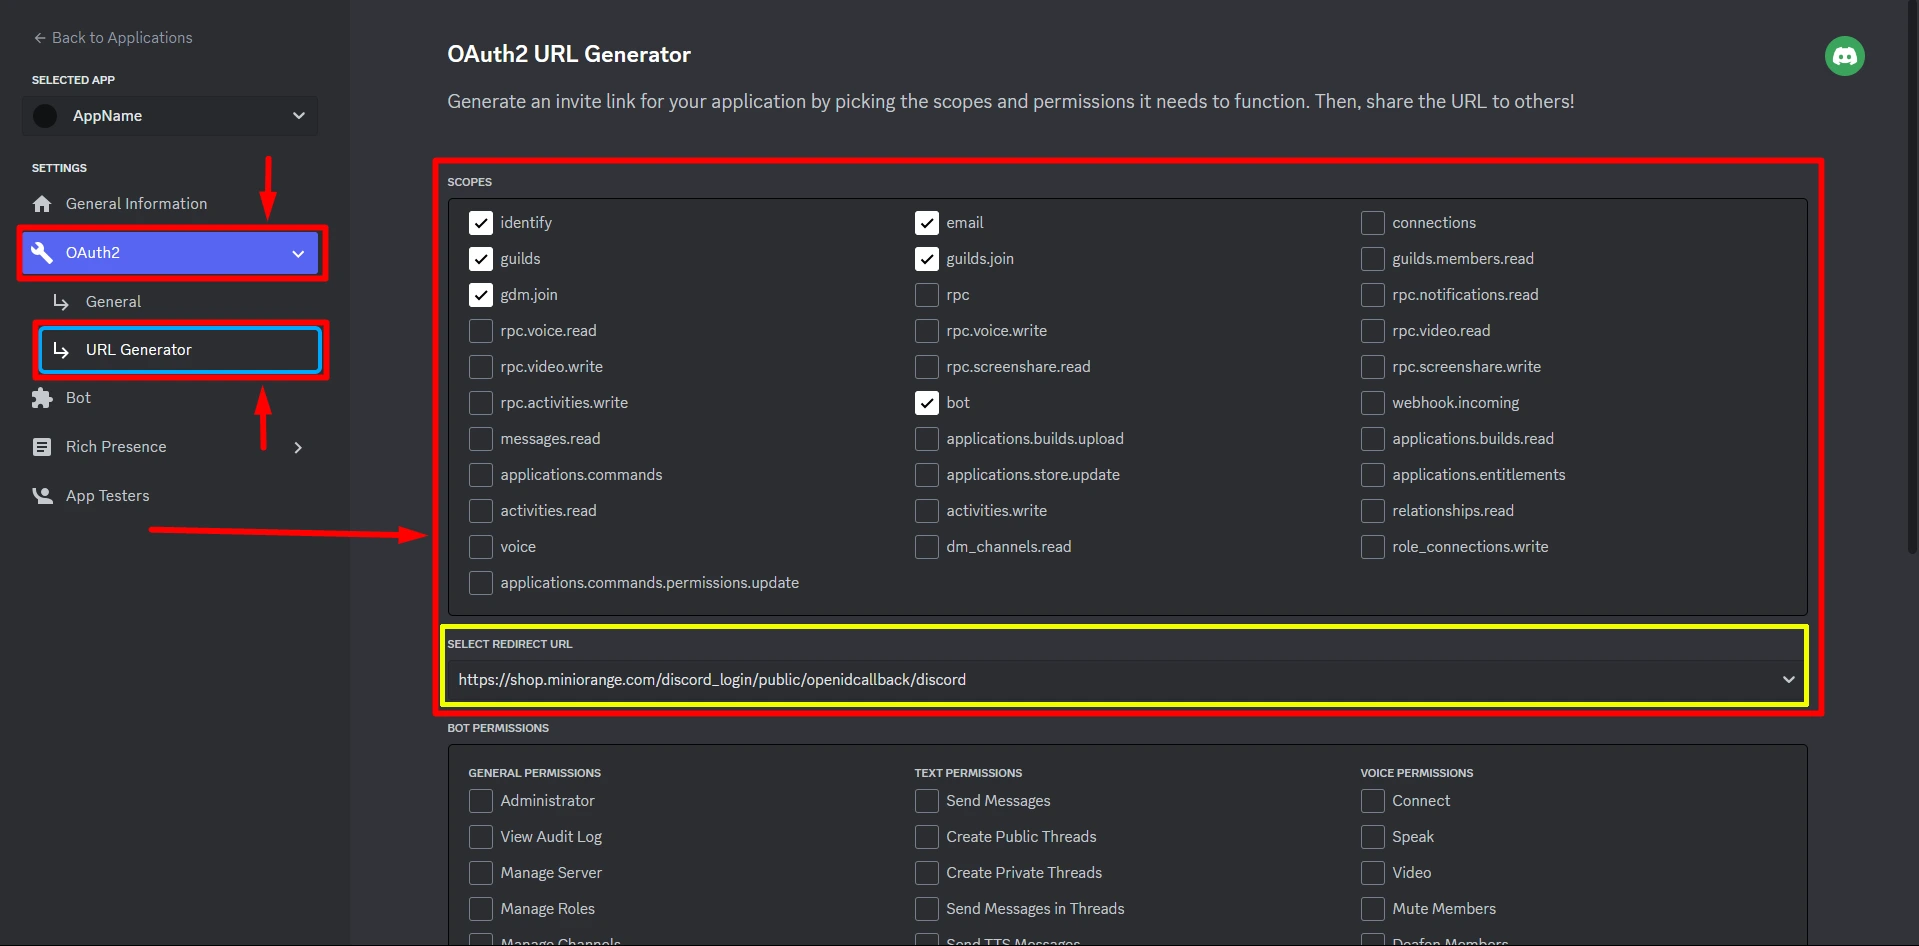
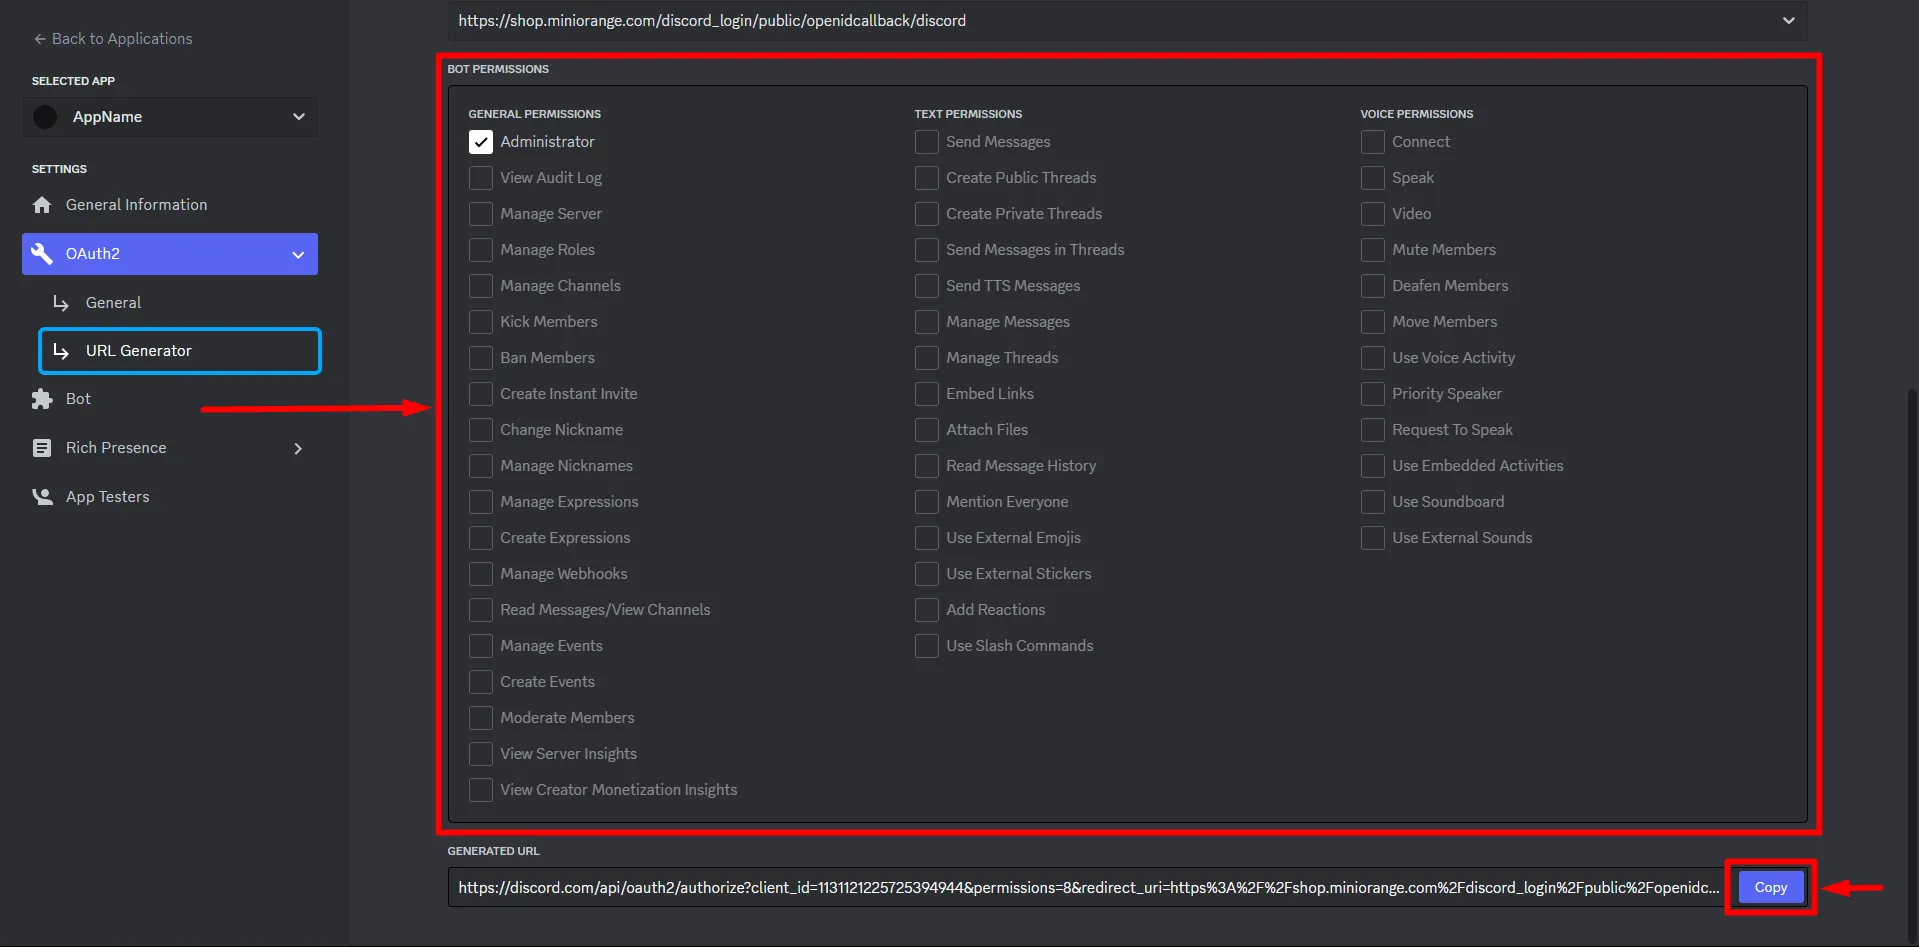
- Now go to OAuth2 > URL Generator. Select the Scopes {identity, email, guilds.join, bot, gdm.join, guilds} and select the miniOrange Redirect URL. (as shown in below image)
- Select Administrator as the Bot Permissions and Copy the Generated URL.
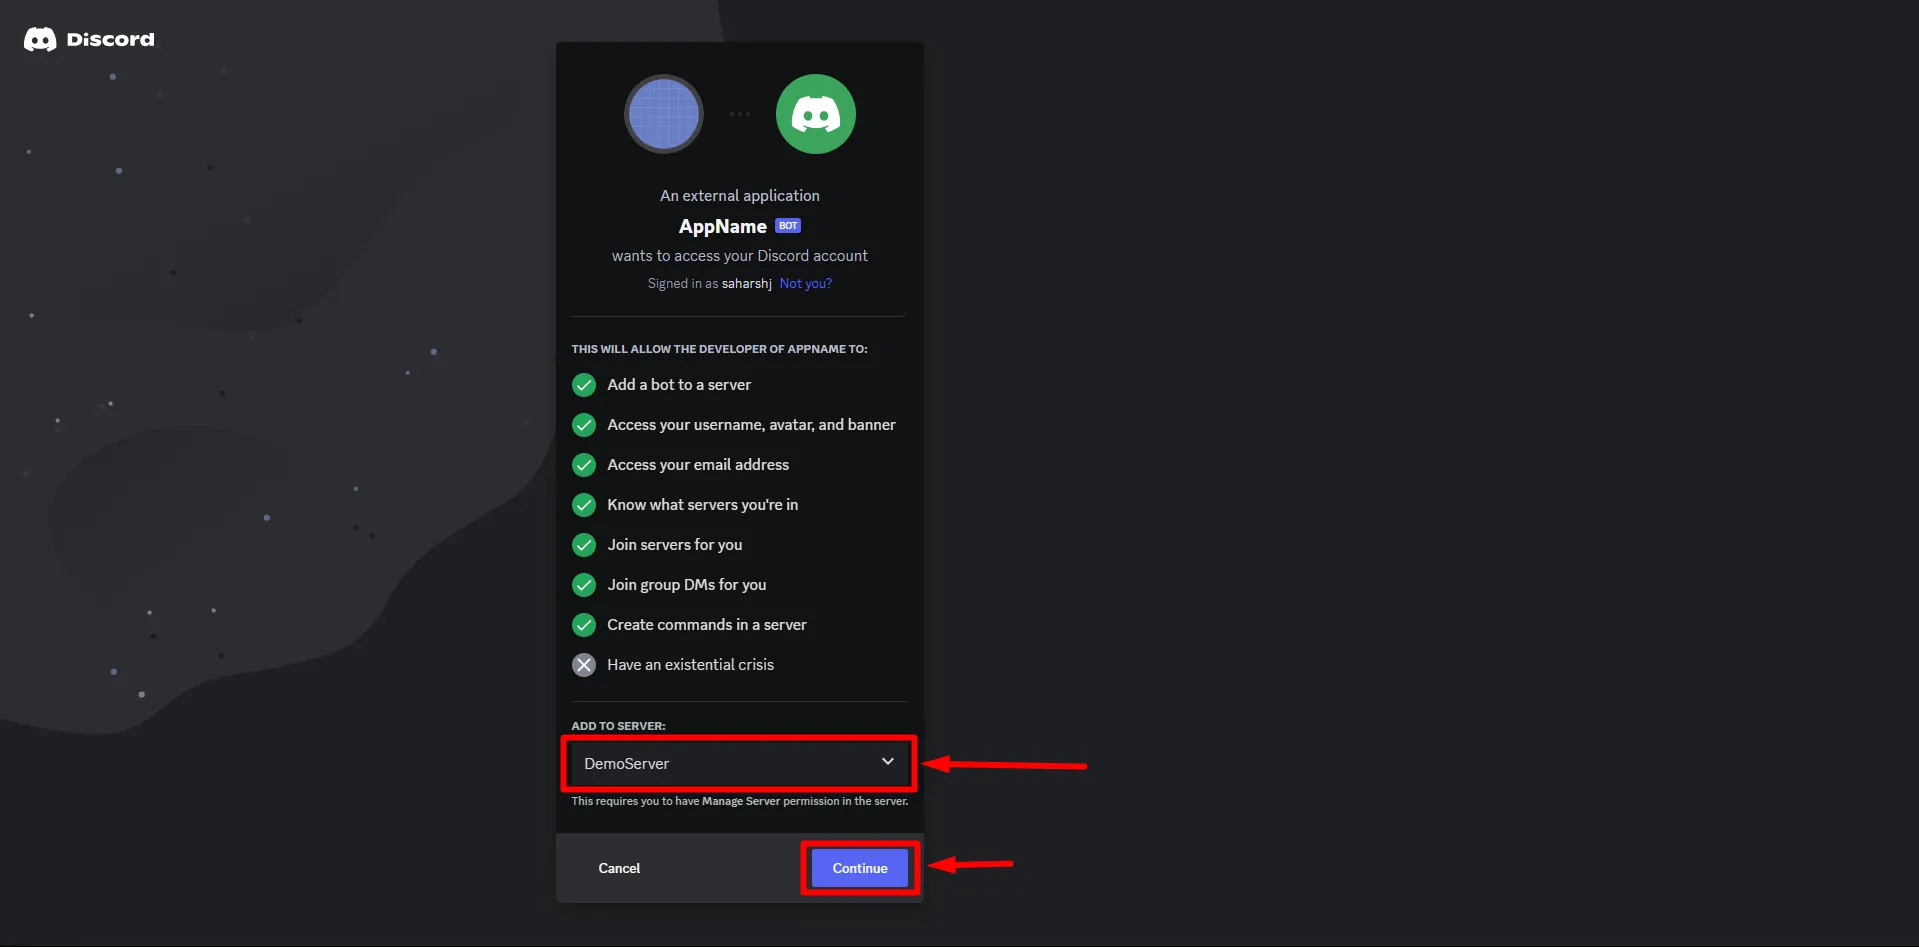
- Now paste the URL in a new tab and select the Server you would like to add the Bot in.
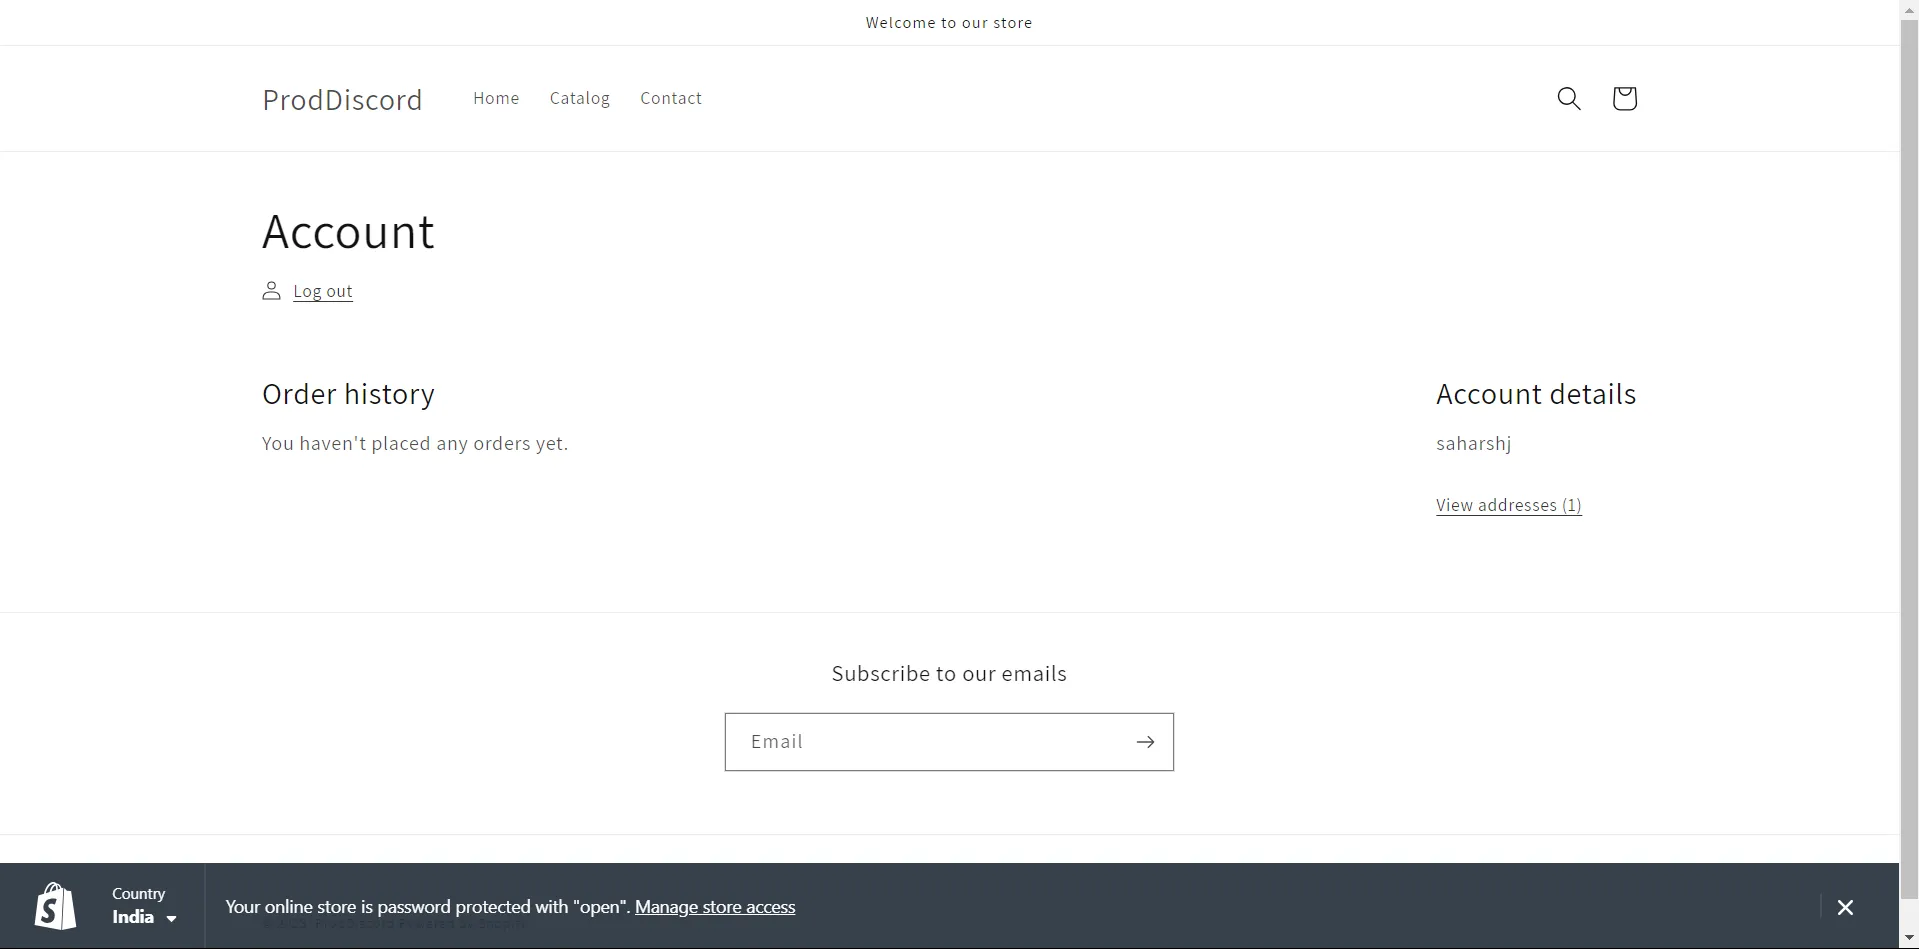
- You should get redirected to an error page or get logged-in to Shopify
- Please check the Discord Server now, if the bot has been added or not.
5.1 Add Discord Social Login App to your Shopify Store:
5.2 Create a Bot on Discord and add it to the server for successful integration.
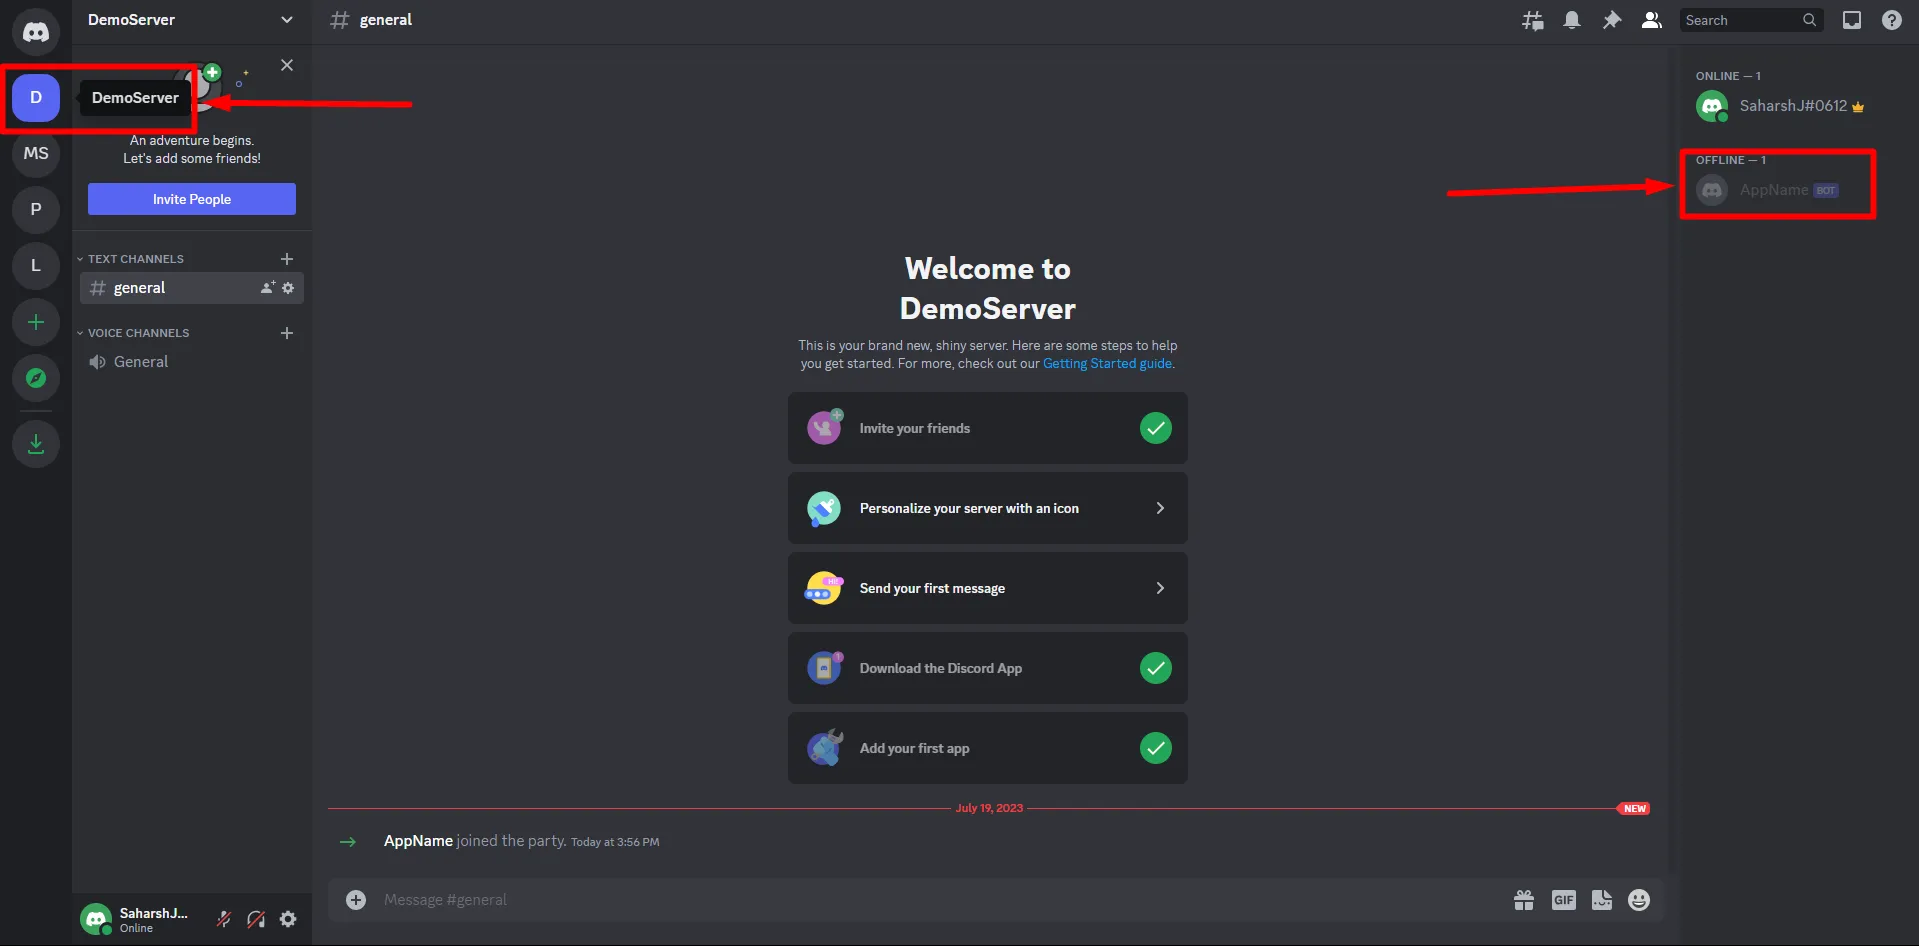
The Integration between Discord and Shopify is now successful.
6. Assign Discord Role to users
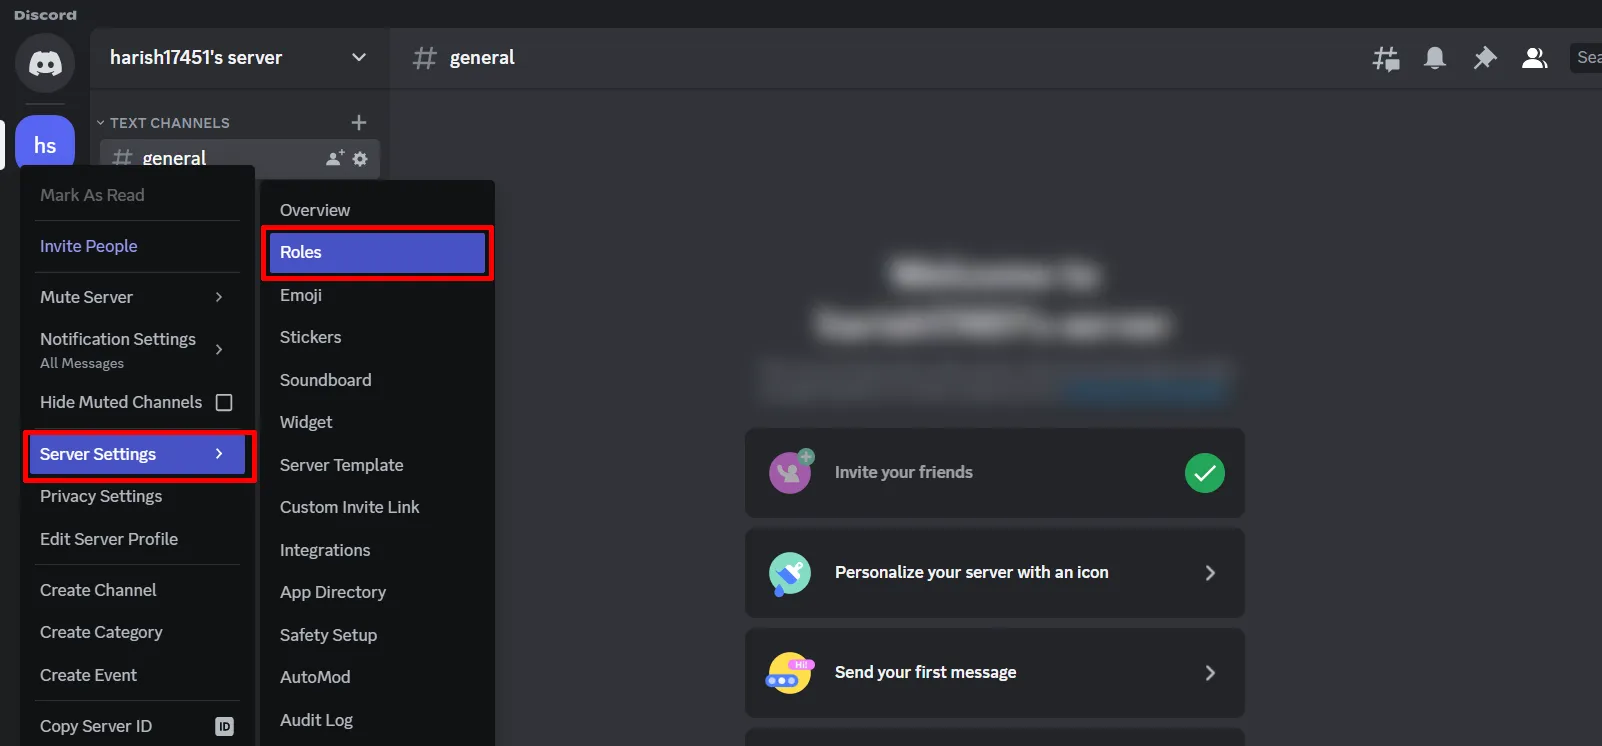
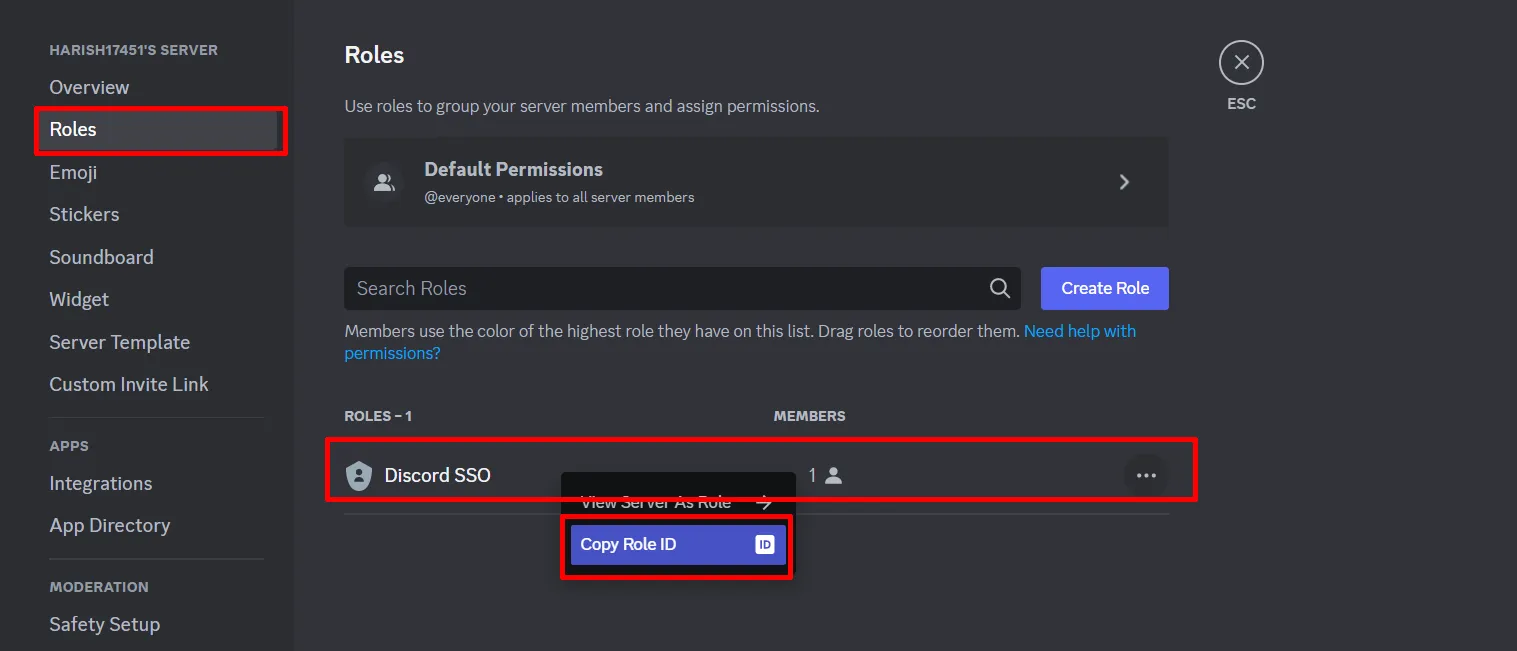
- To get the Server Role ID, navigate to the Server Settings >> Roles section.
- Right click on the previously created Role (you can create a new role if haven't created one yet) and Copy the Role ID.
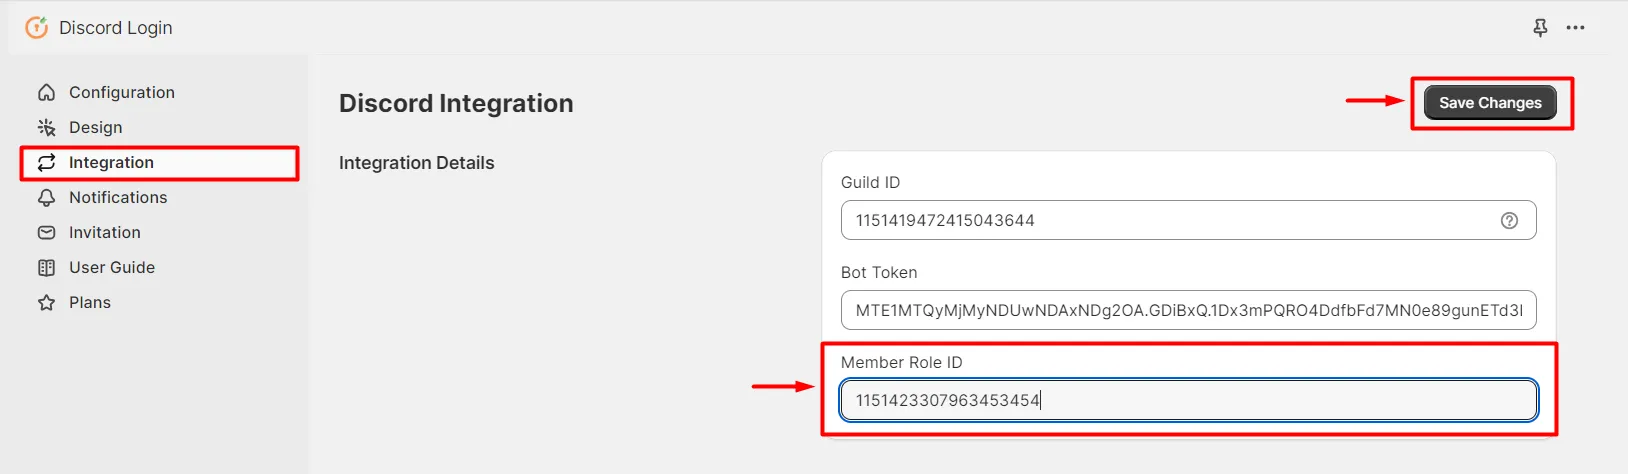
- To assign a Discord Role to users when they login to your Shopify store using Discord Social Login, enter the Role ID copied in the above step in the Member Role ID section as shown in the below image.
- Click on Save Changes.
7. Add Customer to Discord Server
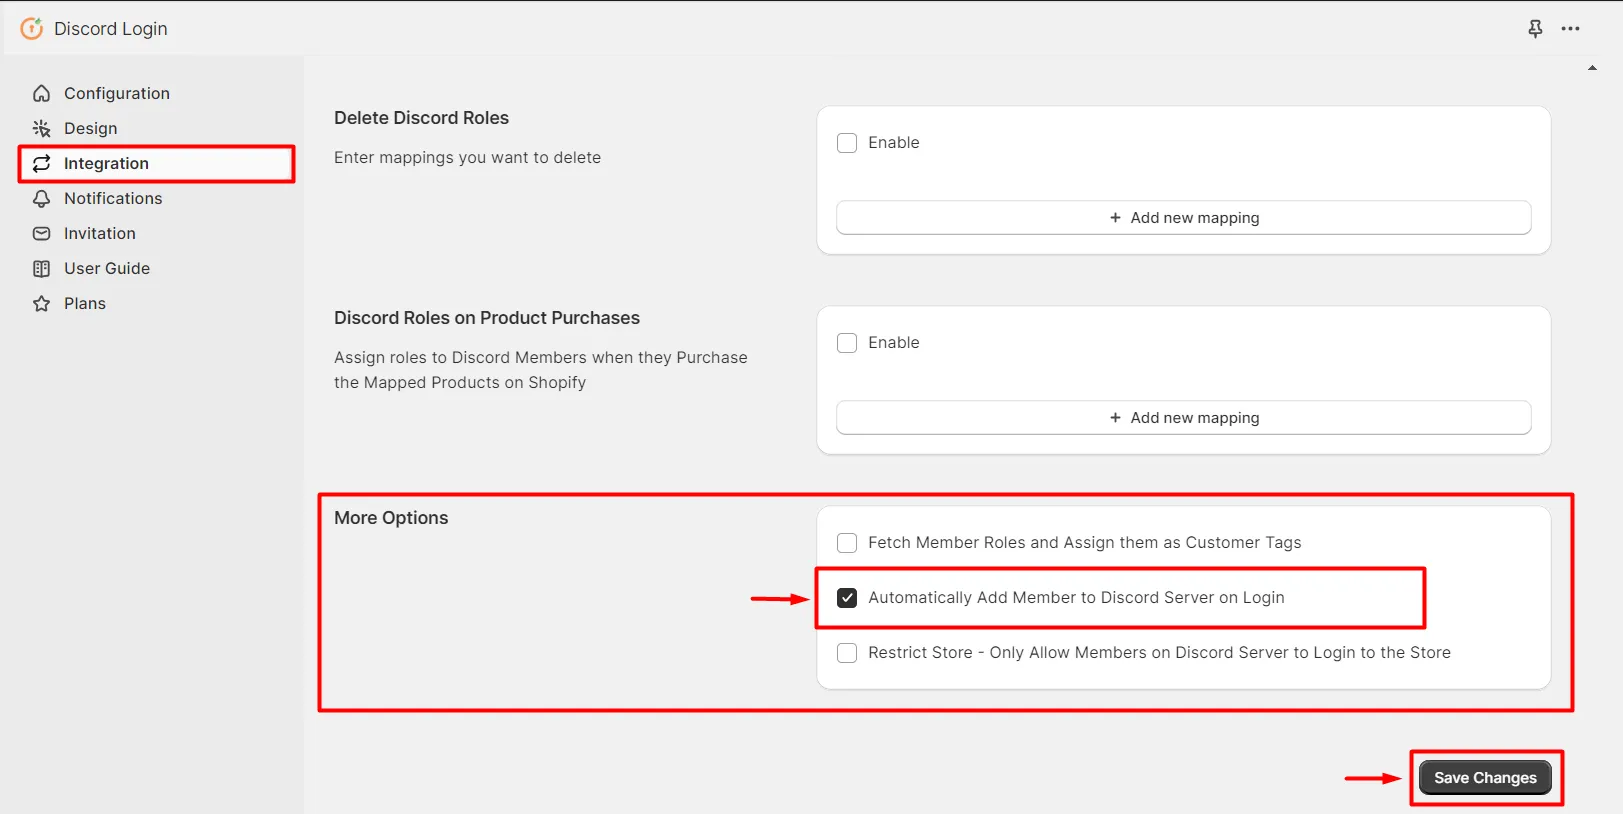
- To add a customer to discord server when they login on Shopify using Discord Social Login, enable the Automatically Add Member to Discord Server on Login option.
- Click on Save Changes.
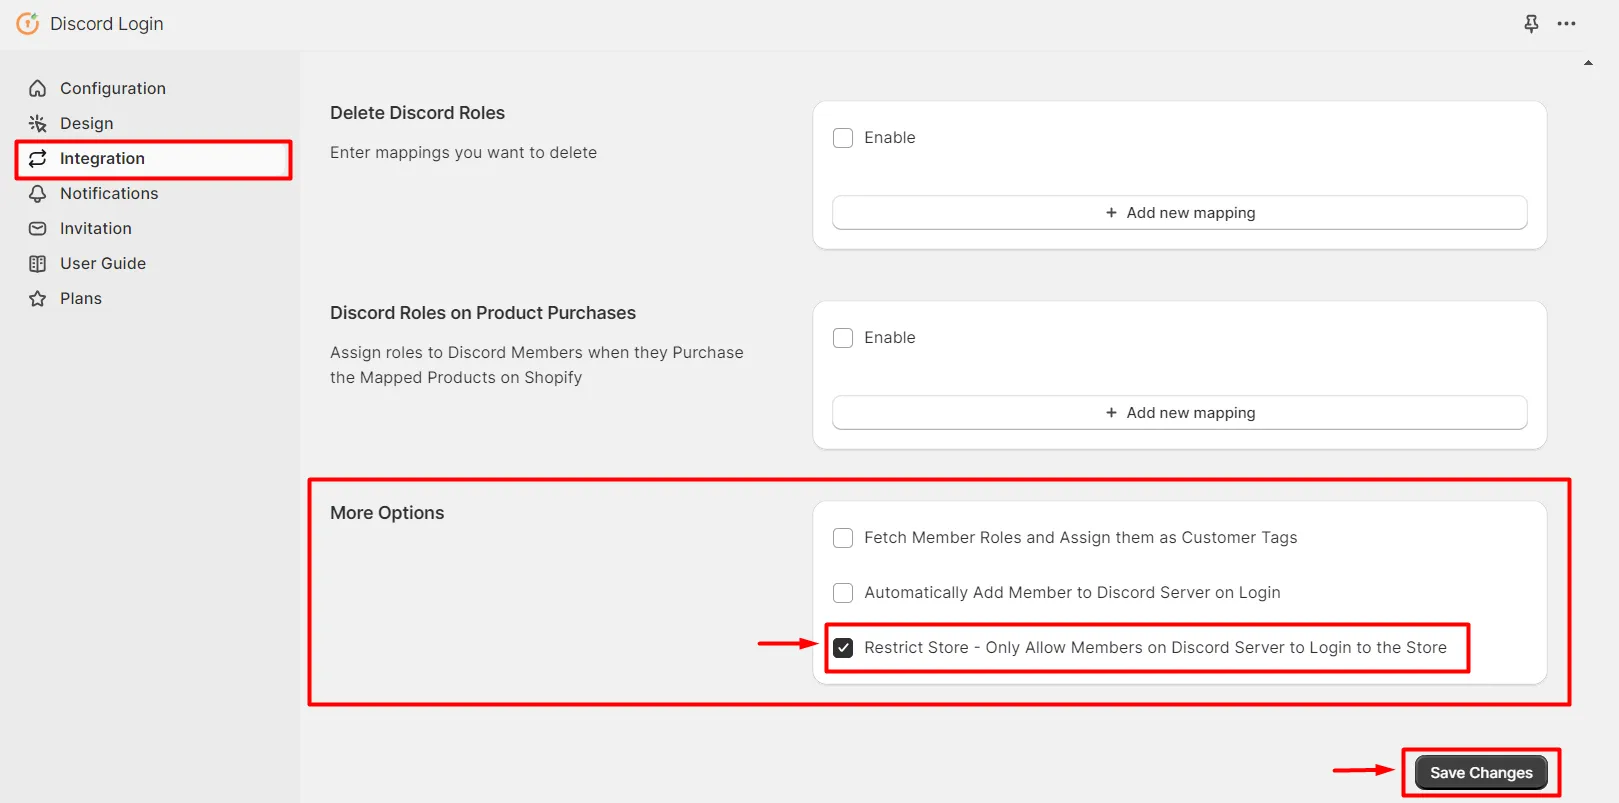
8. Restrict Access of your Shopify Store
- To restrict access of your Shopify Store and only allow members of the discord server to Login/Register, enable Restrict Store - Only Allow Members On Discord Server to Login to the Store option.
- Click on Save Changes.
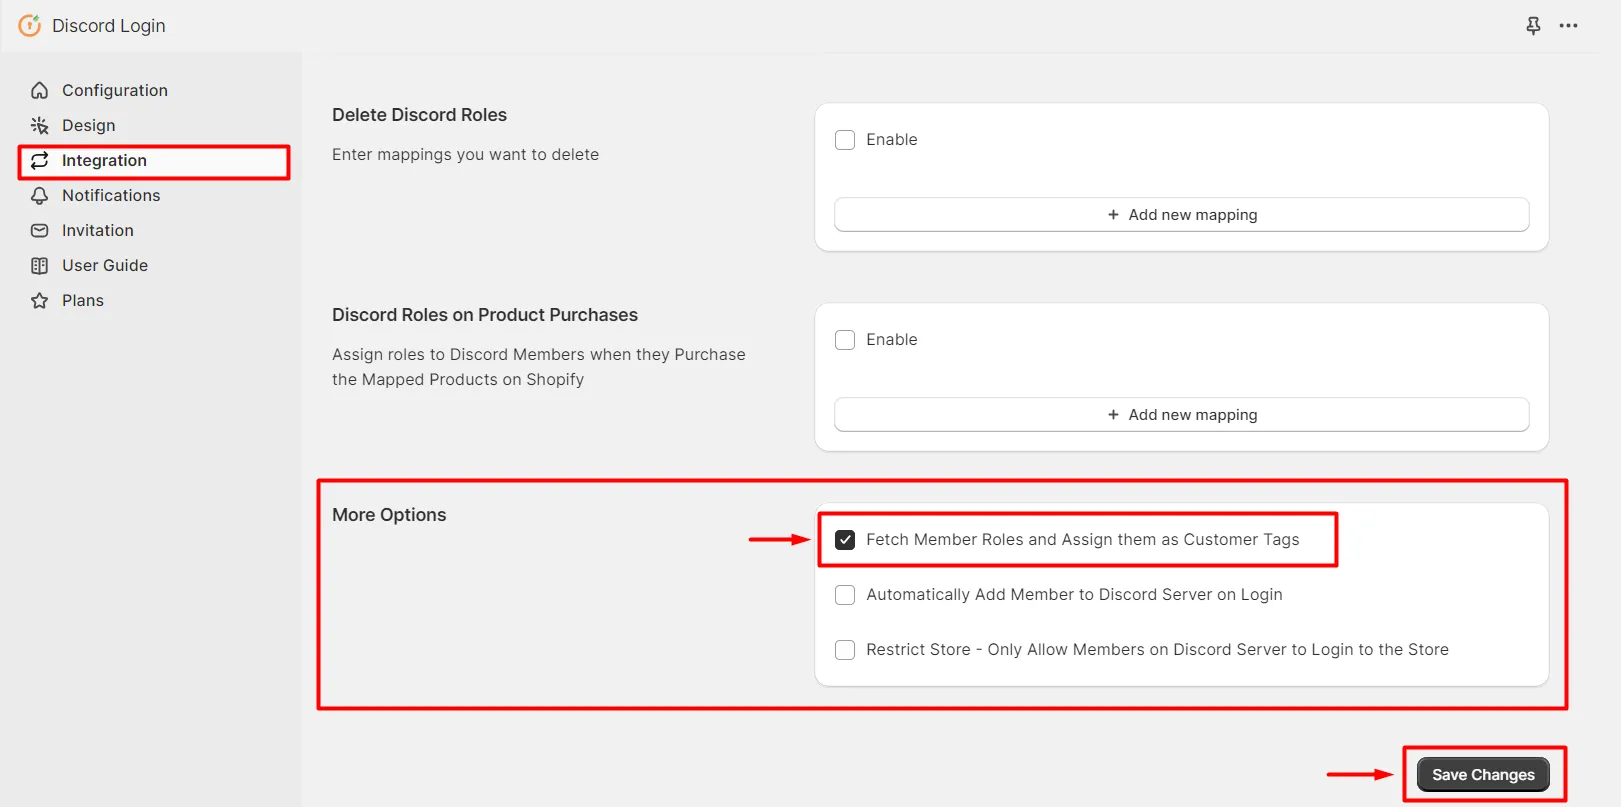
9. Fetch Member Roles from Discord
- To fetch member roles from discord and assign them as Shopify customer tag on successful login using discord, enable Fetch Member Roles and Assign then as Customer Tags option.
- Click on Save Changes.
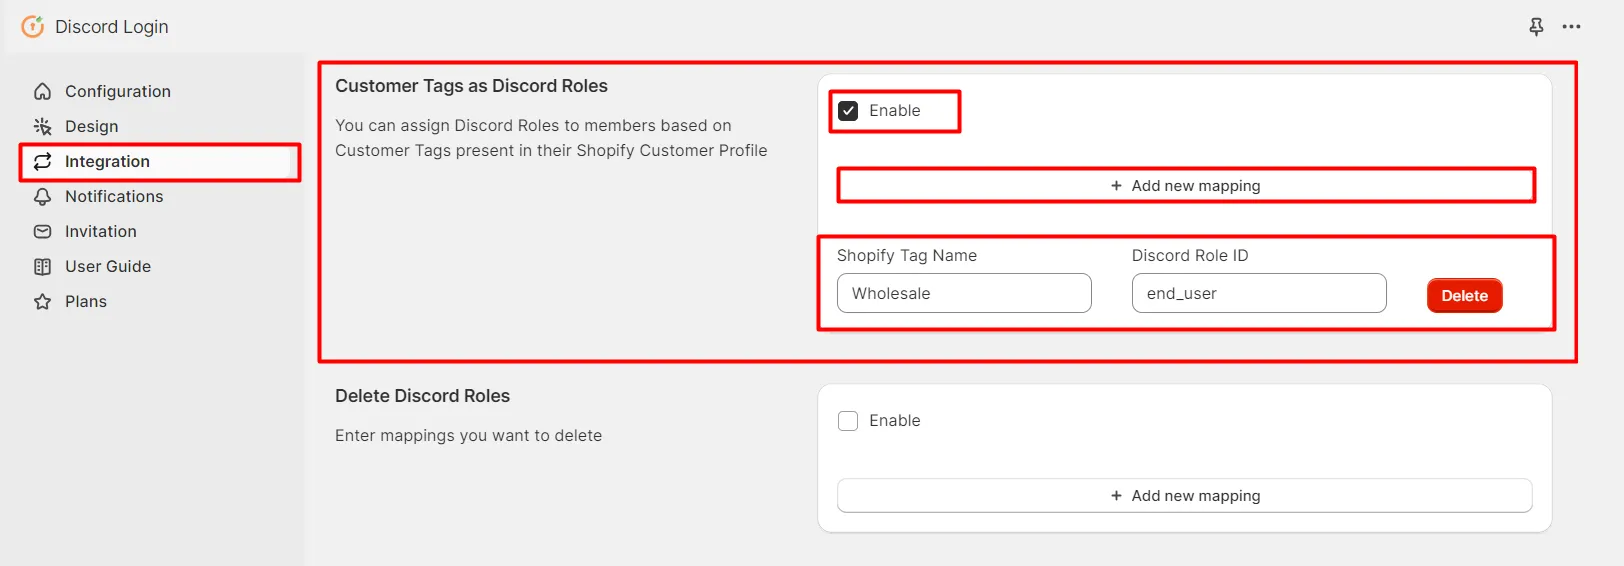
10. Assign roles based on the Customer Tags
- To create Roles on Discord and assign them to members based on the Customer Tags assigned to customers on Shopify, enable Customer Tags as Discord Roles option. Now click on Add new mapping and enter Shopify Tag Name and its corresponding Discord Role ID in their respective fields as Shown in the below image.
- Click on Save Changes.
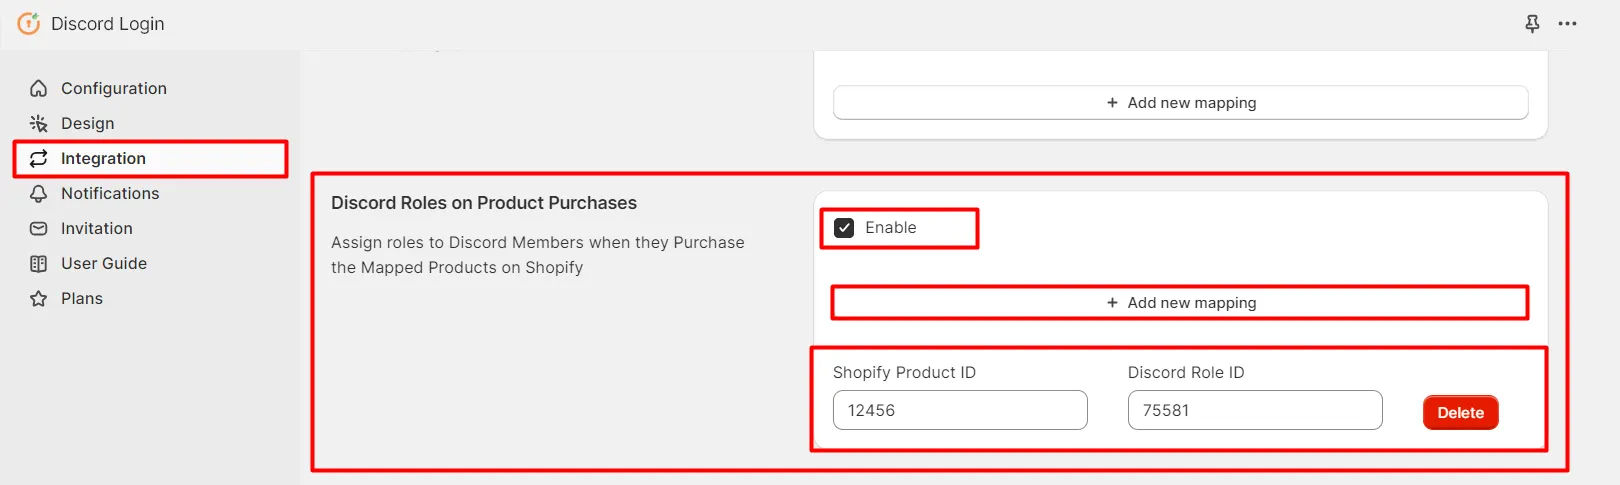
11. Assign Roles based on products purchase
- To assign Roles to members on Discord based on the products they purchase on Shopify, enable Assign Discord Role on Order Placed option.
- To assign Roles to members on Discord based on the products they purchase on Shopify, enable Discord Roles on Product Purchase option. Now click on Add new mapping and enter Shopify Product ID and its corresponding Discord Role ID in their respective fields as Shown in the below image.
- Add Shopify Product ID and respective Discord Role ID so that whenever the user purchase a product with this Product ID, a Role will be assigned to that user on Discord.
- Click on Save Changes.
12. Discord Server Notifications on User registration and Order Placed
- Copy and note down the BOT token you get in Step 5.2.
- Go to your Discord application and right click on your Created Server. Copy the Chanel ID and keep it handy.
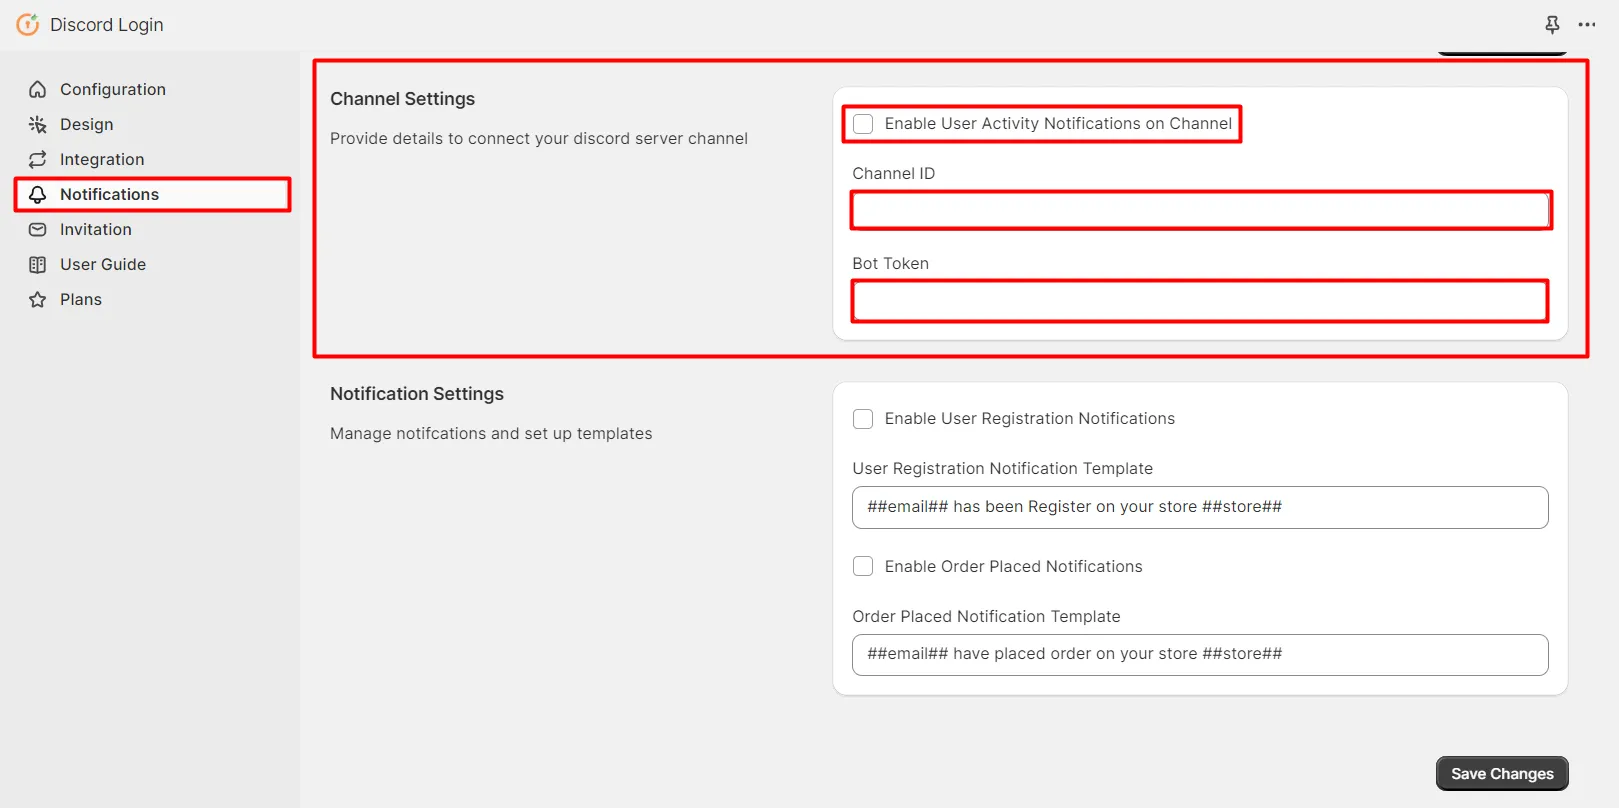
- Now navigate to the Notification section in the Discord Login application. Check the Enable user Activity Notification on Channel option and paste Channel ID and BOT Token copied in above steps.
-
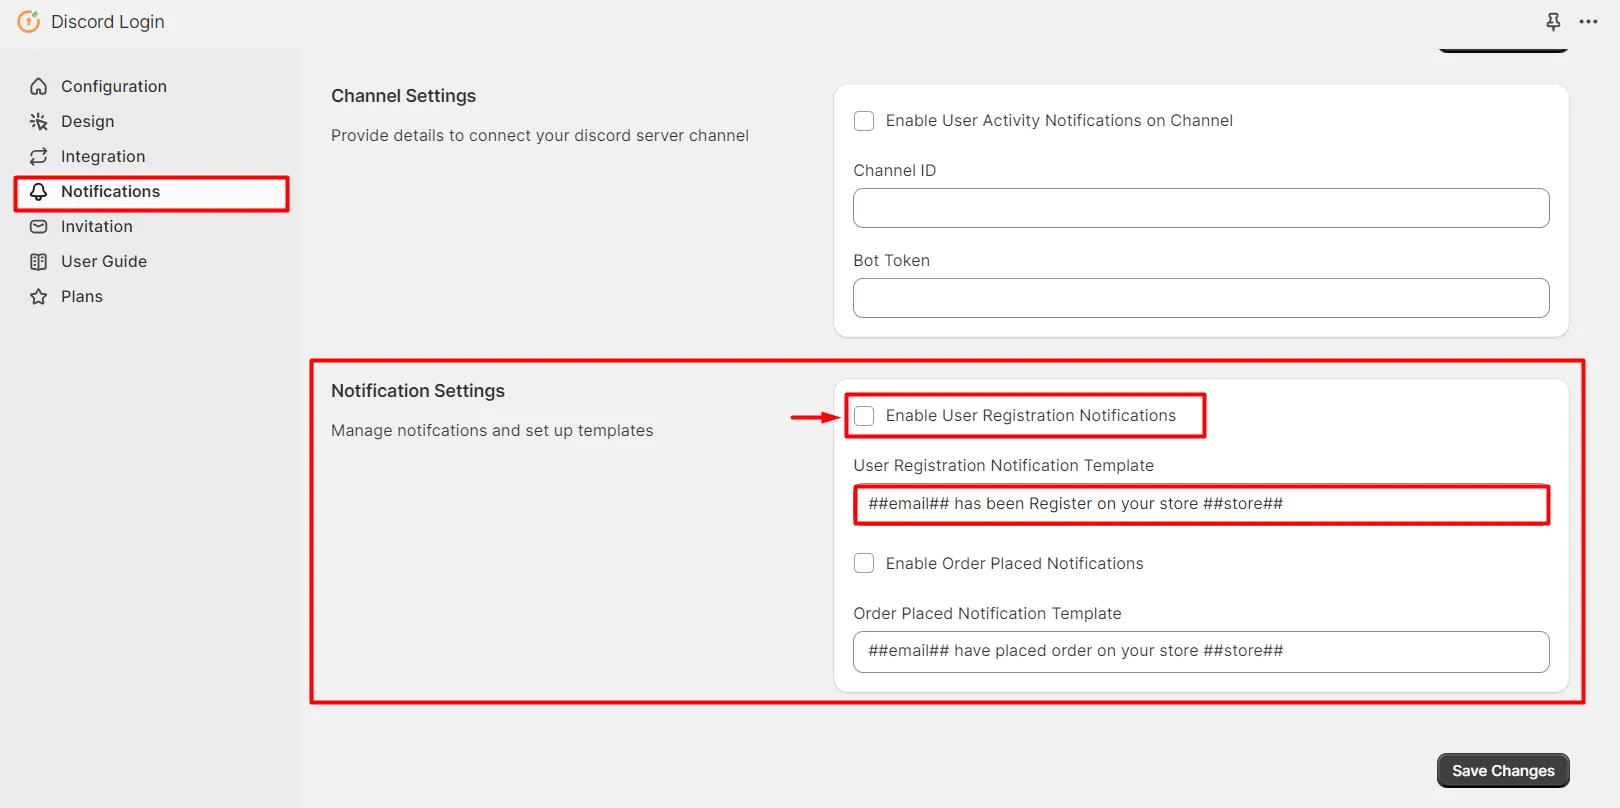
In Notification Section:
- Check the Enable User Registration Notifications option to get notification on your Discord Server whenever any new users register into your Shopify store using Discord SSO Login. You can customize the Notification Template.
- Check the Enable Order Placed Notifications option to get notification on your Discord Server whenever any order is placed on your Shopify store. You can customize the Order Notification Template.

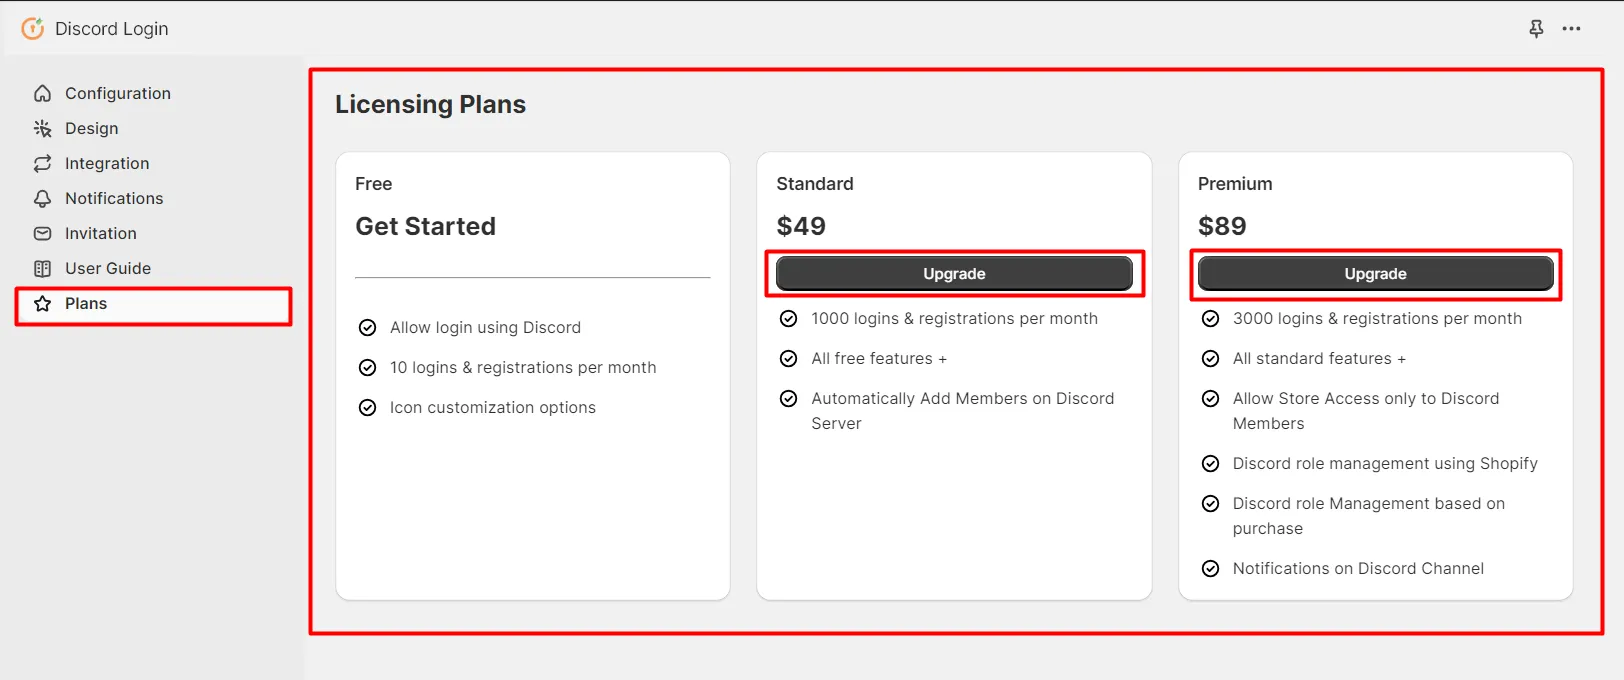
13. How to upgrade to a higher plan?
- Navigate to the Plans section in the Discord Login application, and click on the Upgrade button next to the Plan name you want to upgrade to.
- You will be able to access the upgraded plan features once you have paid the recurring charges.
Additional Resources
If you are looking for anything which you cannot find, please drop us an email on shopifysupport@xecurify.com.
Need Help? We are right here!
