Meet us at WordCamp Europe | ShopTalk | DrupalCon Conferences to explore our solutions. Know More
Configure Azure AD as an OAuth/OpenId Connect Server
Configure Azure AD as an OAuth/OpenId Connect Server
If you want users to login to your WordPress site using their Azure AD credentials, you can simply do it using our WP OAuth Client plugin. Once you configure the Azure AD with WordPress plugin, you can allow users to SSO to your WordPress site using Azure AD. Similarly, you can map your WordPress roles based on your Azure AD attributes/groups. To know more about other features we provide in WP OAuth Client plugin, you can click here.
You can download OAuth Client plugin using the following link.
Follow the Step-by-Step guide to configure Azure with WordPress :
- First of all, go to https://portal.azure.com and sign up/login in your Azure portal.
- Create a new tenant: You can do so by following the below given steps:
- Click on Create a resource.
- Search for Azure Active Directory B2C.
- Select and scroll down until you find an option to Create a new B2C Tenant without Subscription.
- Click on it to create a new tenant.
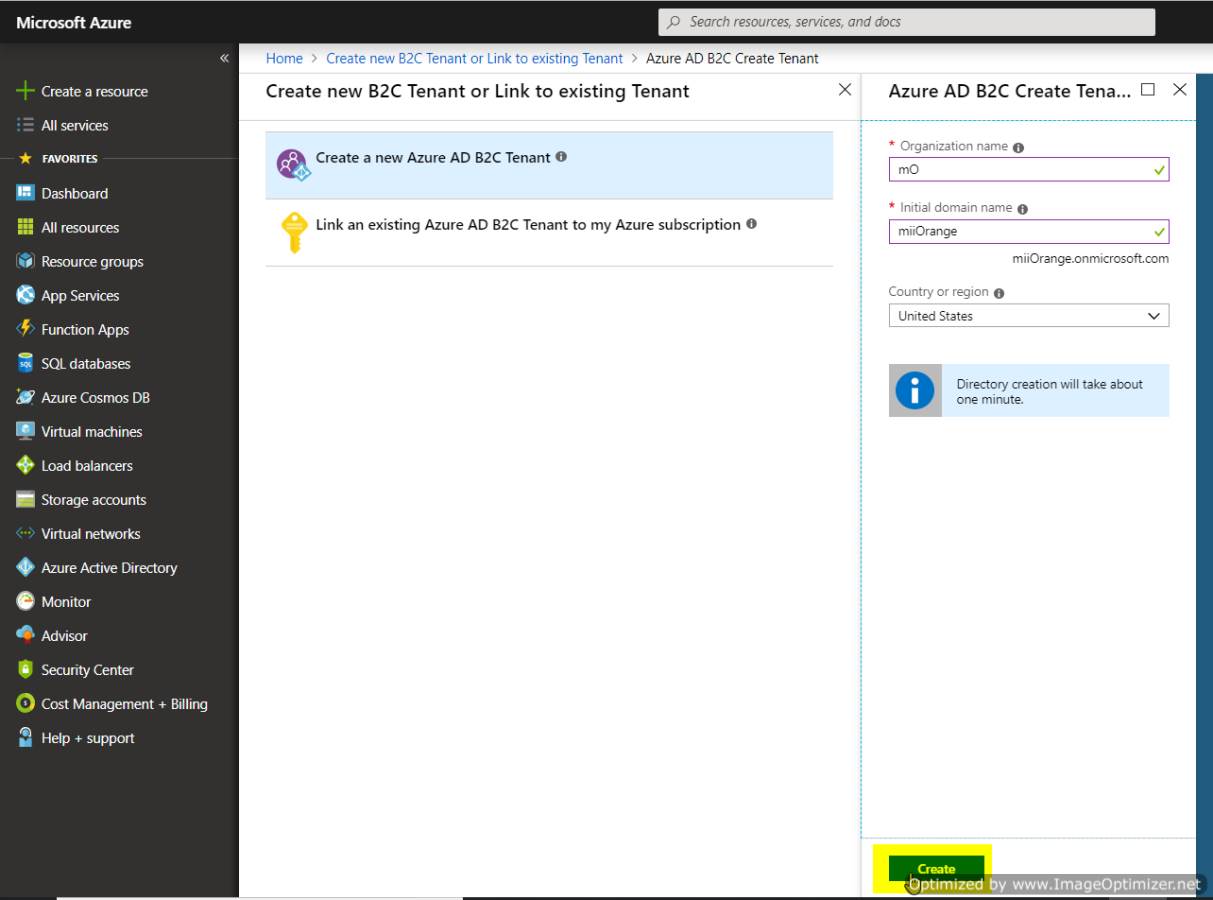
- Select Create a new Azure AD B2C Tenant and enter the following data in their respective text fields:
- Organization name
- Initial Domain name
- Select your Country or Region
- Click on the Save button to create a new tenant
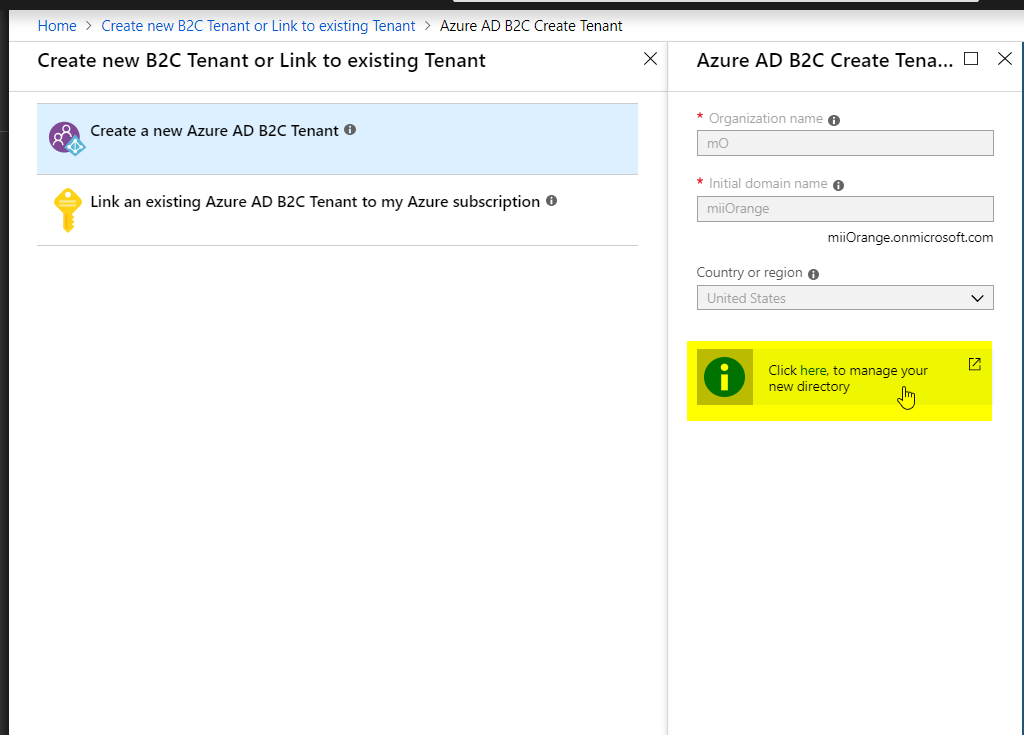
- Click on the following message to manage your directory:
- “Click here, to manage your new directory”
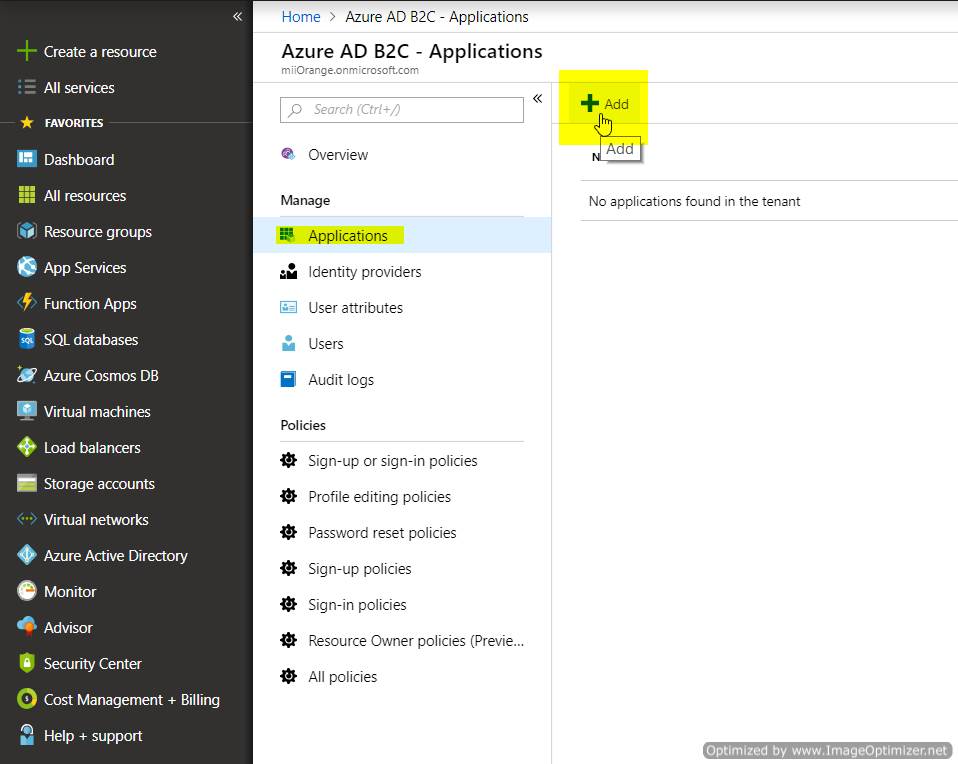
- Click on Applications and then on Add option to add a new application.
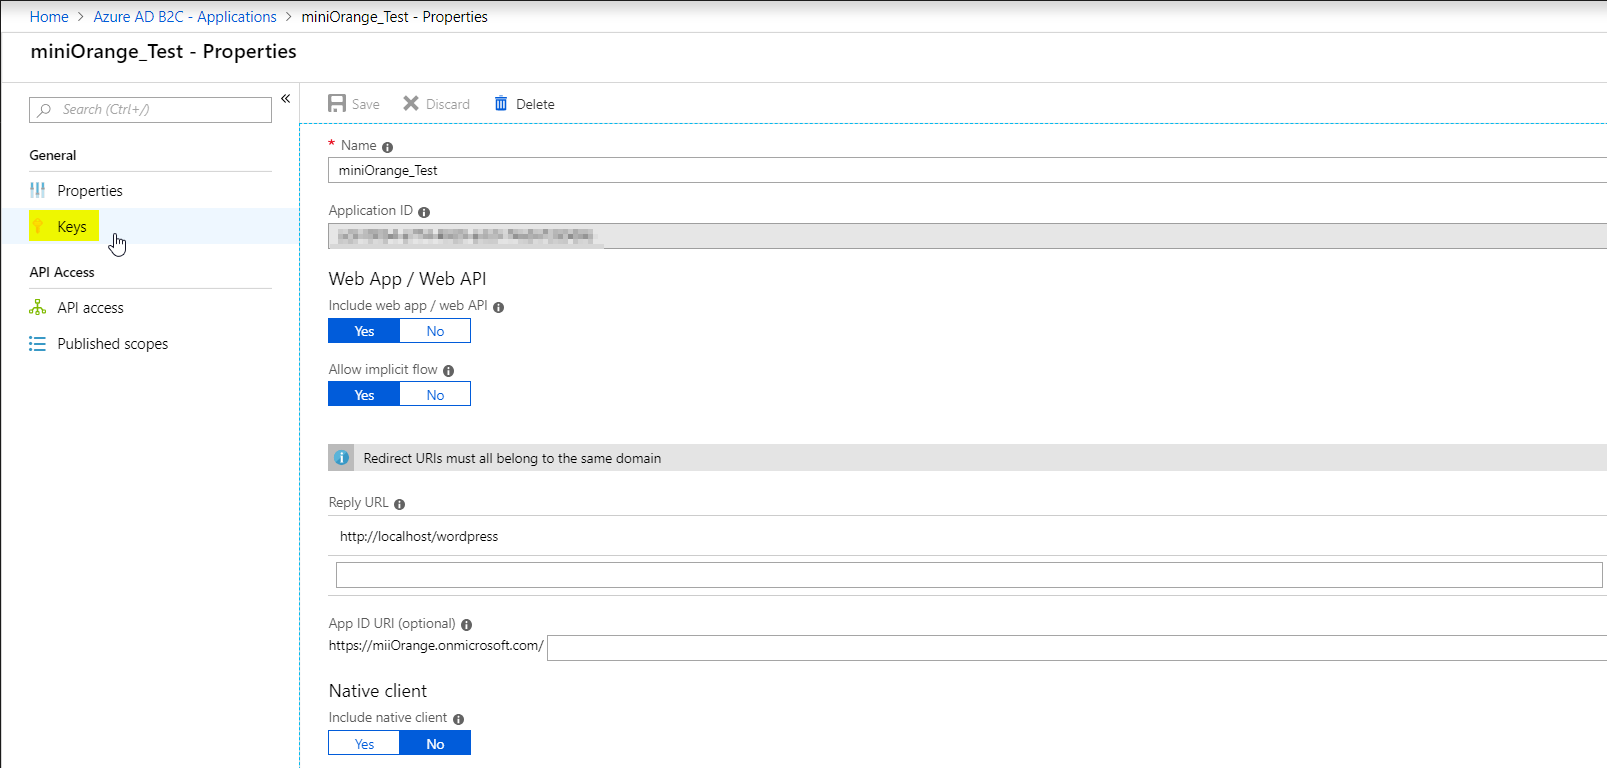
- Enter a name for your application under the Name text field.
- Select Yes from the options in front of Web APP/Web API and Yes from options in front of Allow Implicit Flow. Also, copy the Redirect/Callback URL from the miniOrange OAuth Client plugin and save it under the Reply URL textbox.
- Click on the Create button to create your application. (Refer to the image below)
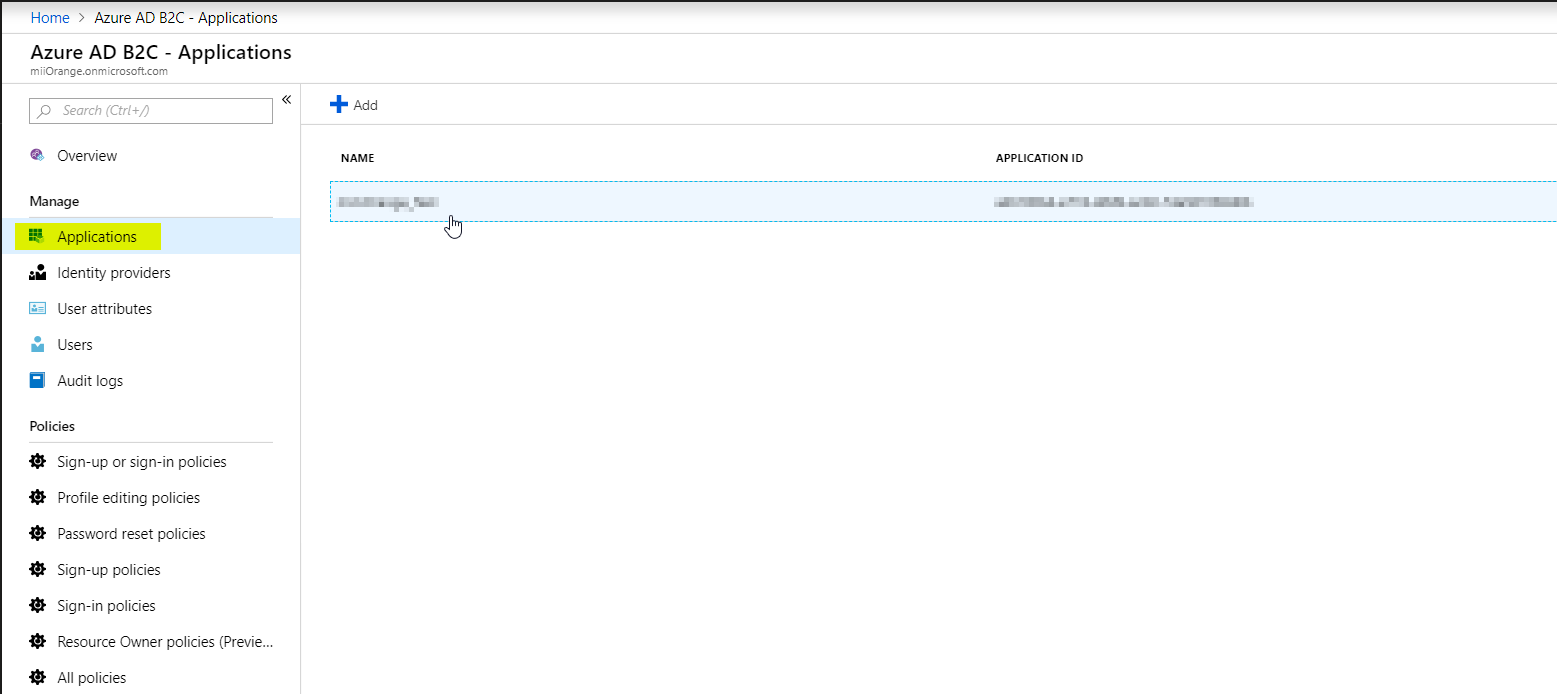
Most importantly, your Callback/ Redirect URl should be httpsonly and not http. - Click on the Applications option under the Manage Menu in the left navigation bar and you will find your application listed there. Click on your application.
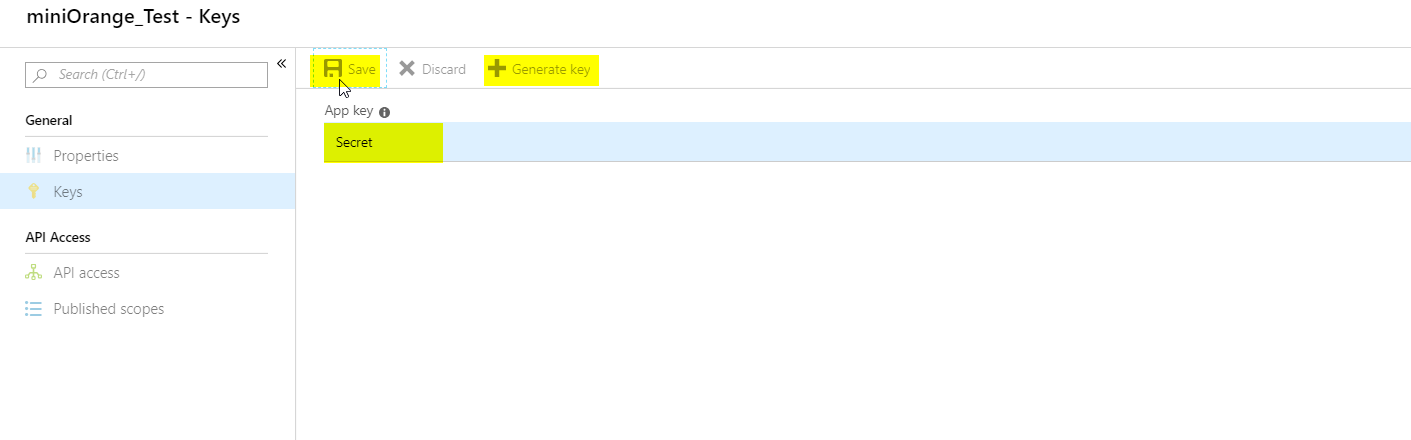
- Copy your Application ID and save it under your Client ID textbox in your miniOrange OAuth Client plugin. Then, click on the Keys option to generate a key.
- Click on the Generate Key option and save it with a name. Click on the Save option and it will generate a random string which you will store as Client secret in your miniOrange OAuth Client plugin.
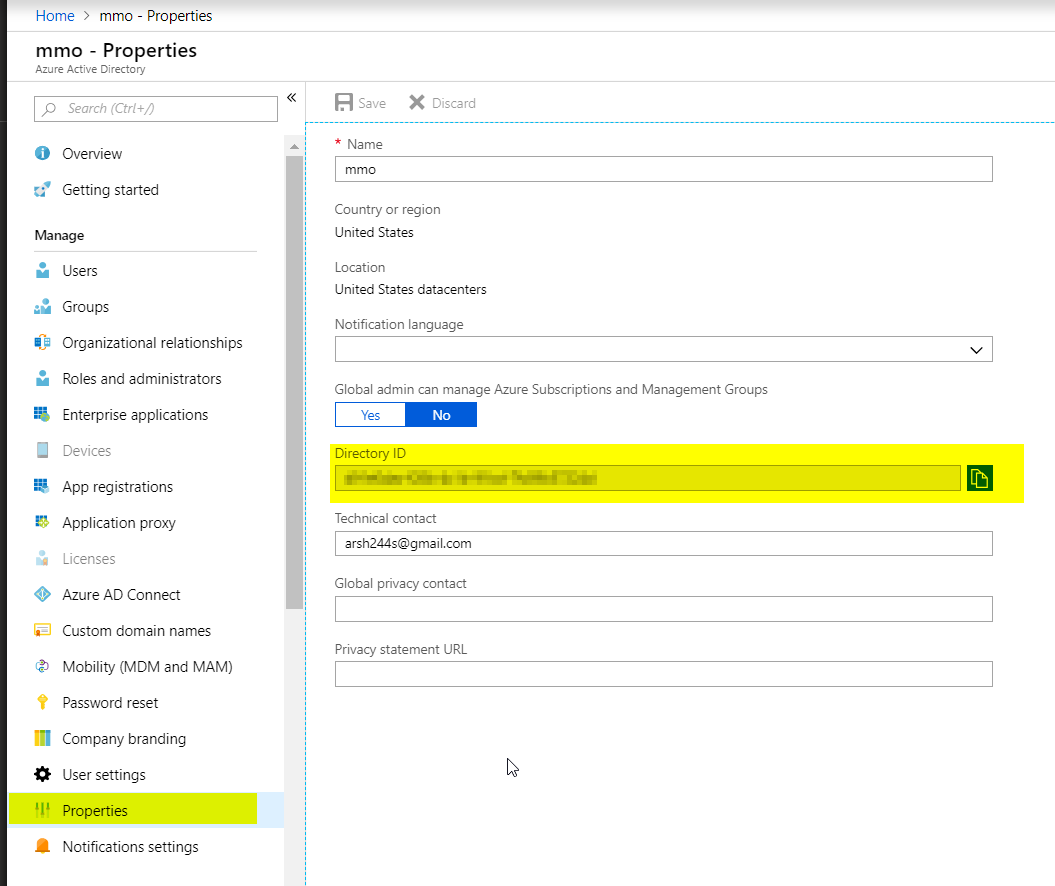
- Now, go to your dashboard and go to Azure Active Directory -> Properties. Copy the Directory ID and substitute this value whenever you need to enter Tenant ID.
- You have successfully completed your Azure AD B2C OAuth Server side configurations.

(Refer to the image on the next page)

Azure AD Endpoints and Scope:
| Client ID : | from the step 10 above |
| Client Secret : | from the step 11 above |
| Scope: | openid |
| Authorize Endpoint: | https://login.microsoftonline.com/[tenant-id]/oauth2/authorize |
| Access Token Endpoint: | https://login.microsoftonline.com/[tenant-id]/oauth2/token |
| Get User Info Endpoint: | https://login.windows.net/common/openid/userinfo |
| Custom redirect url after logout | https://login.microsoftonline.com/<tenantid>/oauth2/logout?client_id=<clientId>&post_logout_redirect_uri=<encoded_redirect_uri_after_logout> |
If you are facing any difficulty please mail us on info@xecurify.com.
×
![Google 12]()