Twitch OAuth & OpenID connect Single Sign-On (SSO) | Twitch SSO Login
Twitch OAuth & OpenID connect Single Sign-On (SSO) | Twitch SSO Login
WordPress OAuth & OpenID Connect Single Sign-On (SSO) plugin enables secure login into WordPress using Twitch as OAuth and OpenID Connect provider. You can also configure plugin using different custom providers and standard IDPs. It supports advanced Single Sign-On (SSO) features such as user profile Attribute mapping, Role mapping, etc. Here we will go through a guide to configure SSO between WordPress and Twitch. By the end of this guide, users should be able to login to WordPress from Twitch. To know more about other features we provide in WP OAuth Single Sign-On ( OAuth & OpenID Connect Client ) plugin, you can click here.
Pre-requisites : Download And Installation
- Log into your WordPress instance as an admin.
- Go to the WordPress Dashboard -> Plugins and click on Add New.
- Search for a WordPress OAuth Single Sign-On (SSO) plugin and click on Install Now.
- Once installed click on Activate.
Steps to configure Twitch Single Sign-On (SSO) Login into WordPress
1. Setup Twitch as OAuth Provider
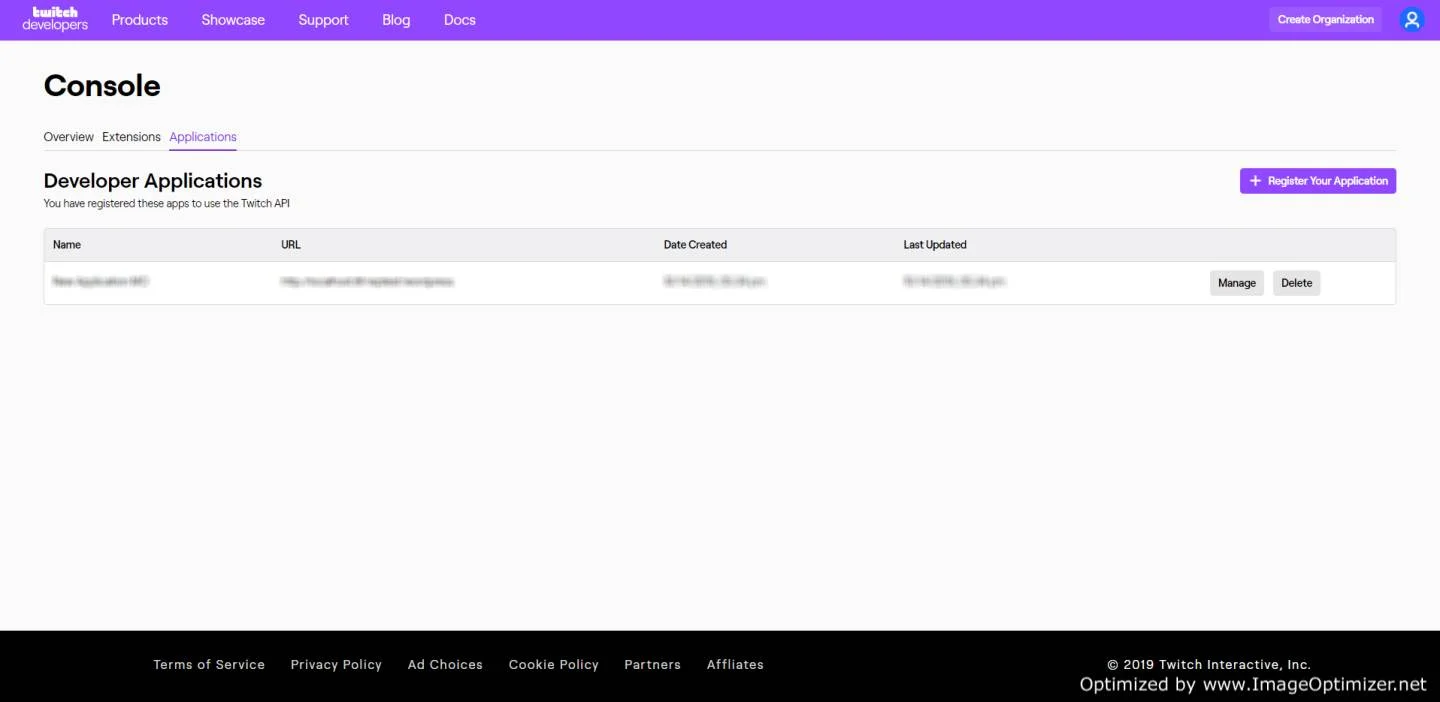
- First of all, go to Twitch Console and Login/Signup.
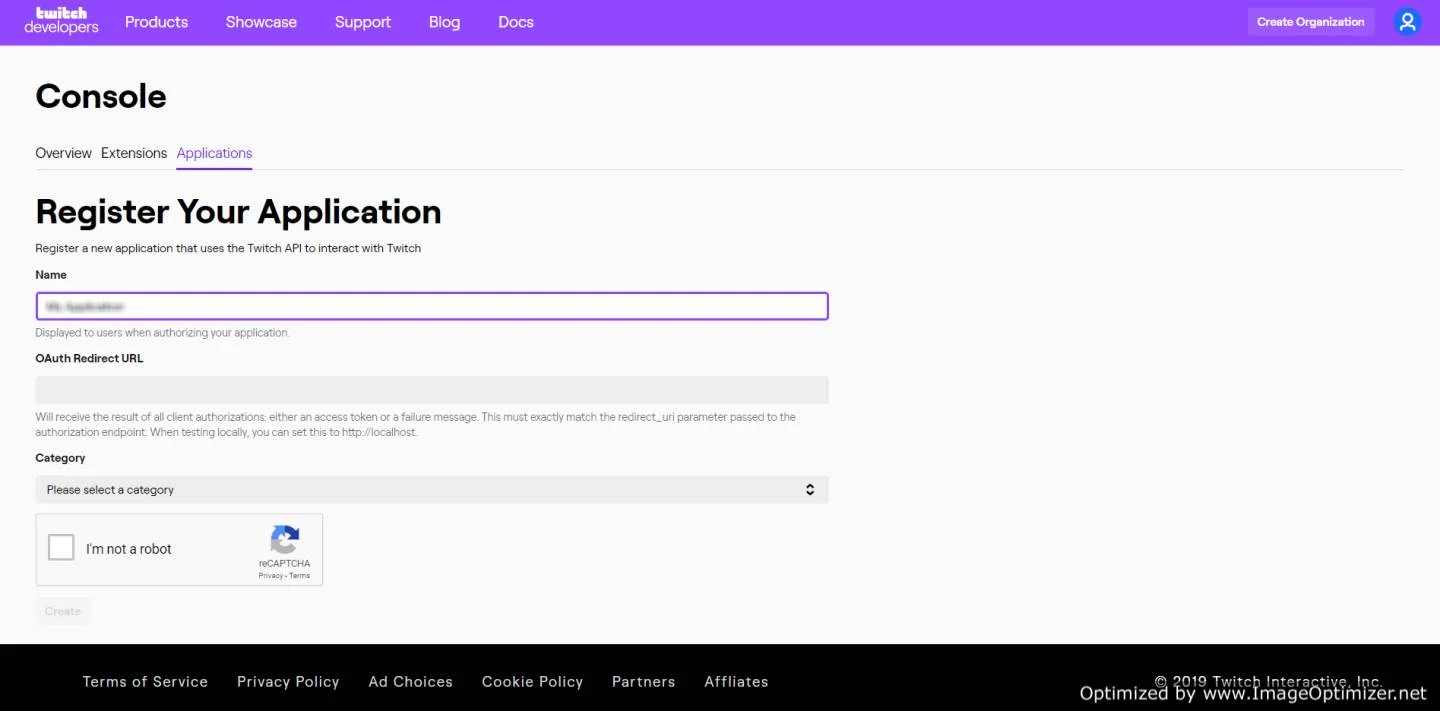
- Go to https://dev.twitch.tv/console . Click on Applications ->Register Your Application .
- Enter your Application name under the Name field.
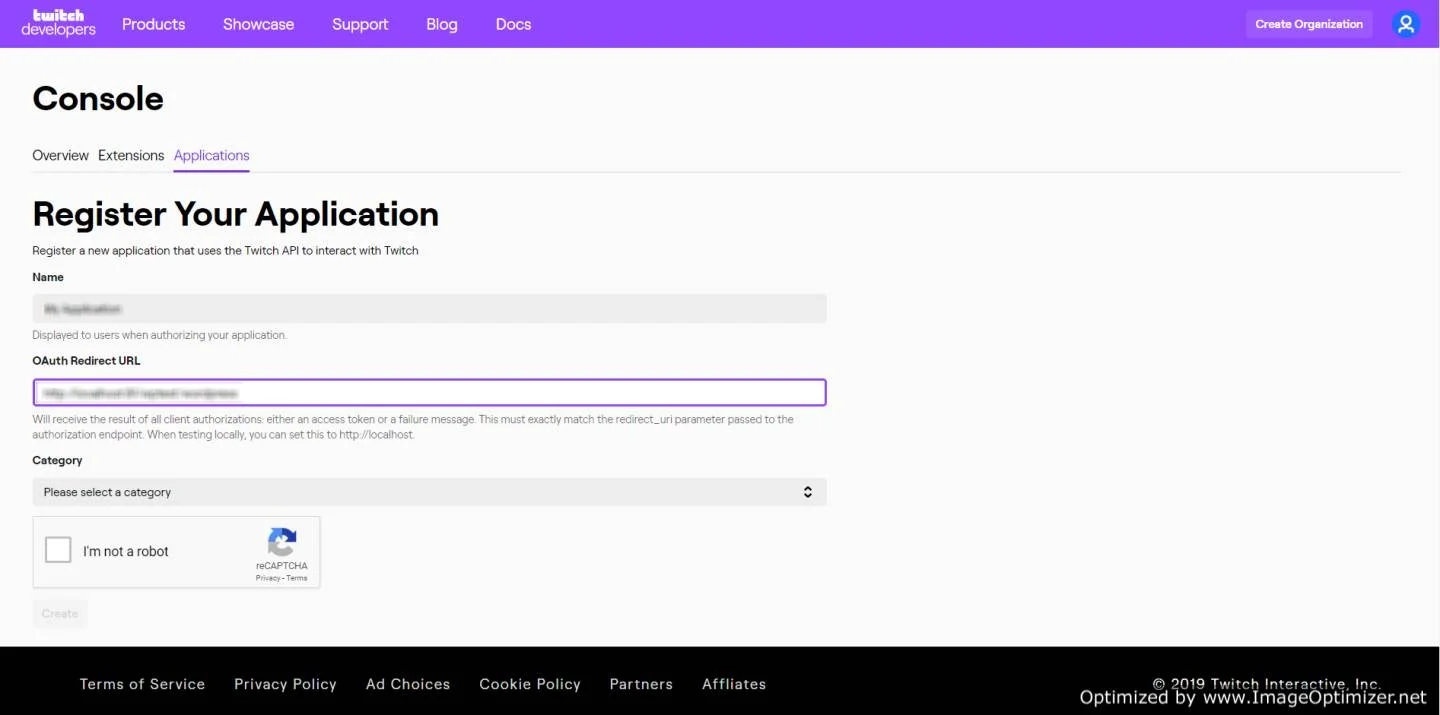
- Enter the Redirect/Callback URI from miniOrange OAuth Client plugin/module under the OAuth Redirect URL field.
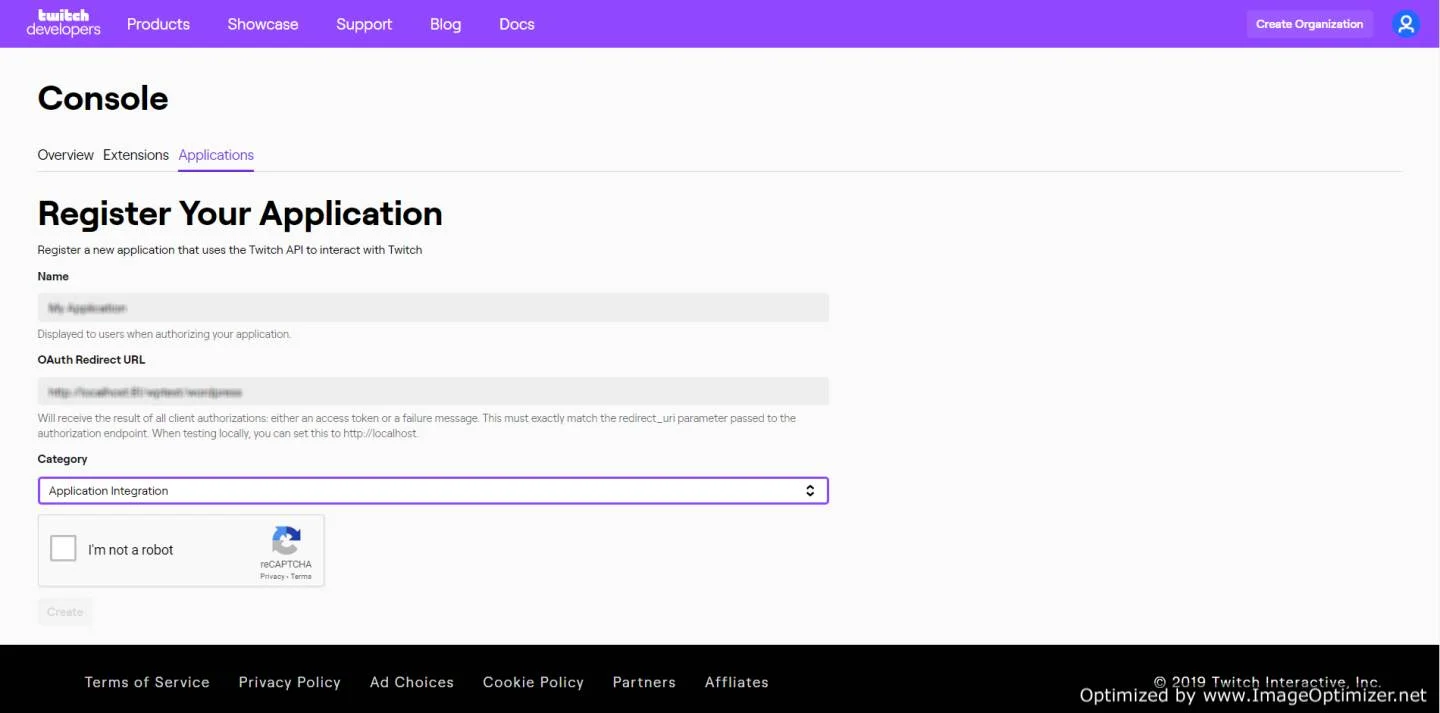
- Select a Category.
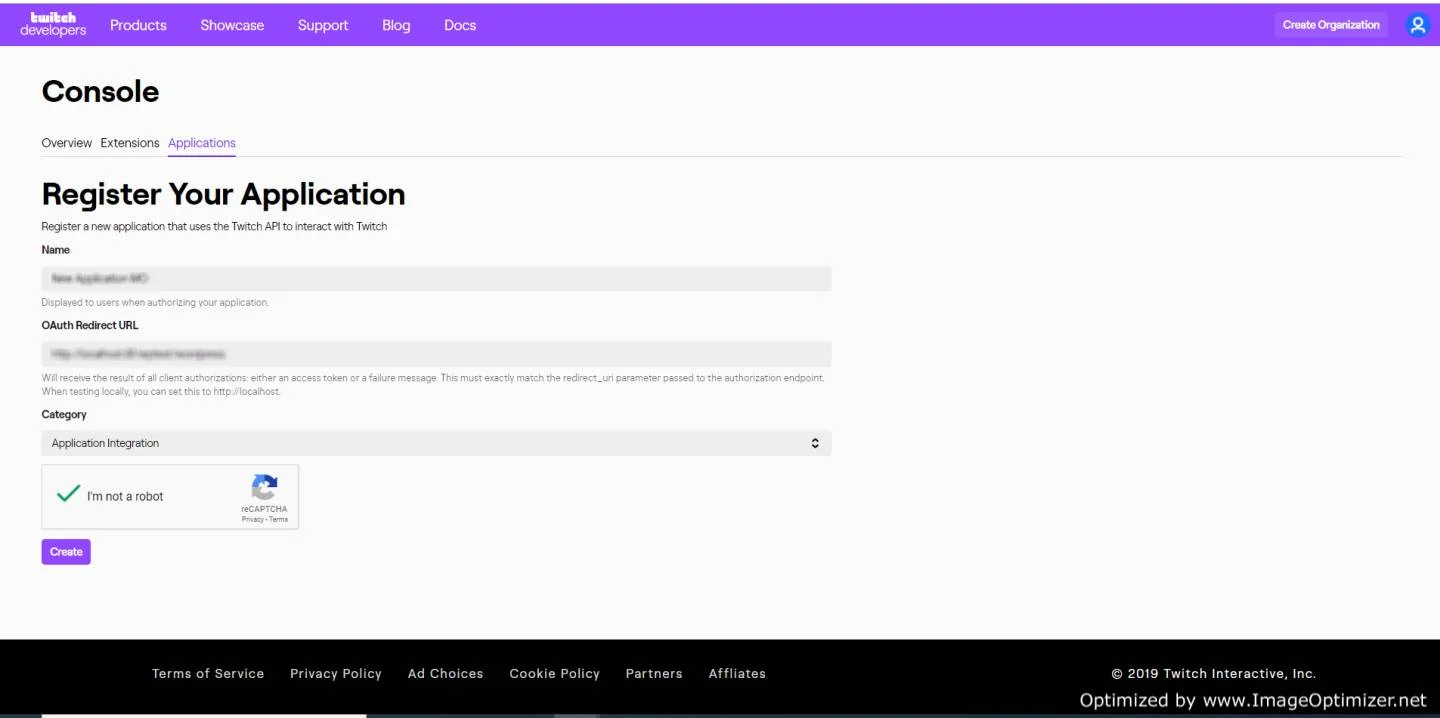
- Click on Create button.
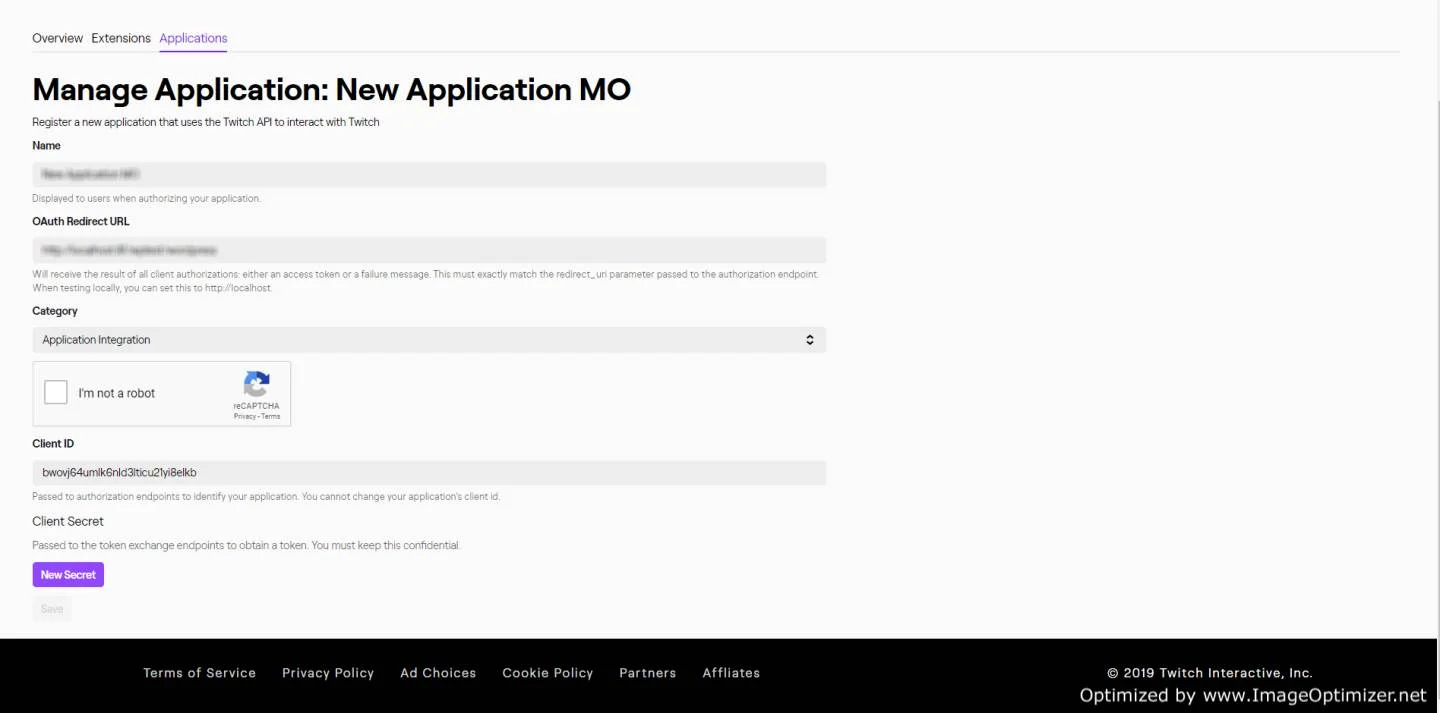
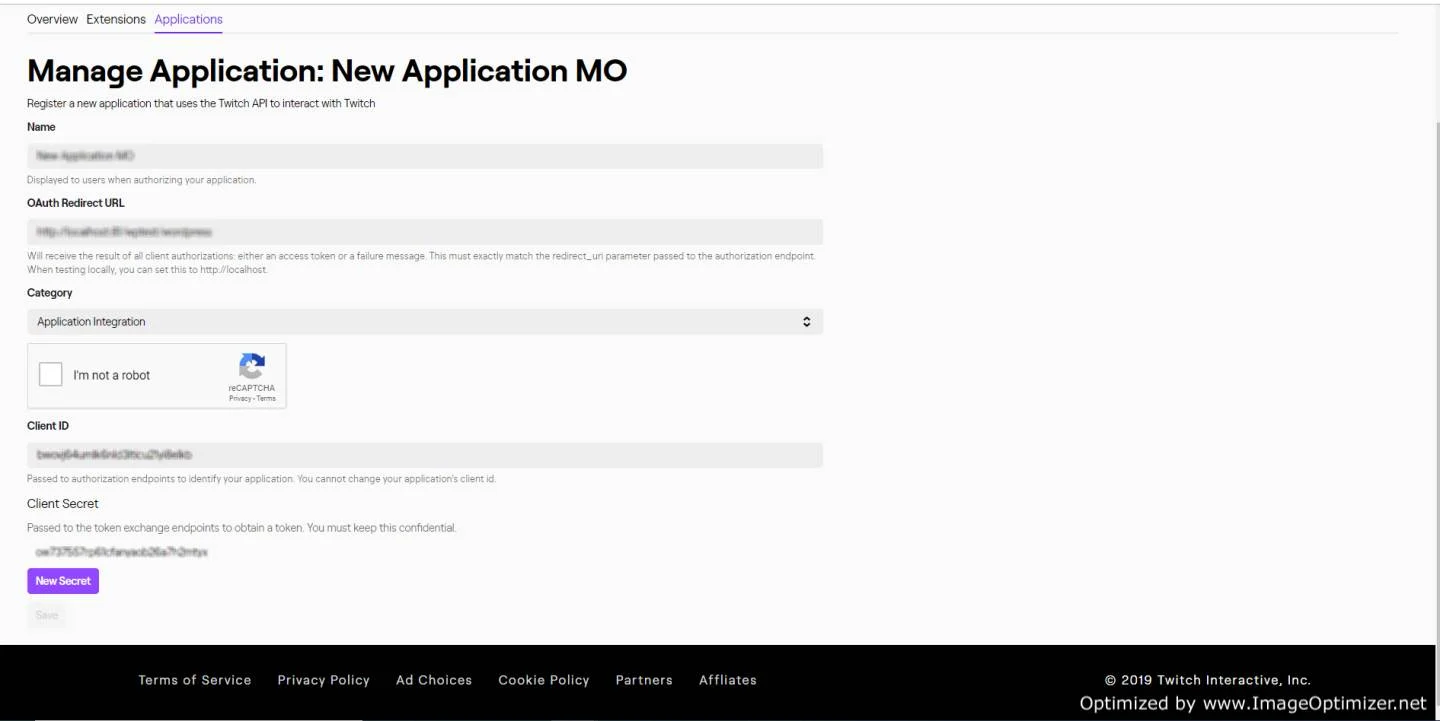
- Click on Manage.
- Click on New Secret button.
- Copy your Client ID and Client Secret and save it on your miniOrange OAuth Client plugin Configuration.
- You have successfully completed your Twitch Oauth Server side configurations.
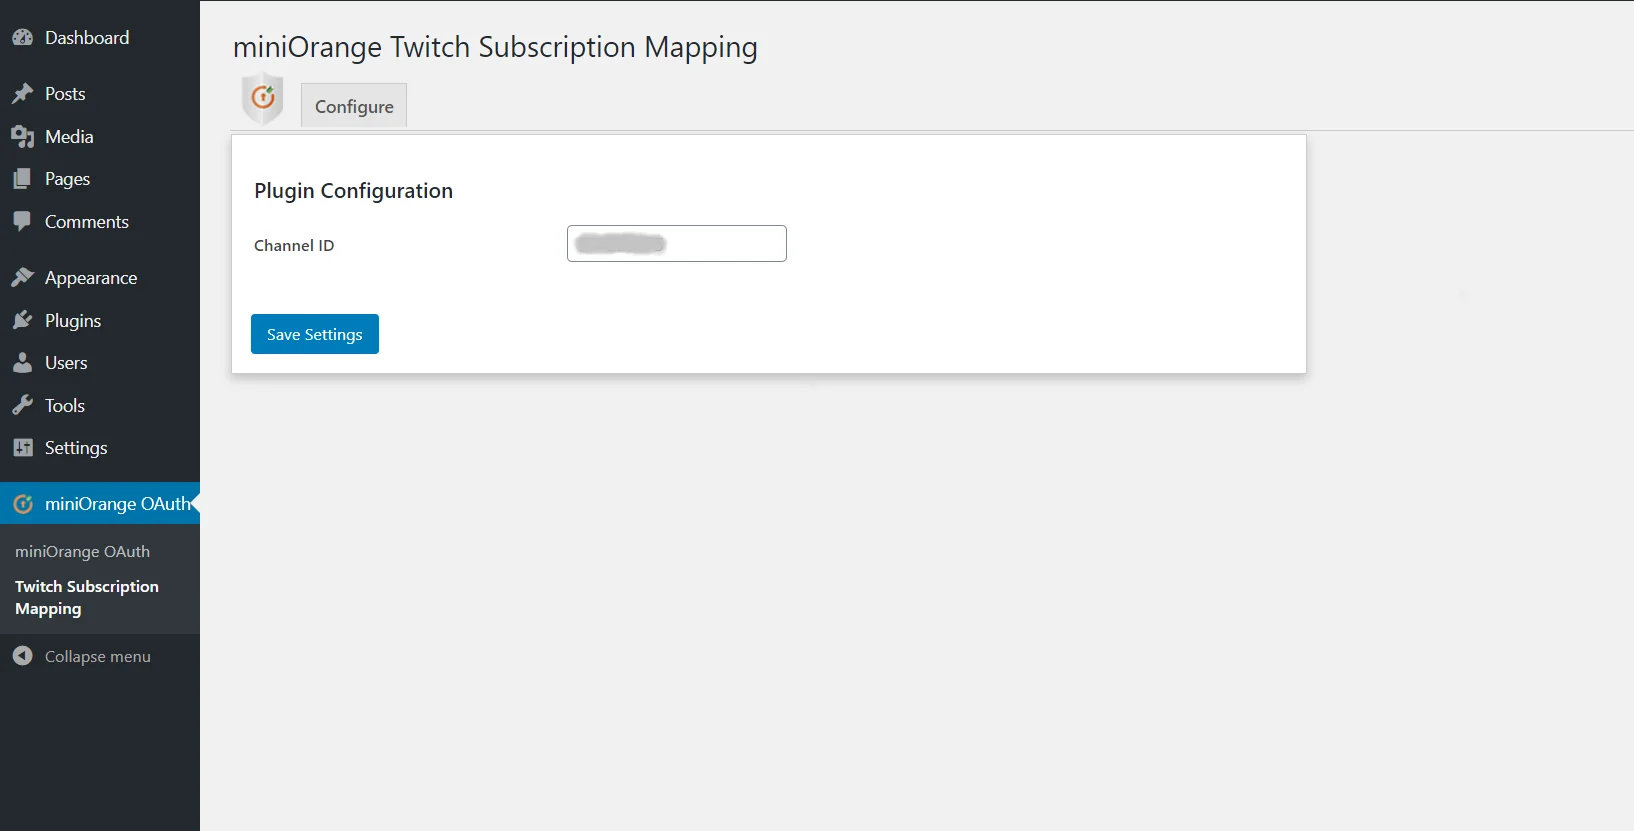
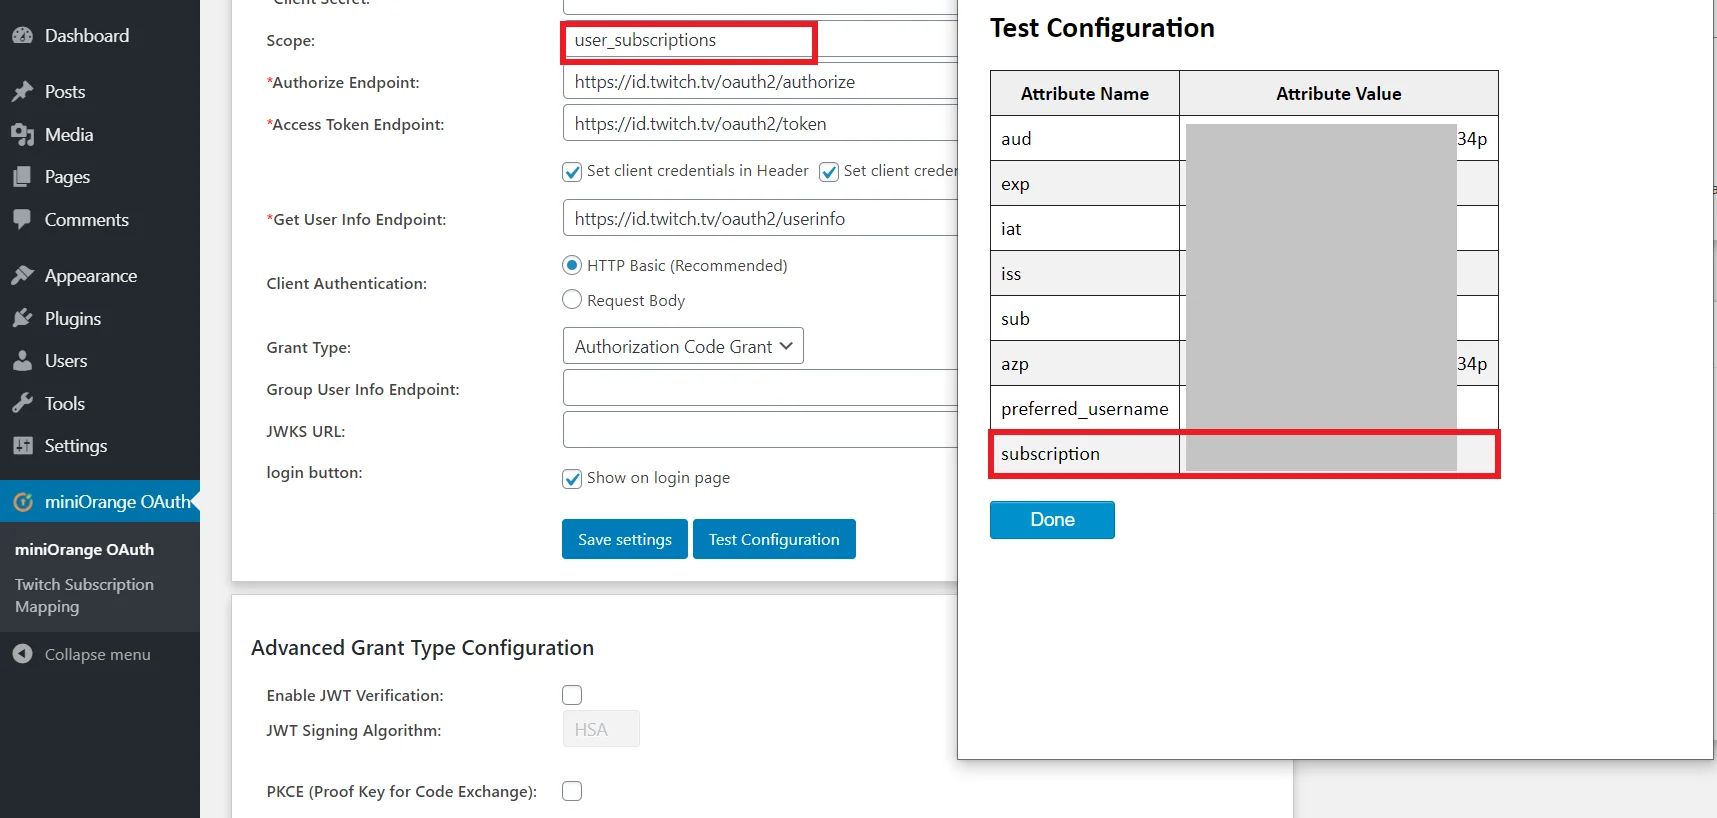
Step 1.1: Twitch Subscription Mapping Add-on [Optional]
- Go to the Twitch Subscription Mapping Add-on and enter your Channel ID and click on Save Settings.
- While configuring your OAuth application for Twitch, enter the scope as user_subscriptions. Once you save the settings, click on Test Configuration. You will get the subscription plan of the user in the subscription attribute as shown in the image below.
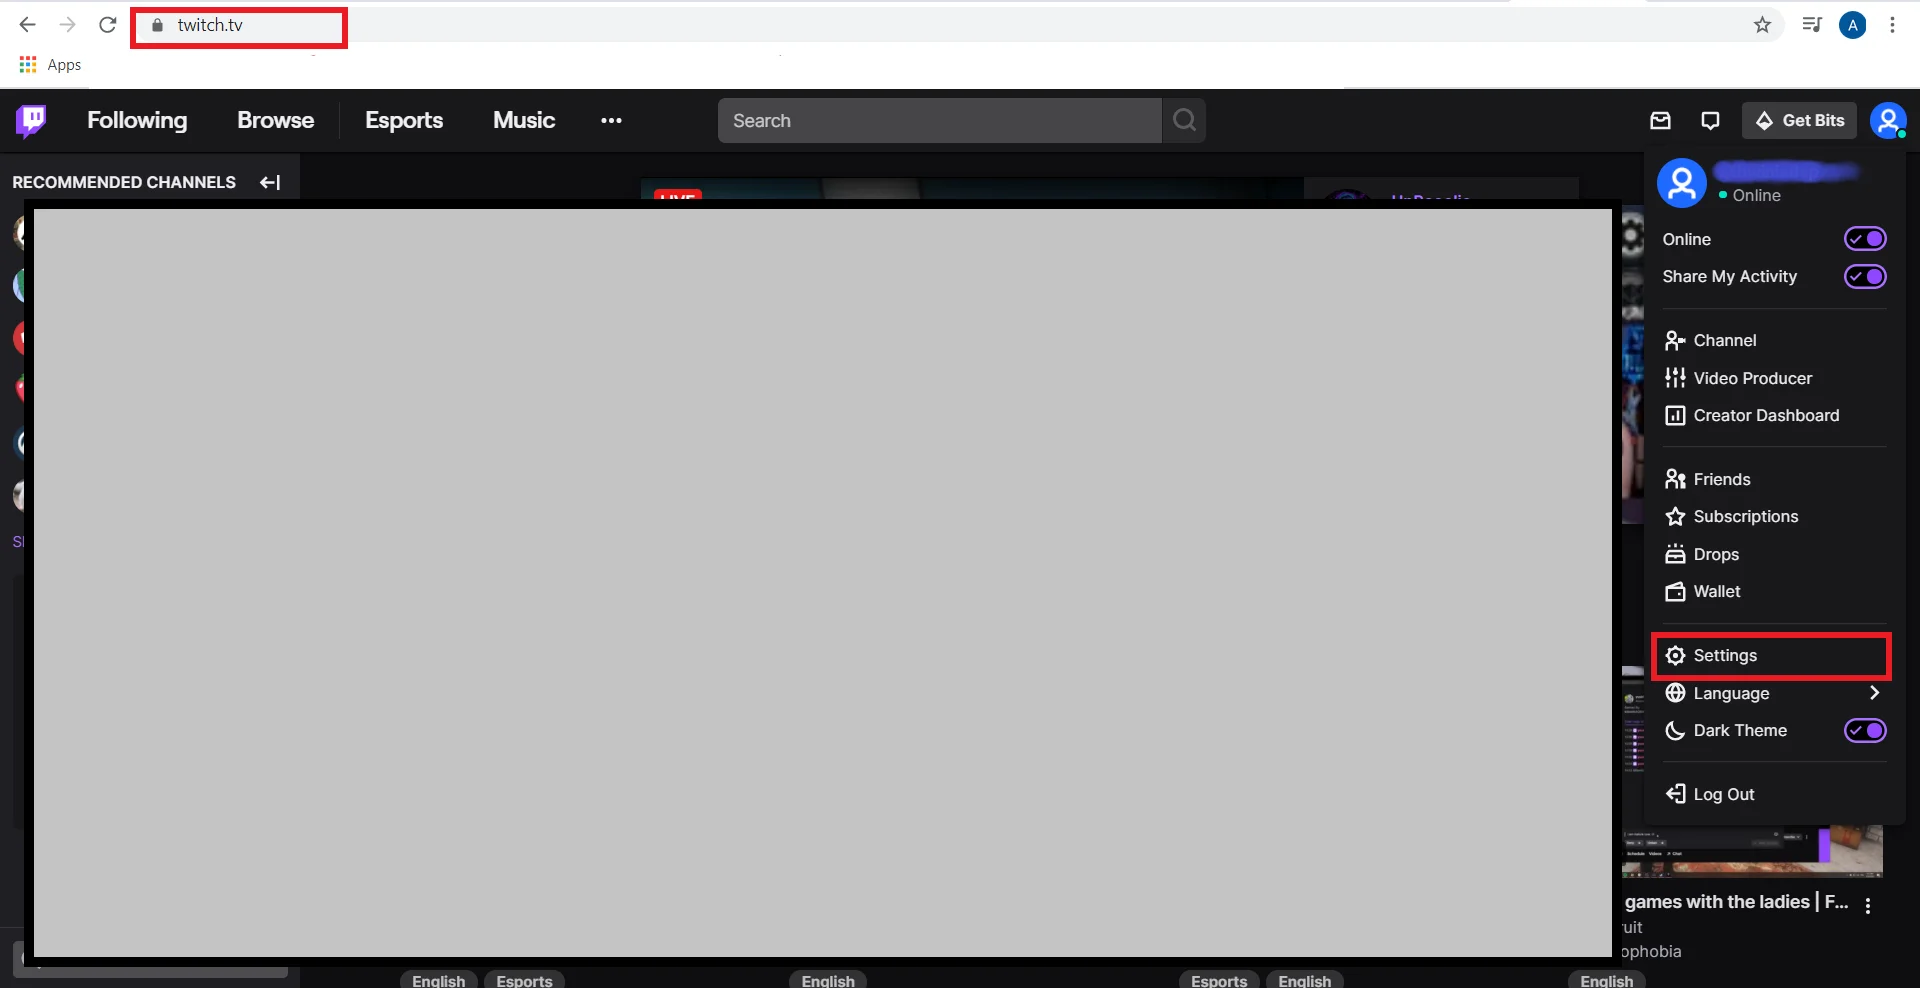
- Go to https://www.twitch.tv/ and login to your channel account. In your profile section click on Settings.
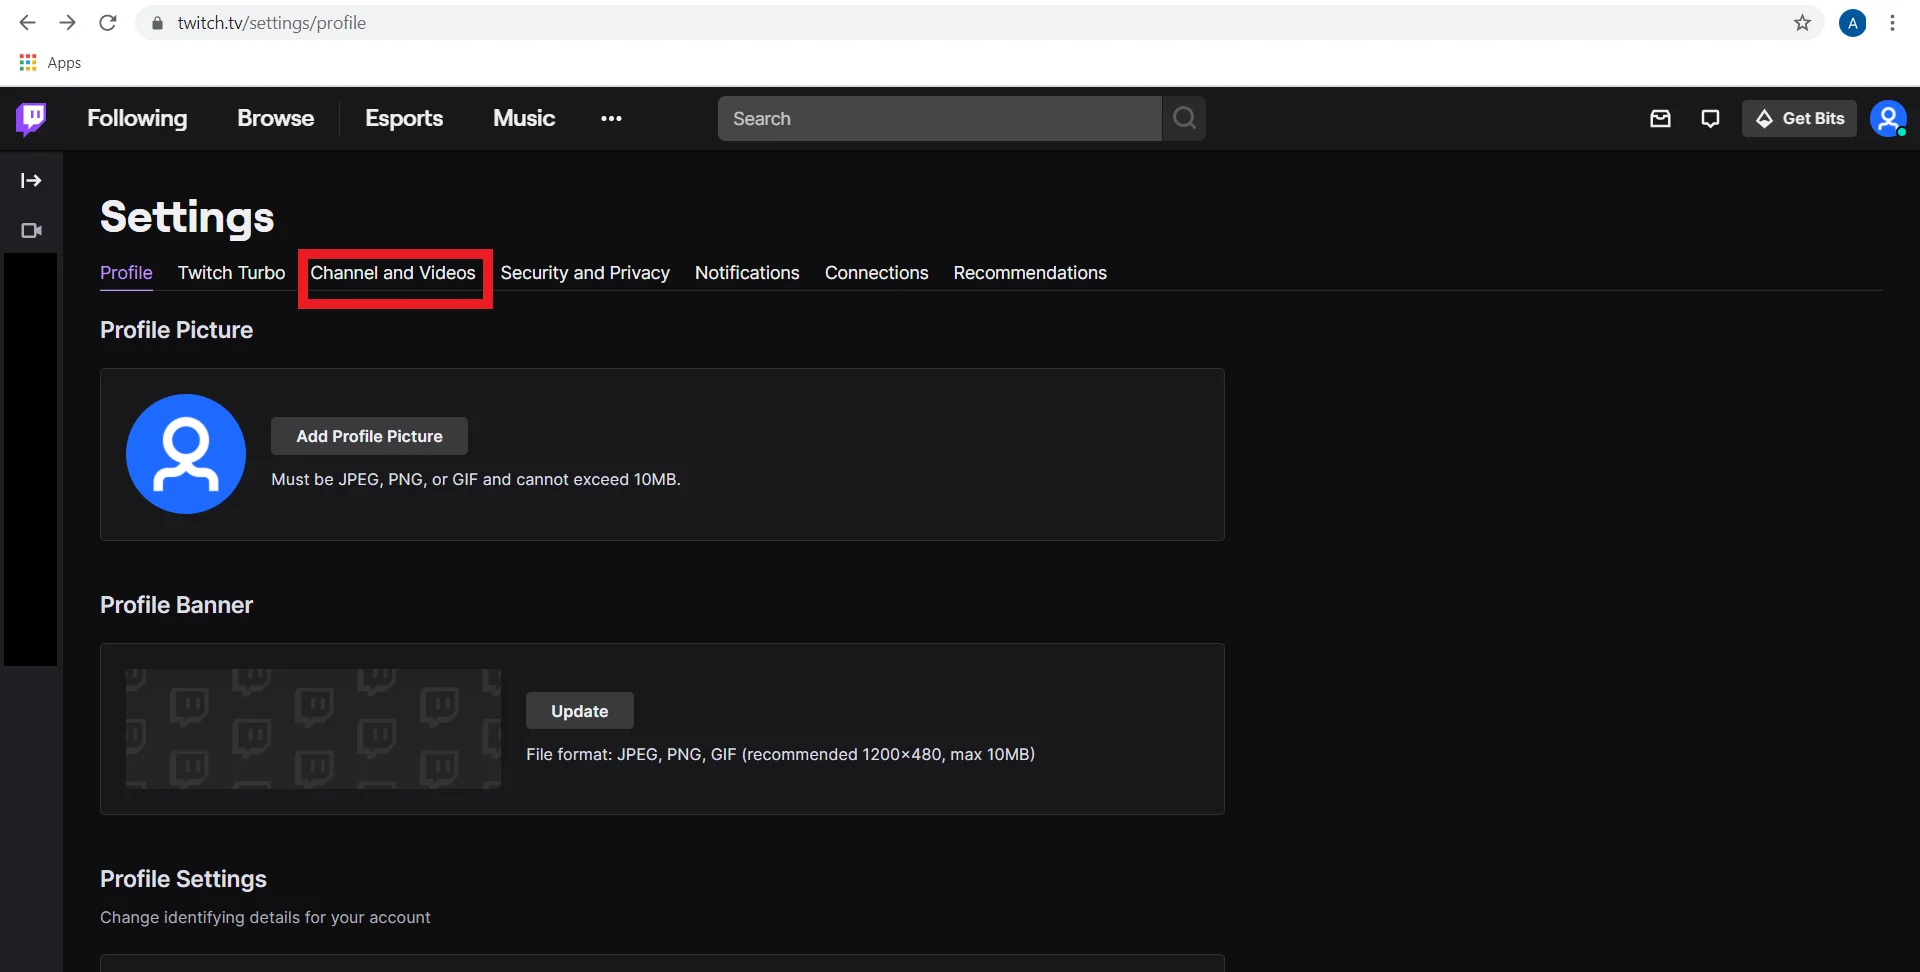
- In the settings window click on Channel and Videos. It will open your channel settings in the creator dashboard.
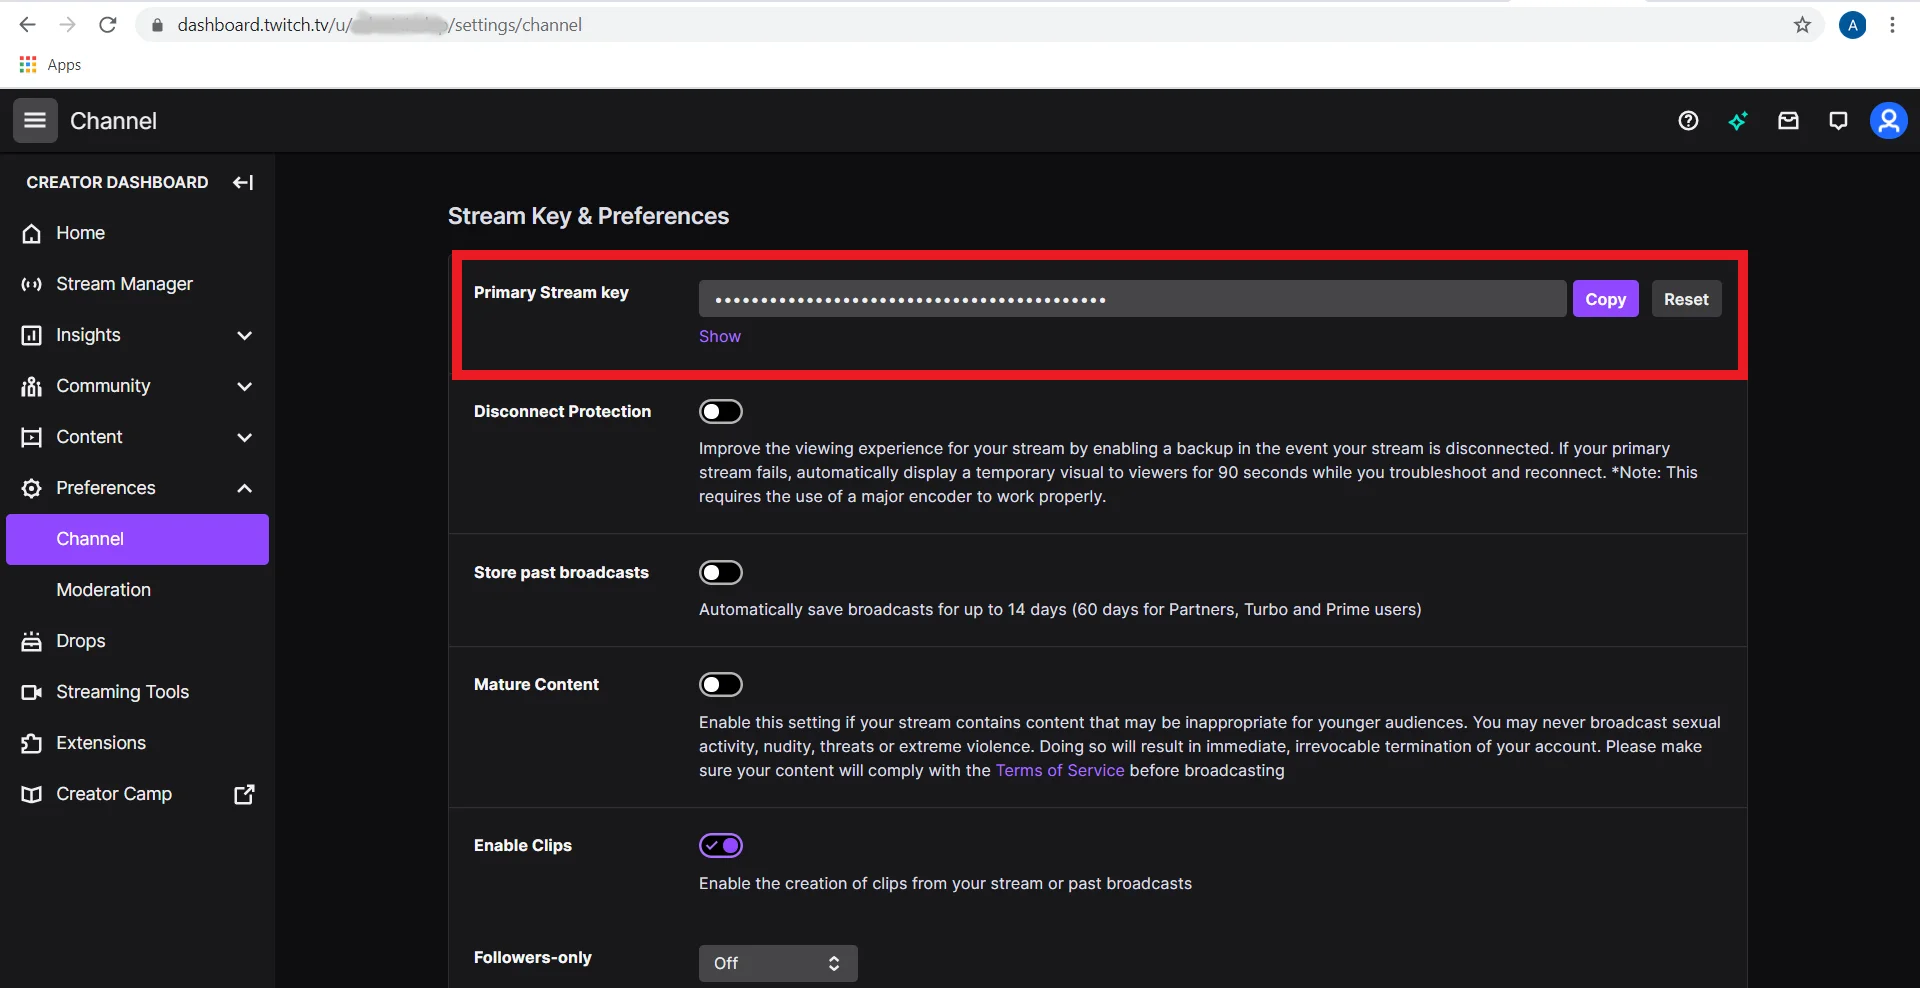
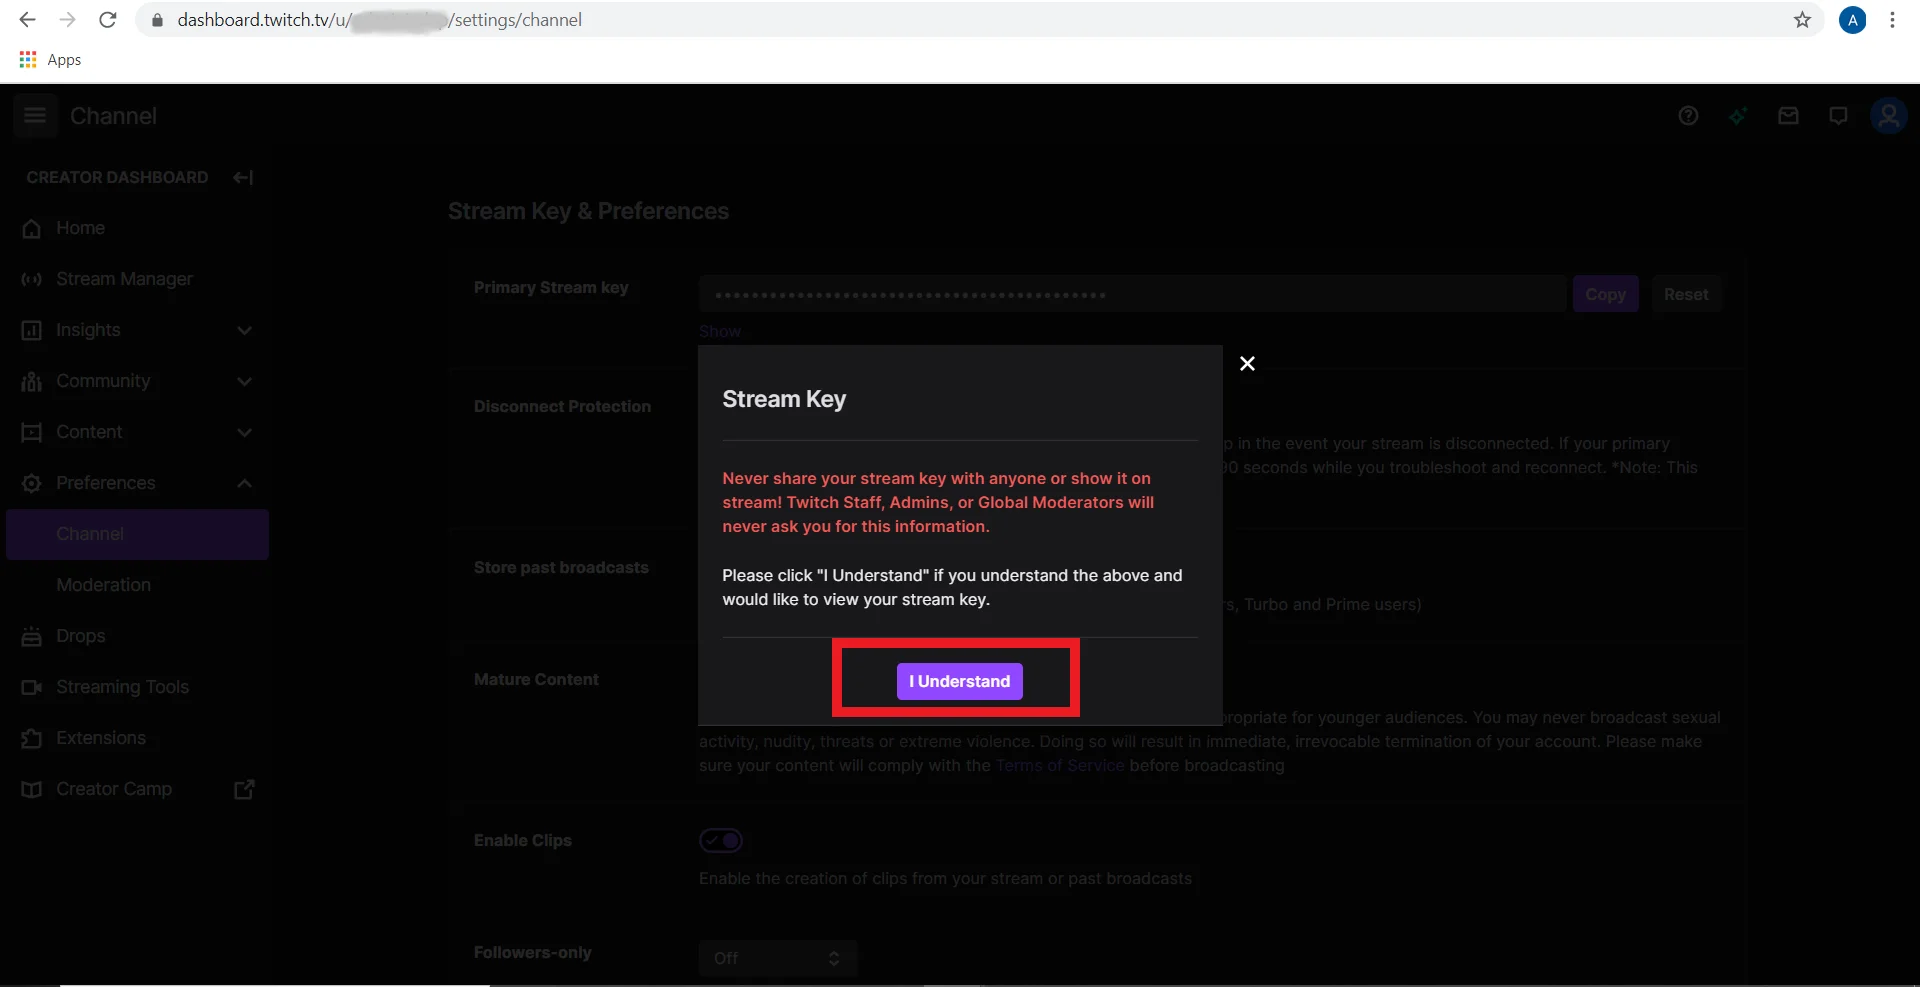
- Here you can see the Primary Stream Key section and click on show.
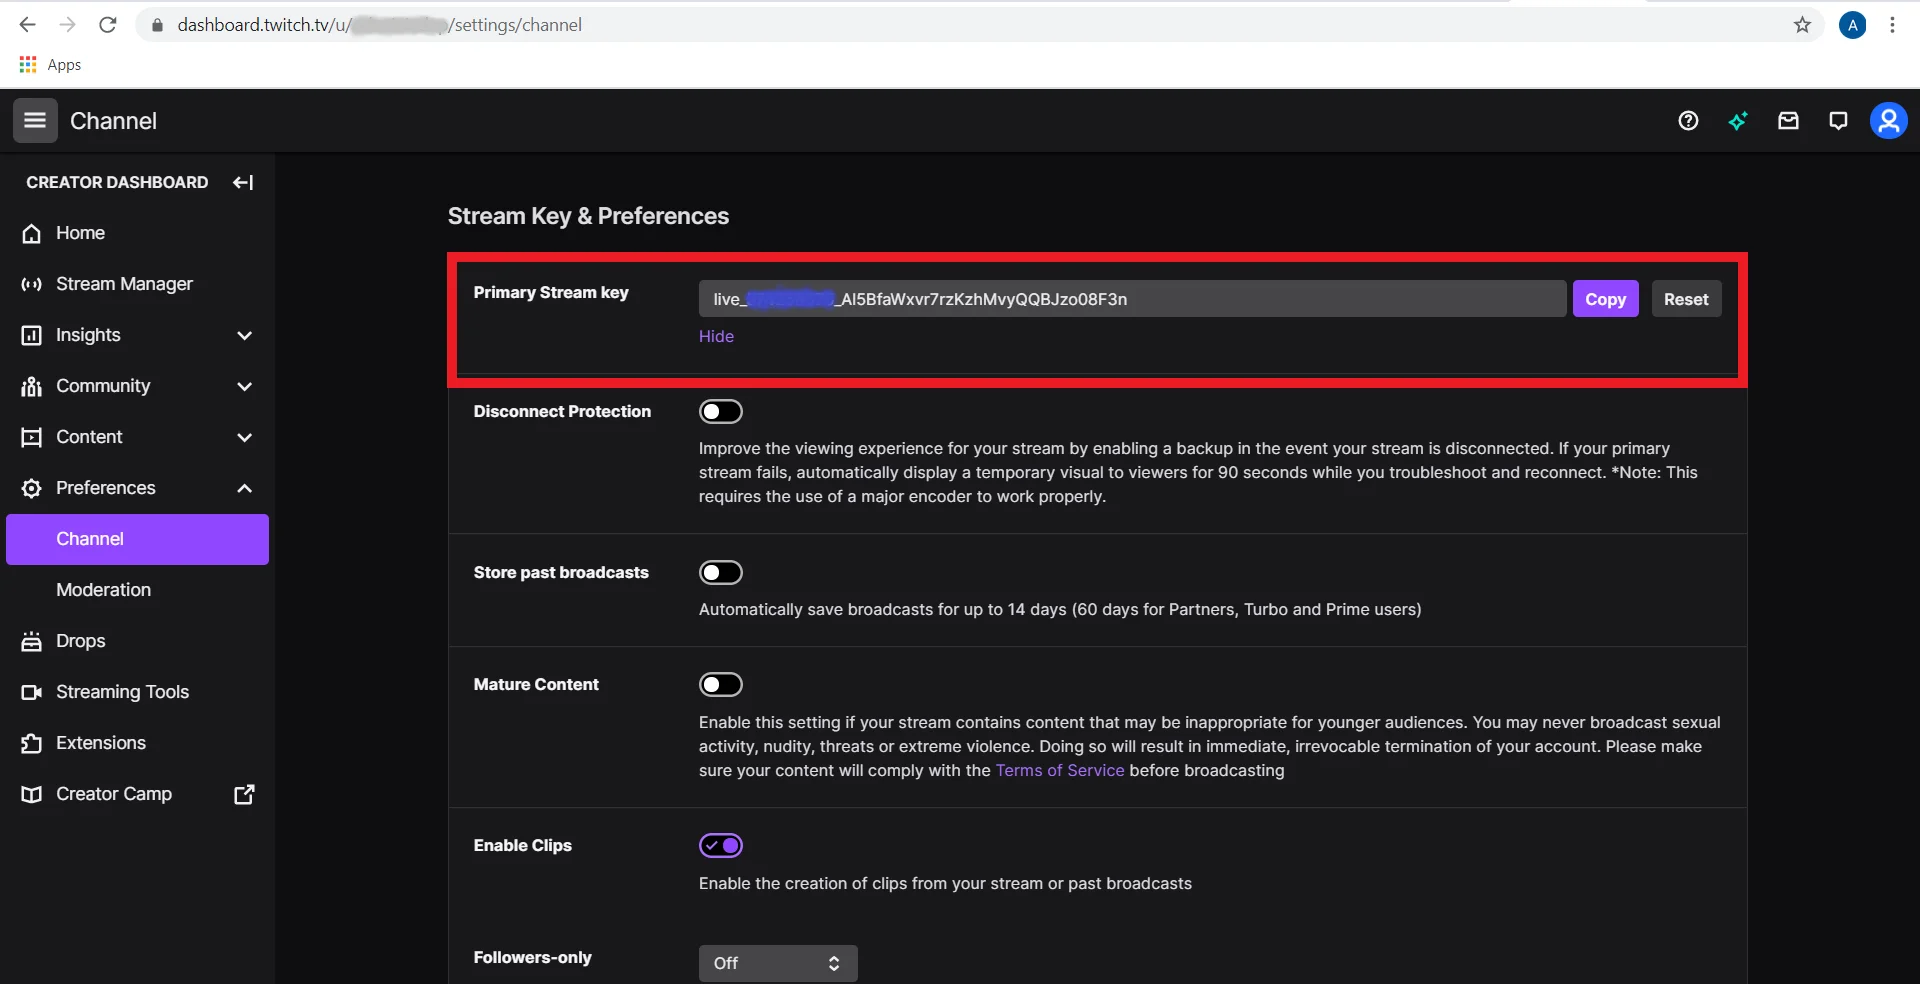
- Click on I Understand to reveal your stream key.
- Your stream key has the pattern live_<your channel id>_ <unique key>.
- Once you get the stream key, copy the numerical channel id to save it in add-on.
- NOTE - Channel ID doesn't change when you reset the Primary Stream Key. Resetting the stream key only changes the <unique key> value.
a) Steps to configure the addon with OAuth client:
b) Find your Channel ID
You have successfully configured Twitch as OAuth Provider for achieving Twitch login into your WordPress Site.
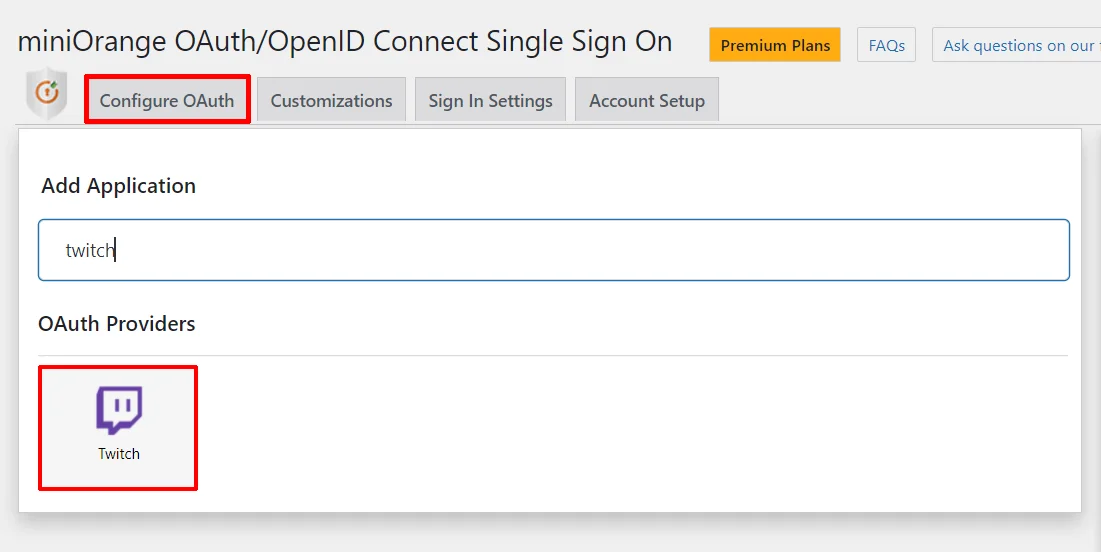
2. Setup WordPress as OAuth Client
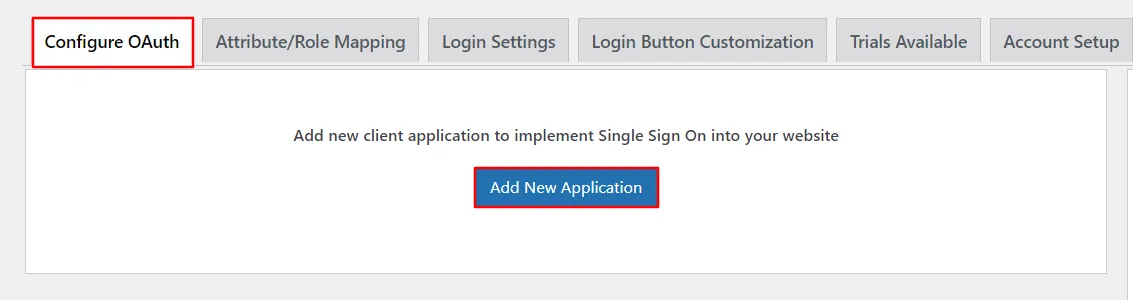
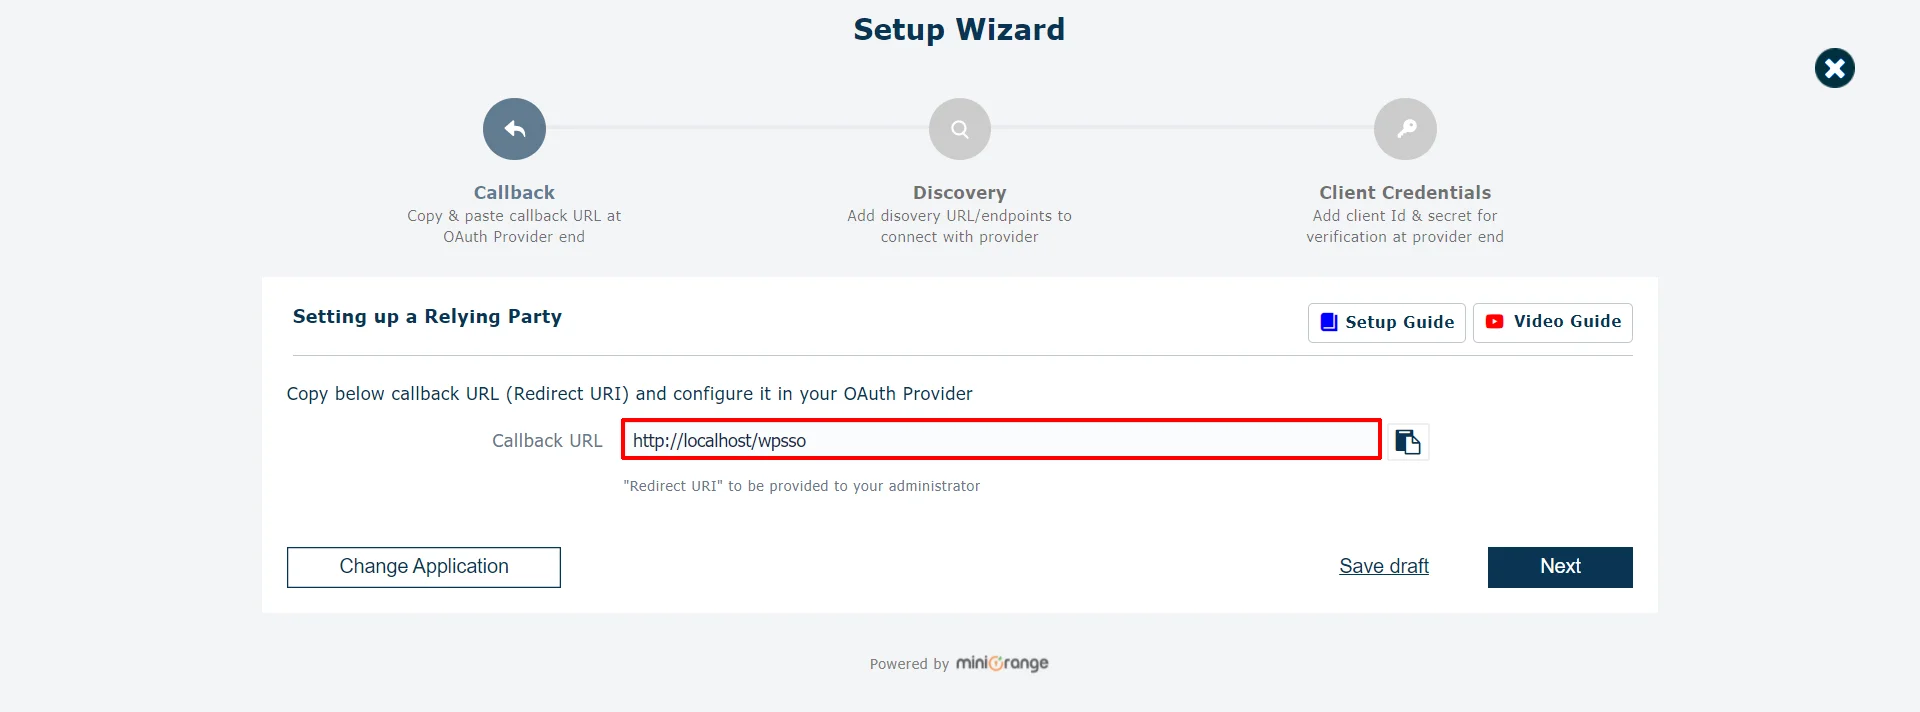
- Go to Configure OAuth tab and click Add New Application to add a new client application into your website.
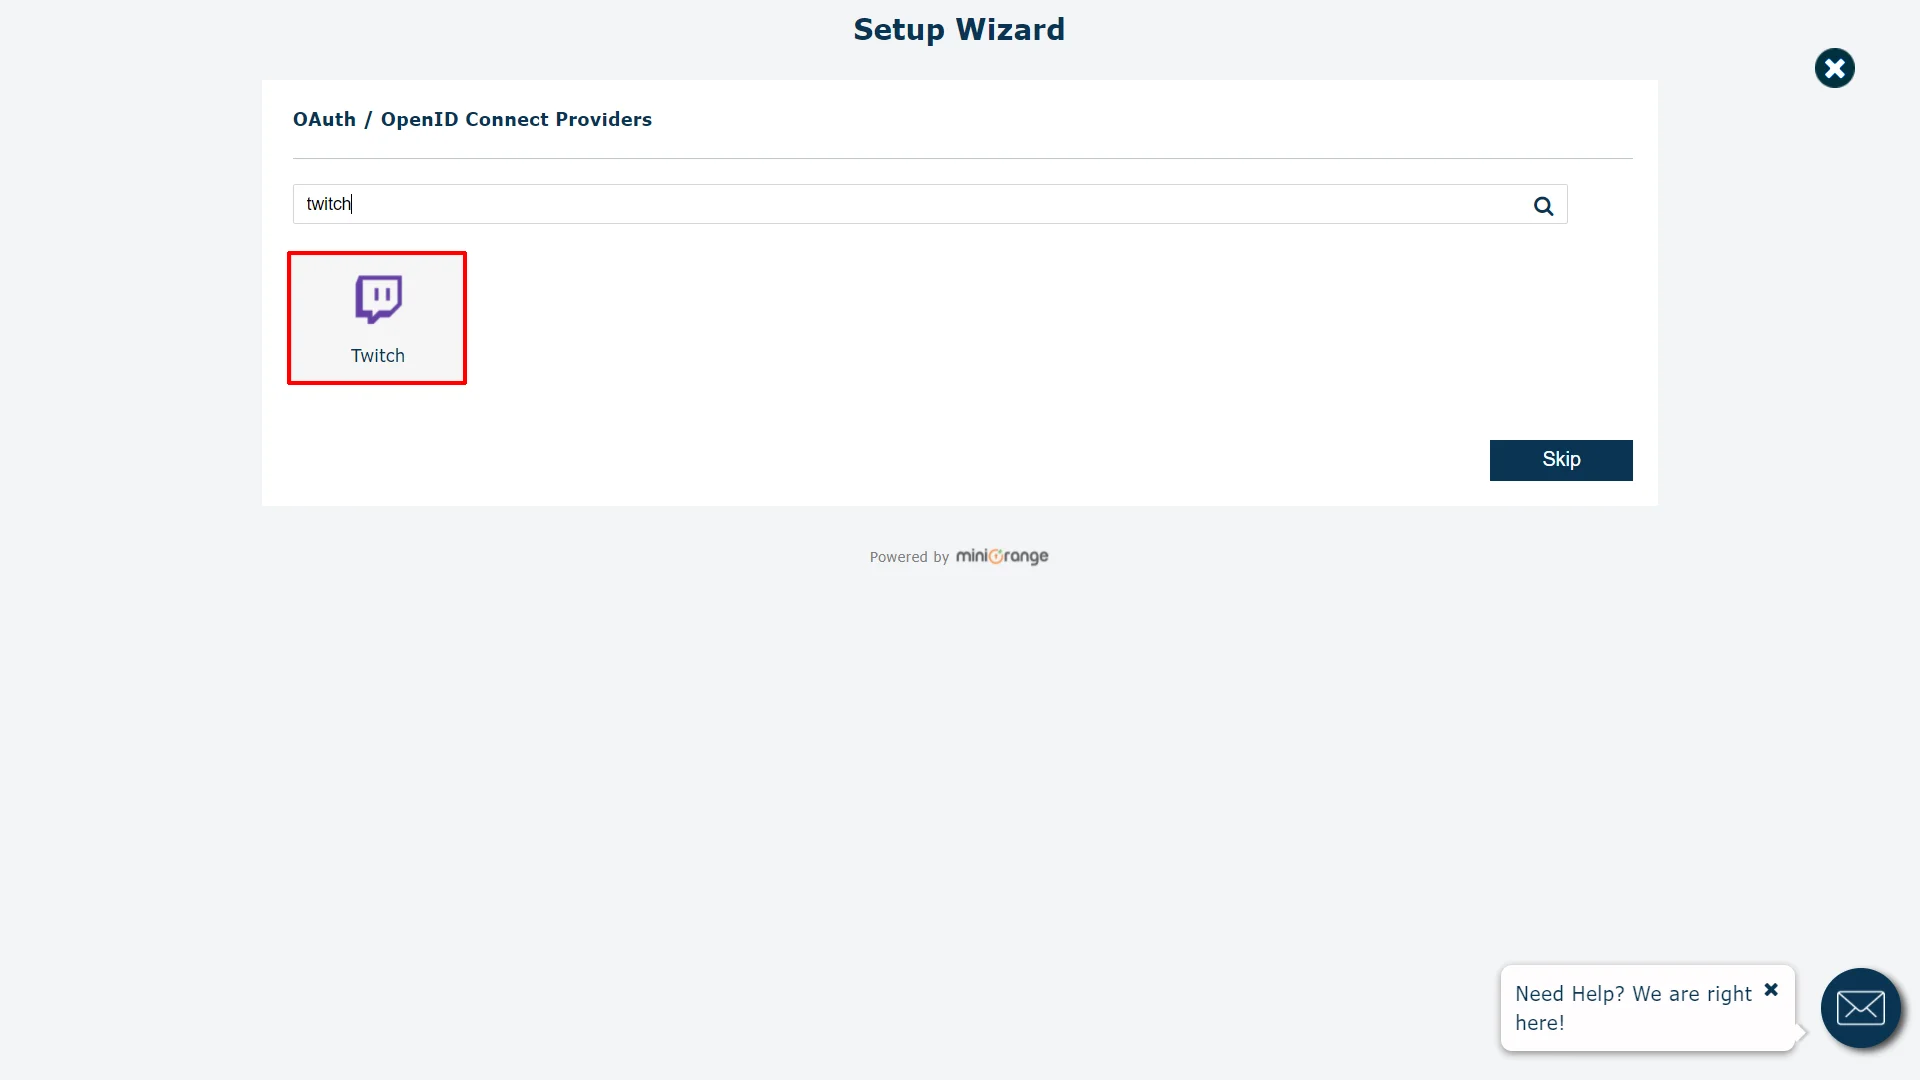
- Choose your Application from the list of OAuth / OpenID Connect Providers, Here Twitch.
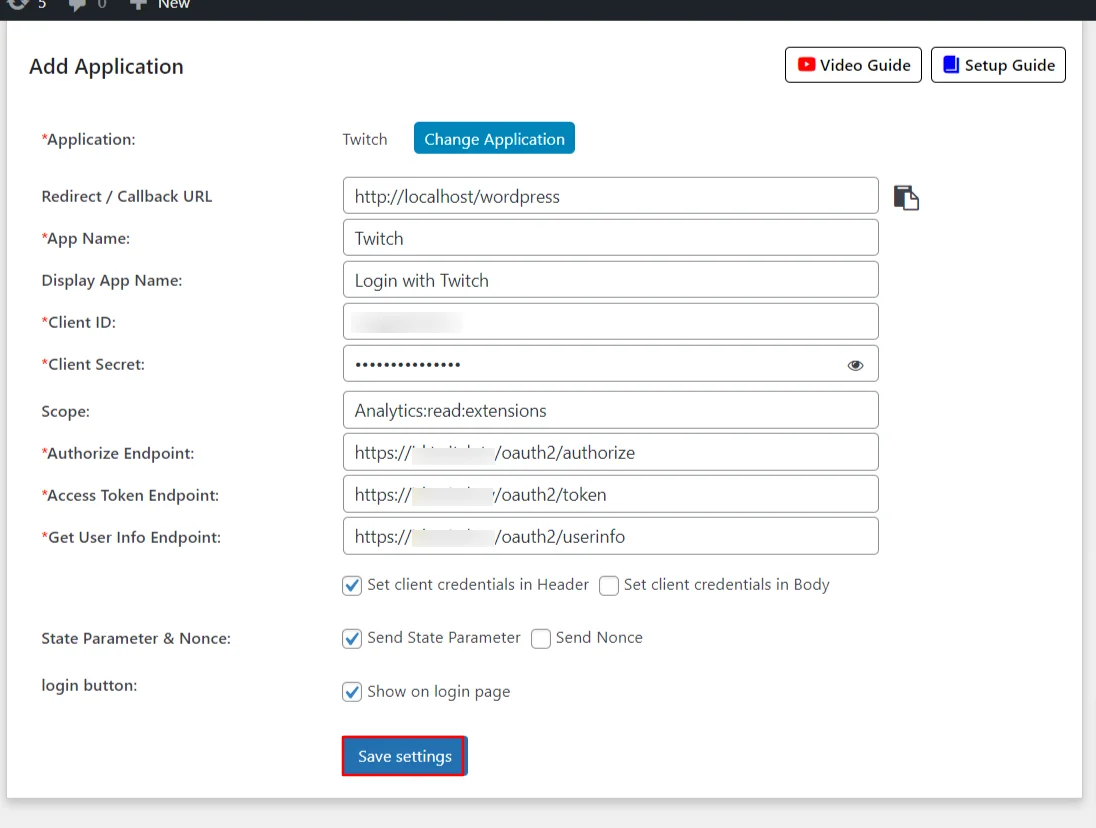
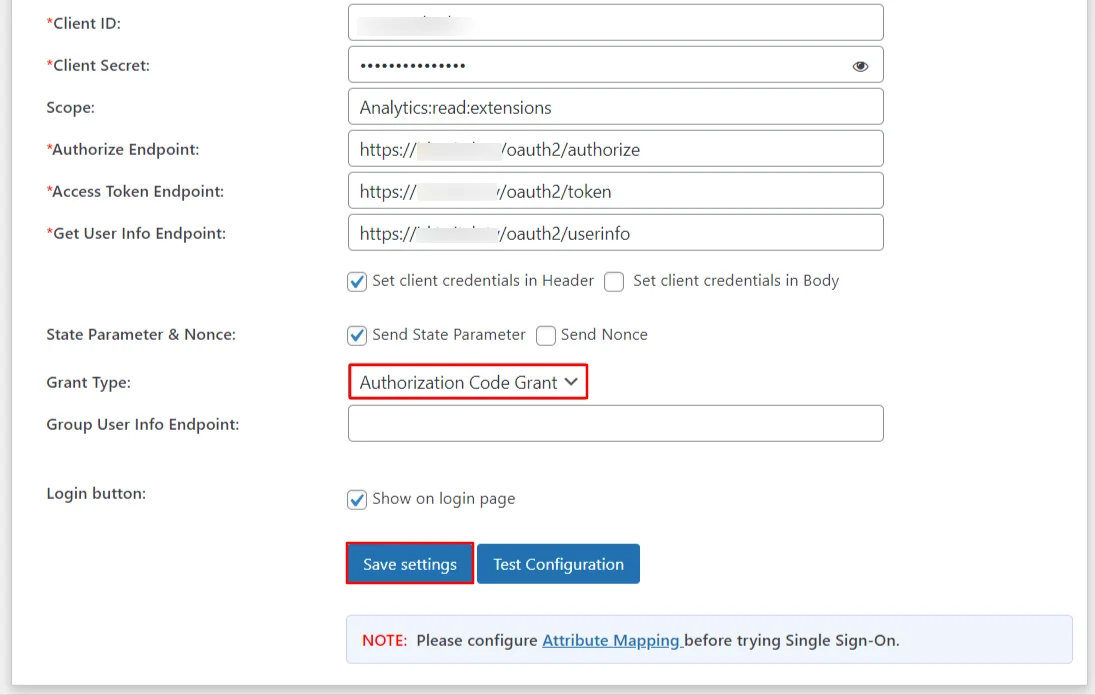
- Copy the Callback URL to be used in OAuth Provider Configuration and click Next.
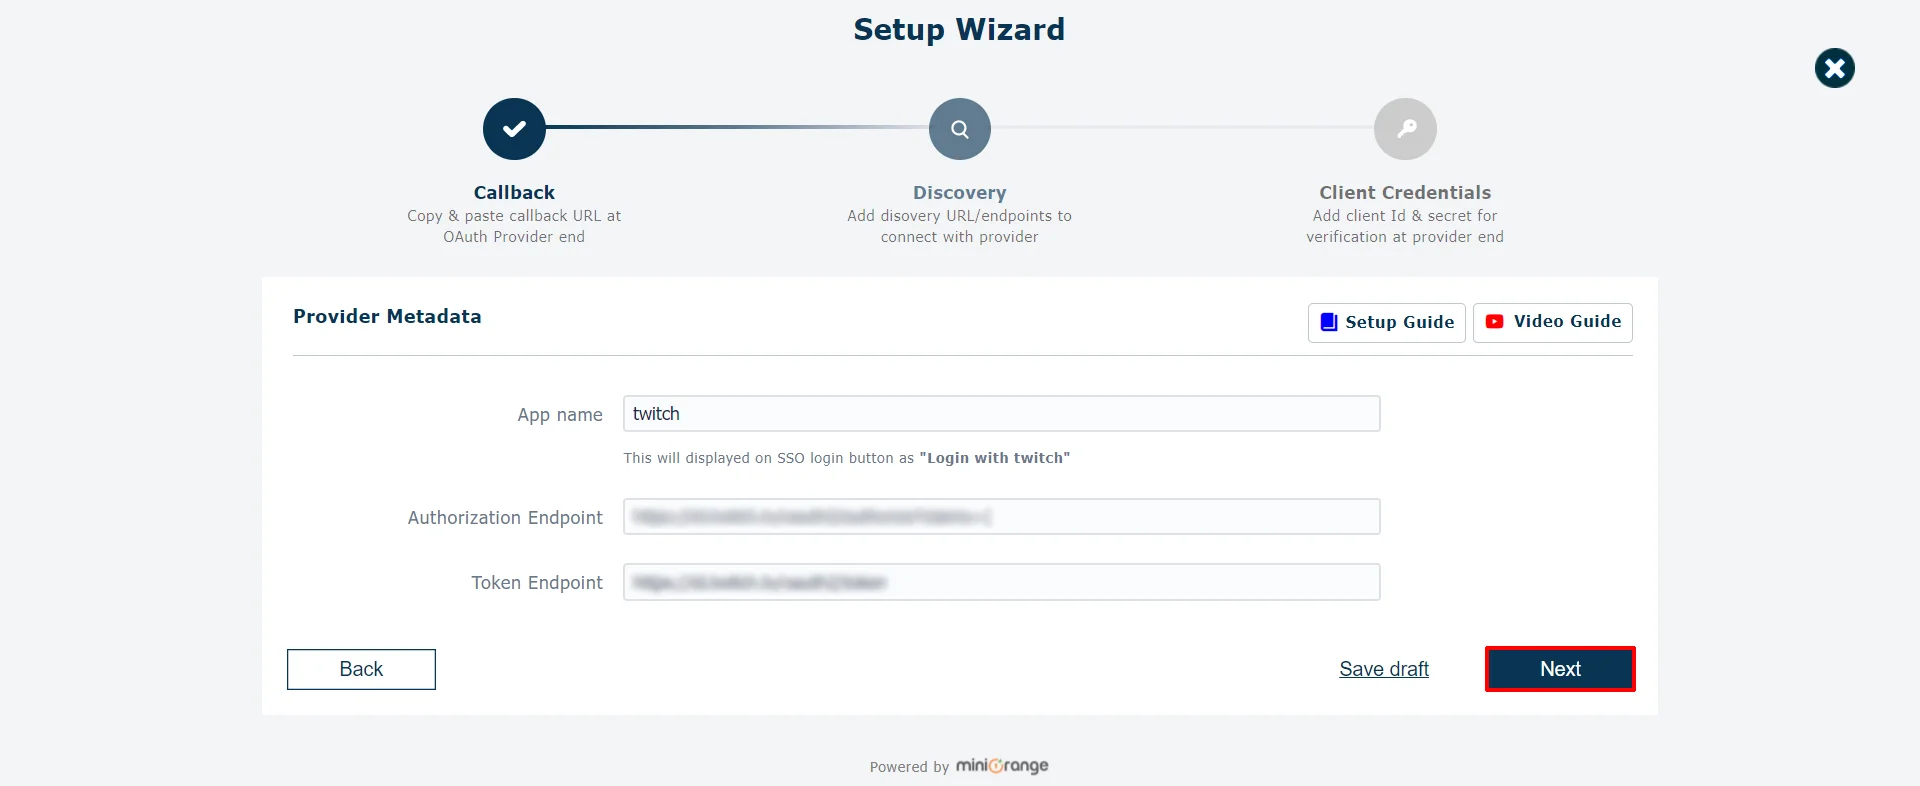
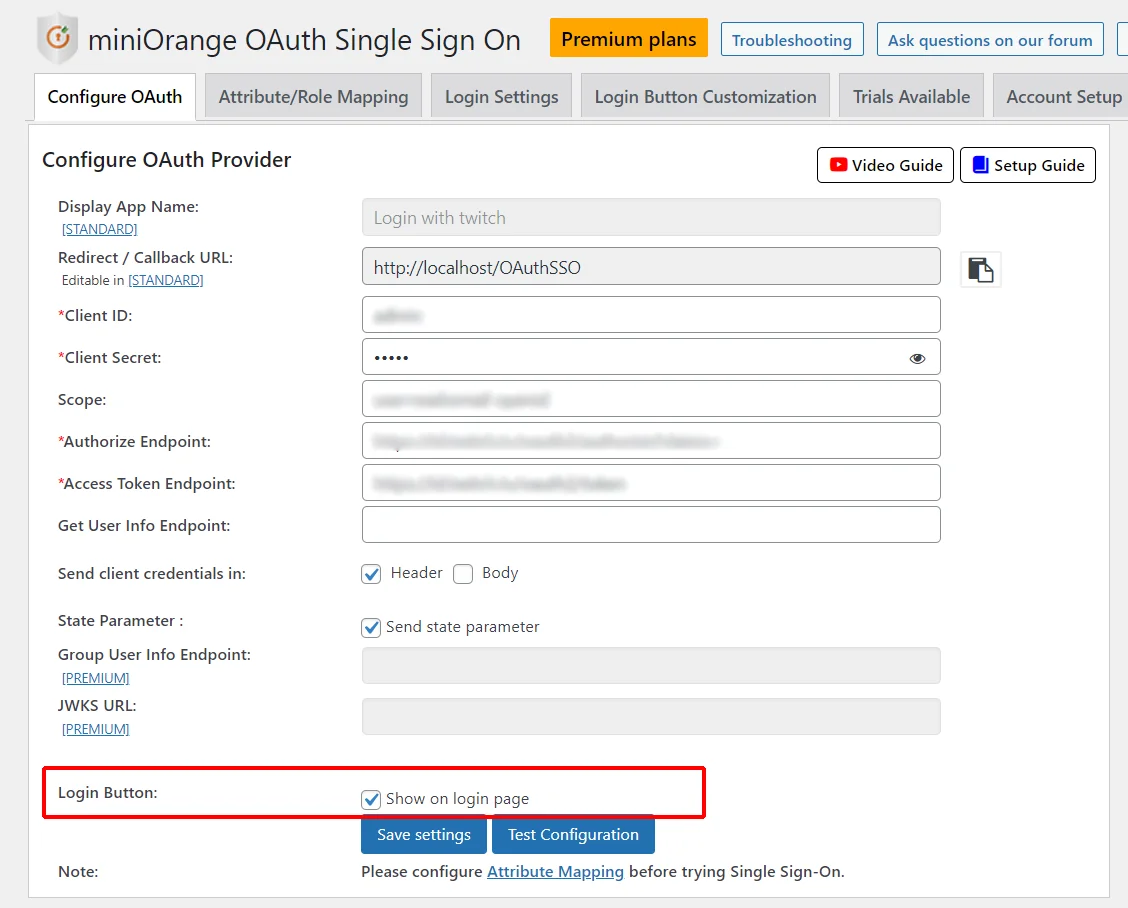
- Configure App name. Copy and paste the endpoints from below table. Click Next.
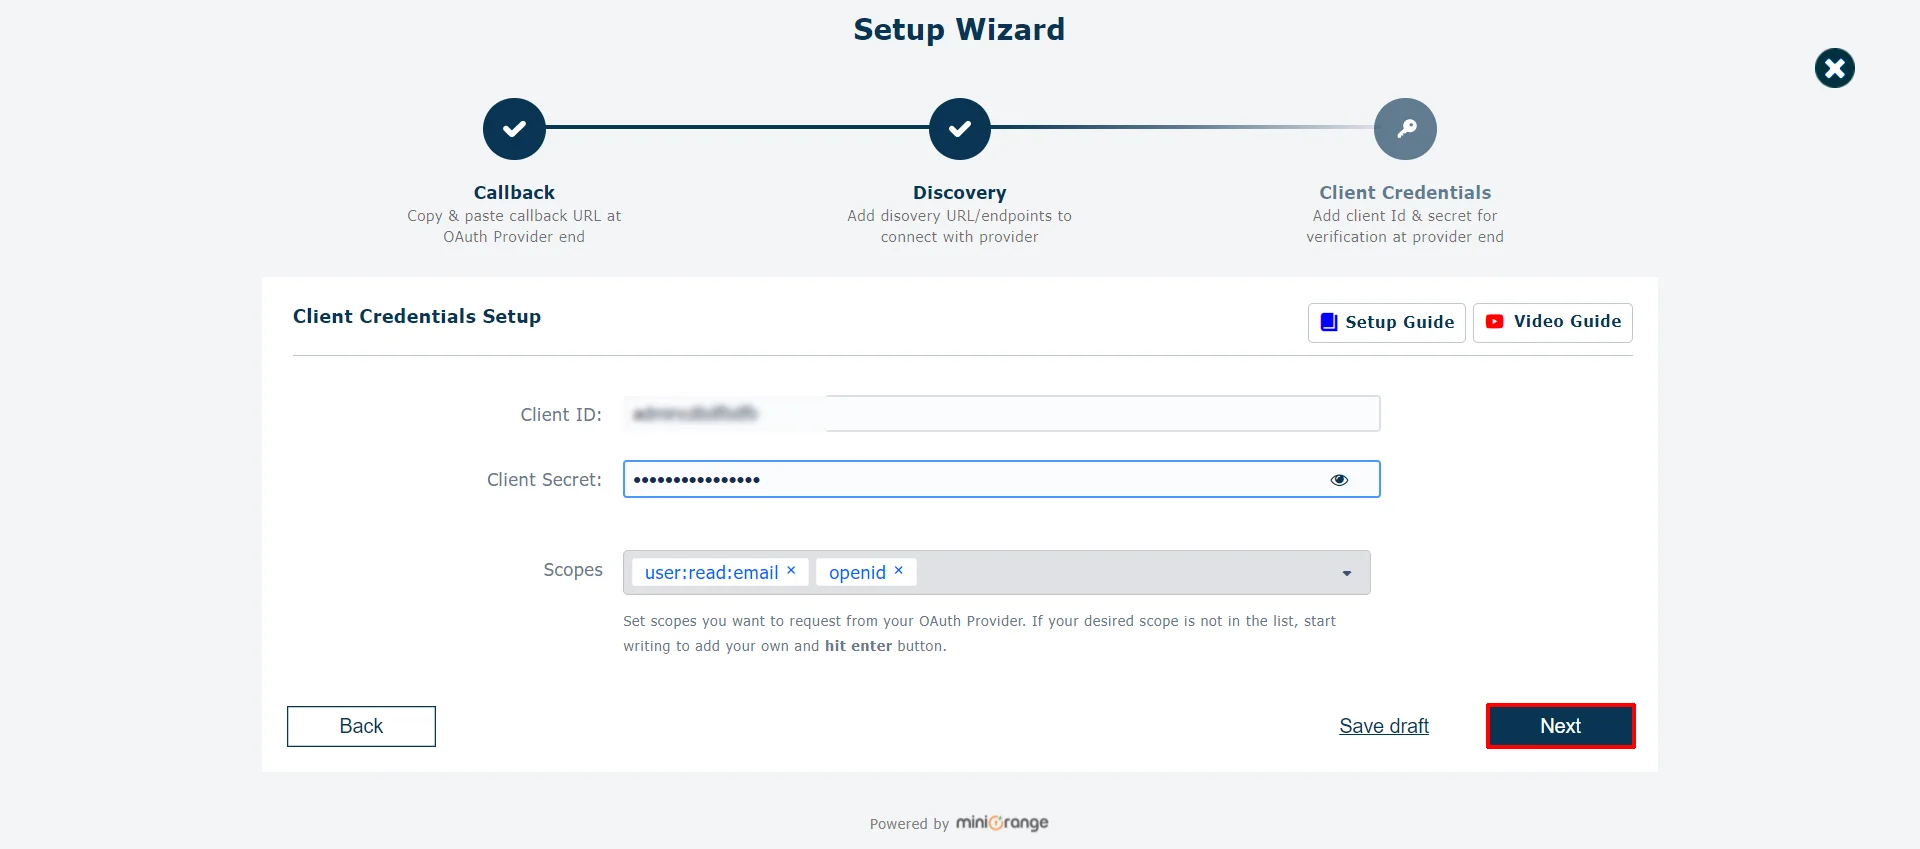
- Configure the client credentials like Client ID & Client Secret is shown in the setup dialogue box and enter the scope value as openid email. Click Next.
- Verify the configuration details and click on Finish to save the configuration.
| Client ID : | from the step 9 above |
| Client Secret : | from the step 9 above |
| Scope: | user:read:email For more scopes click here. |
| Authorize Endpoint: | https://id.twitch.tv/oauth2/authorize |
| Access Token Endpoint: | https://id.twitch.tv/oauth2/token |
| Get User Info Endpoint: | https://id.twitch.tv/oauth2/userinfo |
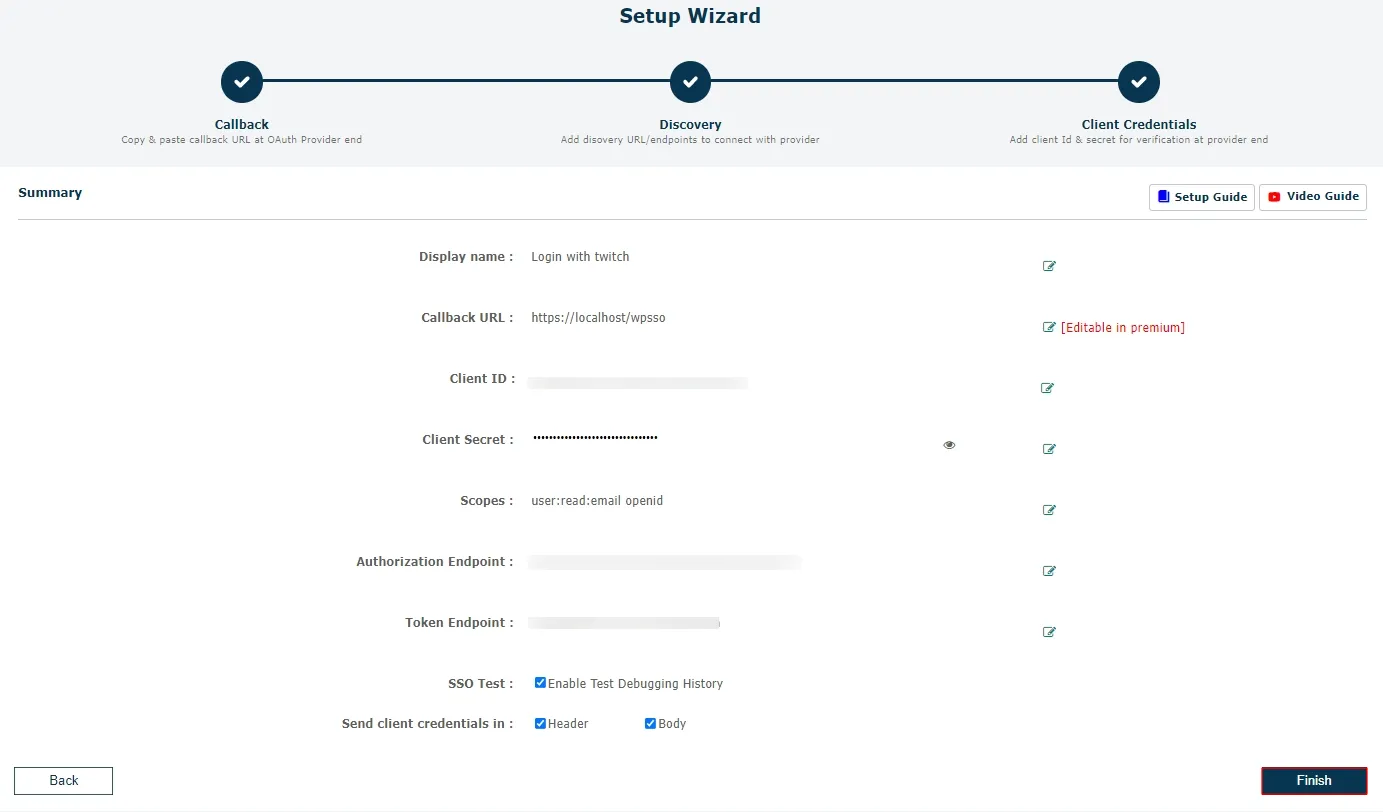
You have successfully configured WordPress as OAuth Client for achieving user authentication with Twitch Single Sign-On (SSO) login into your WordPress Site.
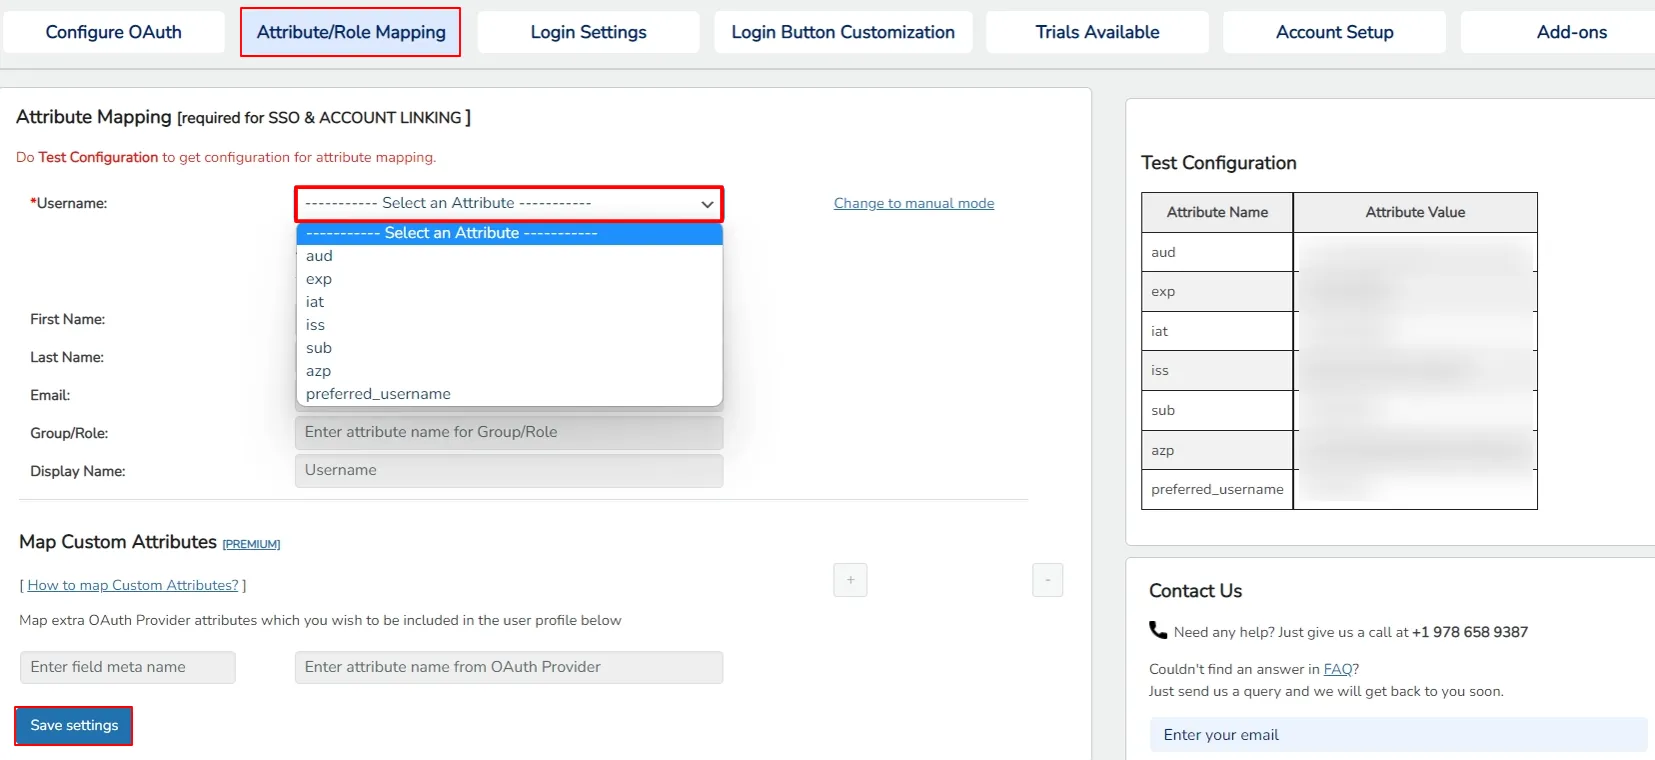
3. User Attribute Mapping
- User Attribute Mapping is mandatory for enabling users to successfully login into WordPress. We will be setting up user profile attributes for WordPress using below settings.
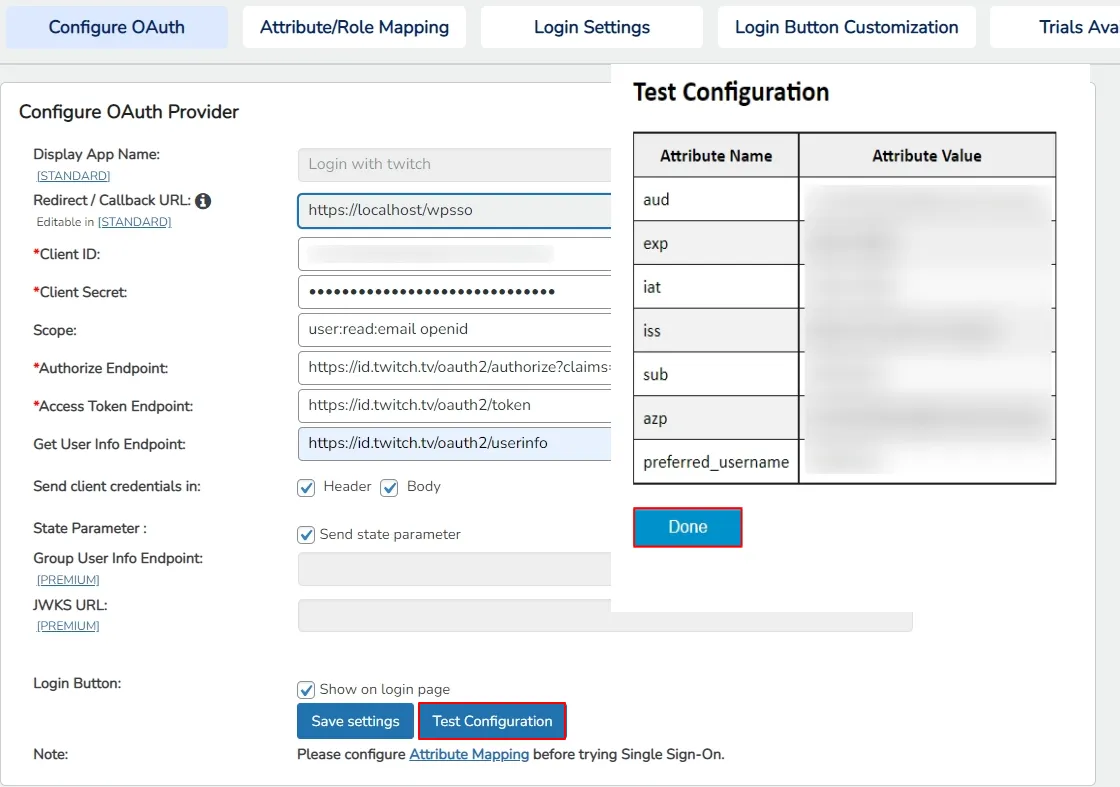
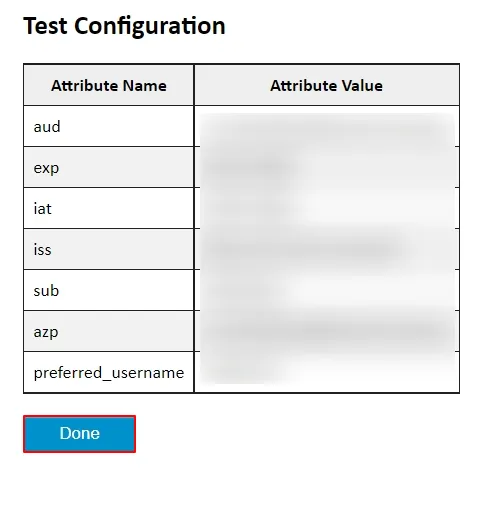
- Go to Configure OAuth tab. Scroll down and click on Test Configuration.
- You will see all the values returned by your OAuth Provider to WordPress in a table. If you don't see value for First Name, Last Name, Email or Username, make the required settings in your OAuth Provider to return this information.
- Once you see all the values in Test Configuration, go to Attribute / Role Mapping tab, you will get the list of attributes in a Username dropdown.
Finding user attributes
4. Sign In Settings
- The settings in Single Sign-On (SSO) Settings tab define the user experience for Single Sign-On (SSO). To add a Twitch login widget on your WordPress page, you need to follow the below steps.
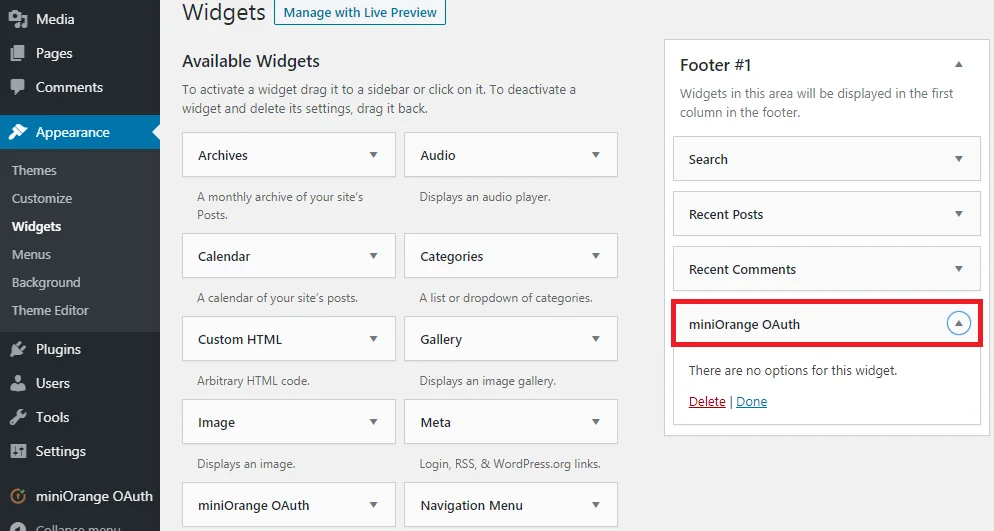
- Go to WordPress Left Panel > Appearances > Widgets.
- Select miniOrange OAuth. Drag and drop to your favourite location and save.
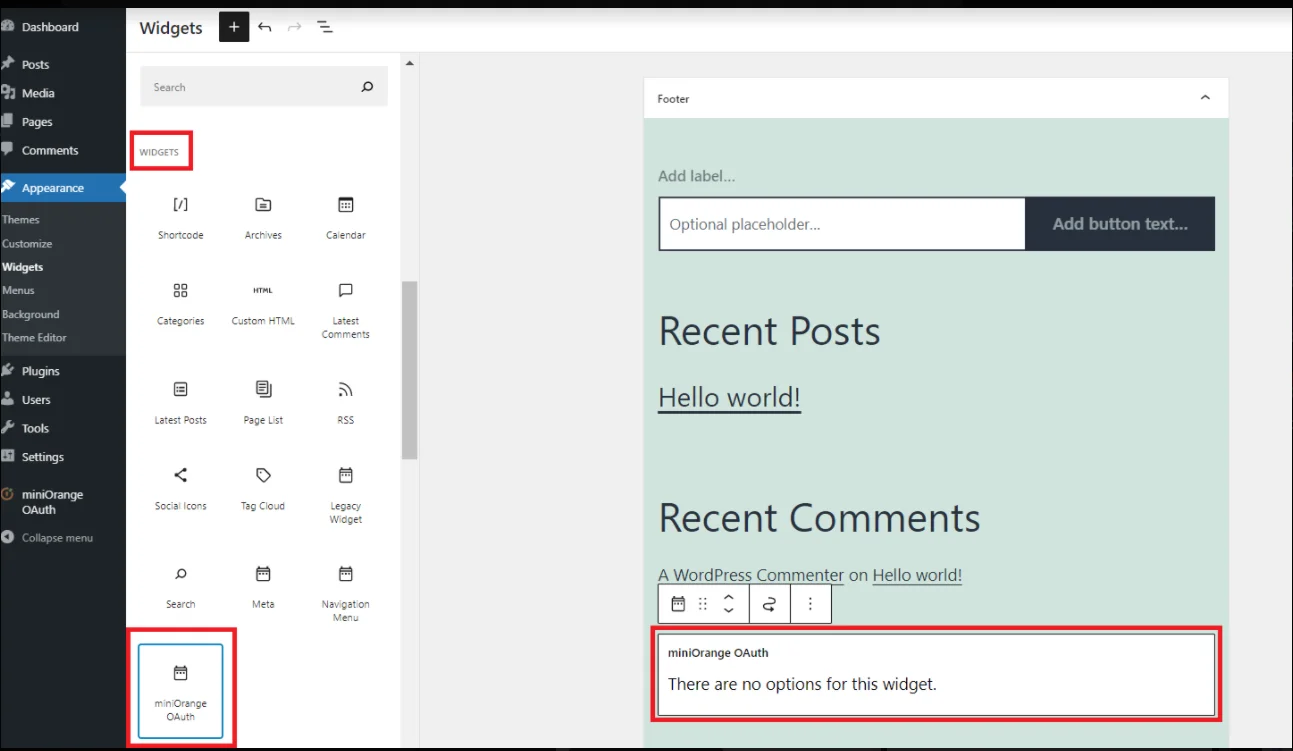
- Go to WordPress Left Panel > Appearances > Widgets.
- Select miniOrange OAuth. Drag and drop to your favourite location and save.
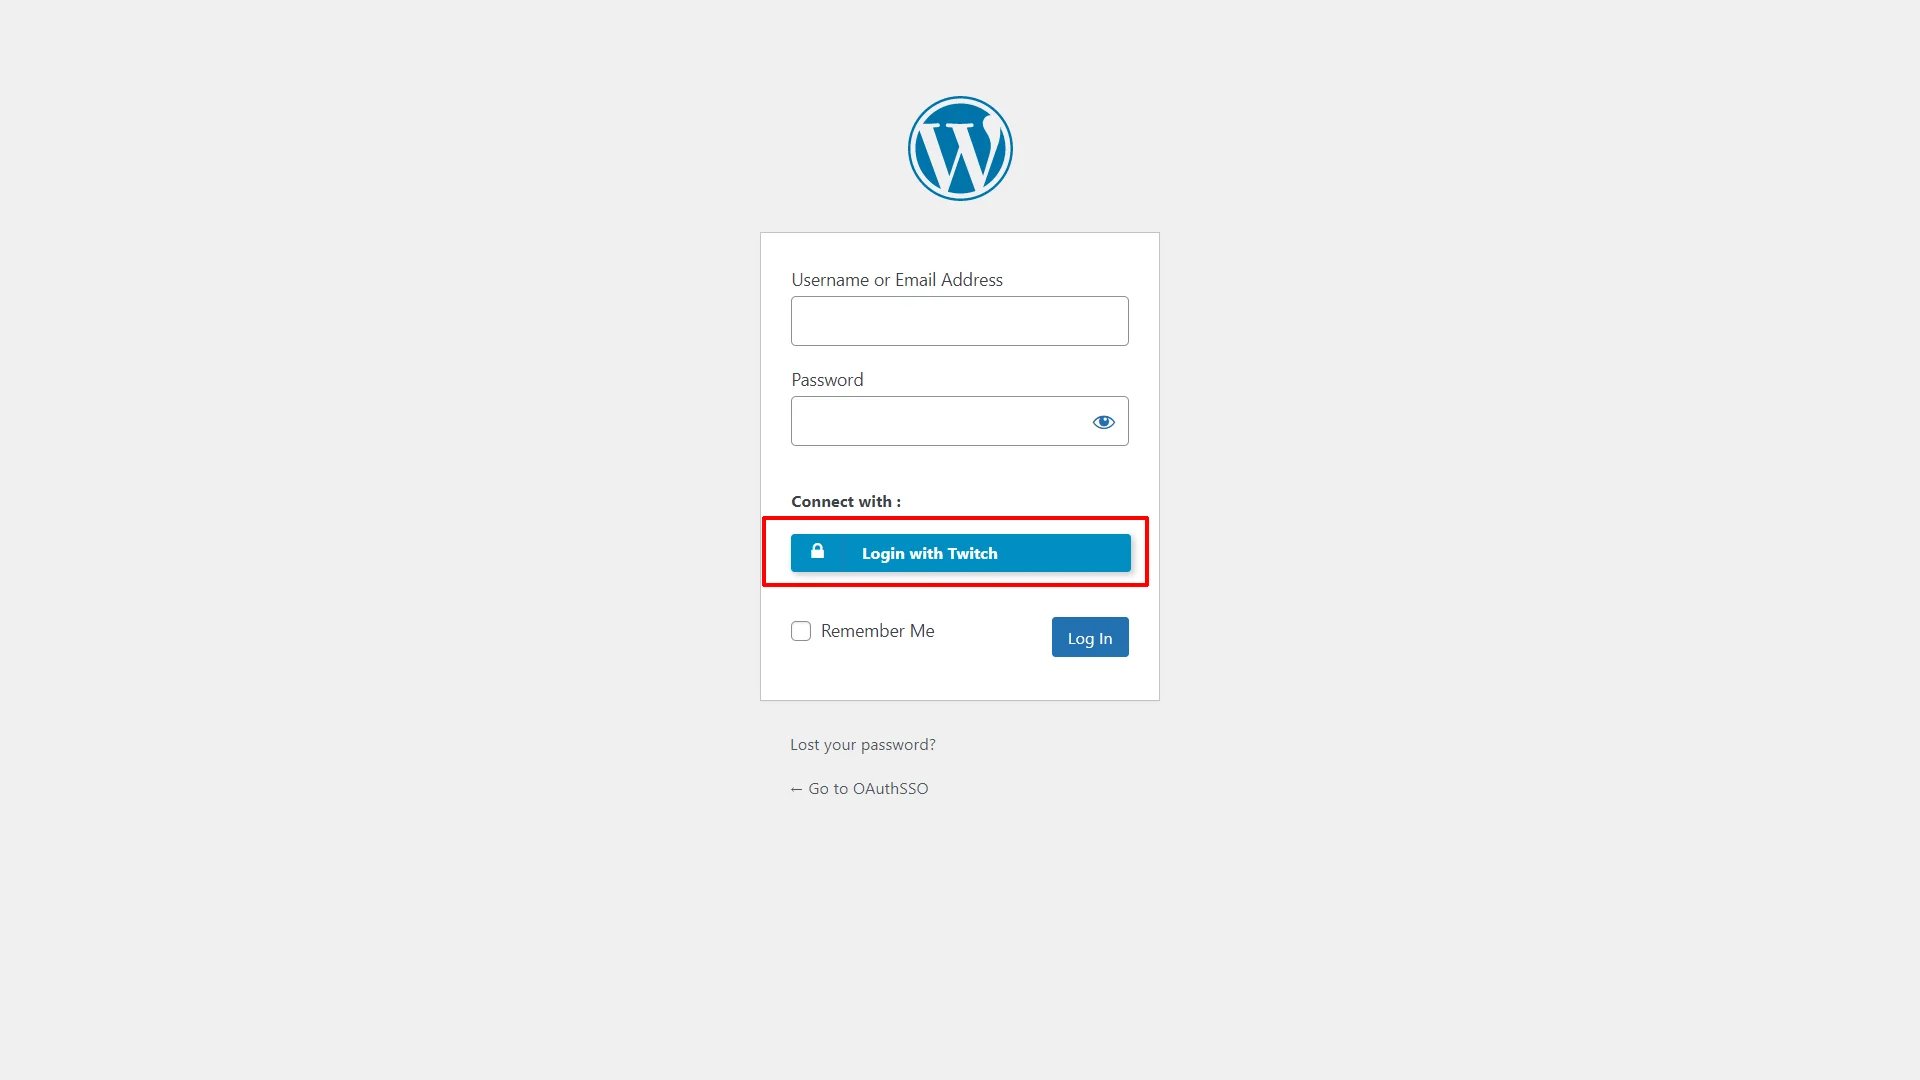
- Open your WordPress page and you can see the Twitch SSO login button there. You can test the Twitch Single Sign-On (SSO) now.
- Make sure the "Show on login page" option is enabled for your application. (Refer to the below image)
- Now, go to your WordPress Login page. (Eg. https://< your-wordpress-domain >/wp-login.php)
- You will see an Twitch SSO login button there. Once you click the login button, you will be able to test the Twitch Single Sign-On (SSO).
- Twitch as OAuth Provider / OpenID Connect
- Documentation of Twitch authentication for login
- WordPress Single Sign-On (SSO) OAuth / OpenID Connect / JWT
- What is OAuth 2.0 and how does it work?
- Frequently Asked Questions (FAQs)
Additional Resources
Mail us on oauthsupport@xecurify.com for quick guidance(via email/meeting) on your requirement and our team will help you to select the best suitable solution/plan as per your requirement.
Need Help? We are right here!
