PayPal OAuth & OpenID connect Single Sign-On (SSO) | PayPal SSO Login
PayPal OAuth & OpenID connect Single Sign-On (SSO) | PayPal SSO Login
WordPress OAuth & OpenID Connect Single Sign-On (SSO) plugin enables secure login into WordPress using PayPal as OAuth and OpenID Connect provider. You can also configure plugin using different custom providers and standard IDPs. It supports advanced Single Sign-On (SSO) features such as user profile Attribute mapping, Role mapping, etc. Here we will go through a guide to configure SSO between WordPress and PayPal. By the end of this guide, users should be able to login to WordPress from PayPal. To know more about other features we provide in WP OAuth Single Sign-On ( OAuth & OpenID Connect Client ) plugin, you can click here.
Pre-requisites : Download And Installation
- Log into your WordPress instance as an admin.
- Go to the WordPress Dashboard -> Plugins and click on Add New.
- Search for a WordPress OAuth Single Sign-On (SSO) plugin and click on Install Now.
- Once installed click on Activate.
Steps to configure PayPal Single Sign-On (SSO) Login into WordPress
1. Setup PayPal as OAuth Provider
- First of all, go to https://developer.paypal.com/developer/applications/ and login to your Paypal Account.
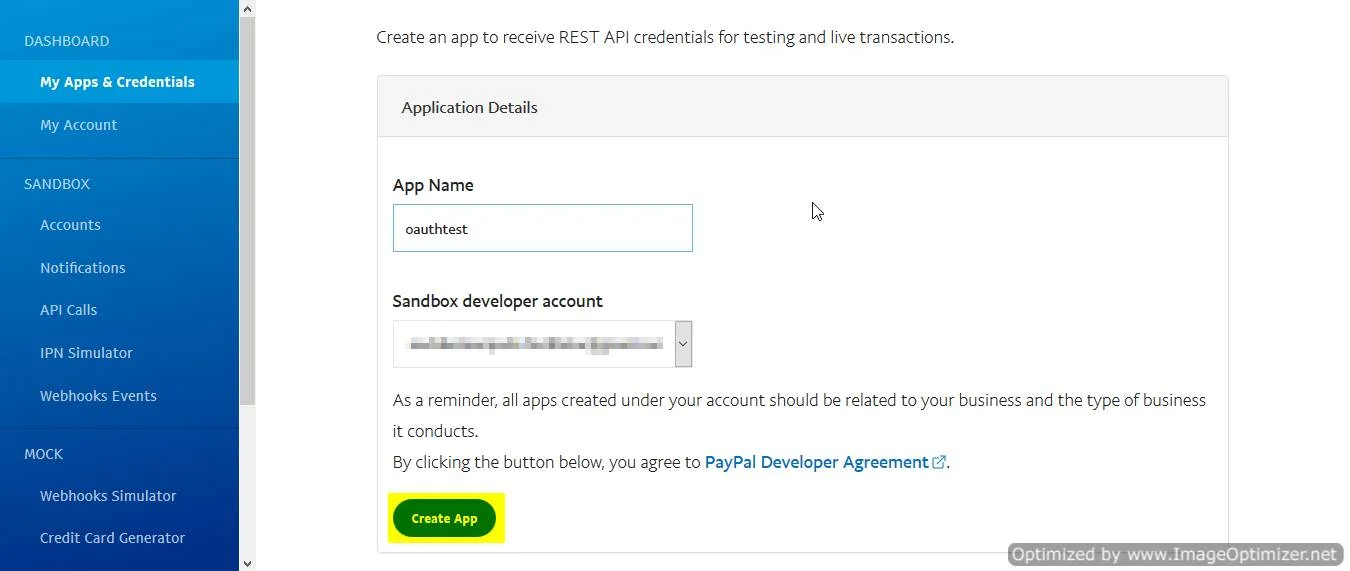
- You will be brought to a Application Management Page. Scroll down to REST API apps and click on Create App.
- You will be shown a form where you have to enter Application Name and Sandbox Developer Account. Fill the form with appropriate information. Then Click on Create App
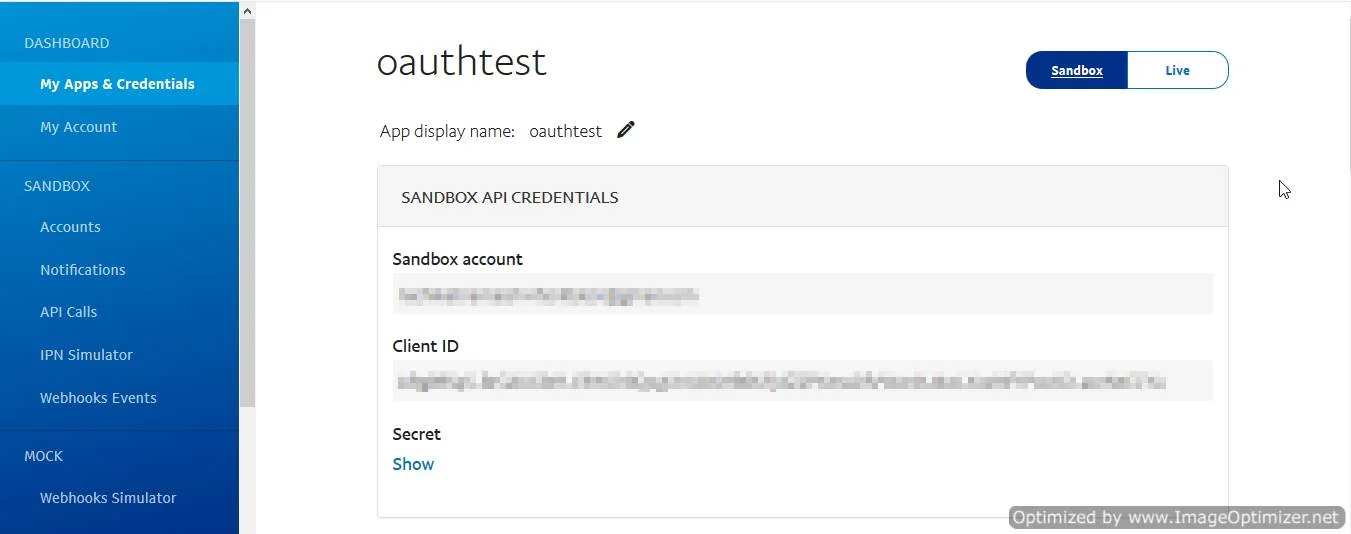
- You will be brought back to Application Management page. Here you can find Client ID and Secret.
- Copy these credentials in MO OAuth Plugin configuration on corresponding fields.
- Scroll Down to Sandbox App Settings. Fill Callback/Redirect URI from MO OAuth Plugin. Then Click on + or press Enter


You have successfully configured Paypal as OAuth Provider for achieving Paypal SSO login into your WordPress Site.
2. Setup WordPress as OAuth Client
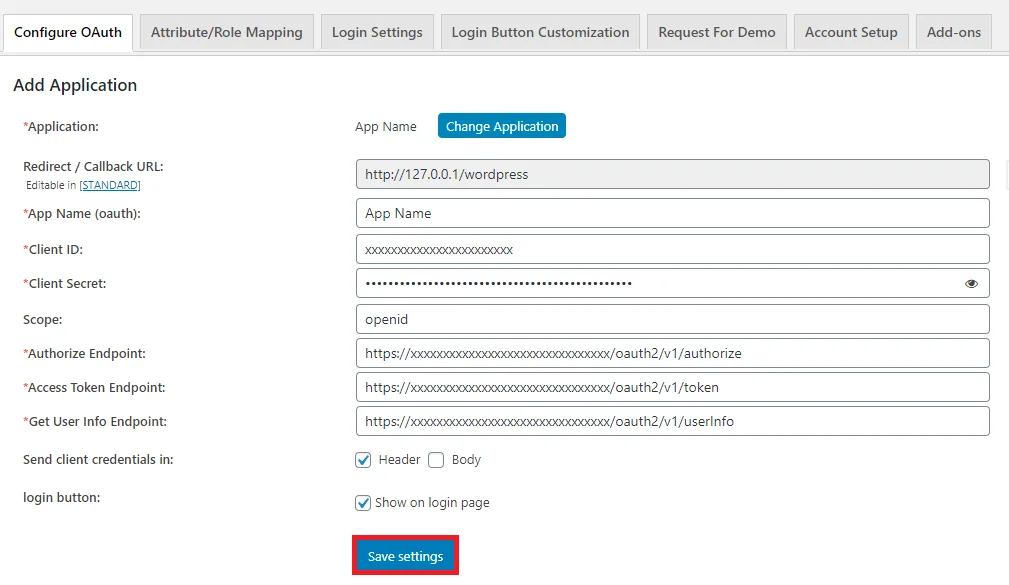
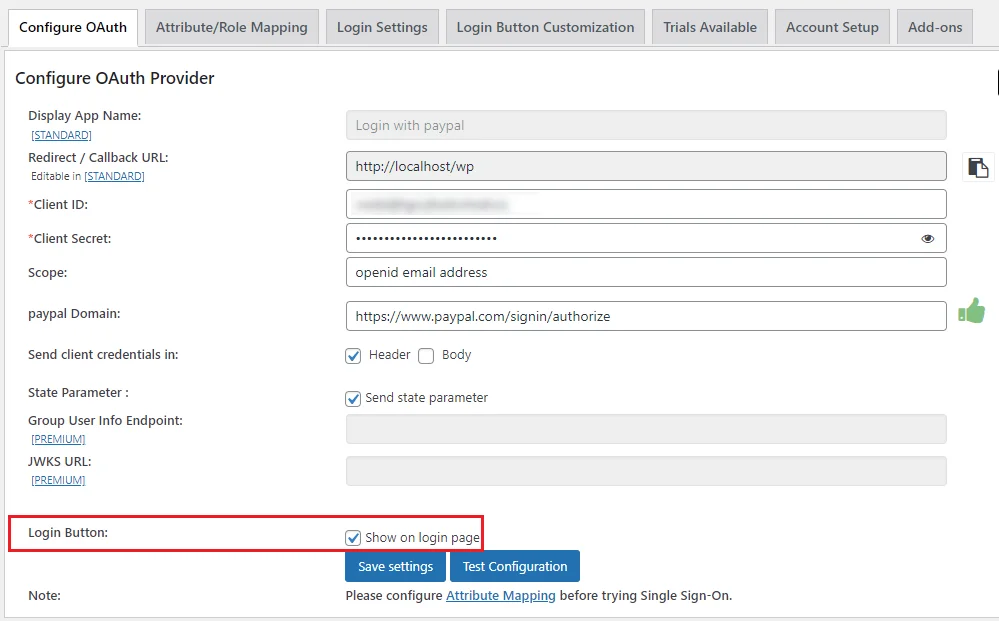
- Go to Configure OAuth tab and configure App Name, Client ID, Client Secret, Scope from provided Endpoints.
- Please refer the below table for configuring the scope & endpoints for PayPal in the plugin.
Client ID : from the step 4 above Client Secret : from the step 4 above Scope: openid Authorize Endpoint: https://www.paypal.com/signin/authorize Access Token Endpoint: https://api.paypal.com/v1/oauth2/token Get User Info Endpoint: - Click on Save Settings to save the configuration.
You have successfully configured WordPress as OAuth Client for achieving Paypal login into your WordPress Site.
3. User Attribute Mapping
- User Attribute Mapping is mandatory for enabling users to successfully login into WordPress. We will be setting up user profile attributes for WordPress using below settings.
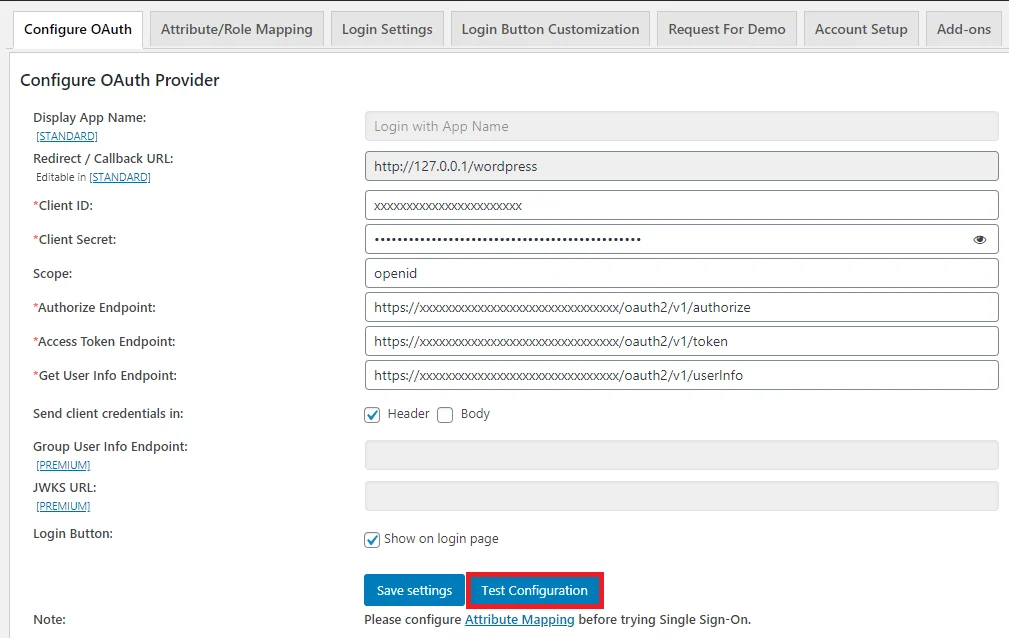
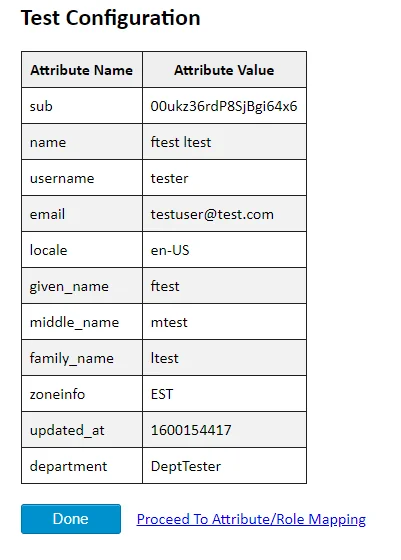
- Go to Configure OAuth tab. Scroll down and click on Test Configuration.
- You will see all the values returned by your OAuth Provider to WordPress in a table. If you don't see value for First Name, Last Name, Email or Username, make the required settings in your OAuth Provider to return this information.
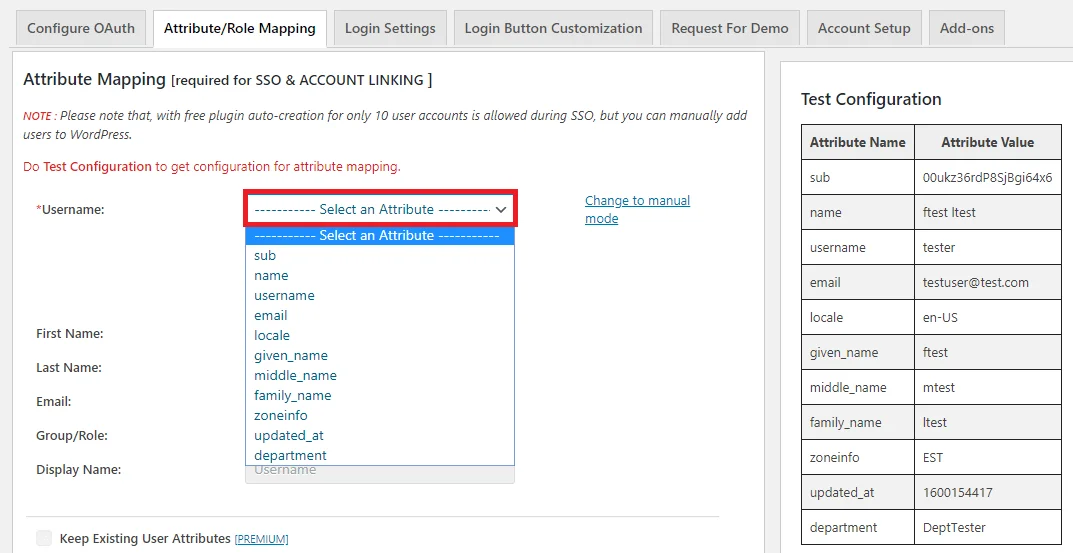
- Once you see all the values in Test Configuration, go to Attribute / Role Mapping tab, you will get the list of attributes in a Username dropdown.
Finding user attributes
4. Role Mapping [Premium]
- Click on “Test Configuration” and you will get the list of Attribute Names and Attribute Values that are sent by your OAuth provider.
- From the Test Configuration window, map the Attribute Names in the Attribute Mapping section of the plugin. Refer to the screenshot for more details.
- Enable Role Mapping: To enable Role Mapping, you need to map Group Name Attribute. Select the attribute name from the list of attributes which returns the roles from your provider application.
Eg: Role - Assign WordPress role to the Provider role: Based on your provider application, you can allocate the WordPress role to your provider roles. It can be a student, teacher, administrator or any other depending on your application. Add the provider roles under Group Attribute Value and assign the required WordPress role in front of it under WordPress Role.
For example, in the below image. Teacher has been assigned the role of Administrator & Student is assigned the role of Subscriber. - Once you save the mapping, the provider role will be assigned the WordPress administrator role after SSO.
Example: As per the given example, Users with role ‘teacher’ will be added as Administrator in WordPress and ‘student’ will be added as Subscriber.


5: Login Settings / Sign In Settings
- The settings in Single Sign-On (SSO) Settings tab define the user experience for Single Sign-On (SSO). To add a PayPal login widget on your WordPress page, you need to follow the below steps.
- Go to WordPress Left Panel > Appearances > Widgets.
- Select miniOrange OAuth. Drag and drop to your favourite location and save.
- Go to WordPress Left Panel > Appearances > Widgets.
- Select miniOrange OAuth. Drag and drop to your favourite location and save.
- Open your WordPress page and you can see the PayPal SSO login button there. You can test the PayPal Single Sign-On (SSO) now.
- Make sure the "Show on login page" option is enabled for your application. (Refer to the below image)
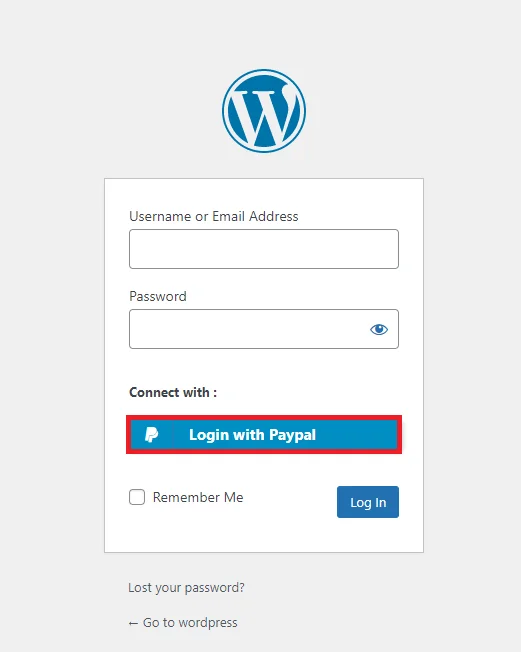
- Now, go to your WordPress Login page. (Eg. https://< your-wordpress-domain >/wp-login.php)
- You will see an PayPal SSO login button there. Once you click the login button, you will be able to test the PayPal Single Sign-On (SSO).


In this Guide, you have successfully configured PayPal Single Sign-On (SSO) by configuring PayPal as OAuth Provider and WordPress as OAuth Client using our WP OAuth Single Sign-On ( OAuth & OpenID Connect Client ) plugin. This solution ensures that you are ready to roll out secure access to your WordPress site using PayPal SSO login credentials within minutes.
Additional Resources
Mail us on oauthsupport@xecurify.com for quick guidance(via email/meeting) on your requirement and our team will help you to select the best suitable solution/plan as per your requirement.
Need Help? We are right here!
