What's New !!

Pricing Offers
We are happy to announce special offers for miniOrange Atlassian SSO, 2FA, REST API, User Sync and Group Sync Apps.
Contact Info
For any query, product related information or any help , contact us now. You can also raise a ticket with our support.

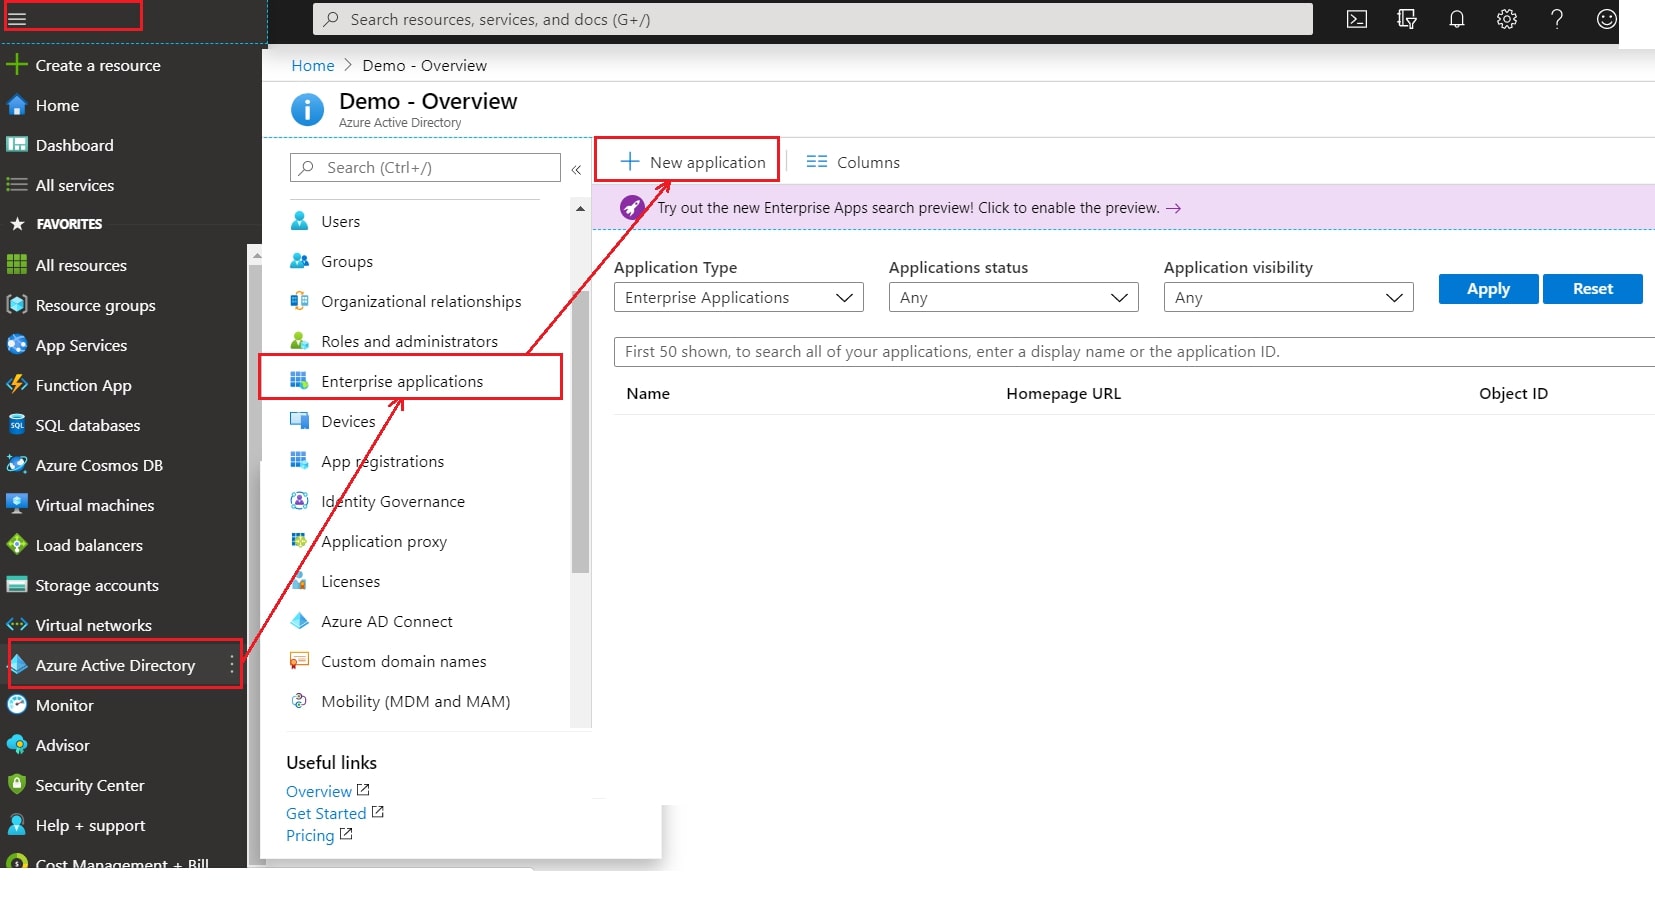
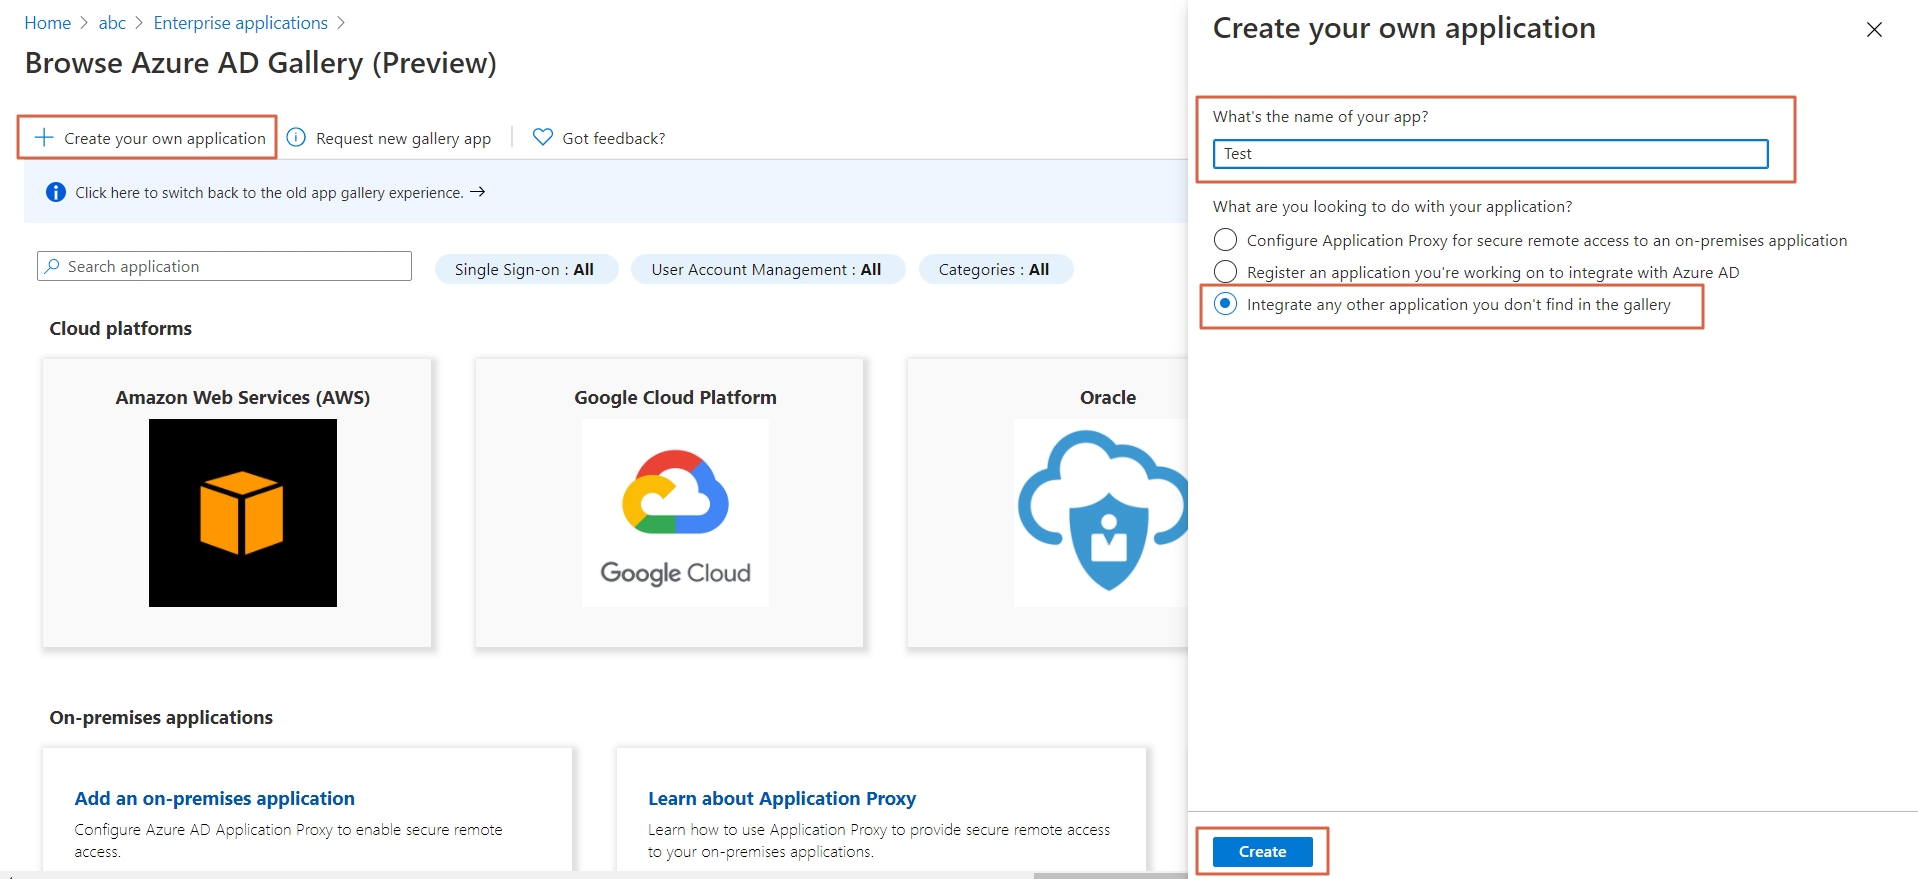
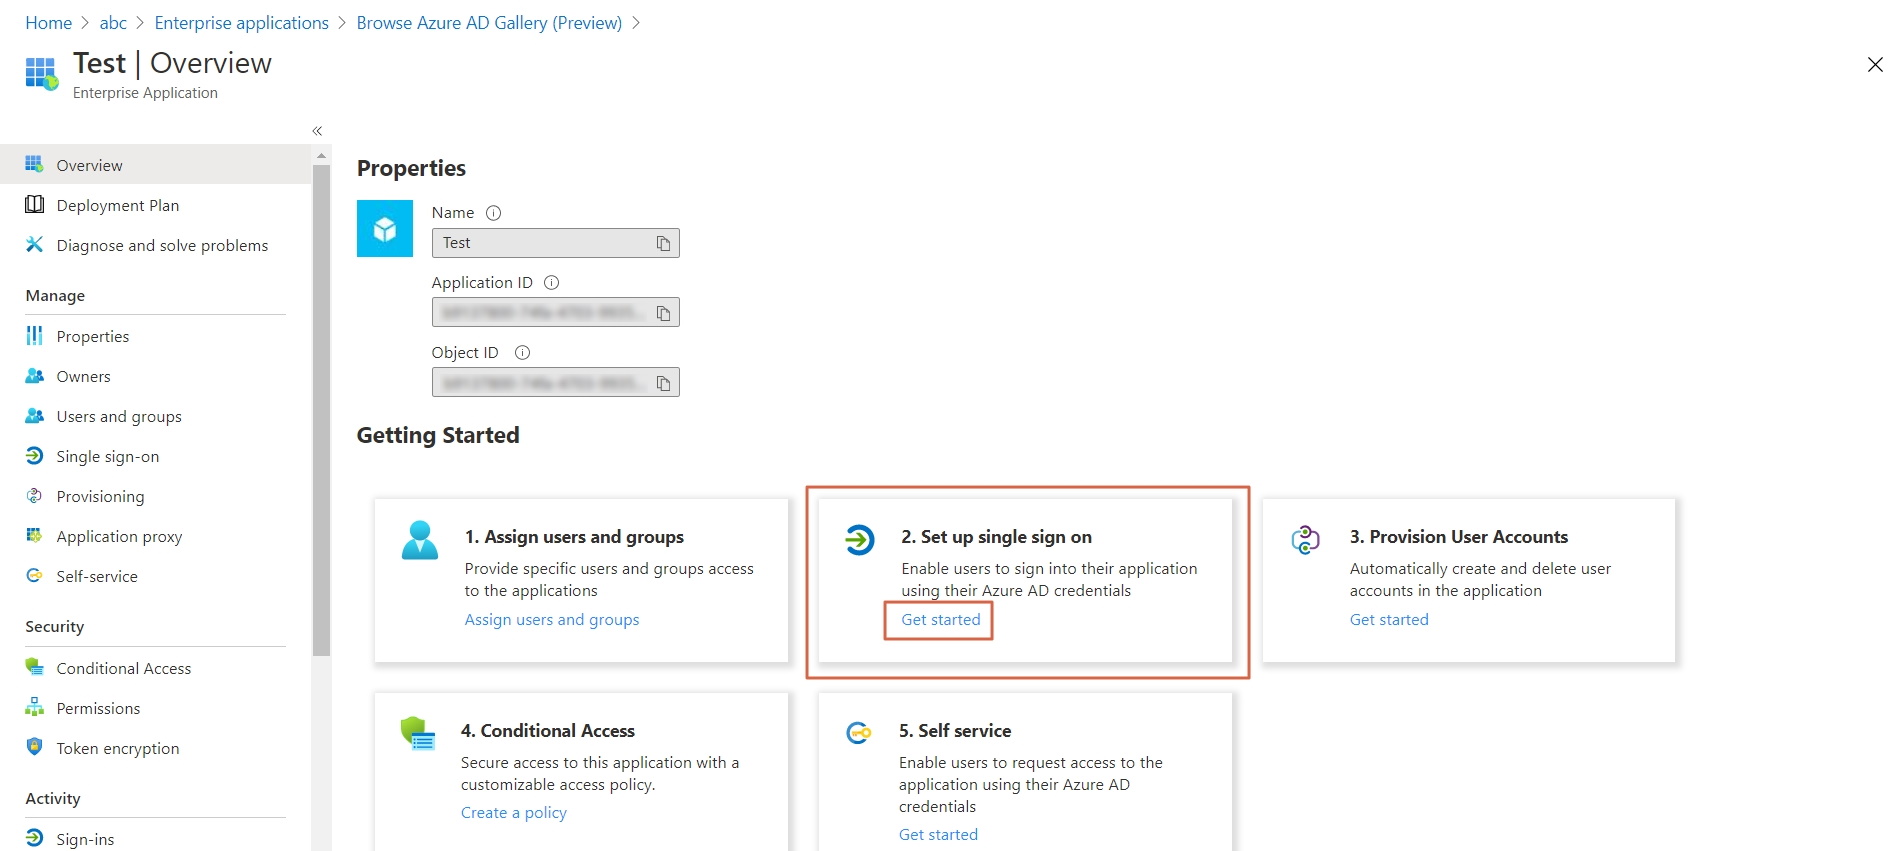
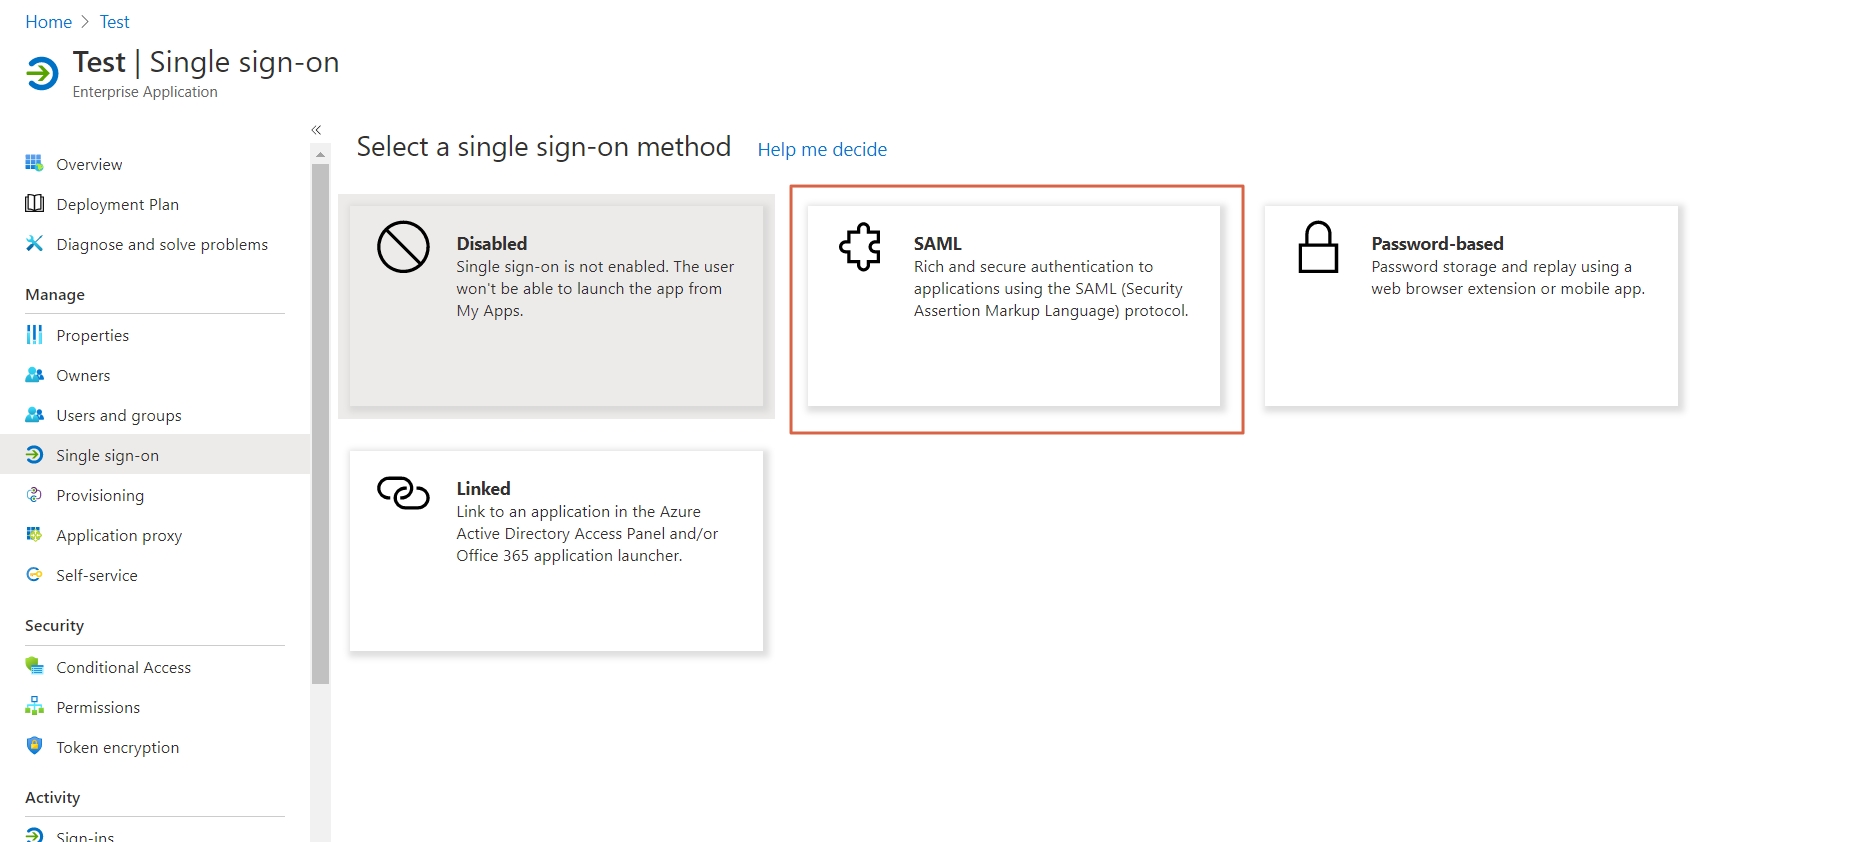
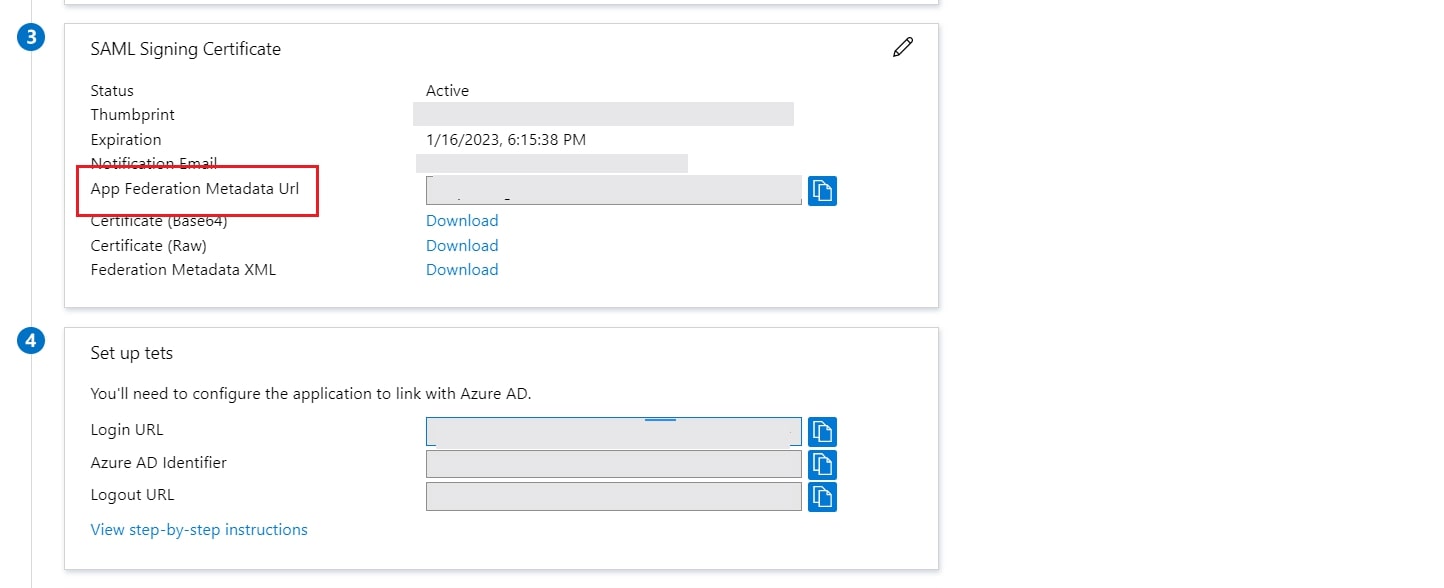
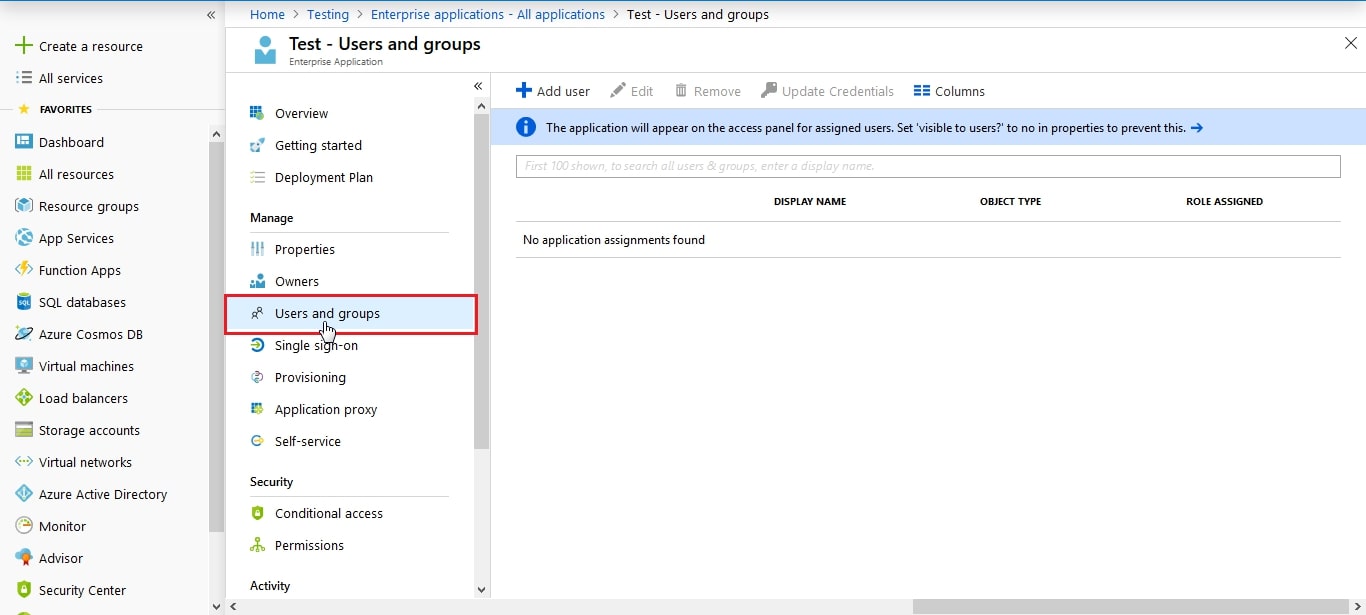
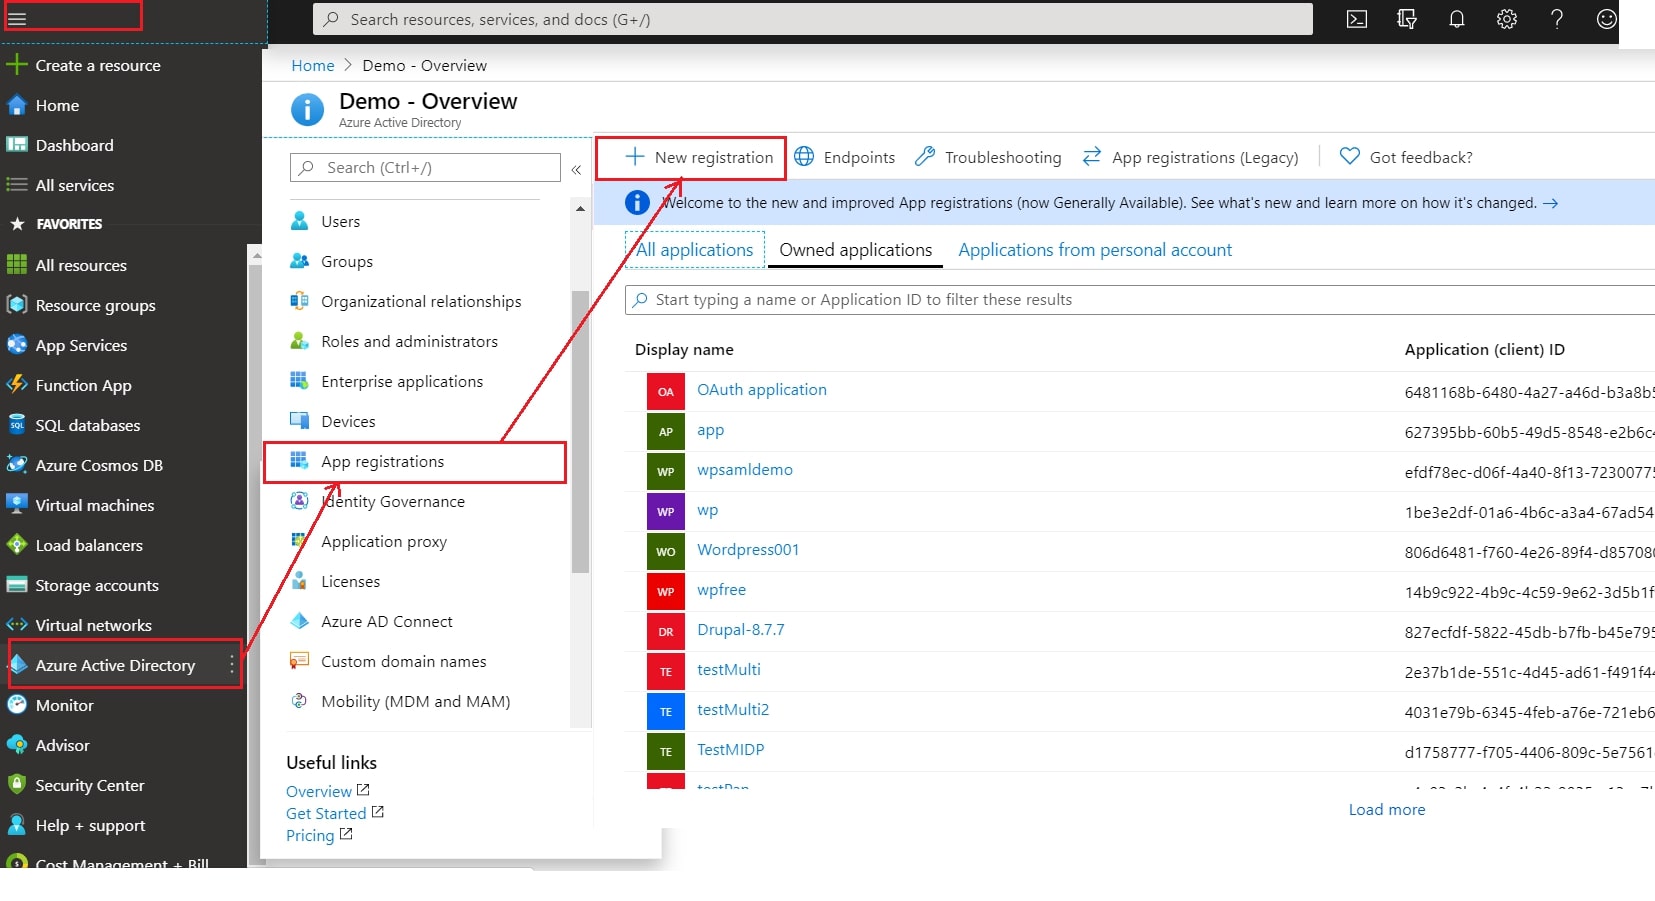
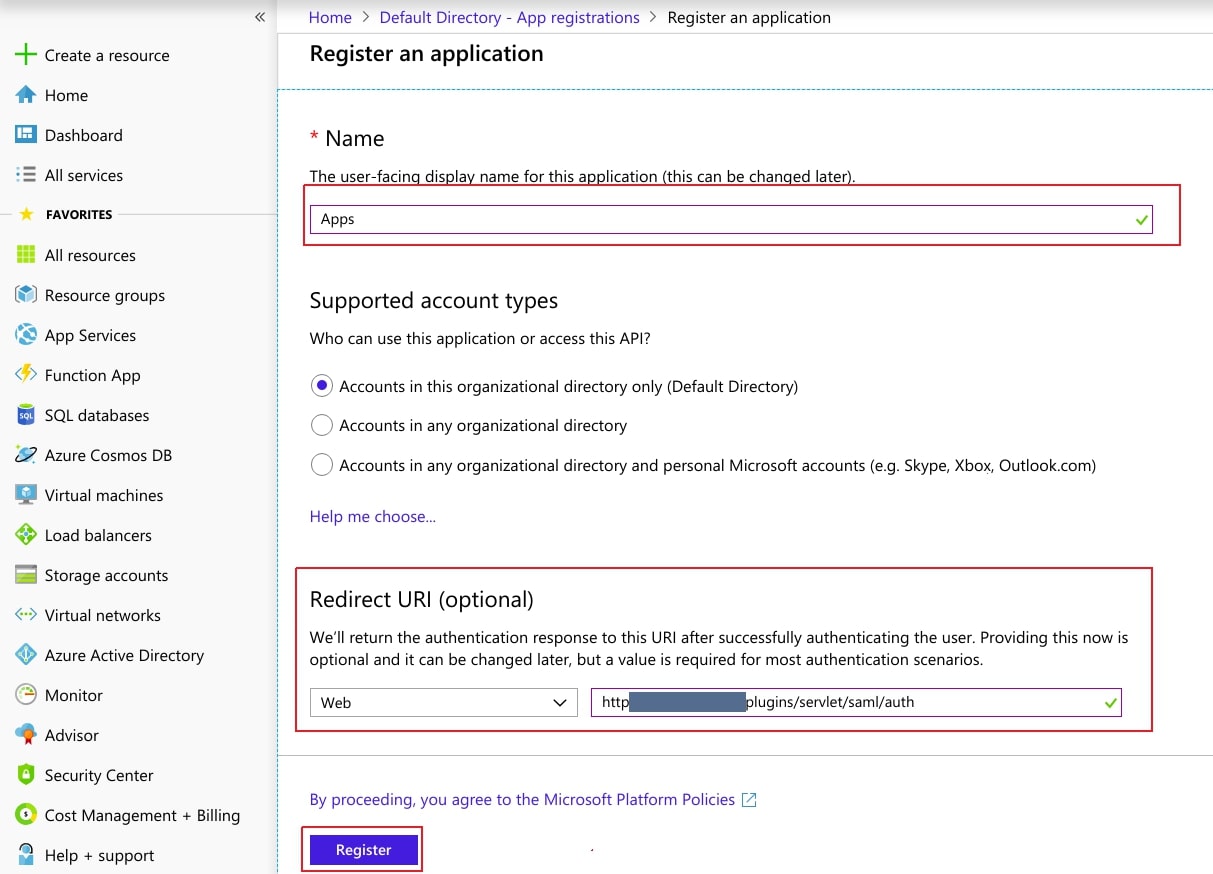
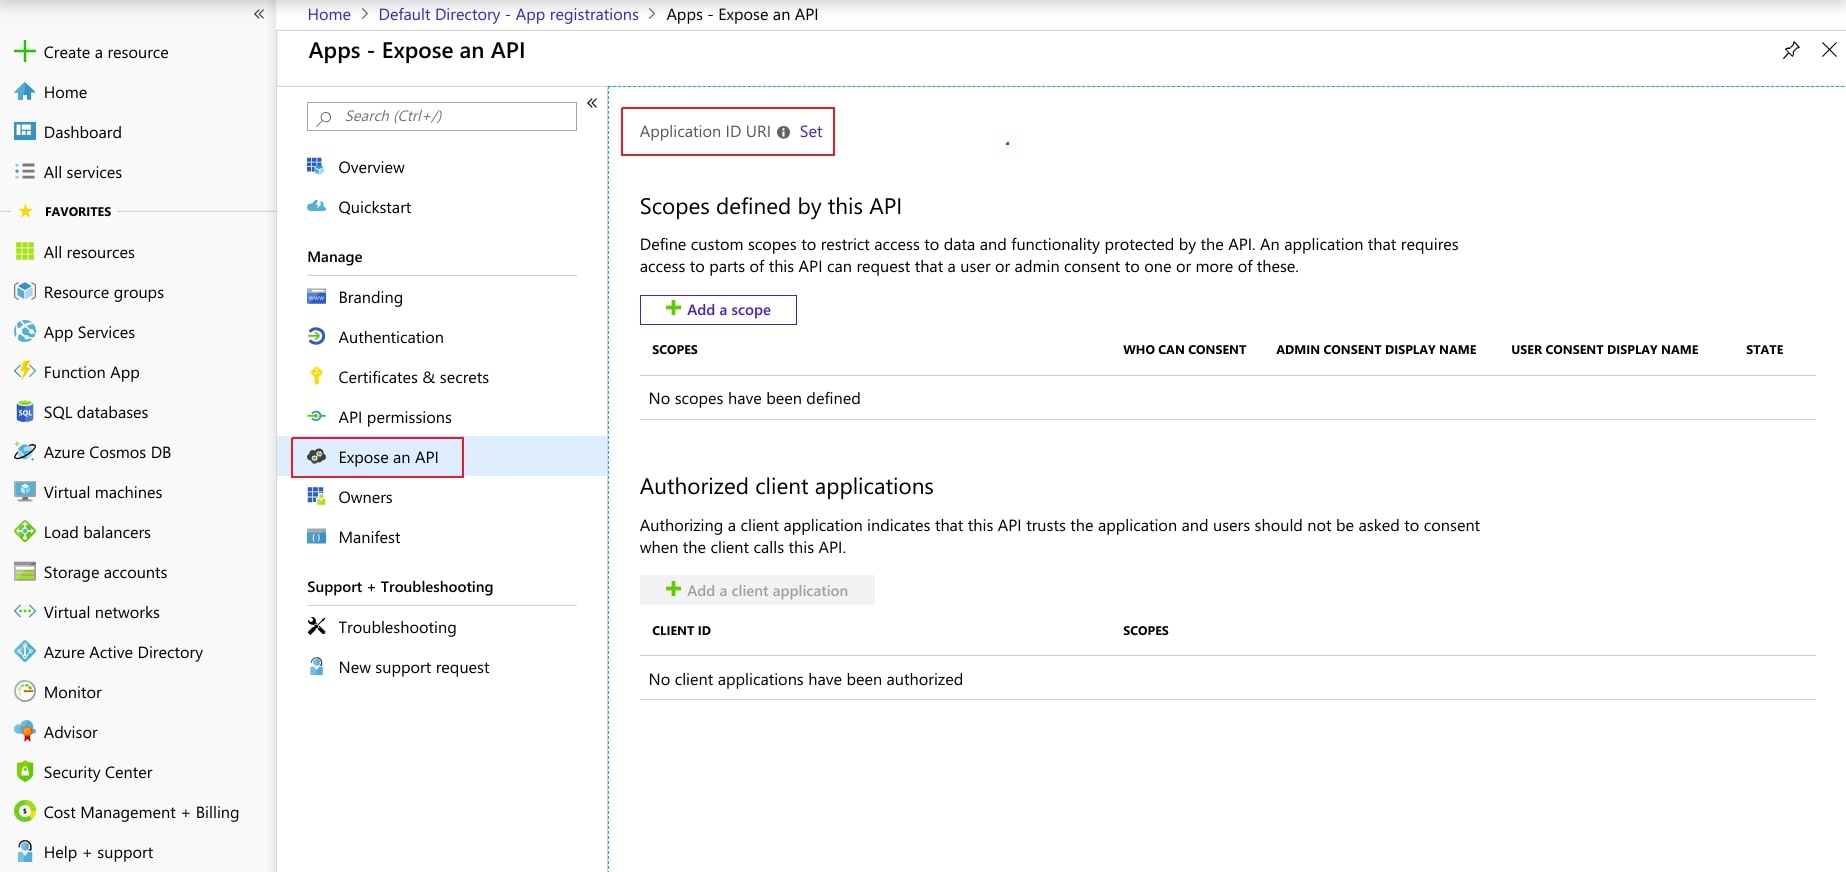
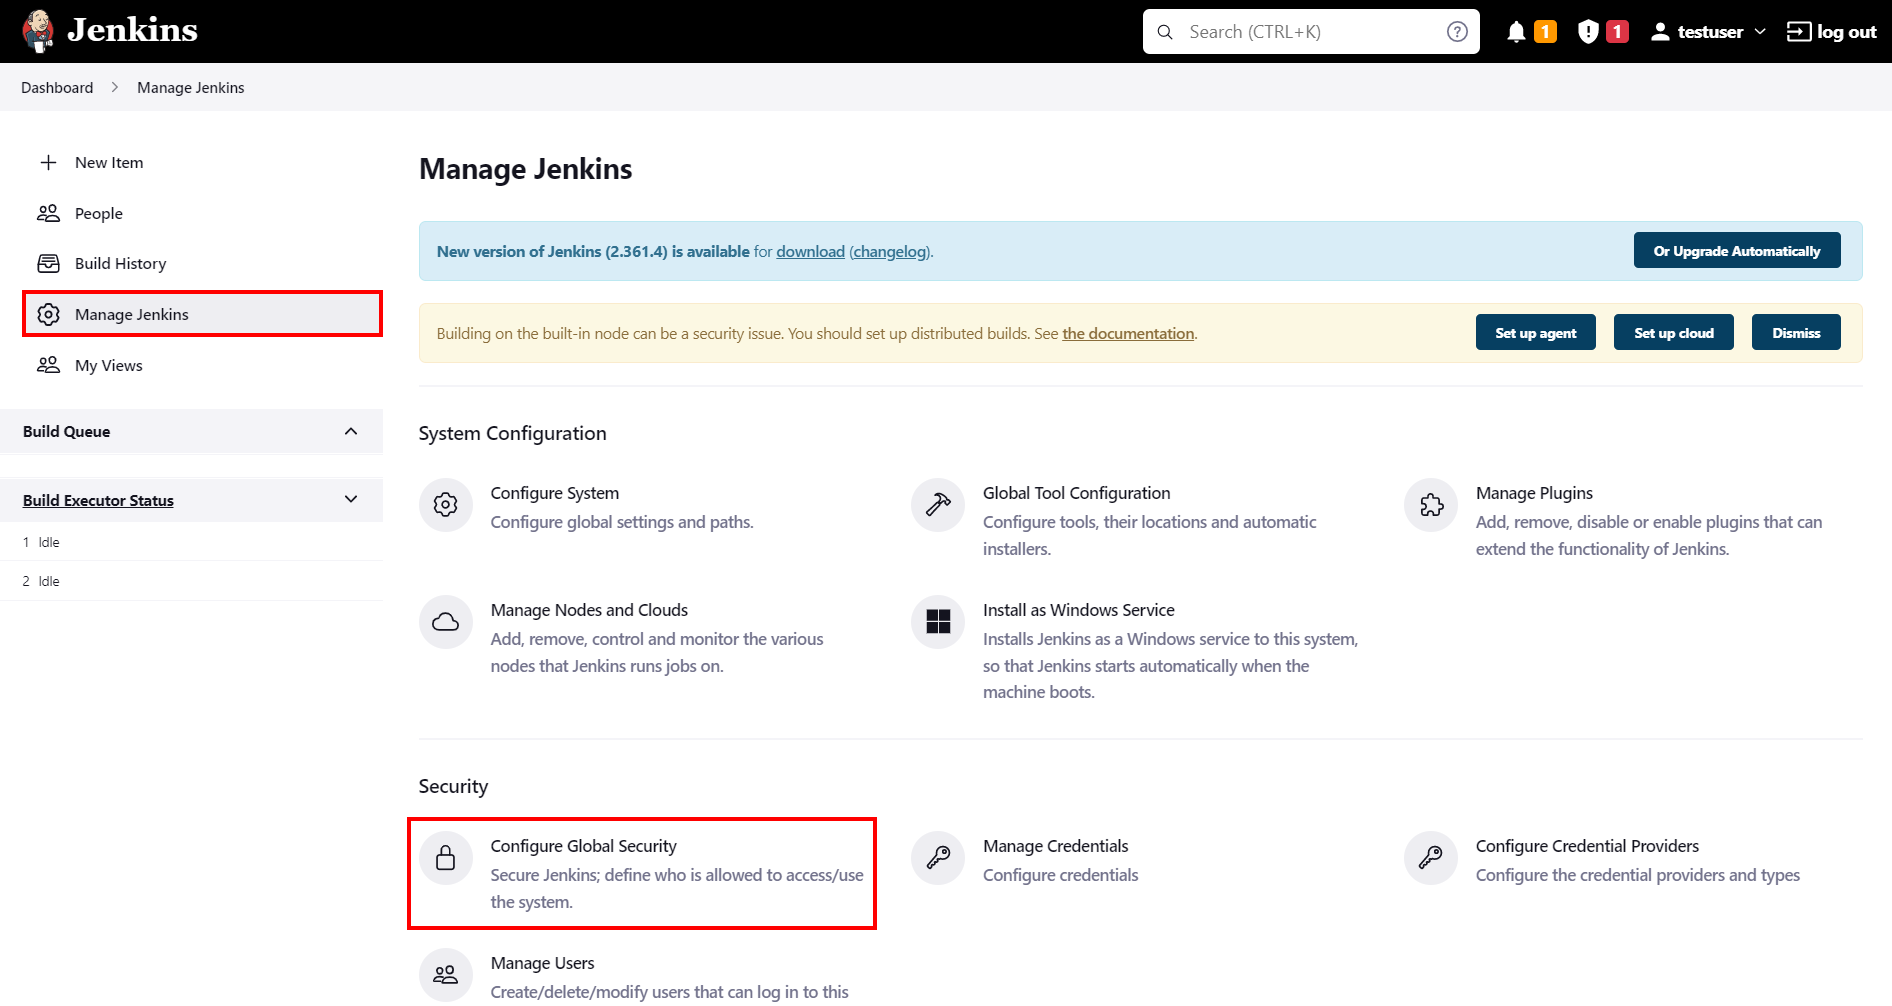
 Prerequisites:
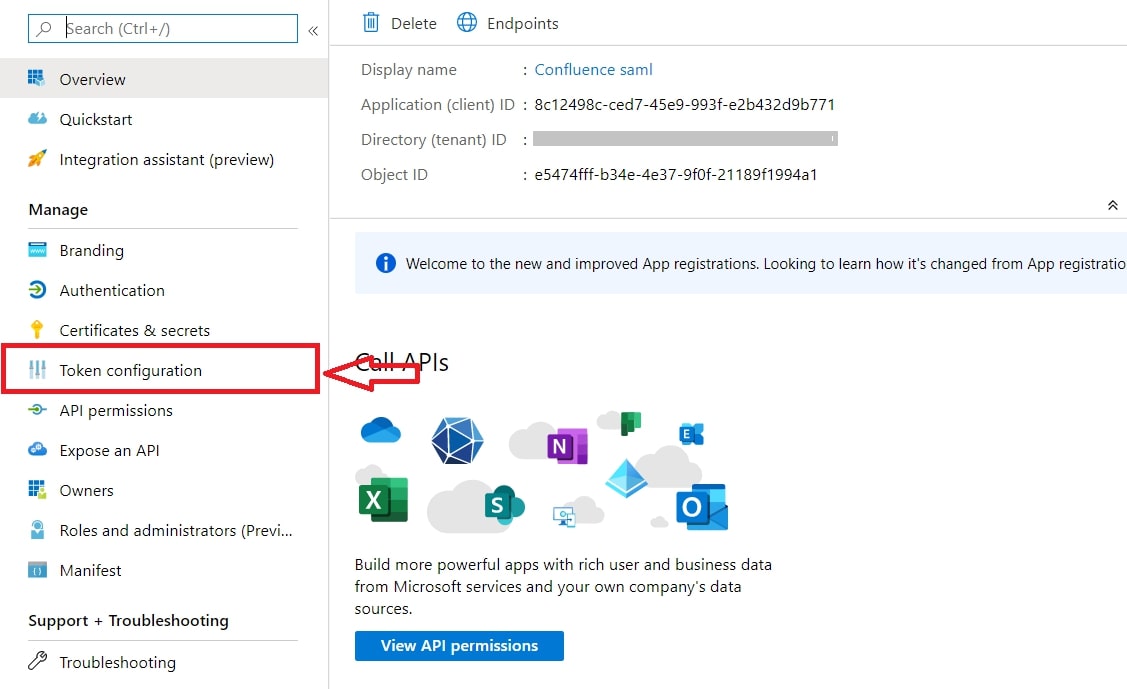
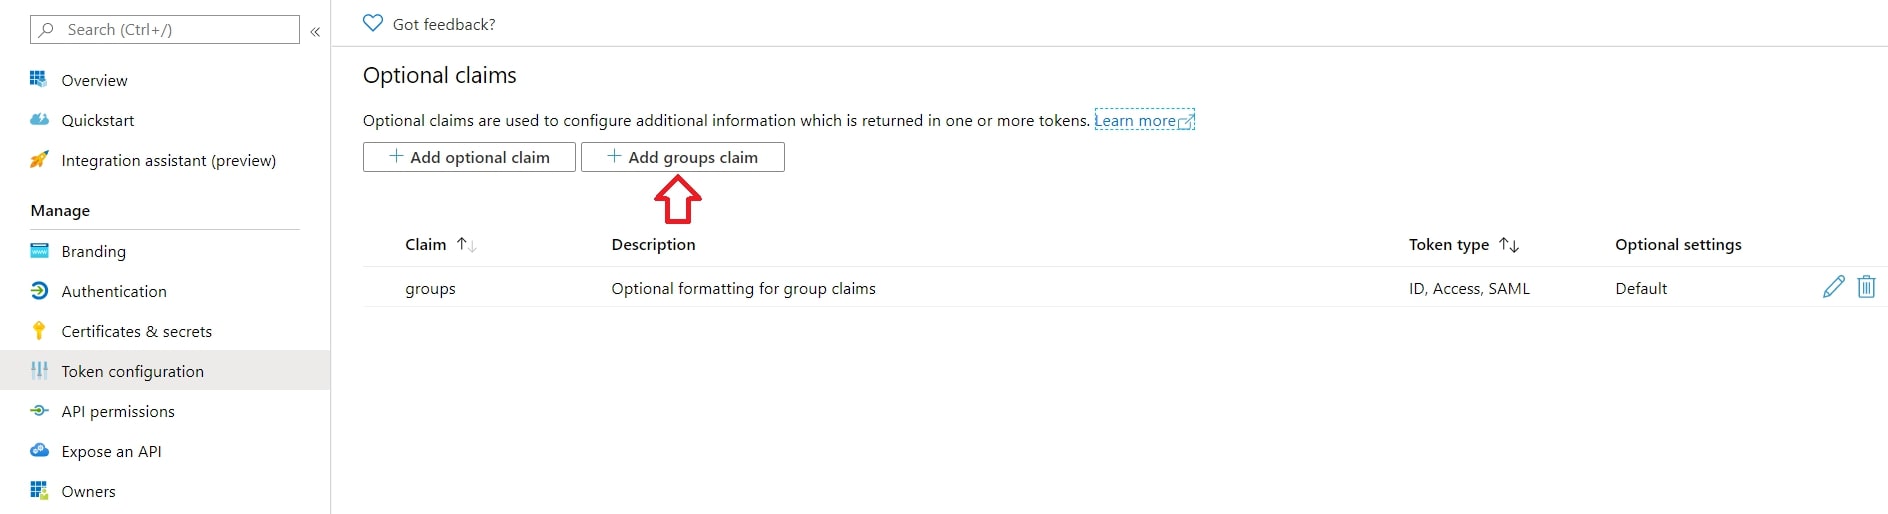