Contents
SAML Single Sign-On into AWS Cognito using Joomla IDP Plugin | AWS Cognito SSO
AWS Cognito (Amazon Web Services)
Login using Joomla Users ( Joomla as SAML IDP ) plugin gives you the ability to use your Joomla credentials to log into AWS Cognito (Amazon Web Services). Here we will go through a step-by-step guide to configure SSO between AWS Cognito as Service Provider and Joomla as an Identity Provider.
Pre-requisites : Download And Installation
- You may install the plugin by following these steps.
Steps for Integration of Joomla Single Sign-On (SSO) with AWS Cognito as Service Provider
1. Download Metadata XML file from IdP
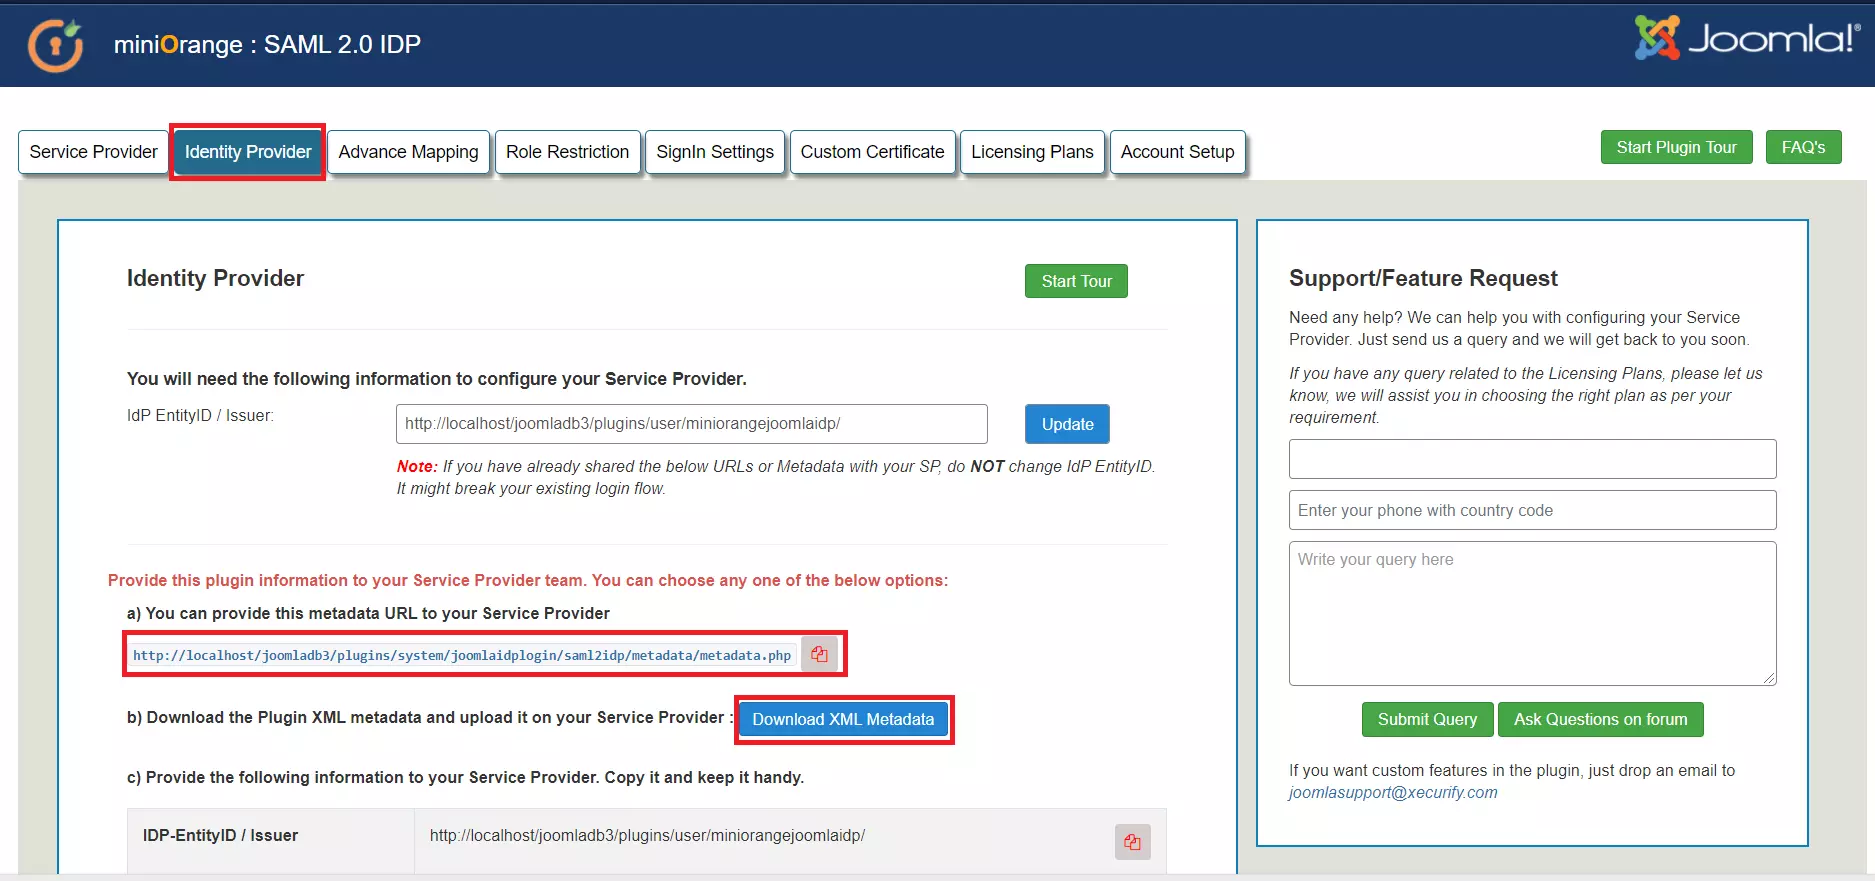
- Go to Identity Provider tab. Click on Download XML Metadata button. Keep this XML file to configure your SP.
2. Configure AWS Cognito as Service Provider
- First of all, go to AWS Cognito Console and sign up/login in your account to Configure AWS Cognito.
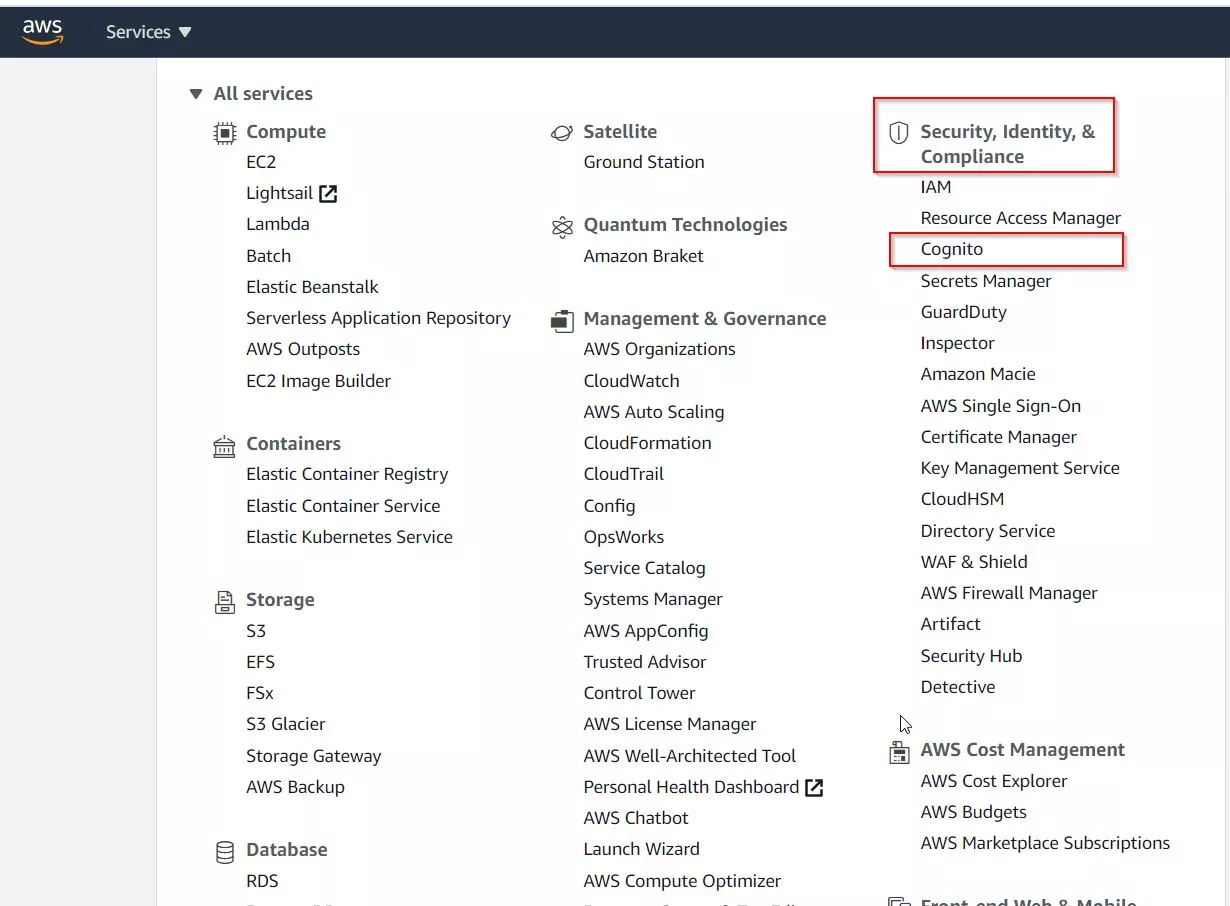
- Go to Services > Security, Identity, & Compliance > Cognito.
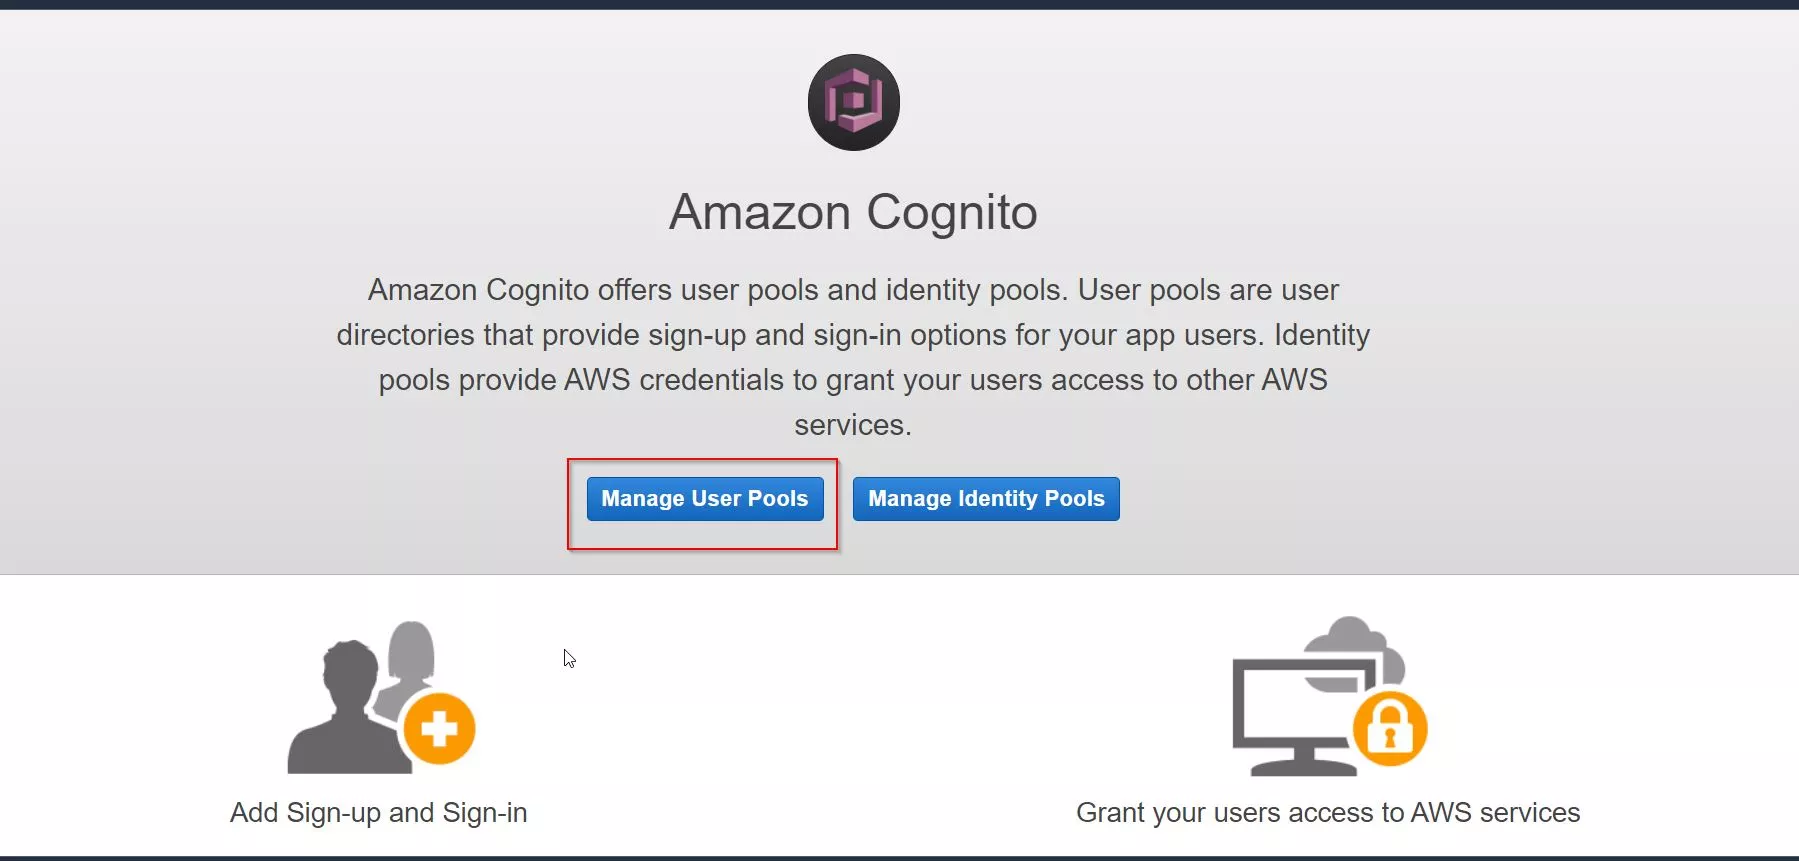
- Click Manage User Pools, then Create a user pool.
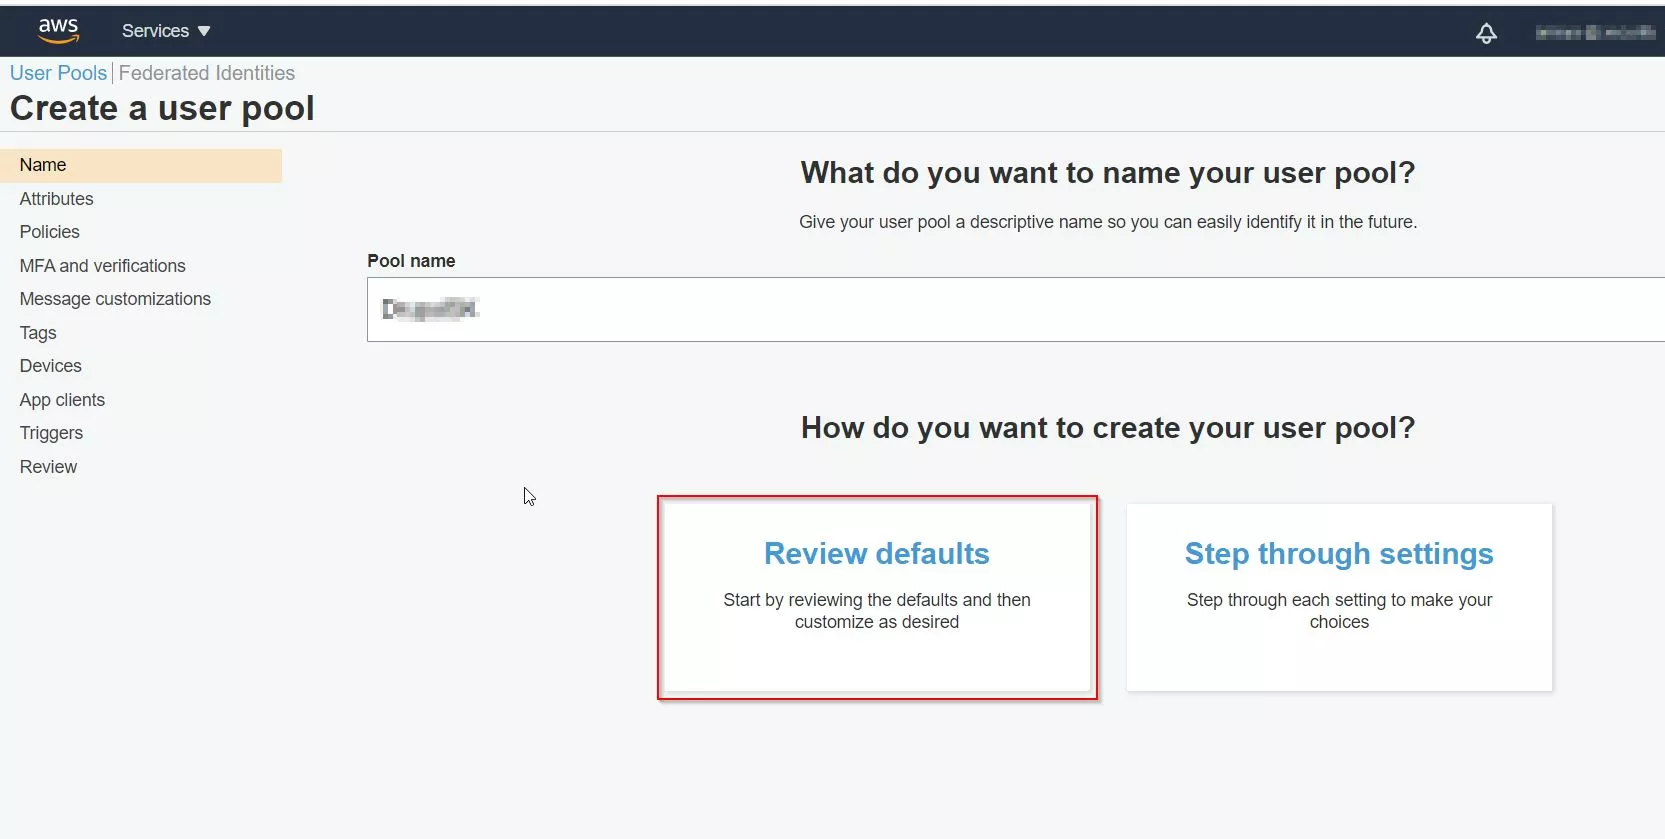
- Enter a name for the Pool Name. Click Review Defaults, then Create Pool .
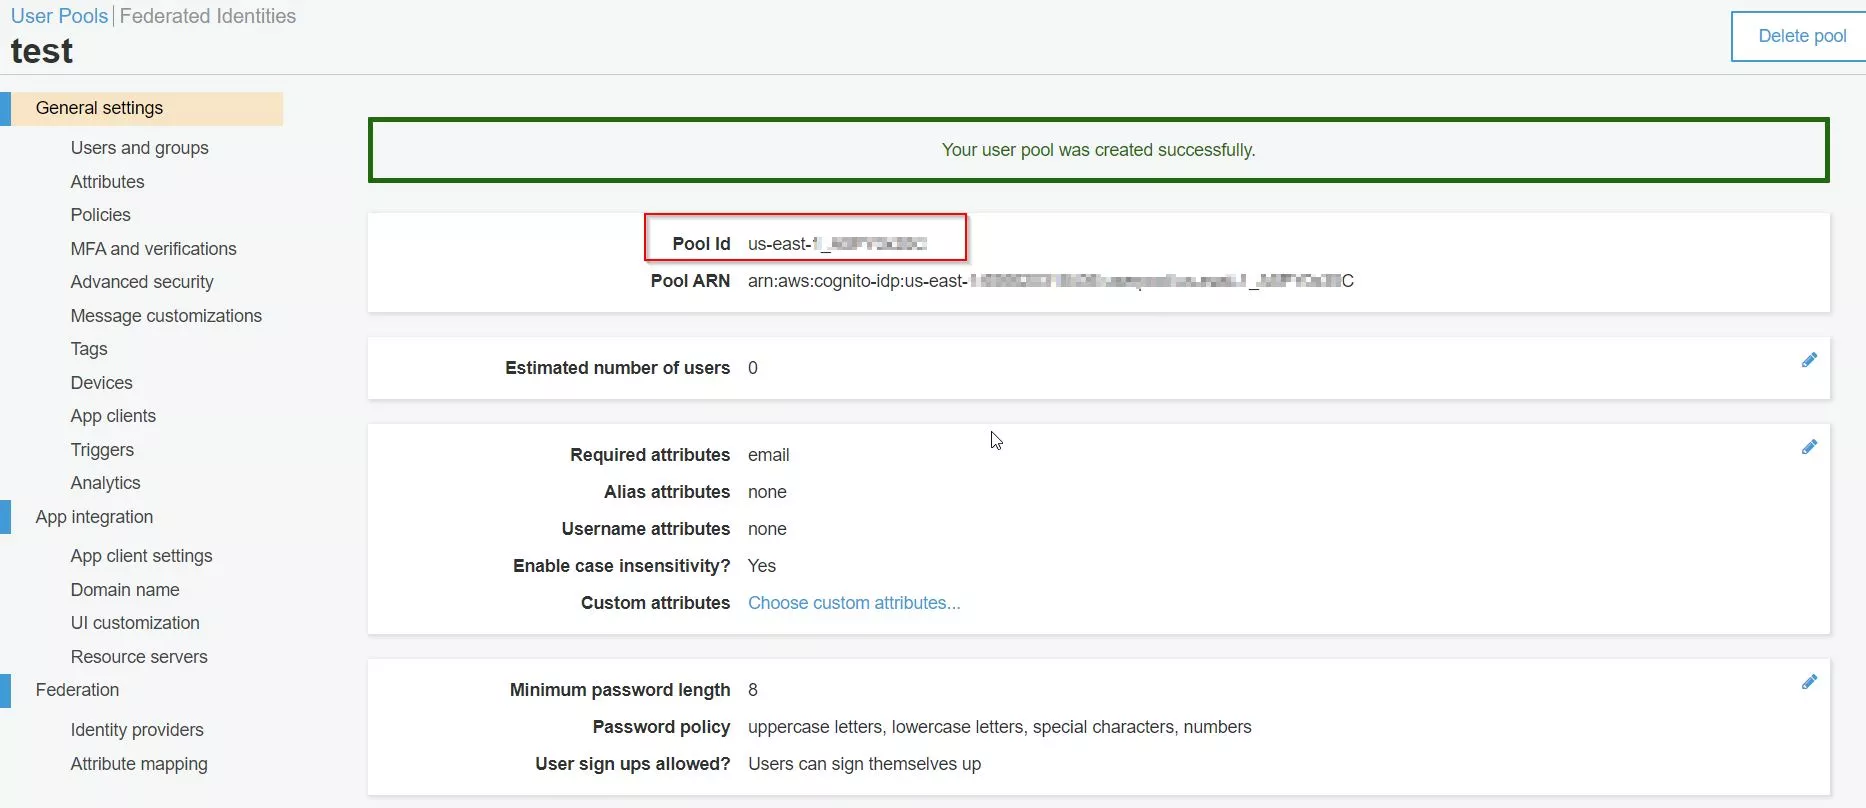
- After creating a pool keep the Pool ID handy or you can note down so that it will help to configure your IdP.
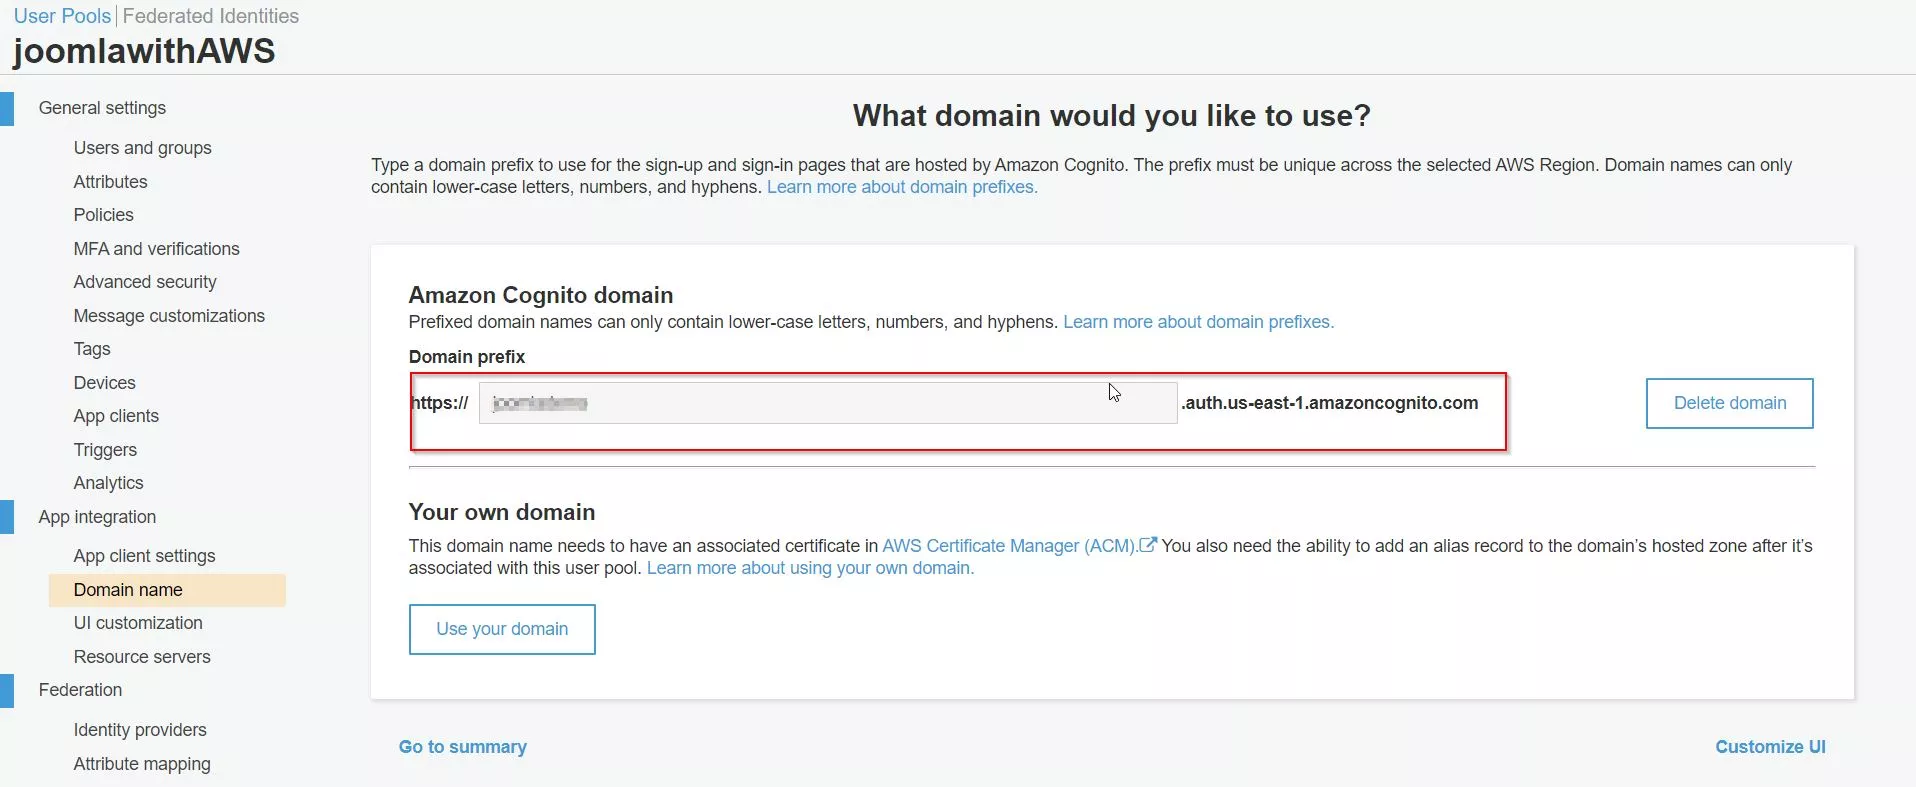
- On the left pane, click on Domain Name under App Integration. Enter an available domain prefix, then save it. Keep this Domain it will require in ACS URL to configure your IDP.
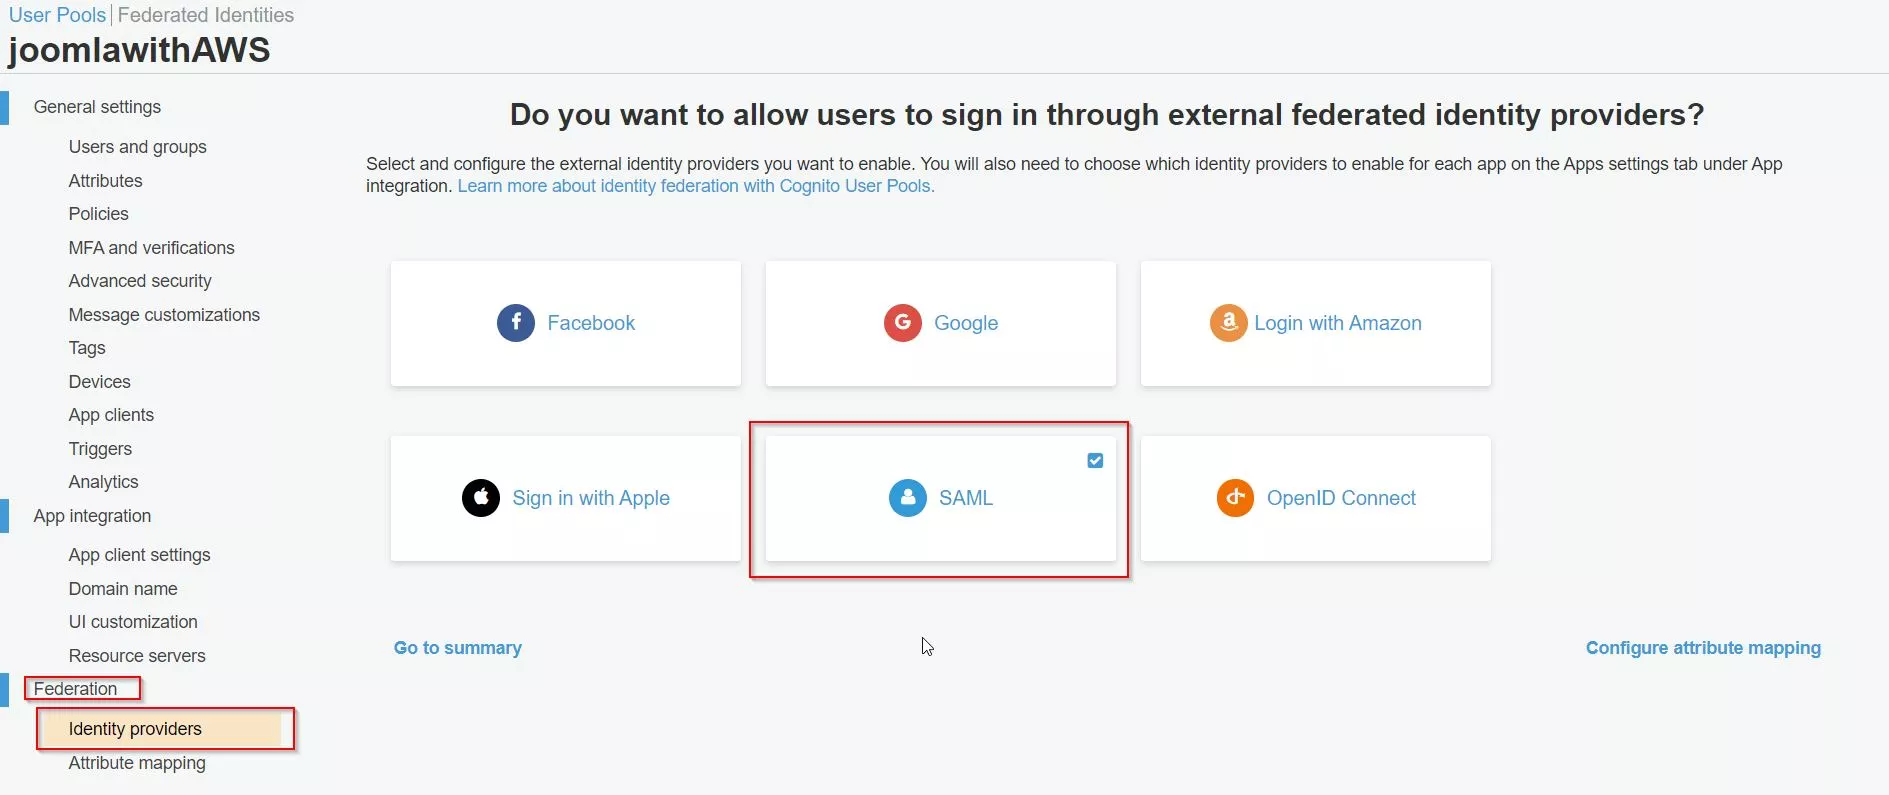
- On the left pane, click on Identity provider under Federation. Then Selct SAML
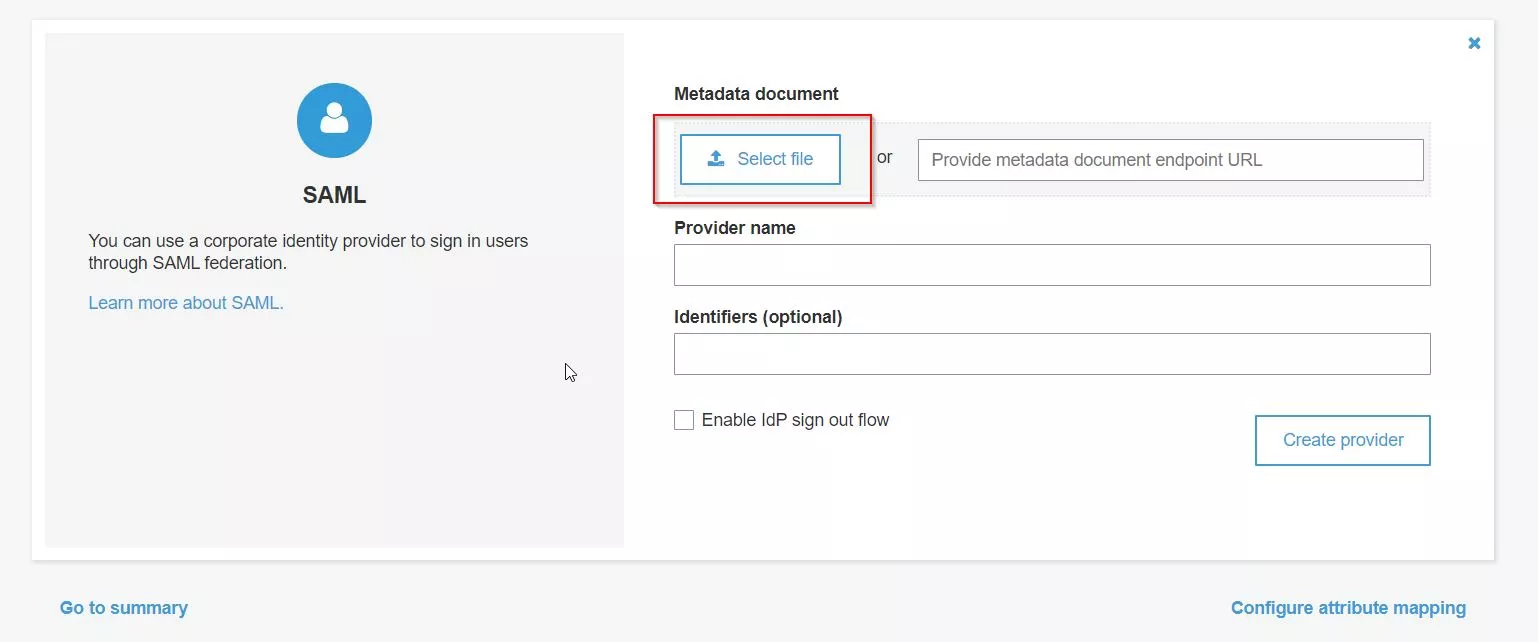
- Upload the downloaded in step-1 Joomla IDP metadata file, name it, then click Create Provider.
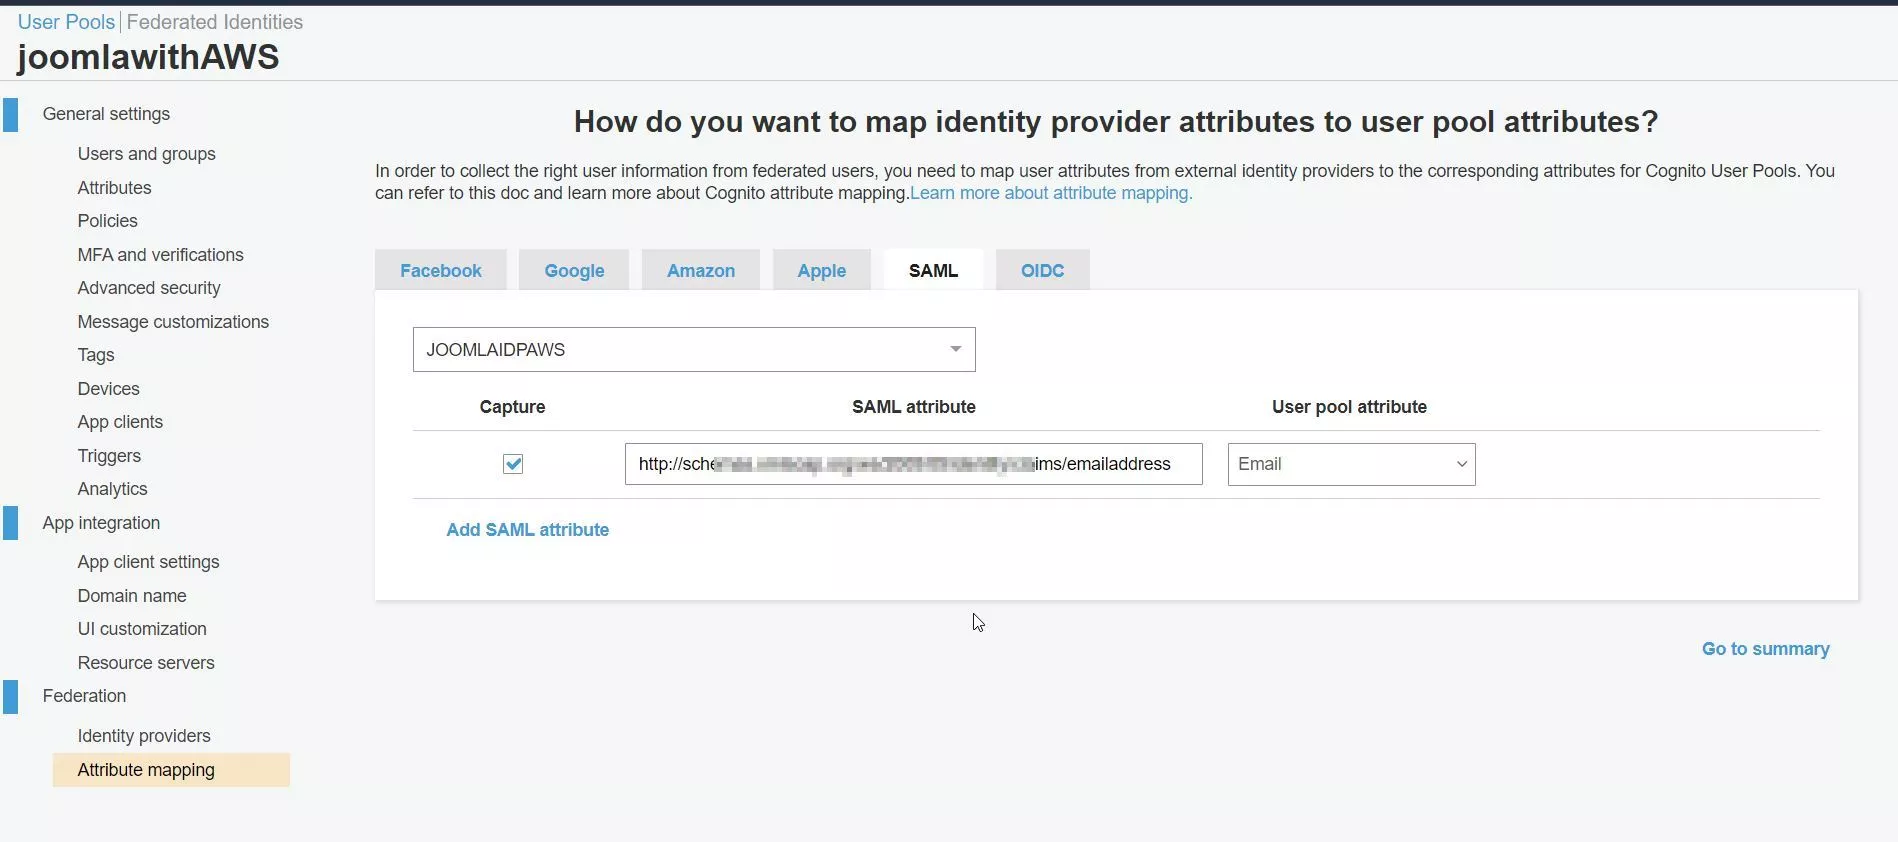
- Under Federation, select Attribute mapping .
- Add this
http://schemas.xmlsoap.org/ws/2005/05/identity/claims/emailaddress
attribute in SAML attribute text field and select User Pool Attribute as Email. - Click Save changes.

3. Configuring Joomla as Identity Provider (IDP)
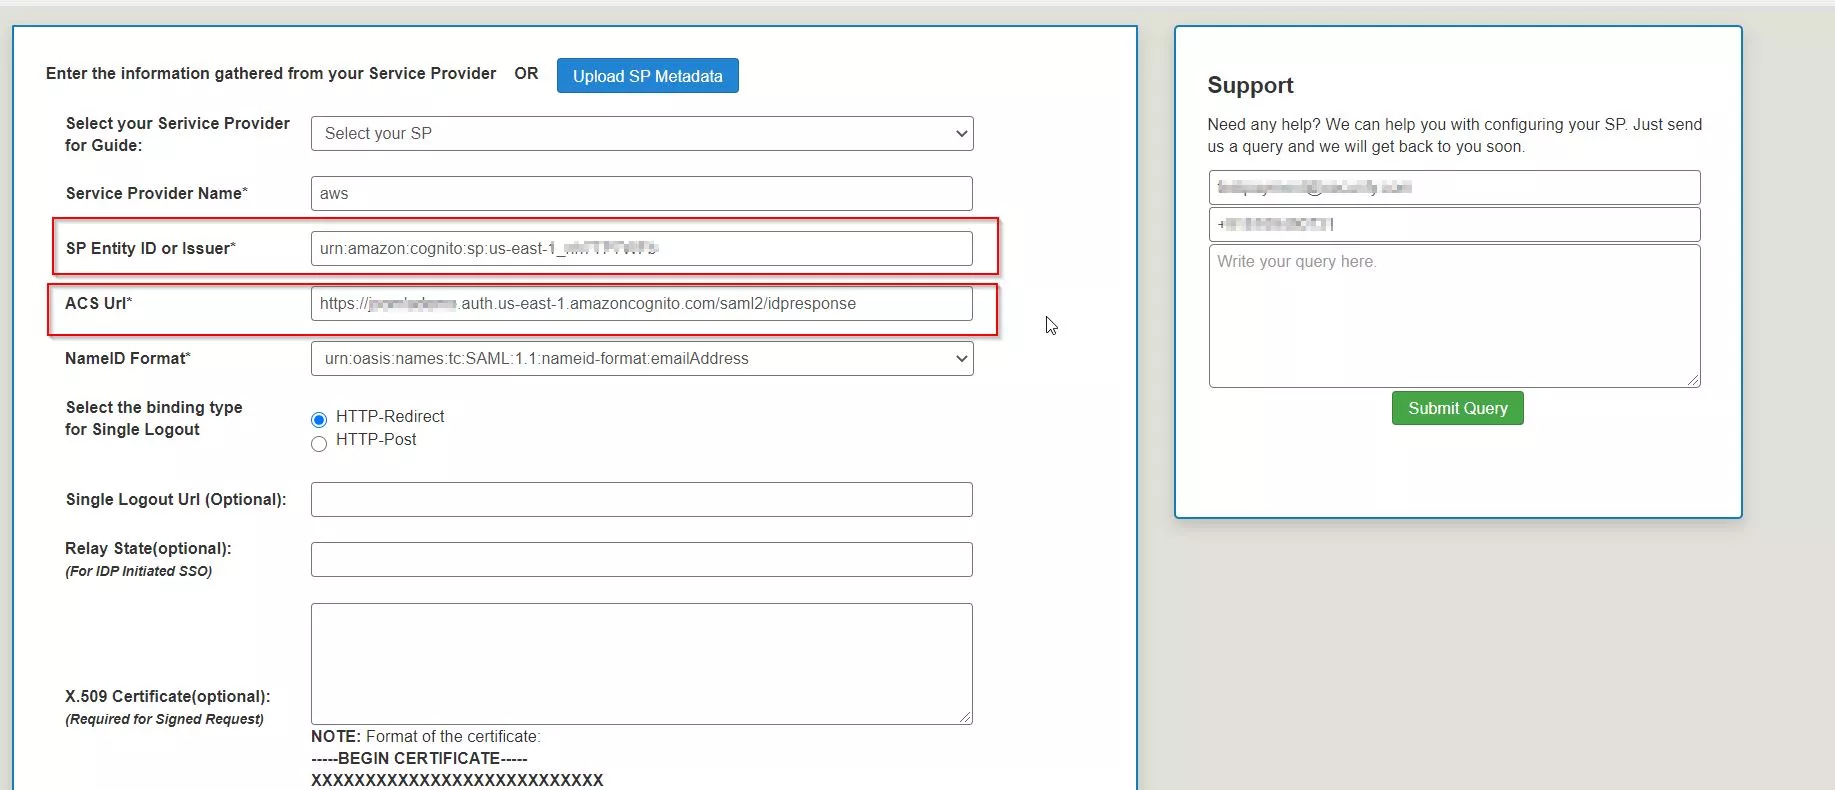
- In miniOrange Joomla SAML IDP Plugin, go to Service Provider tab.
- In the SP Entity ID field, enter urn:amazon:cognito:sp:(YourUserPoolId) , (remove anchor (< >) tag and add your user pool id which you have already copied above while creating the pool.
- Replace "yourUserPoolId" with your Amazon Cognito user pool ID.
- To find the User Pool ID:
- Log in to the AWS Management Console as an administrator.
- Go to Services > Security, Identity, & Compliance, then select Cognito.
- Select Manage User Pools, then the user pool you want to use in the configuration.
- Find Pool Id at the top of the list.
- In the ACS URL field, enter:
https://YourSubdomain.amazoncognito.com/saml2/idpresponse
and save it. - Please replace YourSubdomain with which you have created in the above step.
- You can also find your subdomain by following below steps:
To find YourSubdomain:
Click on Domain Name under App Integration
Copy the whole URL and replace it with YourSubdomain in the ACS URL (please remove all the whitespaces here). - Enable the Assertion Sign checkbox to sign the assertion and click on the Save button.
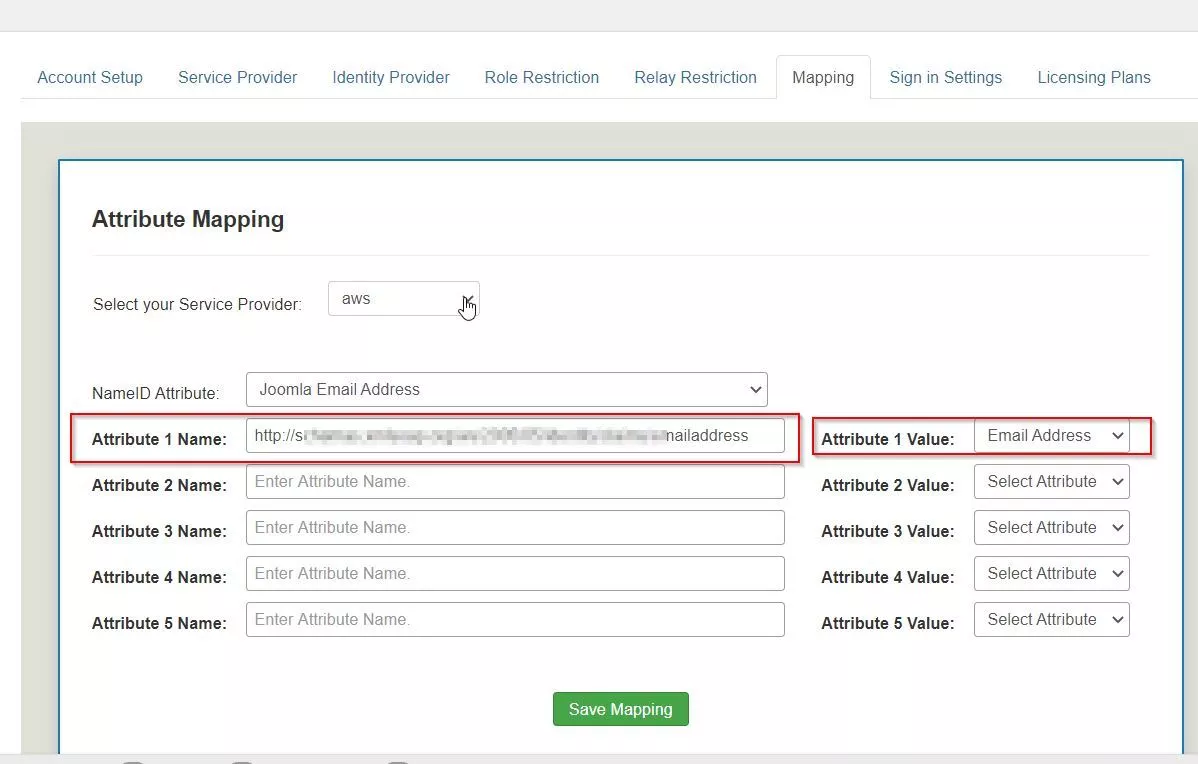
- To map the attributes click on the Mapping tab. Select your Service Provider from the dropdown.
Add thishttp://schemas.xmlsoap.org/ws/2005/05/identity/claims/emailaddress
value in Attribute Name textfield and Select Email Address form Attribute Value dropdown. Click on the Save Mapping button.

4. Configure App Client in AWS Cognito
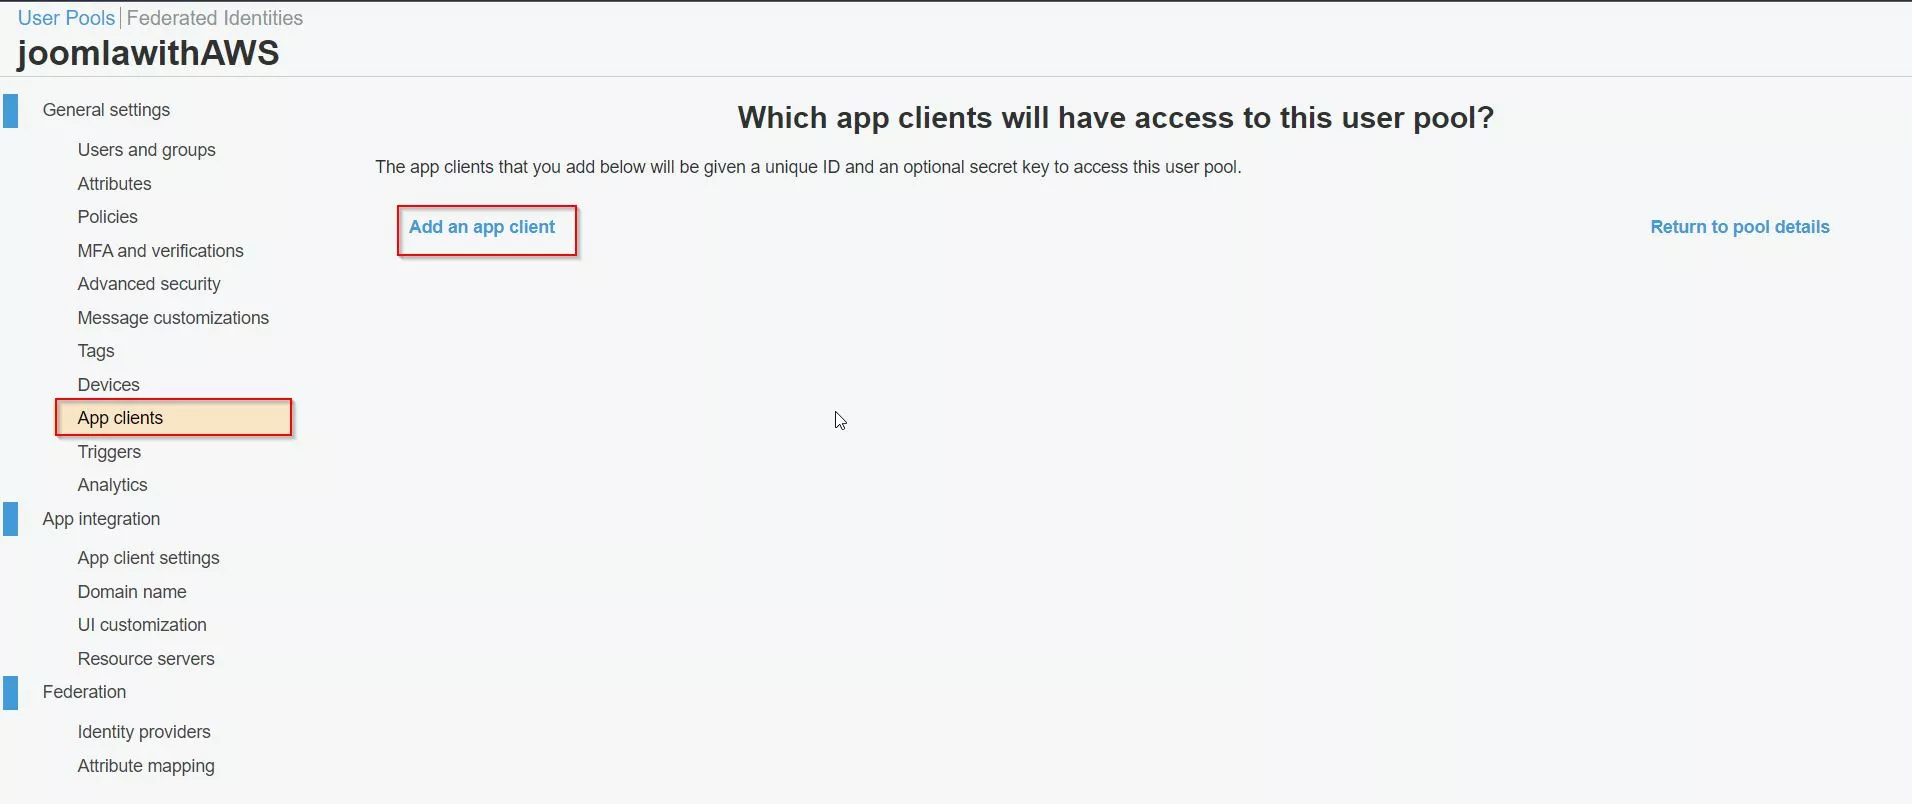
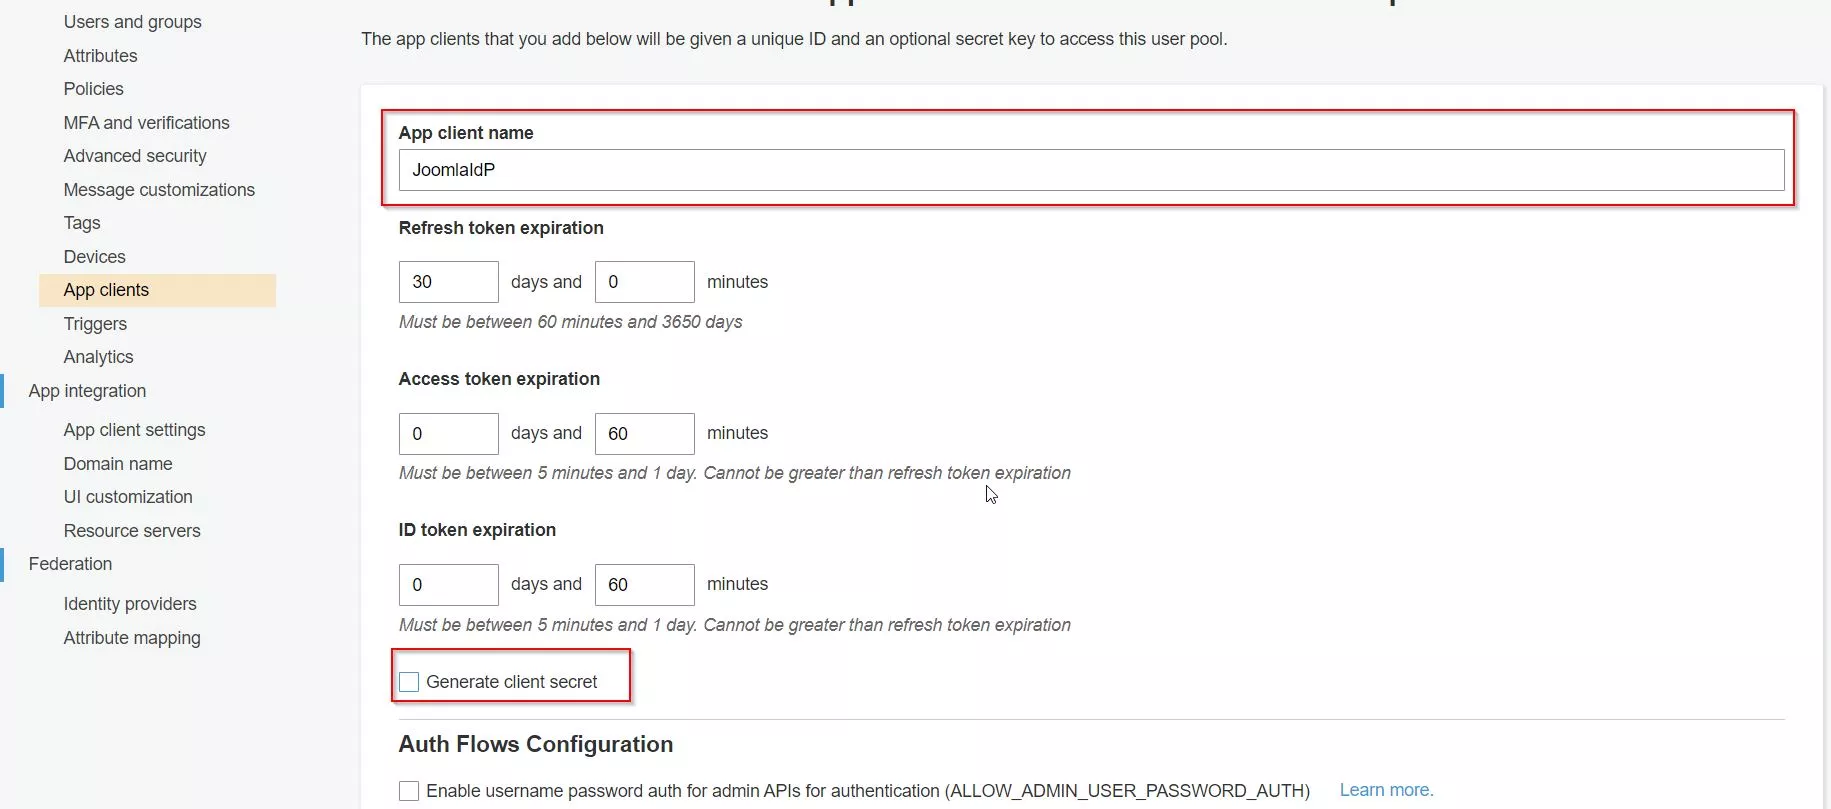
- Now click on the App Clients under General Settings. Click on Add an App Client.
- Enter App client name. For eg. JoomlaIdP. Disable the Generate client secret checkbox and click on the Create App Client button at the bottom.
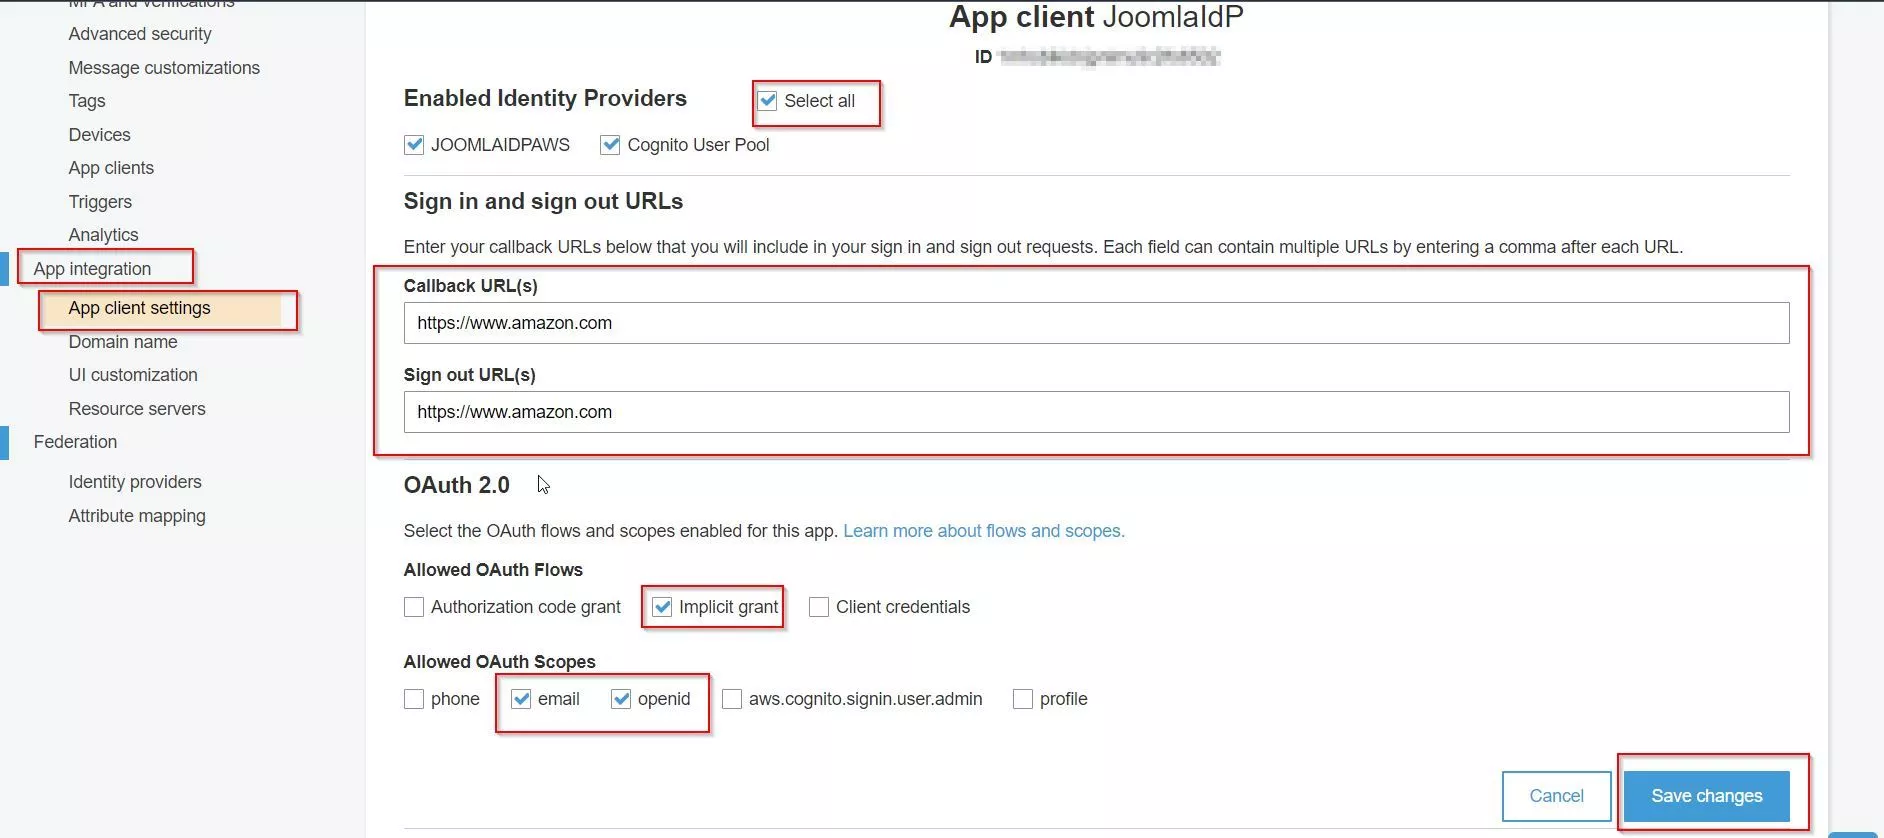
- Now click on the App Client settings under App Integration at the left pane.
- Enable Select all checkbox, enter Callback URL(s) and Sign out URL(s).
Select Implicit Grant under Allowed OAuth Flows.
Now Enable email and openid checkbox under Allowed OAuth Scopes and click on Save Changes button at the bottom right corner. - Now click on Launch Hosted UI at the bottom to perform SSO.
- You can also use the following SSO URL for perform the SSO.
https://(domain_prefix).auth.(region).amazoncognito.com/login?
response_type=token&client_id=(app client id)&redirect_uri=(your redirect URI) - Now you have successfully configured miniOrange Joomla SAML IDP with AWS Cognito as SP.

Additional Resources.
- What is Single Sign-On (SSO)
- What is SAML?
- Additional SAML IDP guides
- Frequently Asked Questions (FAQs)
Free Trial:
If you would like to test out the plugin to ensure your business use case is fulfilled, we do provide a 7-day trial. Please drop us an email at joomlasupport@xecurify.com requesting a trial. You can create an account with us using this link.24*7 Active Support
If you face any issues or if you have any questions, please feel free to reach out to us at joomlasupport@xecurify.com . In case you want some additional features to be included in the plugin, please get in touch with us, and we can get that custom-made for you. Also, If you want, we can also schedule an online meeting to help you Setup the Joomla SAML IDP Single Sign-On plugin.
Need Help? We are right here!

Thanks for your inquiry.
If you dont hear from us within 24 hours, please feel free to send a follow up email to info@xecurify.com
Cookie Preferences
Cookie Consent
This privacy statement applies to miniorange websites describing how we handle the personal information. When you visit any website, it may store or retrieve the information on your browser, mostly in the form of the cookies. This information might be about you, your preferences or your device and is mostly used to make the site work as you expect it to. The information does not directly identify you, but it can give you a more personalized web experience. Click on the category headings to check how we handle the cookies. For the privacy statement of our solutions you can refer to the privacy policy.
Strictly Necessary Cookies
Always Active
Necessary cookies help make a website fully usable by enabling the basic functions like site navigation, logging in, filling forms, etc. The cookies used for the functionality do not store any personal identifiable information. However, some parts of the website will not work properly without the cookies.
Performance Cookies
Always Active
These cookies only collect aggregated information about the traffic of the website including - visitors, sources, page clicks and views, etc. This allows us to know more about our most and least popular pages along with users' interaction on the actionable elements and hence letting us improve the performance of our website as well as our services.
