Meet us at WordCamp Europe | ShopTalk | DrupalCon Conferences to explore our solutions. Know More
Step By Step Guide for Atlassian CROWD Server Single Sign-On (SSO) using SAML
Step 1: Download and installation
- Stop Crowd Server.
- Put the plugin's jar file on plugins directory, sub-directory of your shared Crowd home directory (or the main Crowd directory in versions prior to Crowd 3.0).
- Restart the Crowd Server.
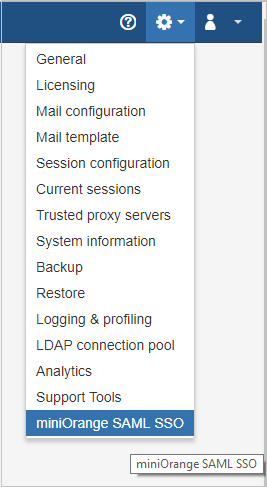
- Login to Crowd Admin Console.
- Click on the admin dropdown and click on miniOrange SAML SSO.
Step 2: Register/Login with miniOrange using addon
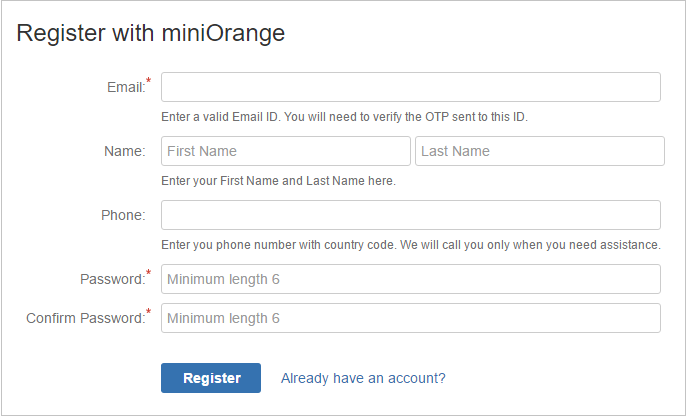
- Click on miniOrange SAML SSO in the admin dropdown.
- Register with miniOrange using a simple form in add-on.
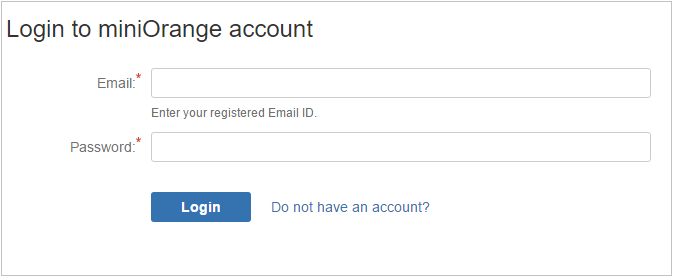
- If you are Already Registered with miniOrange, you can direclty login in to the plugin.
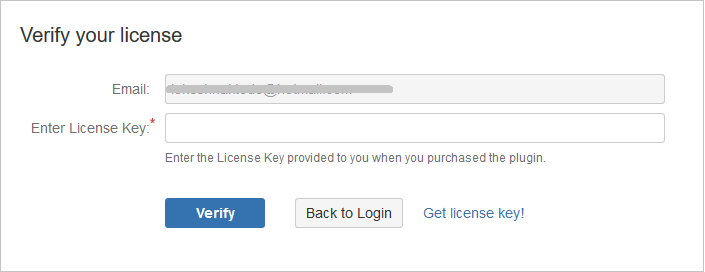
Step 3: Verify License Key
- Enter your license key and click on verify.
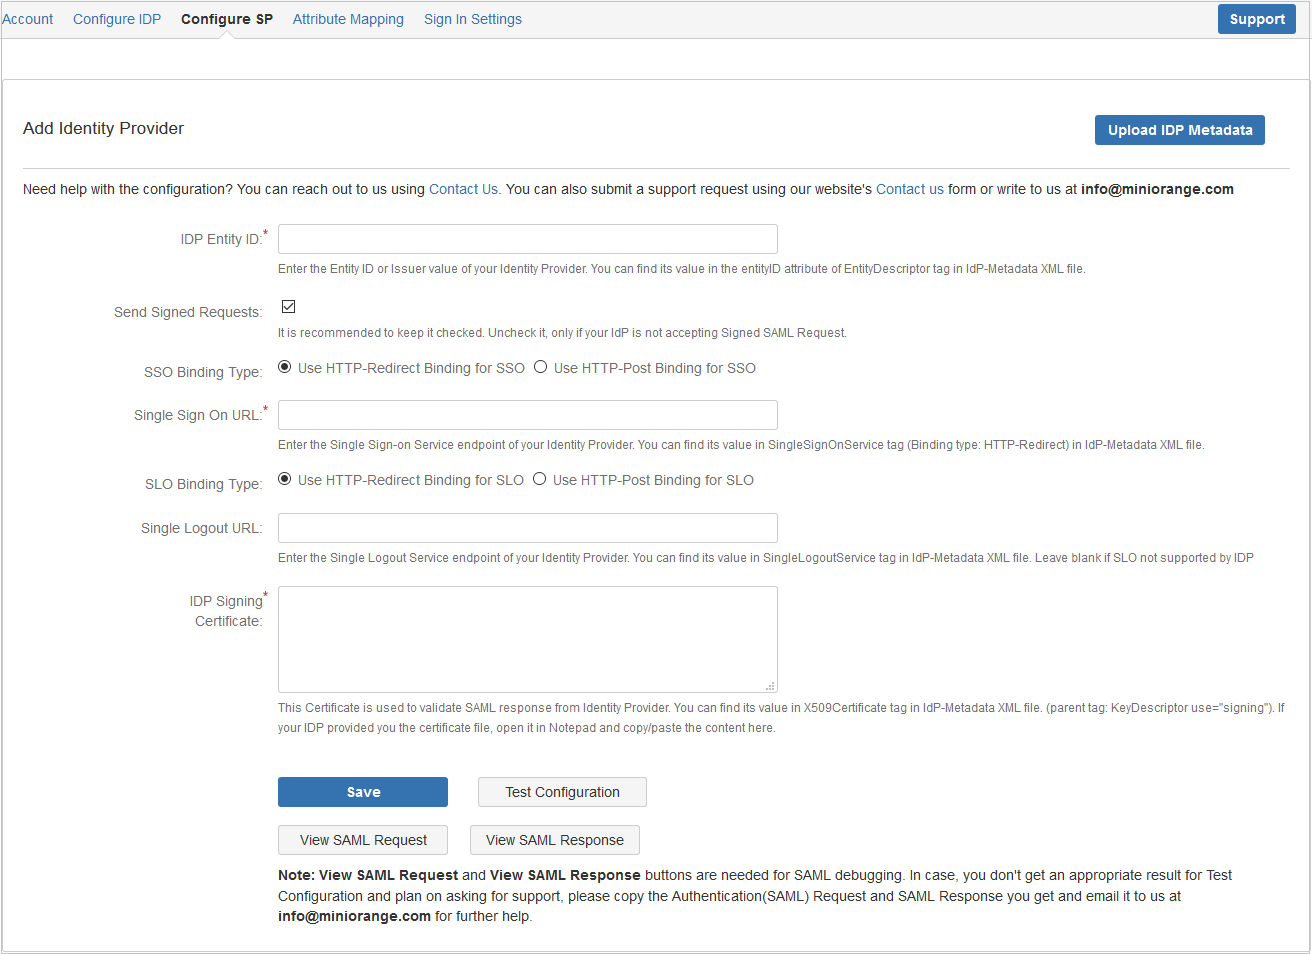
Step 4: Configuring the plugin
- Using IdP information user could add details in Configure SP.
- Provide the required settings (i.e. IdP Entity ID, IdP Single SignOn Service Url, X.509 certificate) in the plugin and save it OR upload metadata given by the IdP by provinding URL or XML file.
FOR EXAMPLE
| IdP Entity Id | https://auth.miniorange.com/moas |
| Single Sign On URL | https://auth.miniorange.com/moas/idp/samlsso |
| Single Logout URL | https://auth.miniorange.com/moas/idp/samllogout |
| Identity Provider Certificate | Upload the certificate downloaded from miniOrange Admin Console |
Step 5: Test Configuration
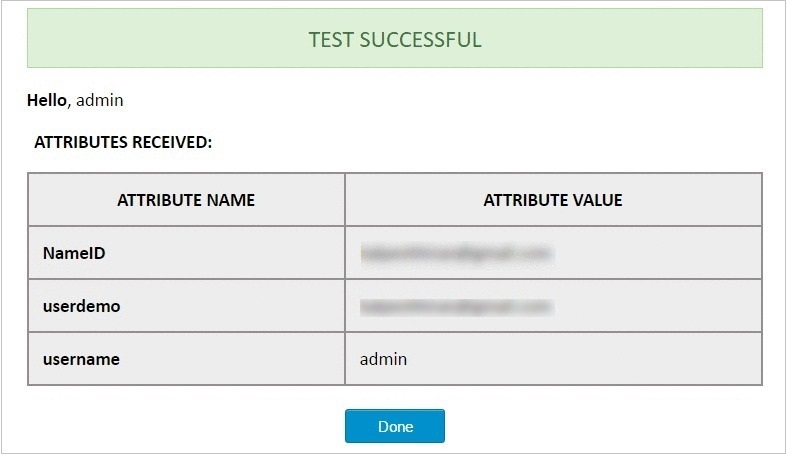
- Click on the Test Configuration button to perform SSO and fetch user attributes from IdP.
- The below screenshot shows successful test result.
- This screenshot shows the attributes that are received and are mapped by attribute mapping.
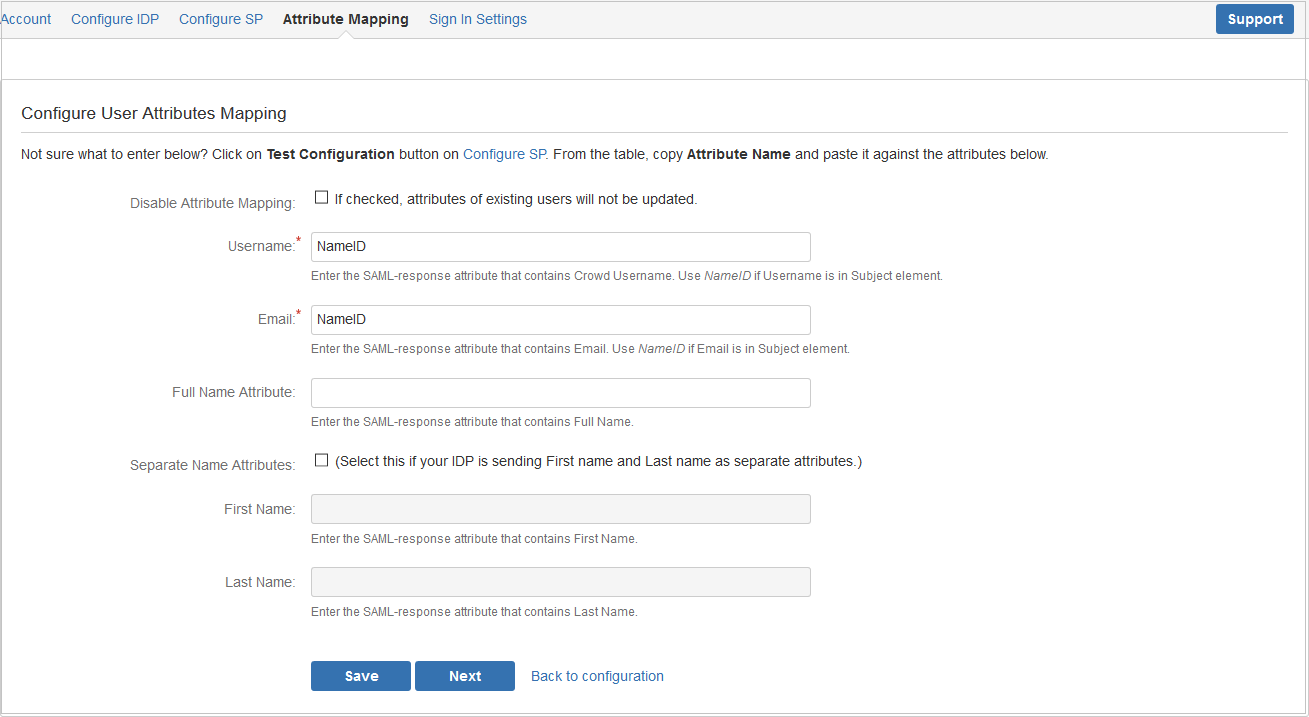
Step 6: Attribute Mapping
- Attribute Mapping helps you to get user attributes from your IdP and map them to Crowd user attributes.
- Please refer to attributes received in successful Test congiguration and use them for Attribute Mapping.
- In Attribute Mapping, Details like username and NameID as shown in step 4 of Test Successful are mapped to Username and Email respectively.
- Also Full Name or Separate Name (i.e First and Last Name) attributes are given as options according to Crowd user attributes.
- While auto registering the users, these attributes will automatically get mapped to your Crowd user details.
- Clicking Keep Existing User Attributes checkbox will disable attribute mapping for existing users. New users will be created with attribute mapping defined.
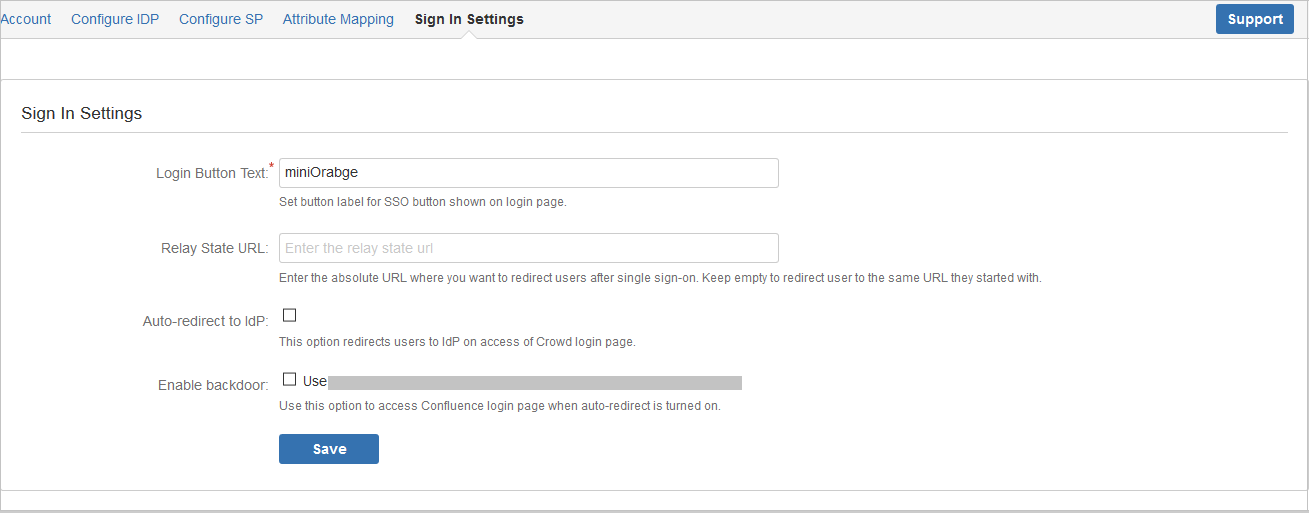
Step 7: SSO Sign In Settings
There are different ways to login to your Atlassian Crowd Server:
- Login Button Text make your organization's SSO easy for Crowd users to recognize.
- Set Relay State URL to redirect all users to a particular URL after SSO login.
- You also have option to disable your Crowd login by clicking Disable Crowd Login checkbox. If Crowd Login is disabled, all users will be redirected to IdP for login. Redirect rules for administrator functions are defined by Secure Admin Login Options.
- Enable backdoor checkbox allows administrators to bypass external authentication and log in with a Crowd administrator using username annd password. Note: a logged-in user cannot access this page, you need to logout to access this.
×
![]()
Business Trial For Free
If you don't find what you are looking for, please contact us at info@miniorange.com or call us at +1 978 658 9387 to find an answer to your question about Crowd Single Sign On (SSO).
Watch the videos to learn more
Watch Demo
Trending searches:
Hello there!
Need Help? We are right here!
