
SAML Single Sign-On (SSO) in Nextcloud | Magento – Nextcloud SSO Login
Overview
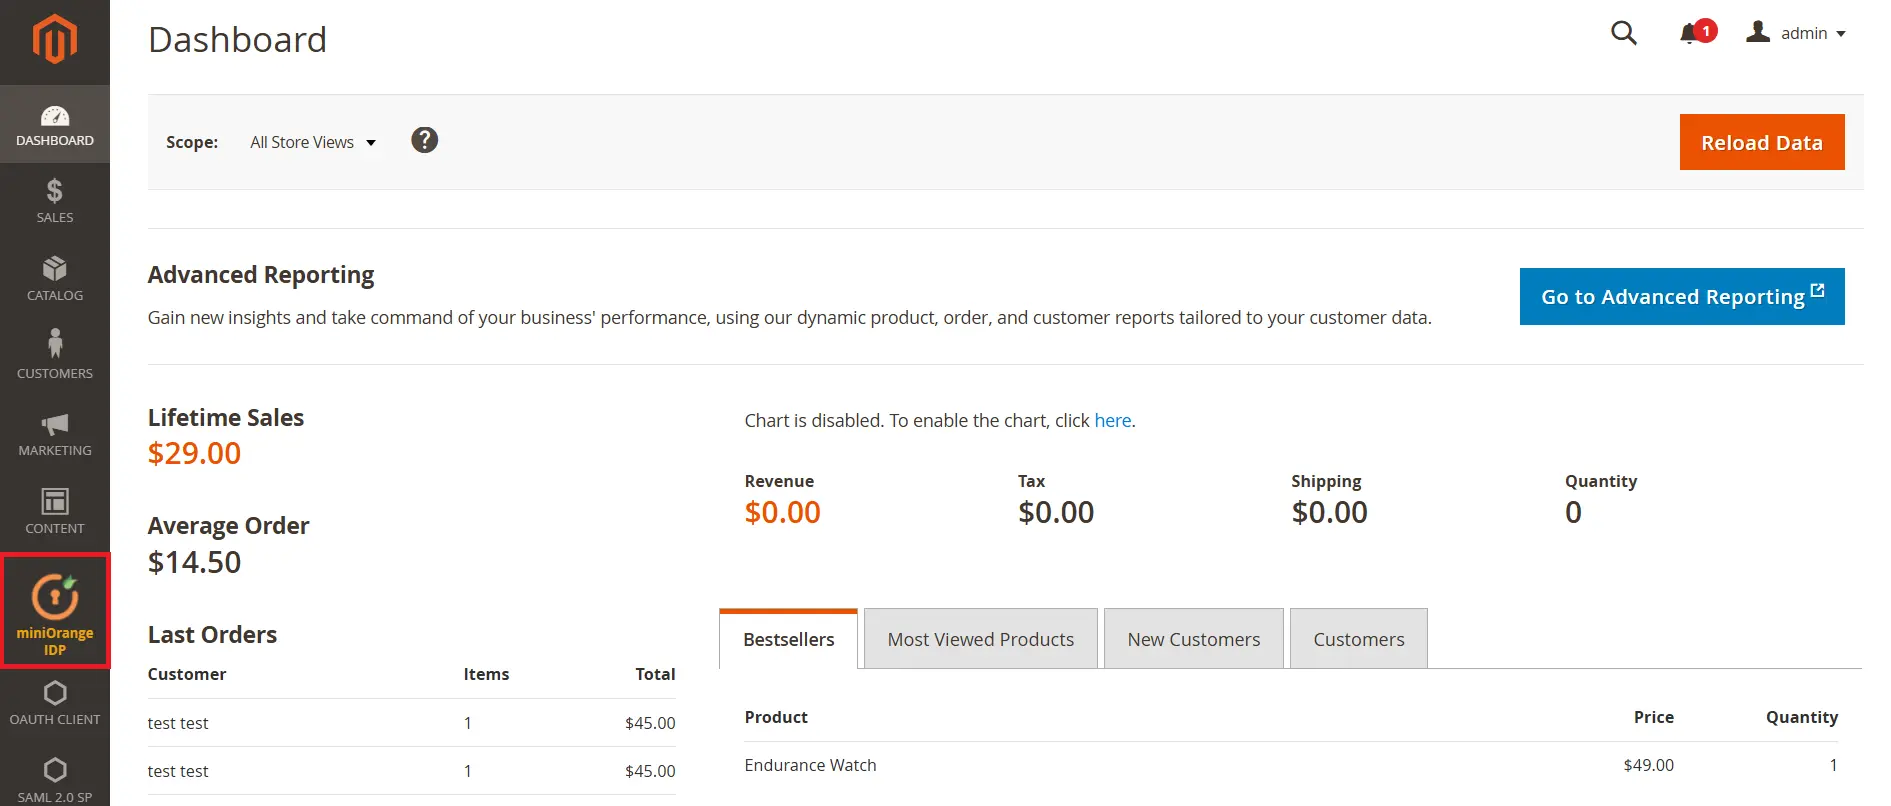
Login into Nextcloud using Magento user credentials. This guide will help you integrate Magento as a SAML 2.0 Identity Provider (IdP) and Nextcloud as a Service Provider (SP) using the miniOrange Magento SAML IDP (Identity Provider) Extension. Magento SAML IDP extenstion gives you the ability to use your Magento credentials to login into Nextcloud (SP). Here we will go through a step-by-step guide to configure SSO between Nextcloud as SP (Service Provider) and Magento as IDP (Identity Provider).





Installation Steps
- Using Composer
- Manual Installation
Prerequisites
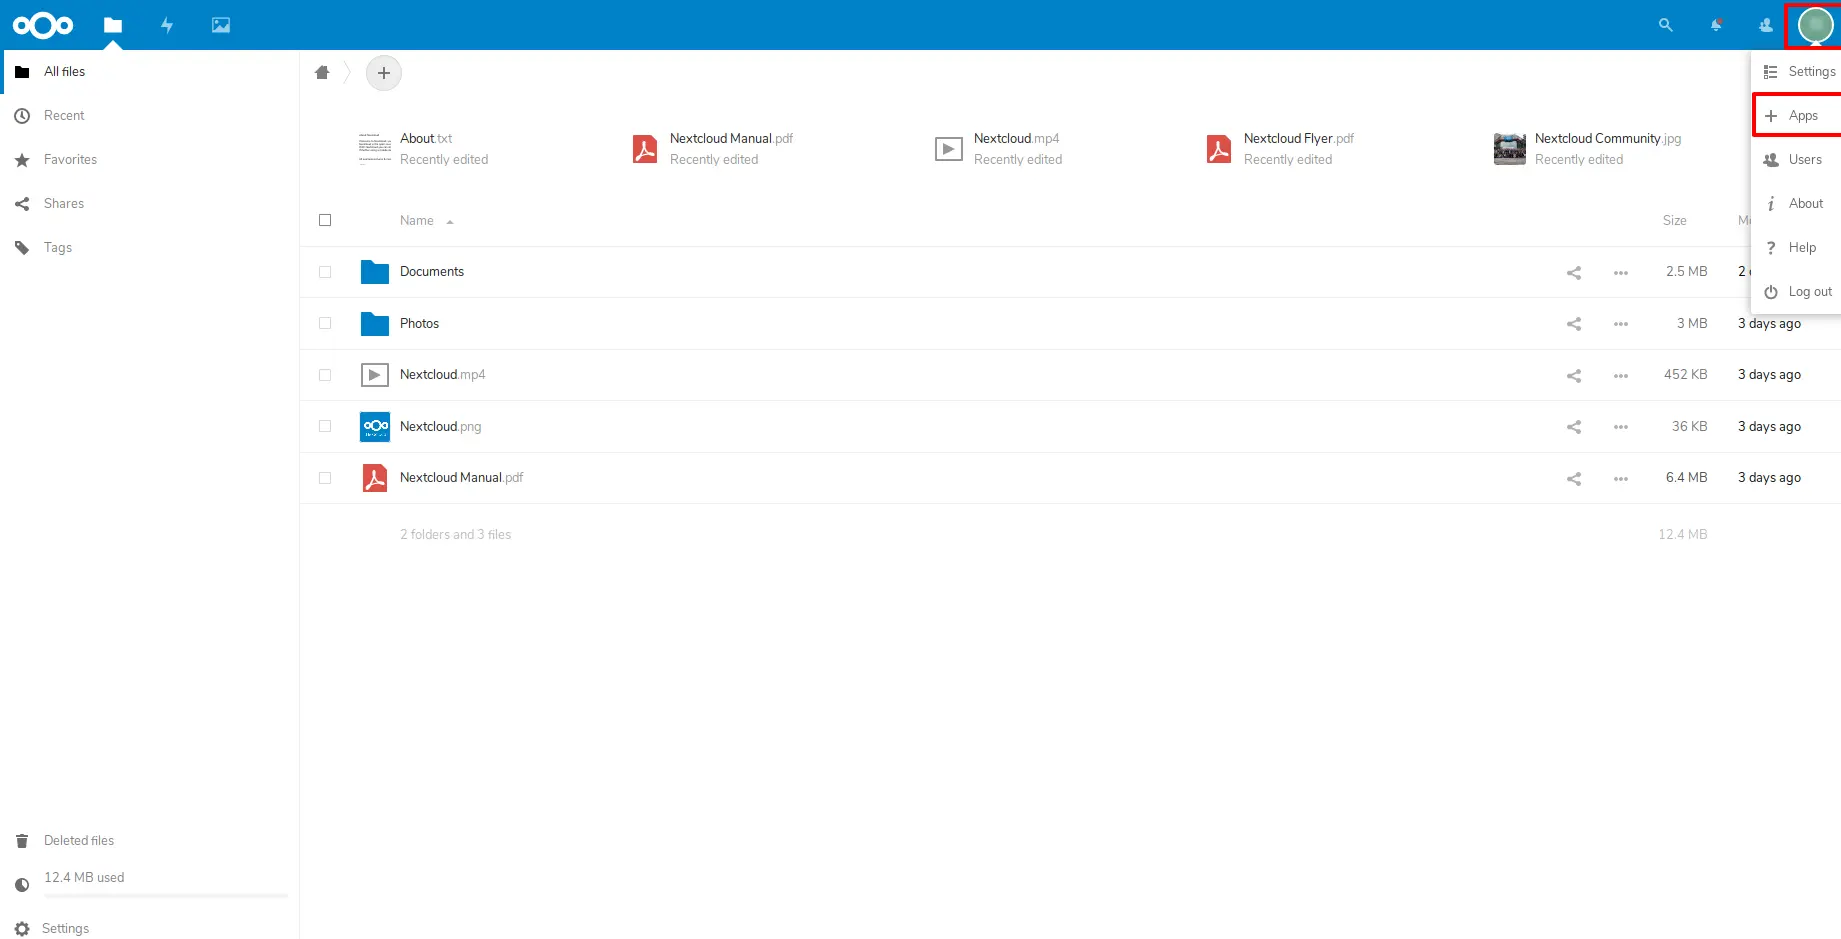
- Open a new browser tab or window, Log in to your Nextcloud account as Account Admin.
- Click on the top right corner. Select Apps.
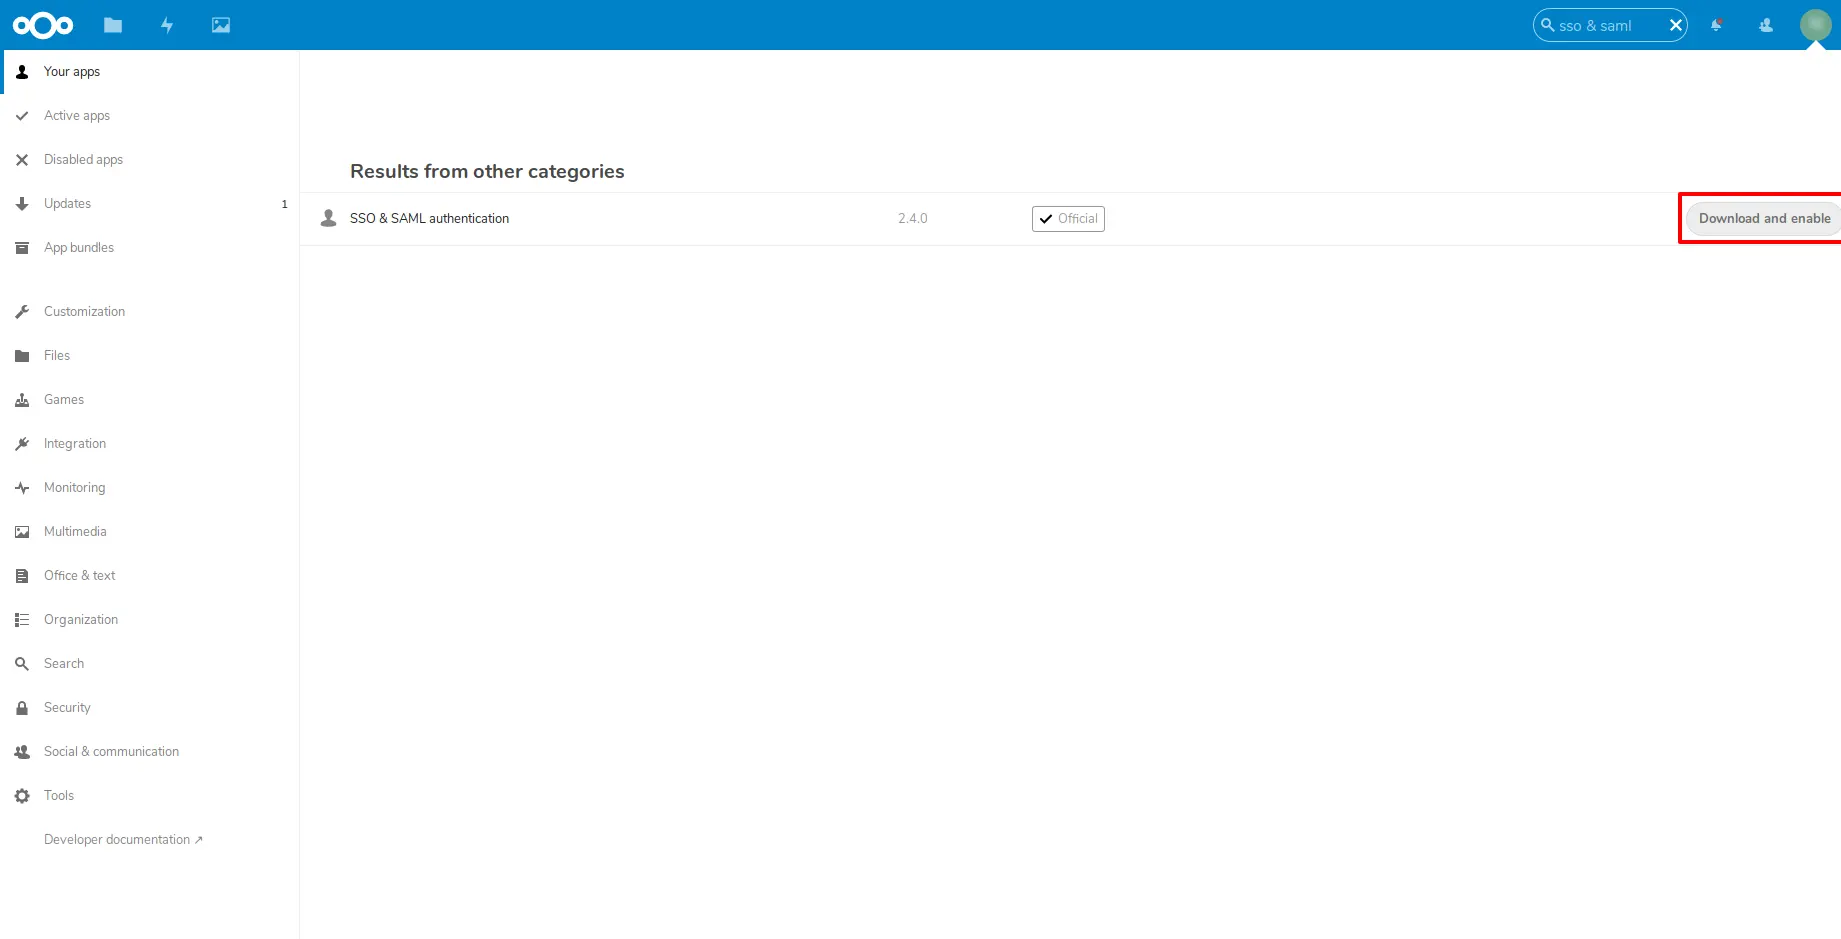
- Search for SSO & SAML Authentication. Click on Download and Enable.
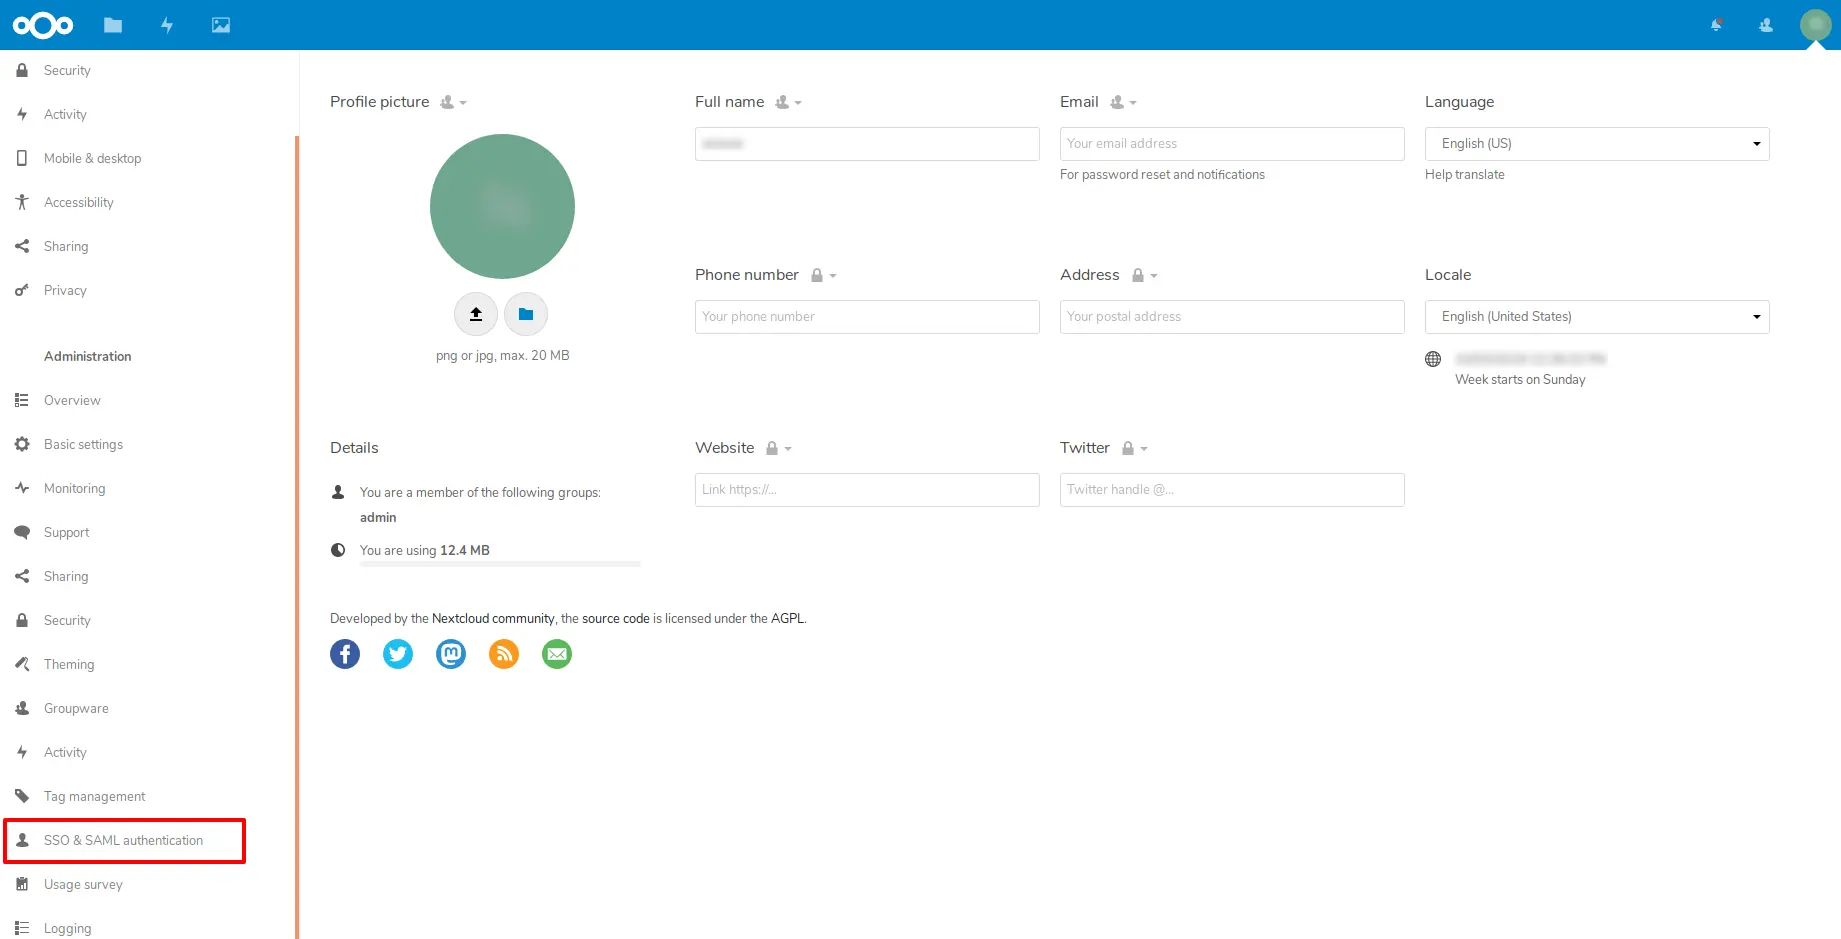
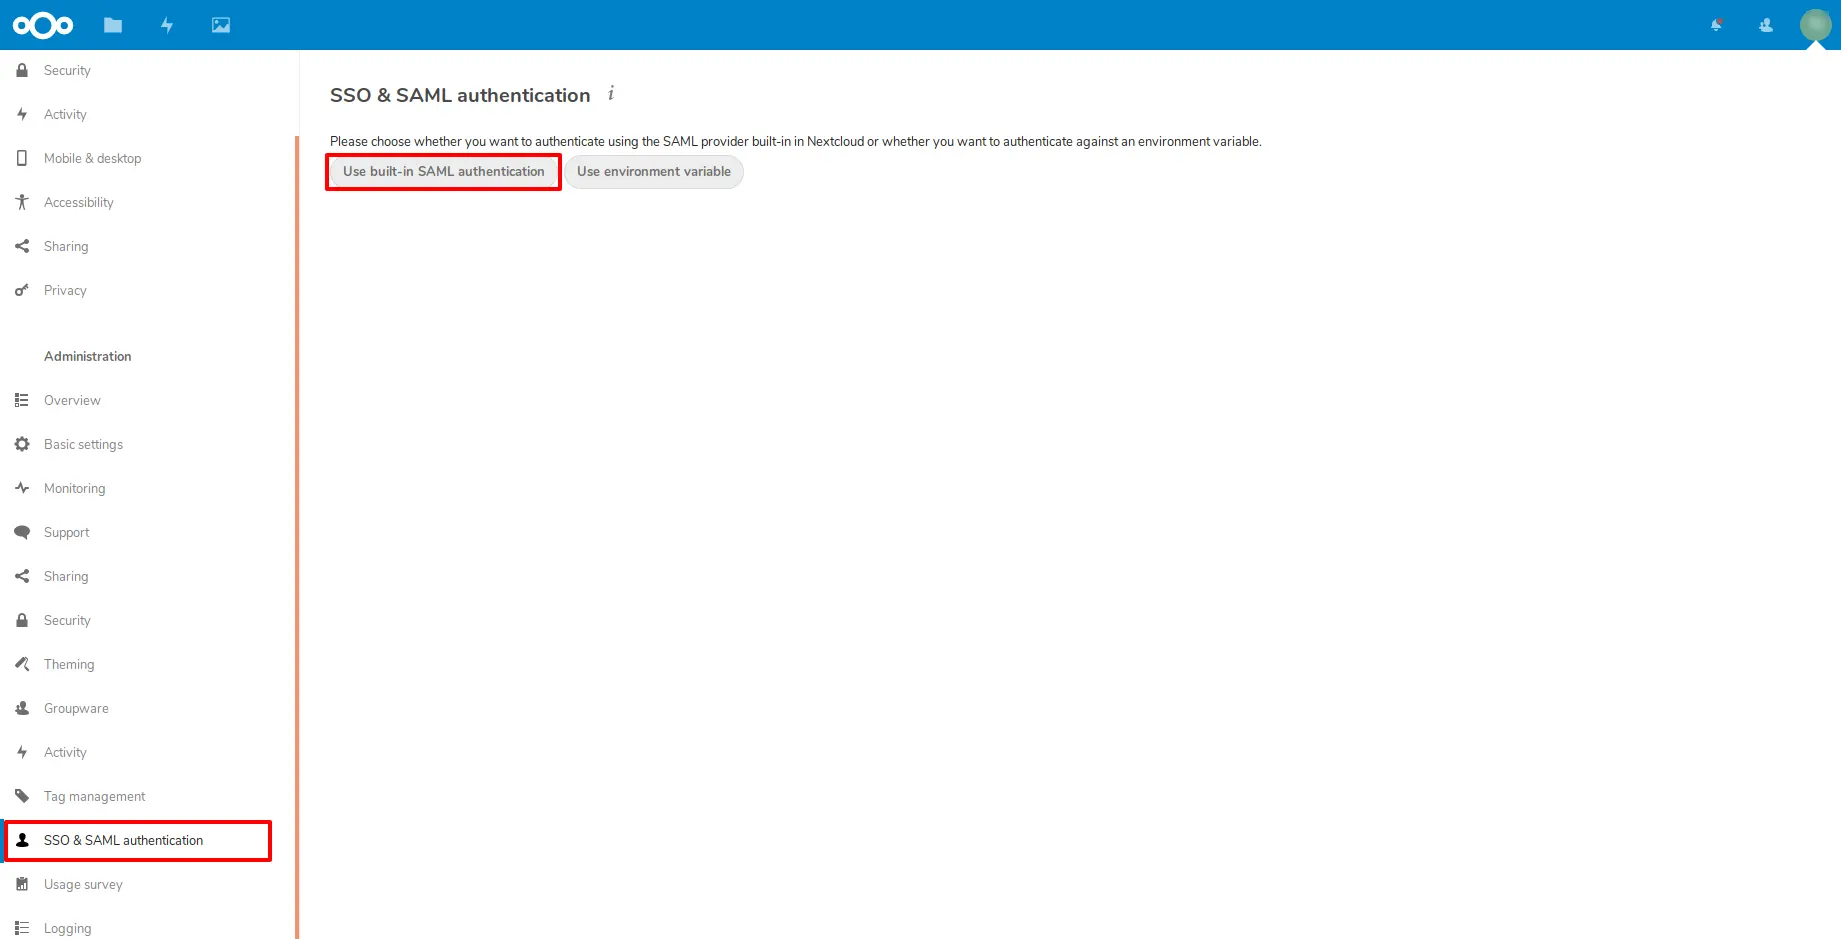
- Click on the top right corner, and select Settings. Find SSO & SAML Authentication on the left side, and open it.
- Click on Use built-in SAML Authentication, click on Add Identity Provider.
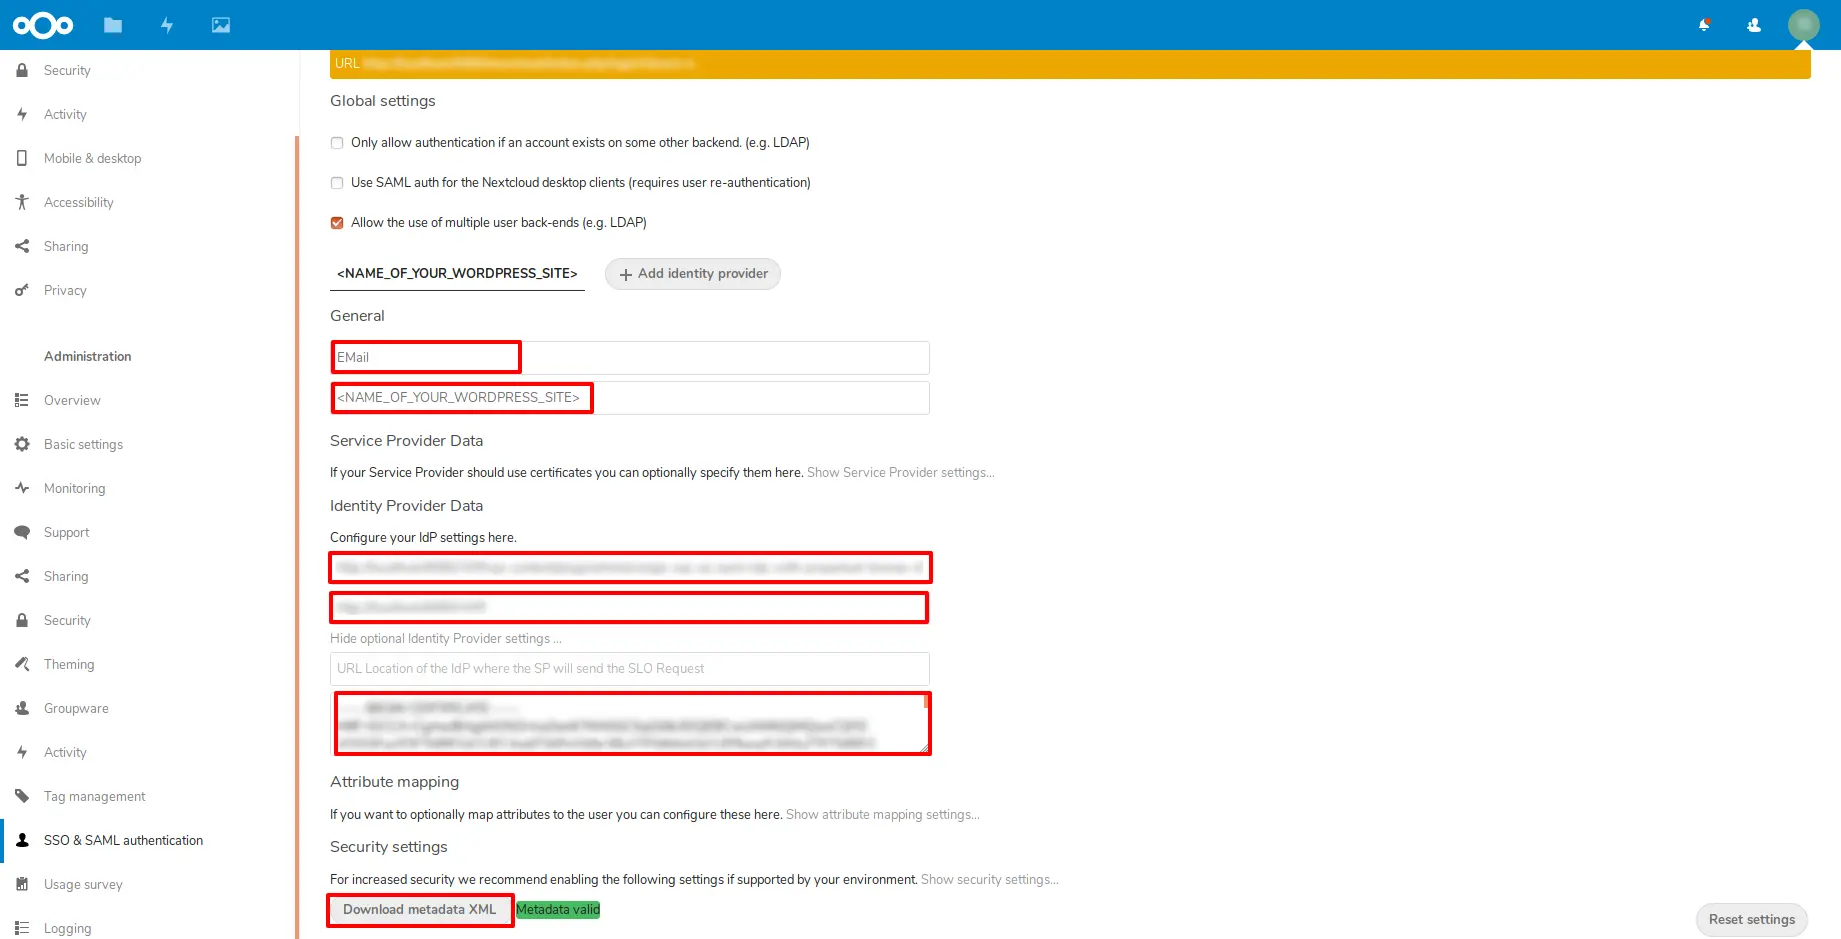
- Once this is done, click on Download metadata XML to download the SP metadata XML file.
Switch back to the tab / window with the IDP Metadata. Enter the information into the corresponding fields.
| Attribute to map the UID to | |
| Identifier of the IDP Entity | Copy and paste the IDP Entity ID. |
| URL Target of the IdP | Copy and paste the SAML Login URL. |
| Certificate | Download the Certificate. Open it in notepad. Copy and paste the content here. |
Steps to configure Nextcloud SAML Single Sign-on (SSO) Login into Magento 2
Configuring Magento as SAML Identity Provider (IdP):
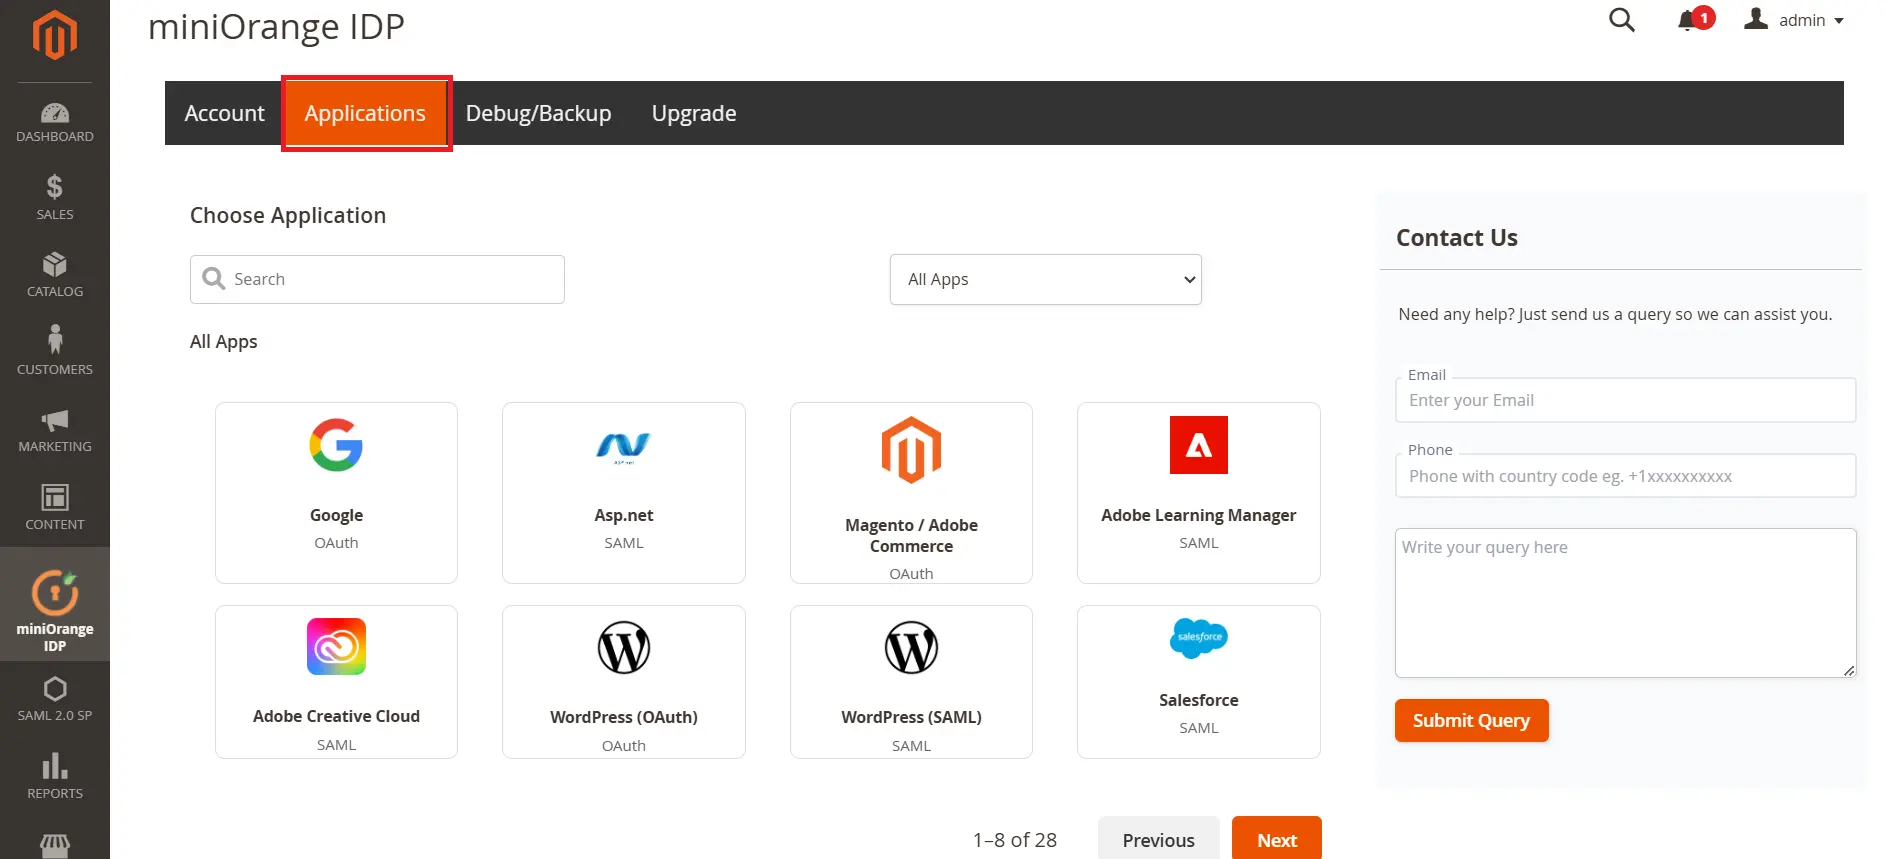
- In the miniOrange IDP (Identity Provider) extension, go to Applications tab.
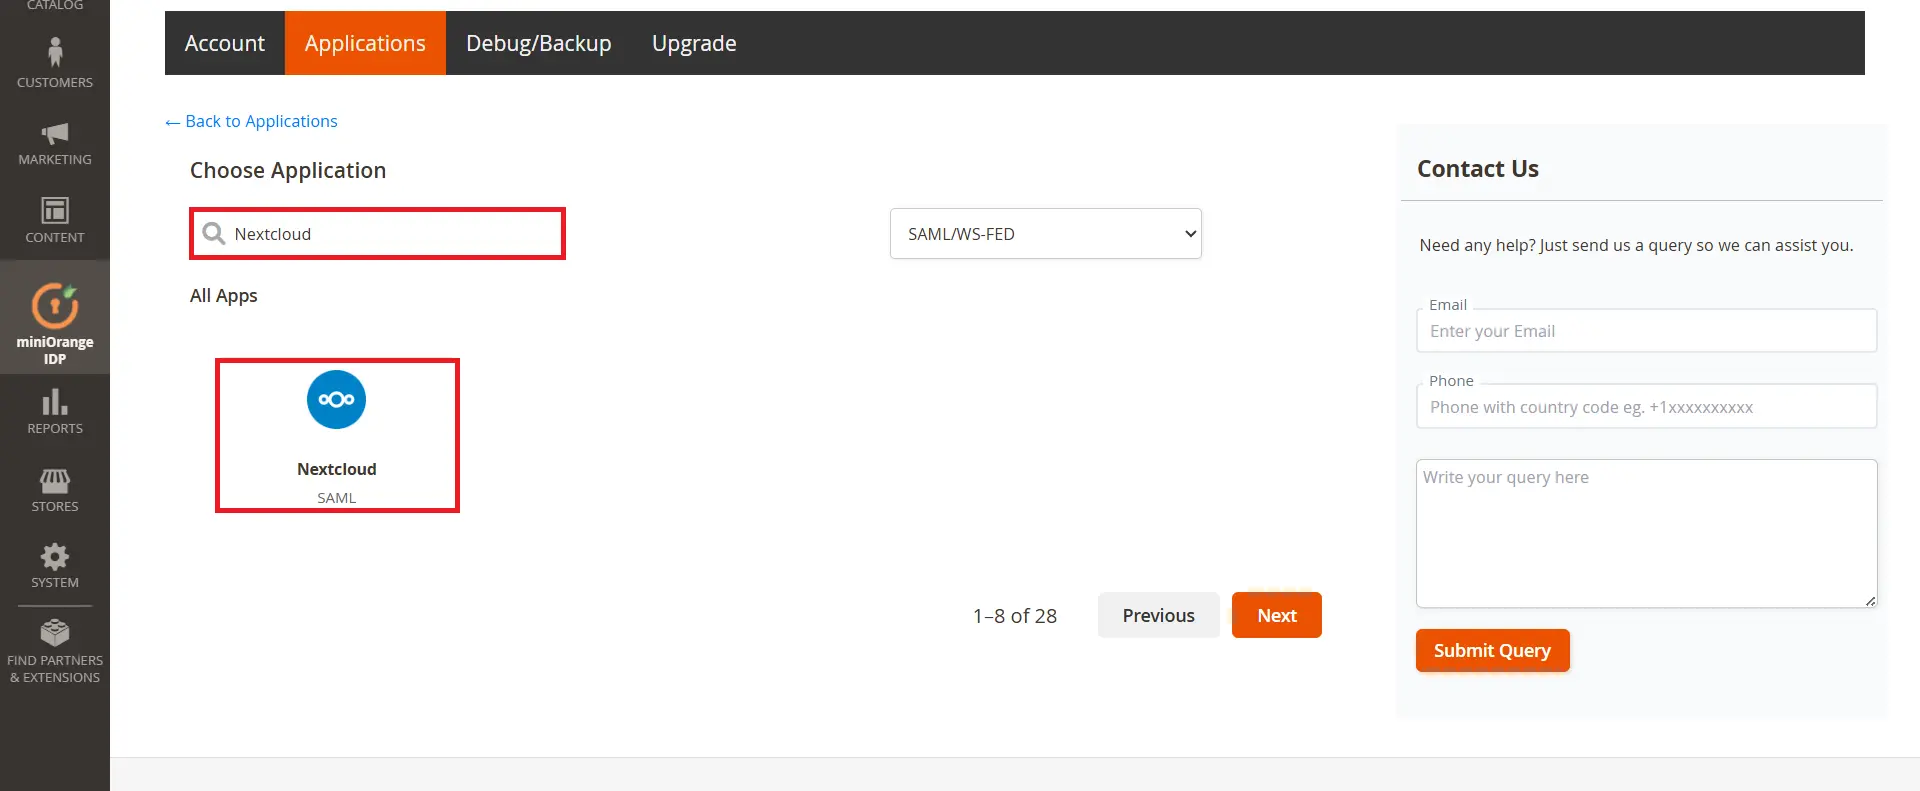
- Search for Nextcloud in the choose application searchbox and select the application.
- Enter the Application name under SP Name.
- Now, enter the SP Entity ID or Issuer and ACS URL copied earlier and save the details.
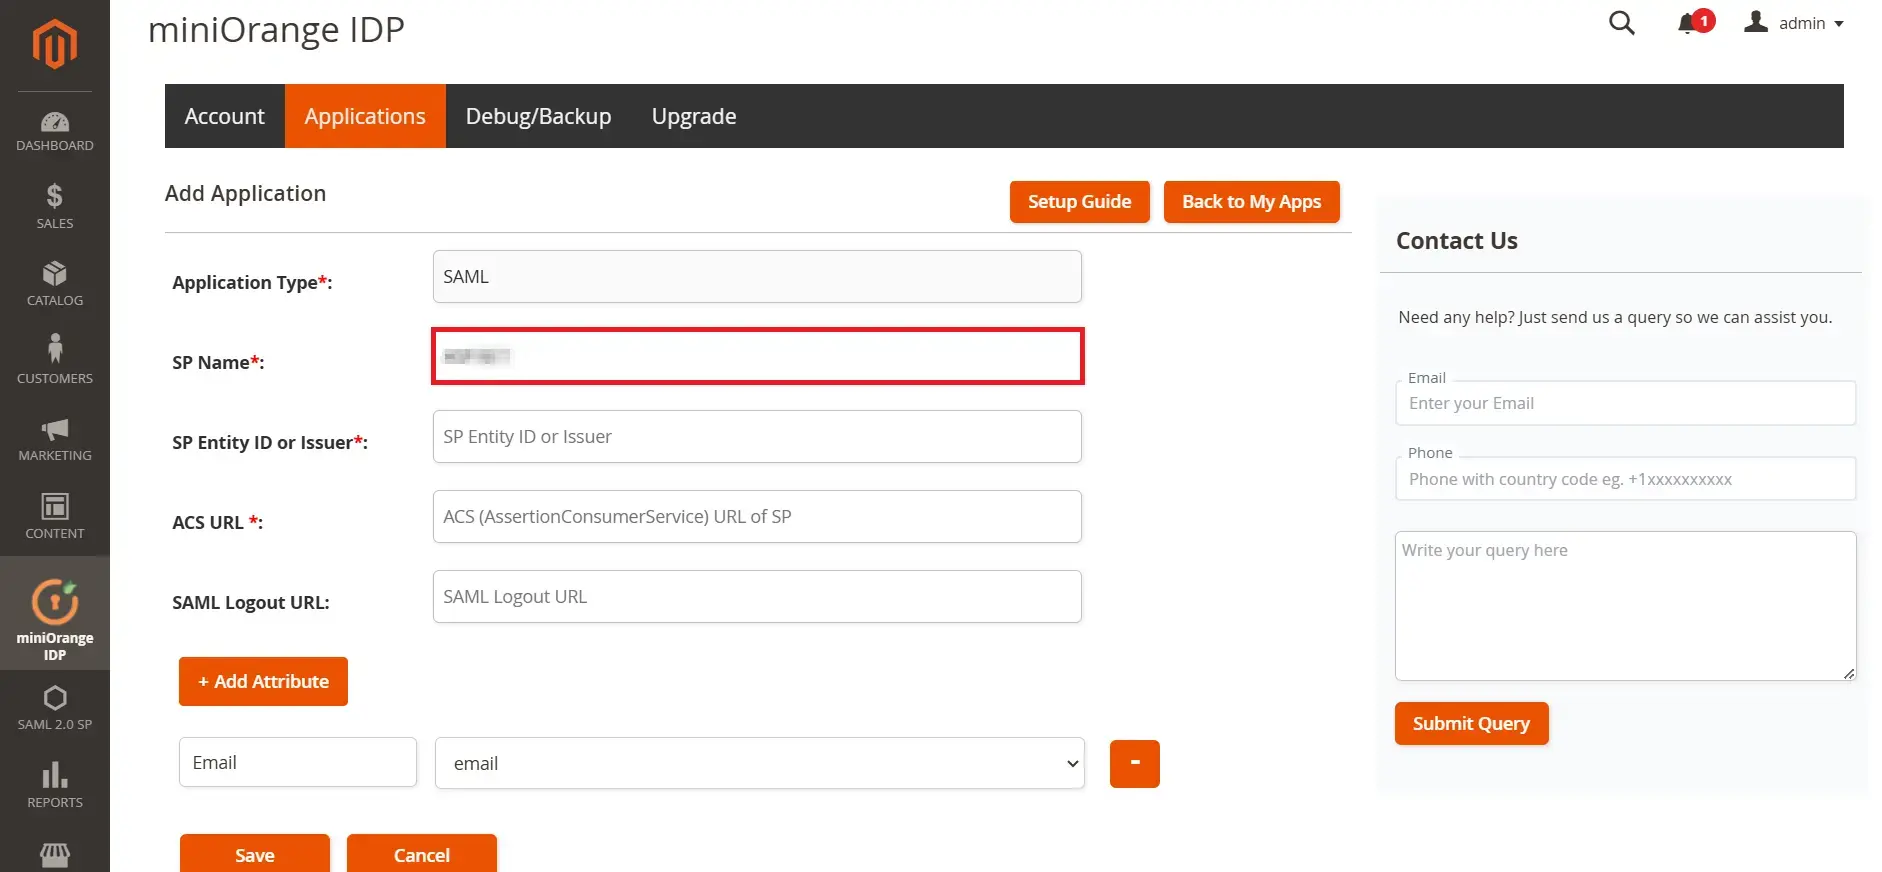

Configure Nextcloud as Service Provider:
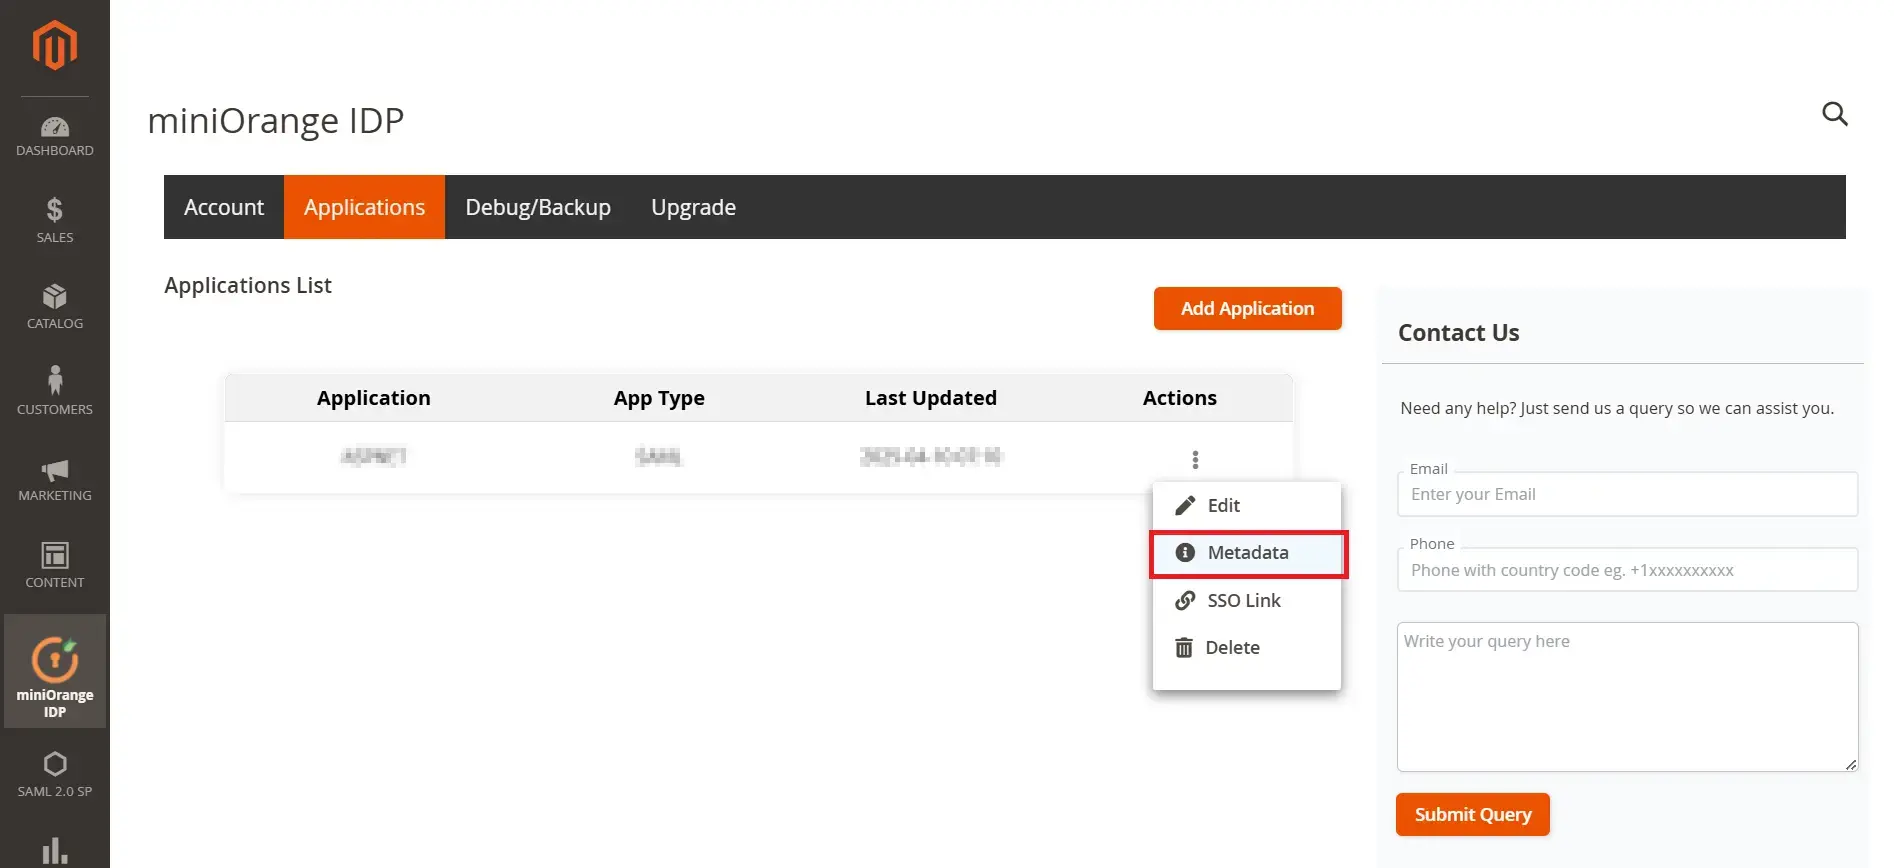
- Navigate to the Applications tab and click on Metadata settings for the Nextcloud application
- Here, you can find the Identity Provider Metadata URL /XML Metadata or endpoints like IDP Entity ID, SAML Login URL, SAML Logout URL (Premium Feature), Certificate. You can also download the IdP Metadata XML file which will be used for Nextcloud configuration.
- You will now have 3 options to provide the IDP Metadata to Nextcloud by downloading the XML Metadata, Metadata URL or providing the detials manually.
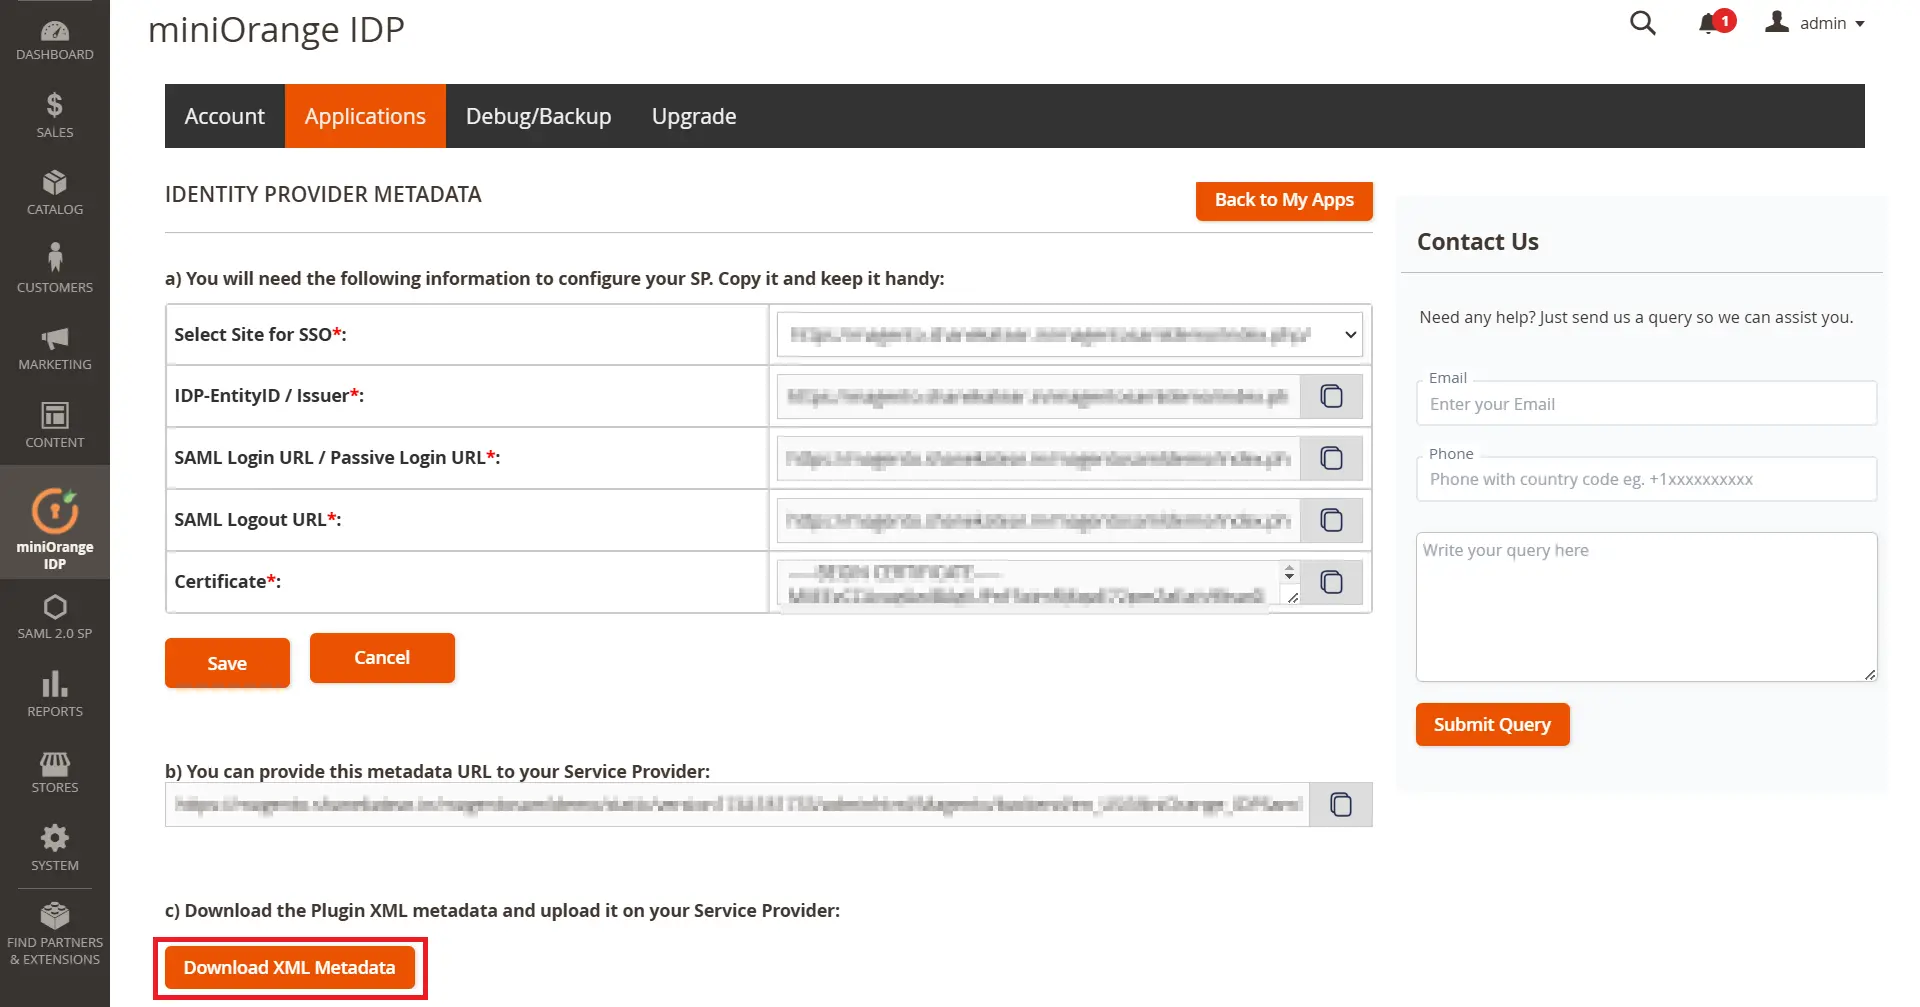
- Option 1 - Download the XML Metadata.
- Download the XML Metadata by clicking it on Download XML Metadata button.
- Navigate to your Nextcloud and upload the XML metadata file downloaded and click on the Fetch Metadata button.
- Option 2 - Metadata URL.
- You can also copy the Metadata URL and provide it to your service provider to fetch the metadata.
- Option 3 - Provide the details manually to the Nextcloud.
- Copy the metadata details according to the table below.
- Navigate to your Nextcloud and paste the metadata details.
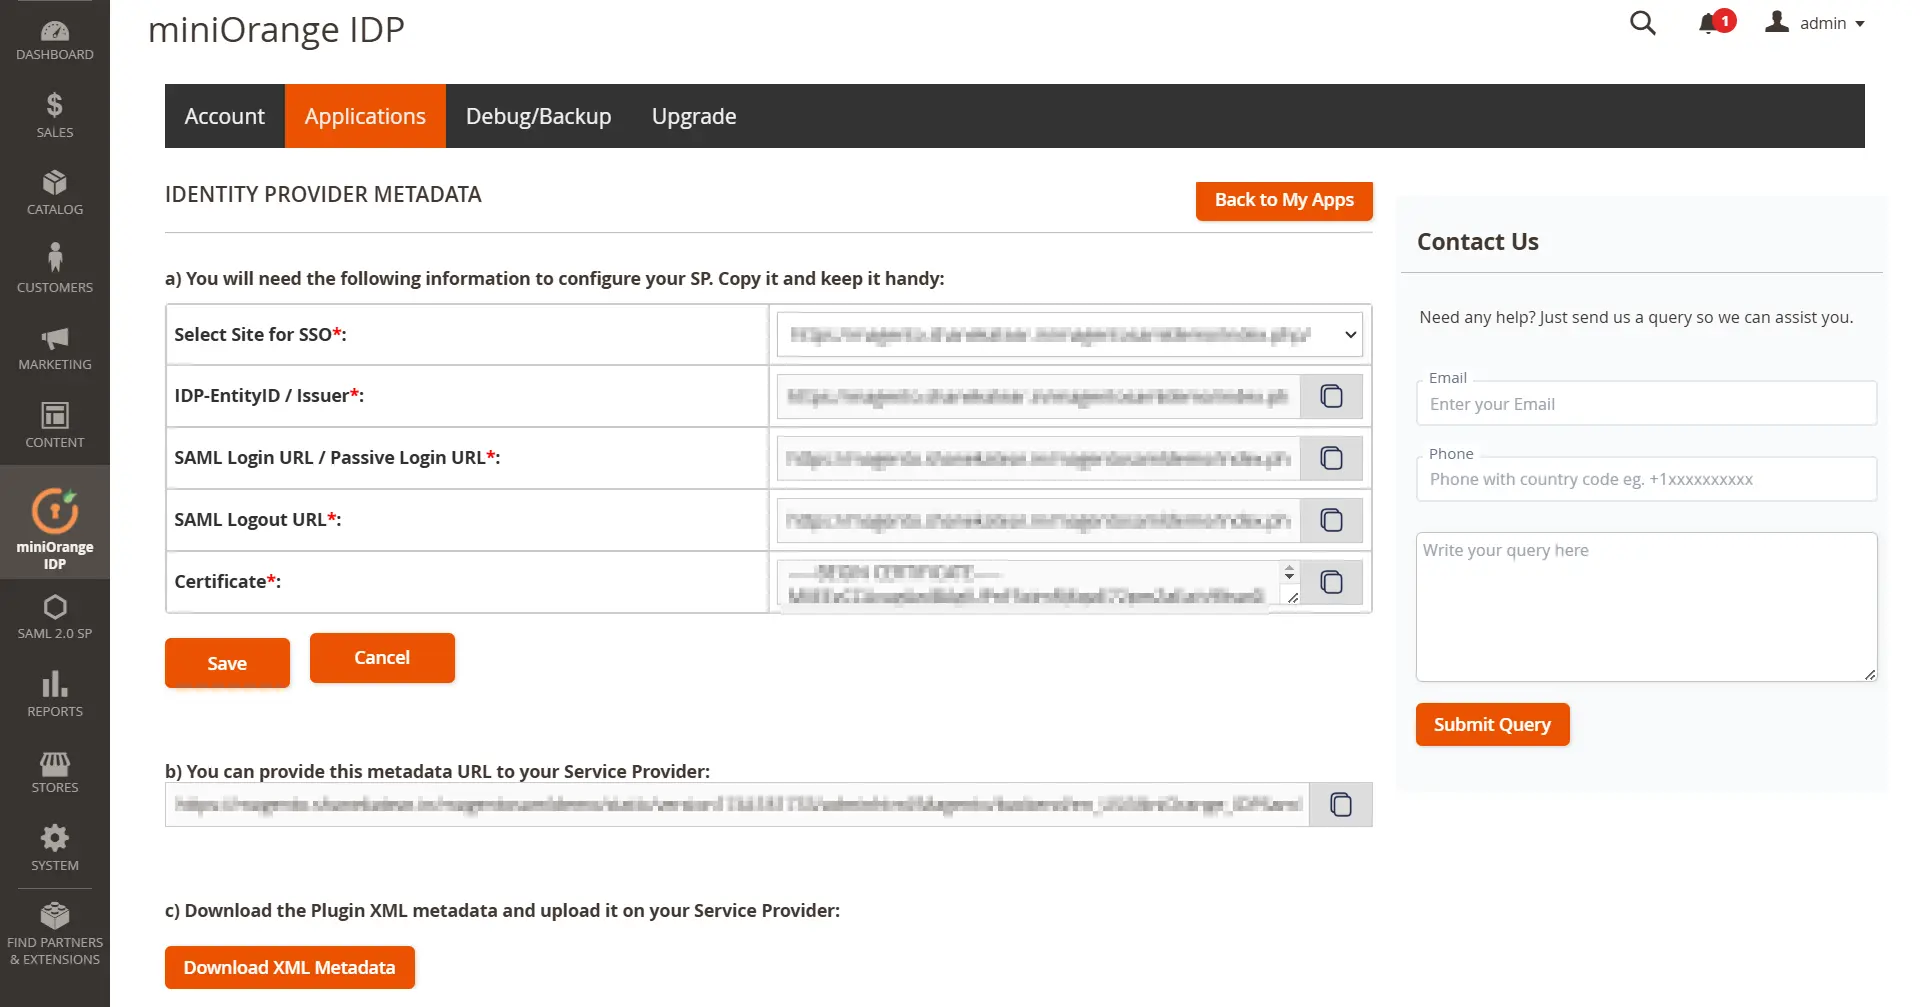
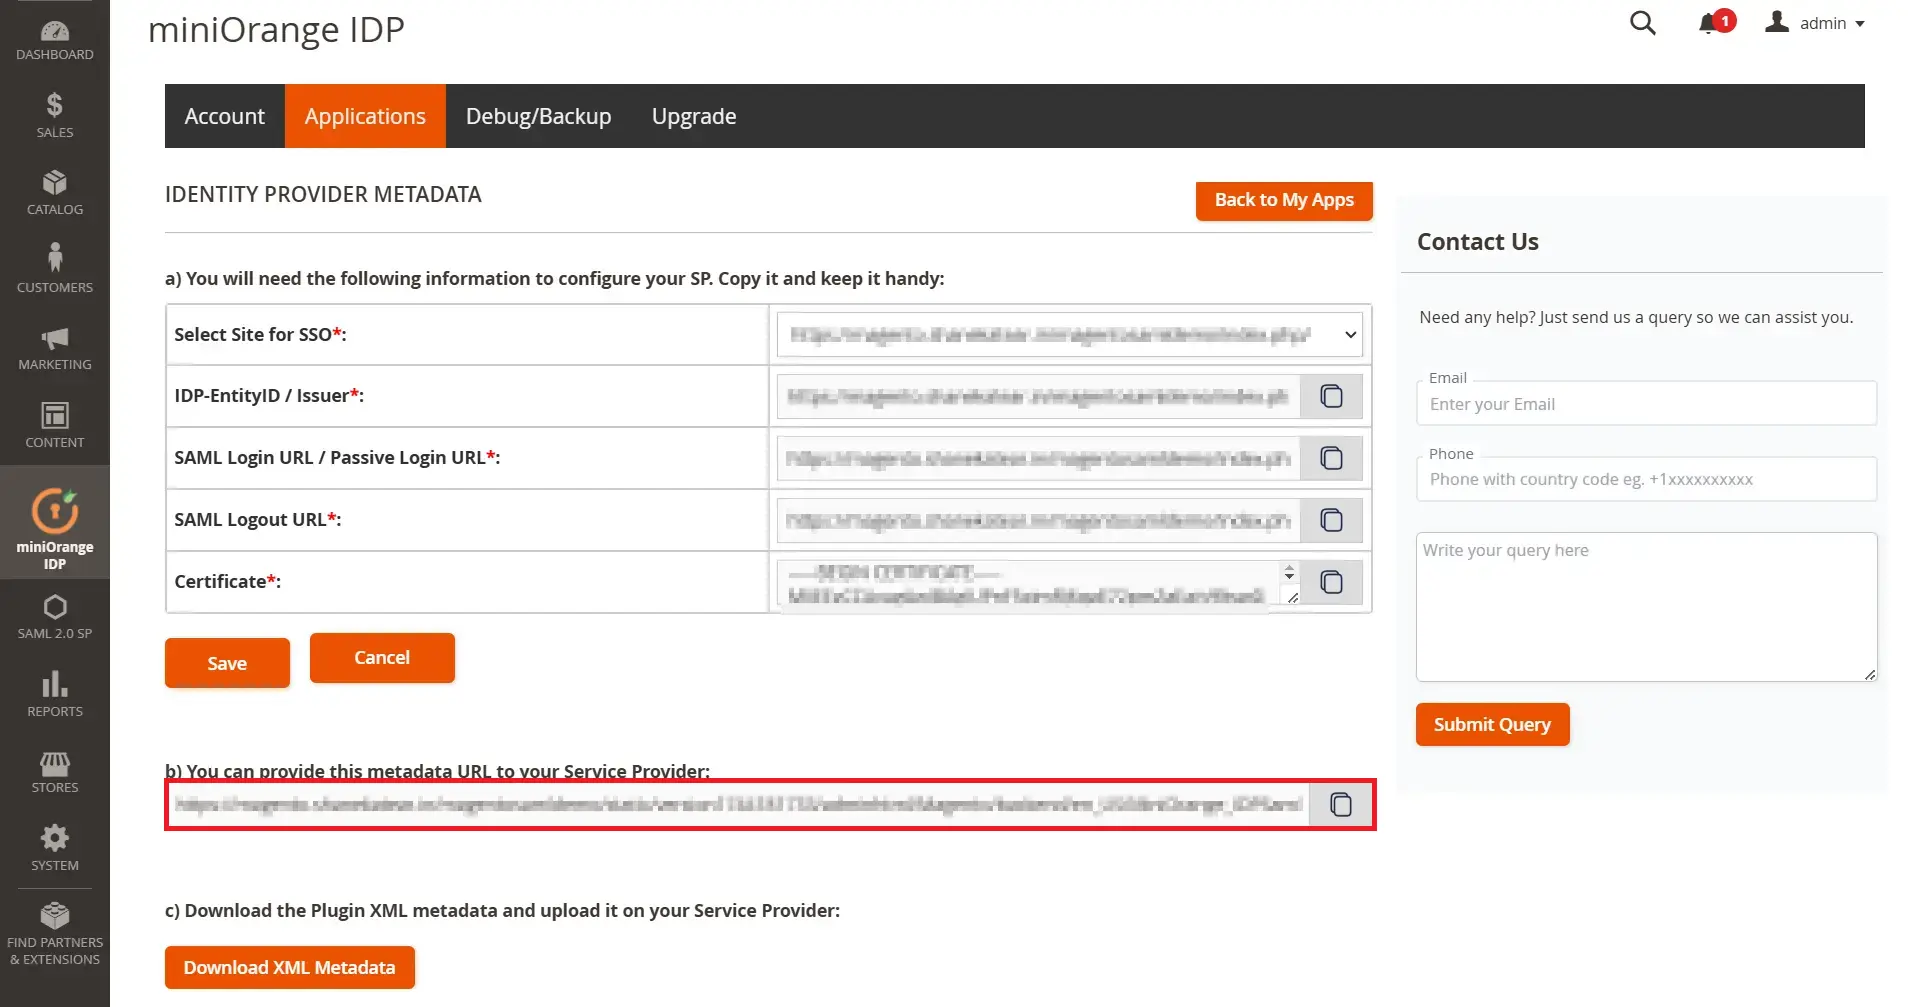
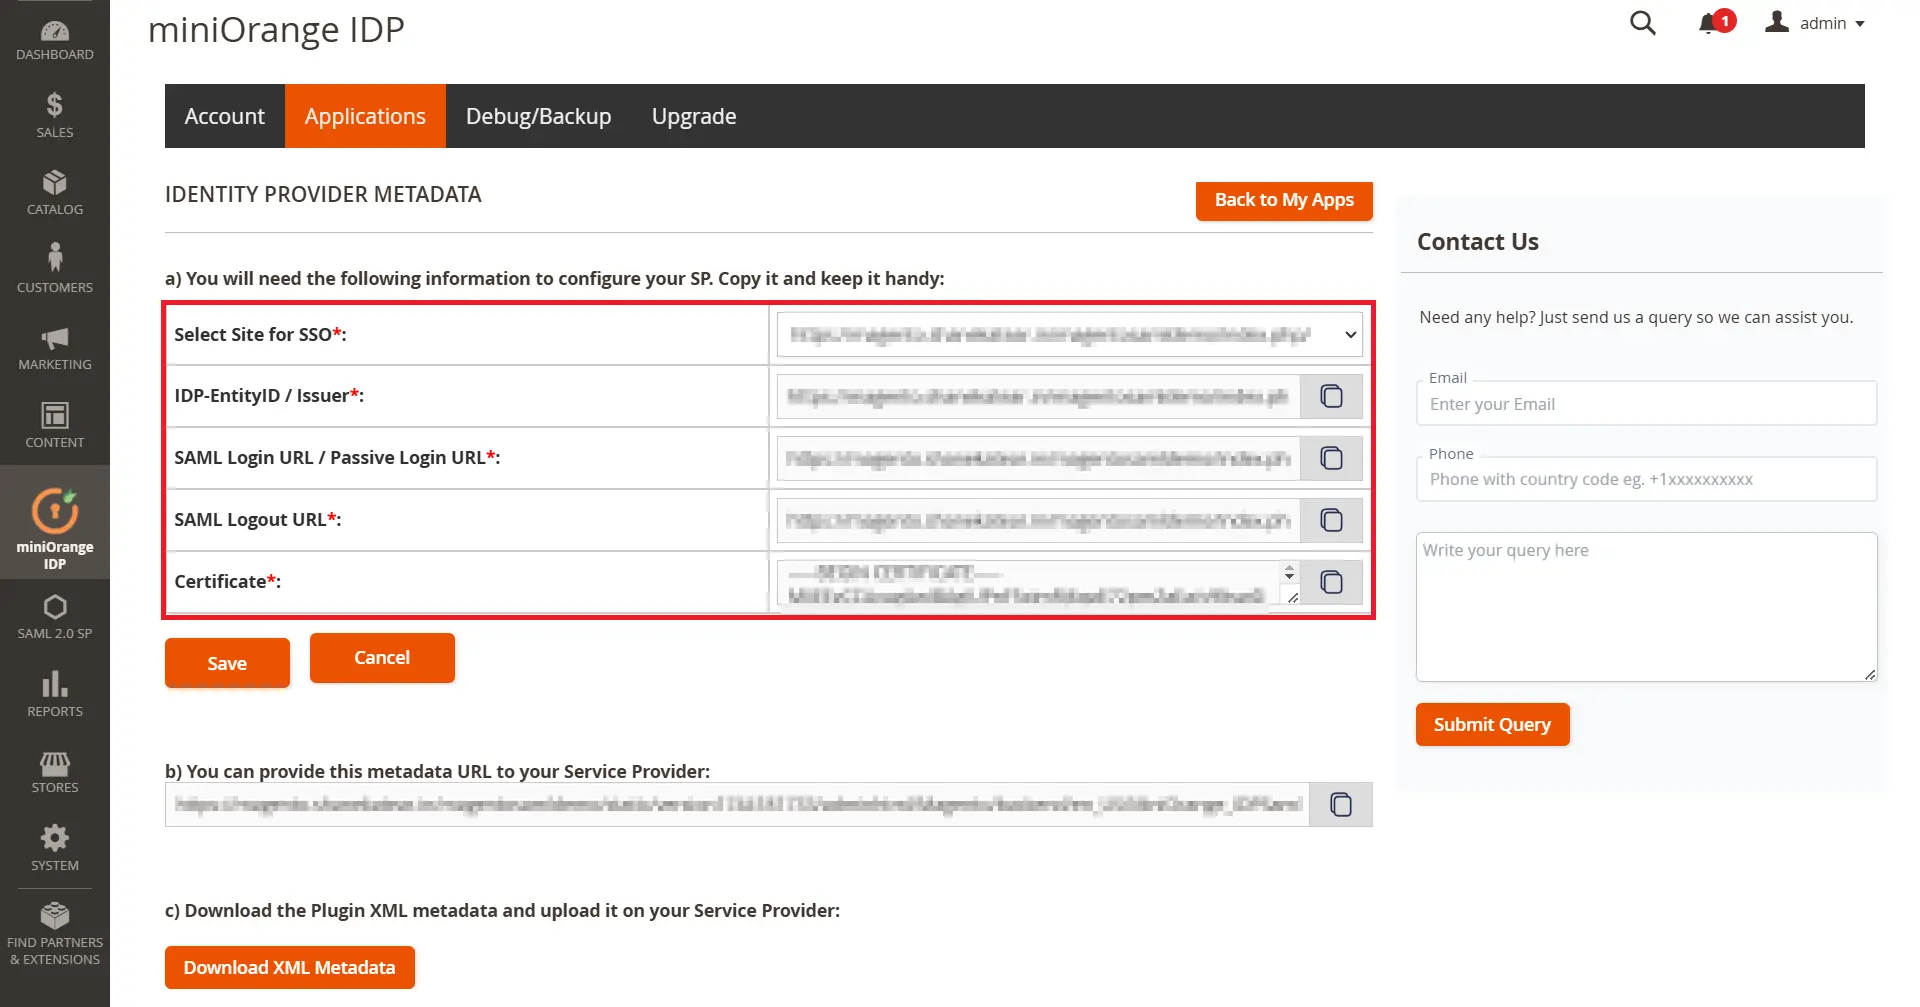
| IDP-EntityID / Issuer | IDP-EntityID / Issuer |
| Single Sign On URL | SAML Login URL / Passive Login URL |
| SAML X509 Certificate | Certificate |
Attribute Mapping *(This is a Premium Feature)
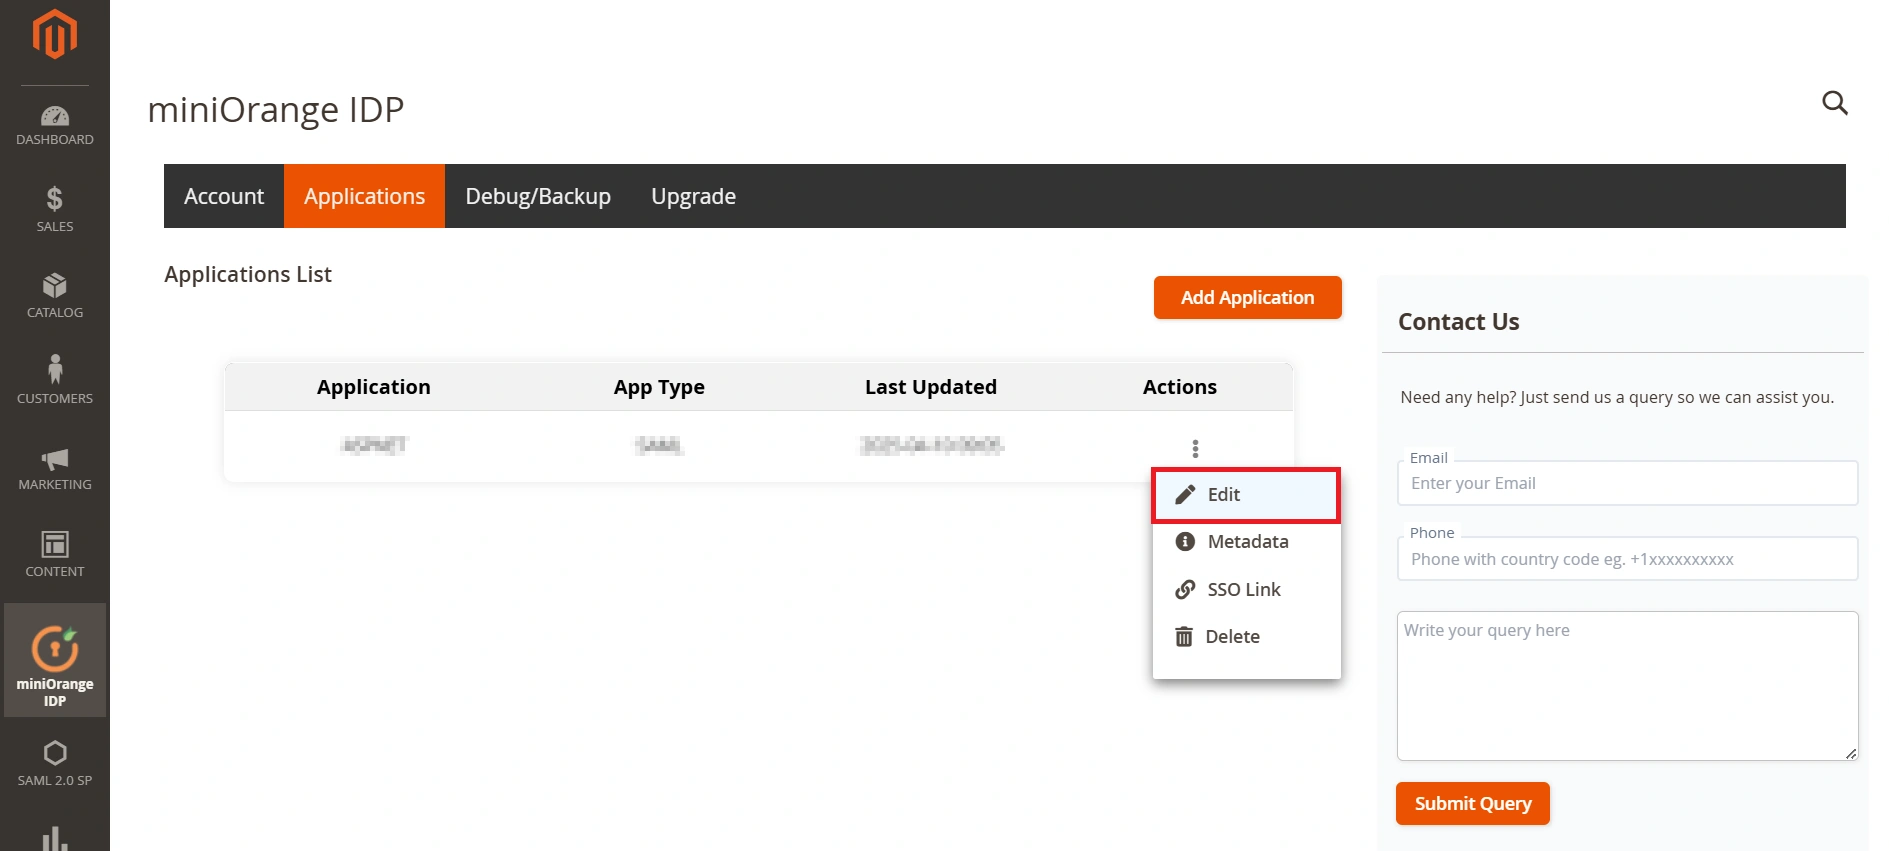
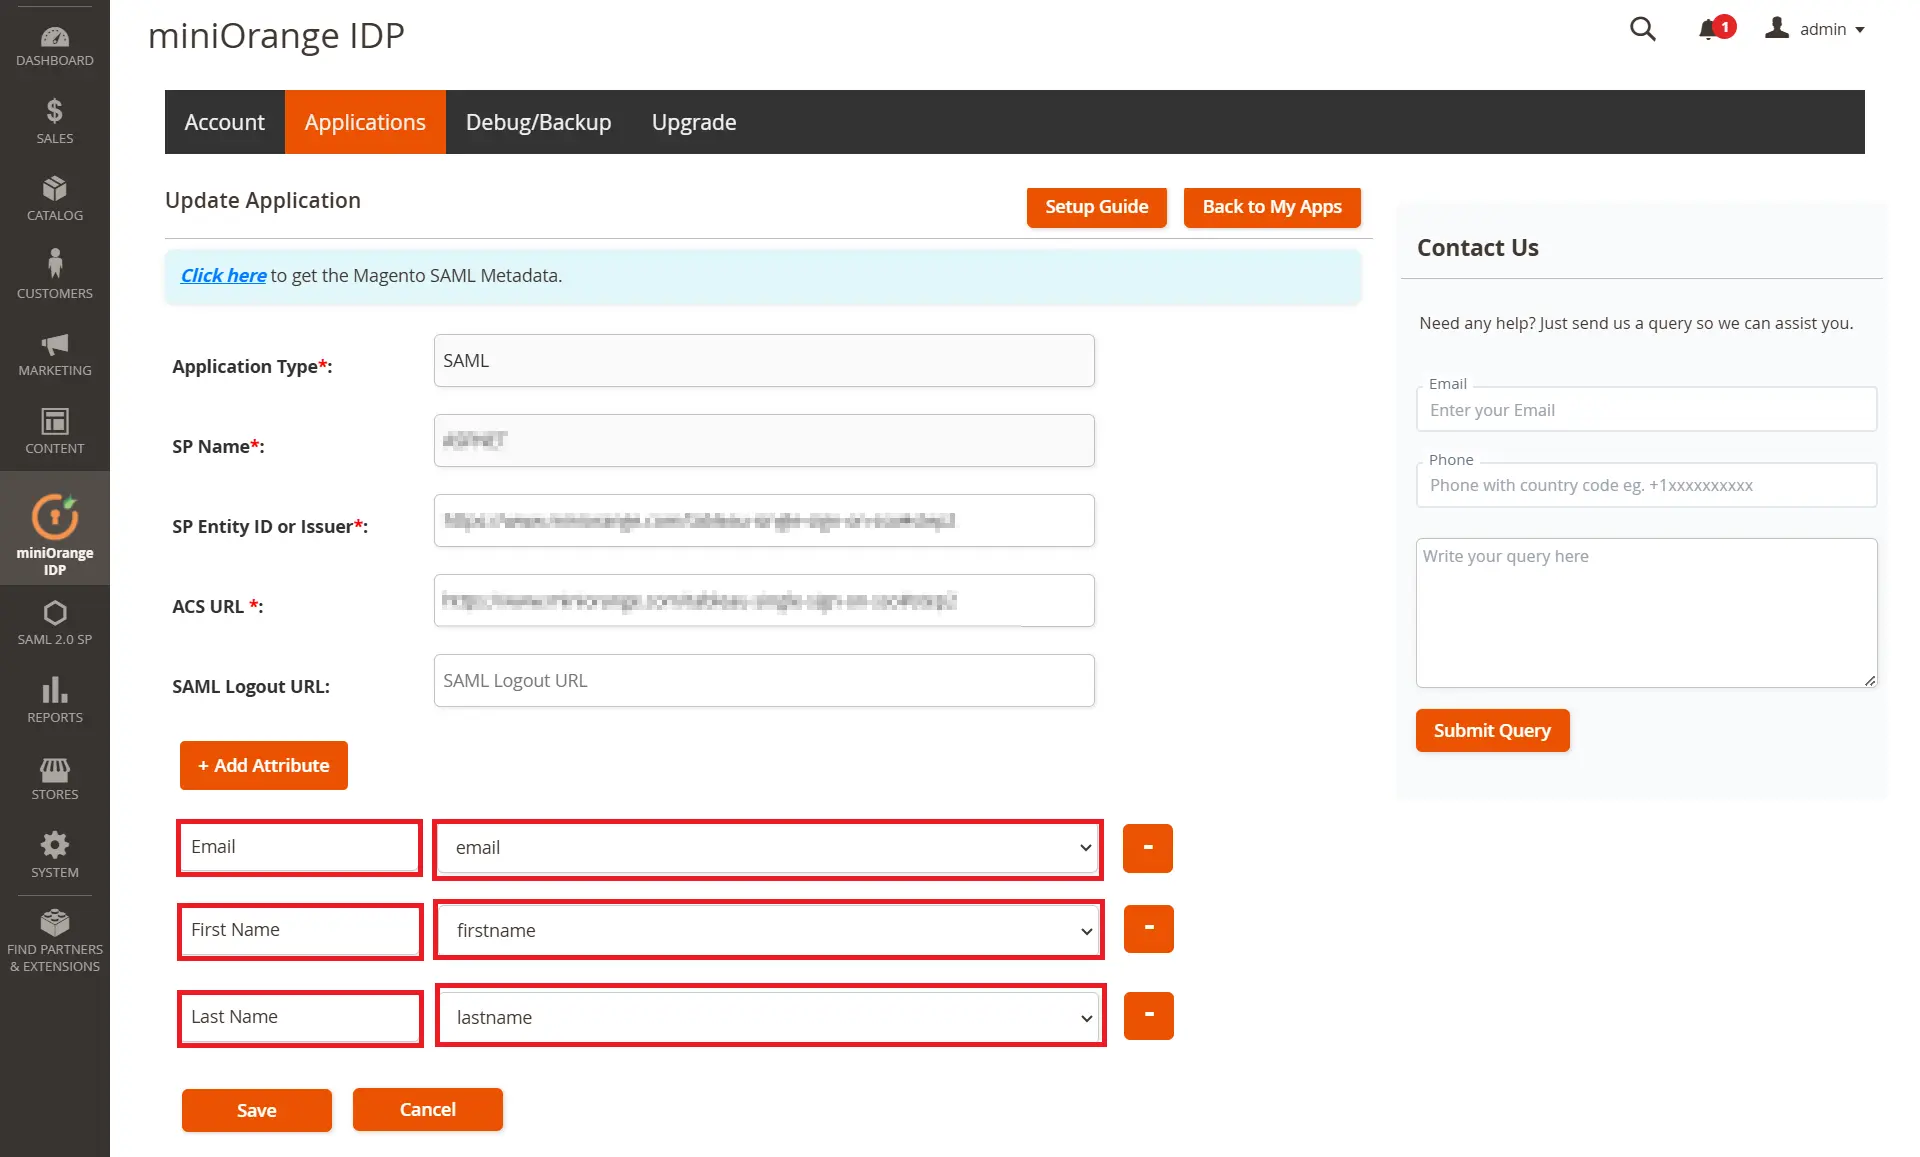
- In the miniOrange Magento IDP extension, navigate to the Applications tab and click on Edit settings for the Nextcloud application.
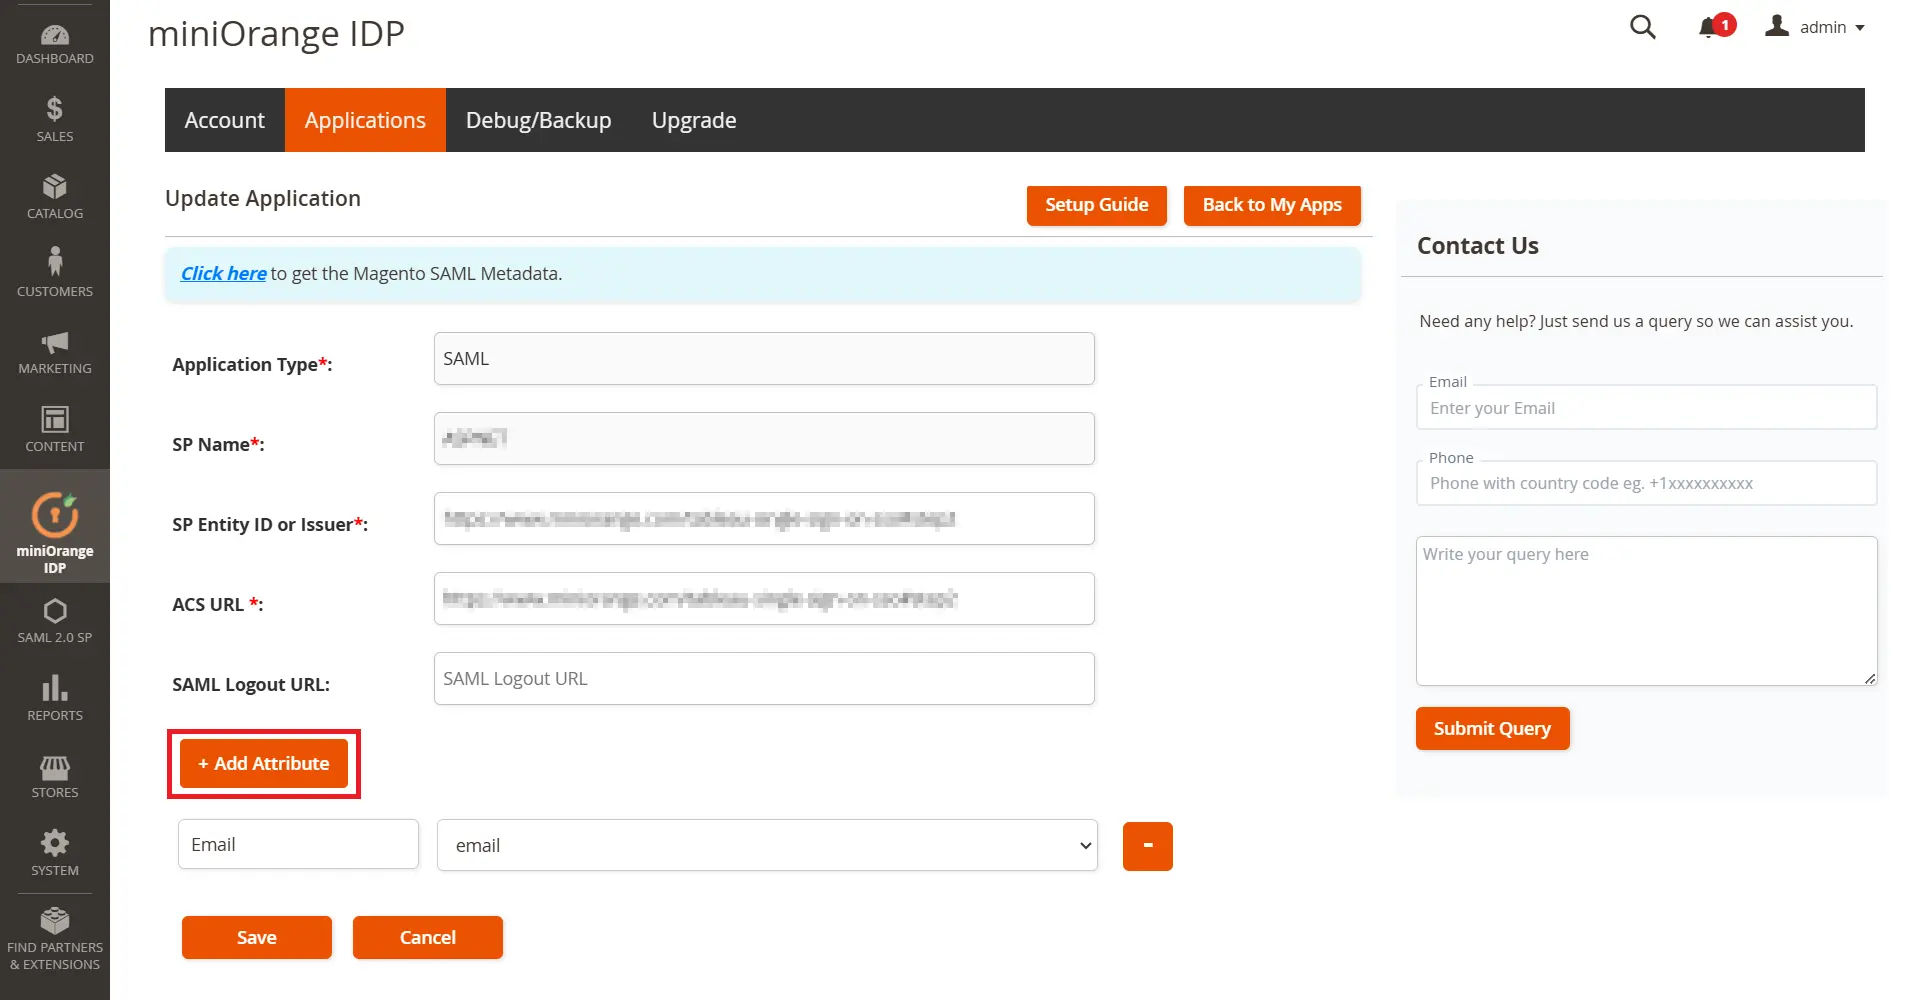
- Click on Add Attribute button.
- Add the attribute name you want to send to your service provider and select the attribute from the dropdown menu and click on Save Button to save changes.
You have successfully configured the SAML SSO between Nextcloud as Service Provider and Magento as SAML Identity Provider.


