Meet us at WordCamp Europe | ShopTalk | DrupalCon Conferences to explore our solutions. Know More
Okta as IDP for Moodle
Step 1: Setup Okta as Identity Provider
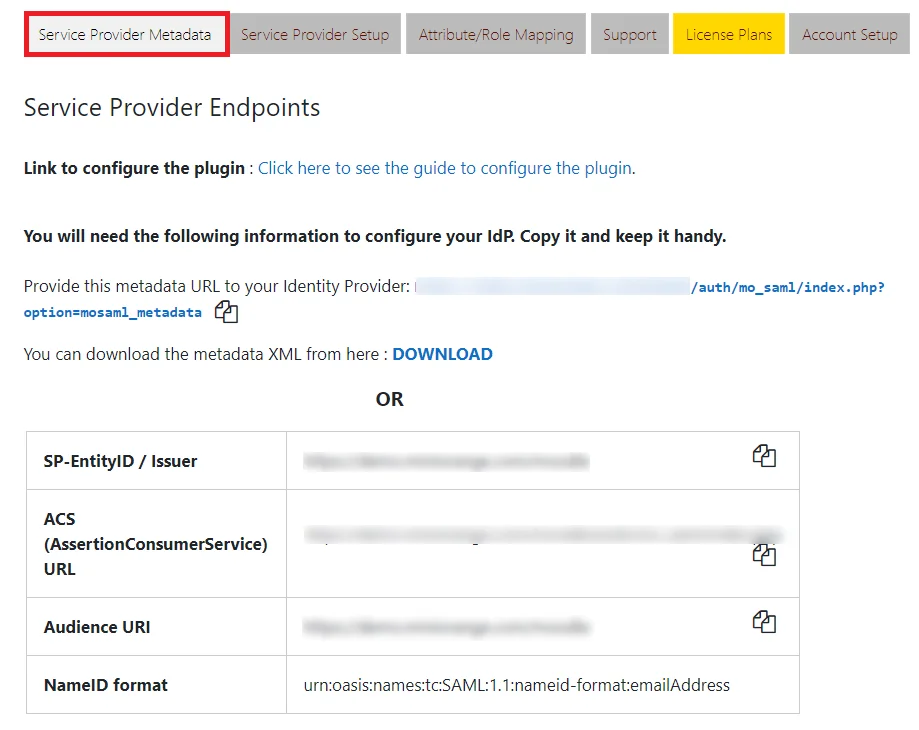
- In the miniOrange SAML 2.0 SSO plugin, navigate to Service Provider Metadata tab. Here, you can find the SP metadata such as SP Entity ID and ACS (AssertionConsumerService) URL which are required to configure the Identity Provider.
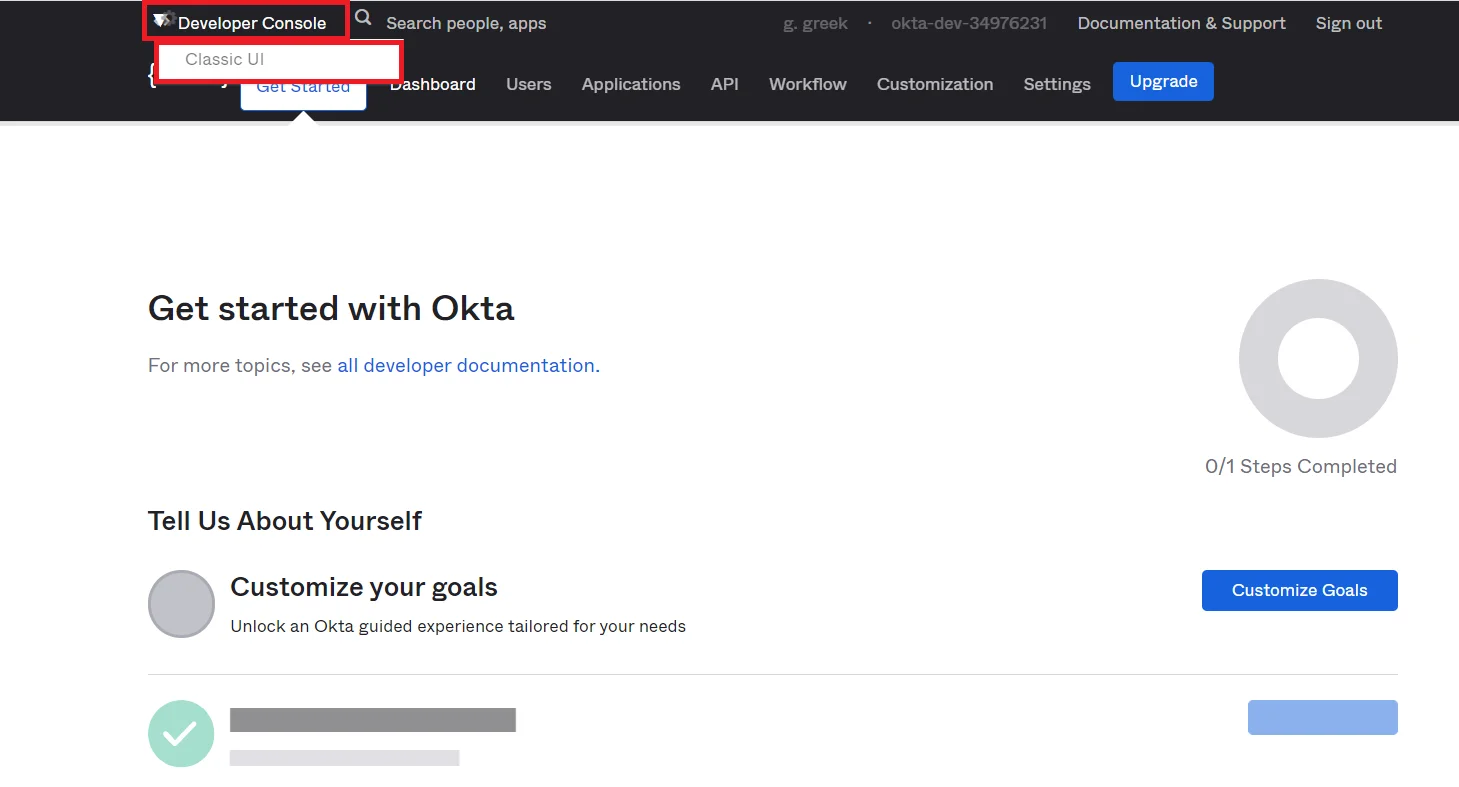
- Login into your Okta dashboard.
- You will be presented with the following screen. Click on the Developer Console arrow and select
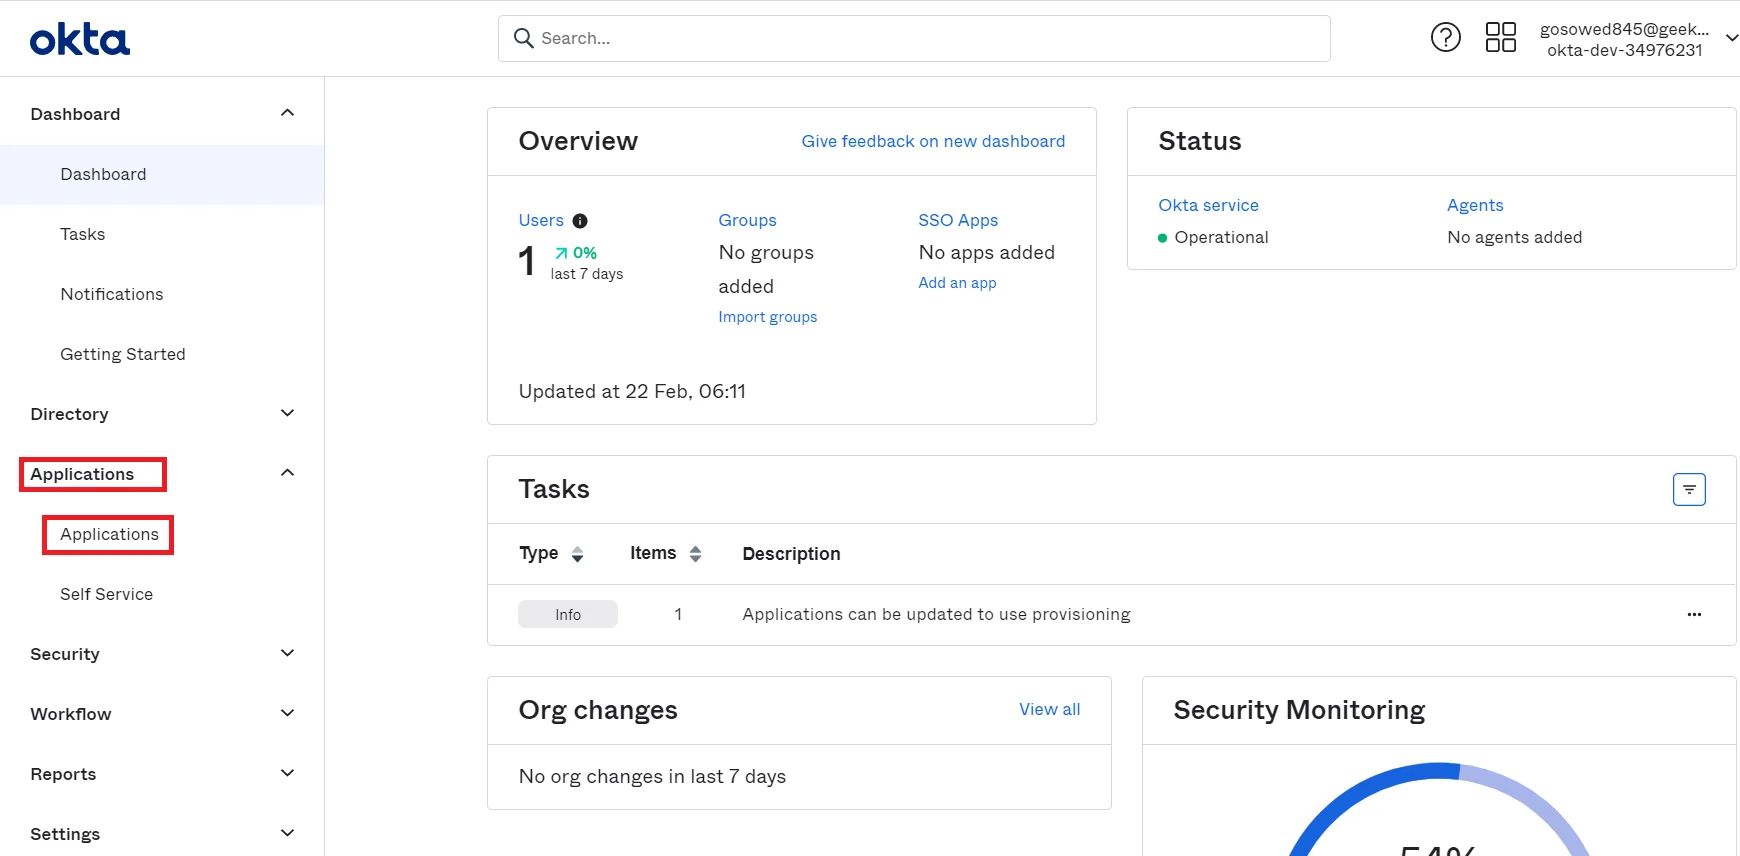
Classic UI from the navigation bar on top in Okta window. - In the Applications tab select Applications.
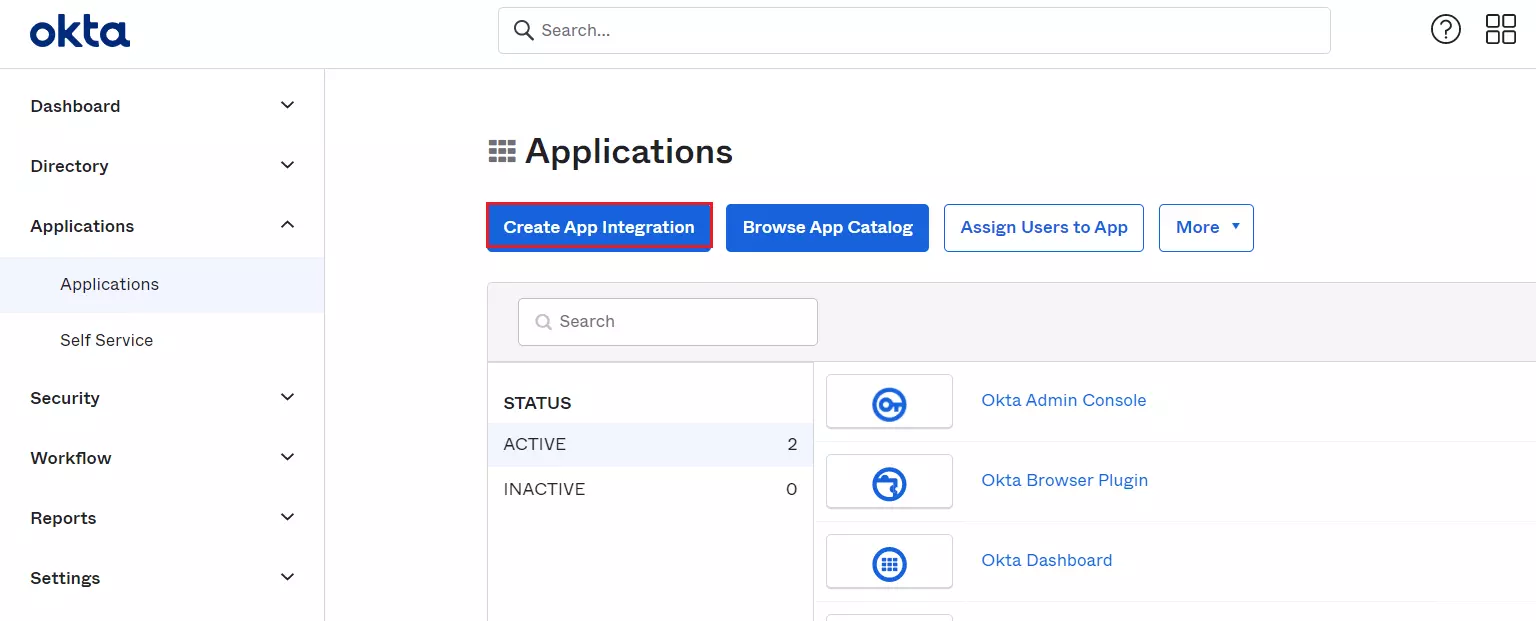
- Click on the Create App Integration button to create new app.
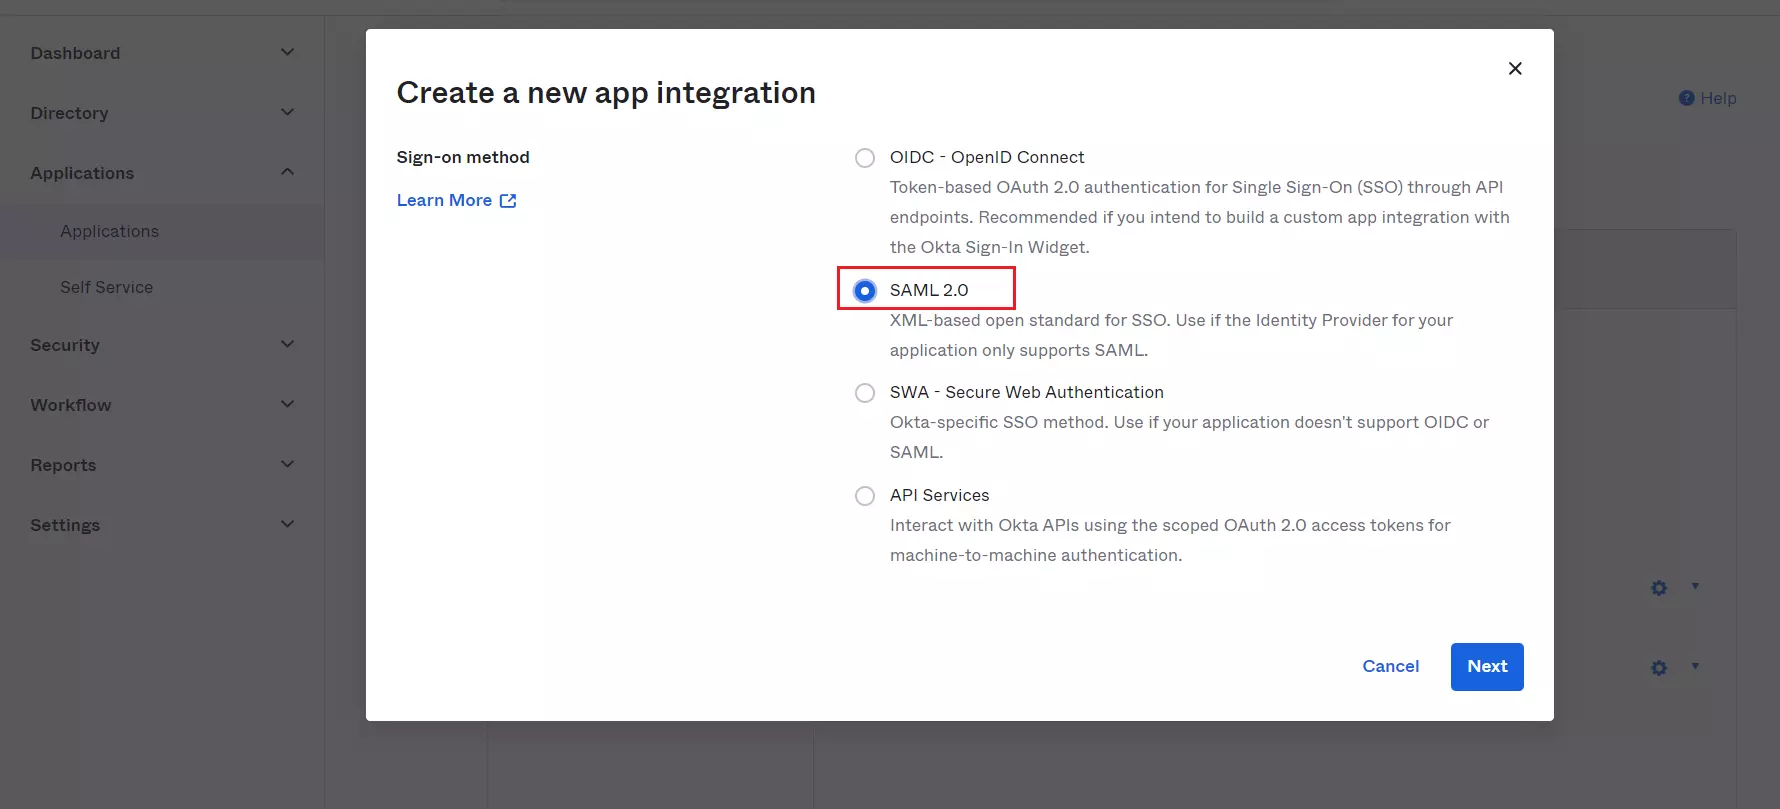
- Select SAML 2.0 as Sign-On method and Click on Next button.
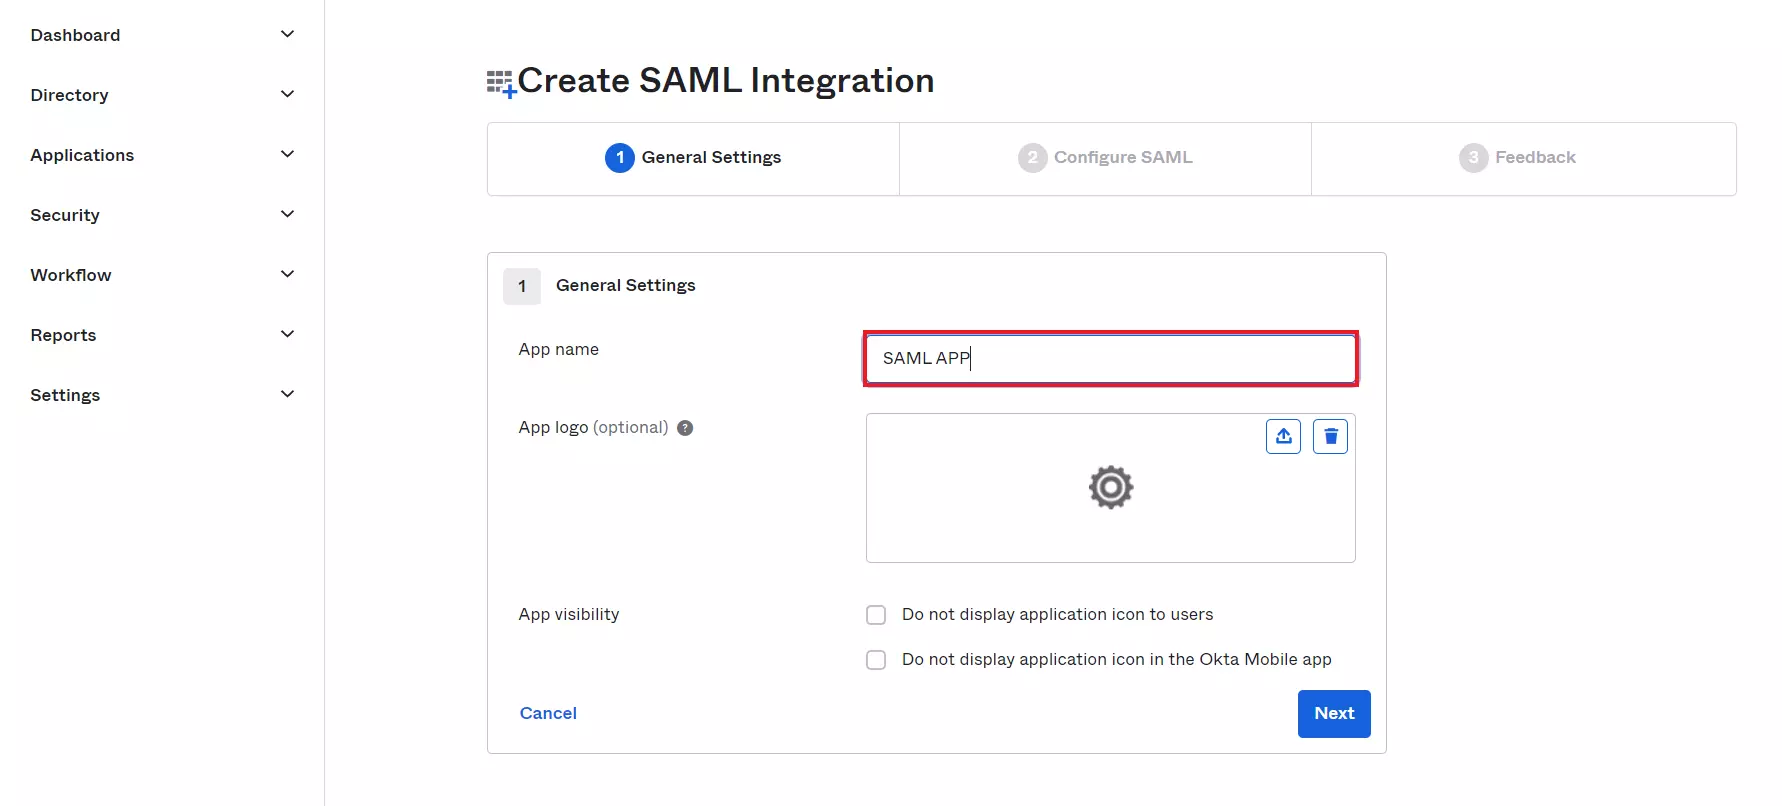
- In General Settings tab, enter App Name and click on Next button.
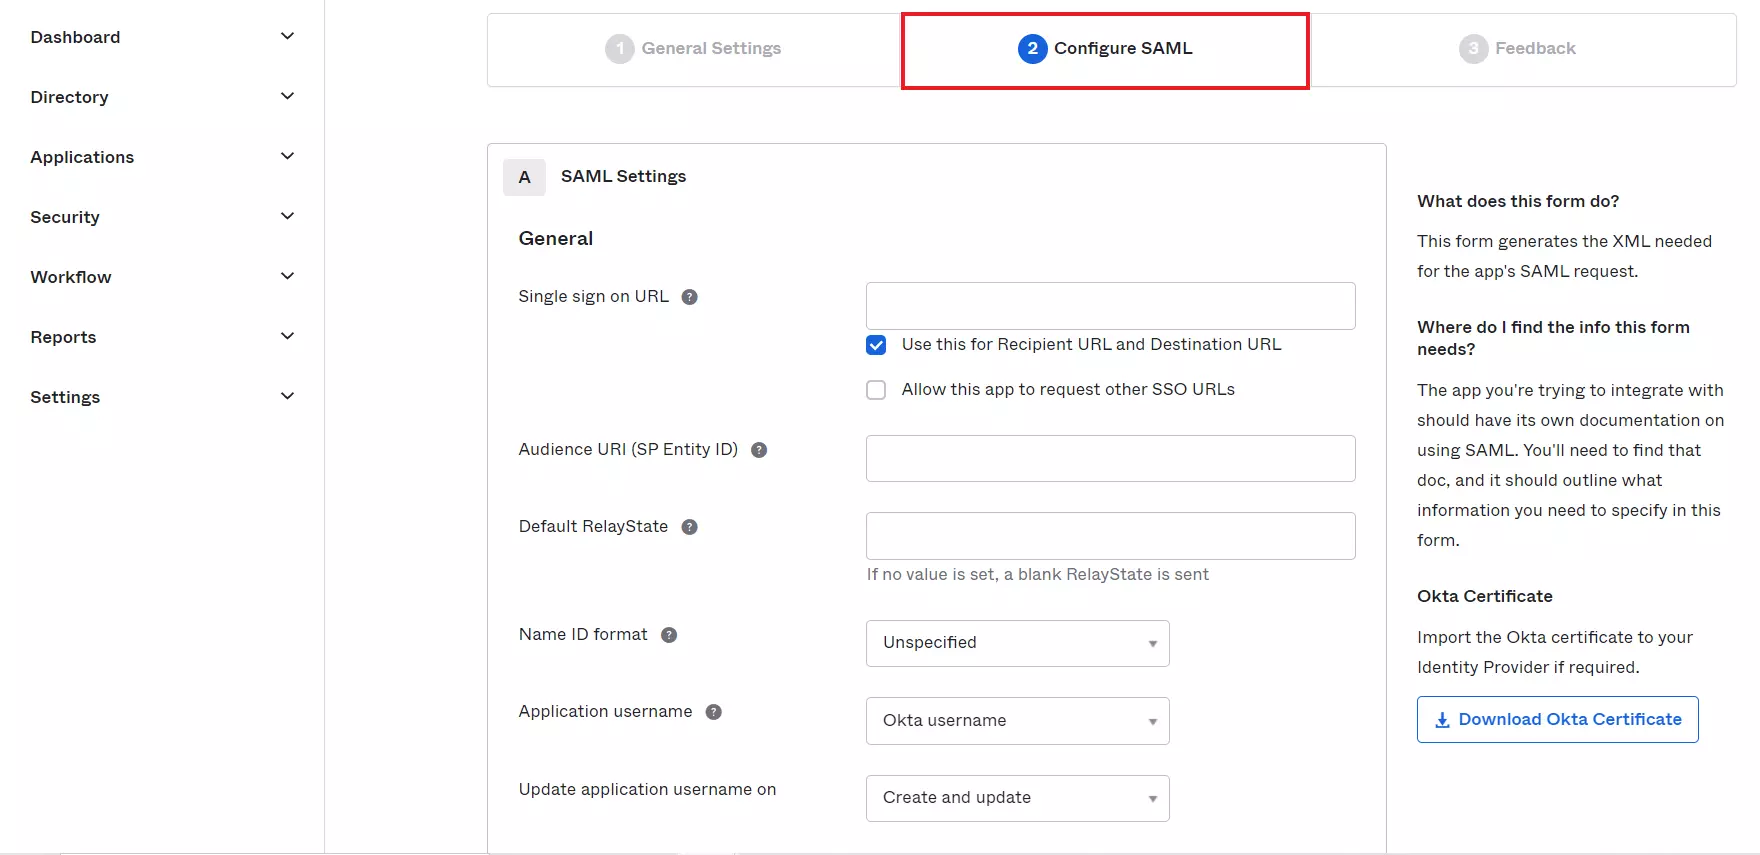
- In Configure SAML tab, enter the required details:
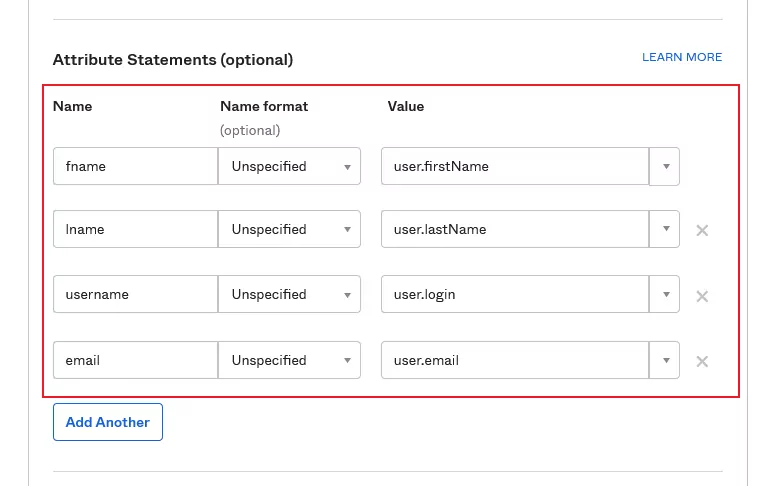
- Configure Group Attribute Statements (Optional) as given in table and click on Next button.
- If you have integrated your Active Directory in Okta and want to map the AD groups, please make sure that you have added the OUs used to import groups.You will also need to map the memberOf
attribute under the integrated directory’s configuration.
Follow the steps below to configure Okta as IdP
 Configure Okta as IdP
| Single Sign On URL |
ACS (AssertionConsumerService) URL from the Service Provider metadata tab of the Plugin |
| Audience URL (SP Entity ID) |
SP Entity ID / Issuer from the Service Provider Metadata tab of the Plugin |
| Default Relay State |
Relay State from the Service Provider Metadata tab of the Plugin |
| Name ID Format |
Select E-Mail Address as a Name Id from dropdown list |
| Application Username |
Okta username |
| Name | Value |
| fname | user.firstName |
| lname | user.lastName |
| username | user.login |
| user.email |
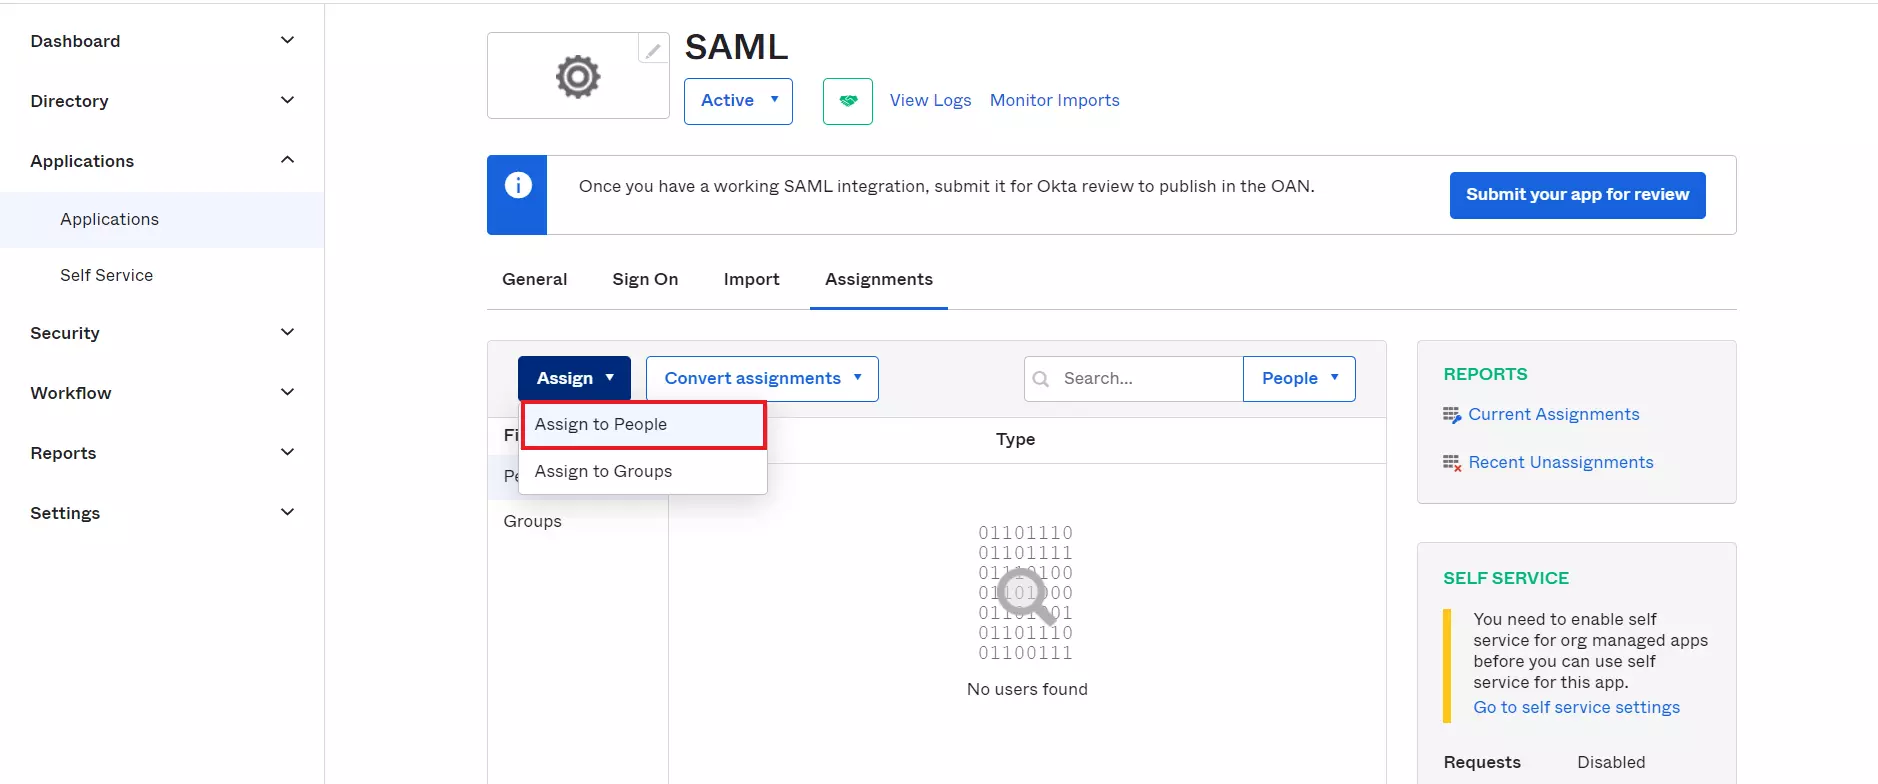
Assigning Groups/People
- Navigate to the application you created and click on the Assignments tab in Okta.
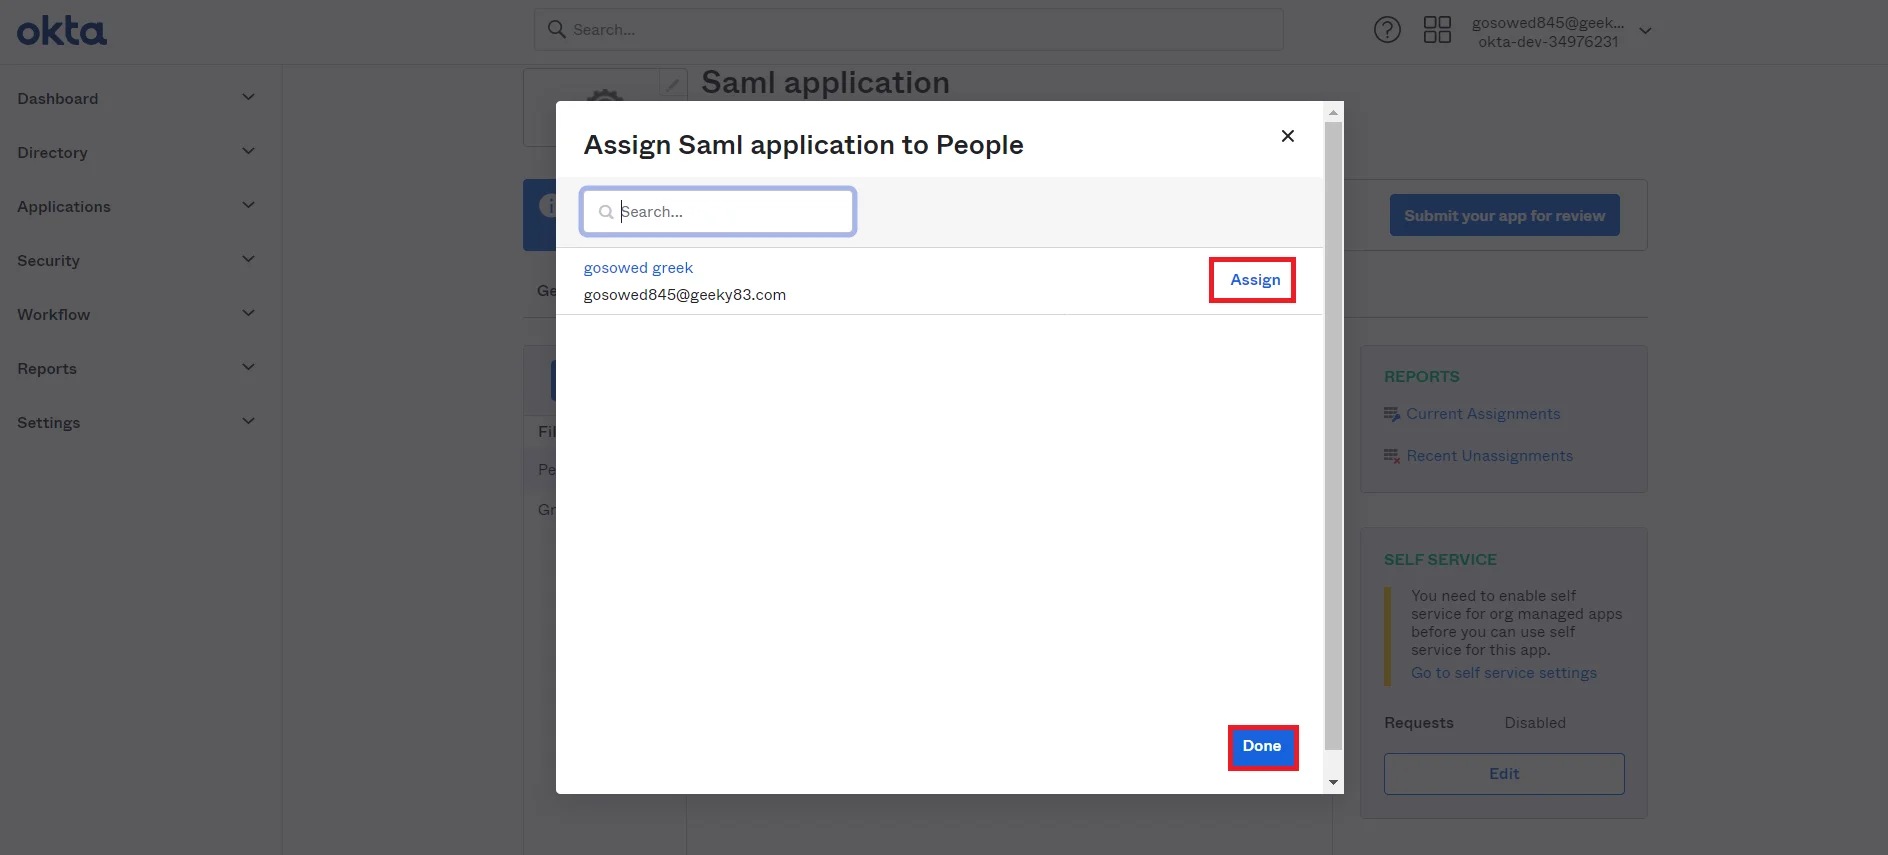
- Click on Assign button to Assign People and Assign Groups.
- Once you Assign the user, click on Done button.
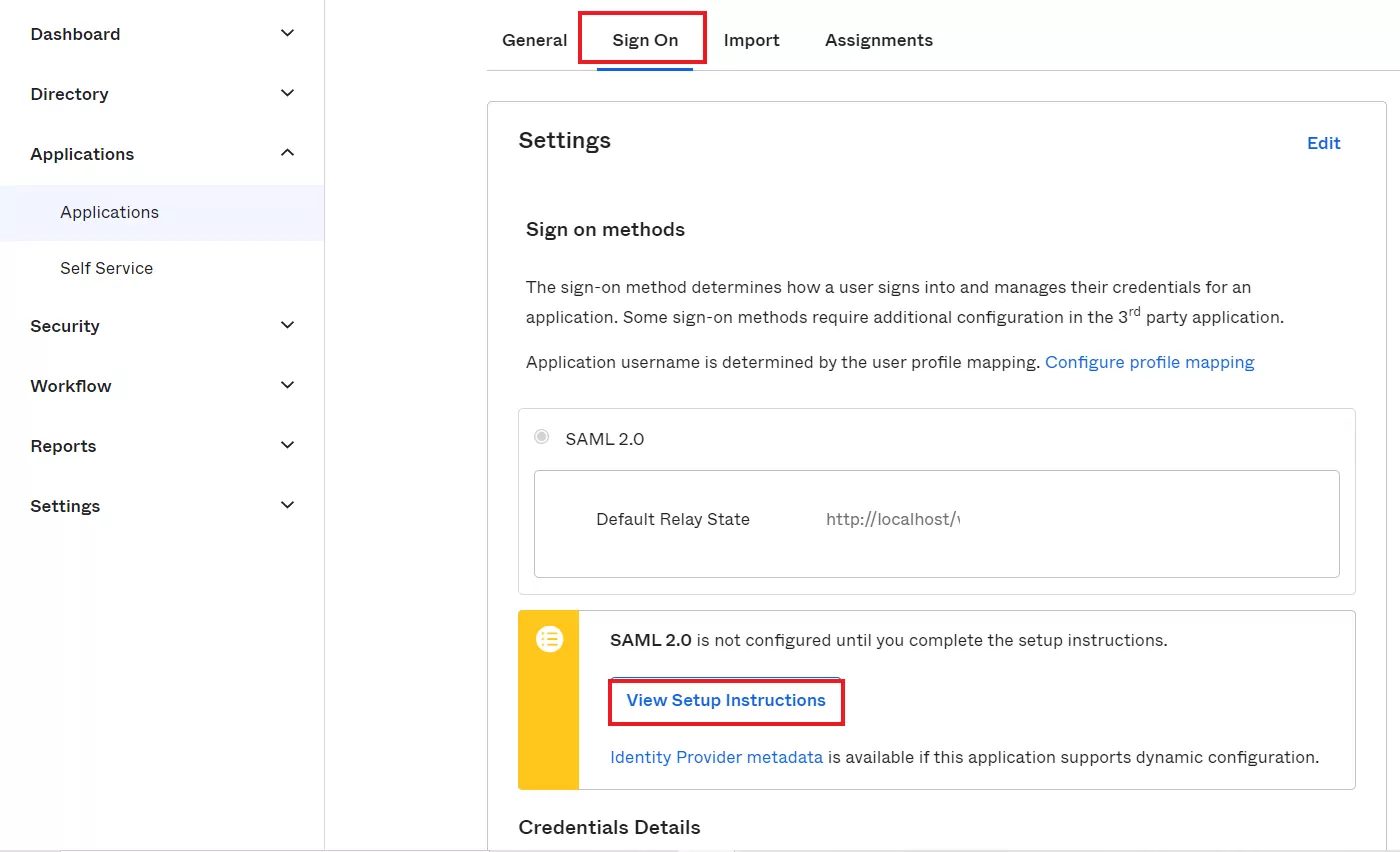
- Navigate to Sign On tab and Click on View Setup Instructions.
- You will get the Okta Metadata file / SAML Login URL (Single Sign on URL), Single Logout URL, IDP Entity ID and X.509 Certificate. You will need this to configure the Service Provider.

×
![]()
Trending searches:
Hello there!
Need Help? We are right here!
