SAML Single Sign-On into AWS AppStream2 using Joomla IDP Plugin | AWS AppStream2 SSO
SAML Single Sign-On into AWS AppStream2 using Joomla IDP Plugin | AWS AppStream2 SSO
AWS AppStream
Login using Joomla Users ( Joomla as SAML IDP ) plugin gives you the ability to use your Joomla credentials to log into AWS AppStream. Here we will go through a step-by-step guide to configure SSO between AWS AppStream as Service Provider and Joomla as an Identity Provider.
Pre-requisites : Download And Installation
- You may install the plugin by following these steps.
Steps for Integration of Joomla Single Sign-On (SSO) with AWS AppStream as Service Provider
1. Configure AWS AppStream as the Service Provider (SP)
- Login to your Amazon Web Services (AWS) Console as an admin.
- Click on Services Tab. Under Security, Identity, & Compliances, click on IAM (Identity and Access Management).
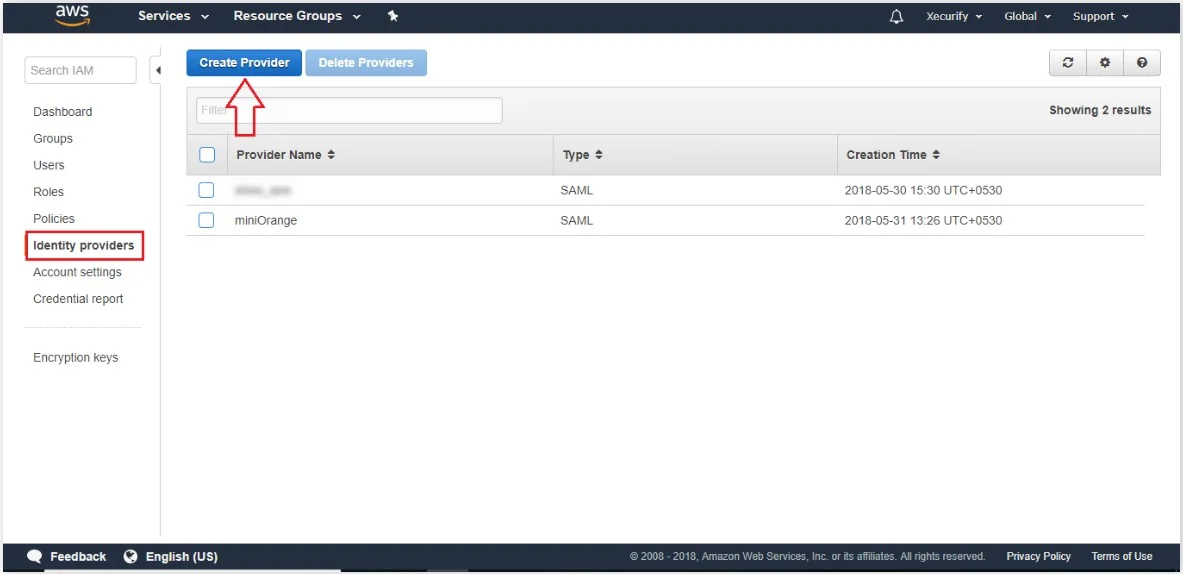
- From the left-hand side list, click on Identity Providers and then click on Create Provider button in the right section.
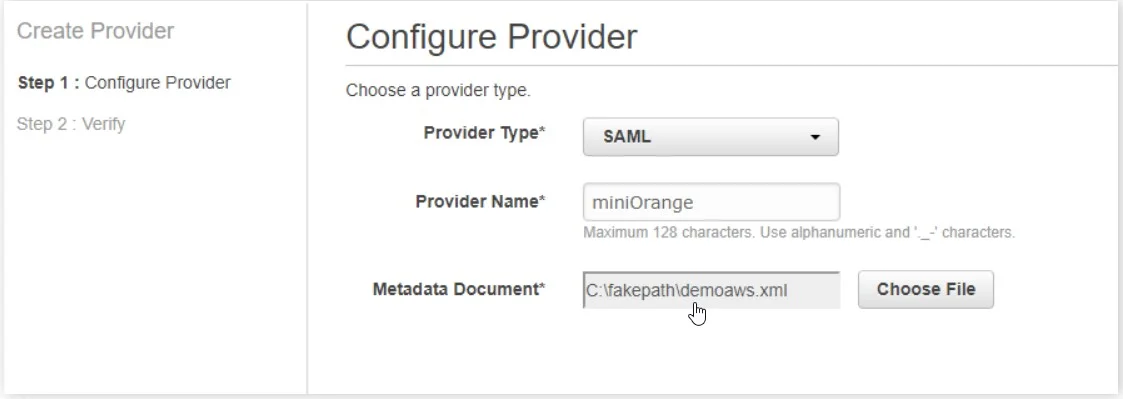
- In the Configure Provider, select SAML as Provider type from the drop-down list.
- Enter any Provider Name (e.g Miniorange).
- Click on Choose File button and choose a metadata file that you have already downloaded in Step 1, then click on Next Step.
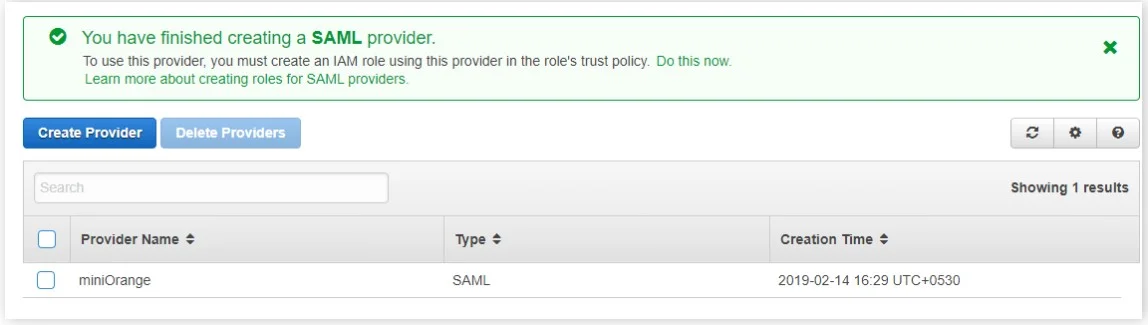
- In the next screen, you will be shown your entered provider information. Verify it and click on the Create button. The SAML Provider is created and it should be listed in the Provider table.
- Create/Add Role
- Now click on Roles from the left-hand side list and then click on Create role button.
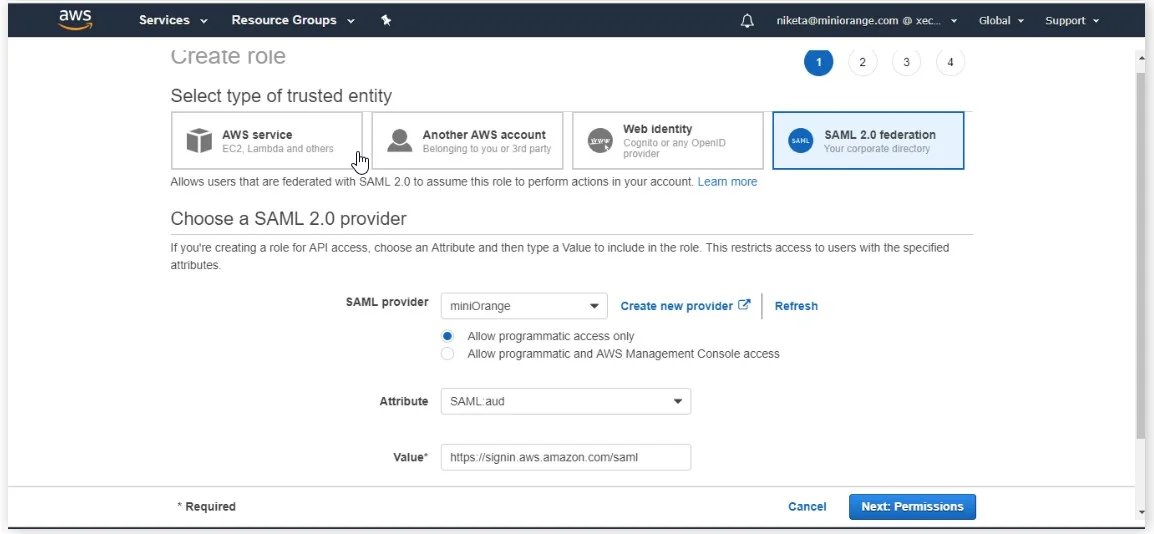
- In the Create Role section, click on SAML 2.0 federation tab.
- Under Choose SAML 2.0 Provider, select the SAML Provider that you have created previously i.e Miniorange.
- After that, choose Allow programmatic access only radio option.
- Select SAML:aud option from the Attribute drop-down list.
- Enter the value as https://signin.aws.amazon.com/saml.
- Then, click on Next: Permissions button.
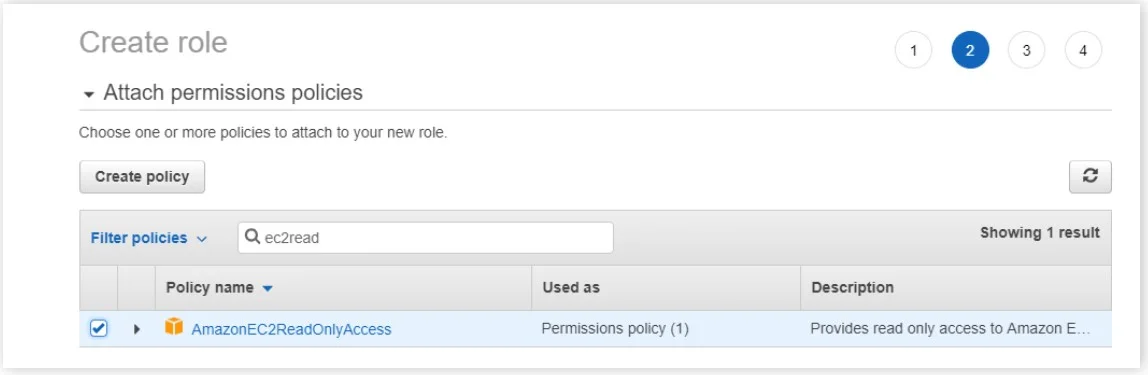
- Check the Policy Name AmazonEC2ReadOnlyAccess and click on Next: Tags button.
- Then, skip Step Add Tags (Optional) by clicking on Next:Rreview button.
- In the next step, enter Role name and click on Create Role button.
- Click on your created role name.
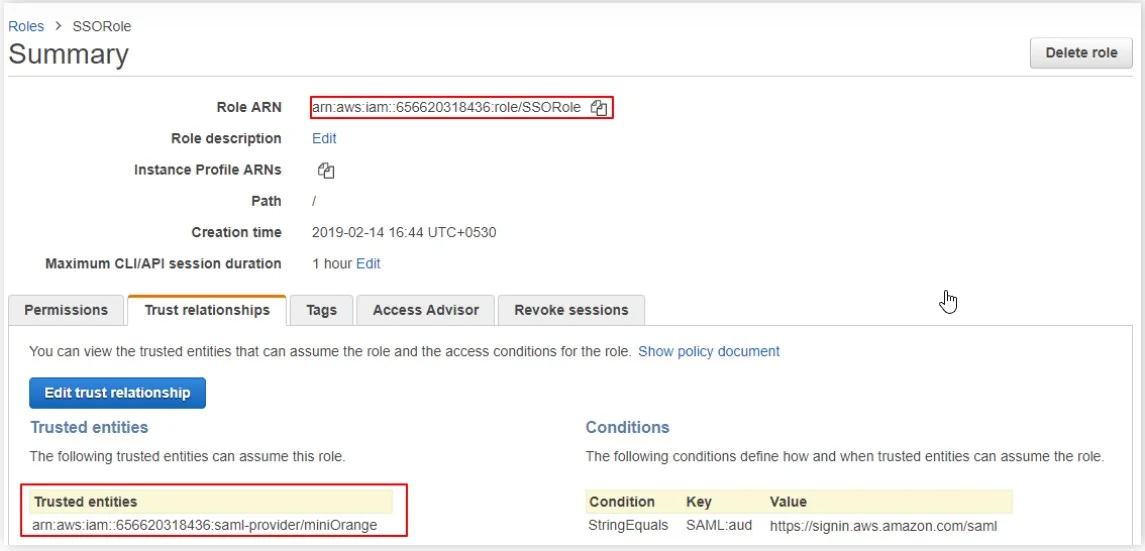
- In the Summary section, click on the trusted relationship tab and copy Role ARN and Trusted Entities value.
- Keep the values with you in comma separated format. For example- arn:aws:iam::656620318436:role/SSORole,arn:aws:iam::656620318436:saml-provider/miniorange
- Add attributes for AWS AppStream
- Enter the value https://aws.amazon.com/SAML/Attributes/RoleSessionName in the Attribute Name field and select E-Mail Address from the Attribute Value dropdown list.
- Click on the '+' icon besides Additional User Attributes to add another set of attributes and enter the value https://aws.amazon.com/SAML/Attributes/Role in the Attribute Name field and enter the machine name whose value here (arn:aws:iam::656620318436:role/SSORole,arn:aws:iam::656620318436:saml-provider/miniOrange) you want to send to SP.
- select Custom Attribute Value from the Attribute Value list and in the Custom Attribute Value, enter comma separated value that created in step 3 e.g.[arn:aws:iam::656620318436:role/SSORole,arn:aws:iam::656620318436:saml-provider/miniOrange].


In this, you have successfully integrated AWS AppStream - SAML Single Sign-On (SSO) with plugin- Login using Joomla Users ( Joomla as SAML IDP ). Configuring AWS AppStream as SP and Joomla as IDP. This solution ensures that you are ready to roll out secure Single Sign-On (SSO) access with SAML 2.0 Authentication into AWS AppStream using Joomla login credentials.
2: Configuring Joomla as Identity Provider (IDP)
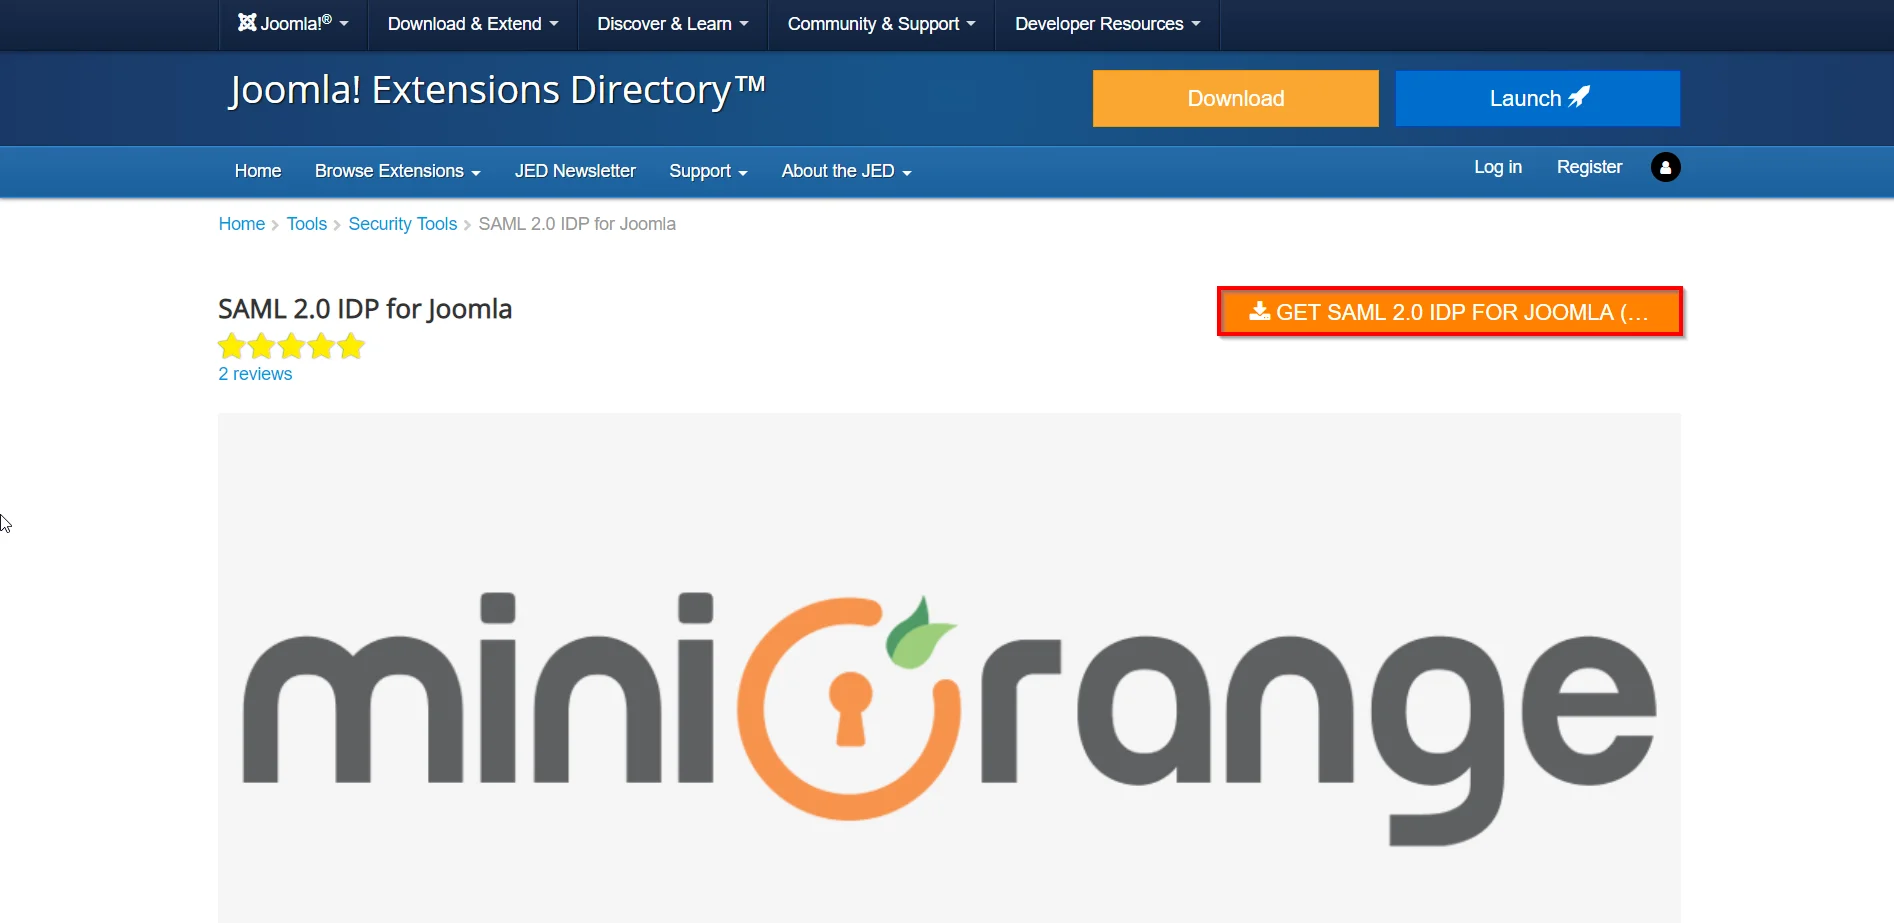
- Download SAML 2.0 IdP for Joomla from Here.
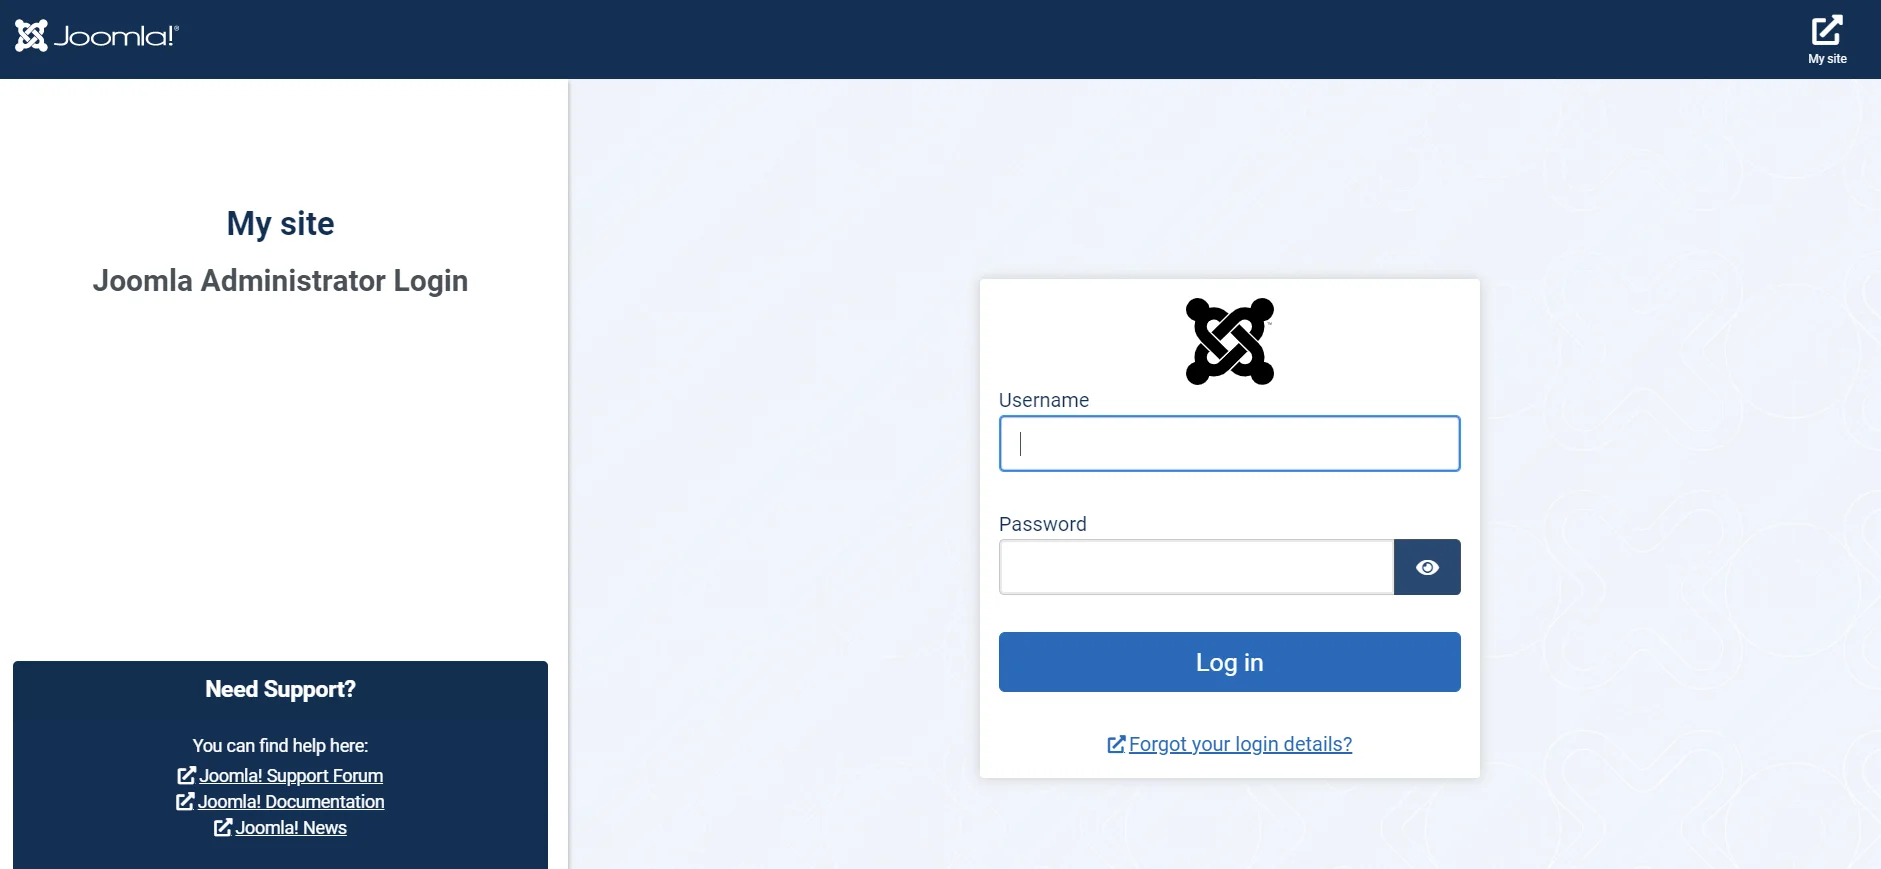
- Login to the administrator section of your Joomla 4 website :–
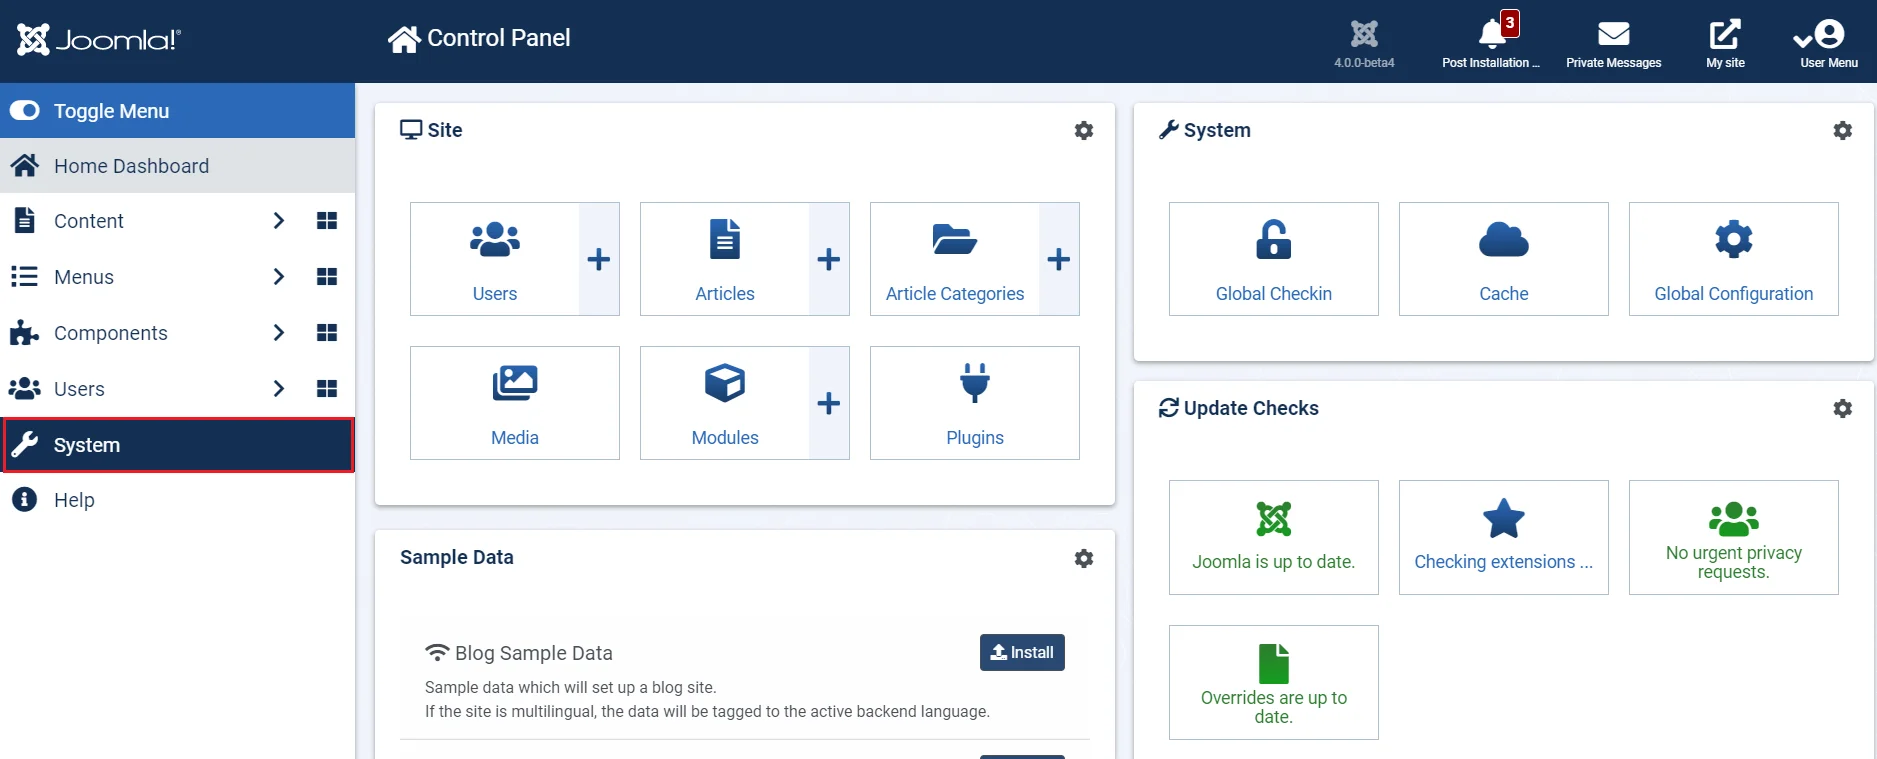
- From the dashboard of Joomla 4 site. Click on System to install the plugin
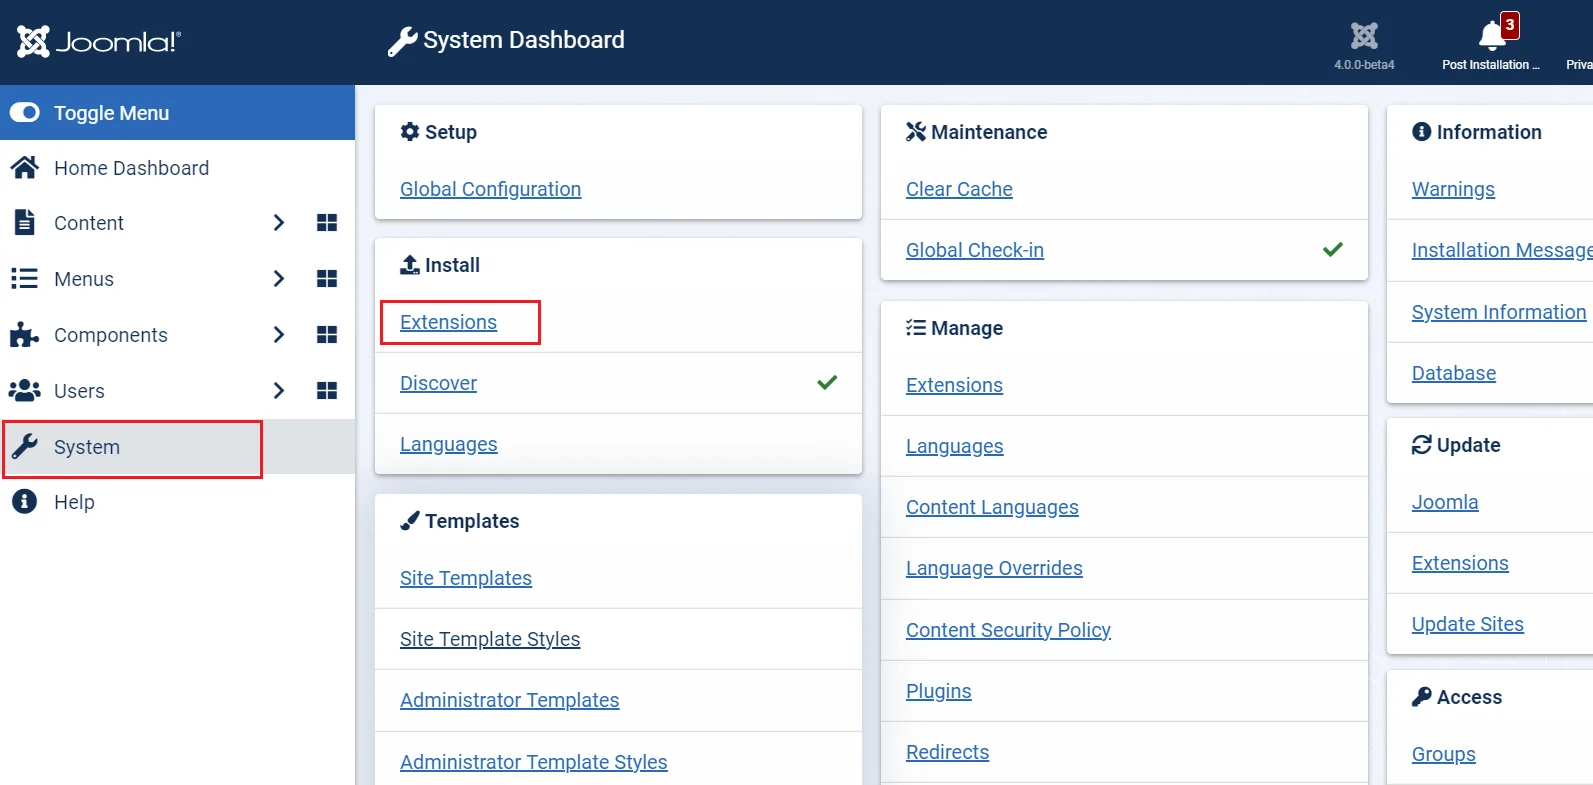
- Under System Install Extentions .
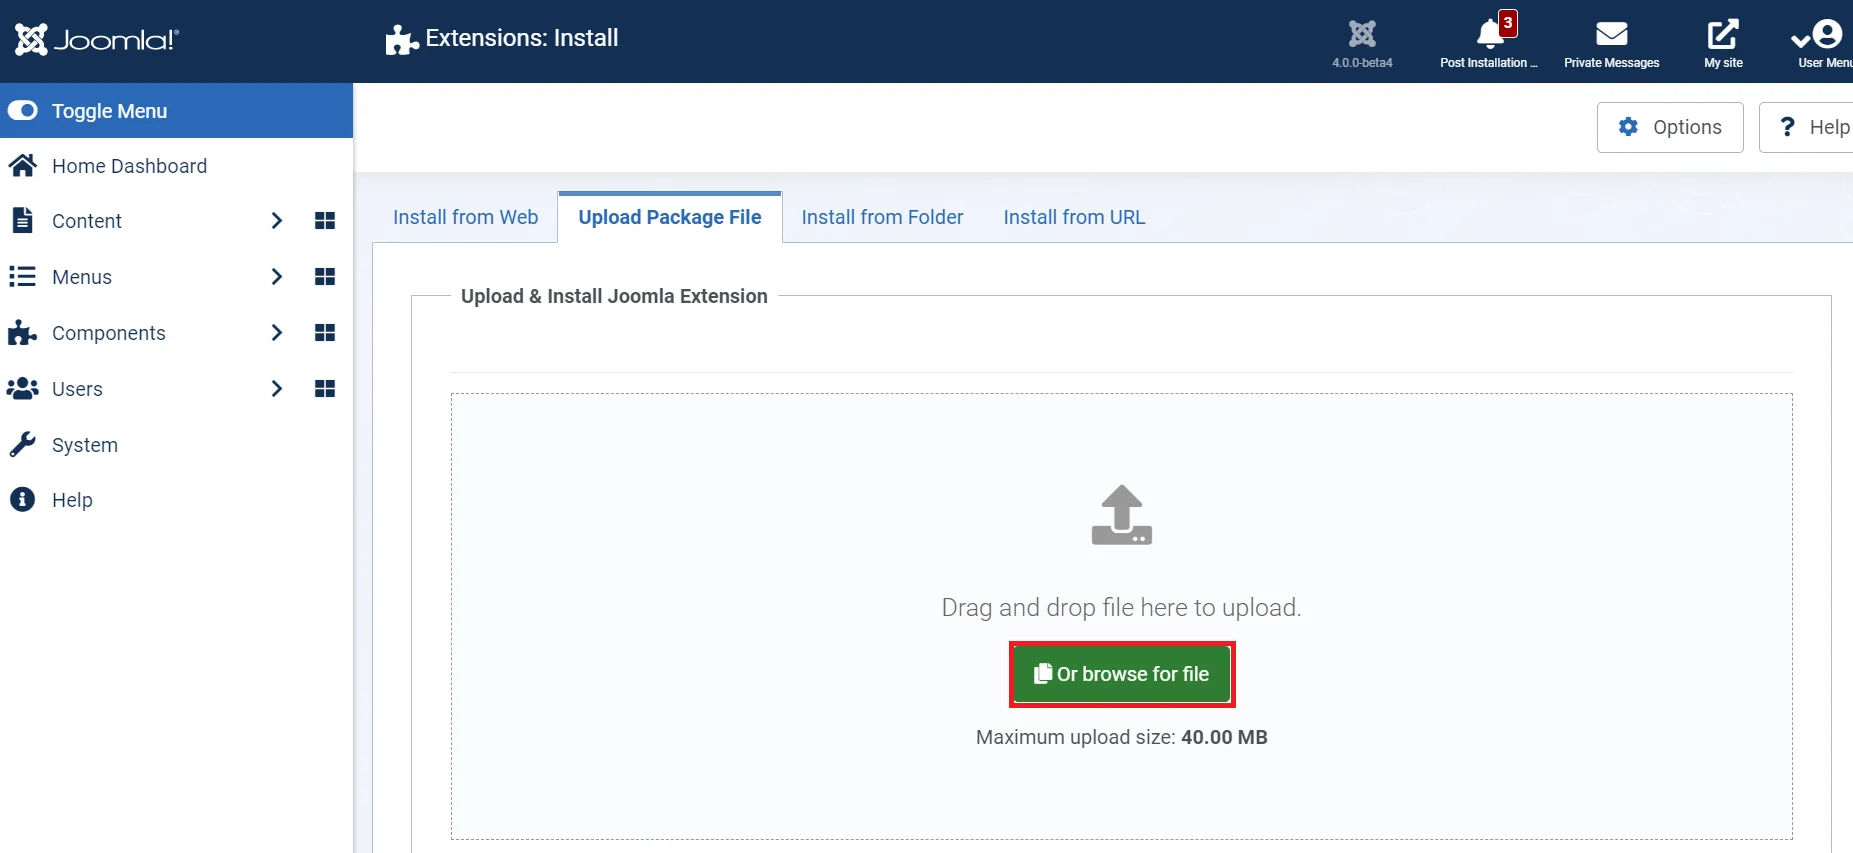
- Drag and drop your miniorange-joomla-saml-idp.zip file in the area indicated in the image below or browse and select the file to install the plugin.
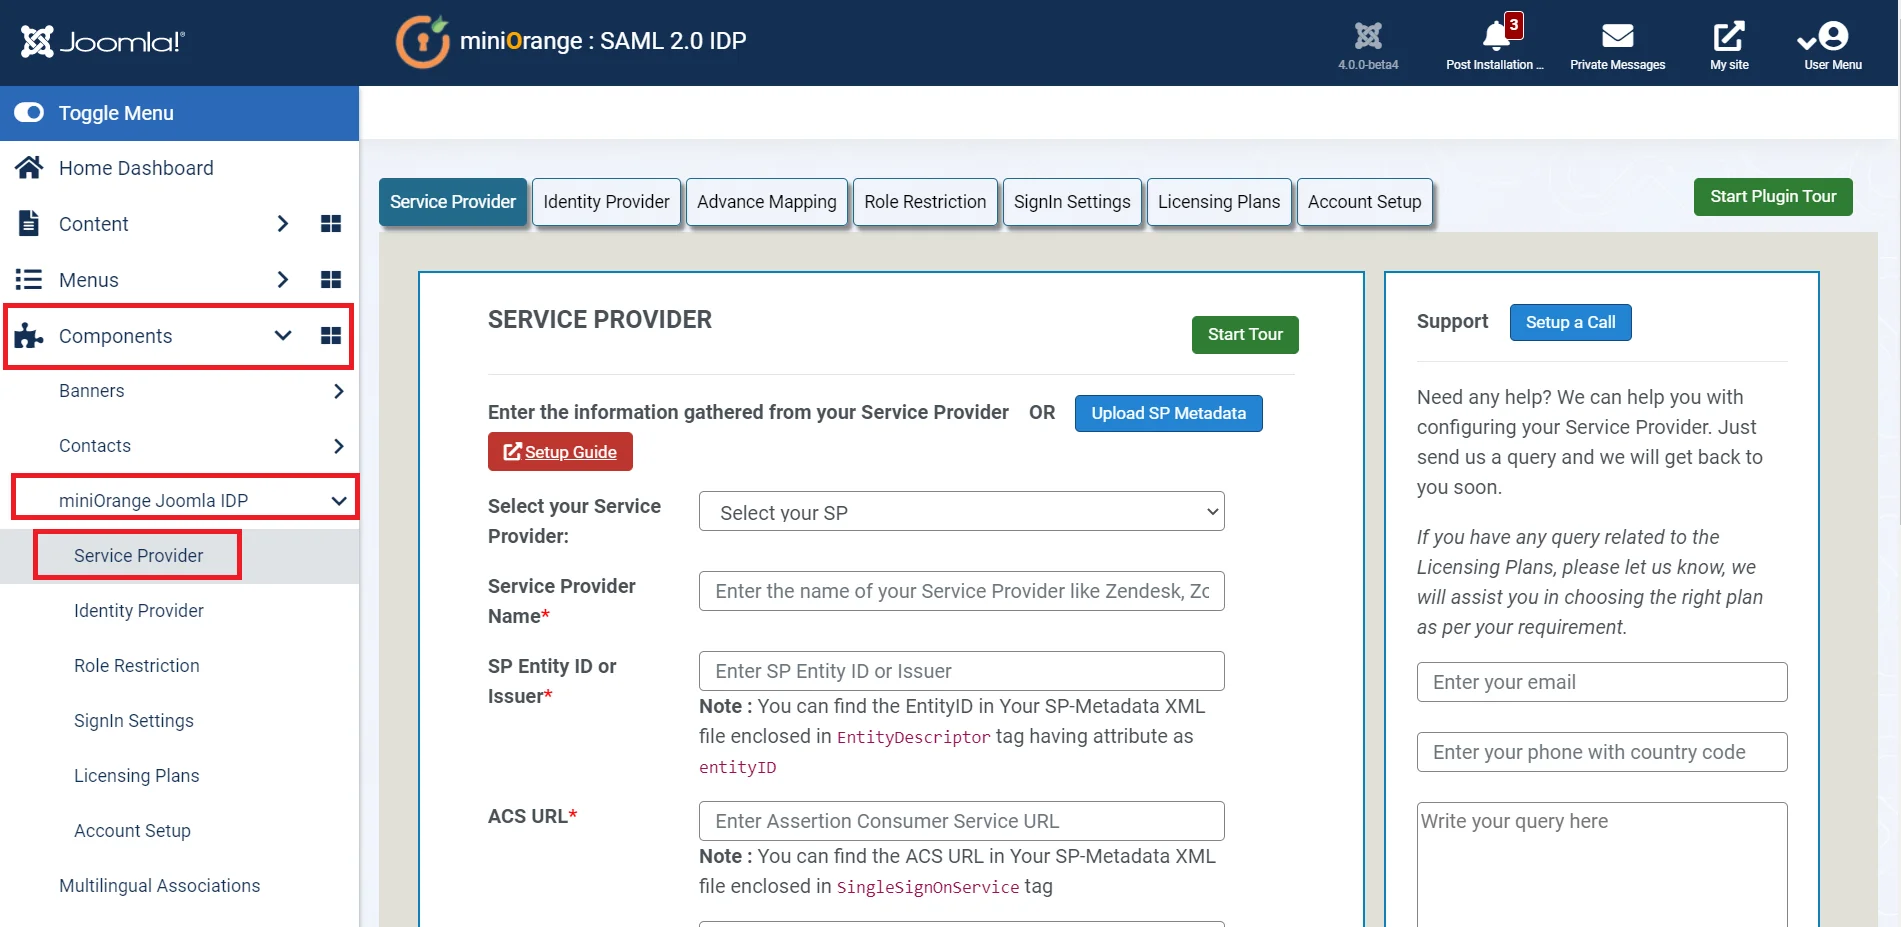
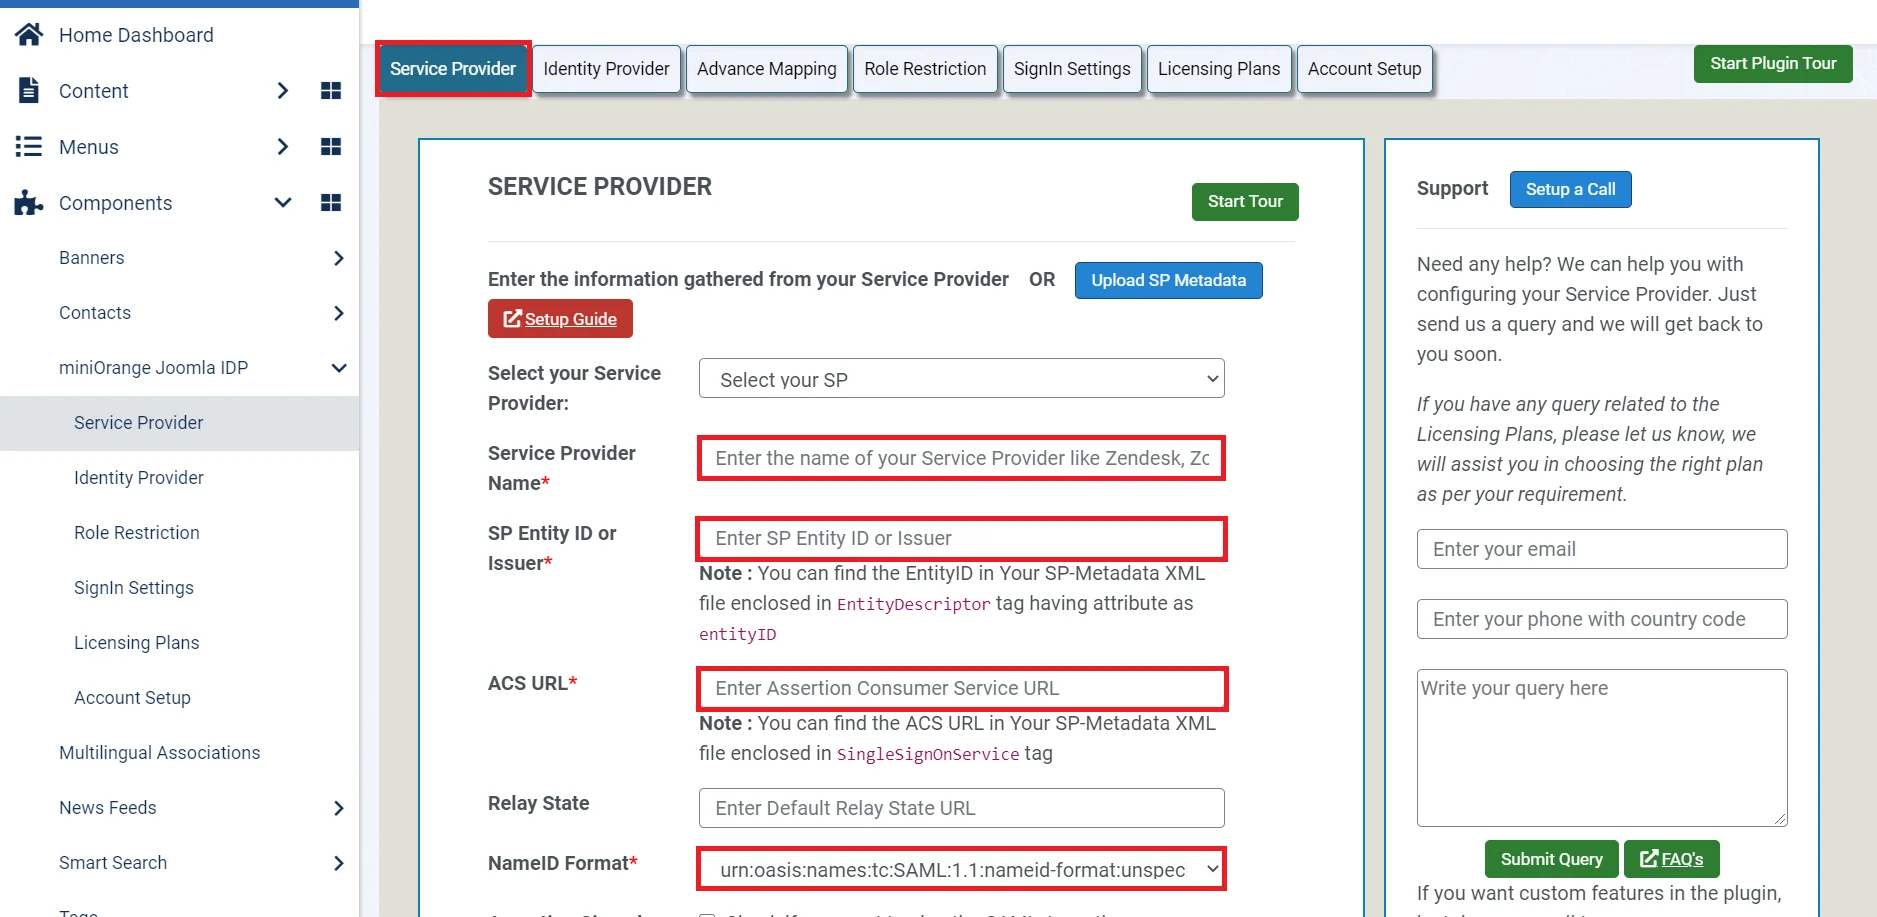
- Now go to Components miniOrange Joomla IDP Service Provider
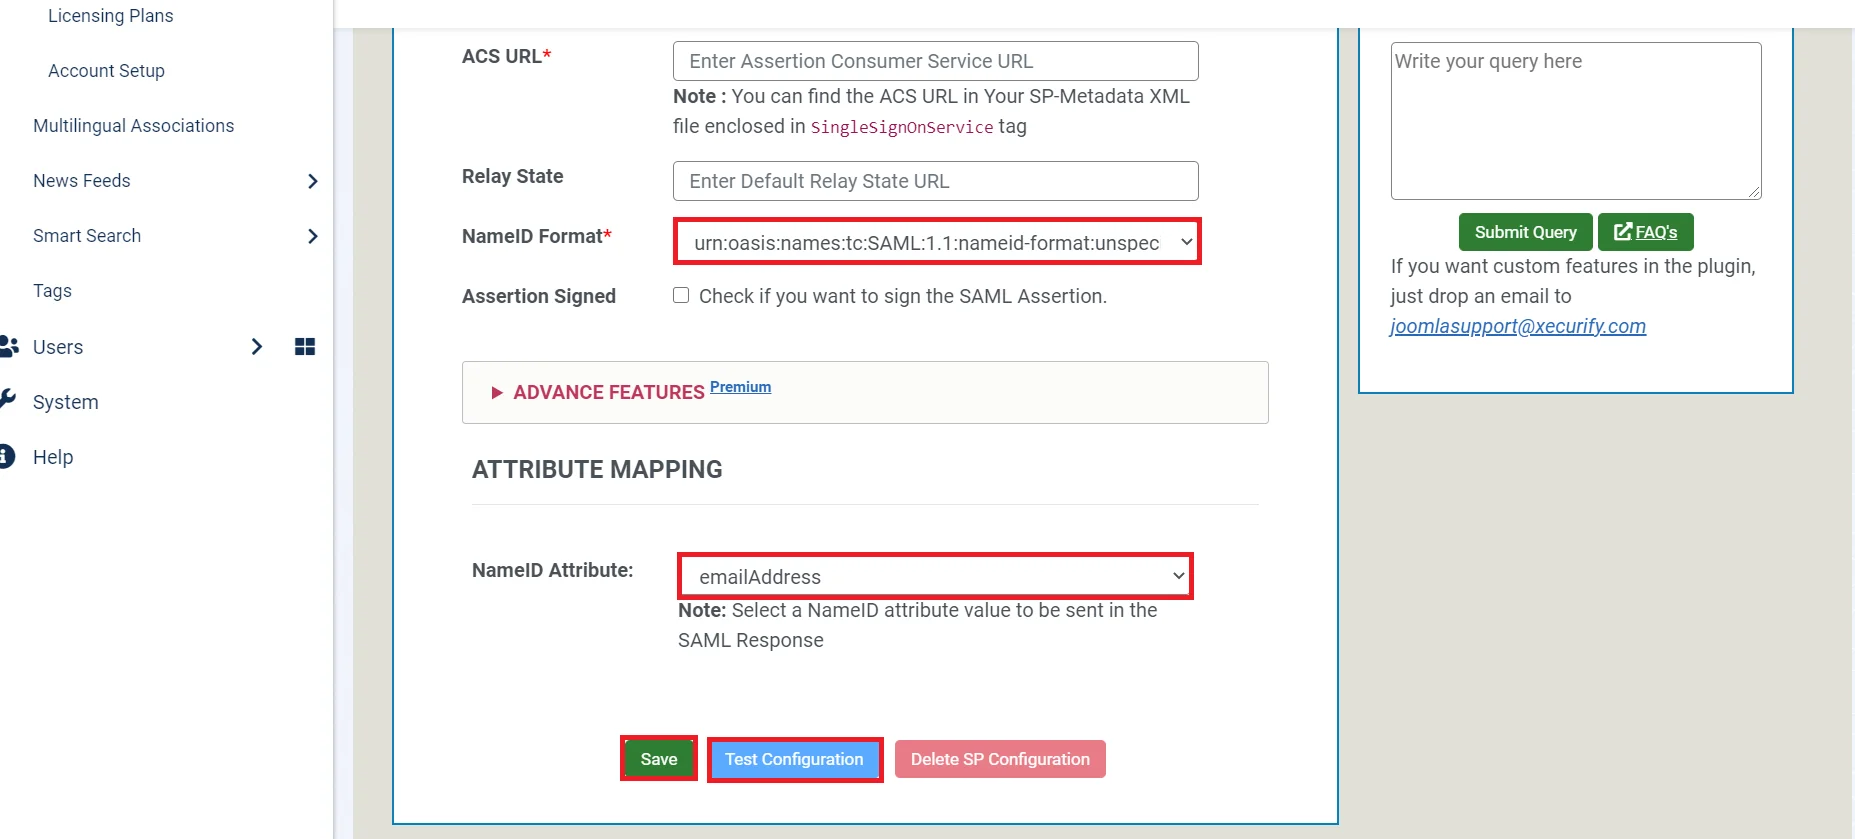
- Under Service Provider tab and fill in the Service Provider Name, SP Entity ID or Issuer, ACS URL and NameID Format. You will get these details from the Service Provider that you are using. Fill in the other fields according to your requirements. Click on Save.
- Click on NameID Attribute tab. Select the NameID Attribute and then click on Save Button.
Enter the following values:
| Service Provider Name | Choose appropriate name according to your choice . |
| SP Entity ID or Issuer | Service Provider Entity ID . |
| ACS URL | SP Assertion Consumer Service URL . |
| X.509 Certificate (optional) [For Signed Request] | Paste certificate value you copied from the Metadata file . |
| NameID Format | Select urn:oasis:names:tc:SAML:1.1:nameid-format:emailAddress. |
| Assertion Signed | Checked. |
Miniorange Joomla SAML Single Sign-On (SSO) supports multiple known SPs like Panopto, Lucid charts, Agylia LMS, Moodle, Inkling SP, Zendesk, Tableau, Owncloud, miniOrange Wordpress SAML SP, Drupal SAML SP, Workplace by Facebook, Salesforce, Zoho, Klipfolio and many more.
You have successfully completed your miniOrange SAML 2.0 IDP configurations. Still, if you are facing any difficulty please mail us on joomlasupport@xecurify.com .
Additional Resources.
- What is Single Sign-On (SSO)
- What is SAML?
- Additional SAML IDP guides
- Frequently Asked Questions (FAQs)
Free Trial:
If you would like to test out the plugin to ensure your business use case is fulfilled, we do provide a 7-day trial. Please drop us an email at joomlasupport@xecurify.com requesting a trial. You can create an account with us using this link.24*7 Active Support
If you face any issues or if you have any questions, please feel free to reach out to us at joomlasupport@xecurify.com . In case you want some additional features to be included in the plugin, please get in touch with us, and we can get that custom-made for you. Also, If you want, we can also schedule an online meeting to help you Setup the Joomla SAML IDP Single Sign-On plugin.
Need Help? We are right here!
