Contents
AWS Cognito SSO Login into Drupal using OAuth / OpenID connect
Drupal OAuth Client module enables Single Sign-On i.e. SSO for a Drupal site with any Identity Provider using OAuth or OpenID connect protocol. This module is compatible with Drupal 7, Drupal 8, Drupal 9, and Drupal 10. Here we will go through the steps to configure the module with the AWS Cognito. Once this configuration is done, users will be able to log in to the Drupal site using their AWS credentials.
Installation Steps:
- Download the module:
composer require 'drupal/miniorange_oauth_client'
- Navigate to Extend menu on your Drupal admin console and search for miniOrange OAuth Client Configuration using the search box.
- Enable the module by checking the checkbox and click on the Install button.
- You can configure the module at:
{BaseURL}/admin/config/people/miniorange_oauth_client/config_clc
- Install the module:
drush en drupal/miniorange_oauth_client
- Clear the cache:
drush cr
- You can configure the module at:
{BaseURL}/admin/config/people/miniorange_oauth_client/config_clc
- Navigate to Extend menu on your Drupal admin console and click on Install new module.
- Install the Drupal OAuth & OpenID Connect Login - OAuth2 Client SSO Login module either by downloading the zip or from the URL of the package (tar/zip).
- Click on Enable newly added modules.
- Enable this module by checking the checkbox and click on install button.
- You can configure the module at:
{BaseURL}/admin/config/people/miniorange_oauth_client/config_clc
Setup Drupal as OAuth Client:
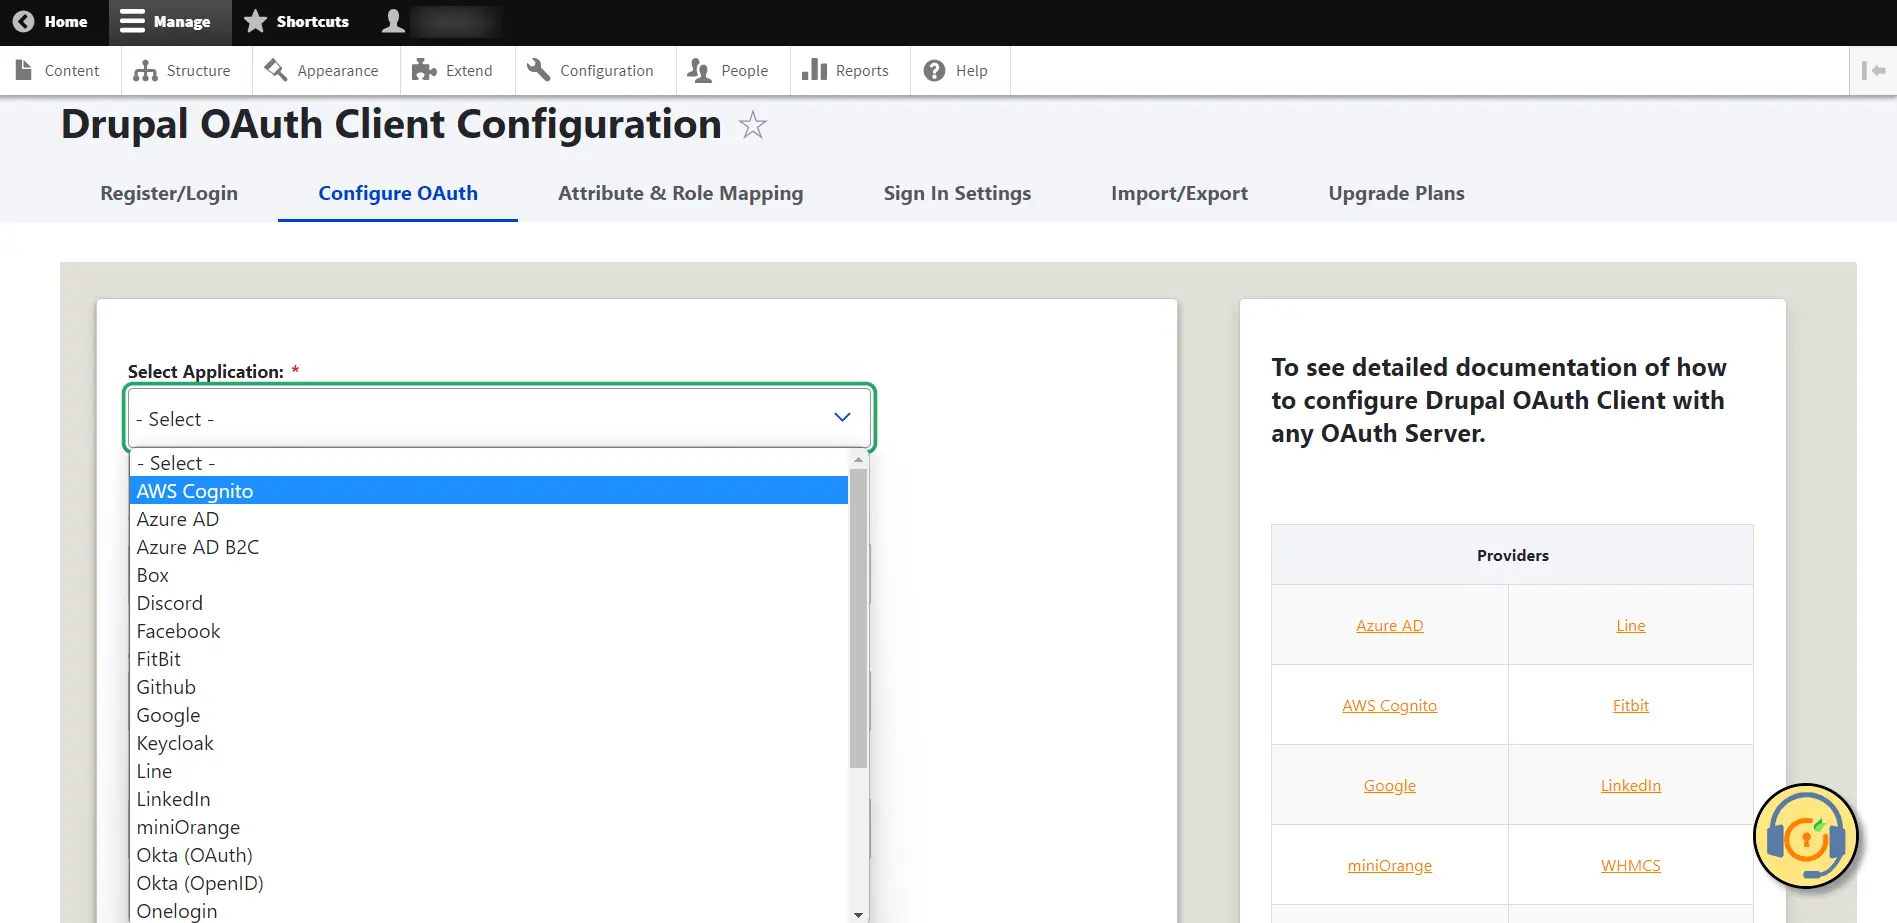
- After installing the module, navigate to the Configuration -> miniOrange OAuth Client Configuration -> Configure OAuth tab and select AWS Cognito from the Select Application dropdown list.
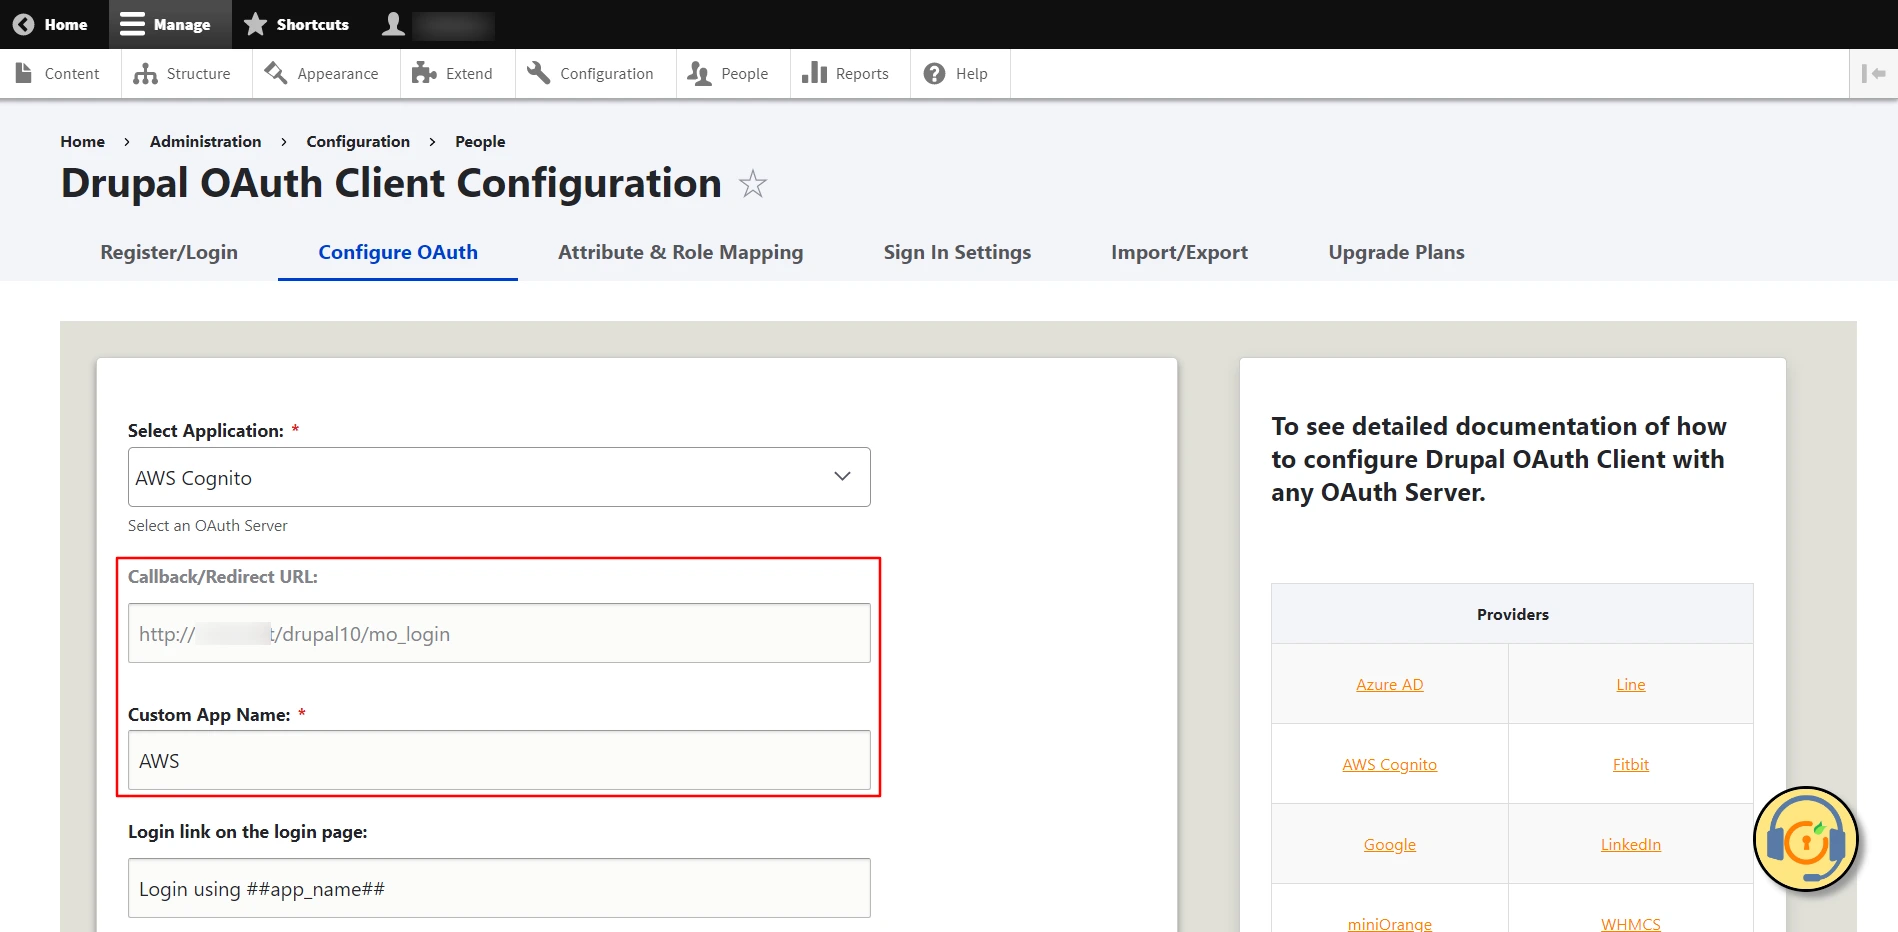
- Copy the Callback/Redirect URL and keep it handy.
Note:- If you have an HTTP Drupal site, and AWS Cognito enforces the HTTPS Redirect URI. Please navigate to the Sign In Settings tab of the module and set the base URL of the site with HTTPS in the Base URL text field.
- Enter the name in the Custom App Name text field. For example, AWS Cognito
Setup AWS Cognito as an OAuth Provider:
- Login to AWS console.
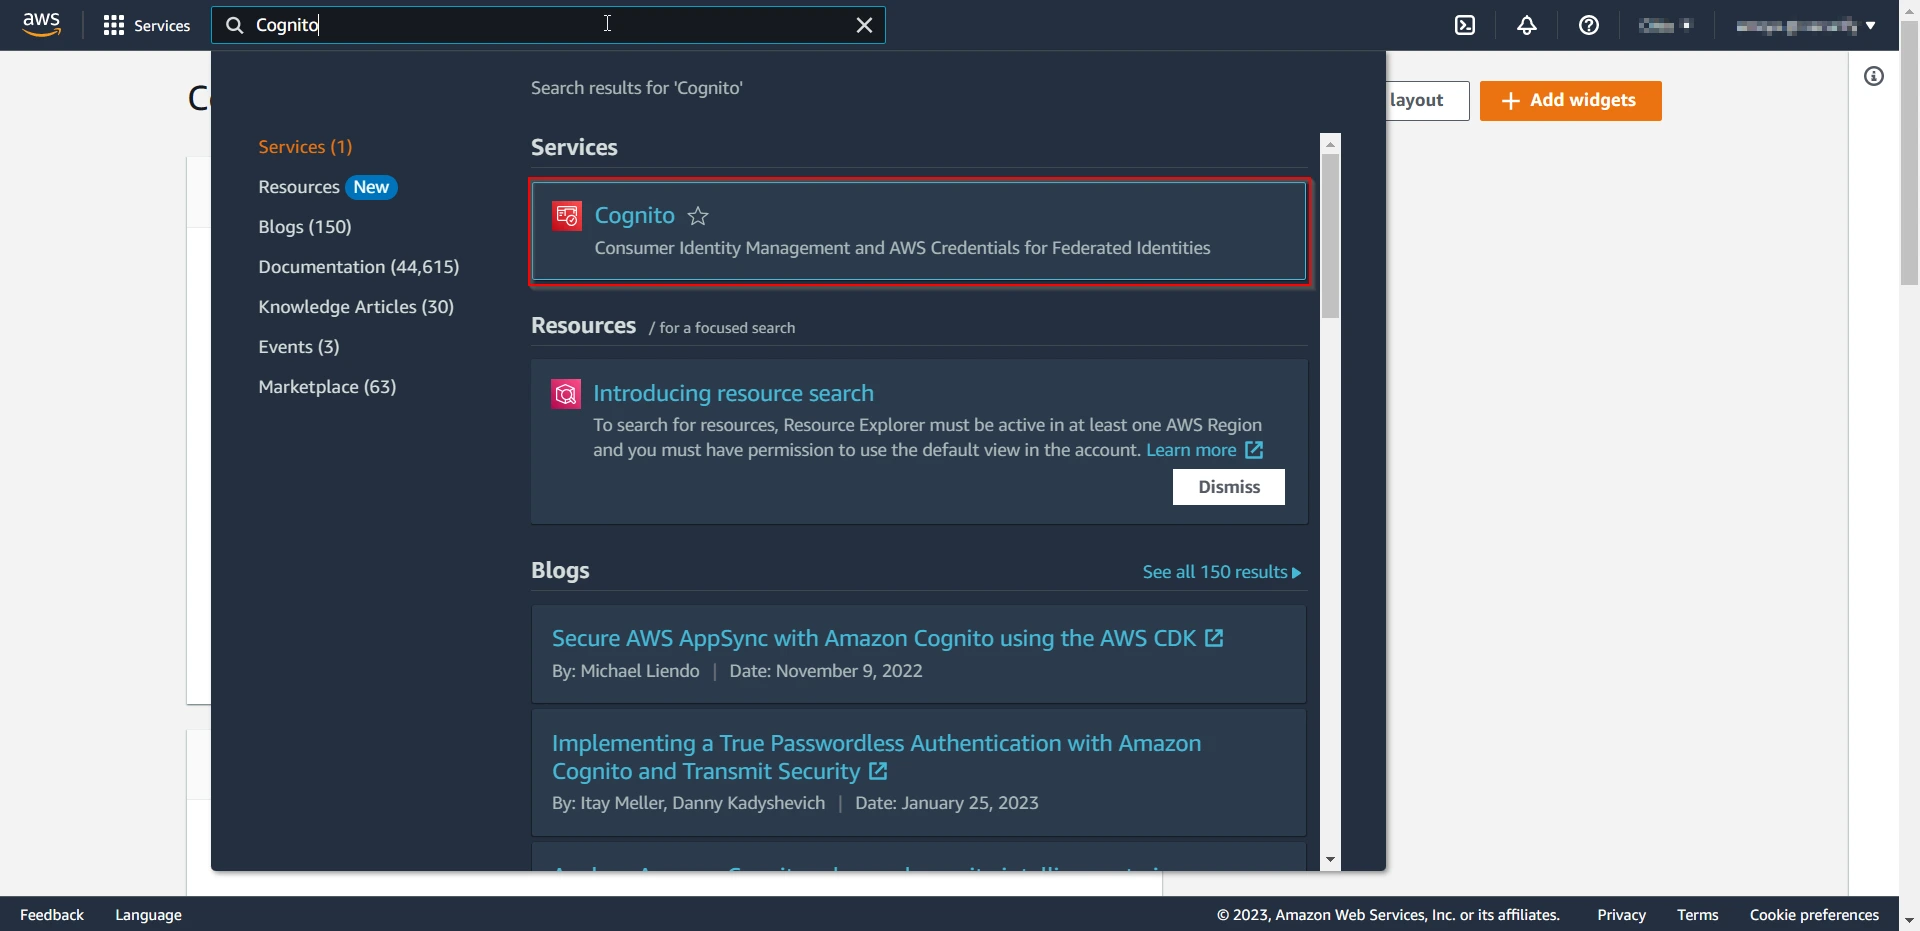
- Search for Cognito and click on it.
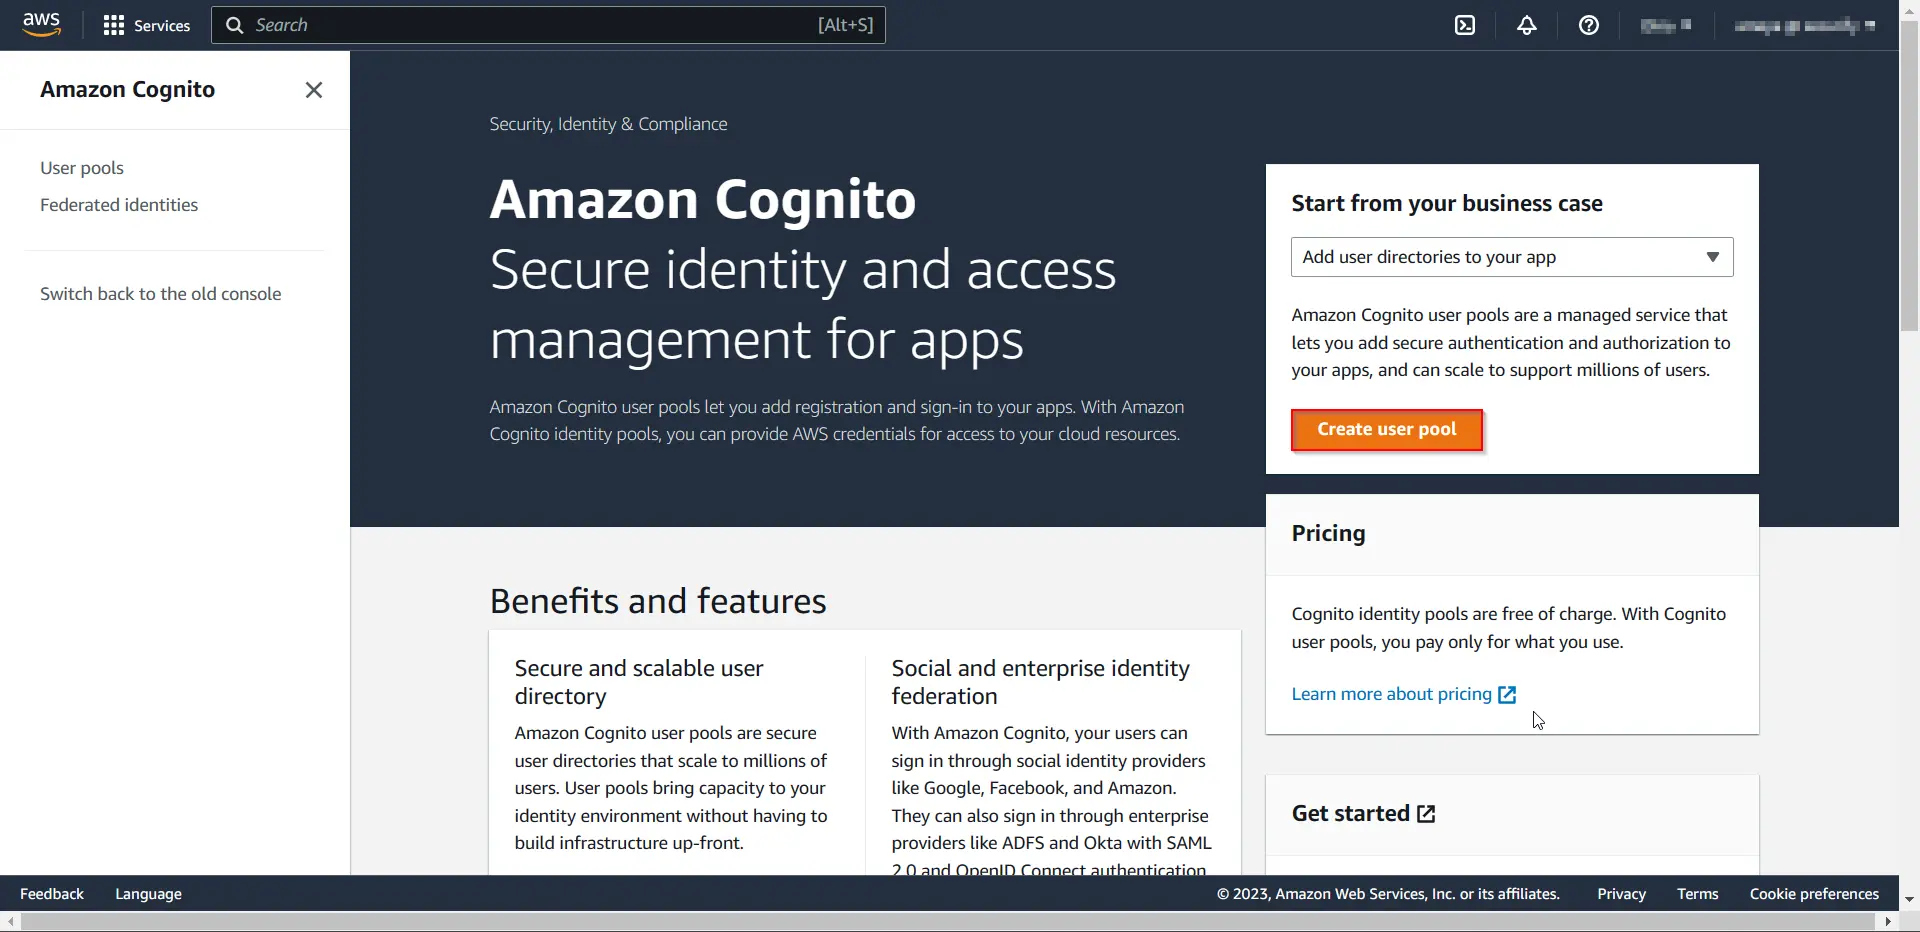
- Click on Create user pool button to create new user pools. (User Pool is a user directory. Users in User Pool can access the app using AWS Cognito credentials.)
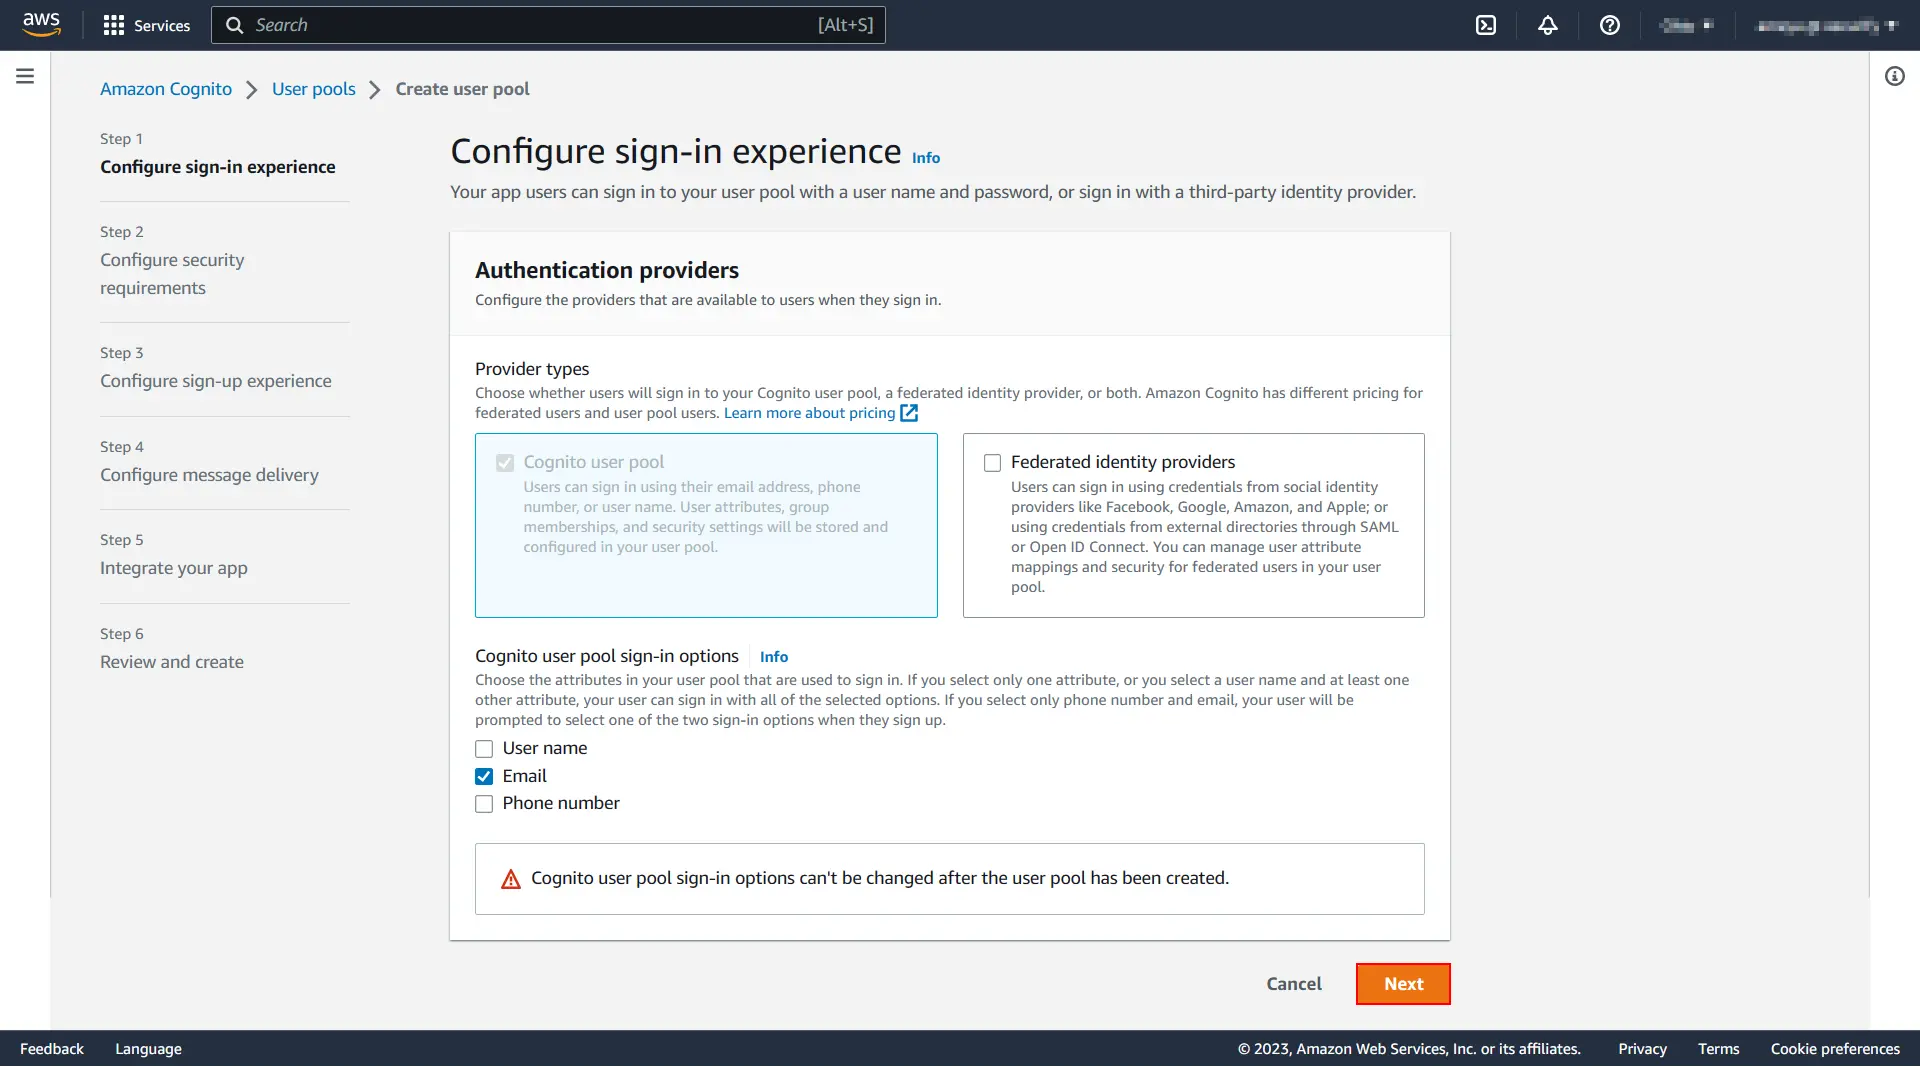
- Select the Provider types (keep it default if you are not sure) and the Cognito user pool sign-in options as per requirement.
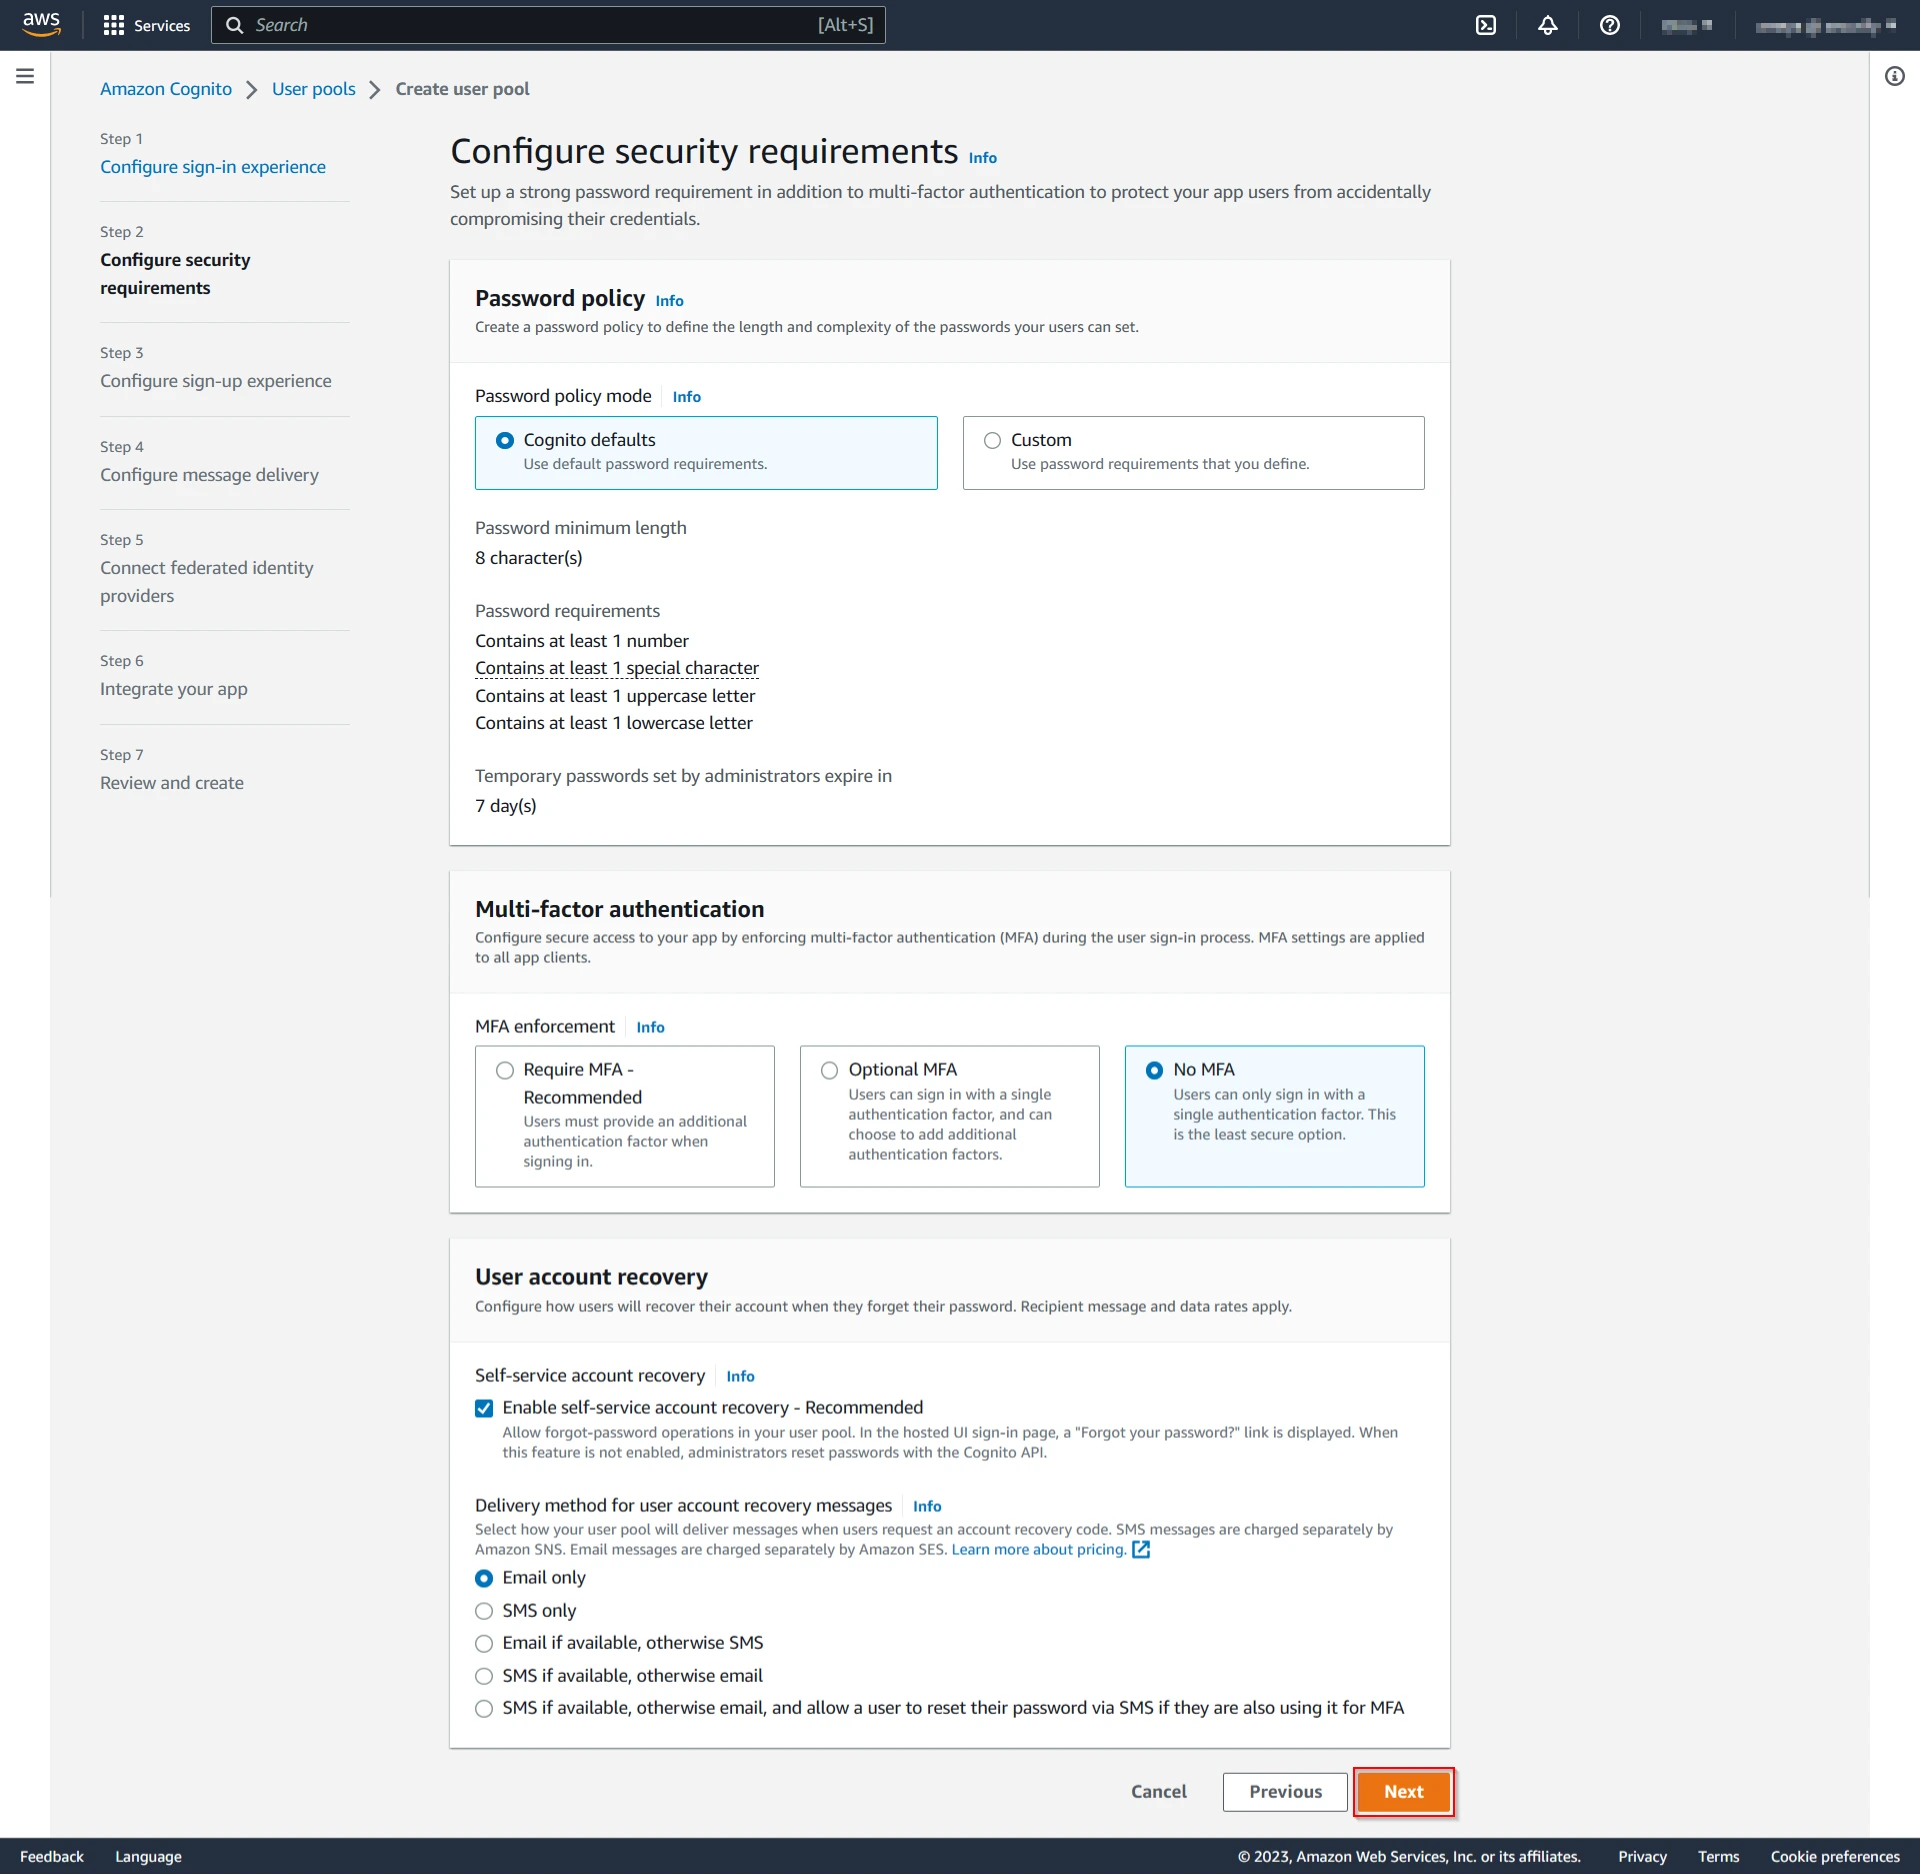
- Select the appropriate options based on the need from the Password policy, Multi-factor authentication, User account recovery and click on Next button.
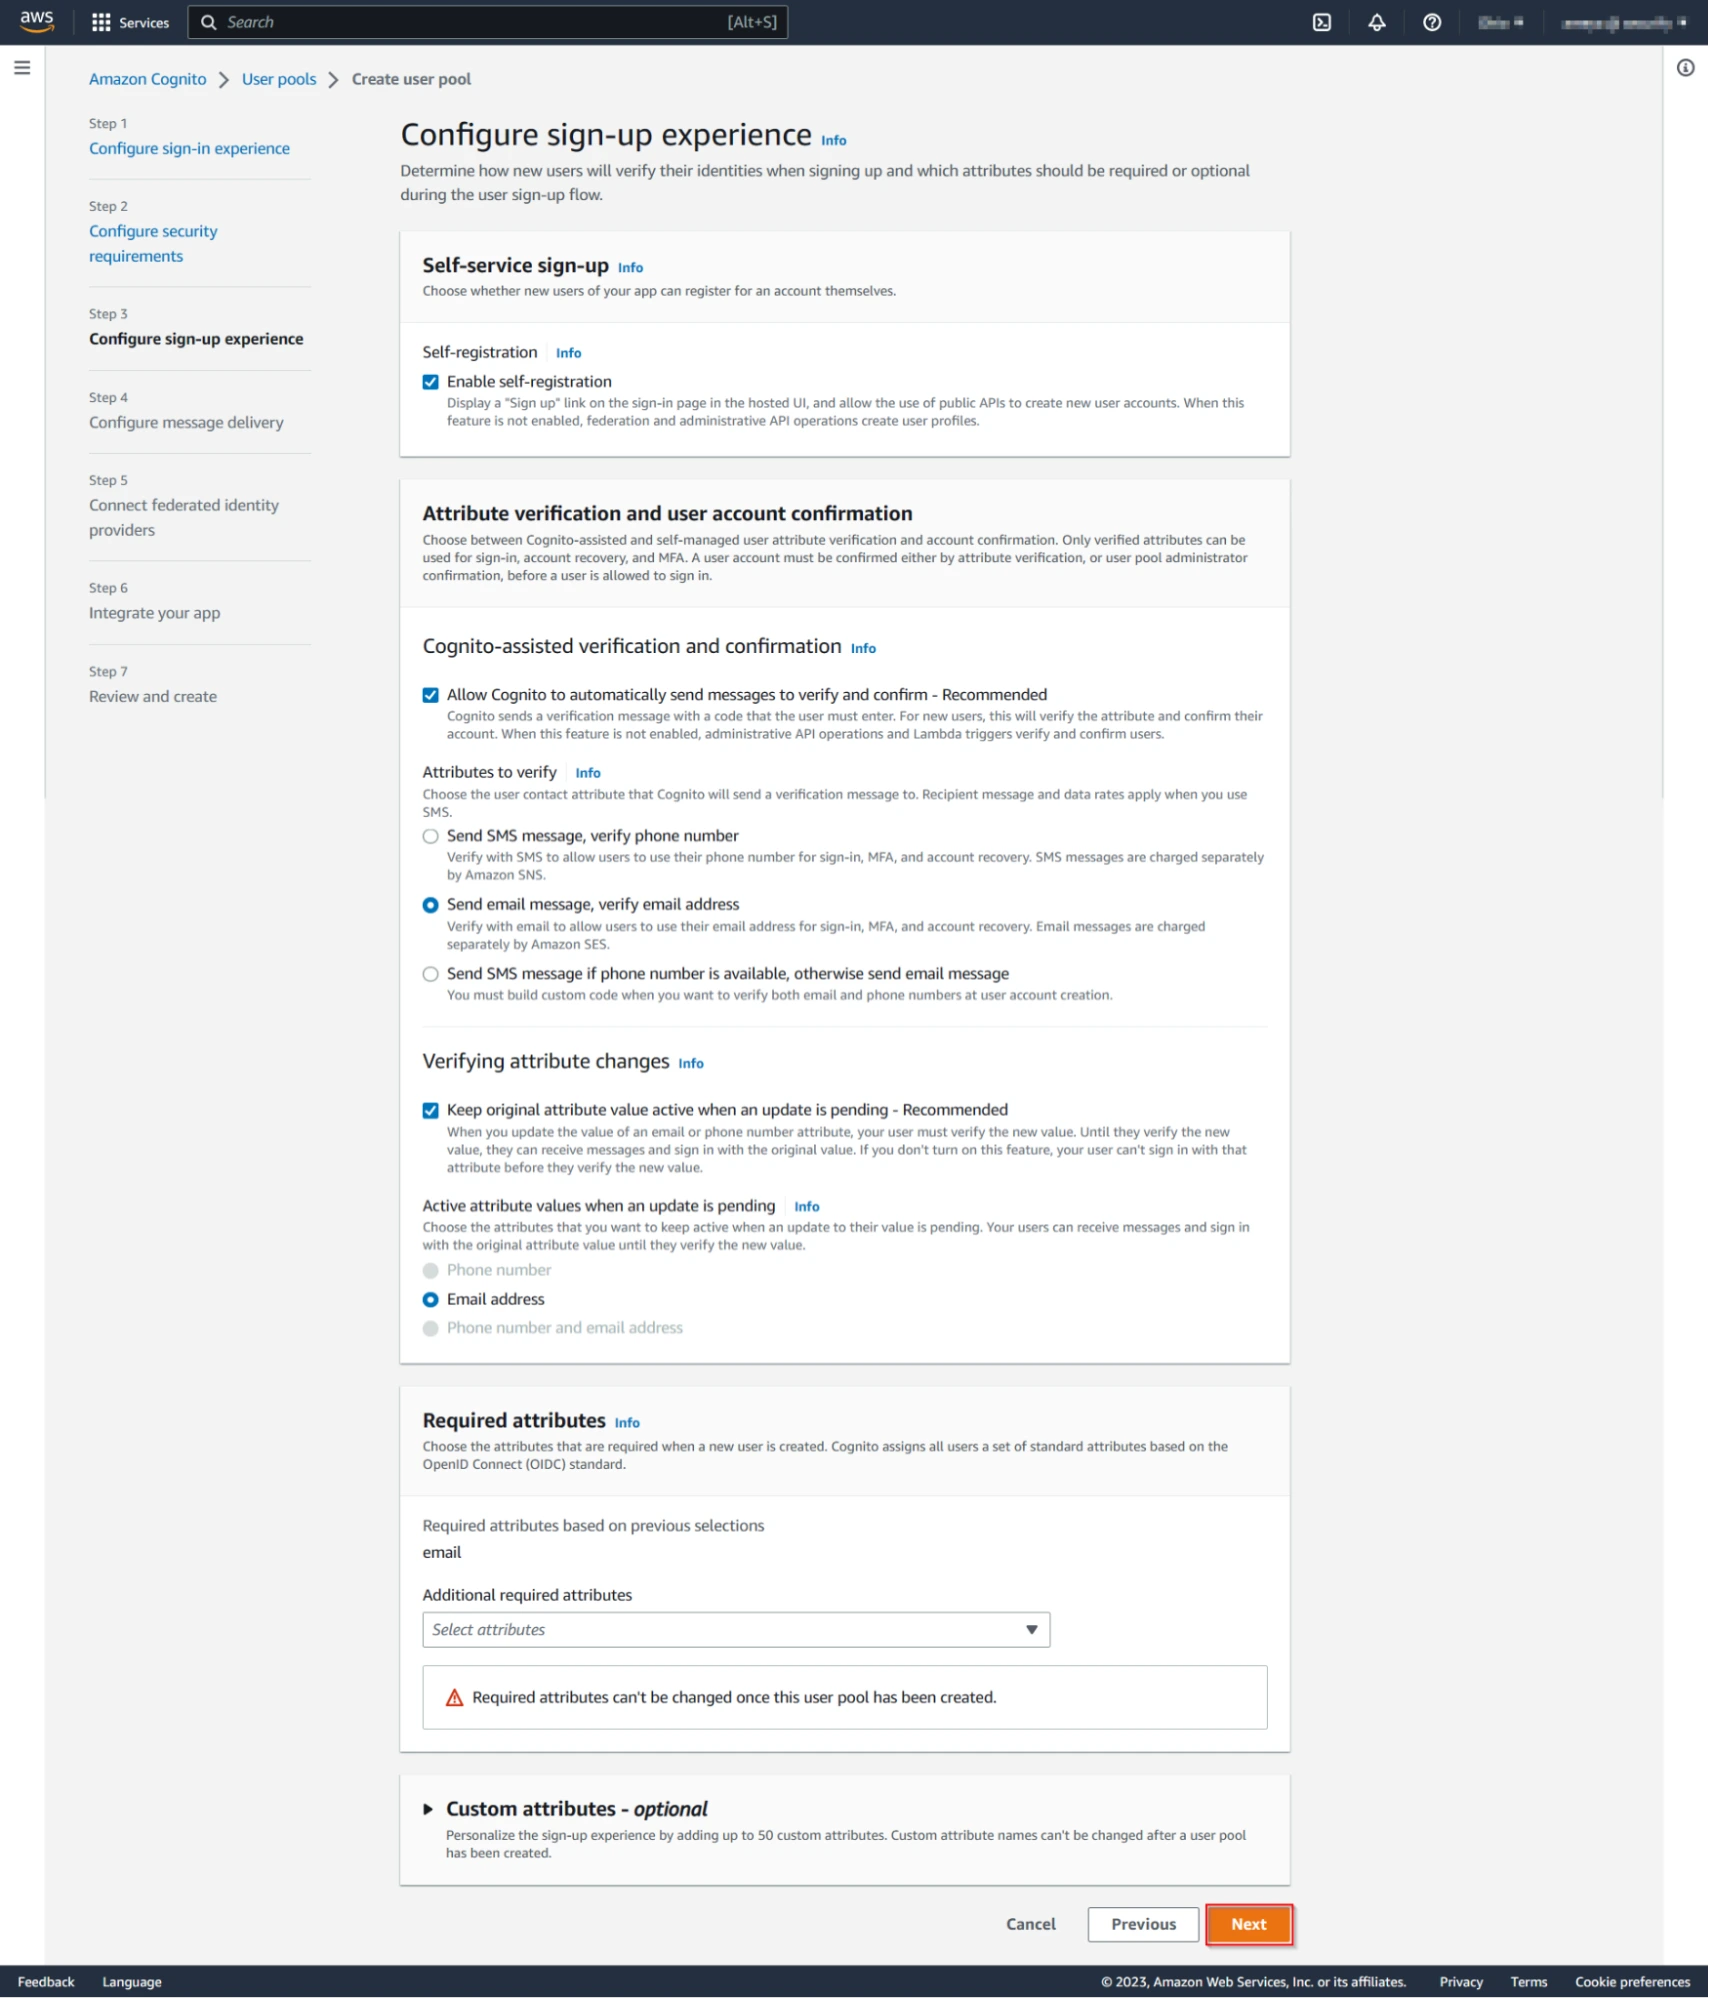
- Select the suitable options from the Configure sign-up experience as per requirements and click on the Next button.
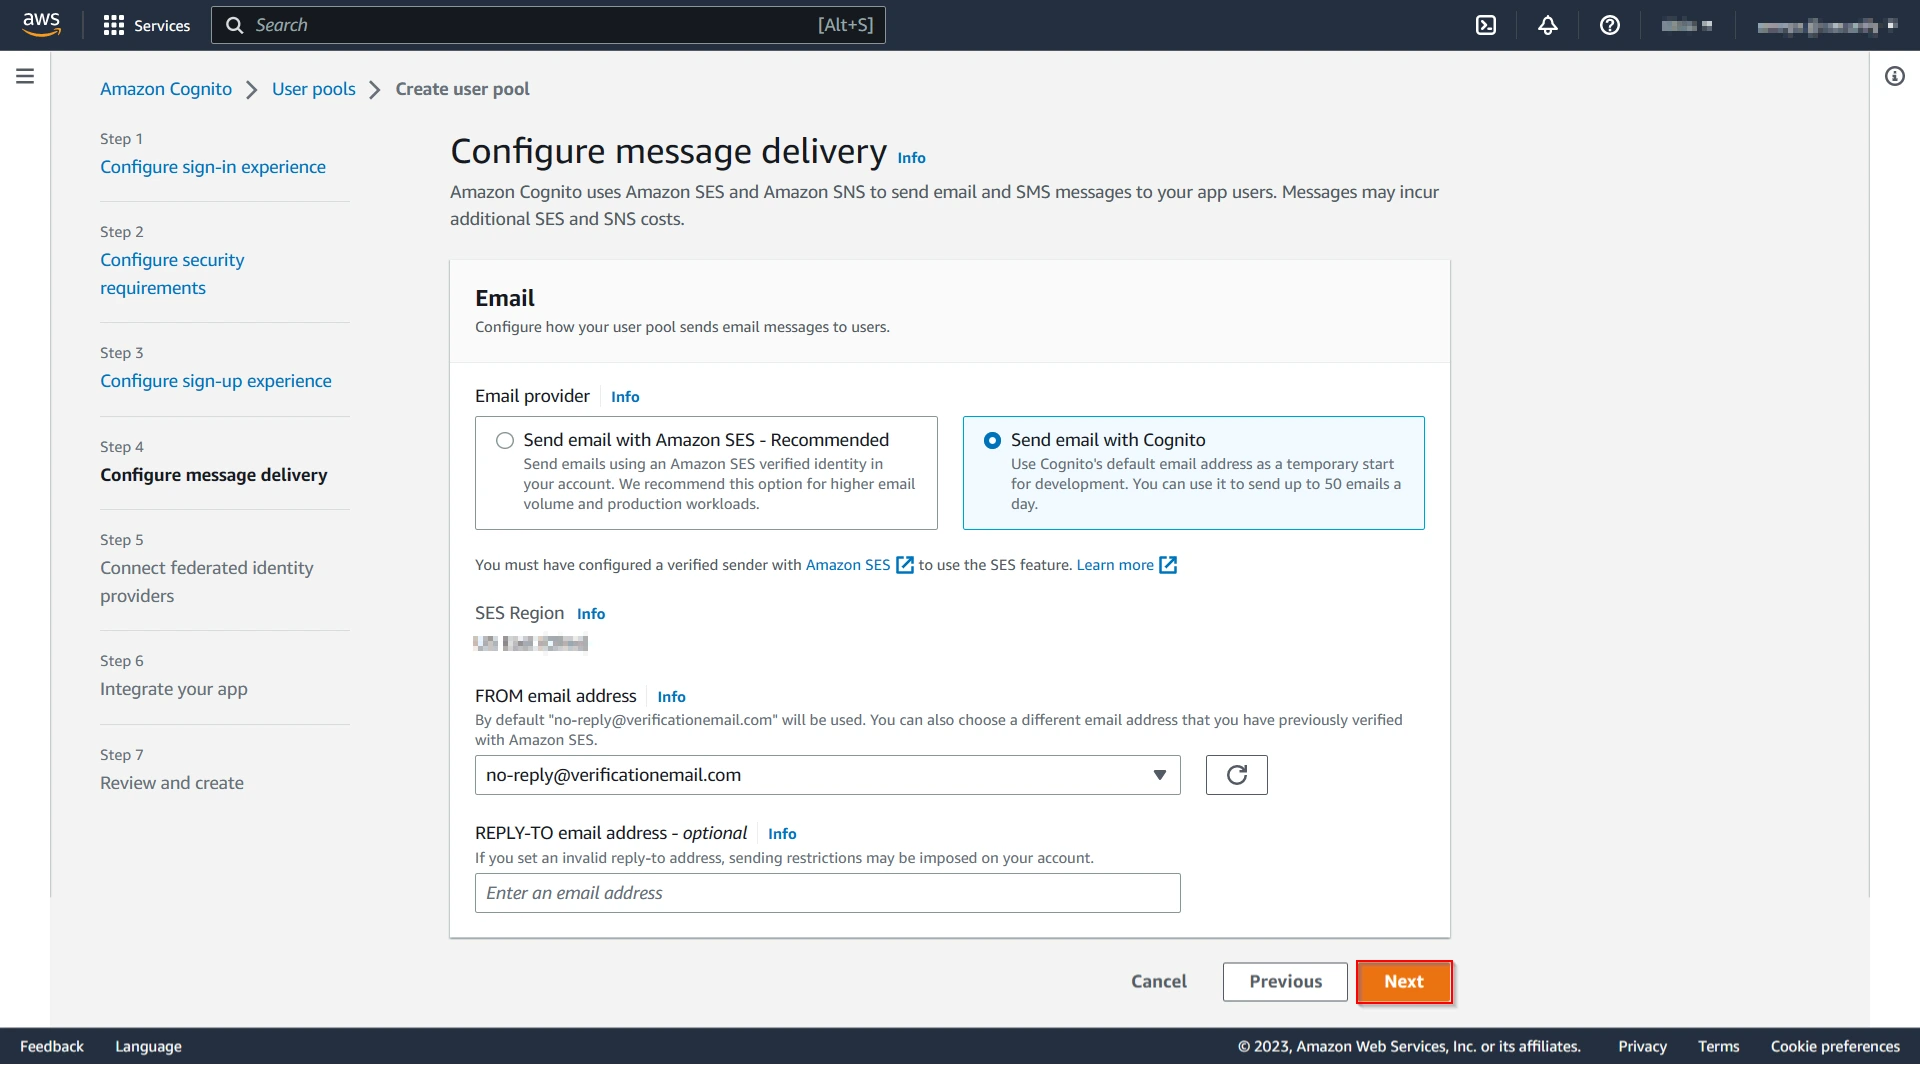
- Choose the message delivery option. Click on the Next button.
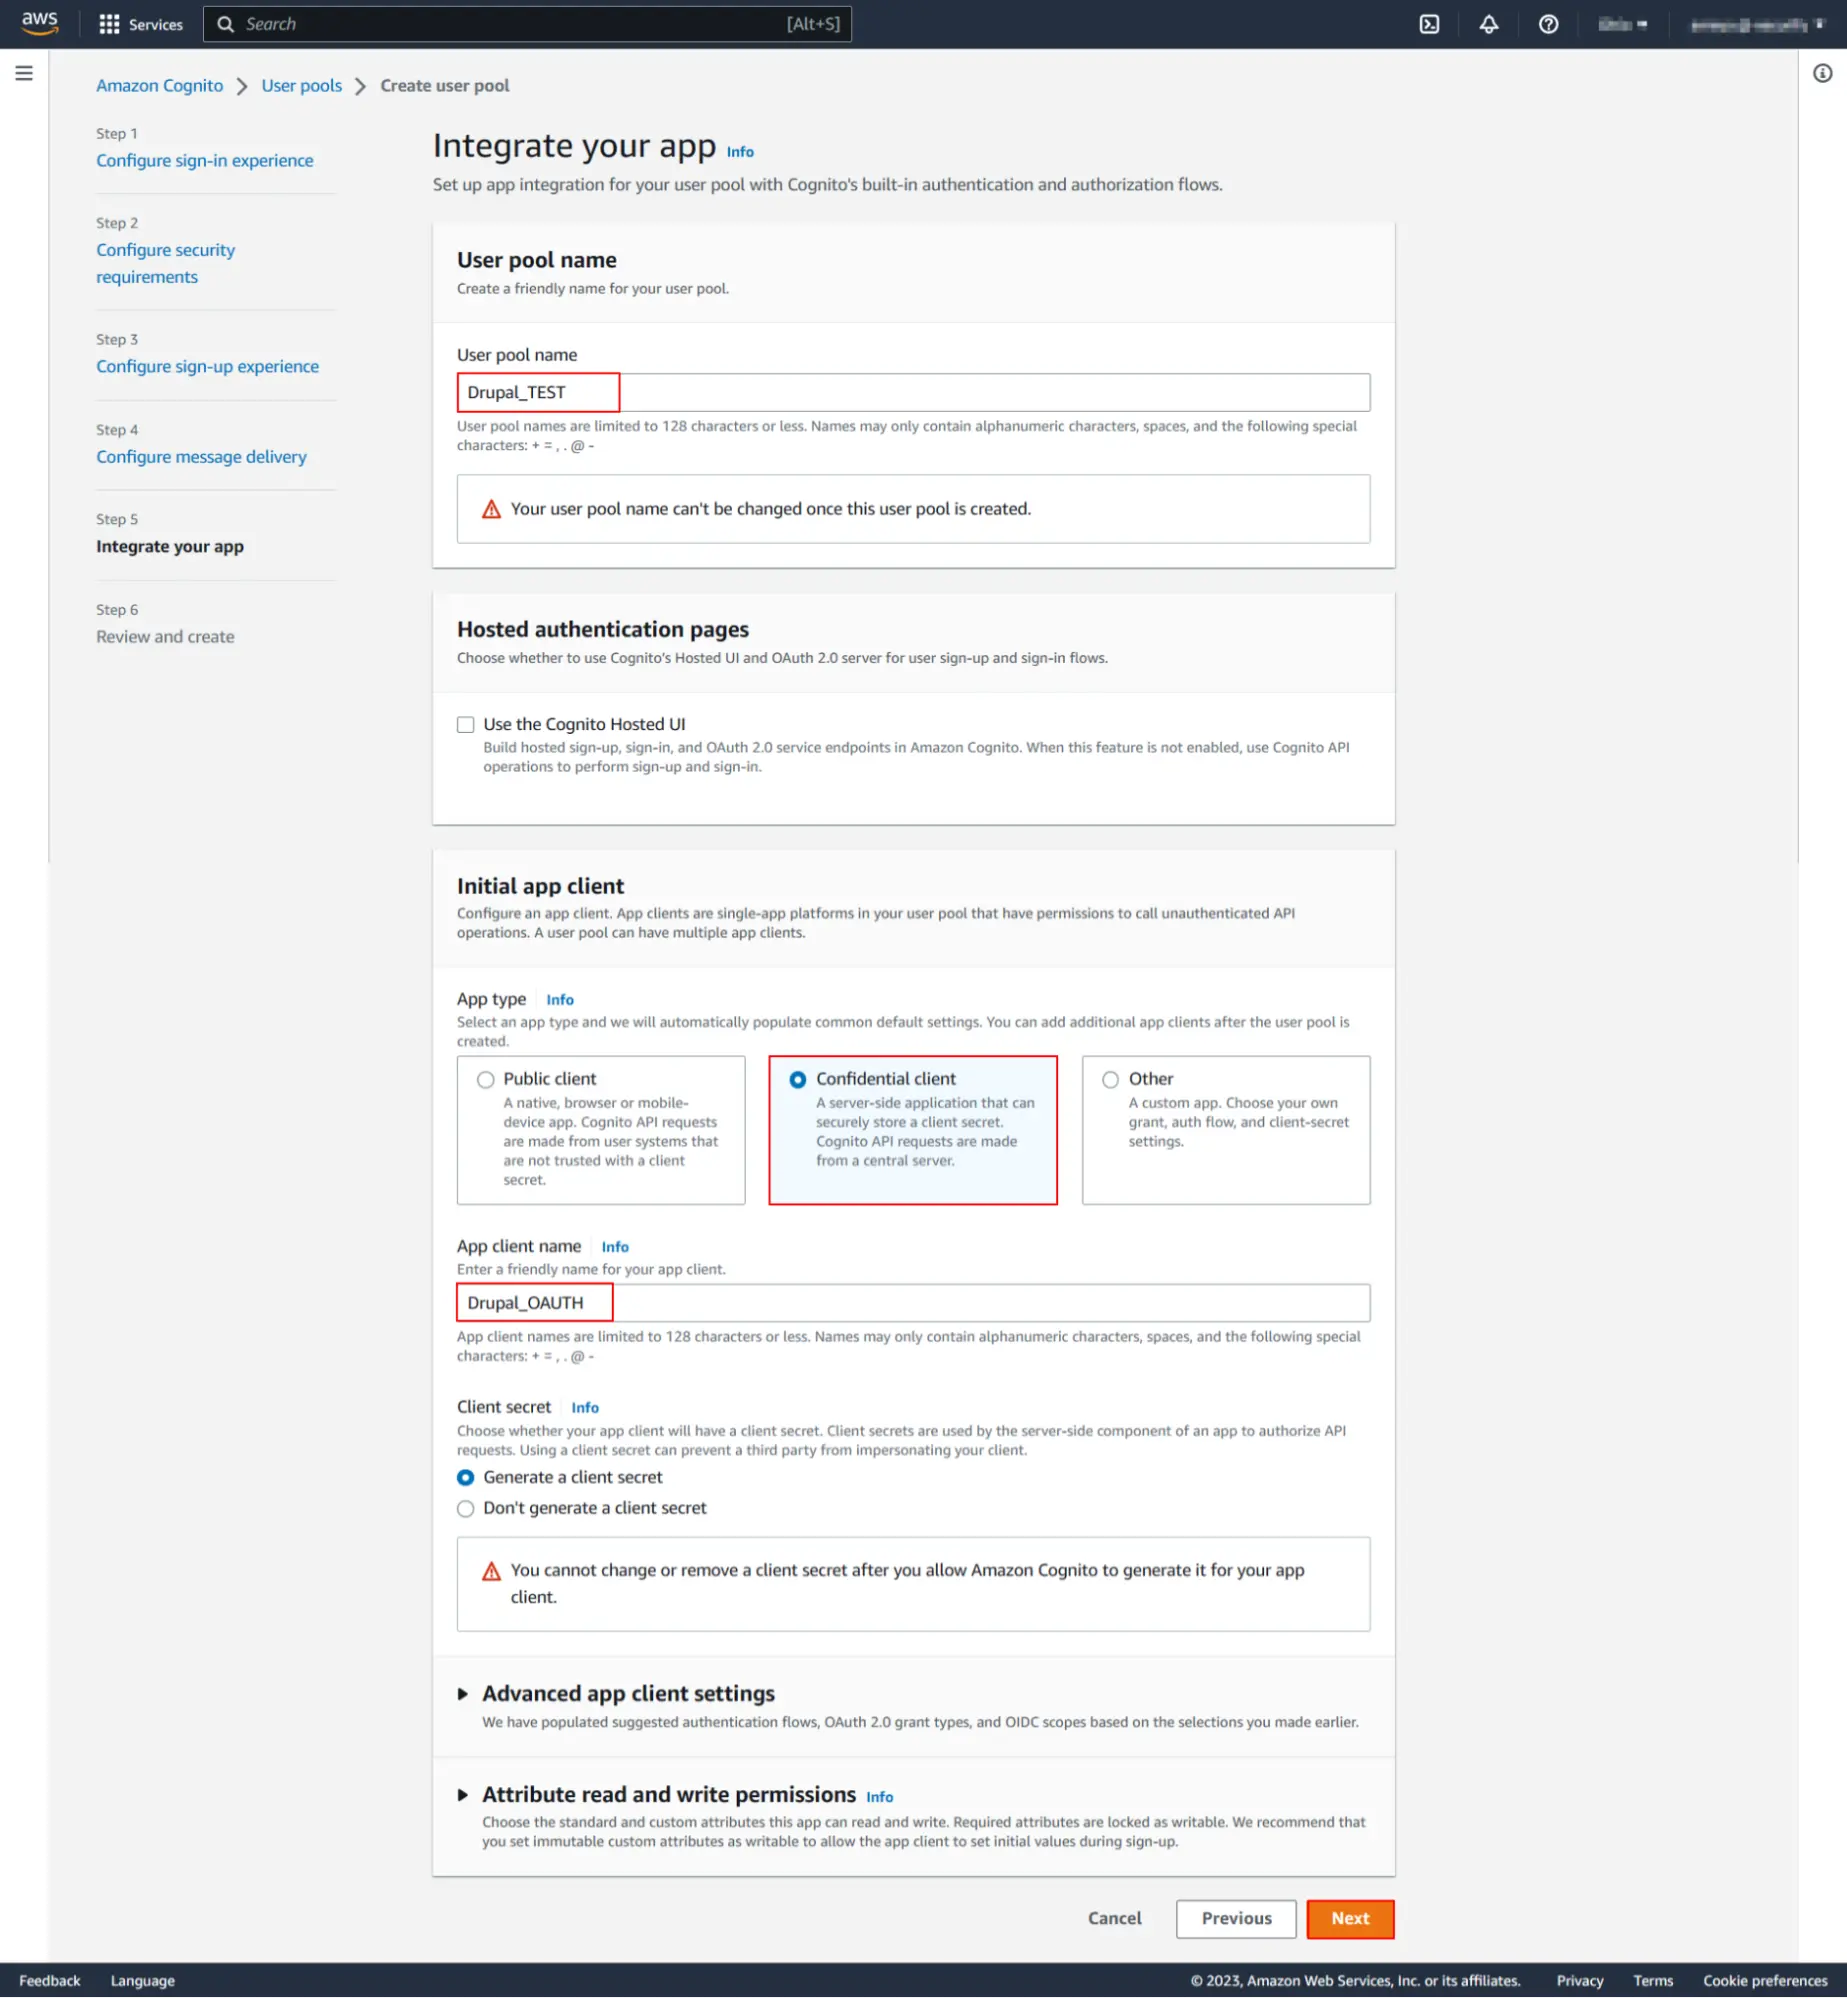
- Enter the User Pool name. Under the Initial app client select the Confidential client radio button. Enter the App client name. Click on the Next button.
- Verify the information, scroll down and click on Create user pool button.
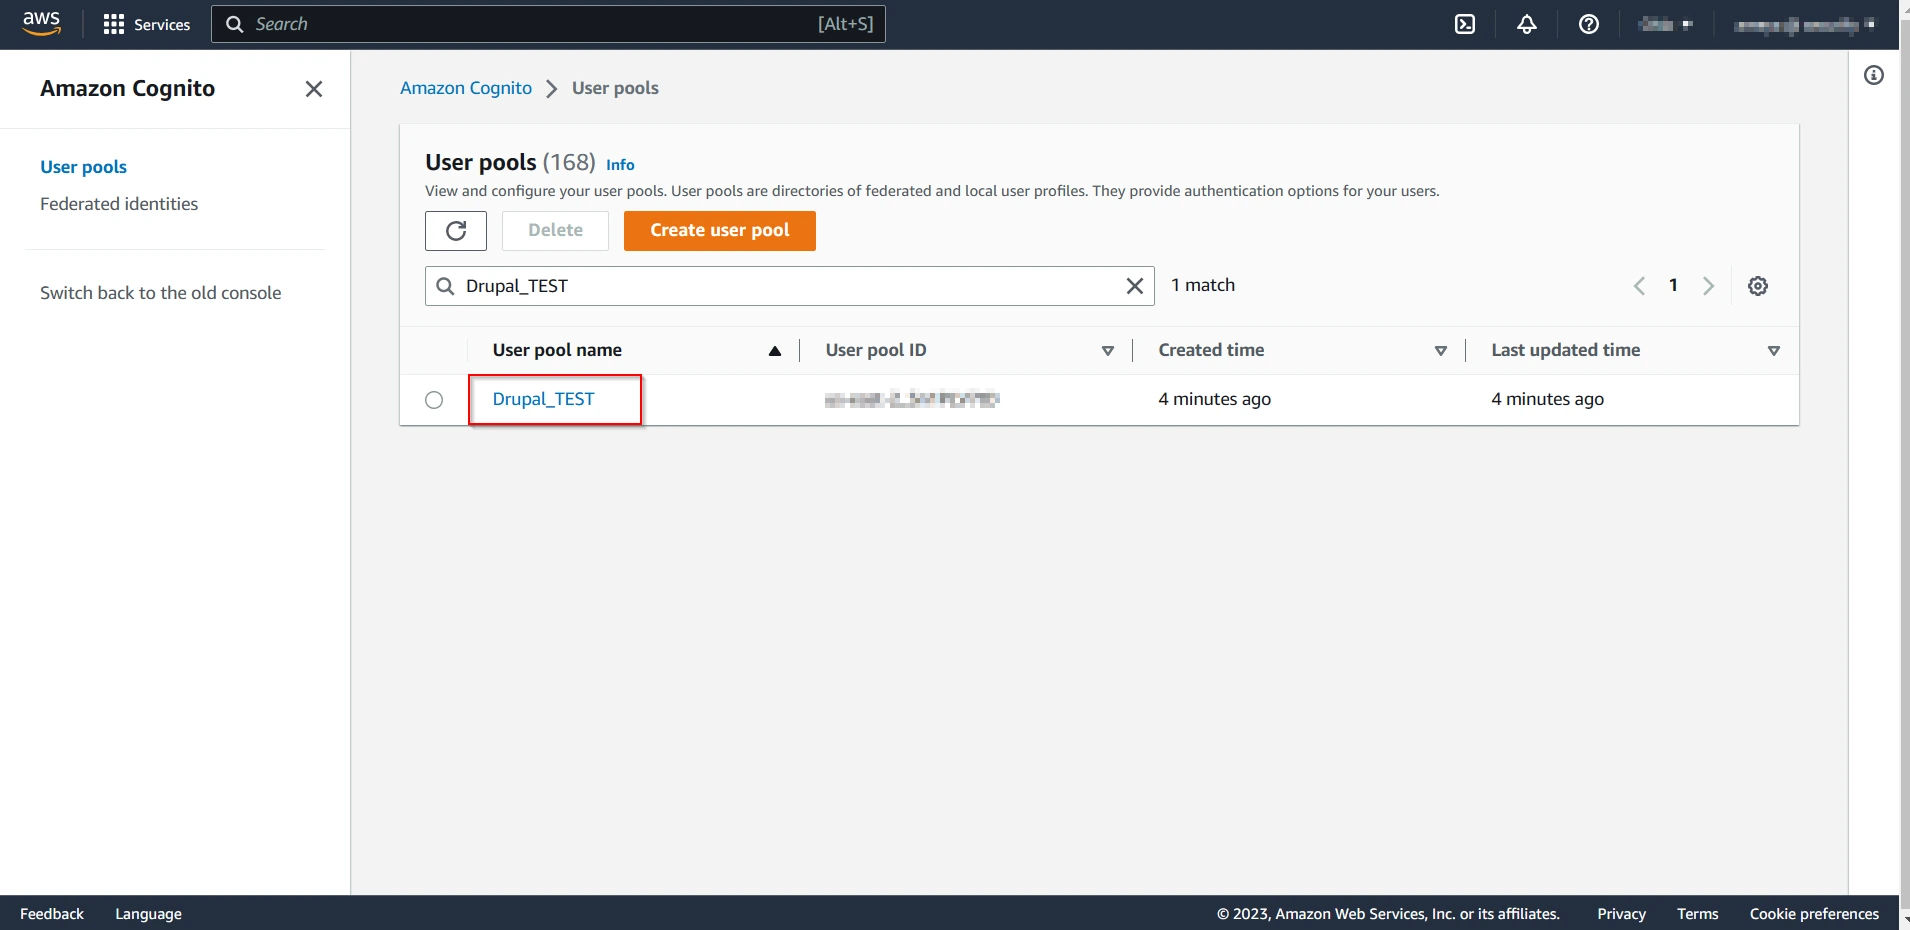
- Now search for the user pool you created and click on it.
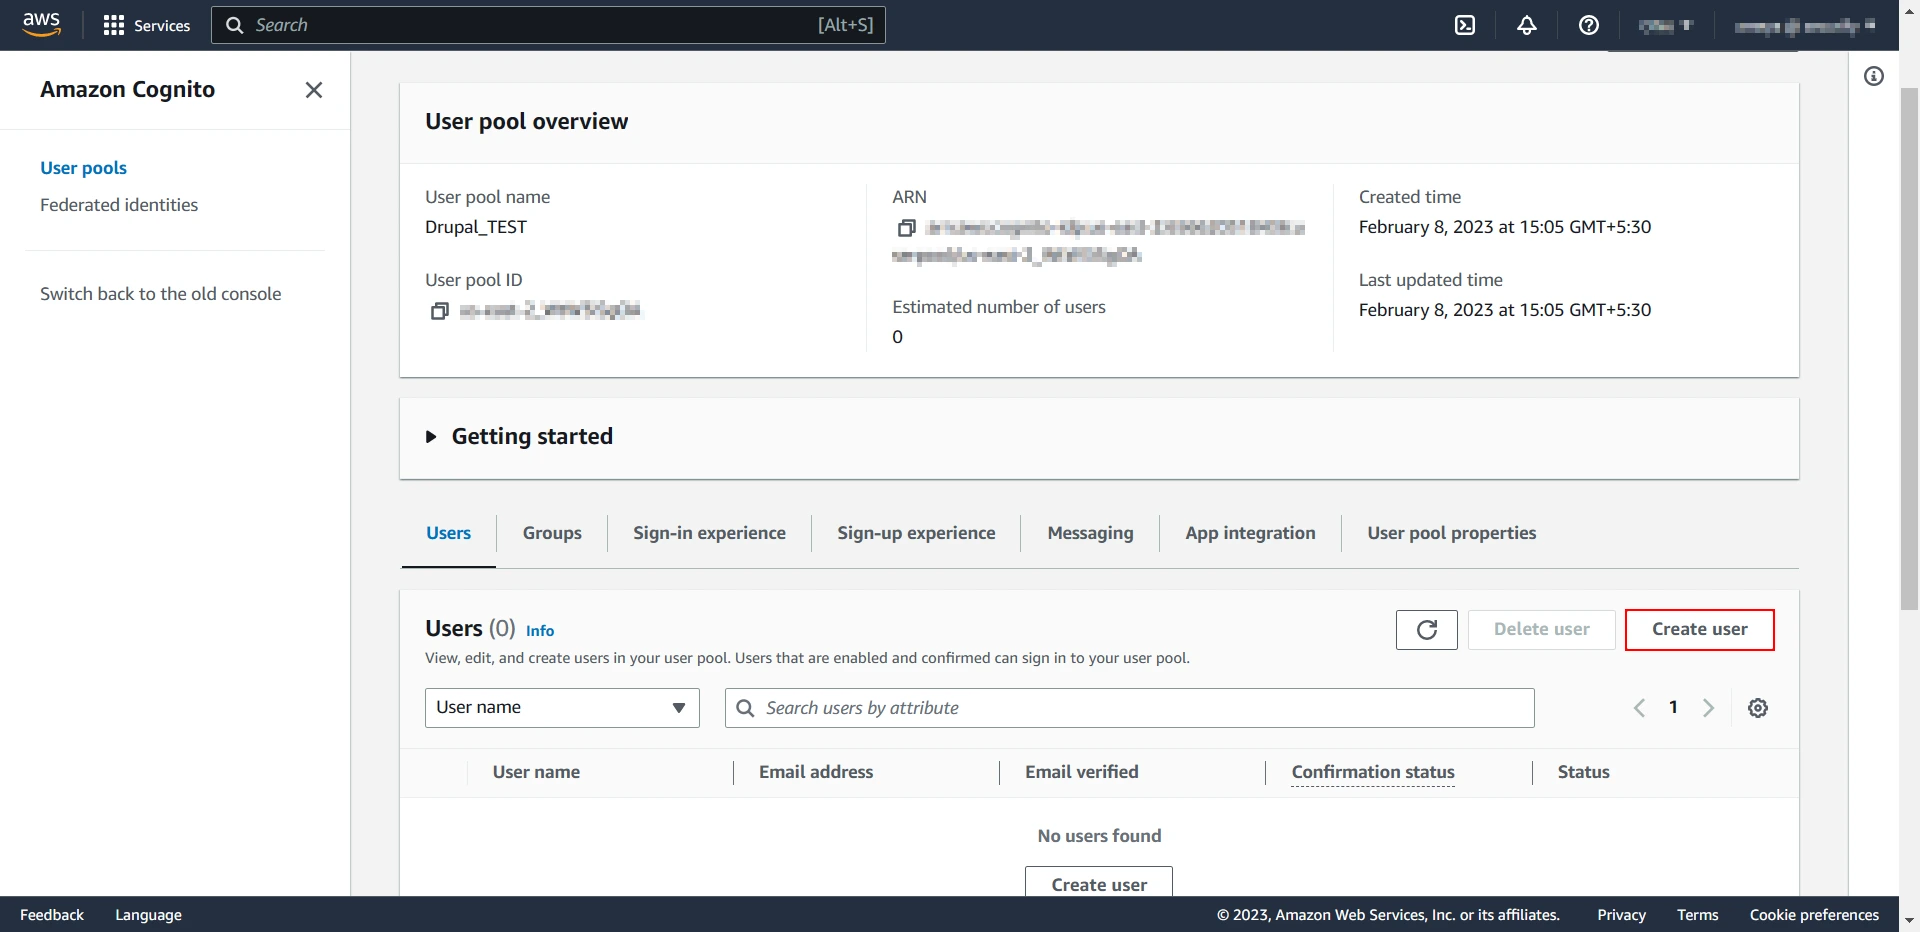
- Now, lets create a user for the app.
- Click on Create user.
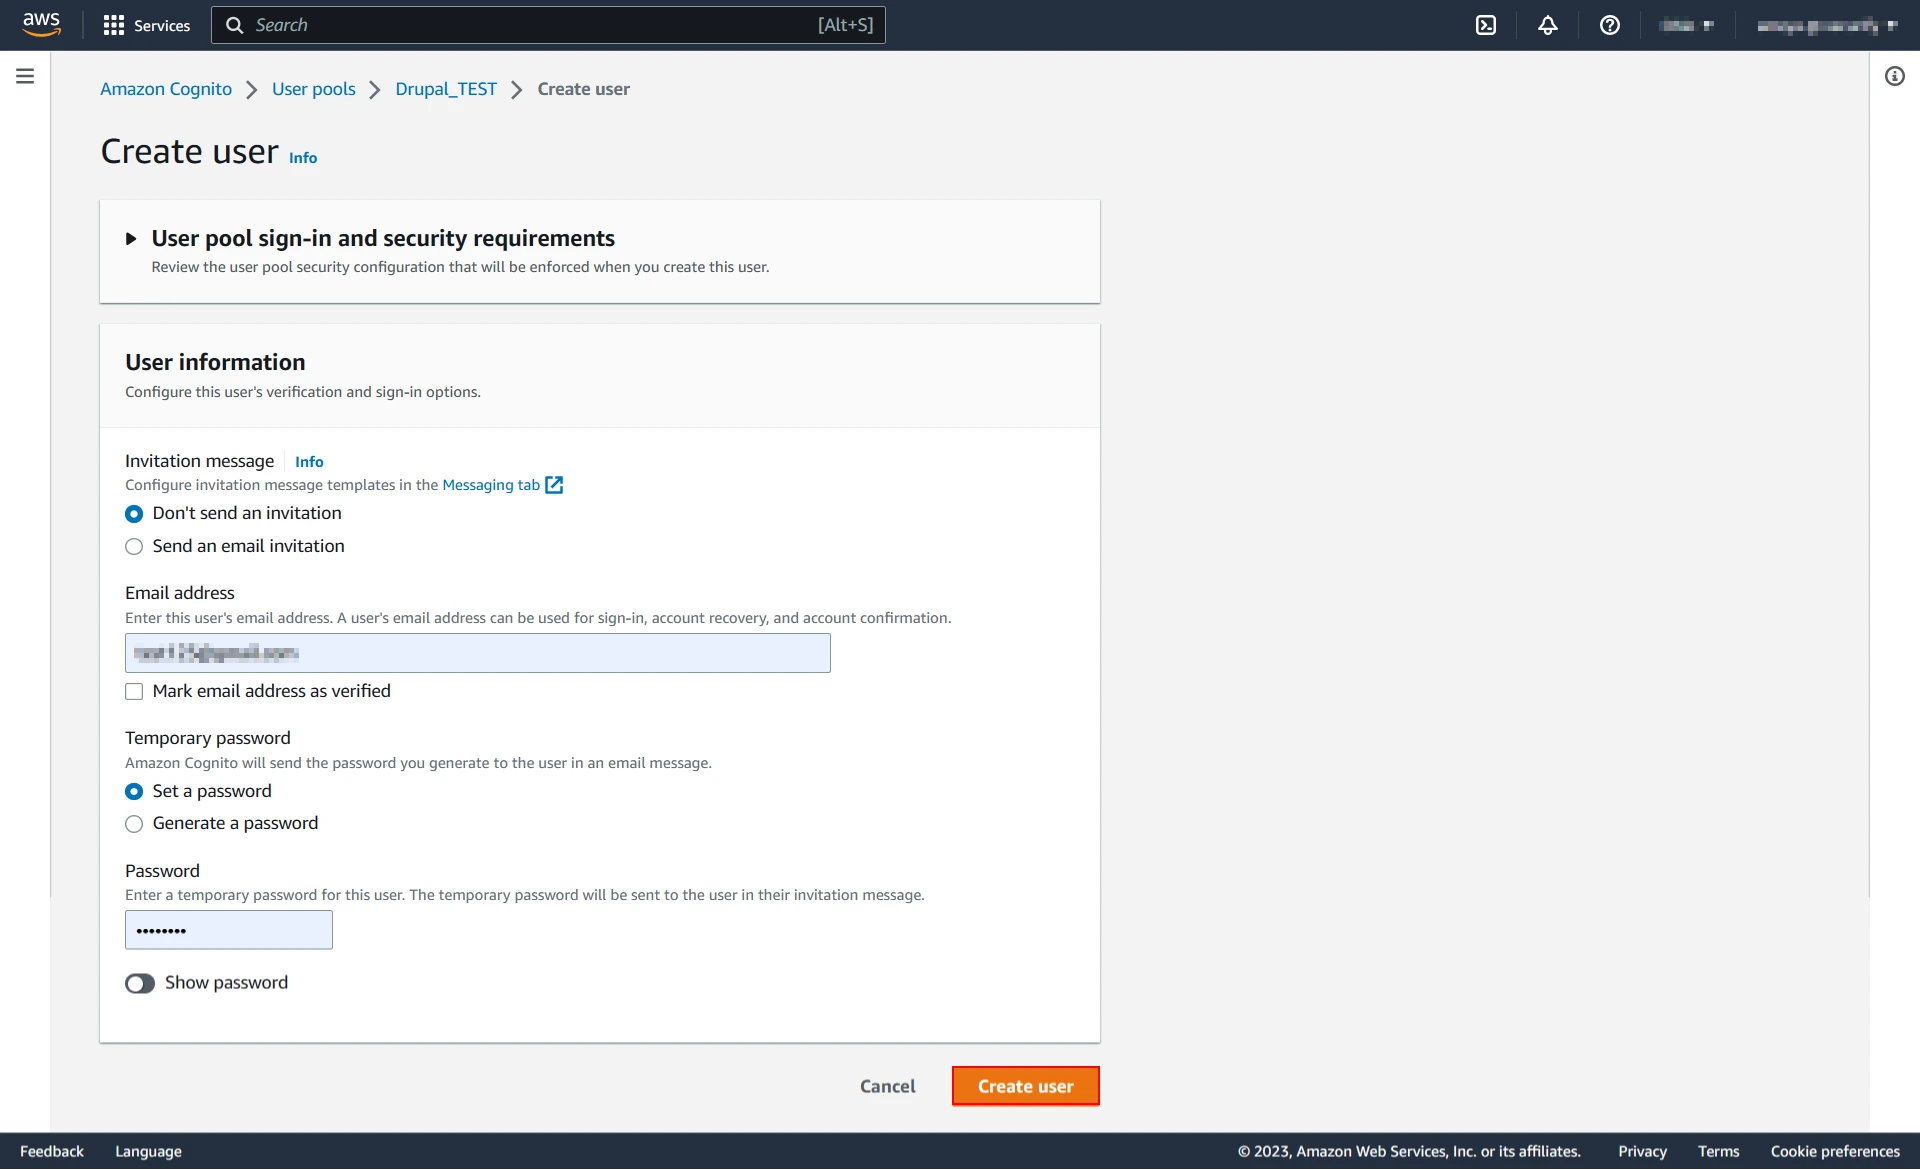
- Enter the user information like email and password and click on Create User button.
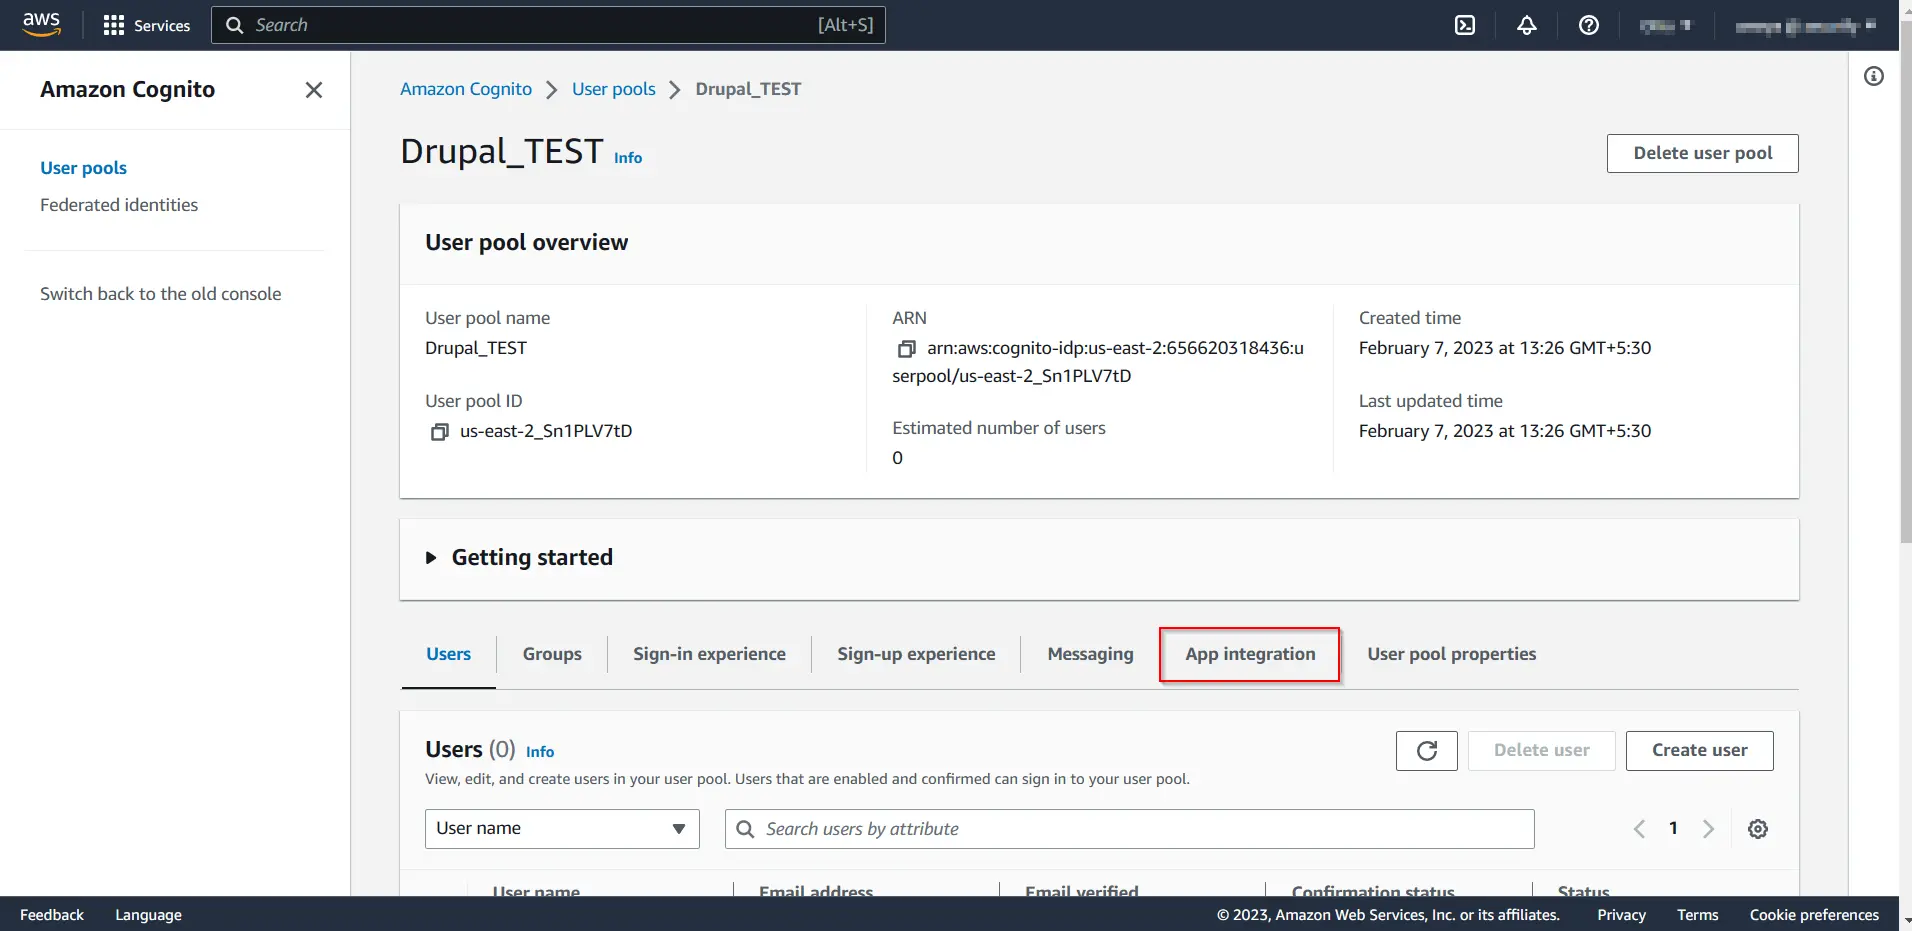
- Click on App integration.
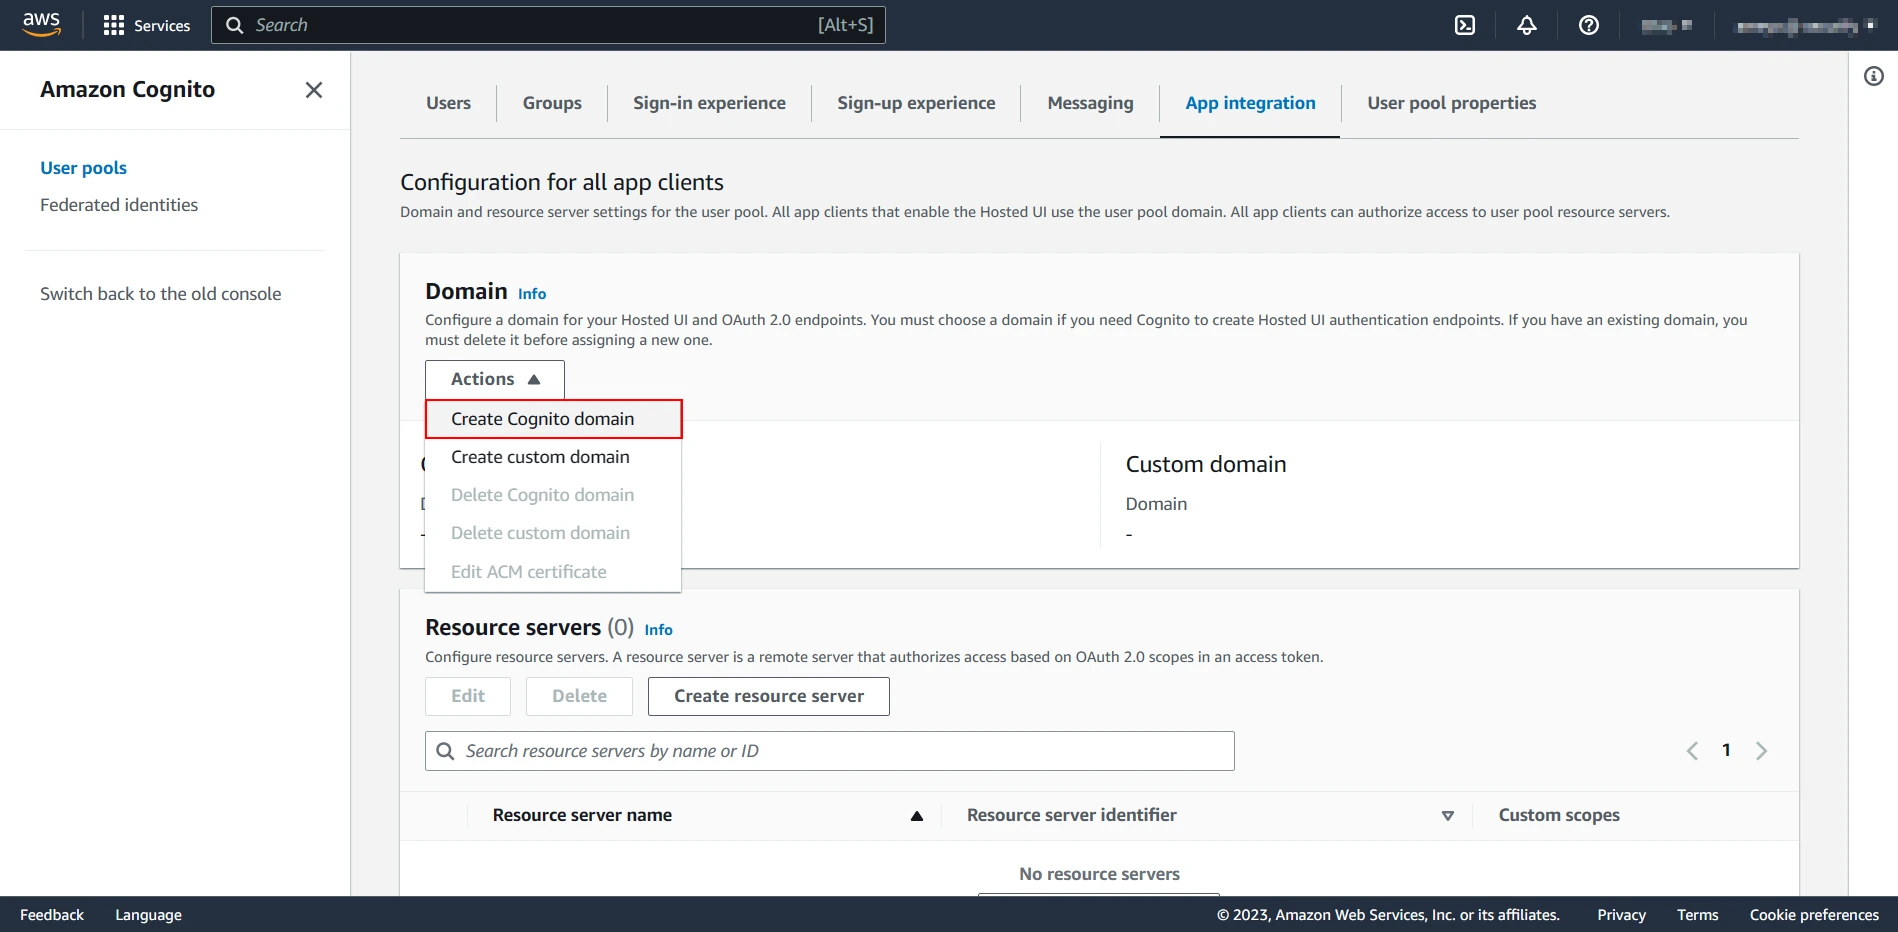
- Under Domain section expand Actions and click on Create Cognito Domain.
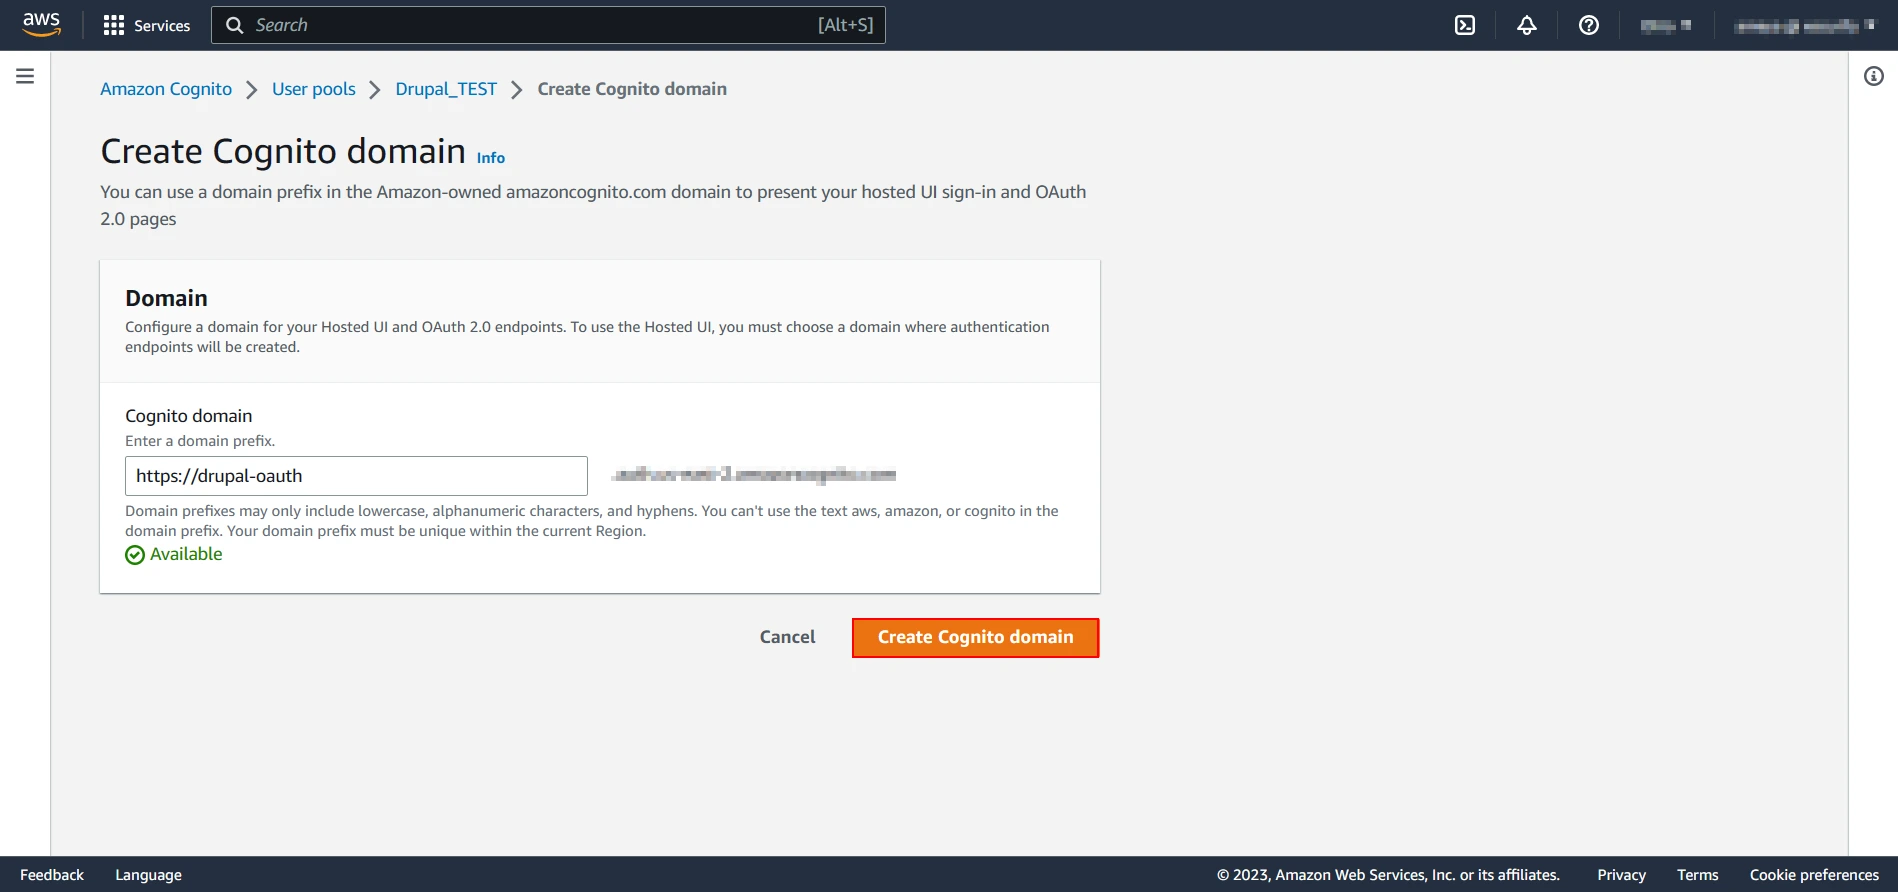
- Enter the domain name and click on Create Cognito Domain. Copy the Cognito domain it will be required later for Authorization and Access Token endpoints.
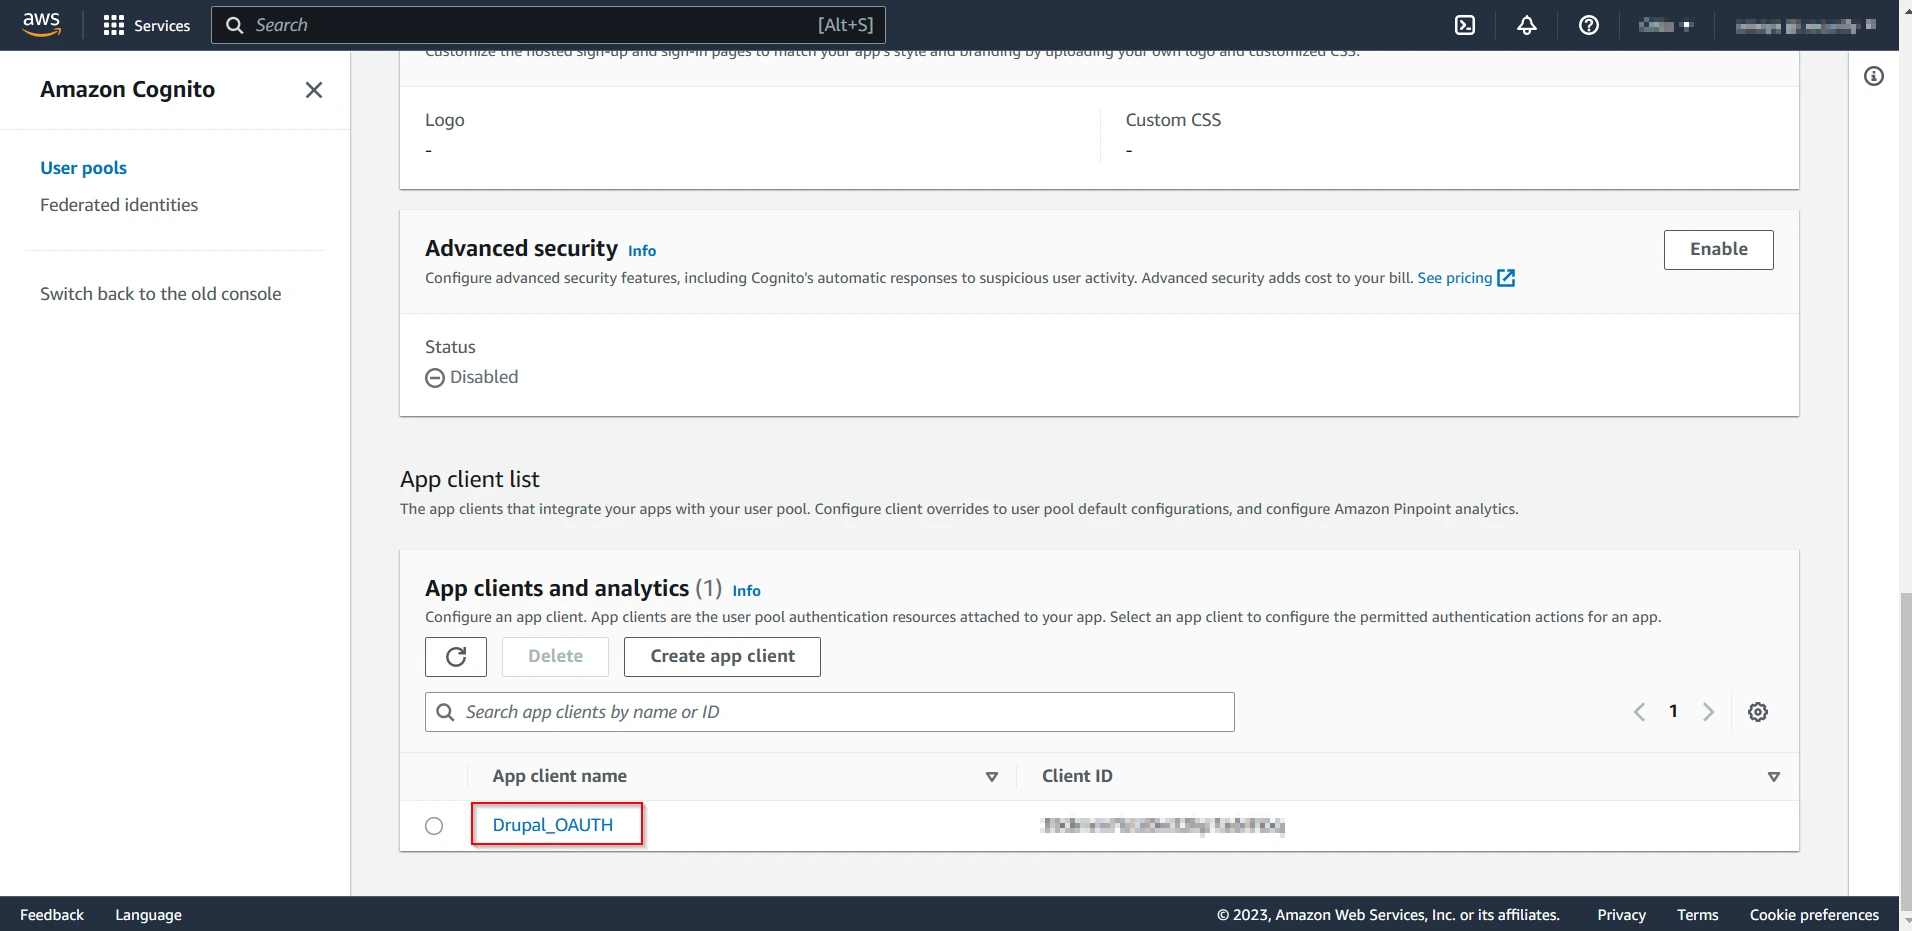
- Scroll down, find your app and click on it.
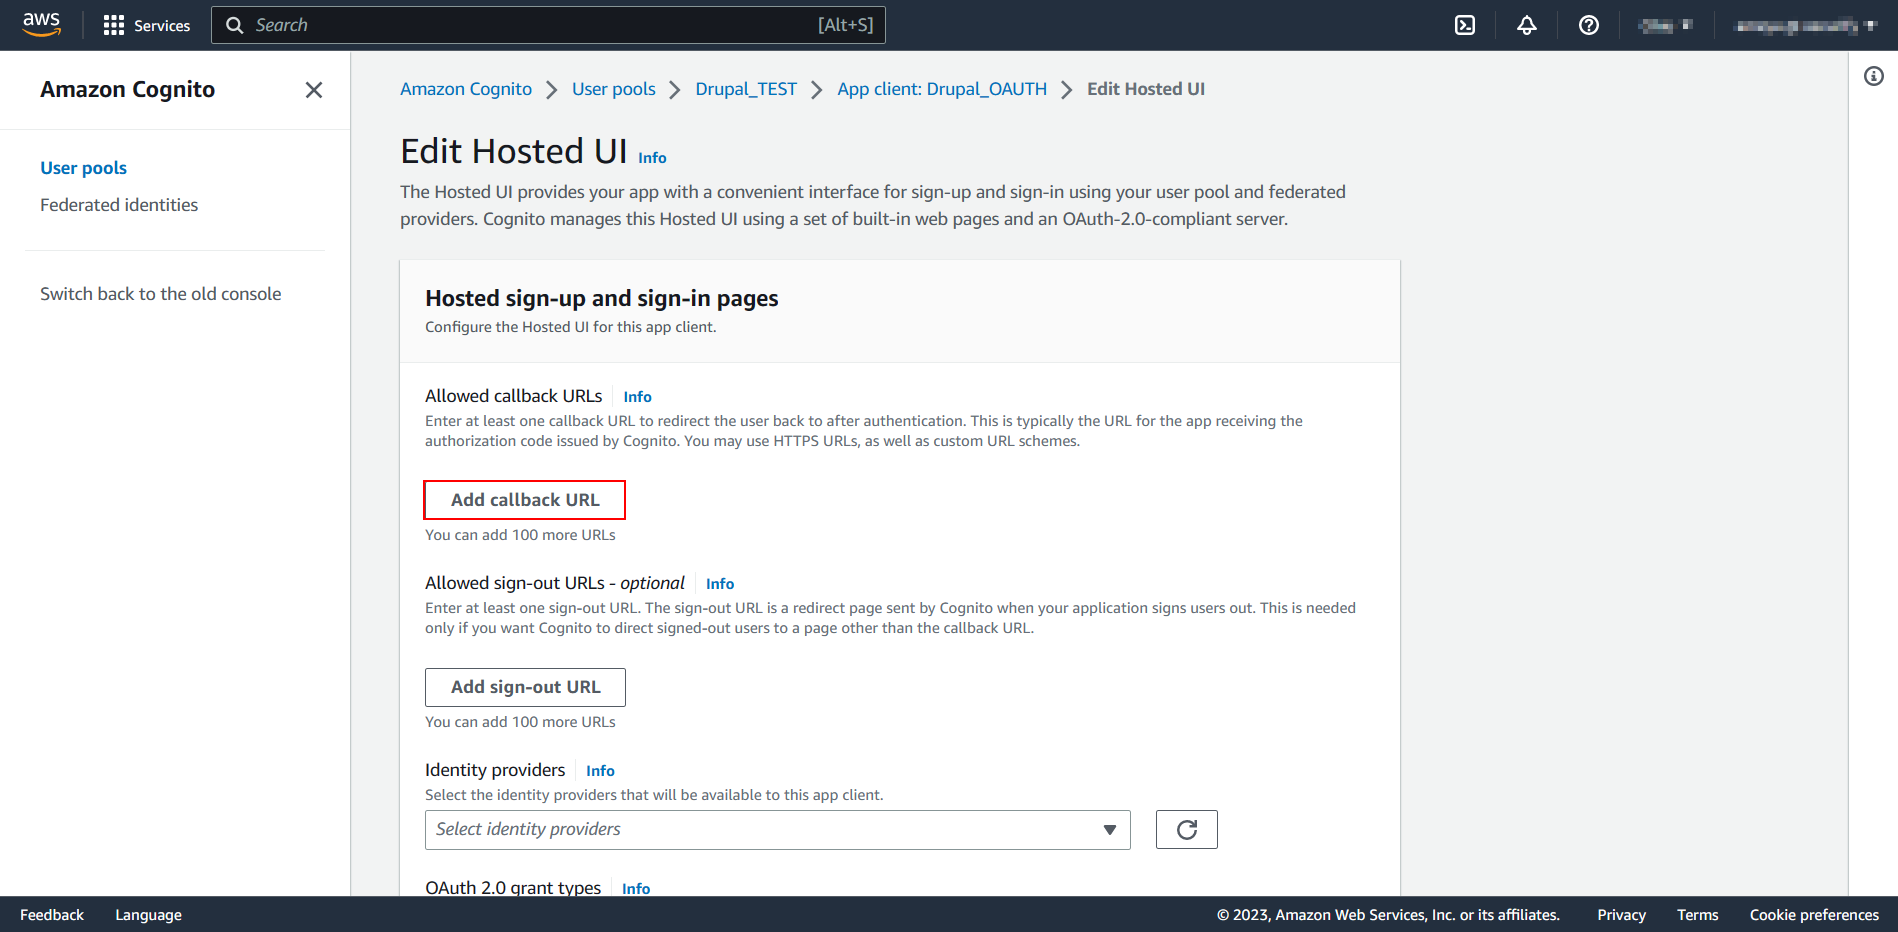
- Scroll down to Hosted UI. Click on Edit button.
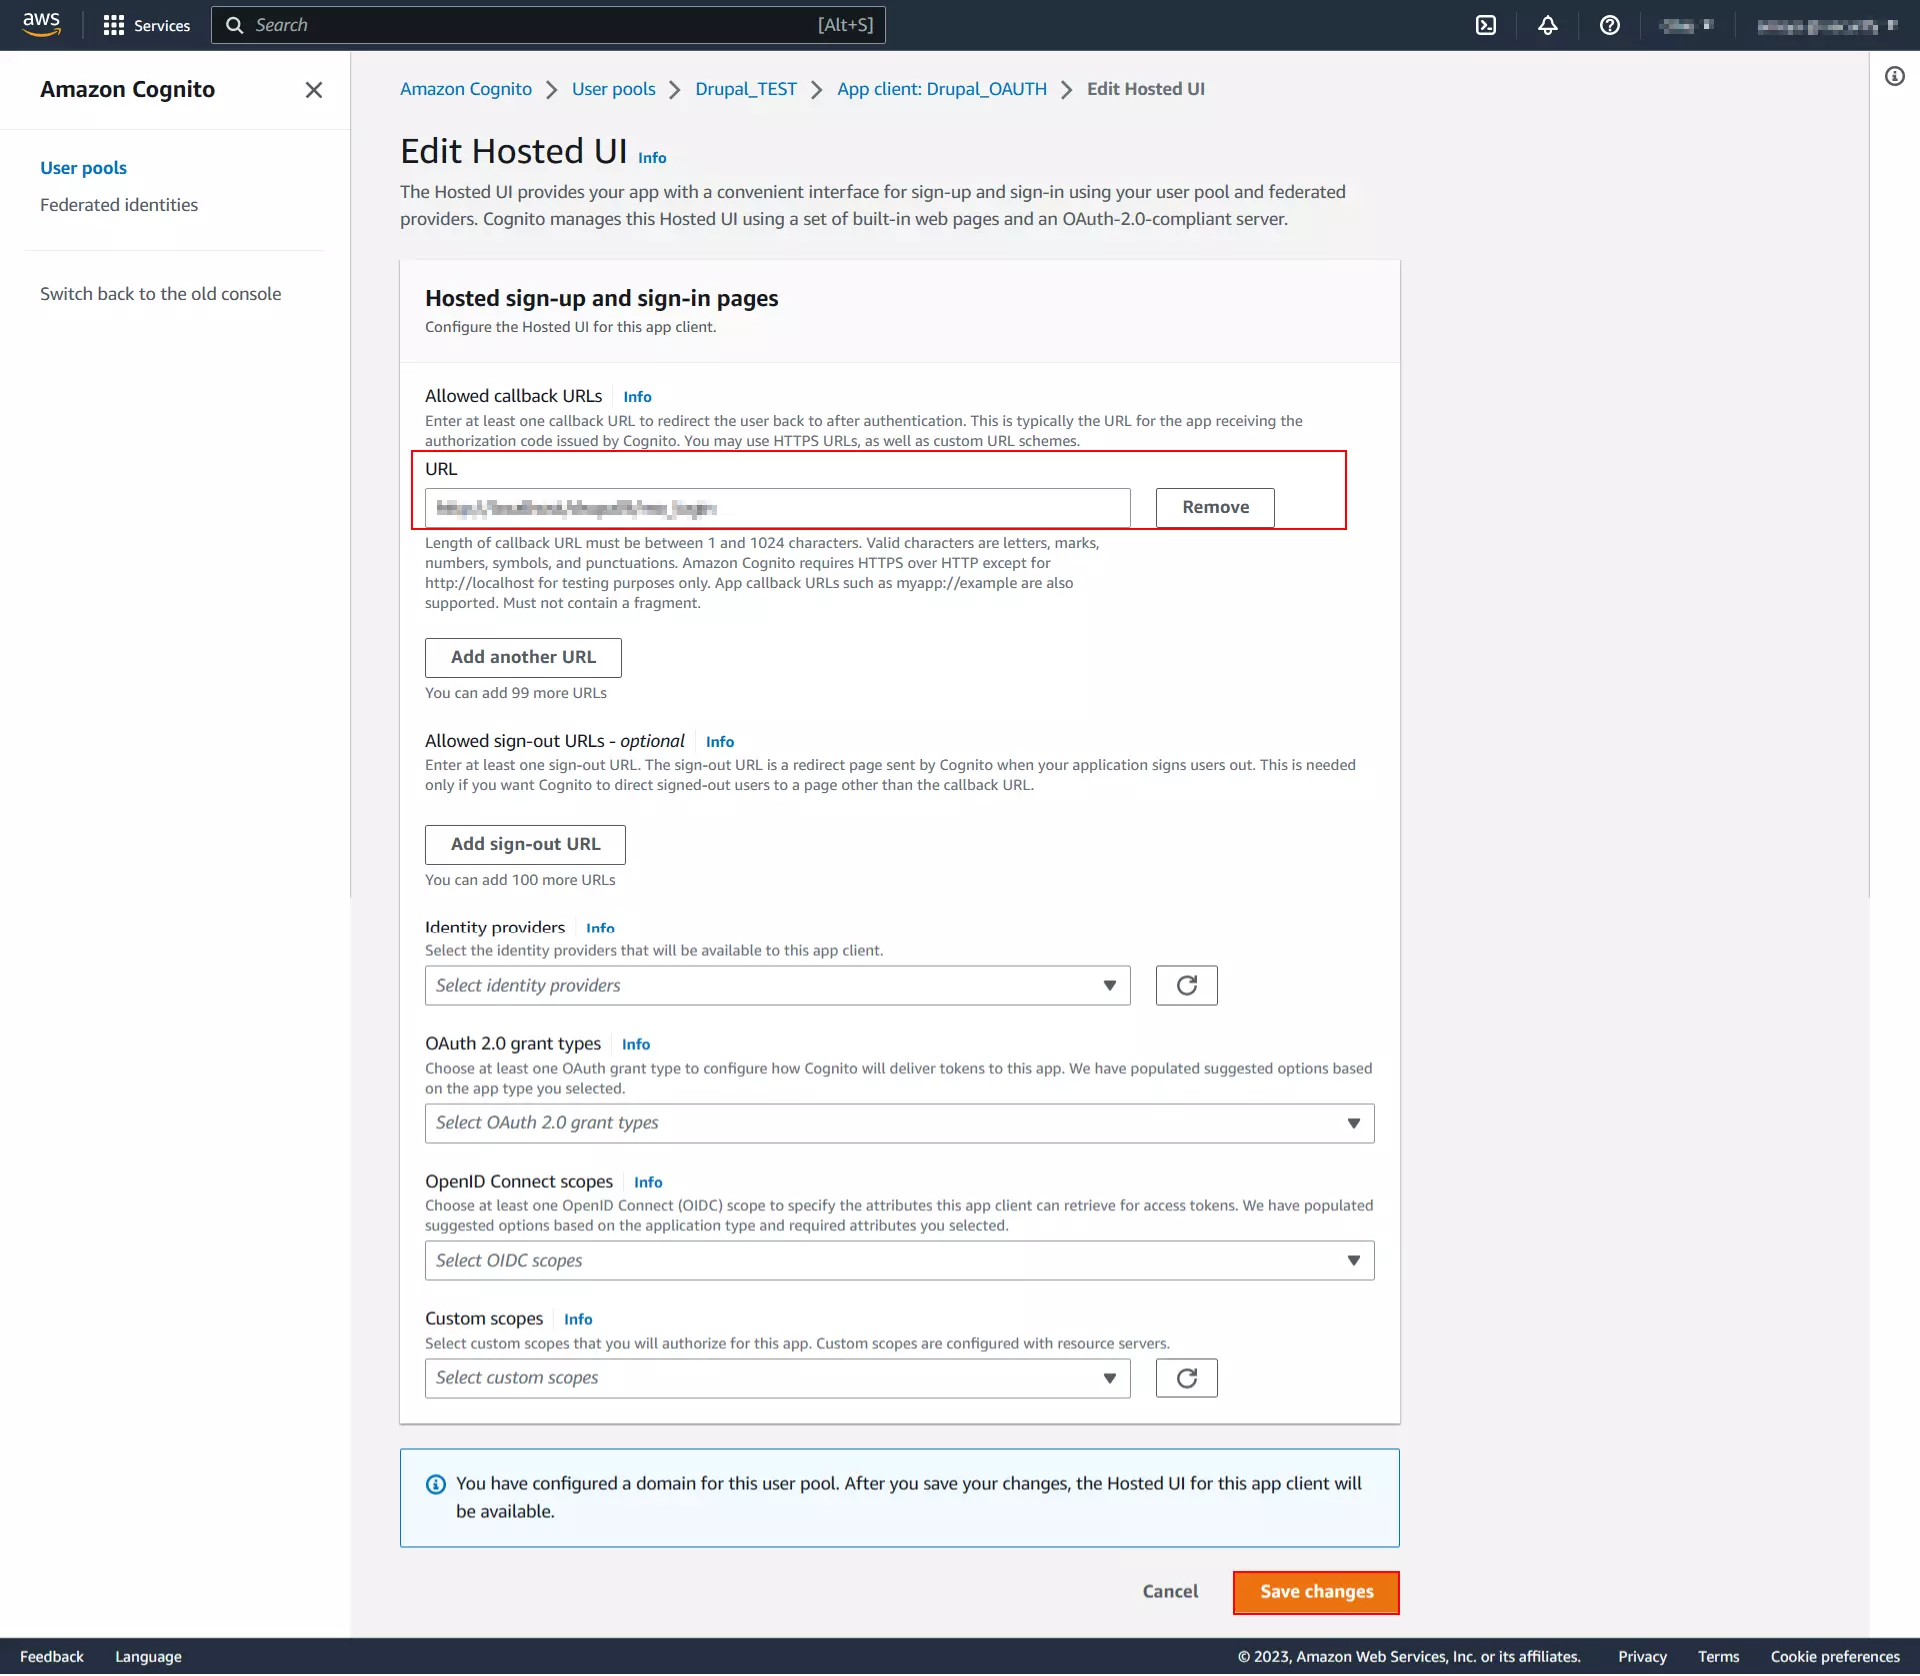
- Click on Add callback URL button.
- Paste the copied Callback/Redirect URL into the URL text field.
- Click on Save button.
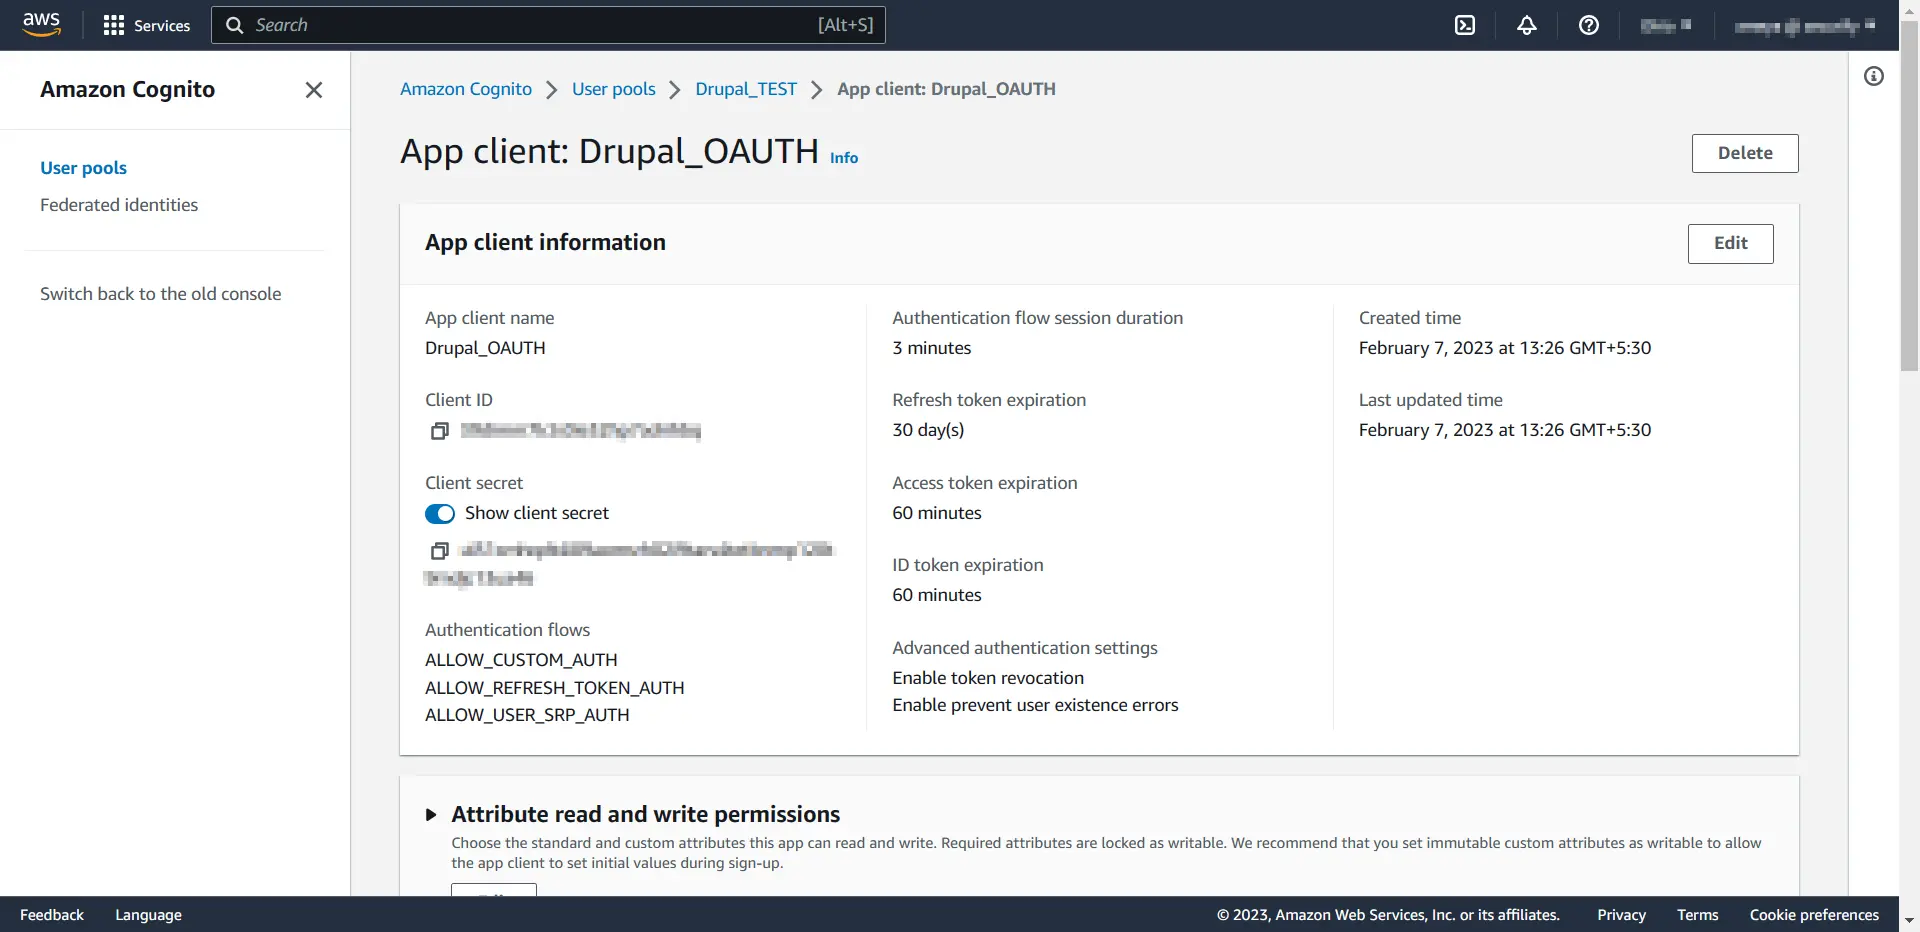
- Copy the Client ID and Client Secret.
Integrating Drupal with AWS Cognito:
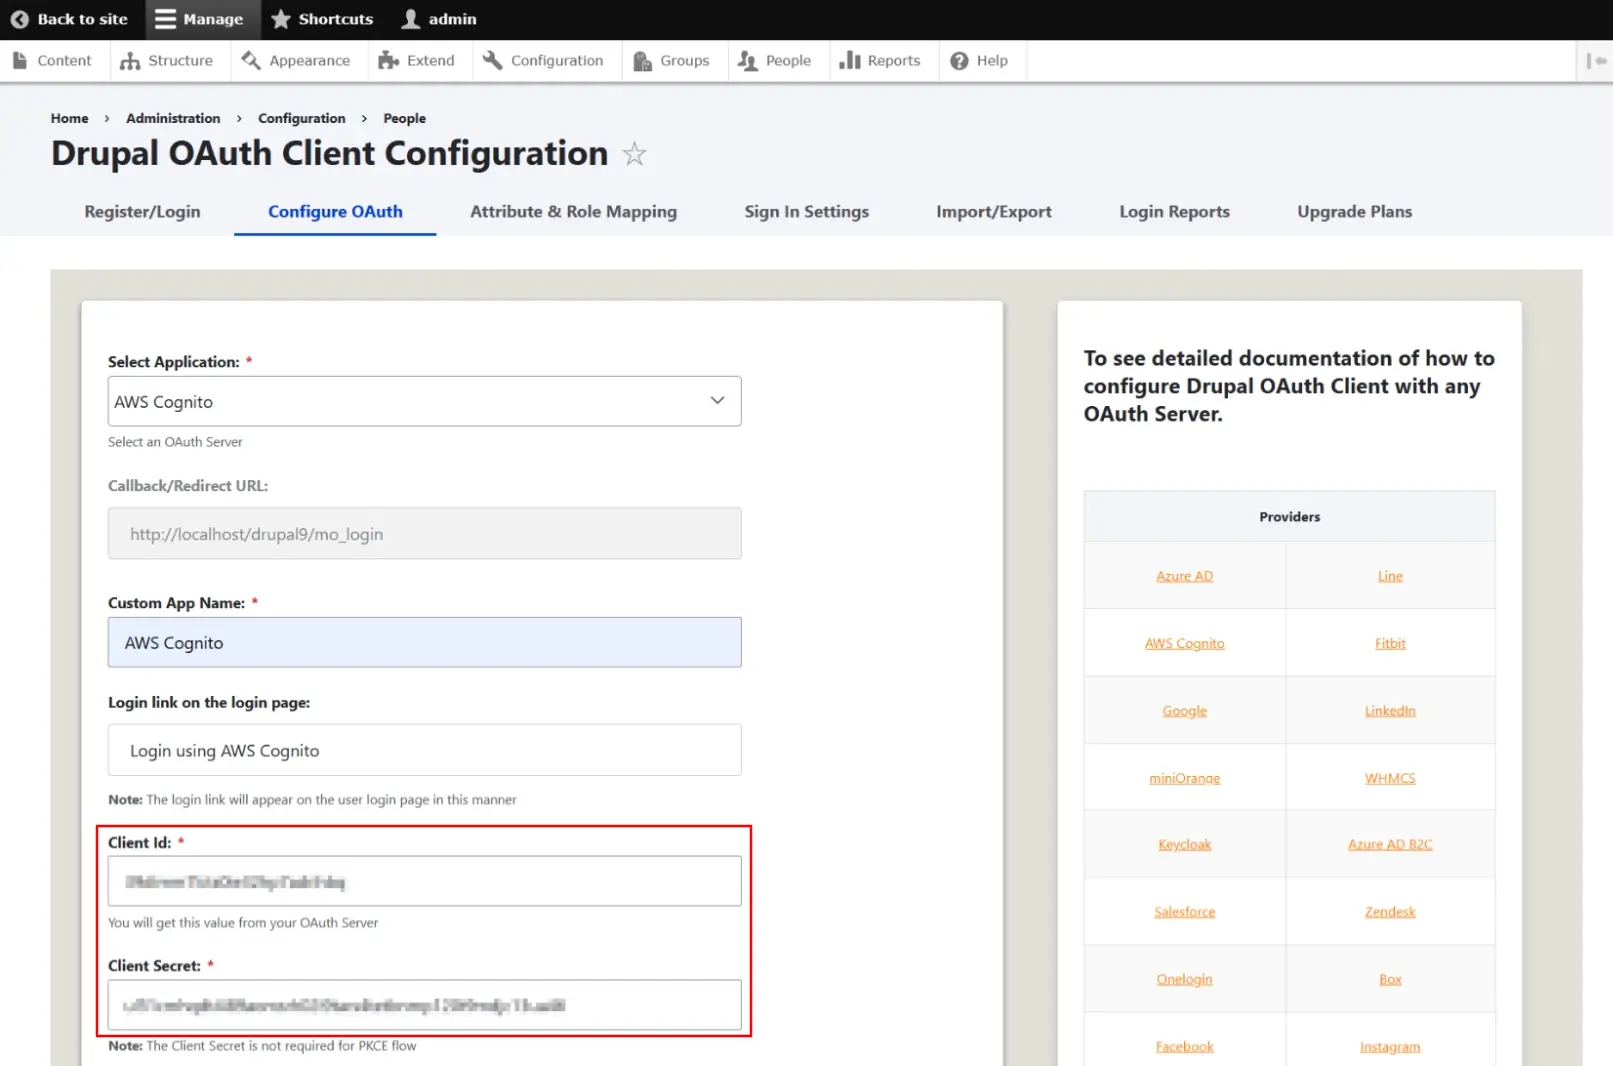
- Go to miniOrange OAuth Client module. Paste the copied Client ID and Client Secret into the respective field.
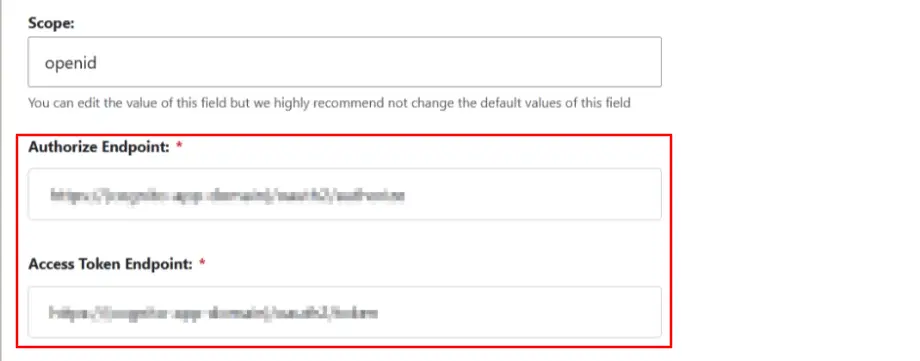
- Replace the inital URL with the Cognito domain into the Authorize Endpoint and Access Token Endpoint textfields.
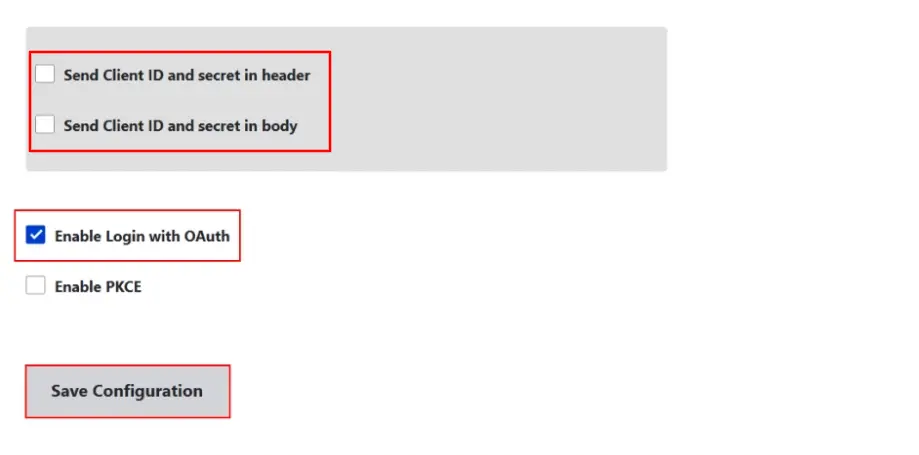
- The 'Send Client ID and Secret in Header or Body' checkbox allows you to specify whether the Client ID and Secret should be included in the header or the body of the Token Endpoint Request. If you're unsure which option to select, you can stick with the default settings.
- Click on the checkbox to Enable Login with OAuth, scroll down, and click the Save Configuration button.
Test Connection between Drupal and AWS Cognito:
- Click on the Perform Test Configuration button.
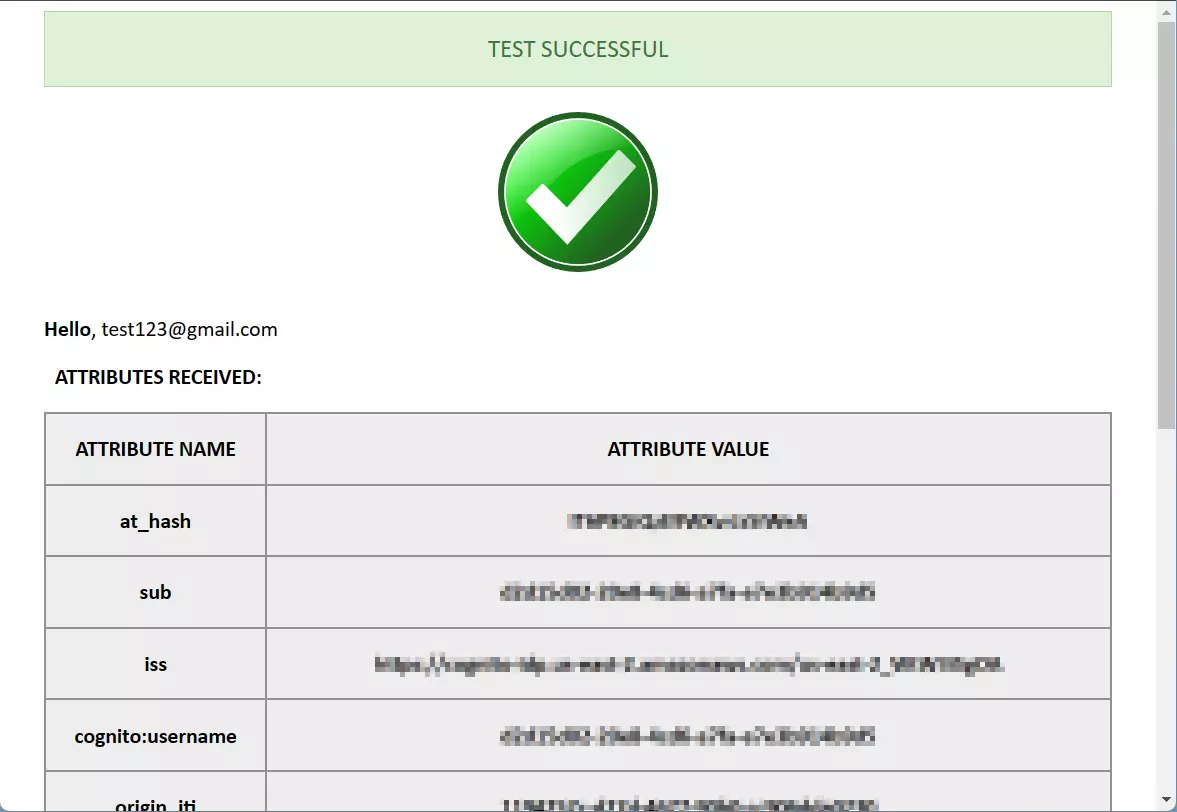
- On a Test Configuration popup, if you don't have an active session in AWS Cognito on the same browser, you'll be prompted to sign in to AWS Cognito. Once successfully logged in, you'll receive a list of attributes retrieved from AWS Cognito.
- Scroll down and click on the Configure Attribute / Role Mapping button.
- On the Attribute & Role Mapping tab, please select the attribute under which the email of the user is received from the Email Address drop-down menu. Similarly, you can select the suitable option from the Name Attribute drop-down menu.

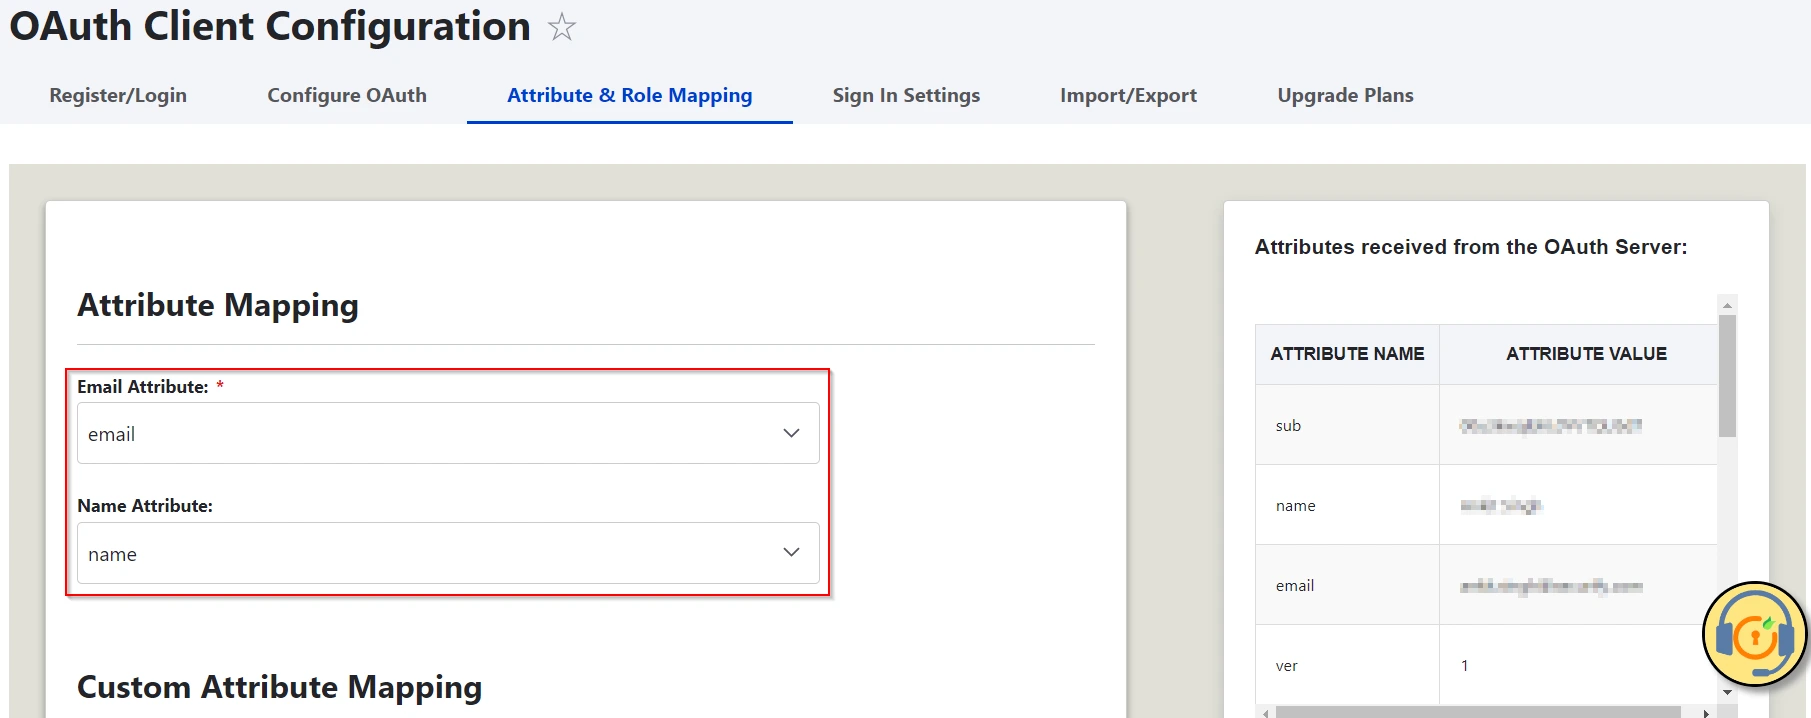
Please note: Mapping the Email Attribute is mandatory for Login.
Congratulations! You have successfully configured AWS Cognito as OAuth/OpenID Provider and Drupal as an OAuth Client.
How to perform the SSO?
- Now, open a new browser/private window and go to your Drupal site login page.
- Click on the Login using the AWS Cognito link to initiate the SSO from Drupal.
- If you want to add the SSO link to other pages as well, please follow the steps given in the image below:

Need Assistance?
If you face any issues during the configuration or if you want some additional features, please contact us at drupalsupport@xecurify.com.
Additional Features:
- Attribute Mapping - map user’s attributes received from OAuth Provider with Drupal fields
- Role mapping - assign a Drupal Role to users on the basis of their role/attribute on the OAuth provider
- Enable single logout - Logout user from the OAuth Provider (i.e. AWS Cognito, Azure AD B2C, Keycloak, Okta) when they logs out form Drupal
- Restrict anonymous access to the complete site or a particular section of the site
- Add Multiple OAuth Provides
- Explore All the features offered by the OAuth Client
Troubleshooting:
Follow the steps mentioned HERE
Follow the steps mentioned HERE
The logout functionality you’ve mentioned here is the default behavior of a module. It’s logging you out of Drupal but not from your Application/Provider. To allow the module to logout from your provider/application account (what you are looking for), you need to make the below configurations: [know more]
As you have upgraded to one of our paid versions of the Drupal module and replaced the free module with the paid one, you must first activate the paid module. Please refer to the below steps. [Know more]
Need Help? We are right here!

Thanks for your inquiry.
If you dont hear from us within 24 hours, please feel free to send a follow up email to info@xecurify.com
Cookie Preferences
Cookie Consent
This privacy statement applies to miniorange websites describing how we handle the personal information. When you visit any website, it may store or retrieve the information on your browser, mostly in the form of the cookies. This information might be about you, your preferences or your device and is mostly used to make the site work as you expect it to. The information does not directly identify you, but it can give you a more personalized web experience. Click on the category headings to check how we handle the cookies. For the privacy statement of our solutions you can refer to the privacy policy.
Strictly Necessary Cookies
Always Active
Necessary cookies help make a website fully usable by enabling the basic functions like site navigation, logging in, filling forms, etc. The cookies used for the functionality do not store any personal identifiable information. However, some parts of the website will not work properly without the cookies.
Performance Cookies
Always Active
These cookies only collect aggregated information about the traffic of the website including - visitors, sources, page clicks and views, etc. This allows us to know more about our most and least popular pages along with users' interaction on the actionable elements and hence letting us improve the performance of our website as well as our services.
