
Brightspace Single Sign-On (SSO) using Shopify Store as Identity Provider
Overview
Brightspace Single Sign On (SSO) using your Shopify store. miniOrange provides a ready-to-use solution for your Shopify store. This solution ensures that you are ready to roll out secure access to your
Brightspace LMS using Shopify Store credentials within minutes.
Brightspace is a web-based learning management system (LMS) software system that allows our users to easily manage course work, assignments, and evaluations on campus, online and around the world. Some of the benefits of Brightspace are it
provides unlimited access to learning materials and also tracks learner progress and performance.
Login using the Shopify
( Shopify Store as SAML IDP )
application gives you the ability to use your
Shopify store credentials to log into Brightspace LMS. Here we will go through a step-by-step guide to configure Single Sign-On (SSO) between the Brightspace LMS as a Service Provider and the
Shopify store as an Identity Provider.



Pre-requisites: App Installation
To configure SSO into Brightspace LMS with Shopify as IDP, you will need to install the Store as IDP - SSO Login app on your store.
- Log in to your Shopify Admin.
- Go to Apps → Shopify App Store.
- Search for Store as IDP - SSO login.
- Click Install to add the app to your store.
- Open the app from Apps to start Brightspace SSO configuration.
Step by Step Guide for configuring SSO into Brightspace LMS using Shopify Store as IDP
Step 1: Get Service Provider metadata from Brightspace LMS
- Login to your Brightspace LMS domain.
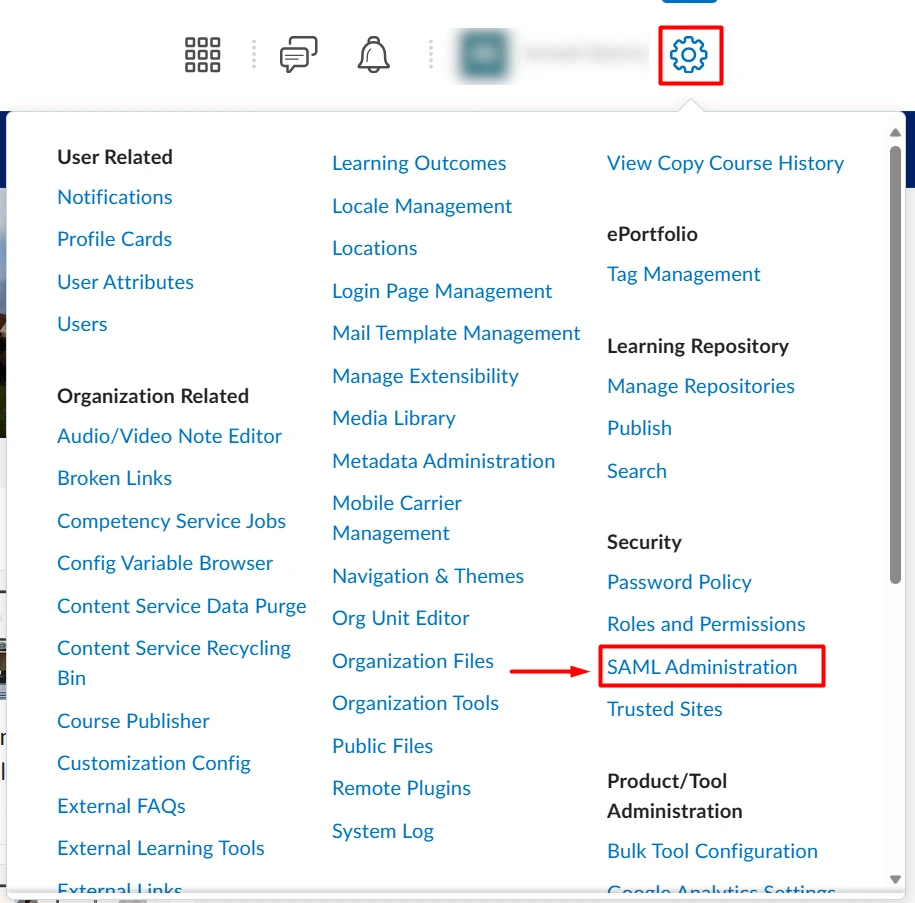
- Click on Settings icon, and under Security, select SAML Administration.
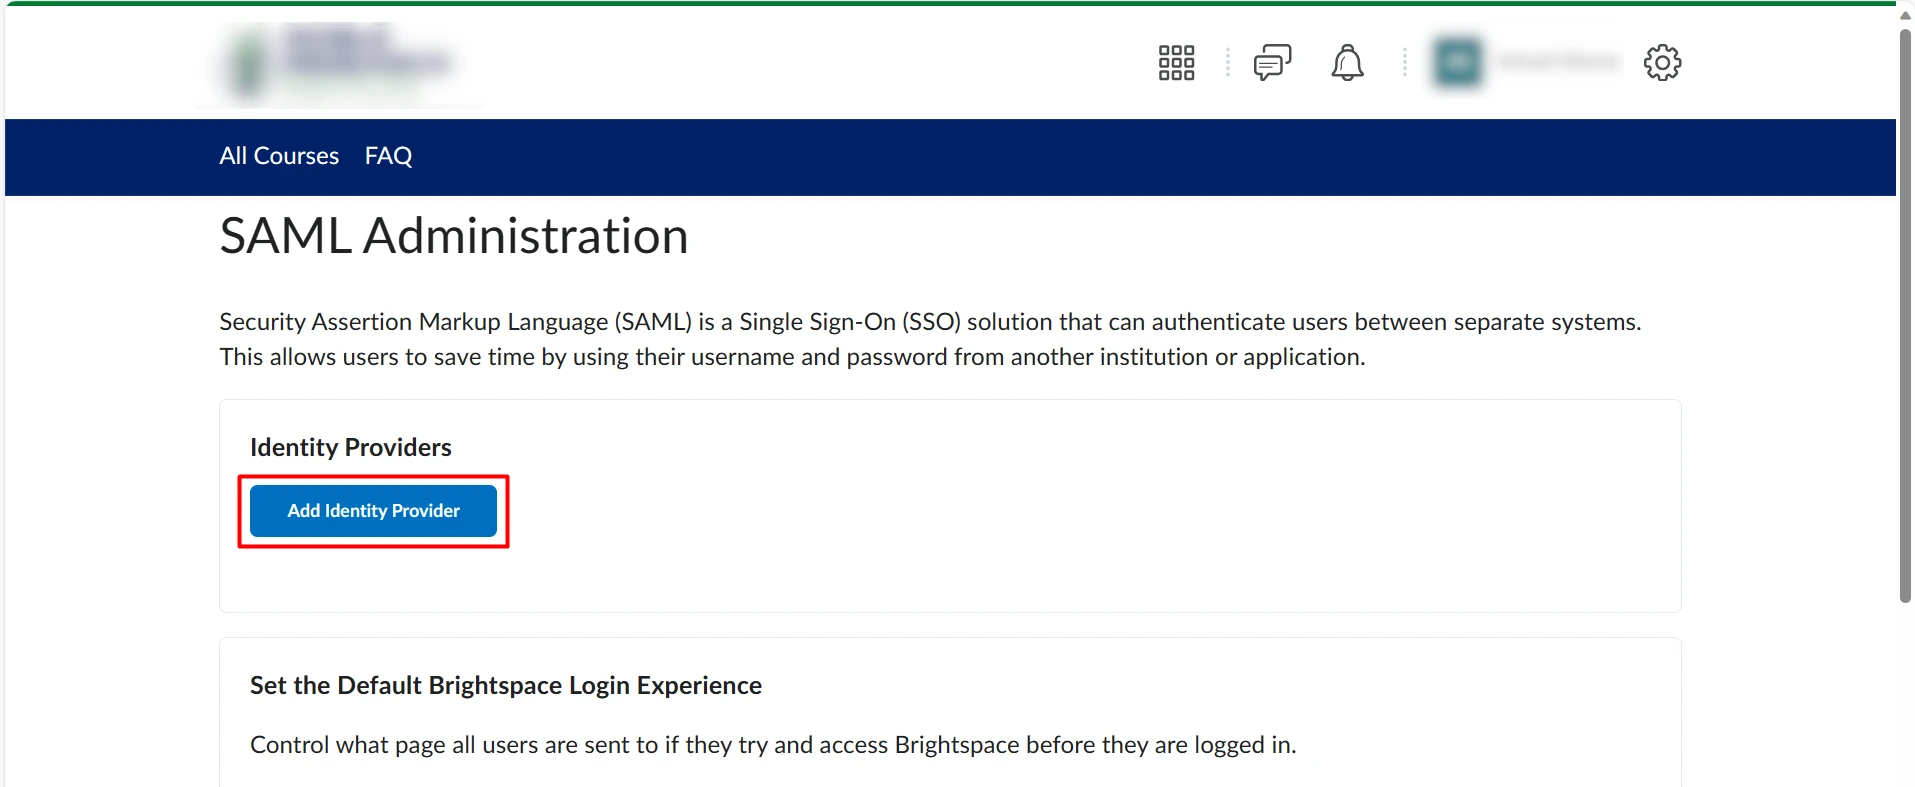
- Click on Add New Identity Provider.
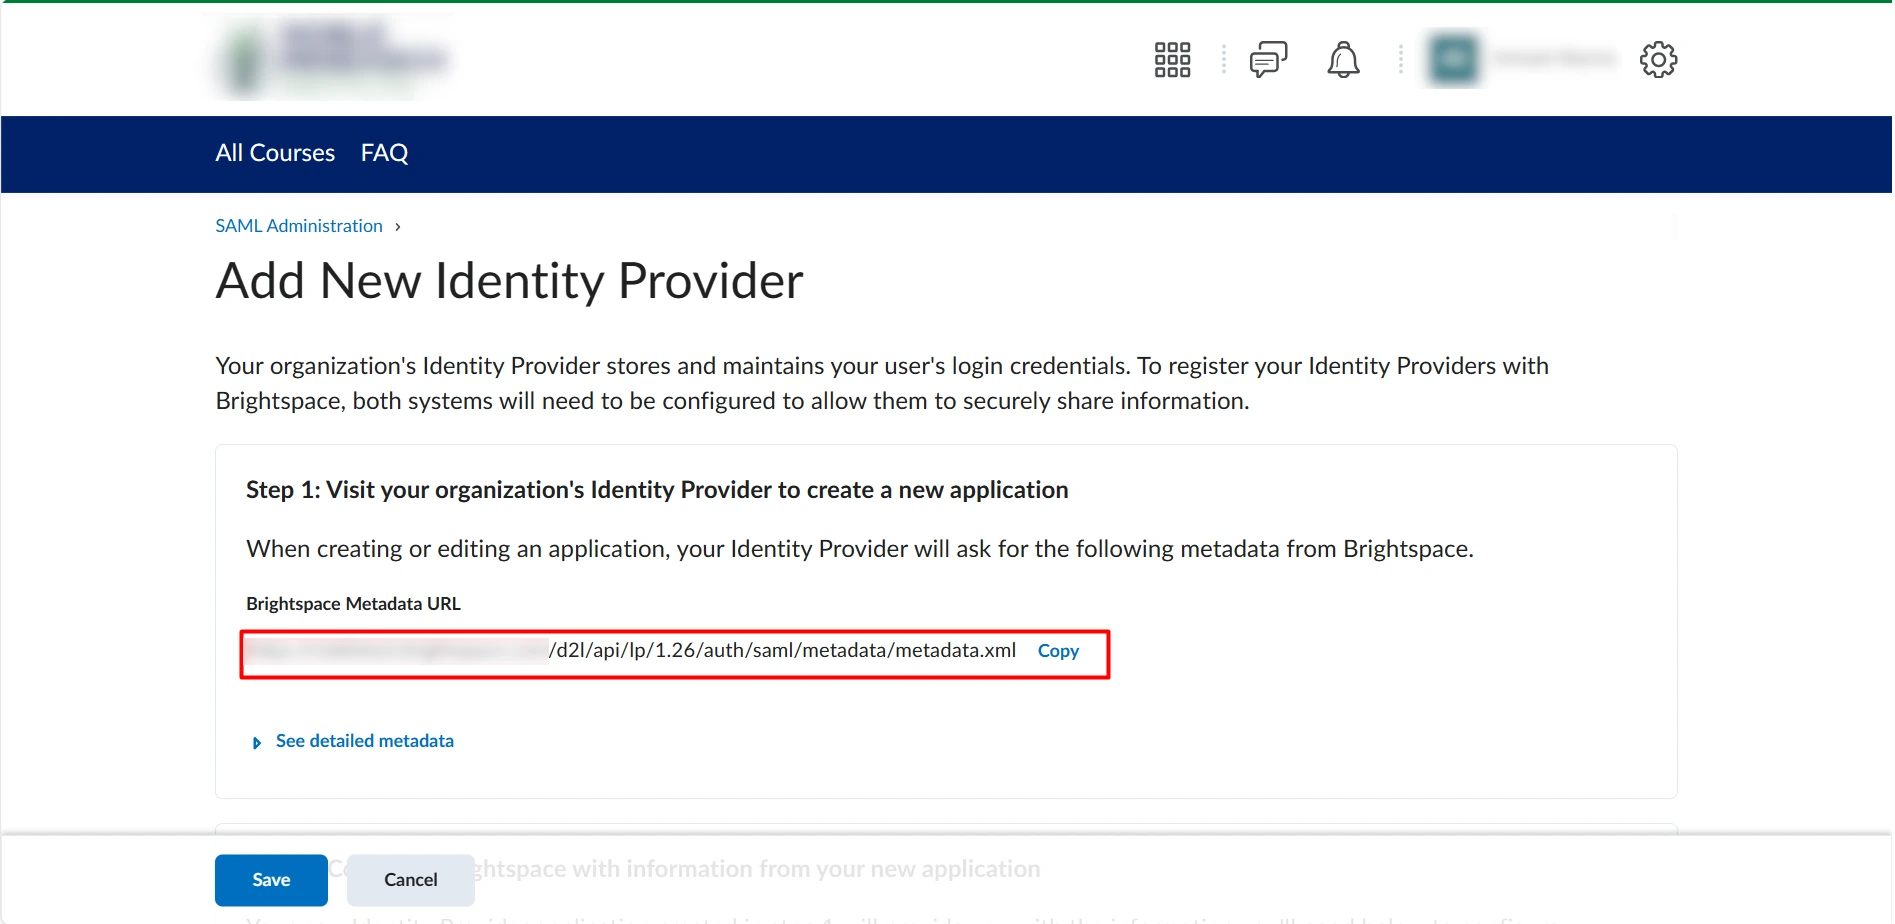
- Copy the metadata URL of your Brightspace application or keep it handy, to configure Brightspace as a service provider in the IDP application.
Step 2: Enable JIT Provisioning
- Login to your Brightspace LMS domain.
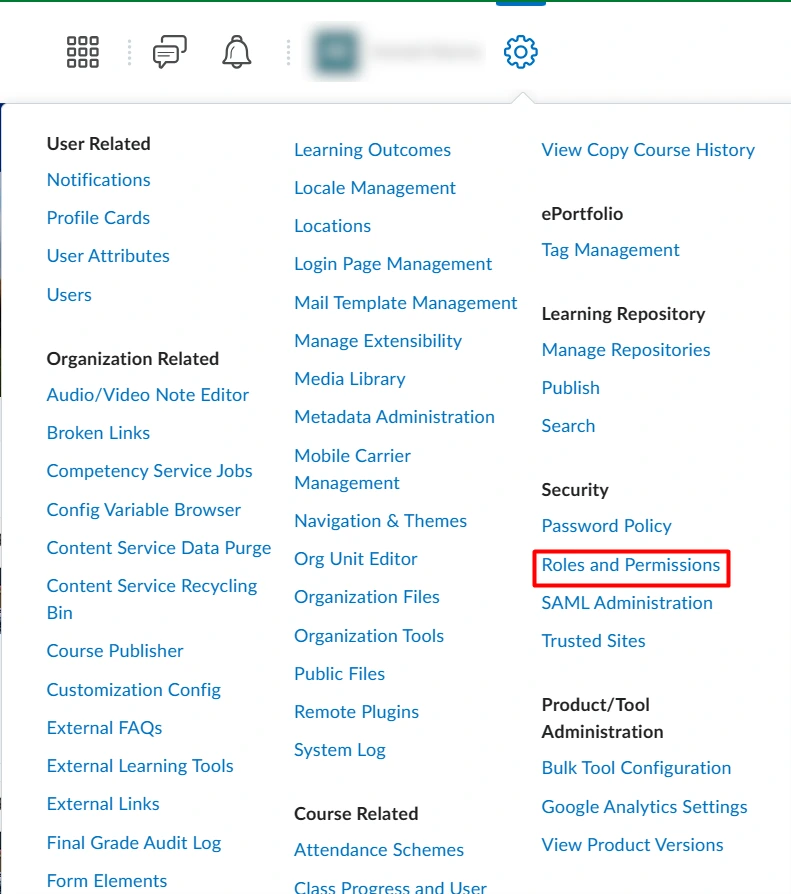
- Click on Settings icon, and under Security, select Roles and Permissions.
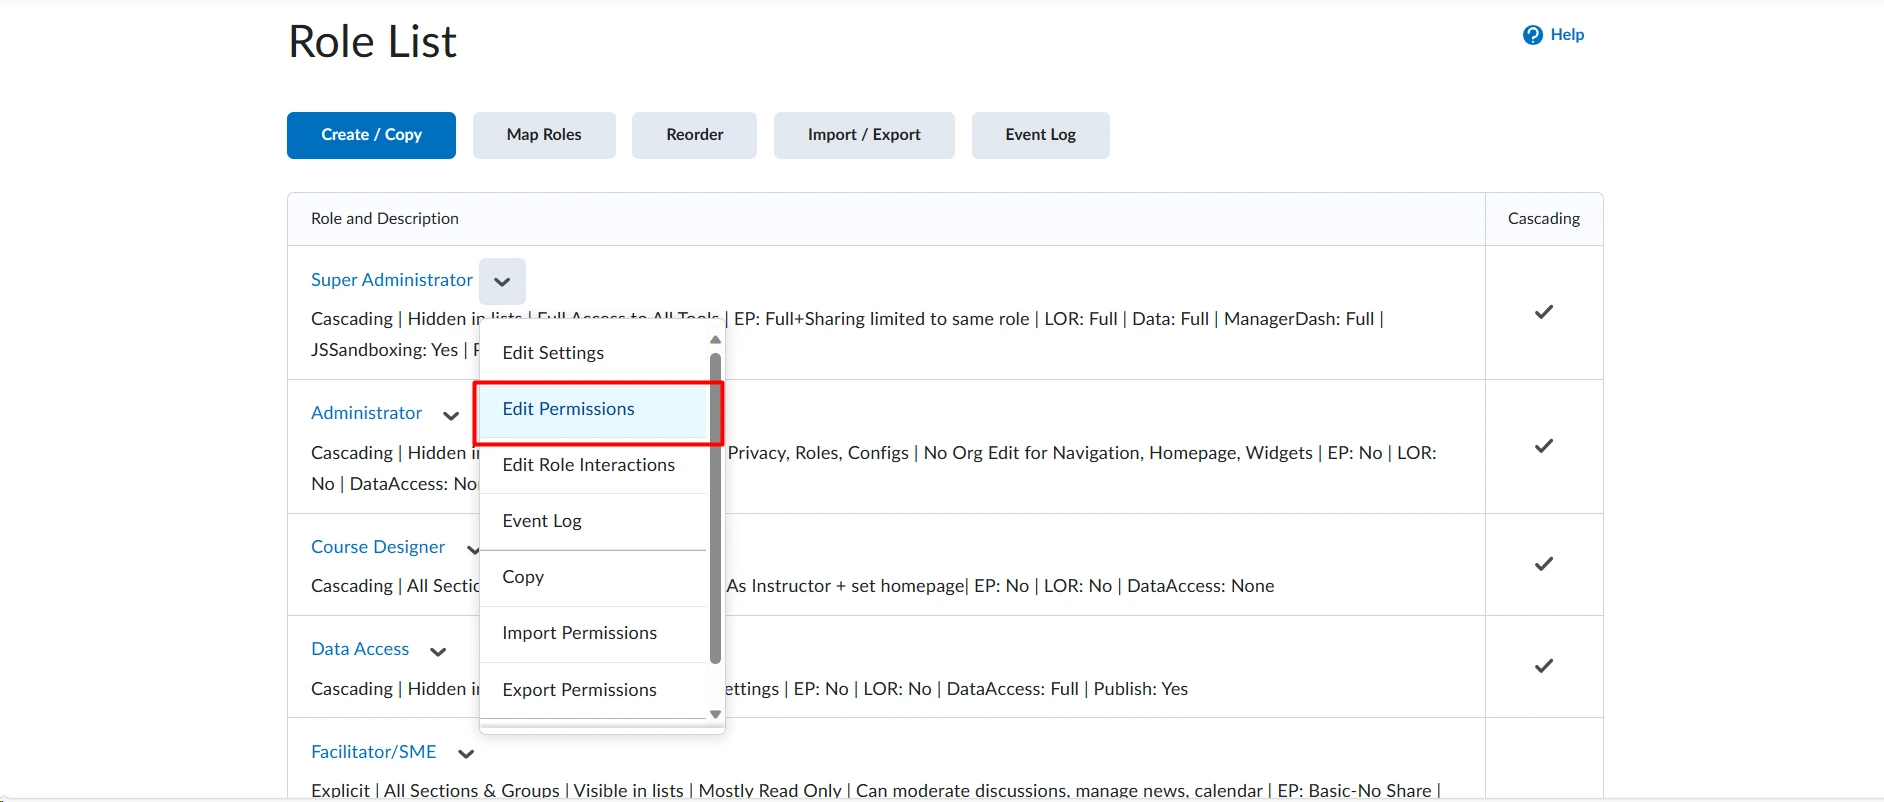
- Select your role according to your privileges, and click on Edit Permissions.
- Check the box for Manage SAML JIT Provisioning Configurations.
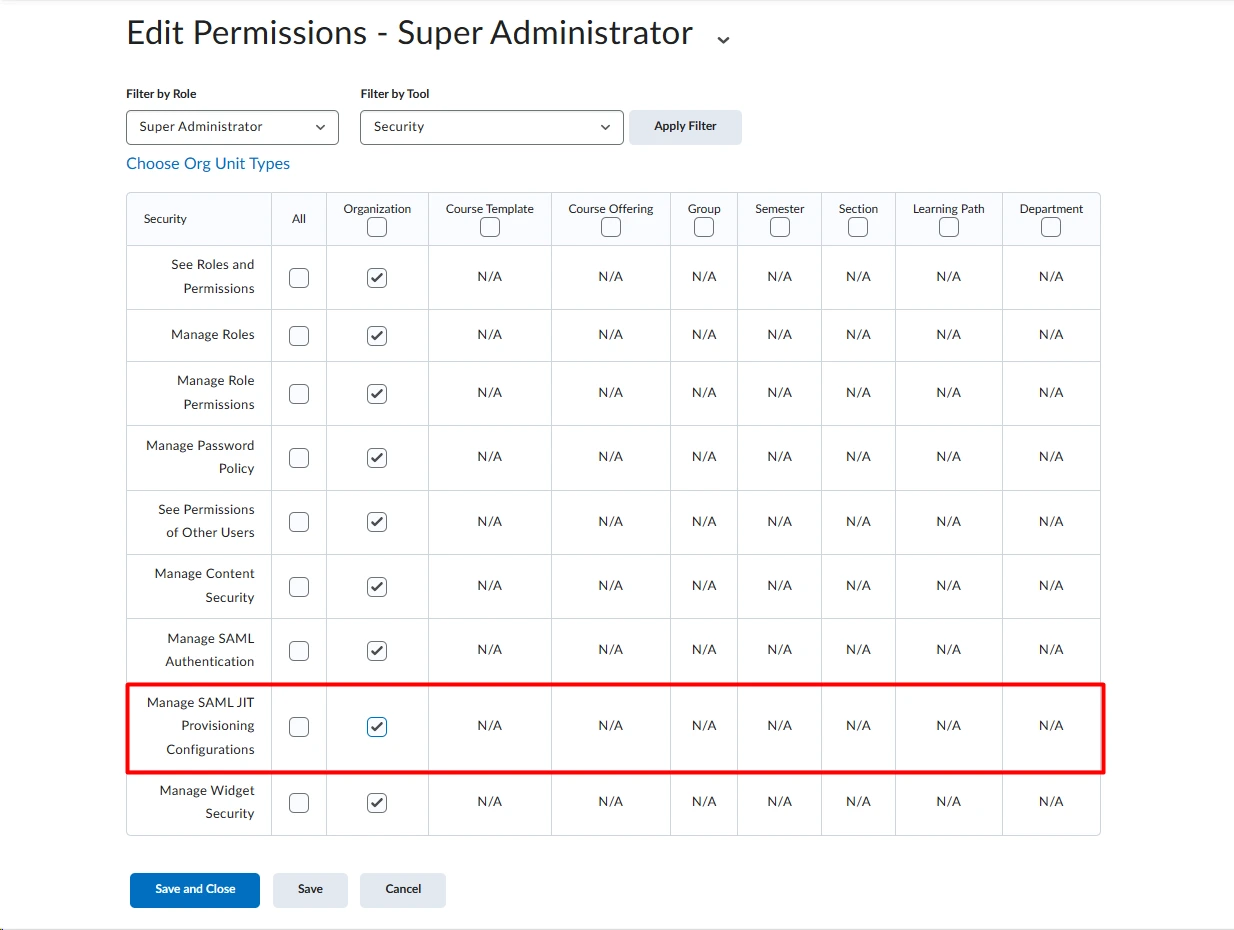
- Now, enable the JIT Provisioning for the creation of new user account.
Step 3: Configure Shopify as IDP
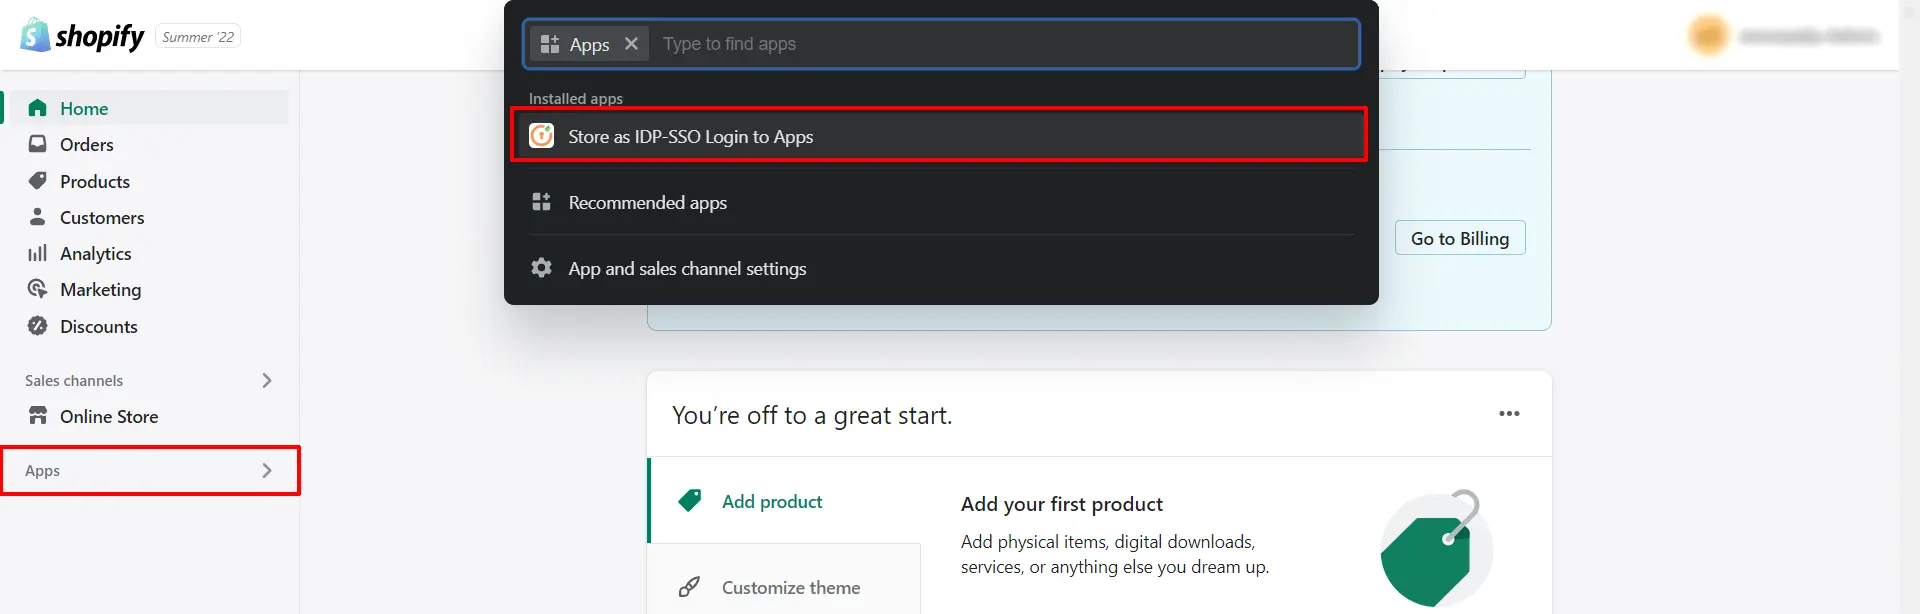
- Now go to your shopify store, click on Apps tab, and select Store as IDP-SSO login application.
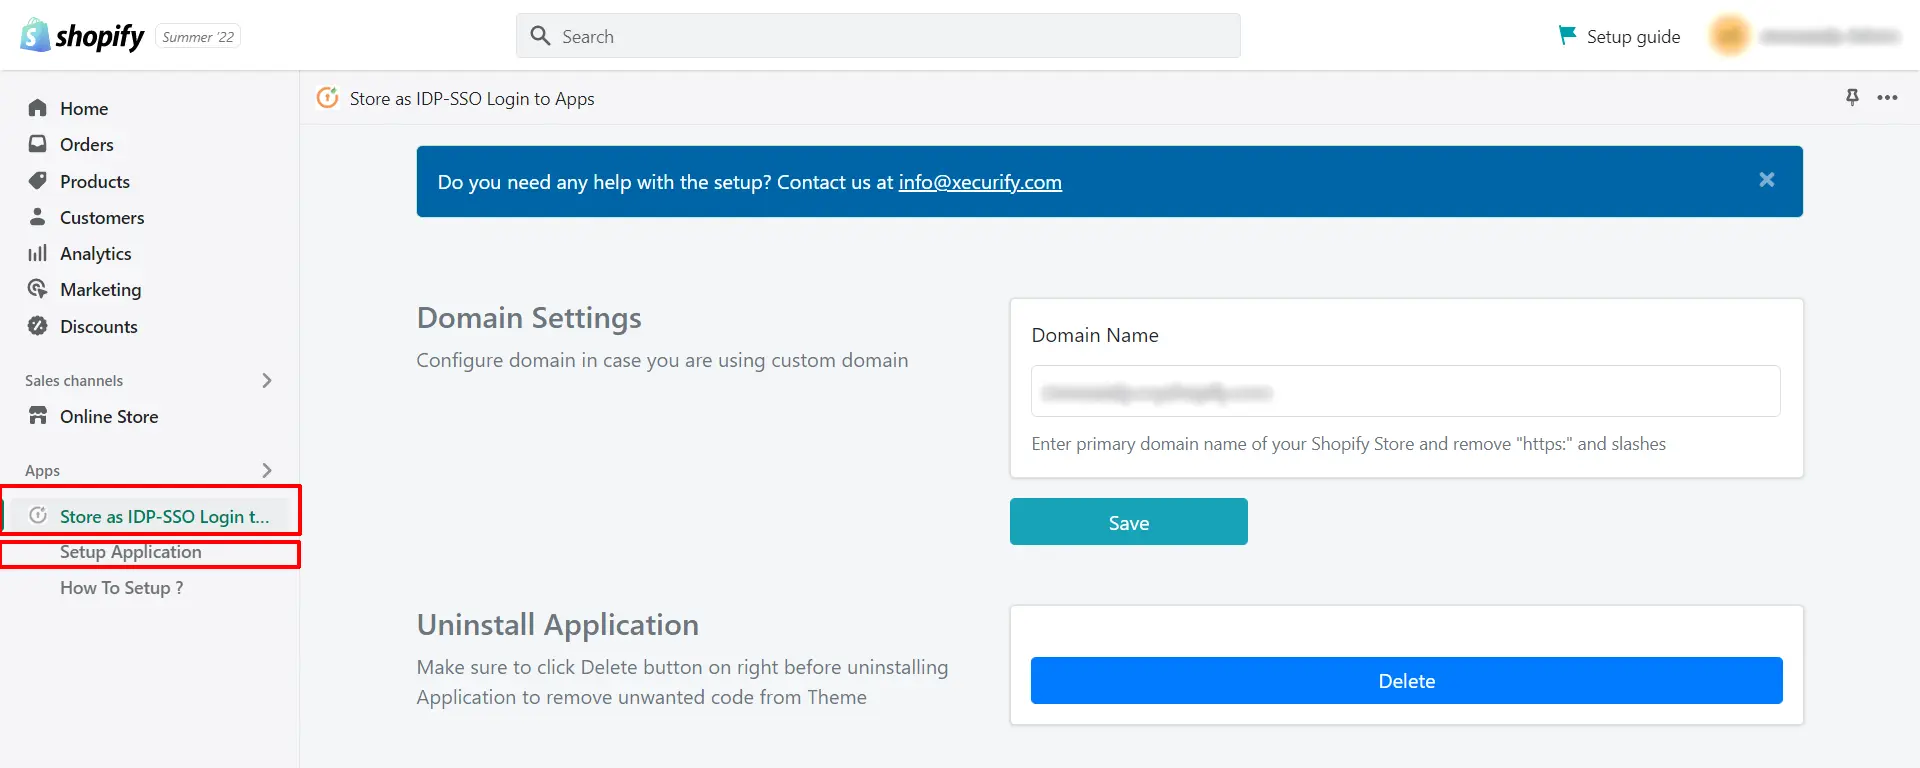
- Click on the Setup Application button in the left navigation bar.
- From the left navigation bar select Apps and click on Add Application button.
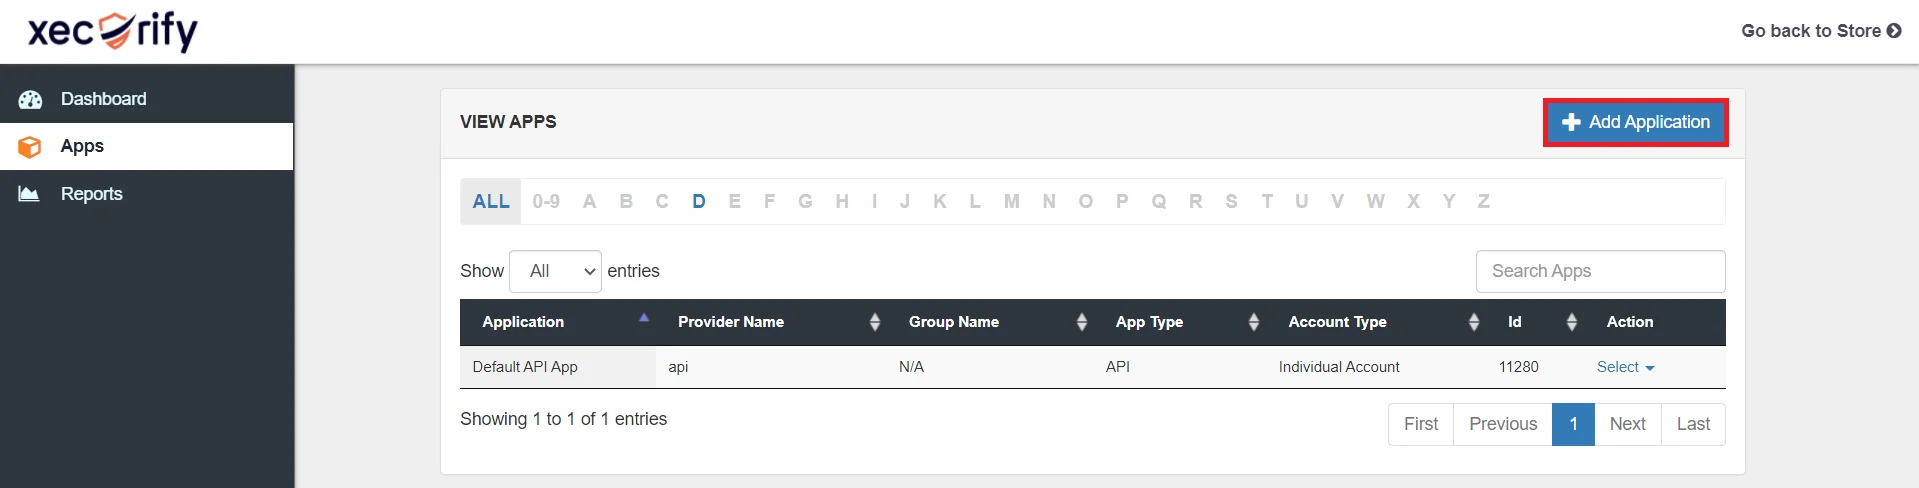
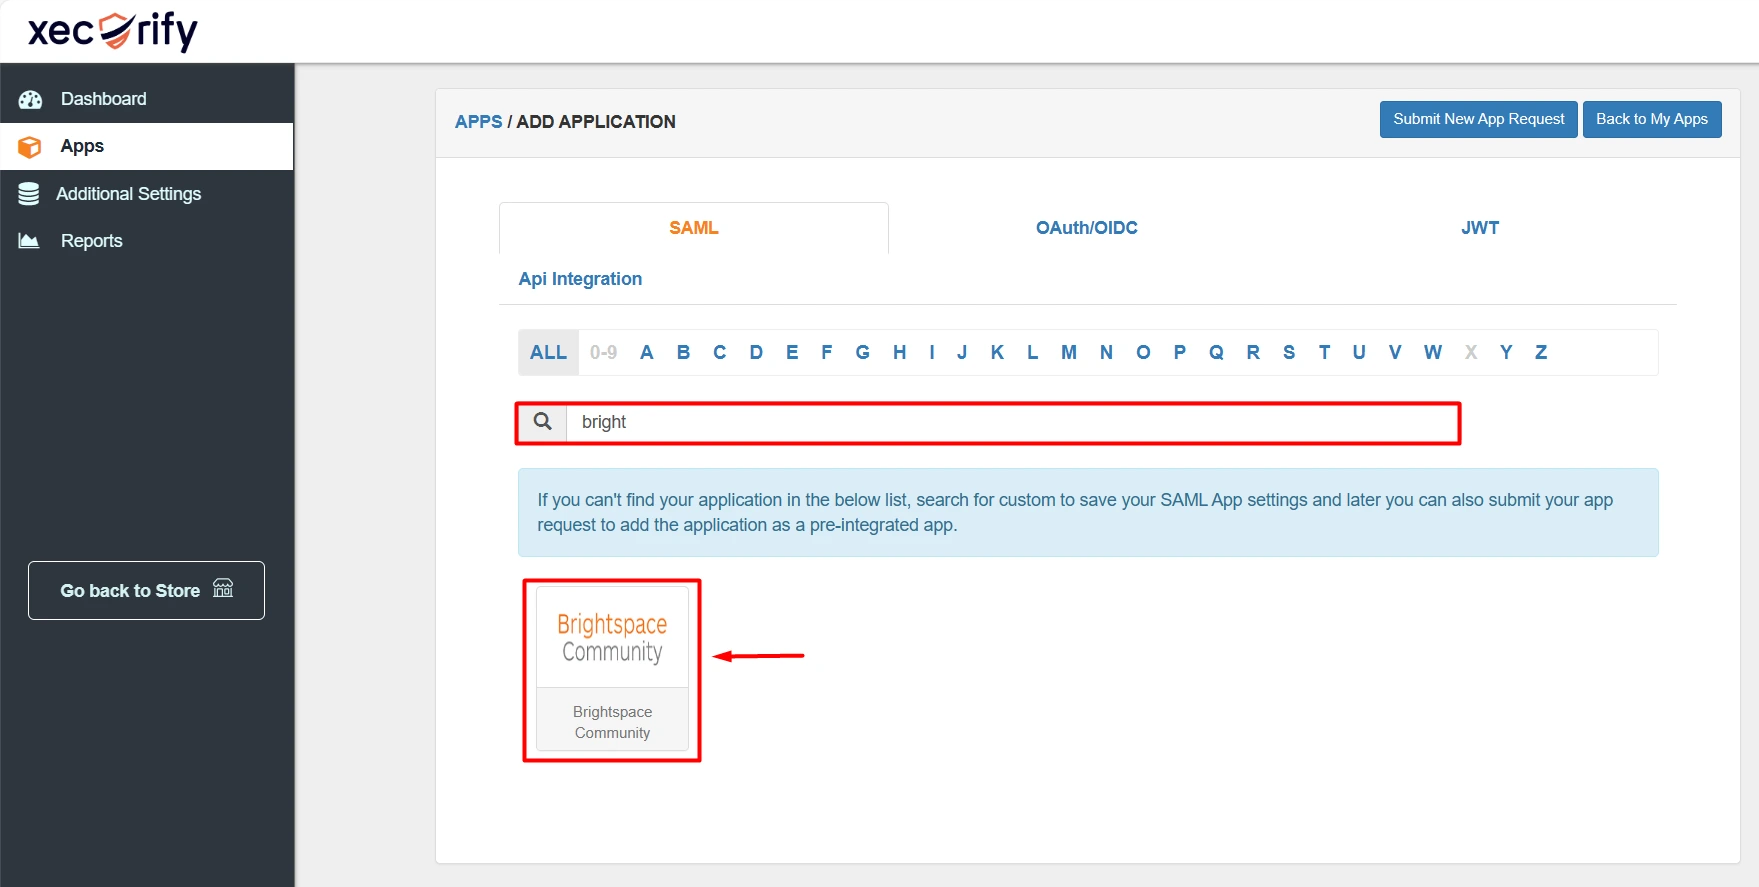
- Go to SAML tab and search for Brightspace and select Brightspace Community.
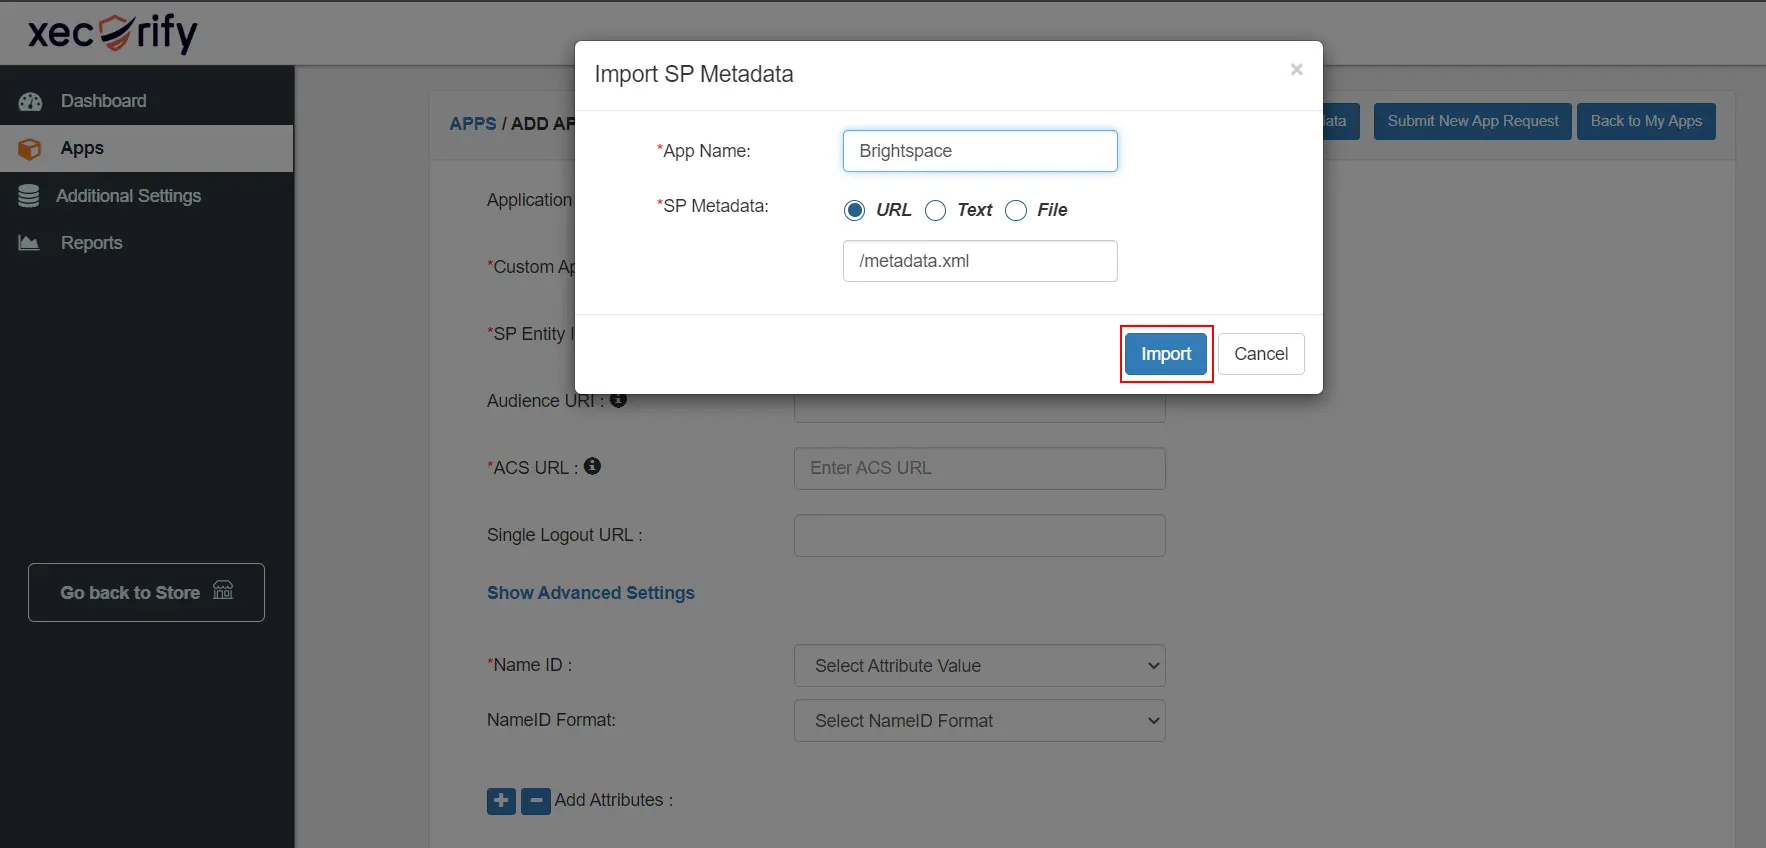
- To import the Brightspace metadata, click on Import SP Metadata.
- Enter the App Name and enter the metadata URL kept handy from Step 1.
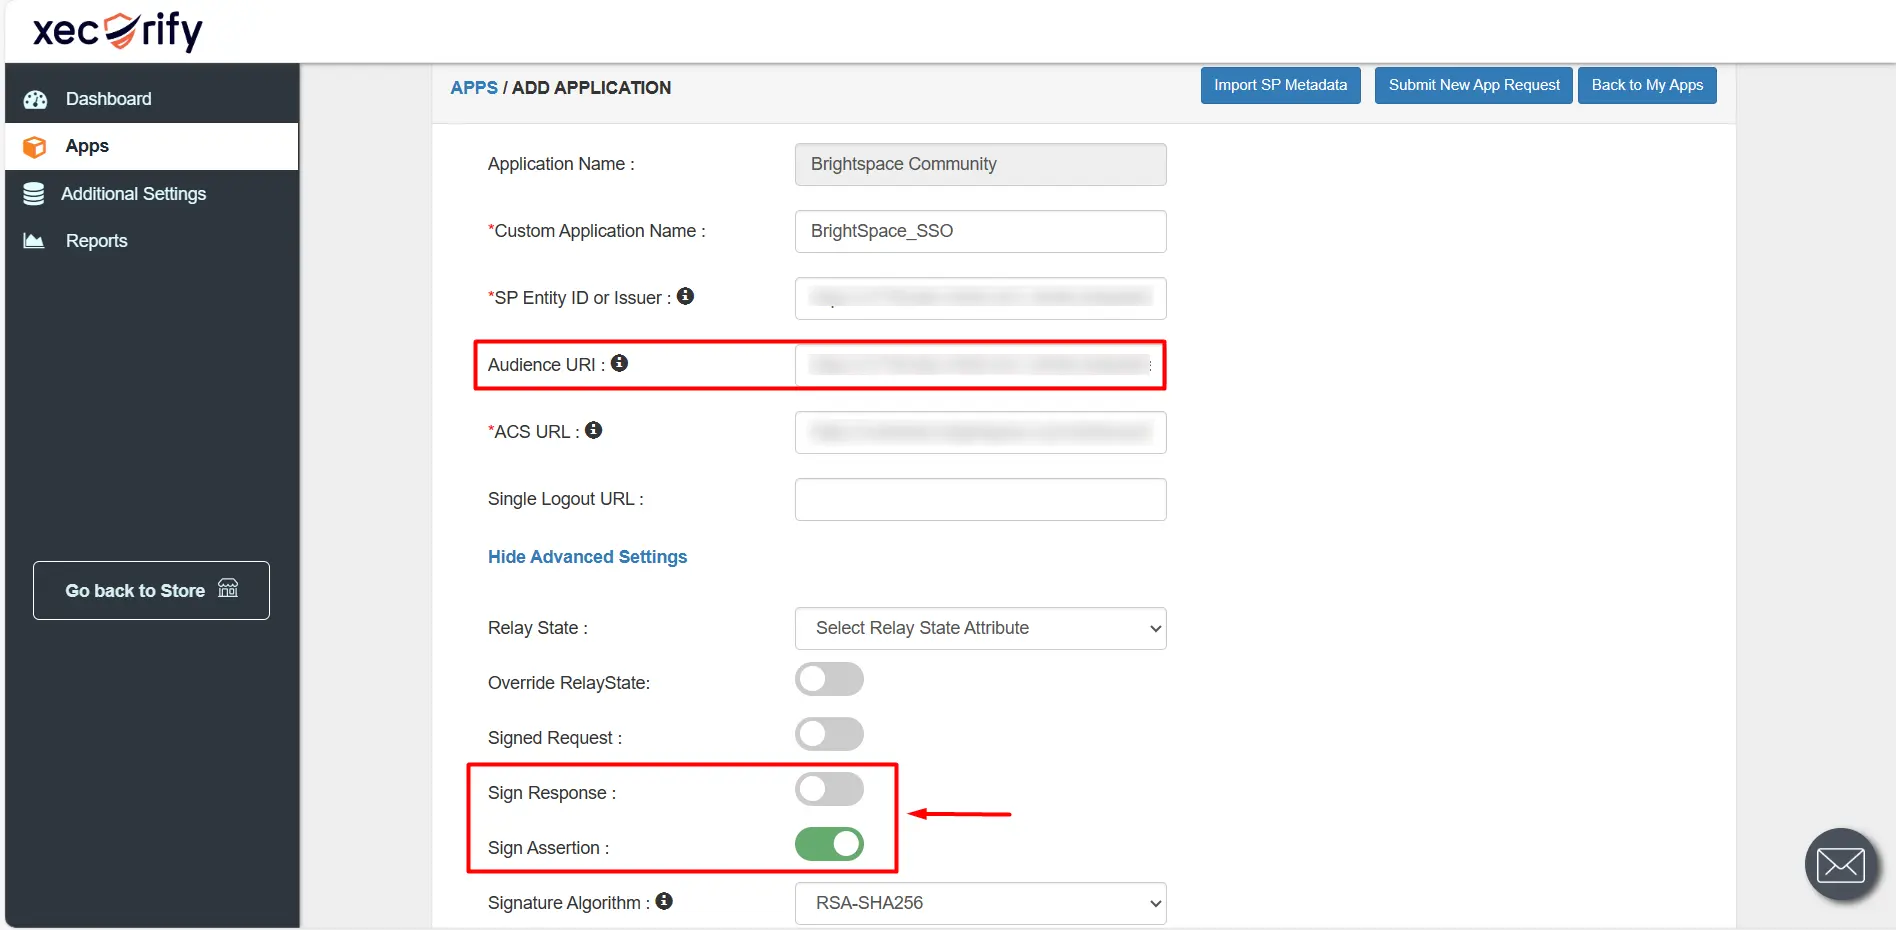
- Manually enter the Audience URI same as the SP Entity ID.
- Click on Show Advanced Settings.
- Fields like Sign Response and Sign Assertion should be turned off and on respectively.
- Enter the remaining values by referring to the table below:
| Name ID | Email Address |
| Name ID Format | urn:oasis:names:tc:SAML:1.1:nameid-format:emailAddress |
| Group Name | DEFAULT |
| Policy Name | Enter any name as per your choice |
| Login Method | Password |
- Click on the Save button to save your configurations.
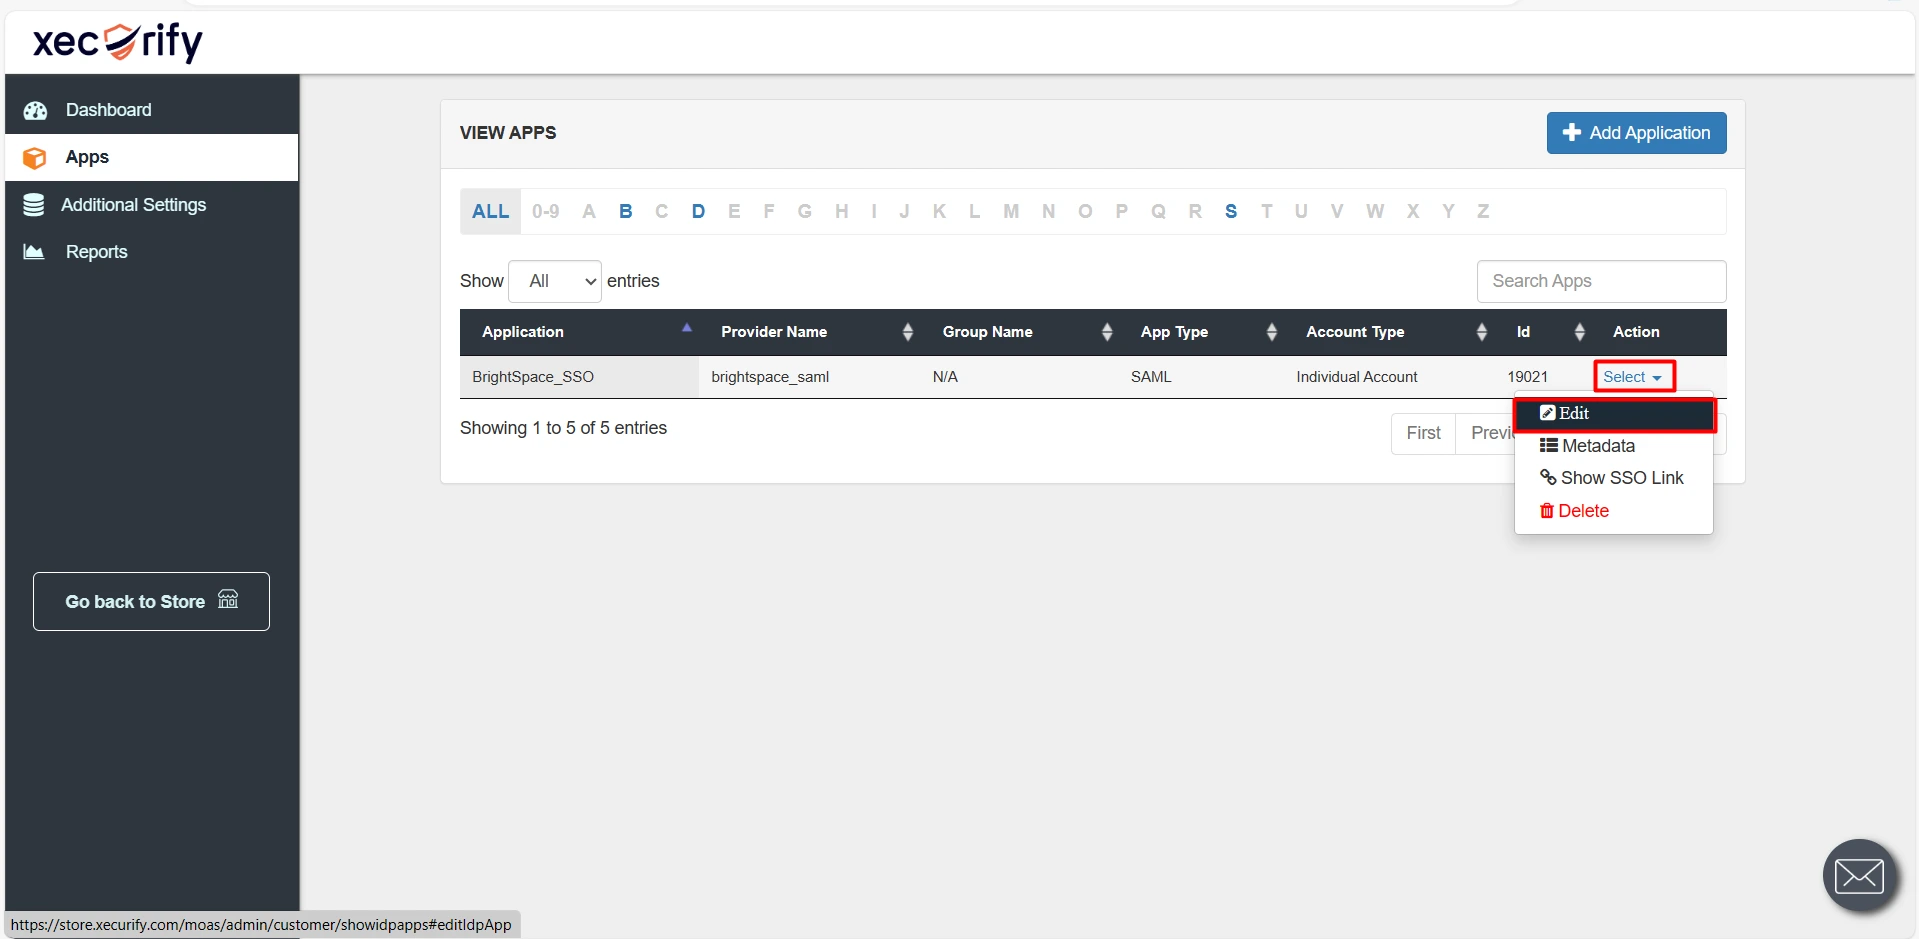
- Click on Edit.
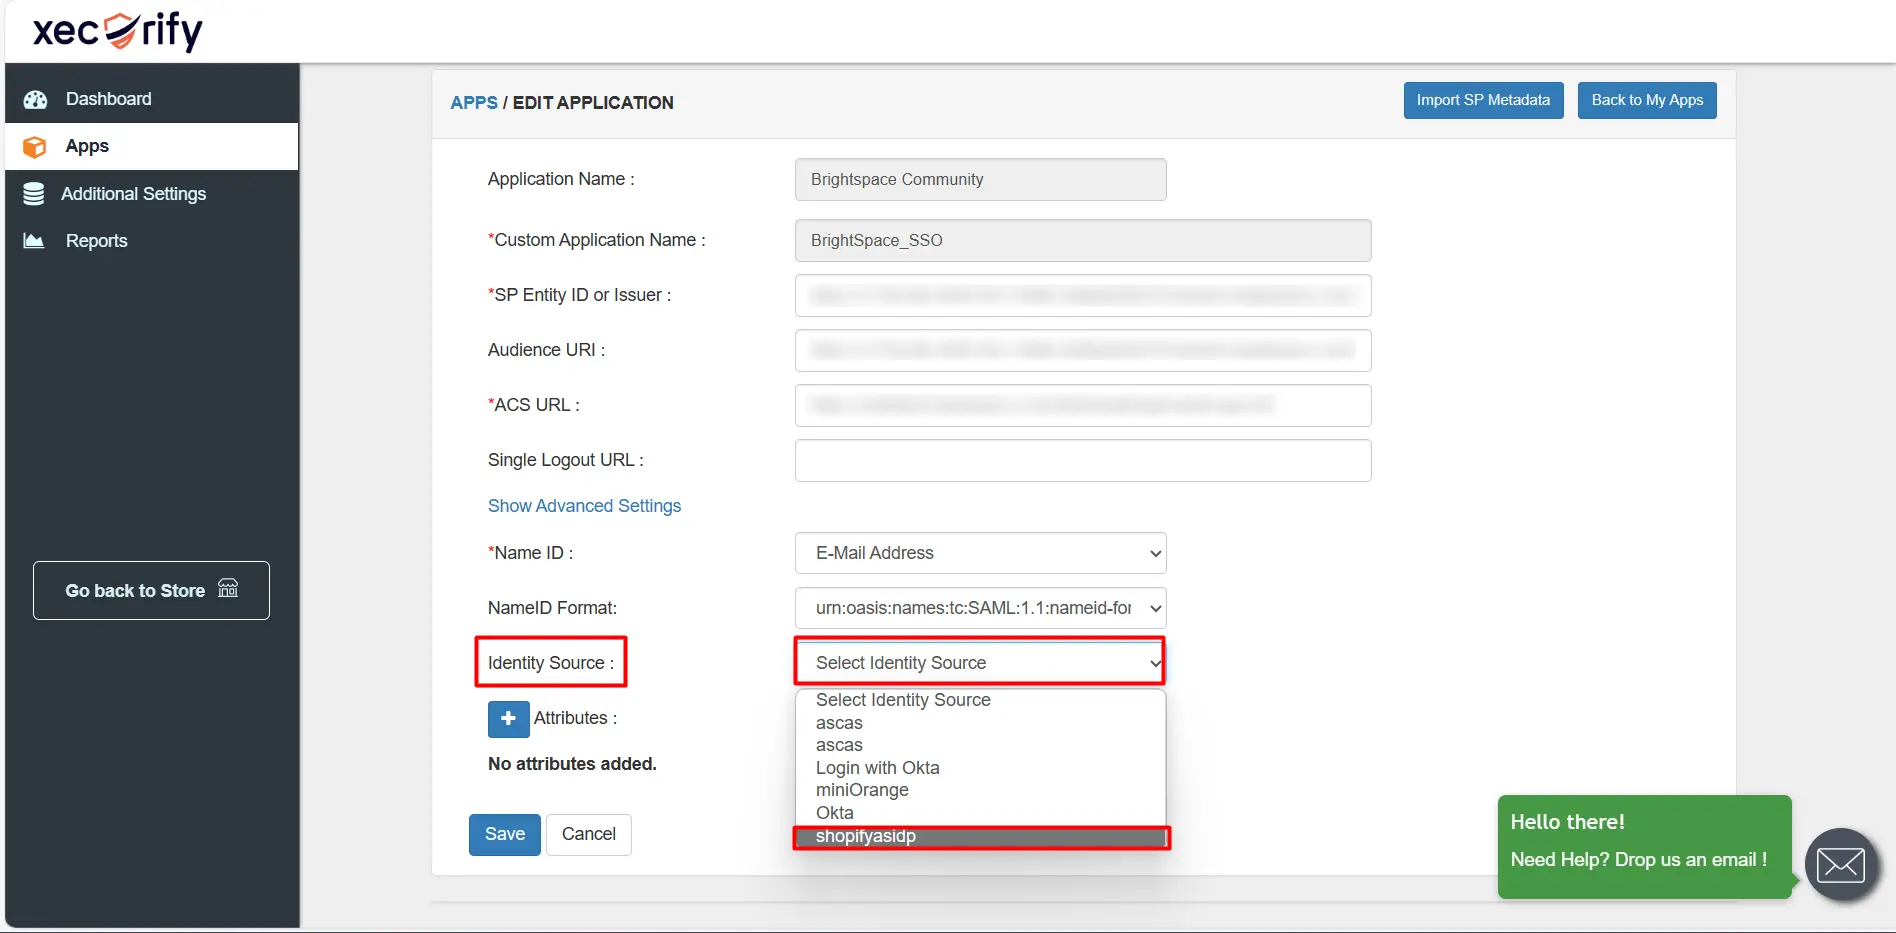
- Set the Identity Source as shopifyasidp.
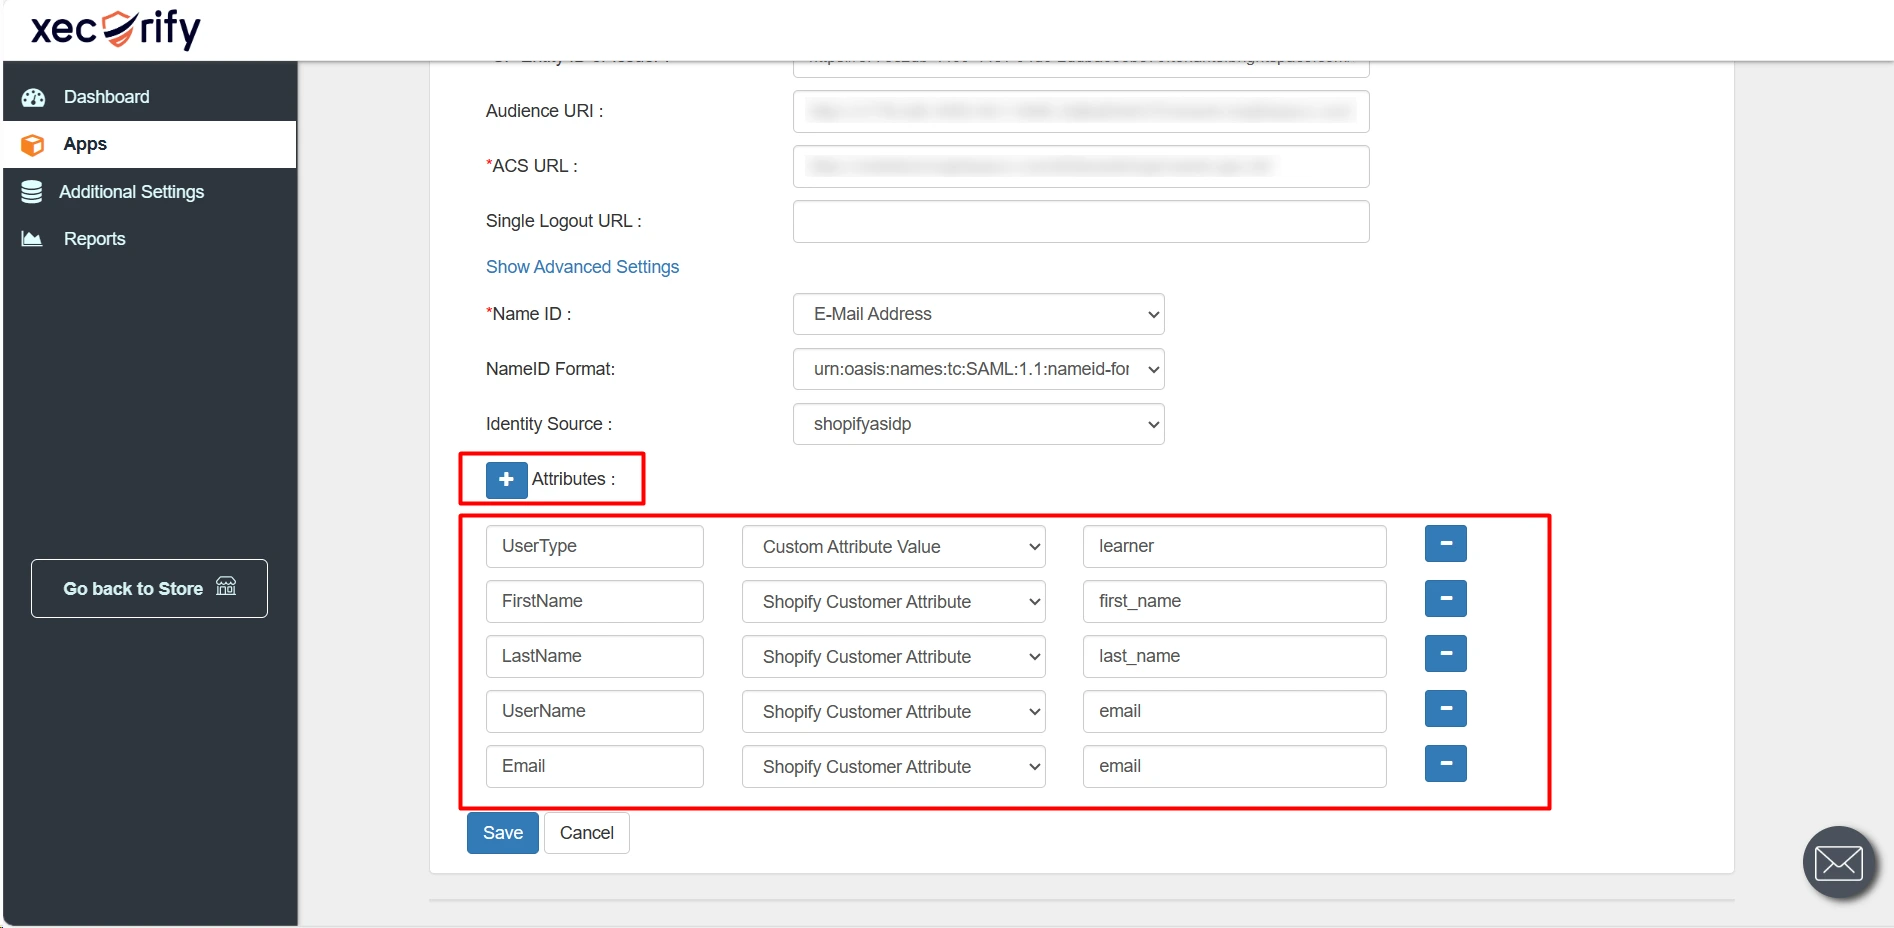
- Enter the Brightspace attributes from Step 4.
- Click on Save.
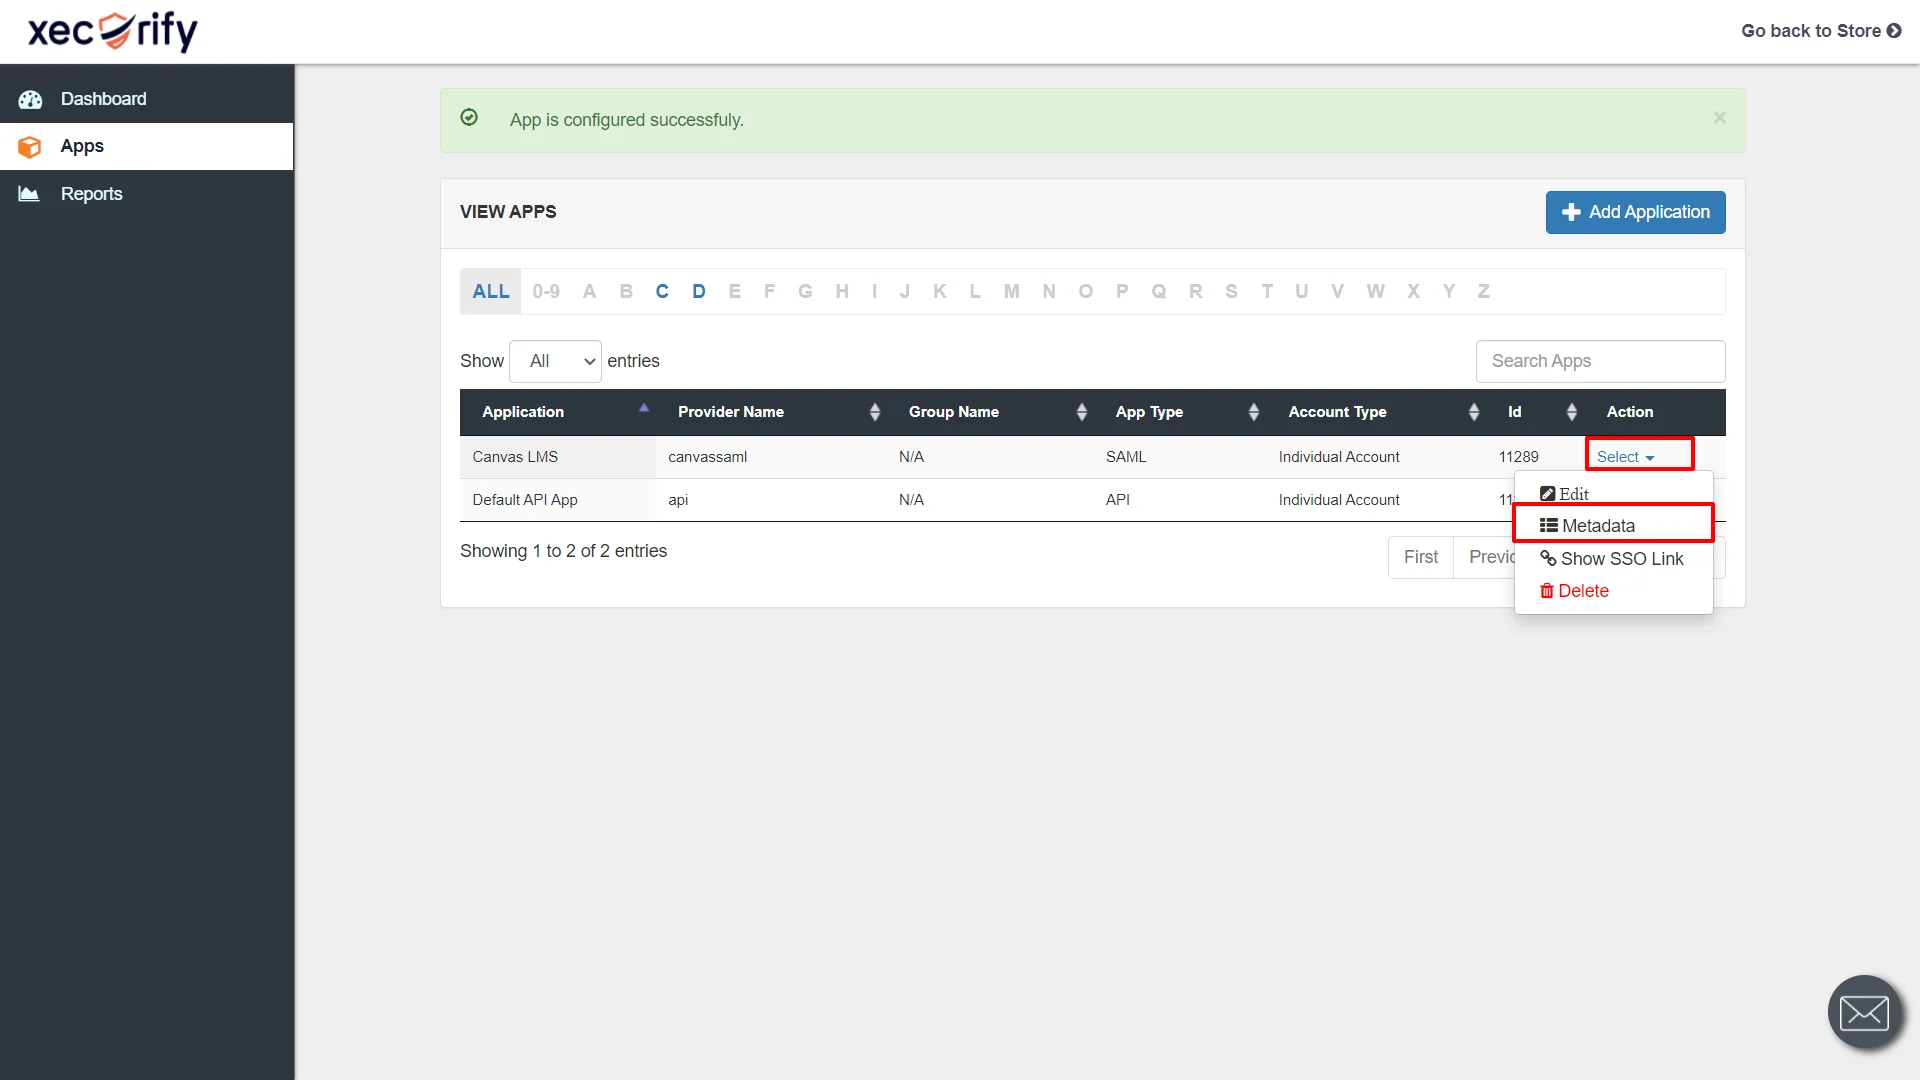
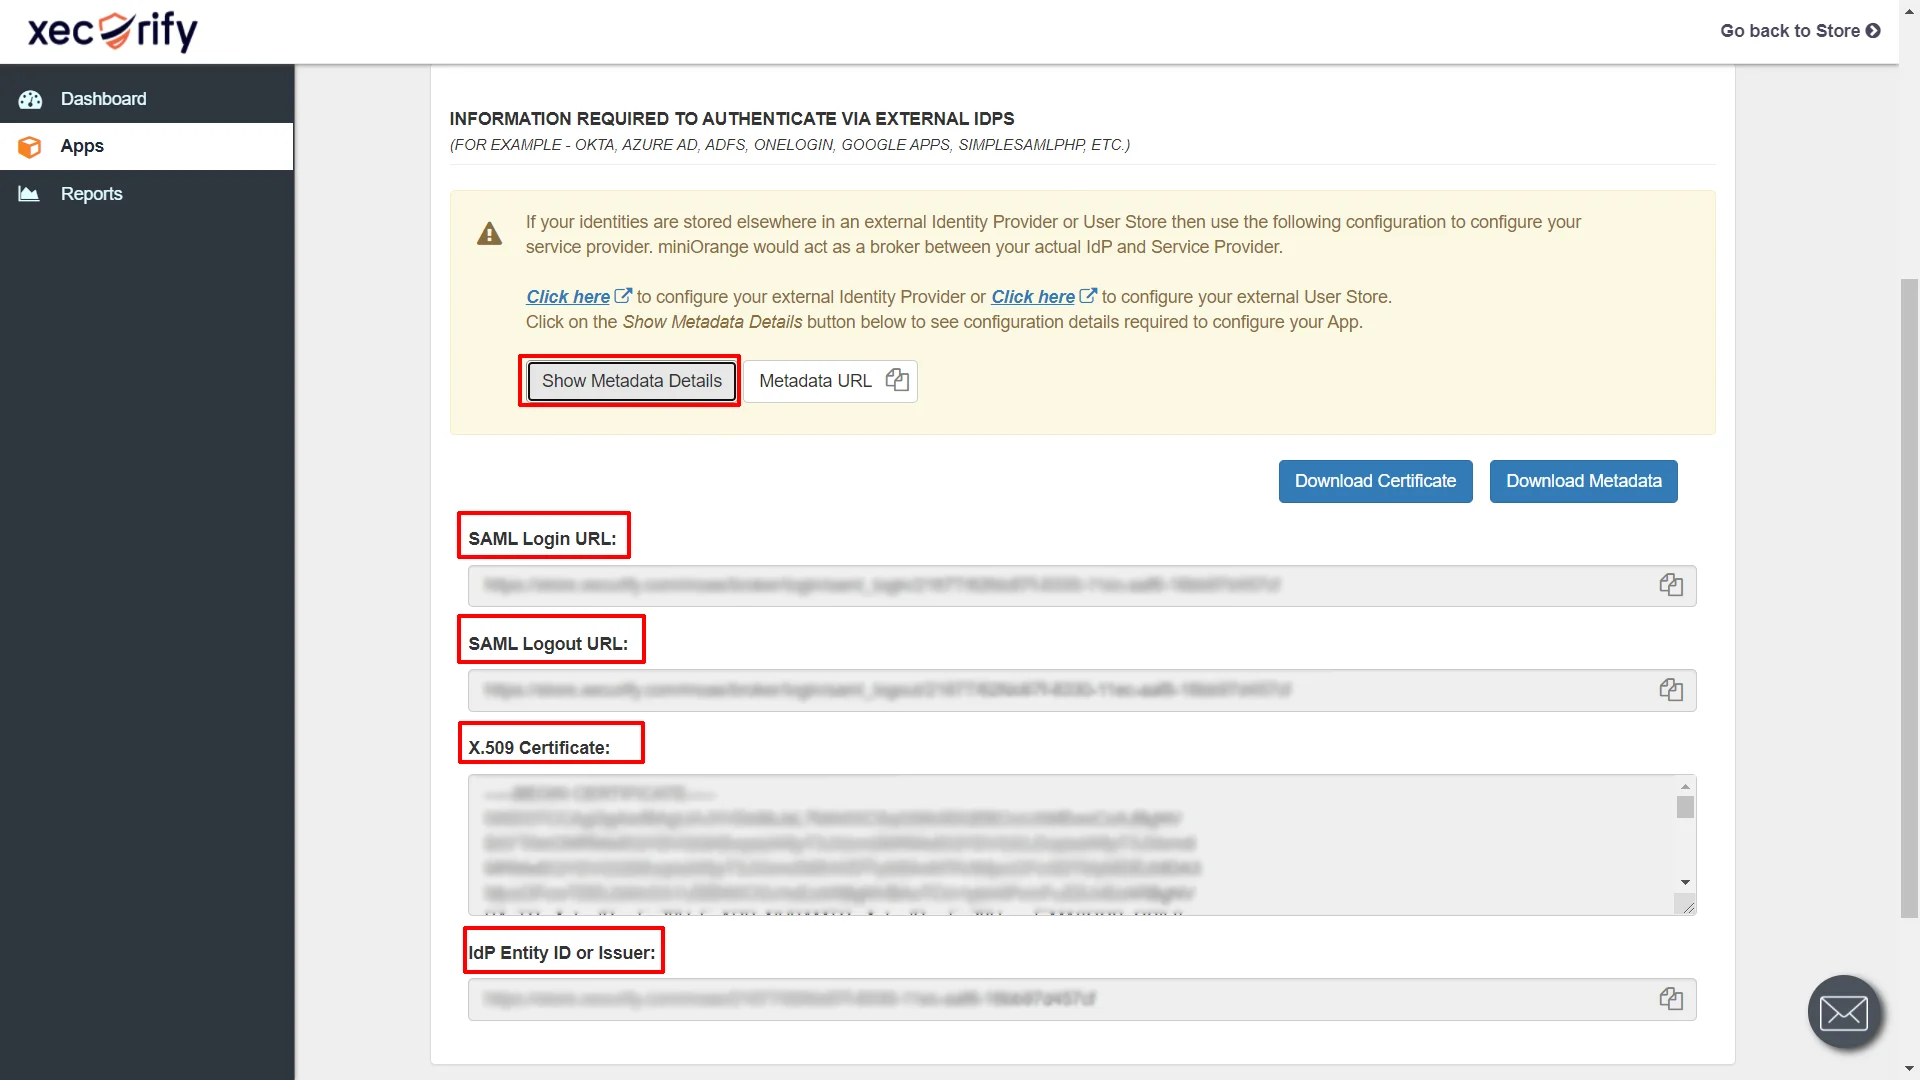
- Now, navigate to Select option and choose Metadata tab.
- Now click on Show Metadata Details under INFORMATION REQUIRED TO AUTHENTICATE VIA EXTERNAL IDPS section. Copy down these data as they will be used in further steps.
Step 4: Configure Brightspace as SP
- Login to your Brightspace LMS domain.
- Click on Settings icon, and under Security, select SAML Administration.
- Click on Add New Identity Provider.
- Enter the Display Name of your SAML identity provider.
- To configure Brightspace as your service provider, click on Import from your Identity Provider.
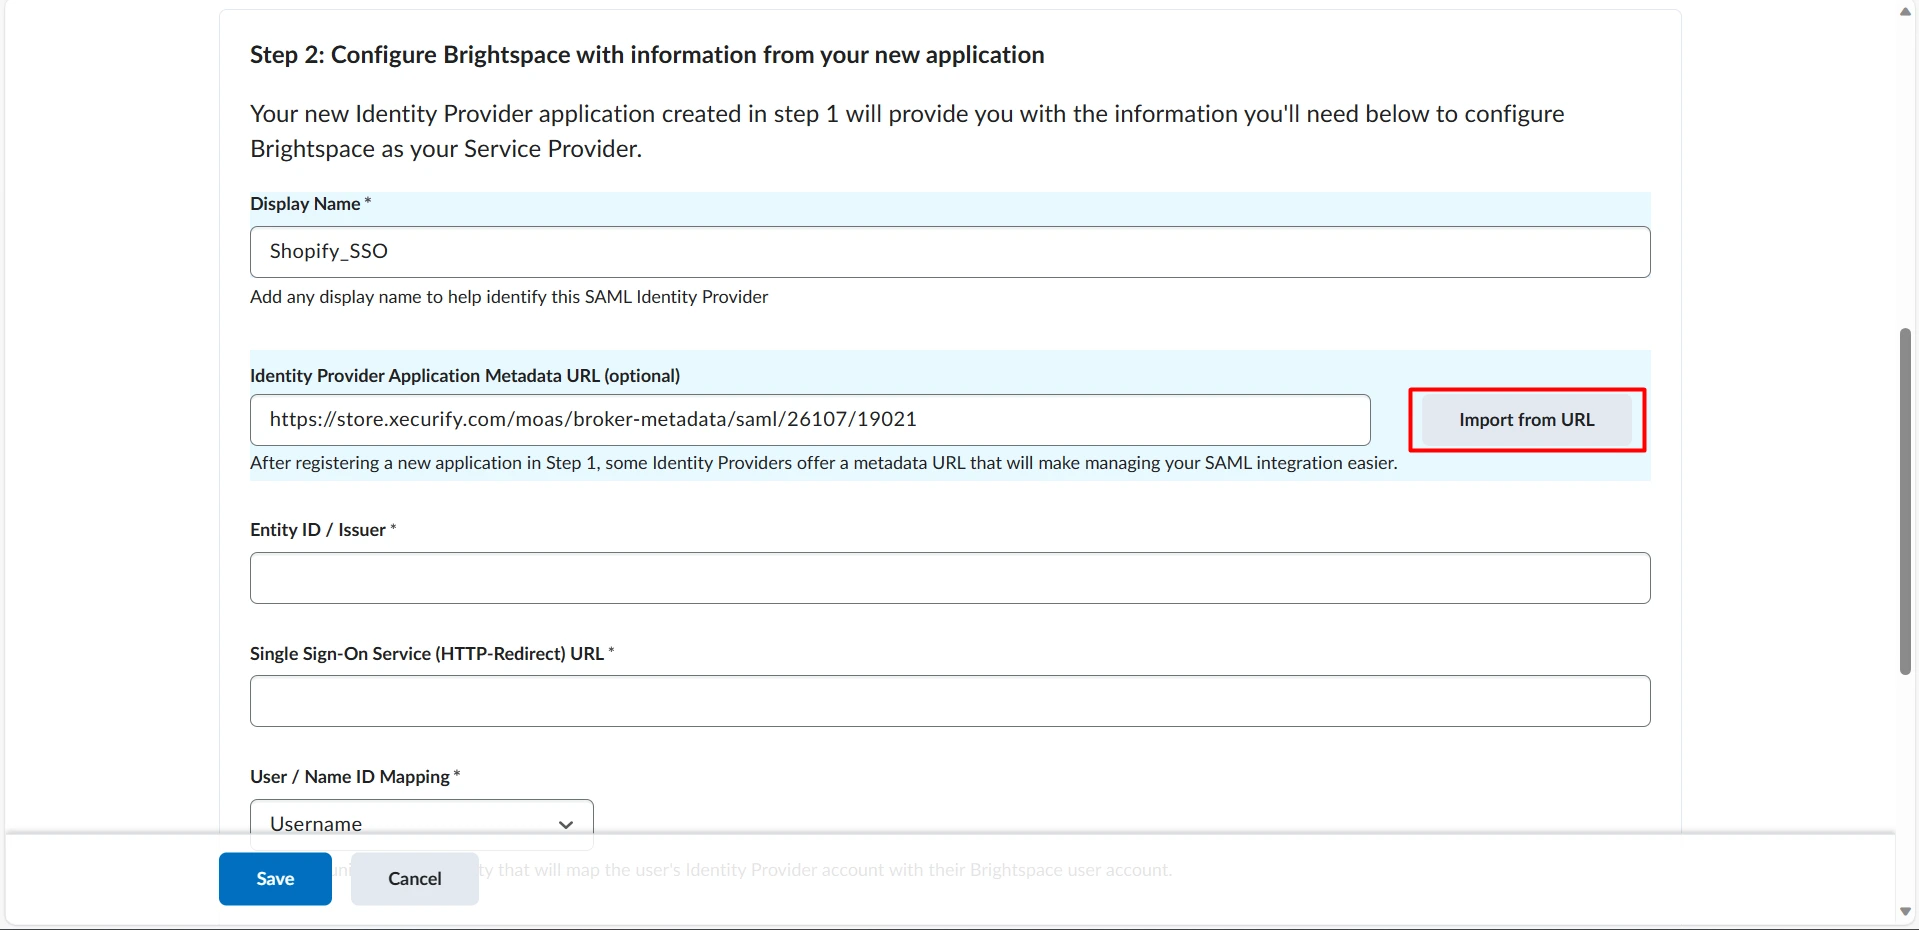
- Fields like Entity ID and Single Sign-On URL have been filled automatically.
- Set the User / Name ID Mapping as Email Address.
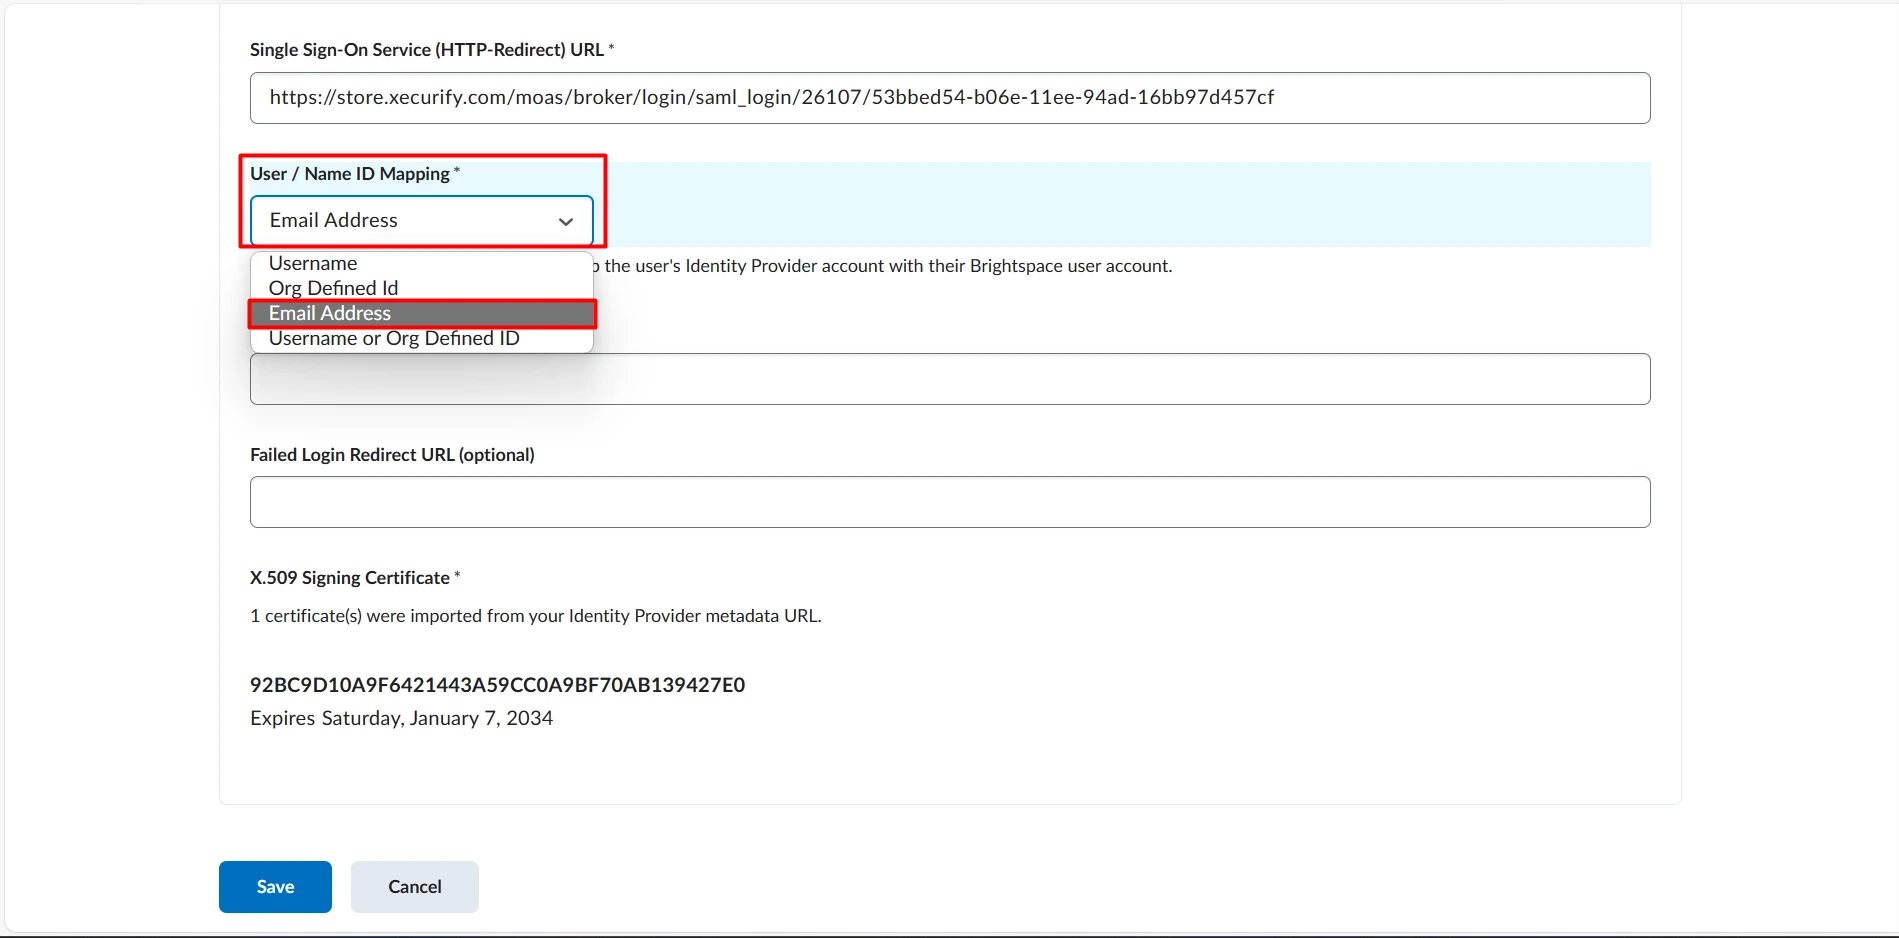
- Click on Save.
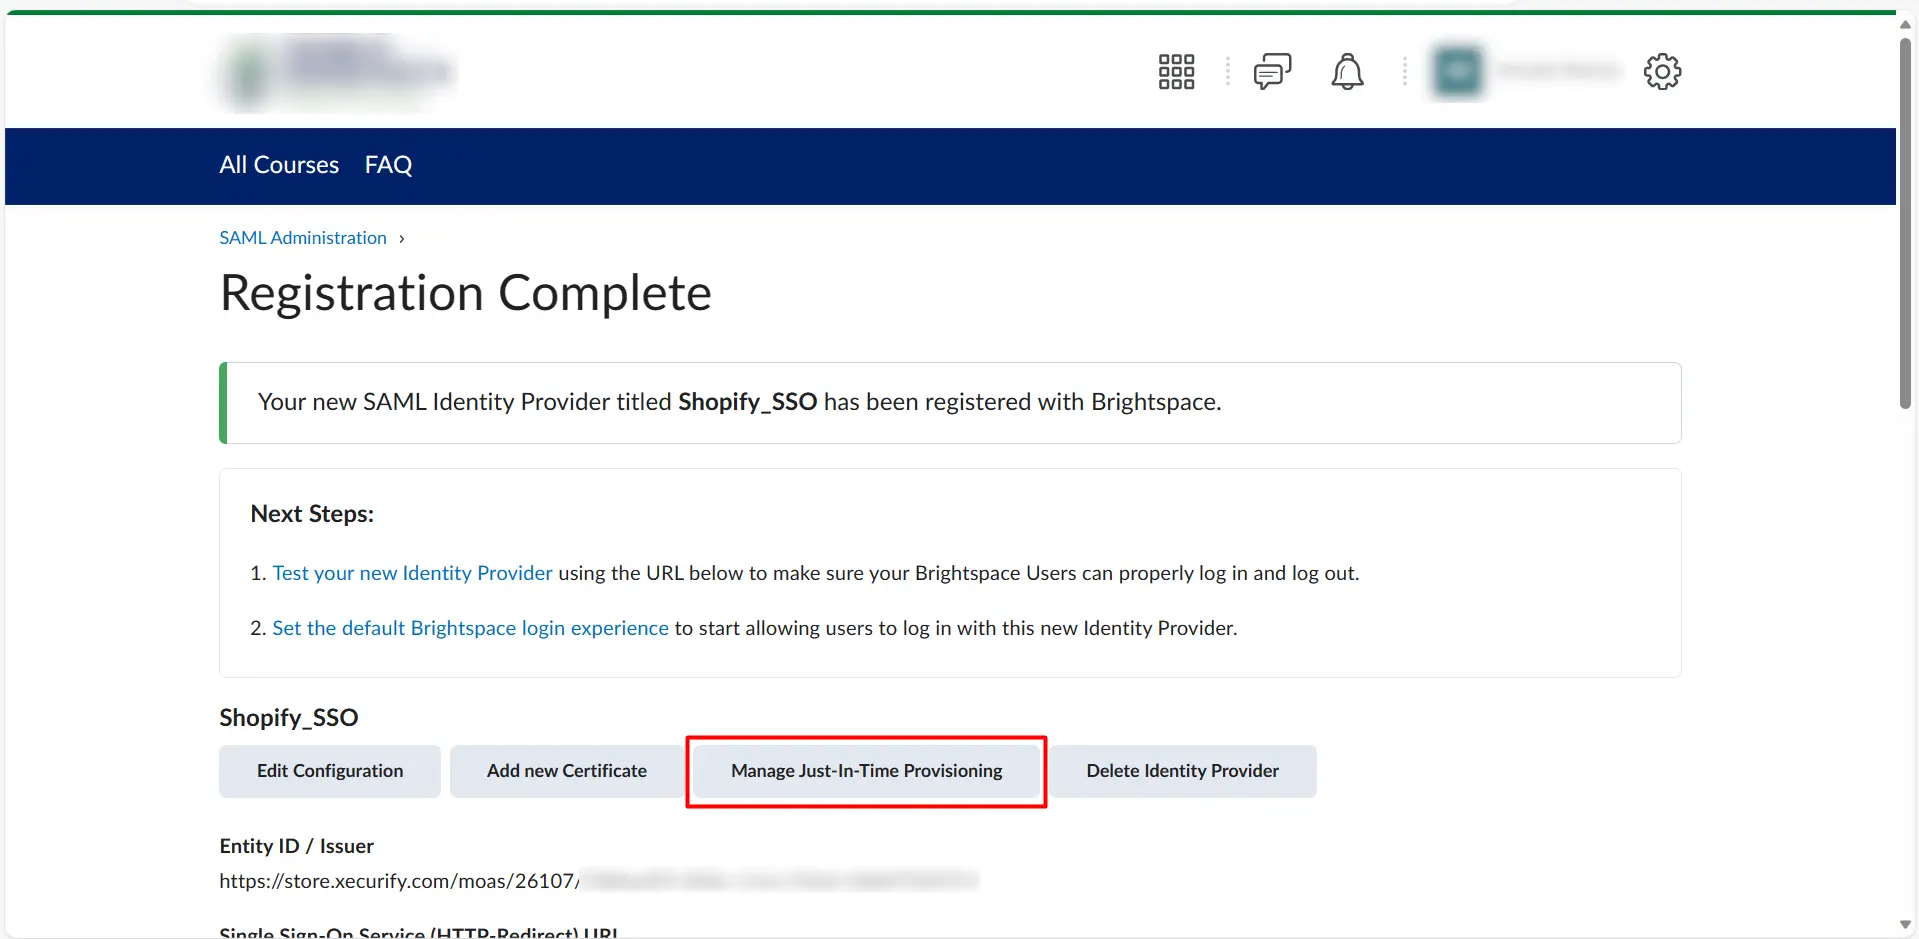
- You can see that your SAML Identity Provider has been successfully registered with Brightspace.
- Now, click on Manage Just-In-Time Provisioning.
- Under Attribute Map, check the box for Update attributes on login.
- Under Role Map, select Learner for Brightspace Role and Provider Role respectively.
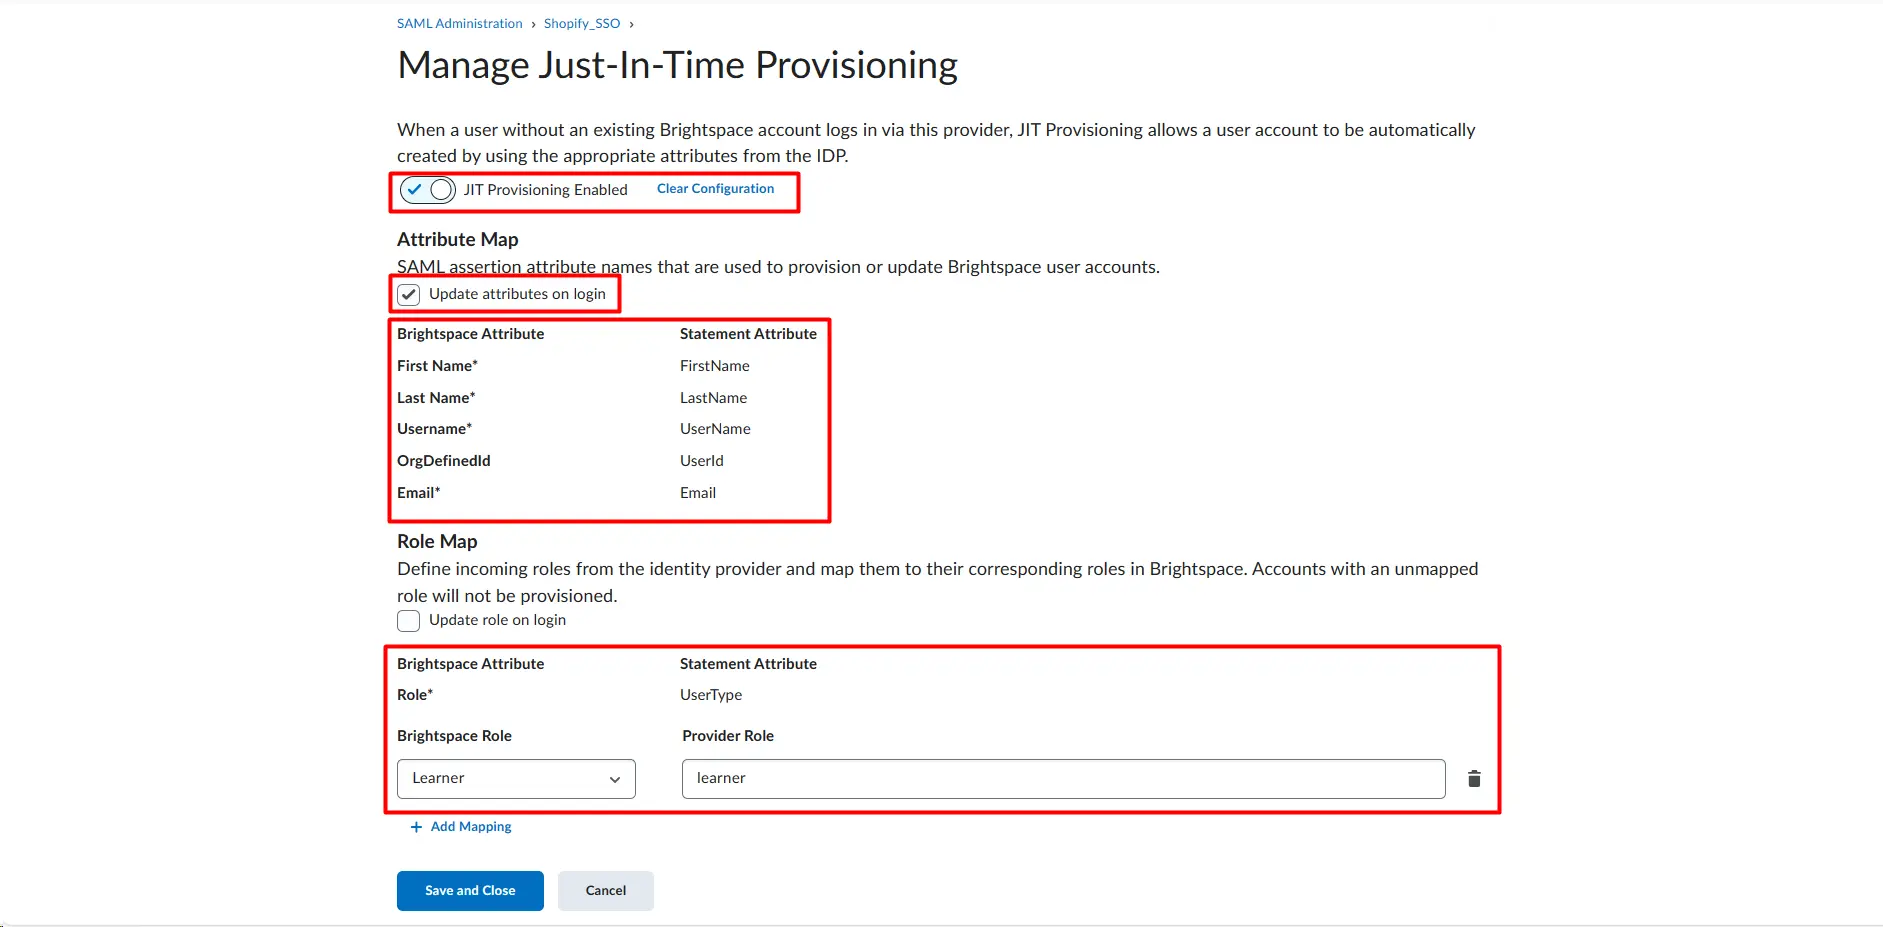
- Click on Save and Close.
Step 5: Testing SSO for Brightspace LMS
- Go to your Brightspace LMS login page.
- Click on the login button you customized earlier. You’ll be redirected to the login page of the Shopify store.
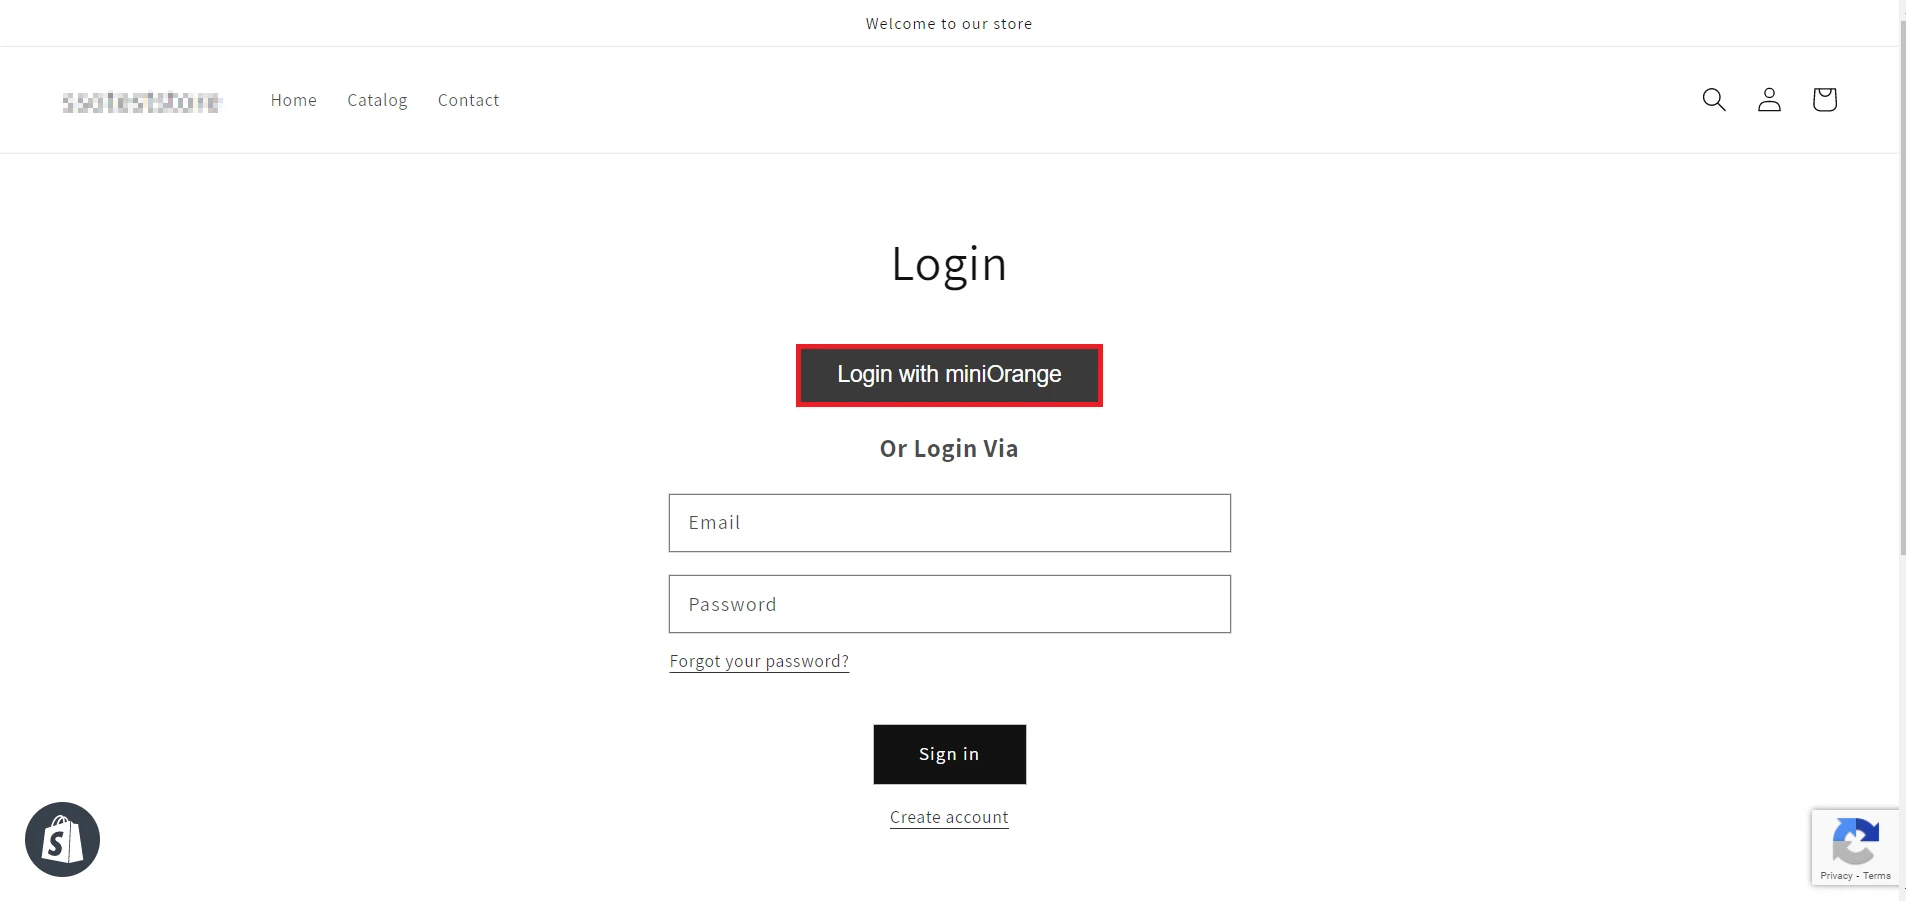
- Enter your Shopify Store login credential and click on Login. You will be automatically logged in to your Brightspace LMS account.
You have successfully configured Shopify as Identity Provider for your Brightspace LMS application.
Thank you for your response. We will get back to you soon.
Something went wrong. Please submit your query again


