ADFS As IdP For moodle
Step 1: Setup ADFS as Identity Provider
Follow the steps below to configure ADFS as IdP
 Configure ADFS as IdP
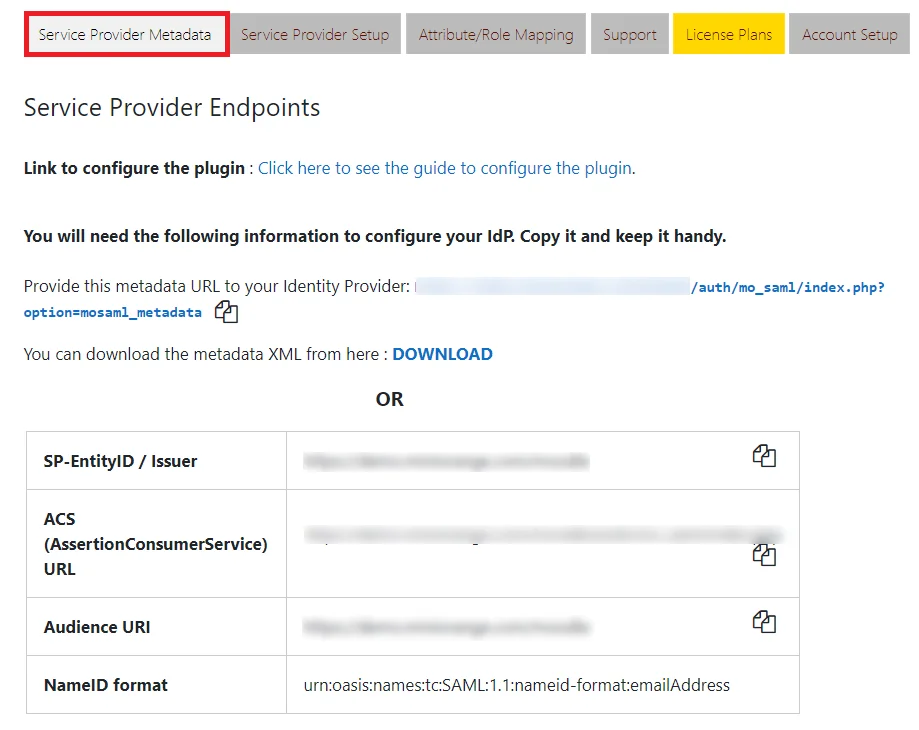
- In the miniOrange SAML 2.0 SSO plugin, navigate to Service Provider Metadata tab. Here, you can find the SP metadata such as SP Entity ID and ACS (AssertionConsumerService) URL which are required to configure the Identity Provider.
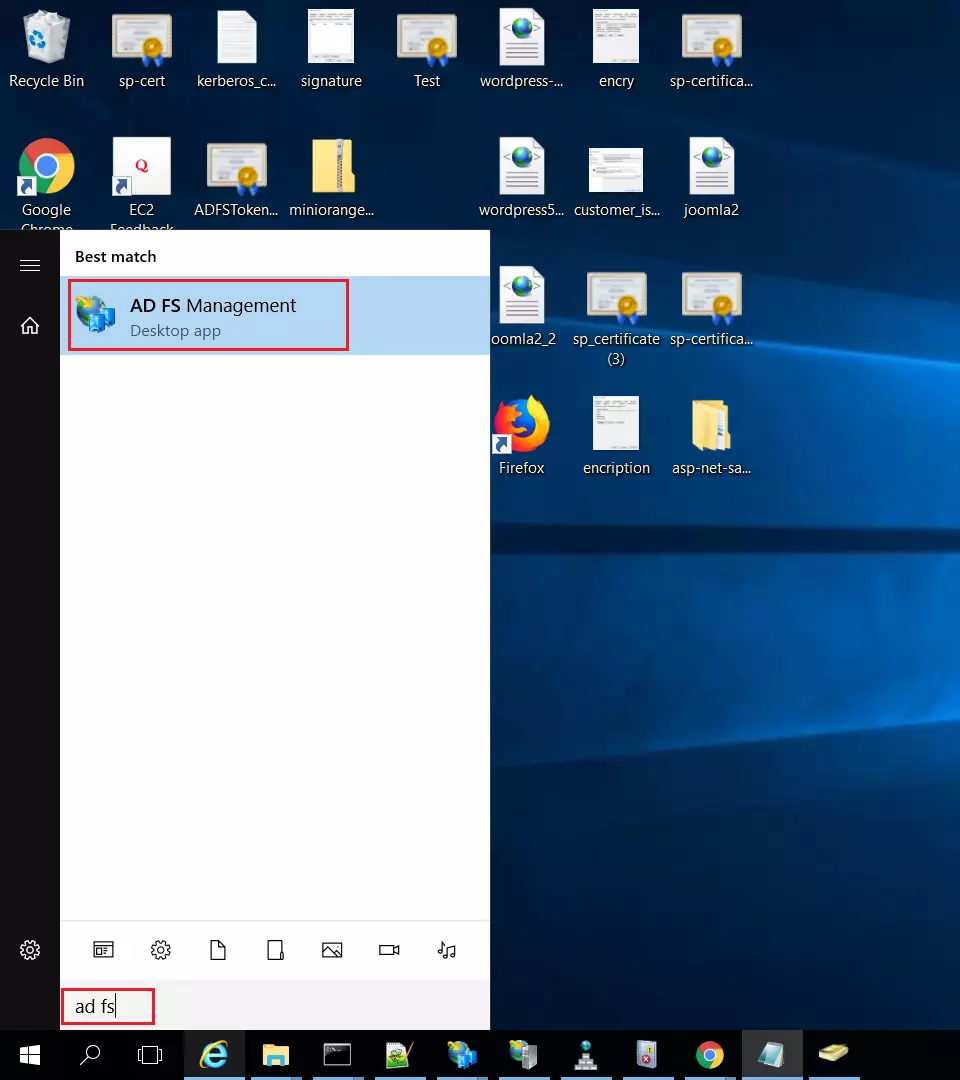
- On ADFS, search for ADFS Management application.
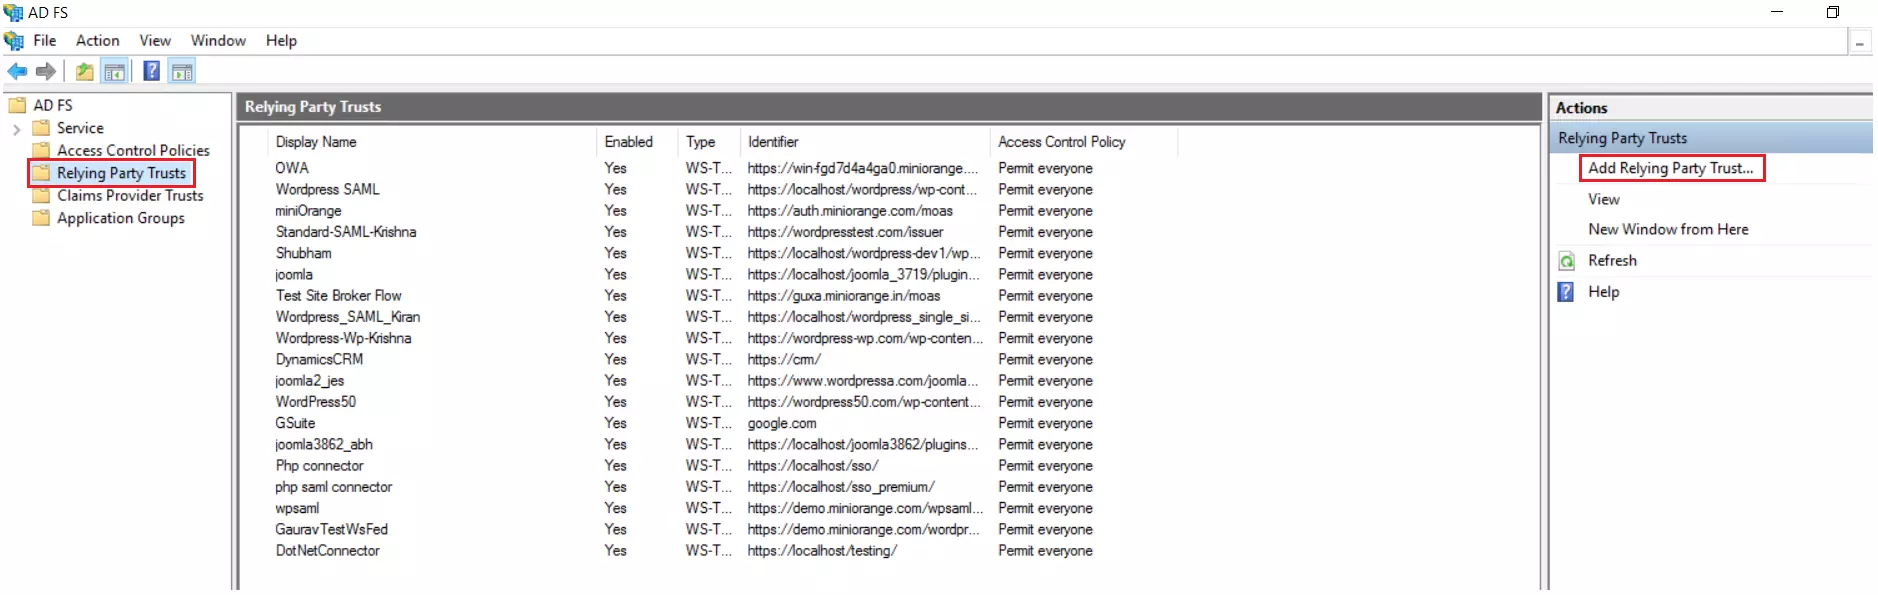
- After opening the AD FS Management, select Relying Party Trust & then click on Add Relying Party Trust.
- Click the Start button from the Relying Party Trust Wizard pop up. But before that please make sure Claims aware is selected.
- Select the options for adding a relying party trust.
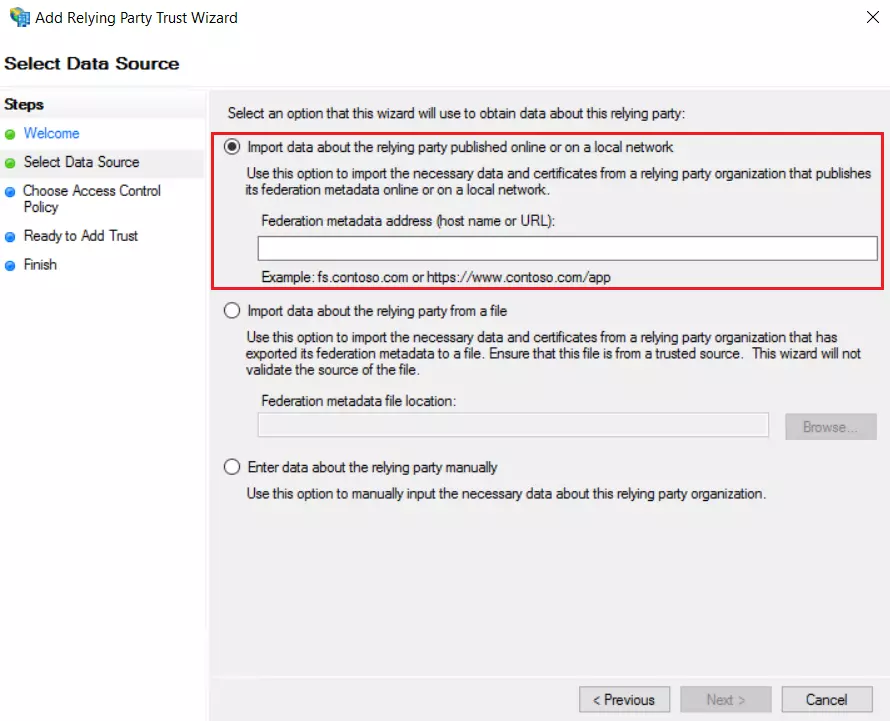
- In Select Data Source: Import data about the relying party published online or on the local network option & then add URL in Federation metadata address (Navigate to Service Provider Info tab from the plugin for getting SP Meatadata URL).
- Skip step-5 to step-8 & start configuring from step-9.
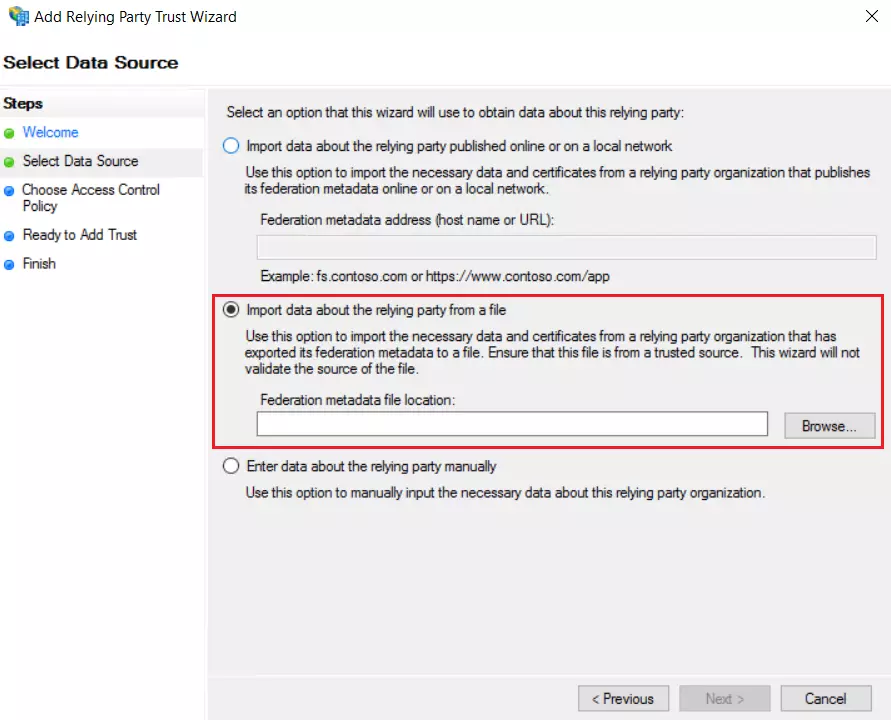
- In Select Data Source: Import data about the relying party from a file option & then browse the metadata file(You can download the SP metadata file from the plugin under the Service Provider Metadata tab).
- Skip step-5 to step-8 & start configuring from step-9.
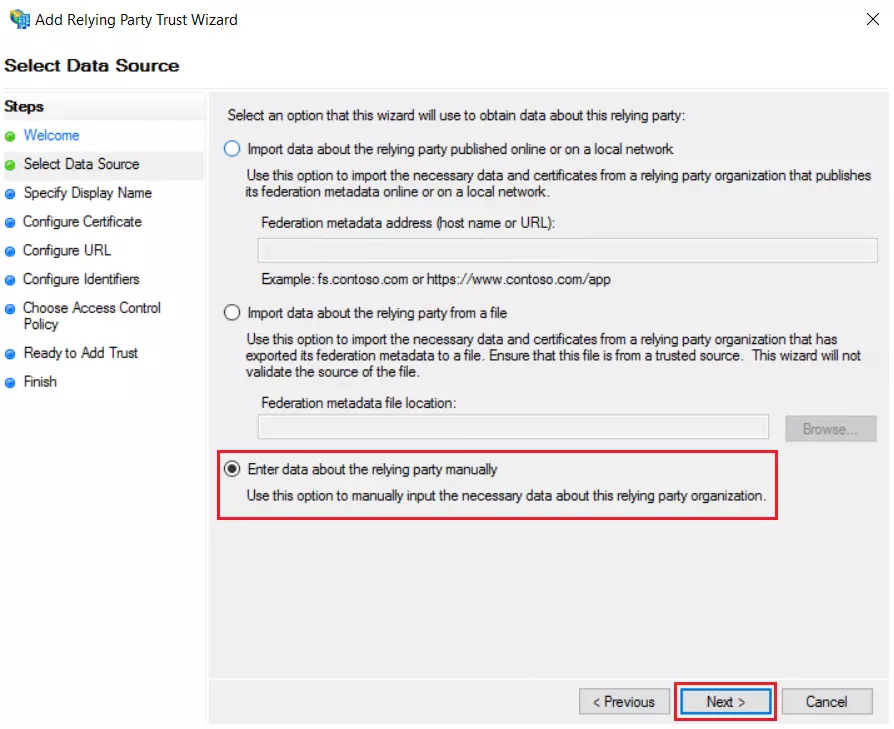
- In Select Data Source: Enter Data about the relying party manually & Click on Next.
- Enter Display Name & Click Next.
- Upload the certificate & click Next. Download the certificate from plugin & use the same certificate to upload on ADFS.
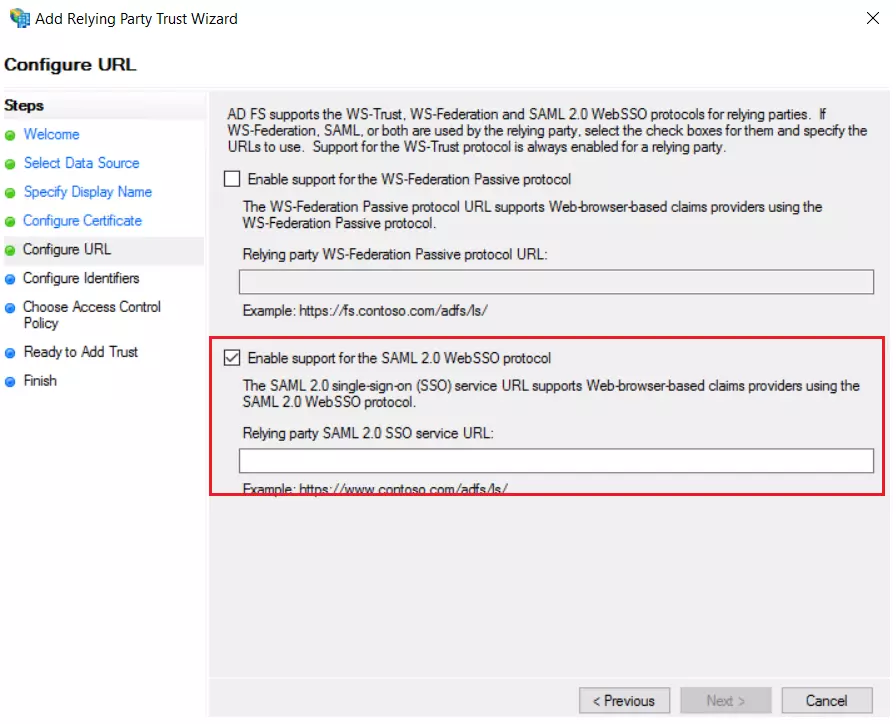
- Select Enable support for the SAML 2.0 WebSSO protocol & Enter ACS URL from the plugins Service Provider Info Tab. Click Next.
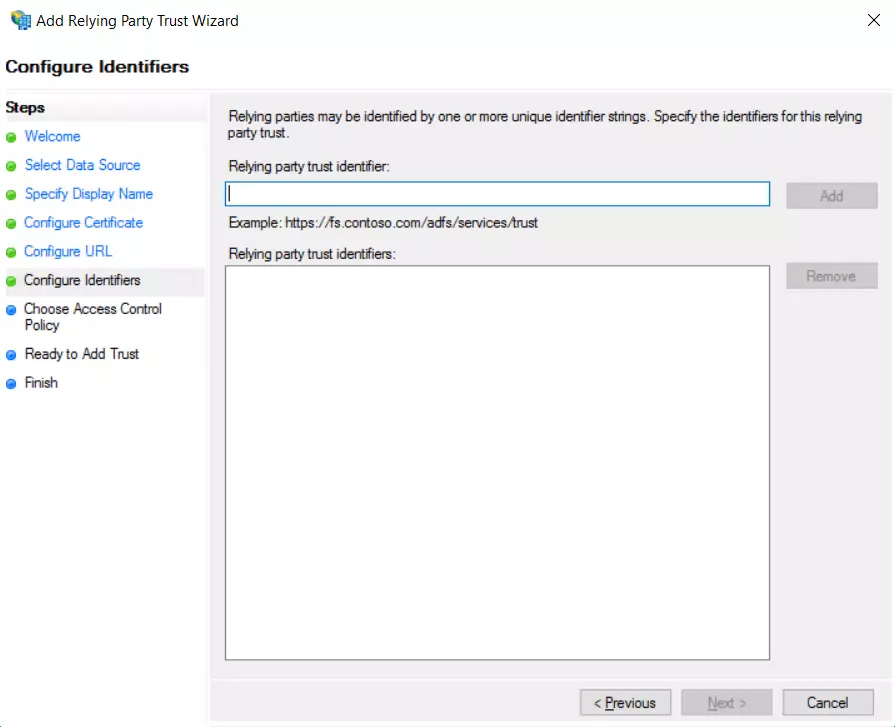
- Add Entity ID from plugins Service Provider Info Tab as Relying party trust identifier then click Add button & then click Next.
- Also download the Signing certificate from Service Provider Info Tab from the plugin.
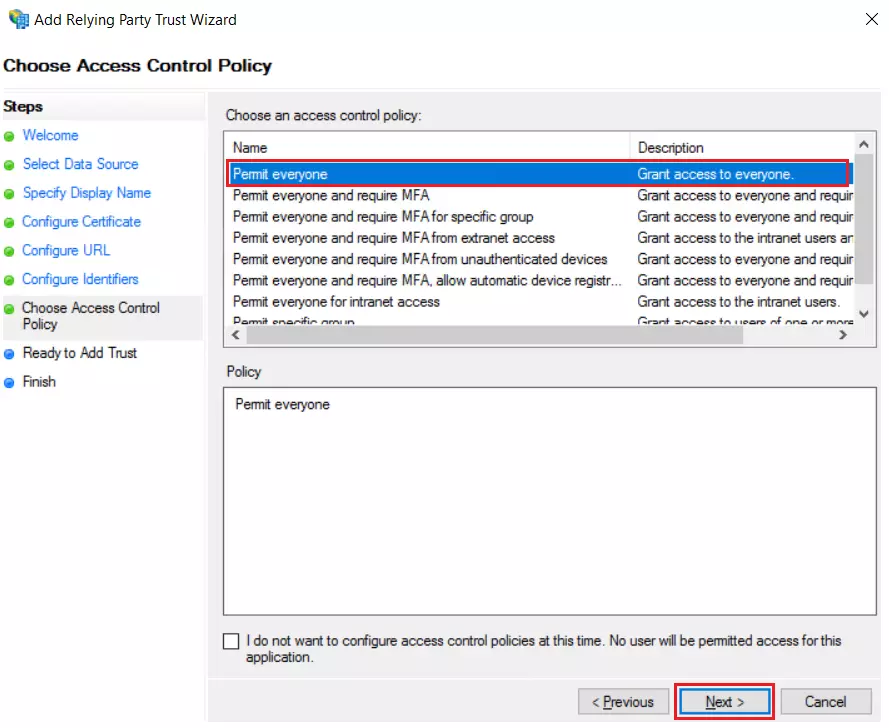
- Select Permit everyone as an Access Control Policy & click on Next.
- Click the Next button from Ready to Add Trust & click Close.
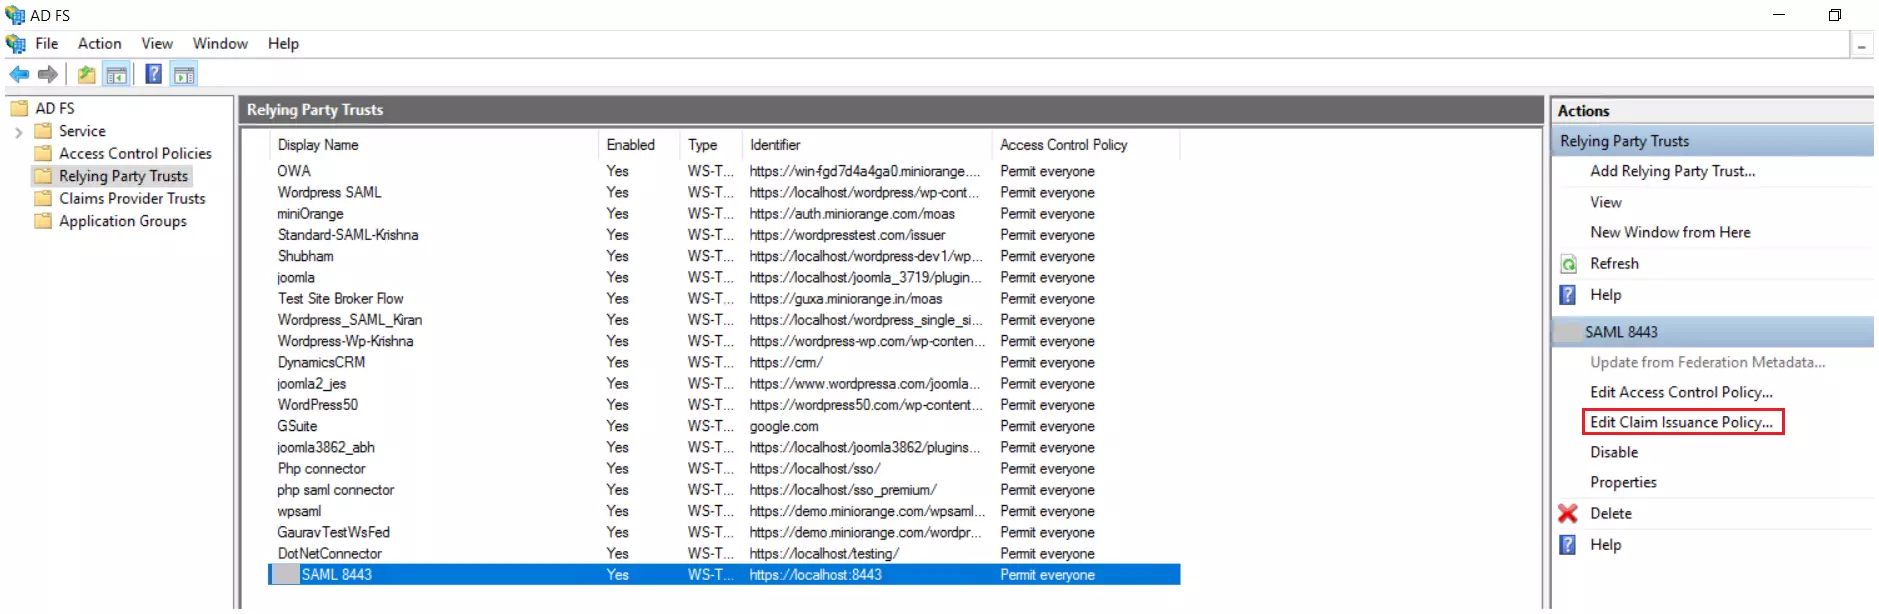
- It will show you the list of Relying Party Trusts. Select the respective application & click on Edit Claim Issuance Policy.
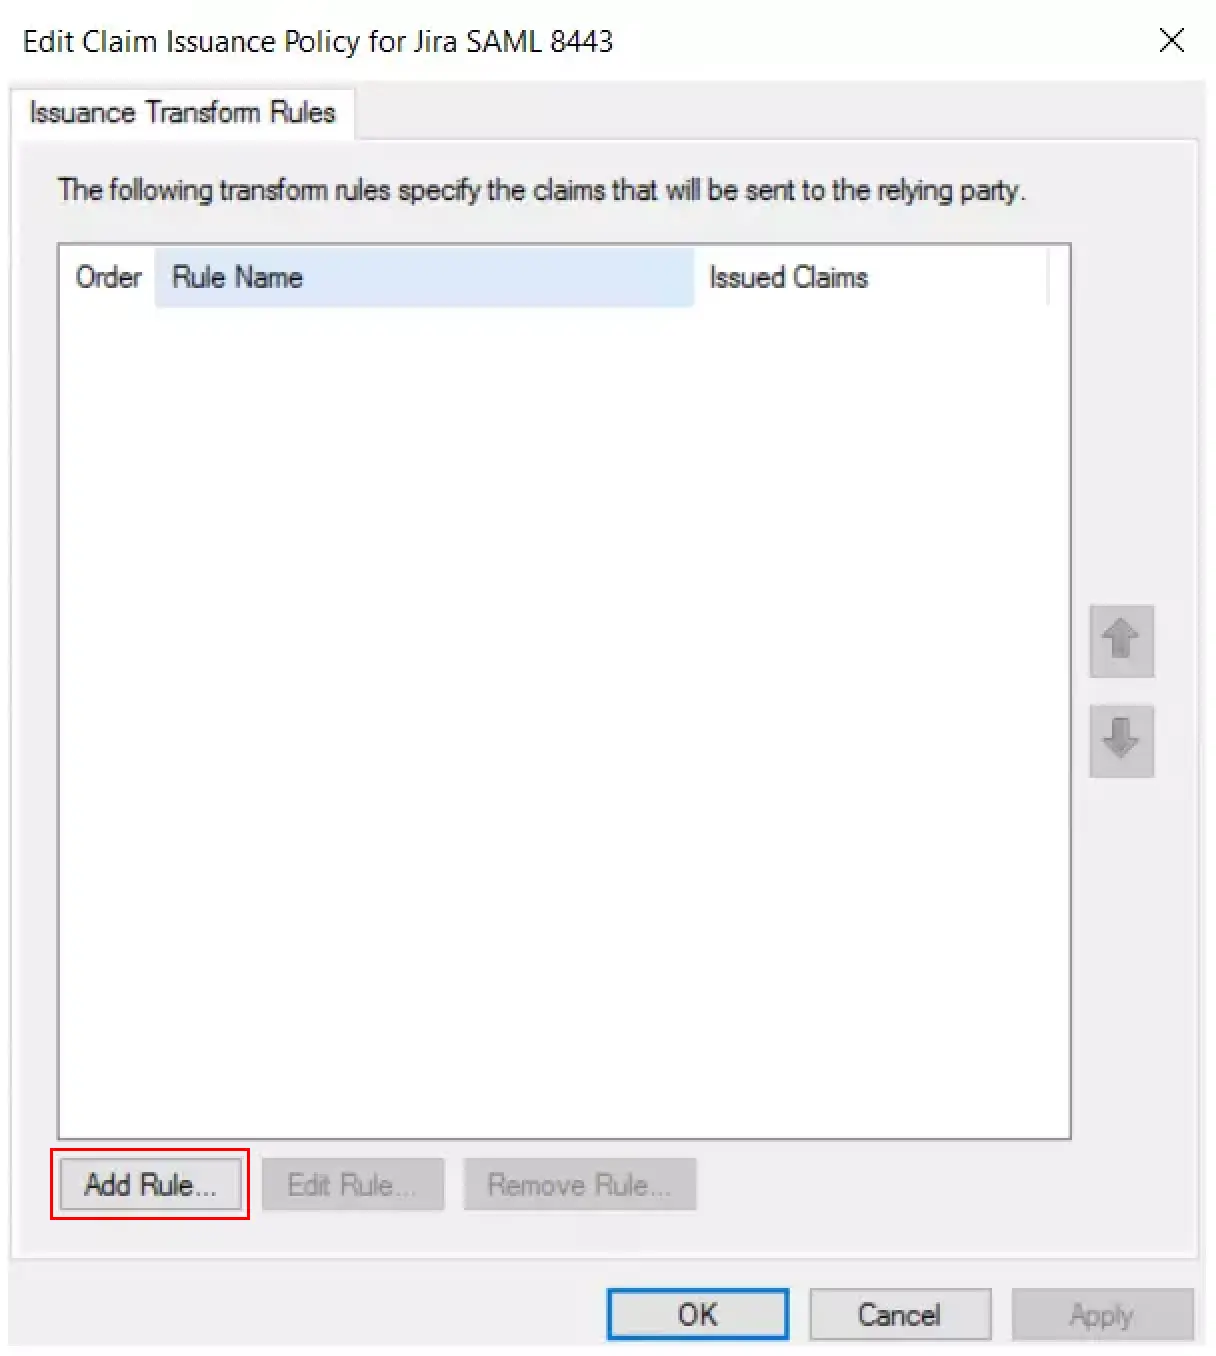
- Click on Add Rule button.
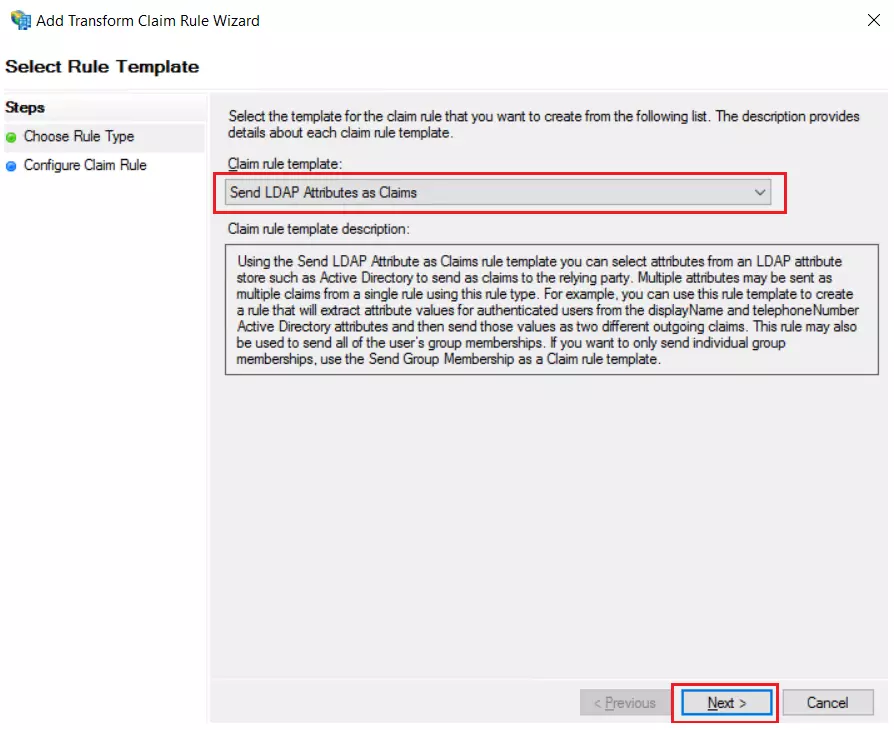
- Select Send LDAP Attributes as Claims & click on Next.
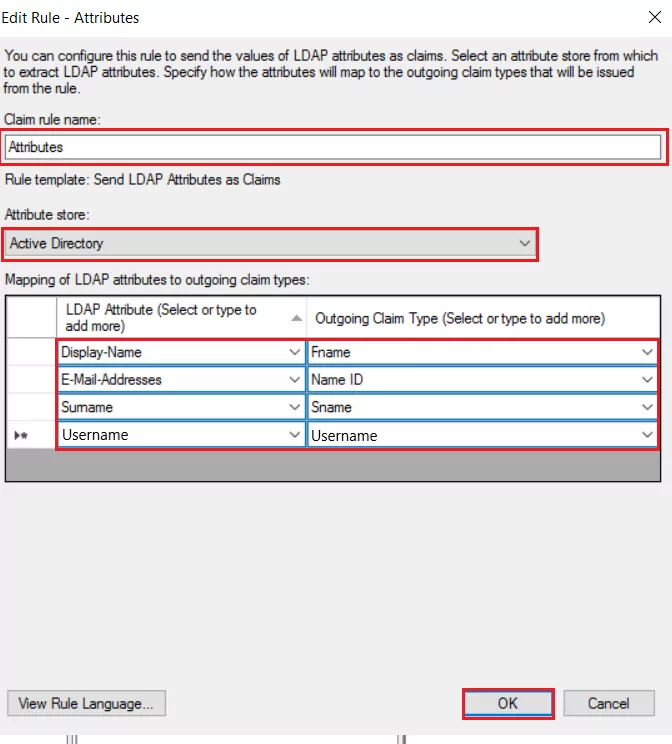
- Enter Claim rule name as Attributes and Attribute Store as Active Directory.
- Enter the following Attribute Values.
- Click Apply and then Ok.

Using Metadata URL
Using Metadata XML file
Using Manual configuration
| LDAP Attribute | Outgoing Claim Type |
| E-Mail-Addresses | Name ID |
| Display-Name | Fname |
| Surname | Sname |
| Username | Username |
×
![]()
Trending searches:
Hello there!
Need Help? We are right here!
