AuthAnvil as idp for WordPress
Authanvil Single Sign-On(SSO) login for WordPress can be achieved by using our WordPress SAML Single Sign-On(SSO) plugin. Our plugin is compatible with all the SAML compliant Identity providers. Here we will go through a step-by-step guide to configure SSO login between Wordpress site and Authanvil by considering Authanvil as IdP(Identity provider) and WordPress as SP(Service provider).
 Pre-requisites : Download And Installation
To configure Authanvil as SAML IdP with WordPress, you will need to install the miniOrange WP SAML SP SSO plugin:
Steps to configure Authanvil Single Sign-On (SSO) Login into WordPress
Step 1: Setup AuthAnvil as IDP (Identity Provider)
Follow the steps below to configure AuthAnvil as IdP
Configure AuthAnvil as IdP
- In the miniOrange SAML SP SSO plugin, navigate to Service Provider Metadata tab. Here, you can find the SP metadata such as SP Entity ID and ACS (AssertionConsumerService) URL which are required to configure the Identity Provider.
- SP Entity ID
- ACS URL
-
Login to Authanvil and Go to SSO Management +(add icon) Create New Application Custom Application.
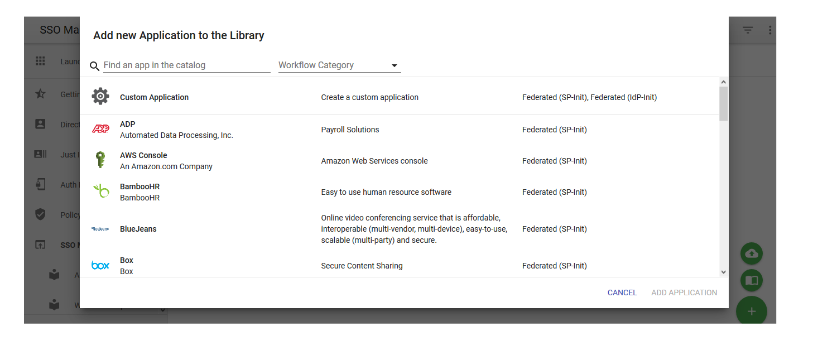
-
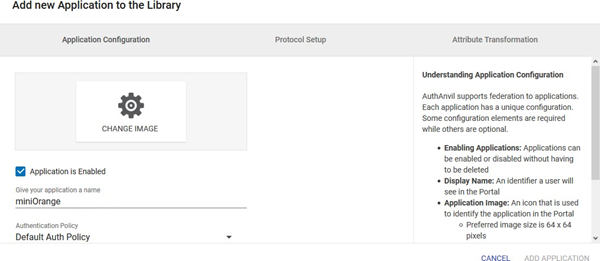
Enter the Application Name
-
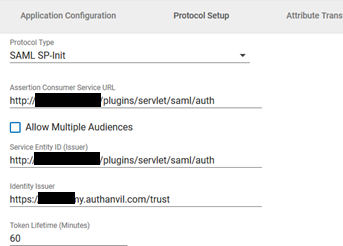
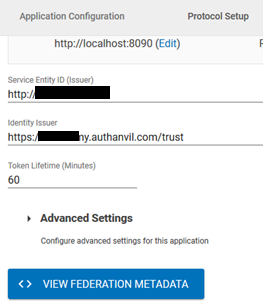
Go to Protocol Setup and Enter following info:
Protocol Setup SP-INIT Assertion Consumer Service URL ACS URL copied from the plugin Allow Multiple Audiences Unchecked Audience URI SP Entity ID copied from the plugin Service Entity ID SP Entity ID copied from the plugin
-
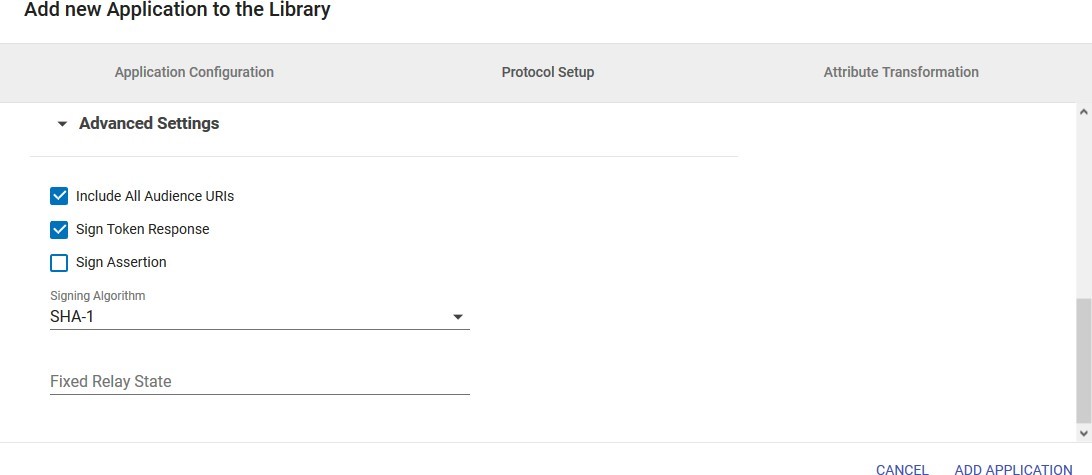
Enter Advanced Setting
Include All Audience URIs Checked Sign Token Response Checked Sign Assertion Unchecked Signing Algorithm SHA1
-
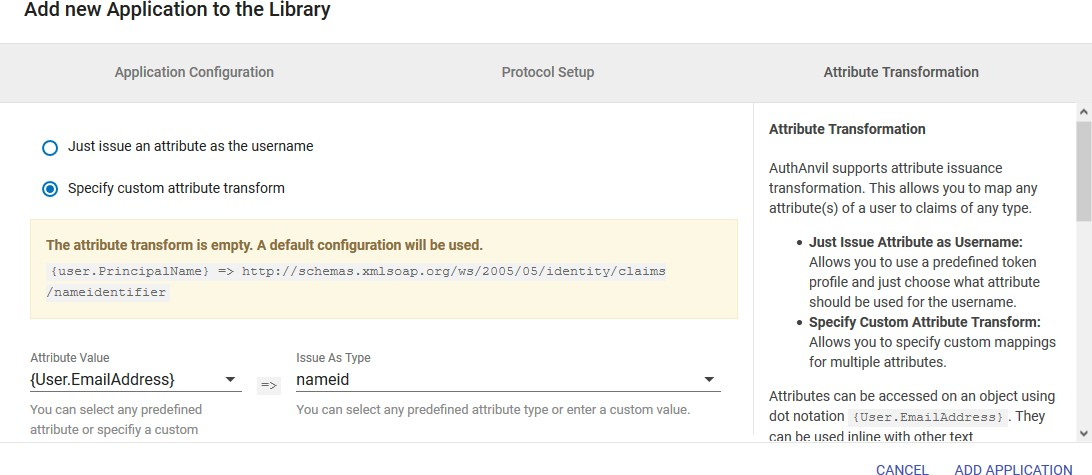
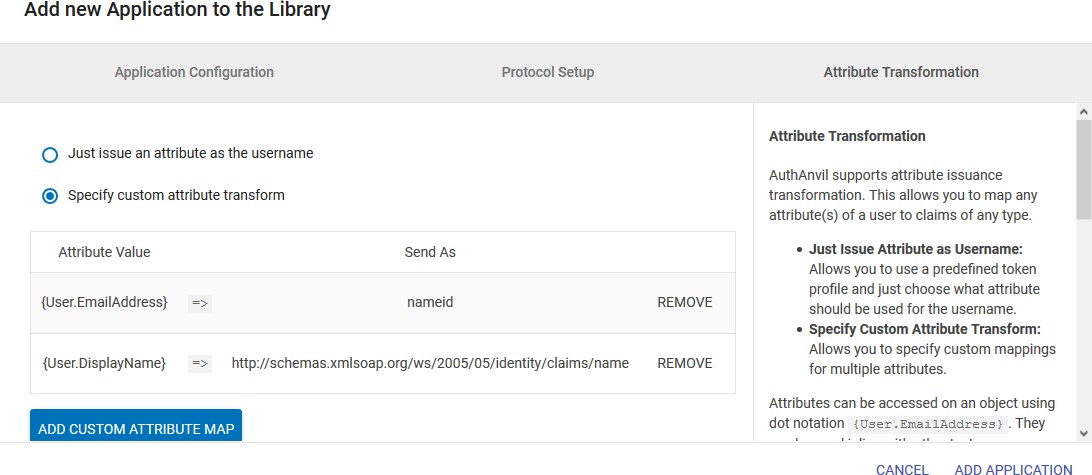
Go to Attribute Transformation Tab and select Specify Custom Attribute Transformation. Add the NameID attribute and click on Add. Then add the name attribute as given in the image.
-
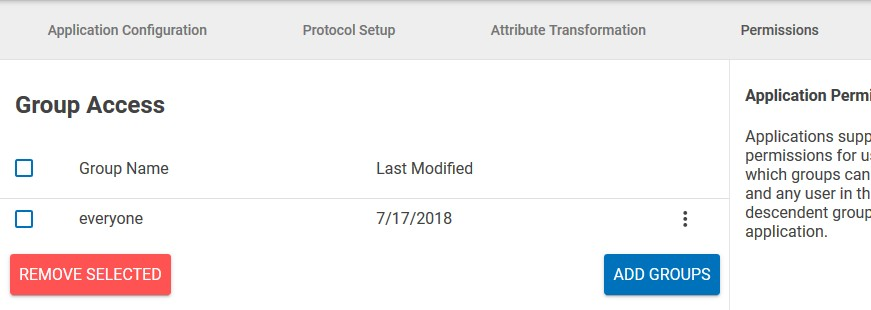
Go to Permission tab and add Groups to which you want to give access to this application.
- Click on Add Application and then Save Changes.
-
Open the app. Click on View Federation Metadata in Protocol Setup Tab and save the generated metadata xml file. This metadata file will be required to configure the plugin.
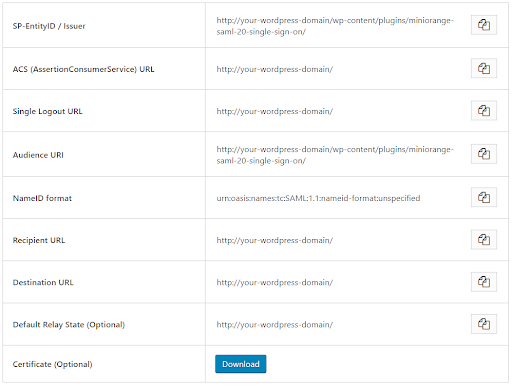 Prerequisites: Copy these values from the Service Provider Info tab of the SAML plugin.
Instructions:
Prerequisites: Copy these values from the Service Provider Info tab of the SAML plugin.
Instructions:
×
![]()
Trending searches:
Hello there!
Need Help? We are right here!
