Azure AD As IDP for Moodle
Step 1: Setup Azure AD as Identity Provider
Follow the steps below to configure Azure AD as IdP
×
![]()
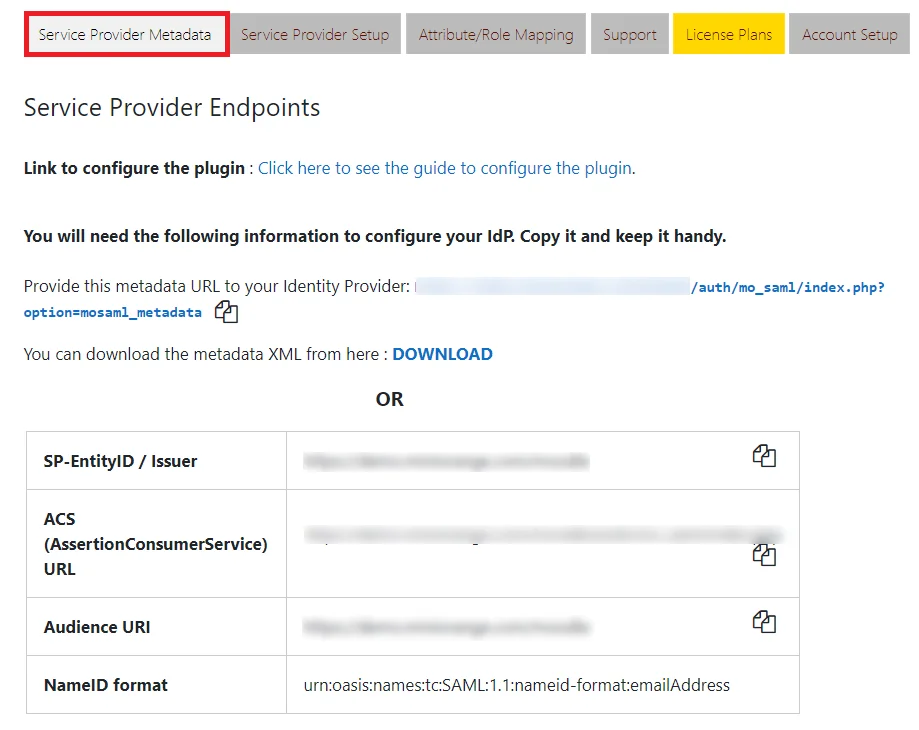
- In the miniOrange SAML 2.0 SSO plugin, navigate to Service Provider Metadata tab.
Here,
you can find the SP metadata such as SP Entity ID and ACS (AssertionConsumerService) URL
which are required to configure the Identity Provider.
 Configure Azure AD as IdP
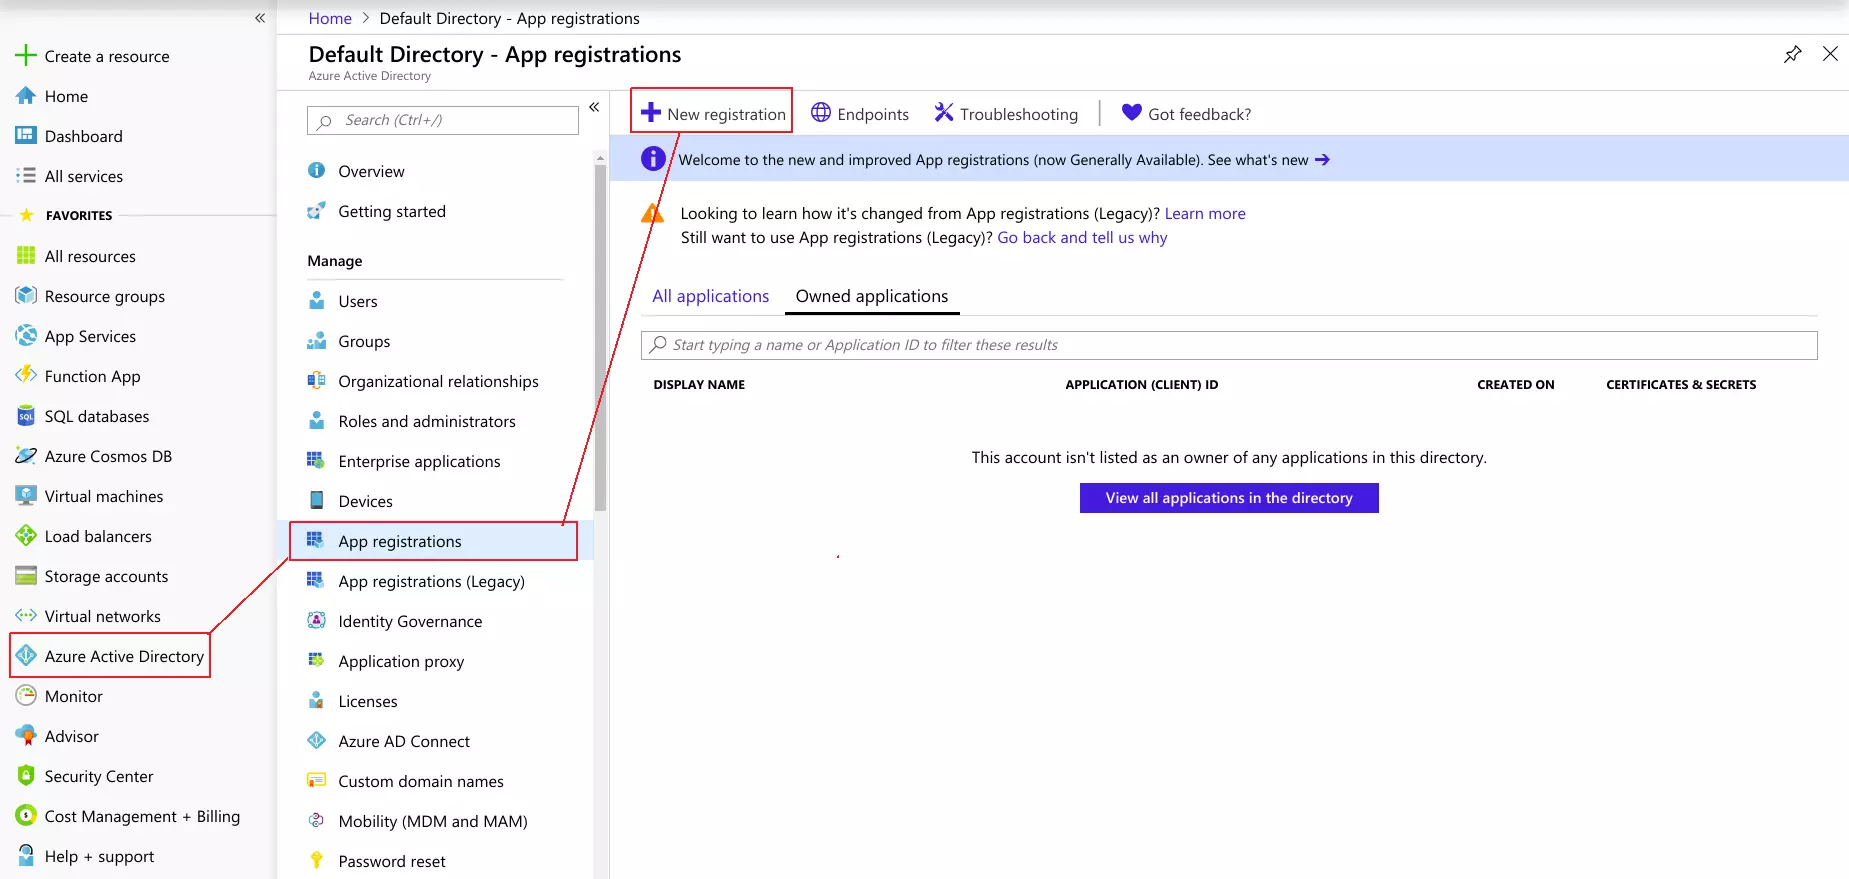
- Log in to Azure AD Portal
- Select Azure Active Directory ⇒ App Registrations. Click on New Application Registration.
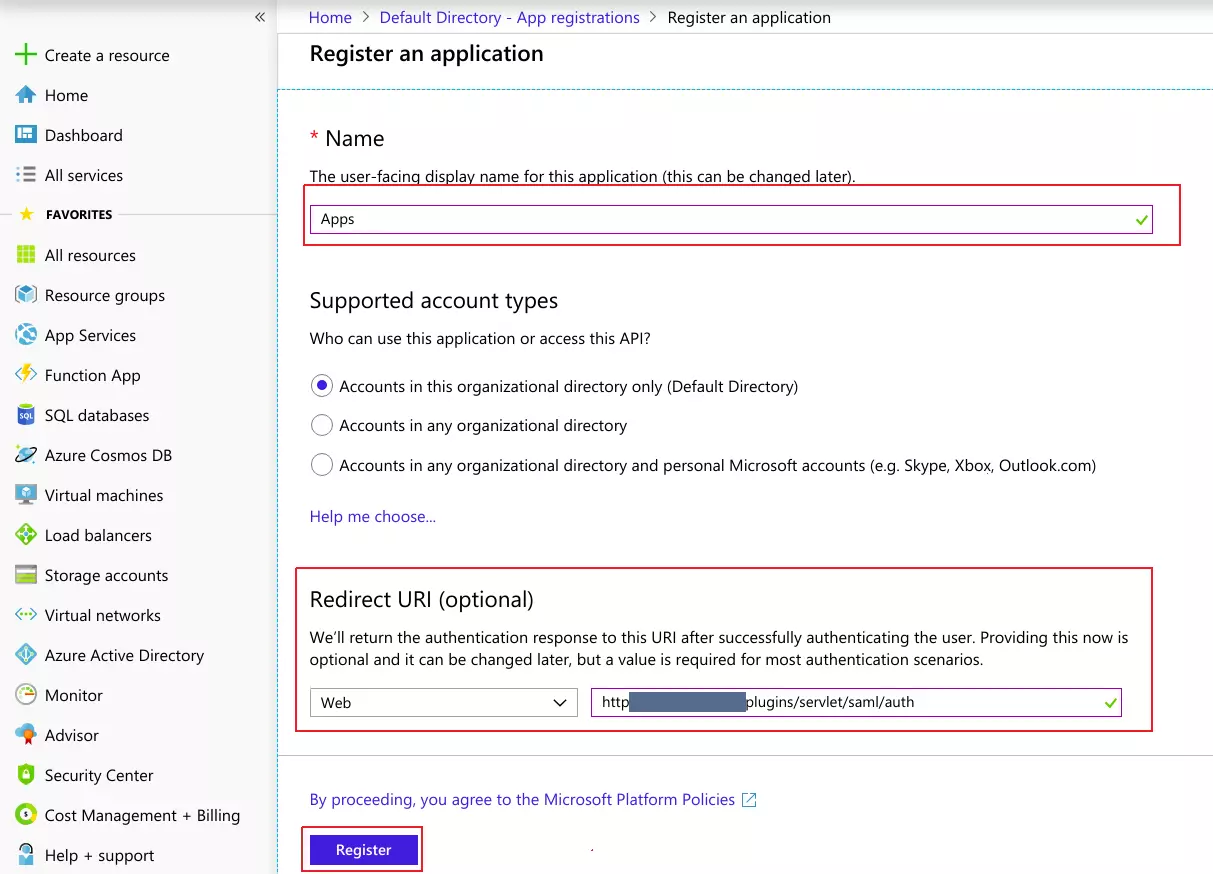
- Assign a Name and choose the account type.In the Redirect URI field, provide the ACS URL provided in Service Provider Metadata tab of the plugin and click on Register button.
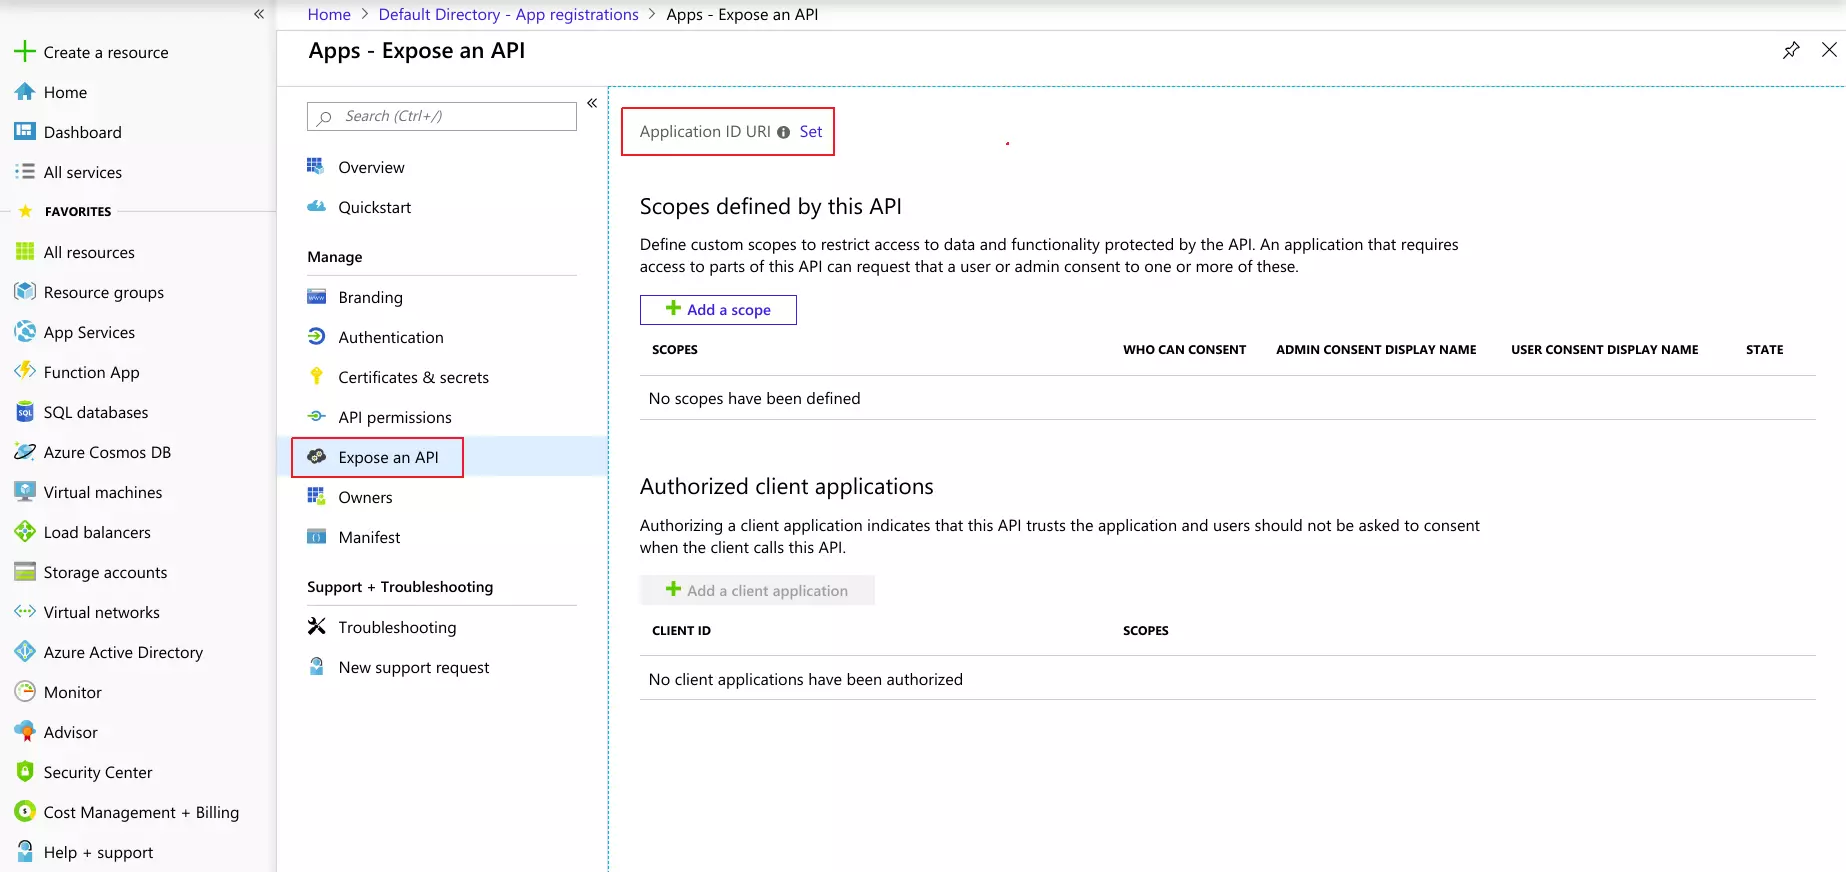
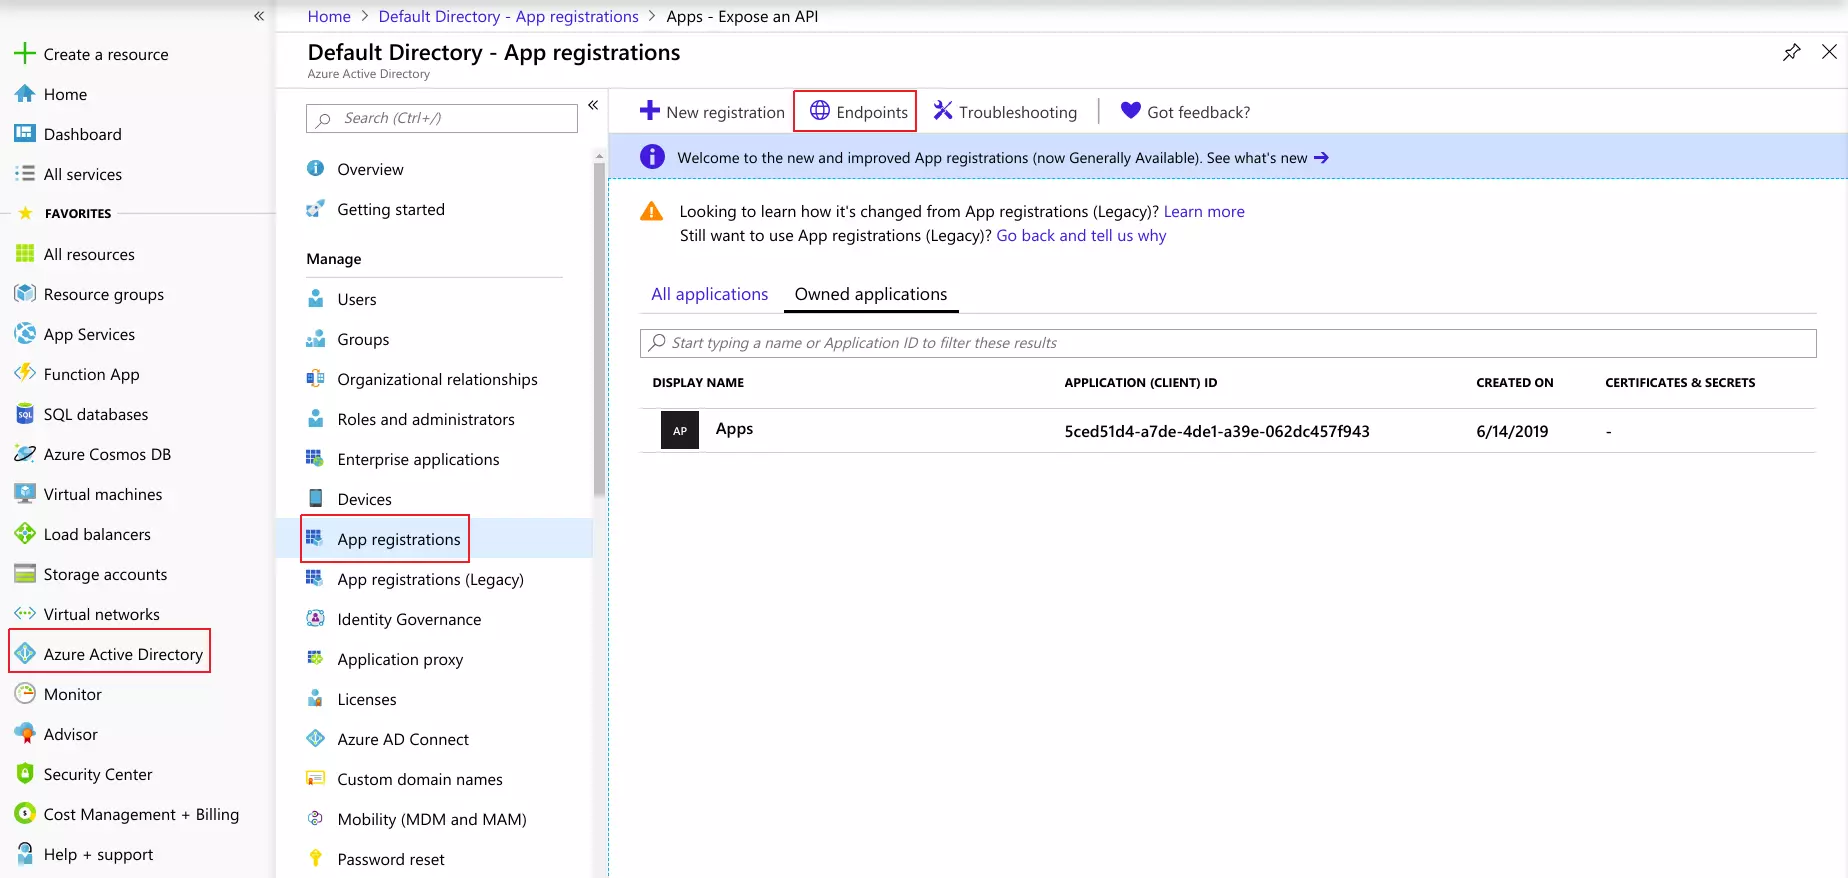
- Now, navigate to Expose an API menu option and Click the Set
button and replace the APPLICATION ID URI with the plugin's SP Entity ID
Here, enter the SP Entity ID value from the Service Provider Metadata tab of the plugin.
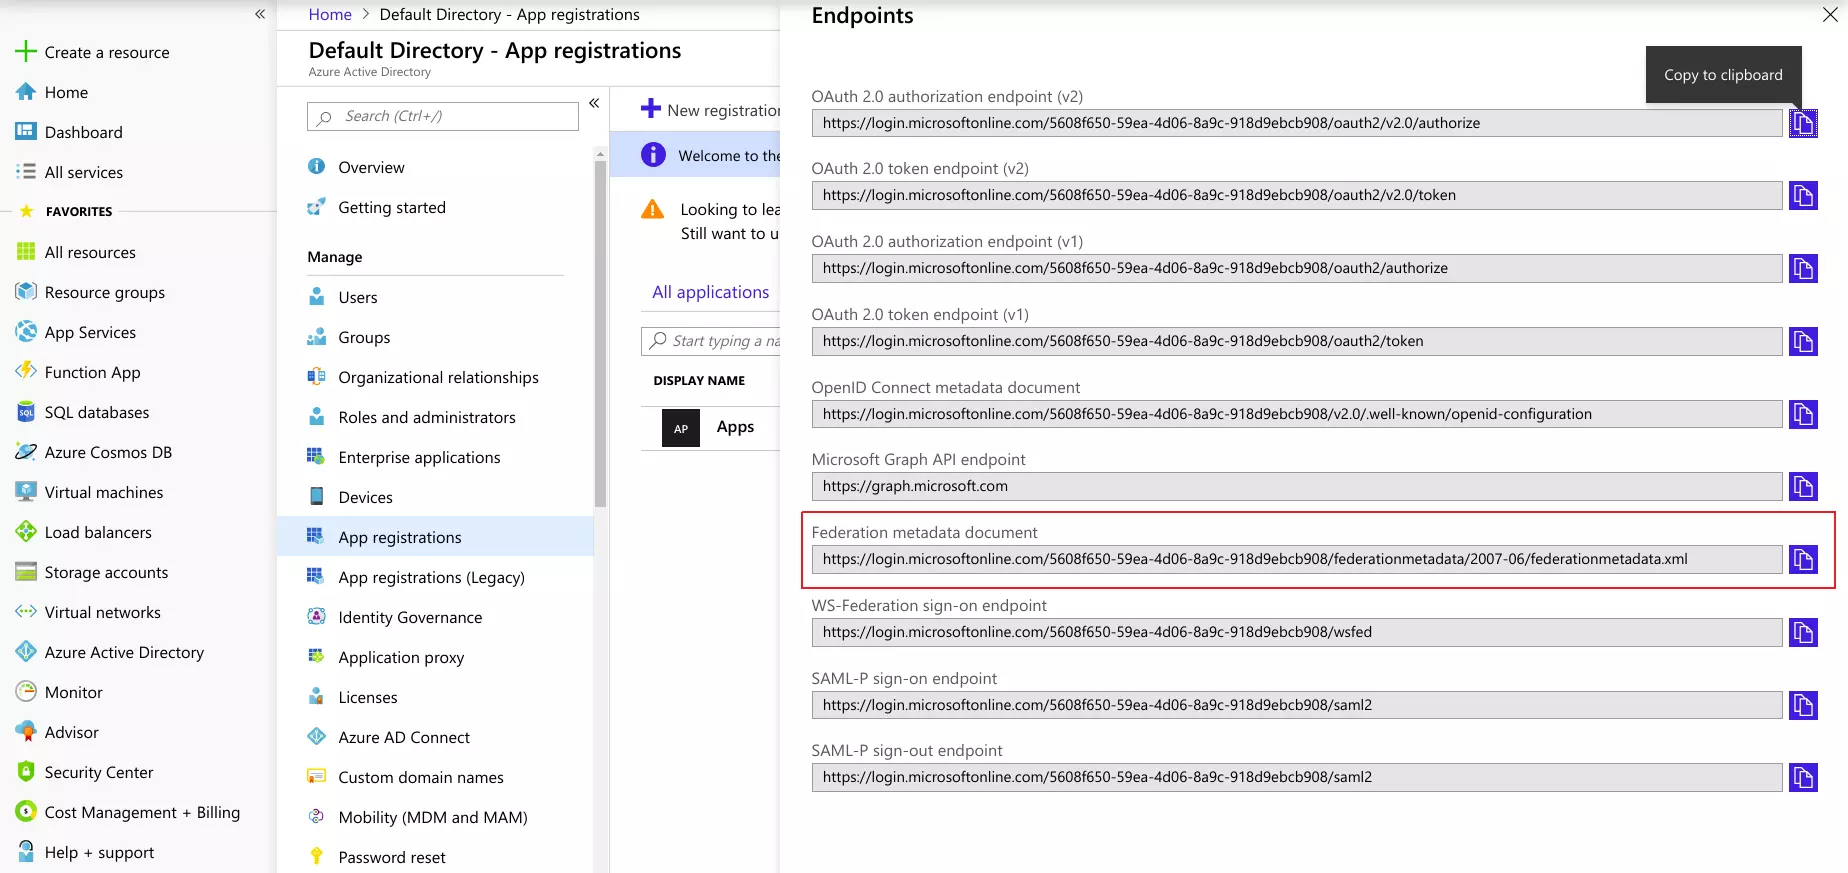
- Go back to Azure Active Directory ⇒ App Registrations window and click on Endpoints link.
- This will open up a window with multiple URLs listed there. Copy the Federation Metadata Document URL. This will be required while configuring the SAML plugin.
- In the miniOrange SAML 2.0 SSO plugin, navigate to Service Provider Metadata tab.Here, you can find the SP metadata such as SP Entity ID and ACS(AssertionConsumerService) URL which are required to configure the Identity Provider.
Configure Azure AD as IdP
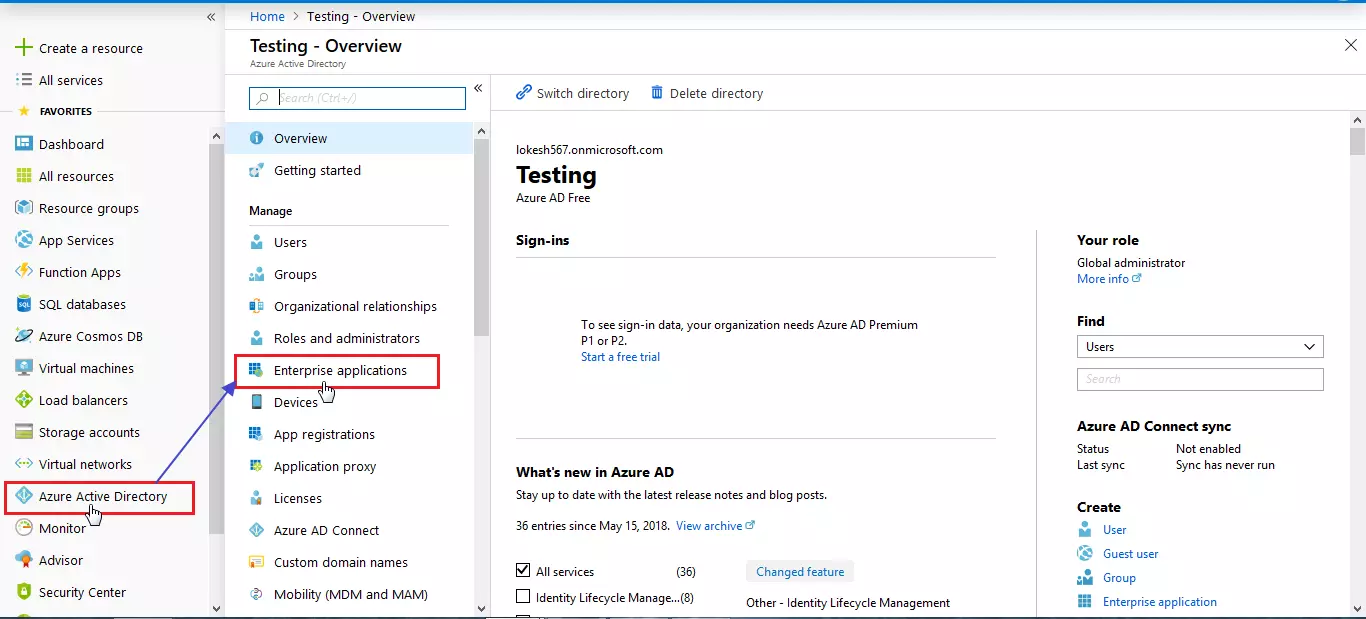
- Log in to Azure AD Portal
- Select Azure Active Directory ⇒ Enterprise Applications.
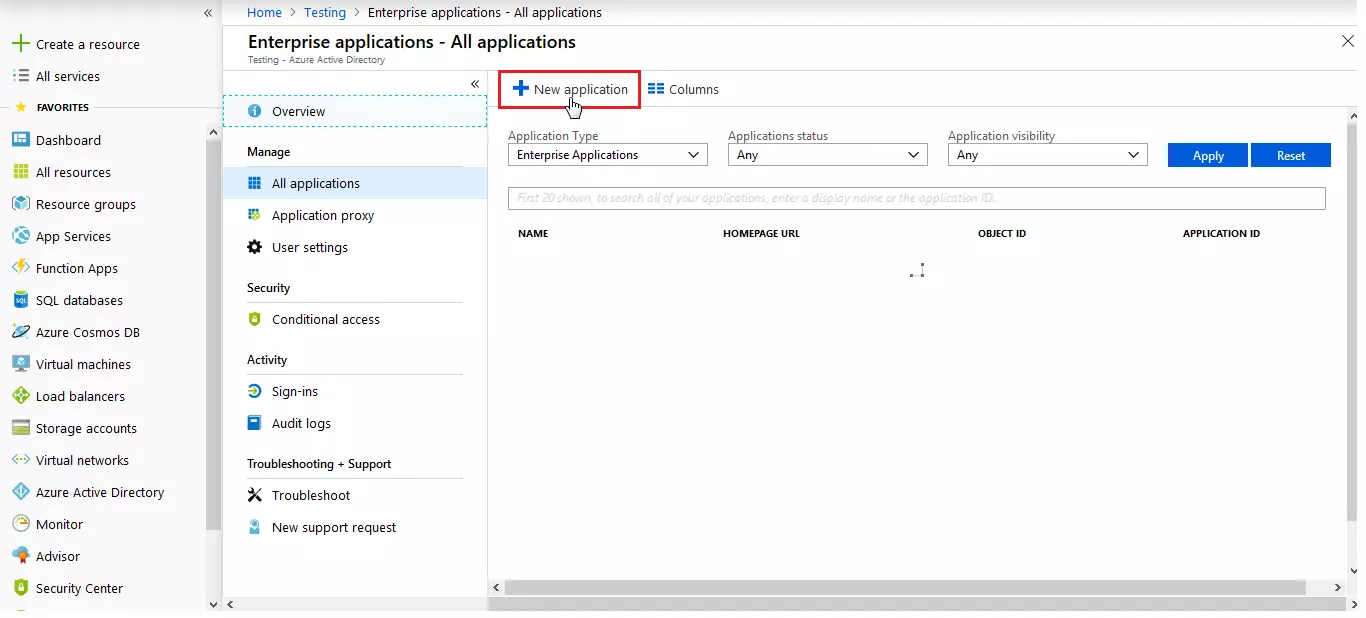
- Click on New Application.
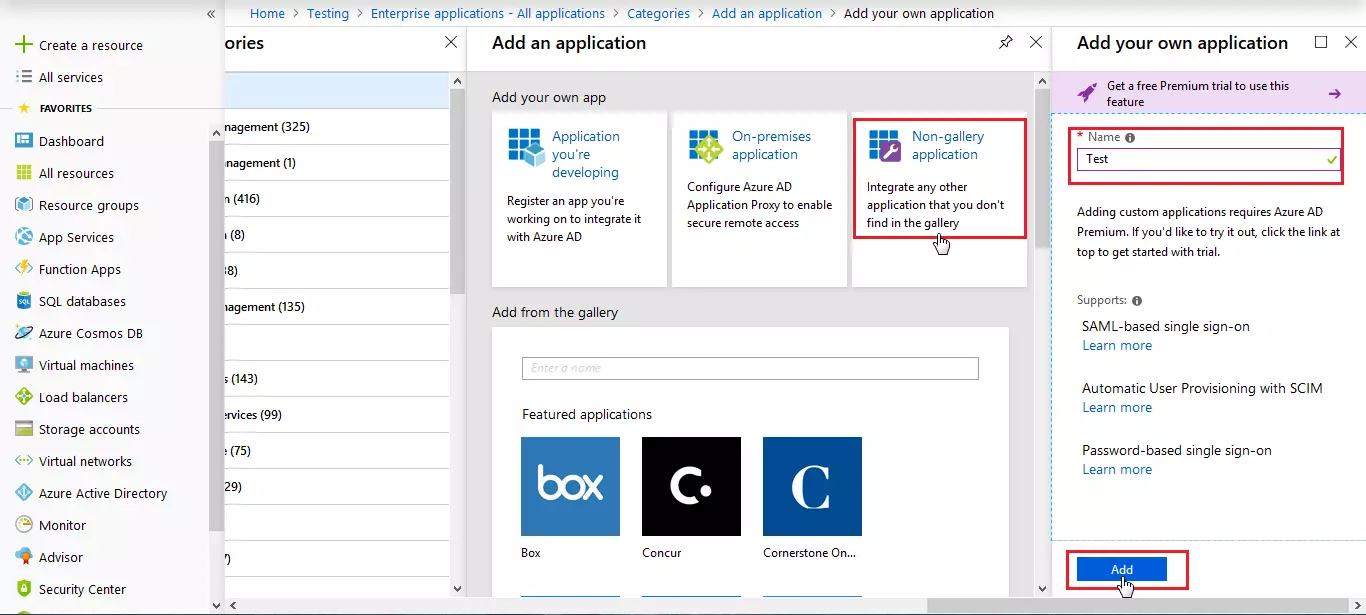
- Click on Non-gallery application section and enter the name for your app and click on Add button.
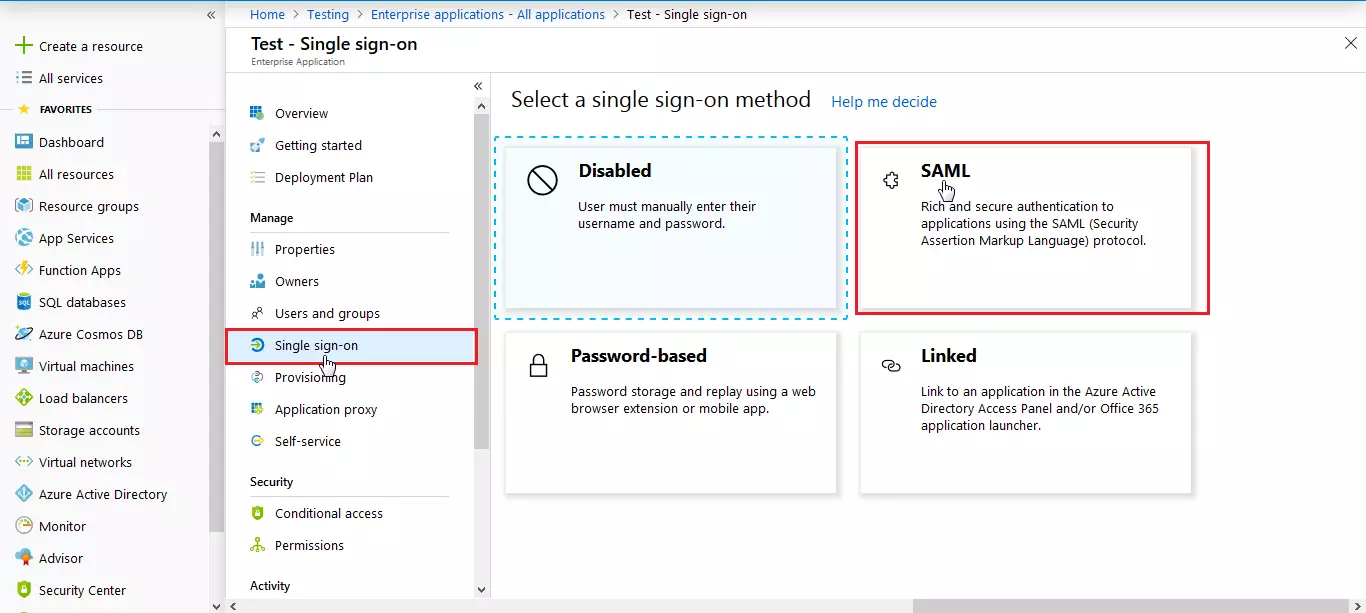
- Click on Single sign-on from the application's left-hand navigation menu. The next screen presents the options for configuring single sign-on. Click on SAML.
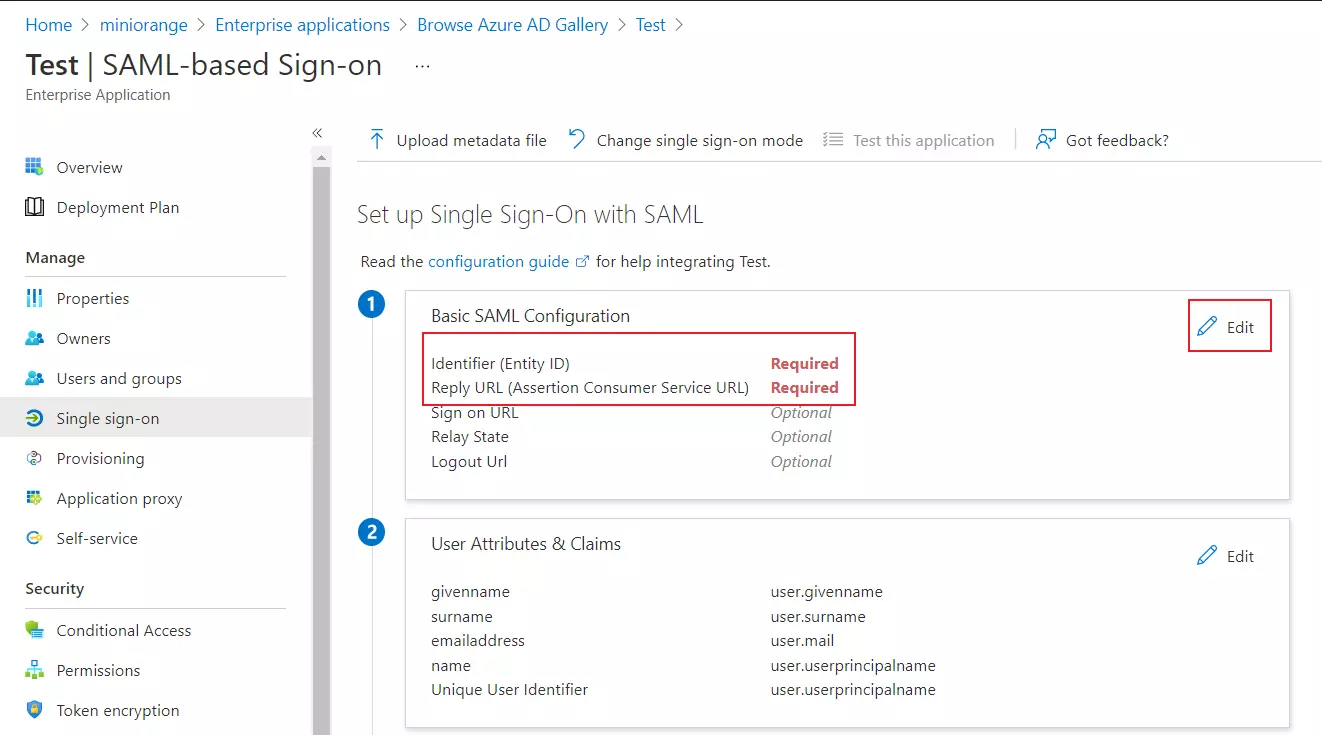
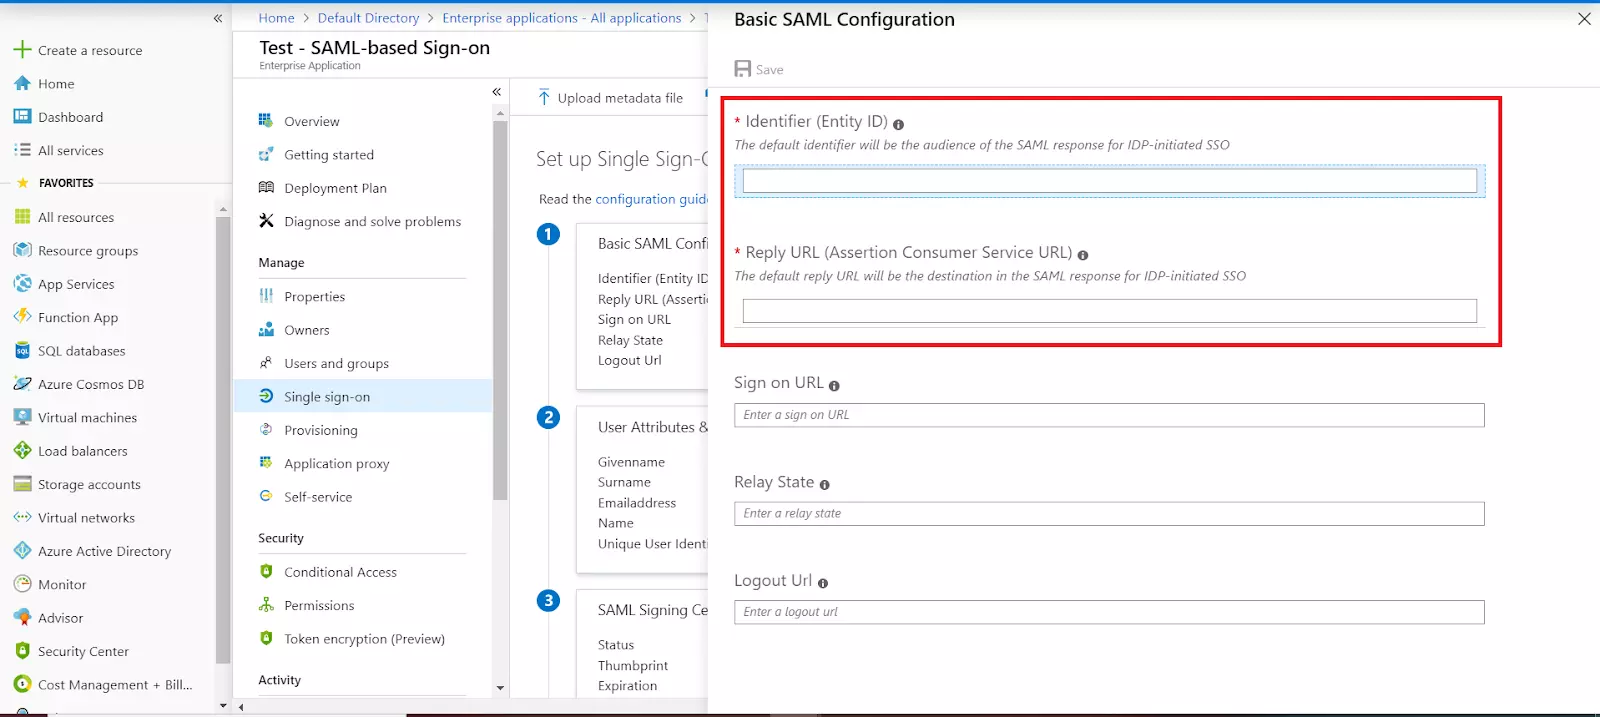
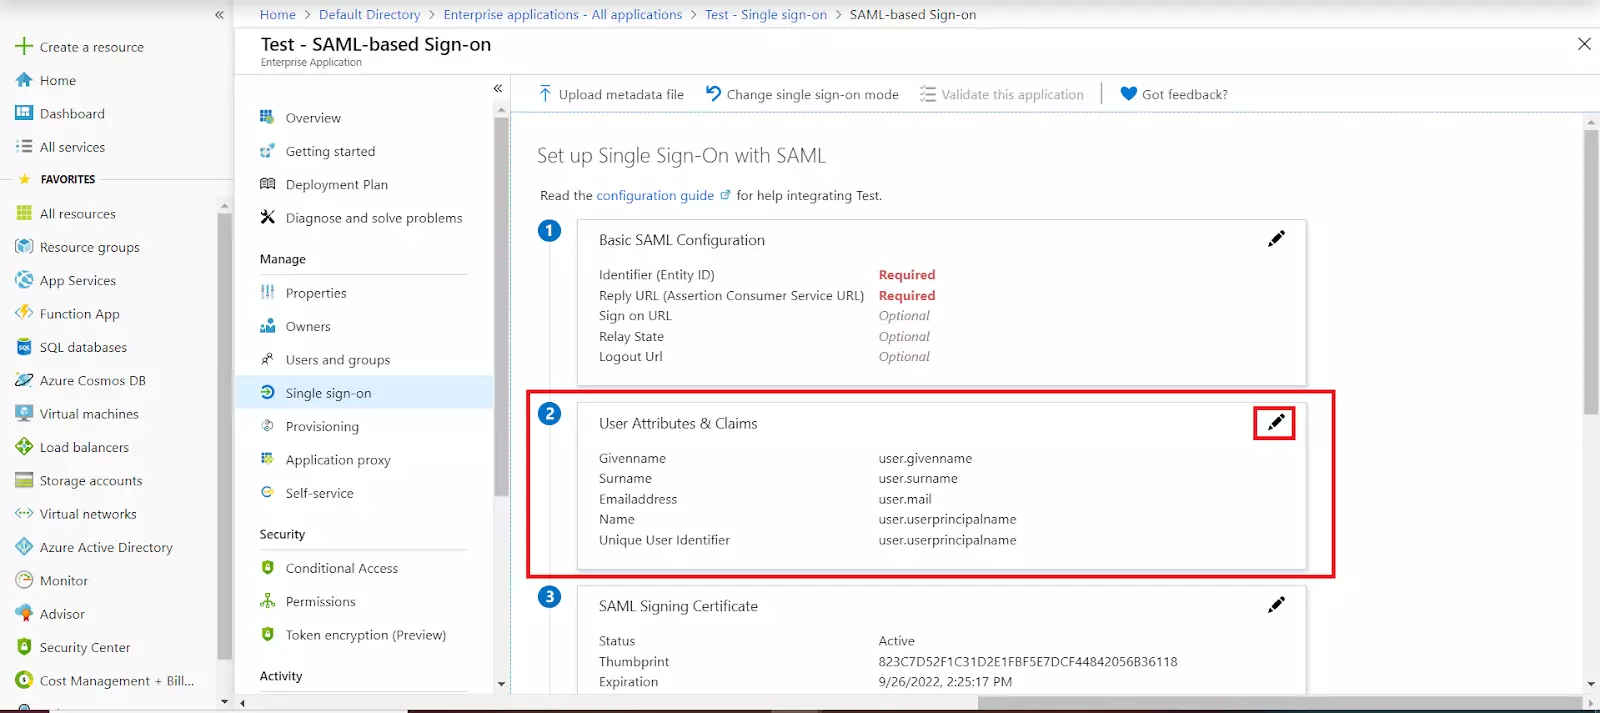
- Enter the SP Entity ID for Identifier and the ACS URL for Reply URL from Service Provider Metadata tab of the plugin.
- By default, the following Attributes are sent.
- In the User Attribute & Claims tab click on Edit.
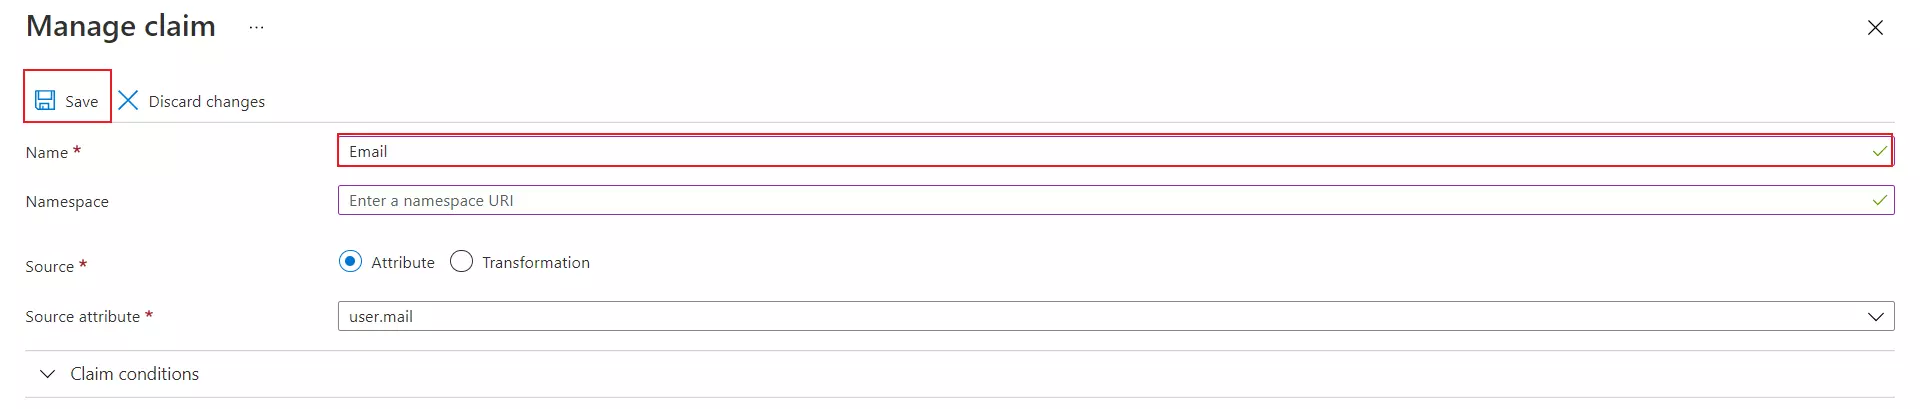
- Click on the claim names you want to edit.
- You can edit the Name and Namespace as per required.
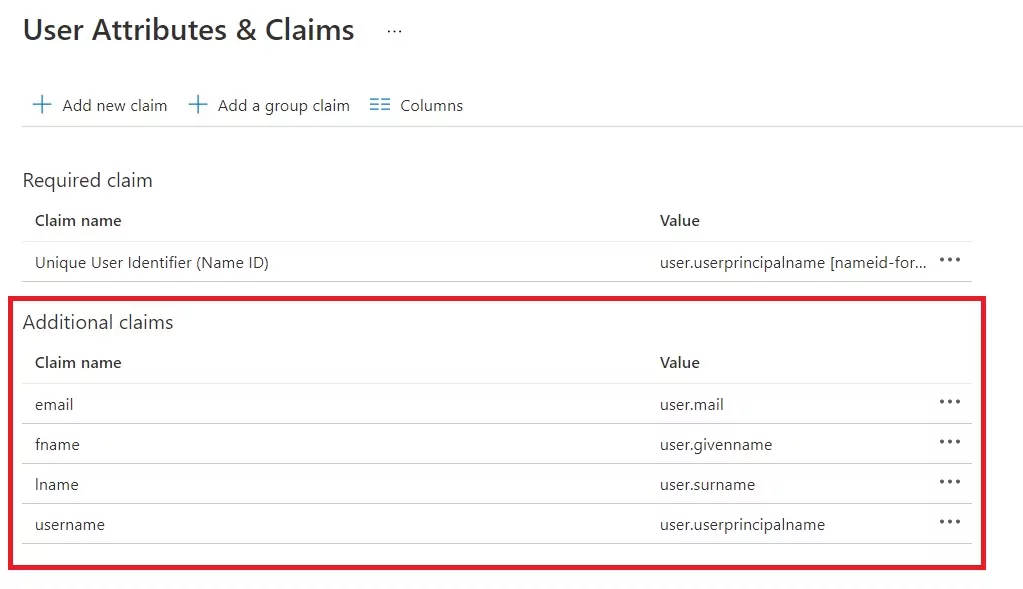
- Once the claim names are edited you will get the following screen.
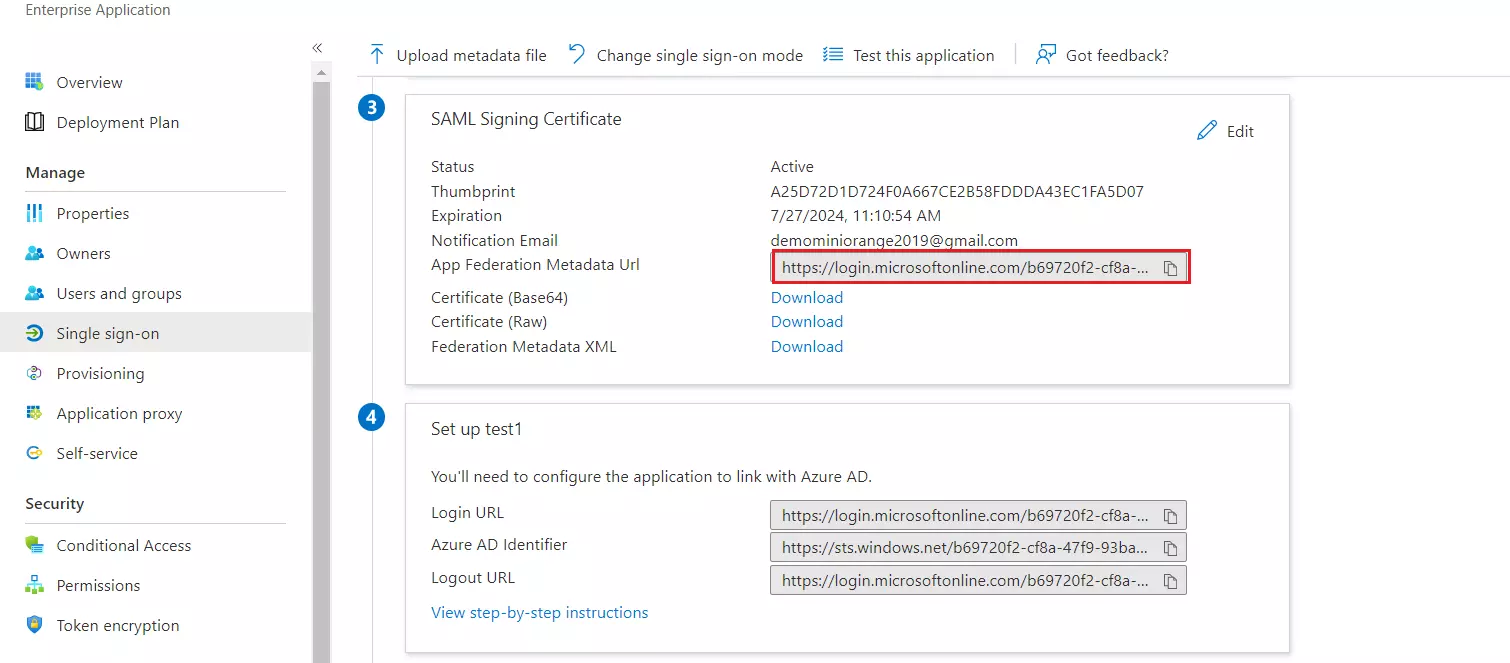
- Copy App Federation Metadata Url. This will be used while configuring the SAML plugin.
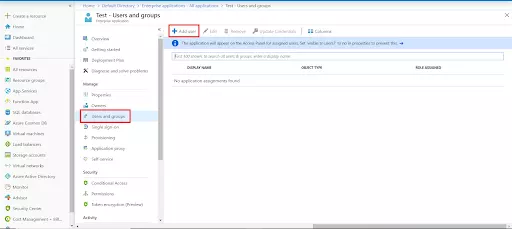
- Assign users and groups to your SAML application
- As a security control, Azure AD will not issue a token allowing a user to sign in to the application unless Azure AD has granted access to the user. Users may be granted access directly, or through group membership.
- Click on Users and groups from the applications left-hand navigation menu. The next screen presents the options for assigning the users/groups to the application.
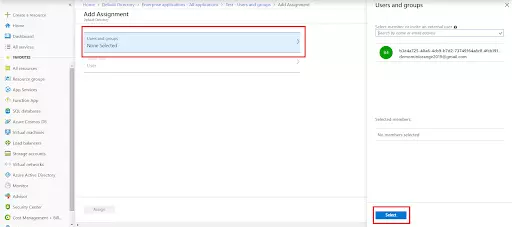
- After clicking on Add user, Select Users and groups in the Add Assignment screen.
- The next screen presents the option for selecting user or invite an external user. Select the appropriate user and click on the Select button.
- Here, you can also assign a role to this user under Select Role section. Finally, click on Assign button to assign that user or group to the SAML application.


Trending searches:
Hello there!
Need Help? We are right here!
