Azure AD as IDP template
Step 1: Setup Azure AD as IDP (Identity Provider)
Follow the steps below to configure Azure AD as IdP
×
![]()
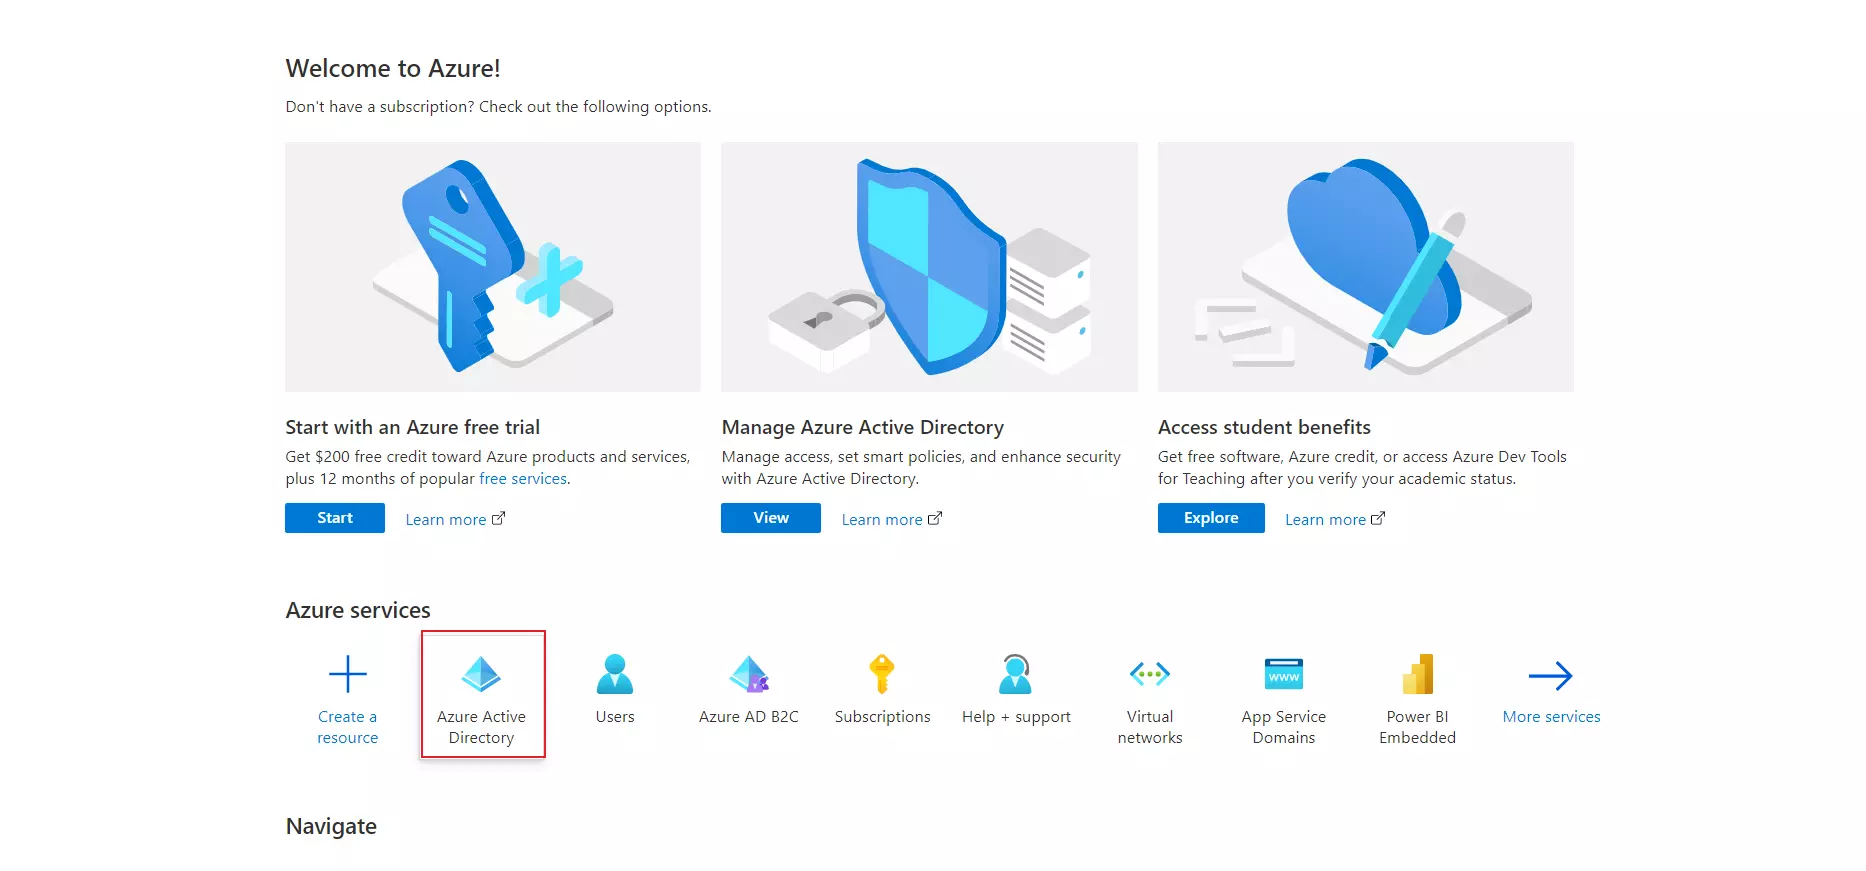
- Log in to Azure AD Portal as admin.
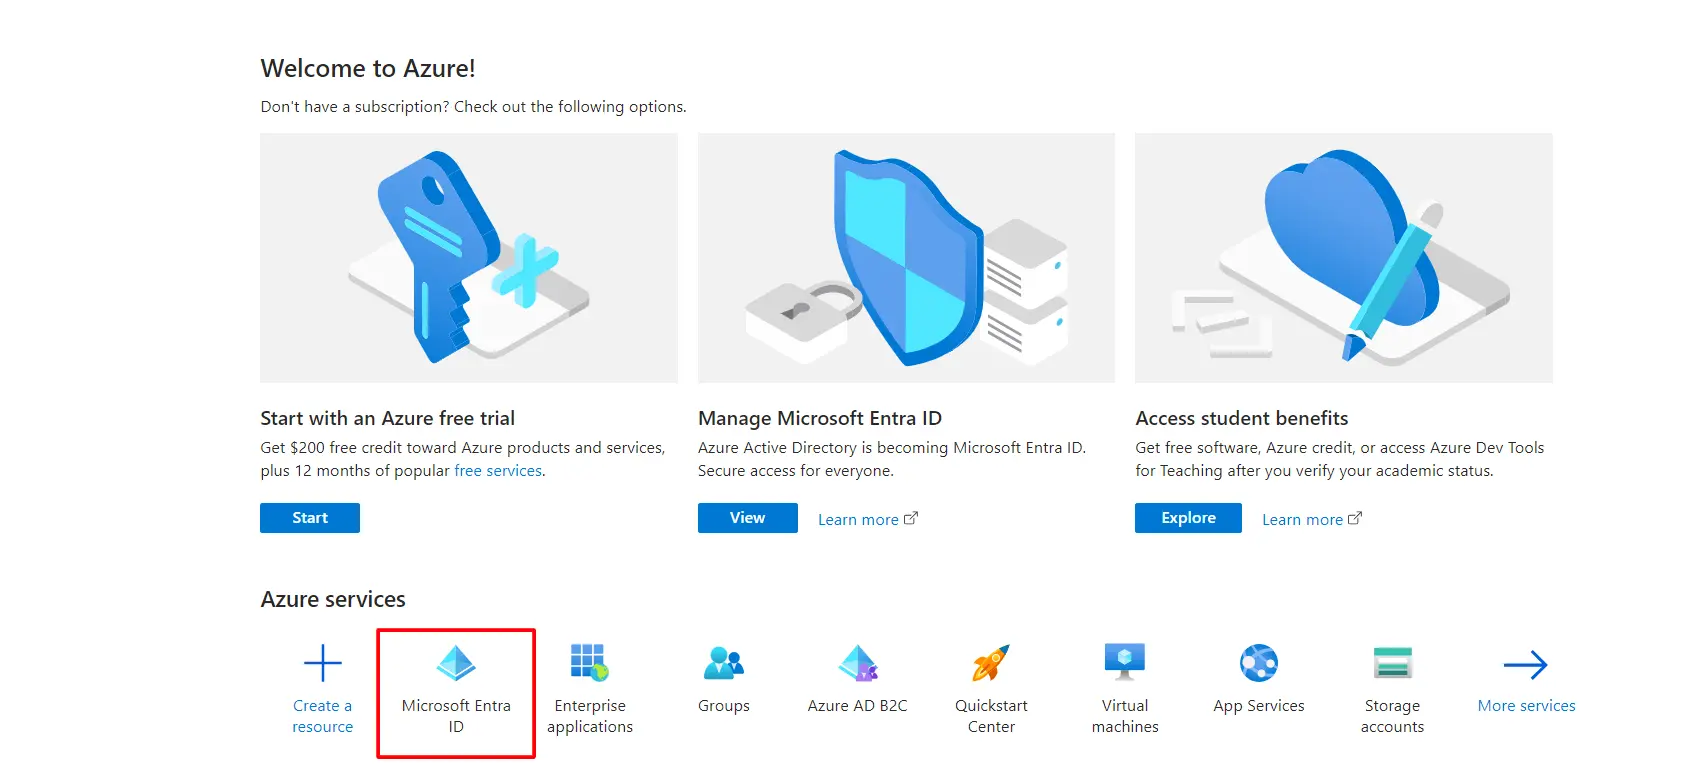
- Select Azure Active Directory.
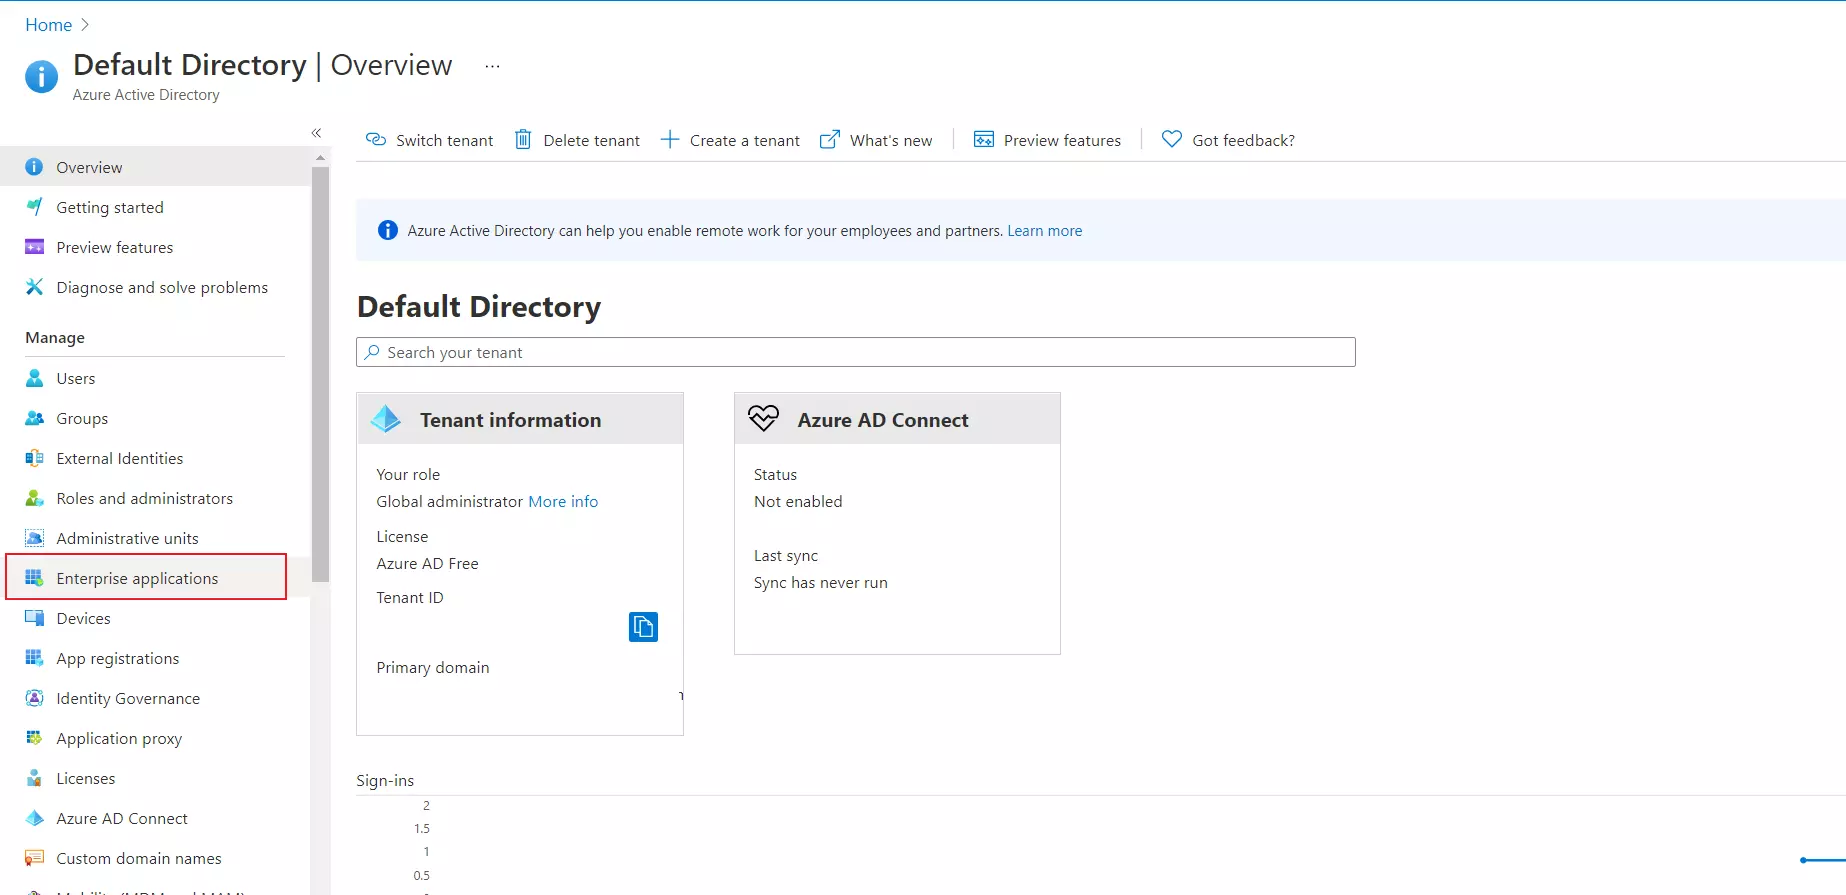
- Select Enterprise Application.
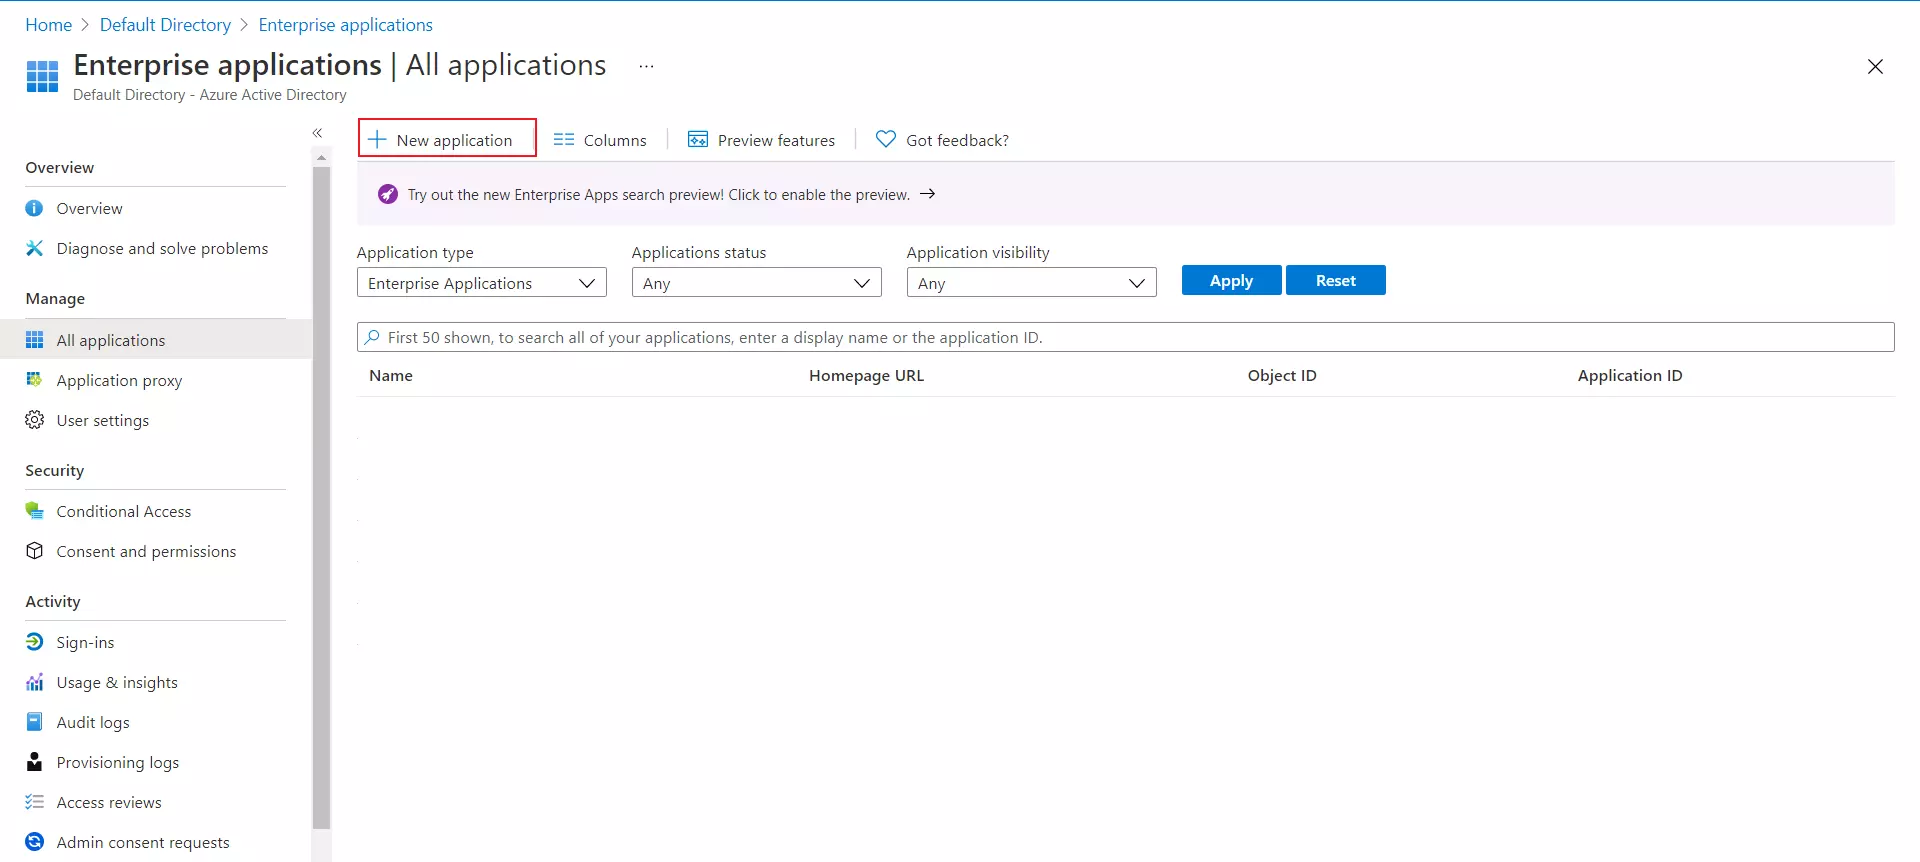
- Click on New Application.
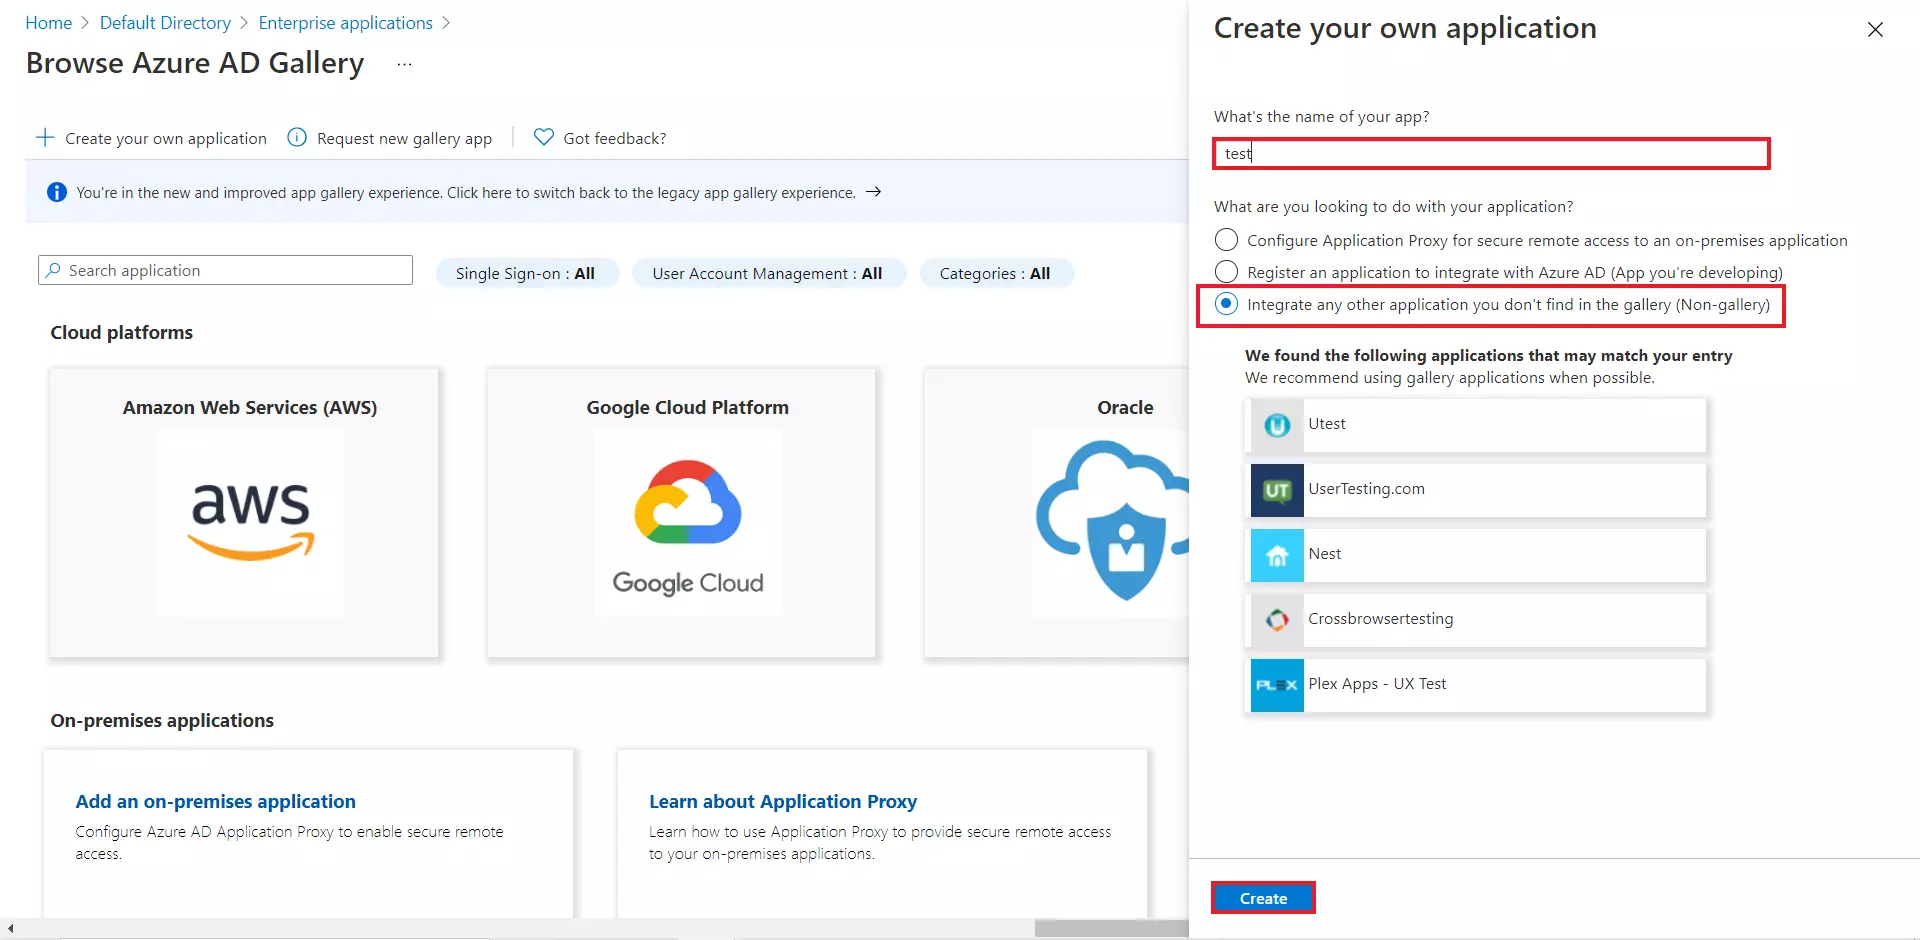
- Click on Create your own Application.
- Enter the name for your app then select Non-gallery application section and click on Create button.
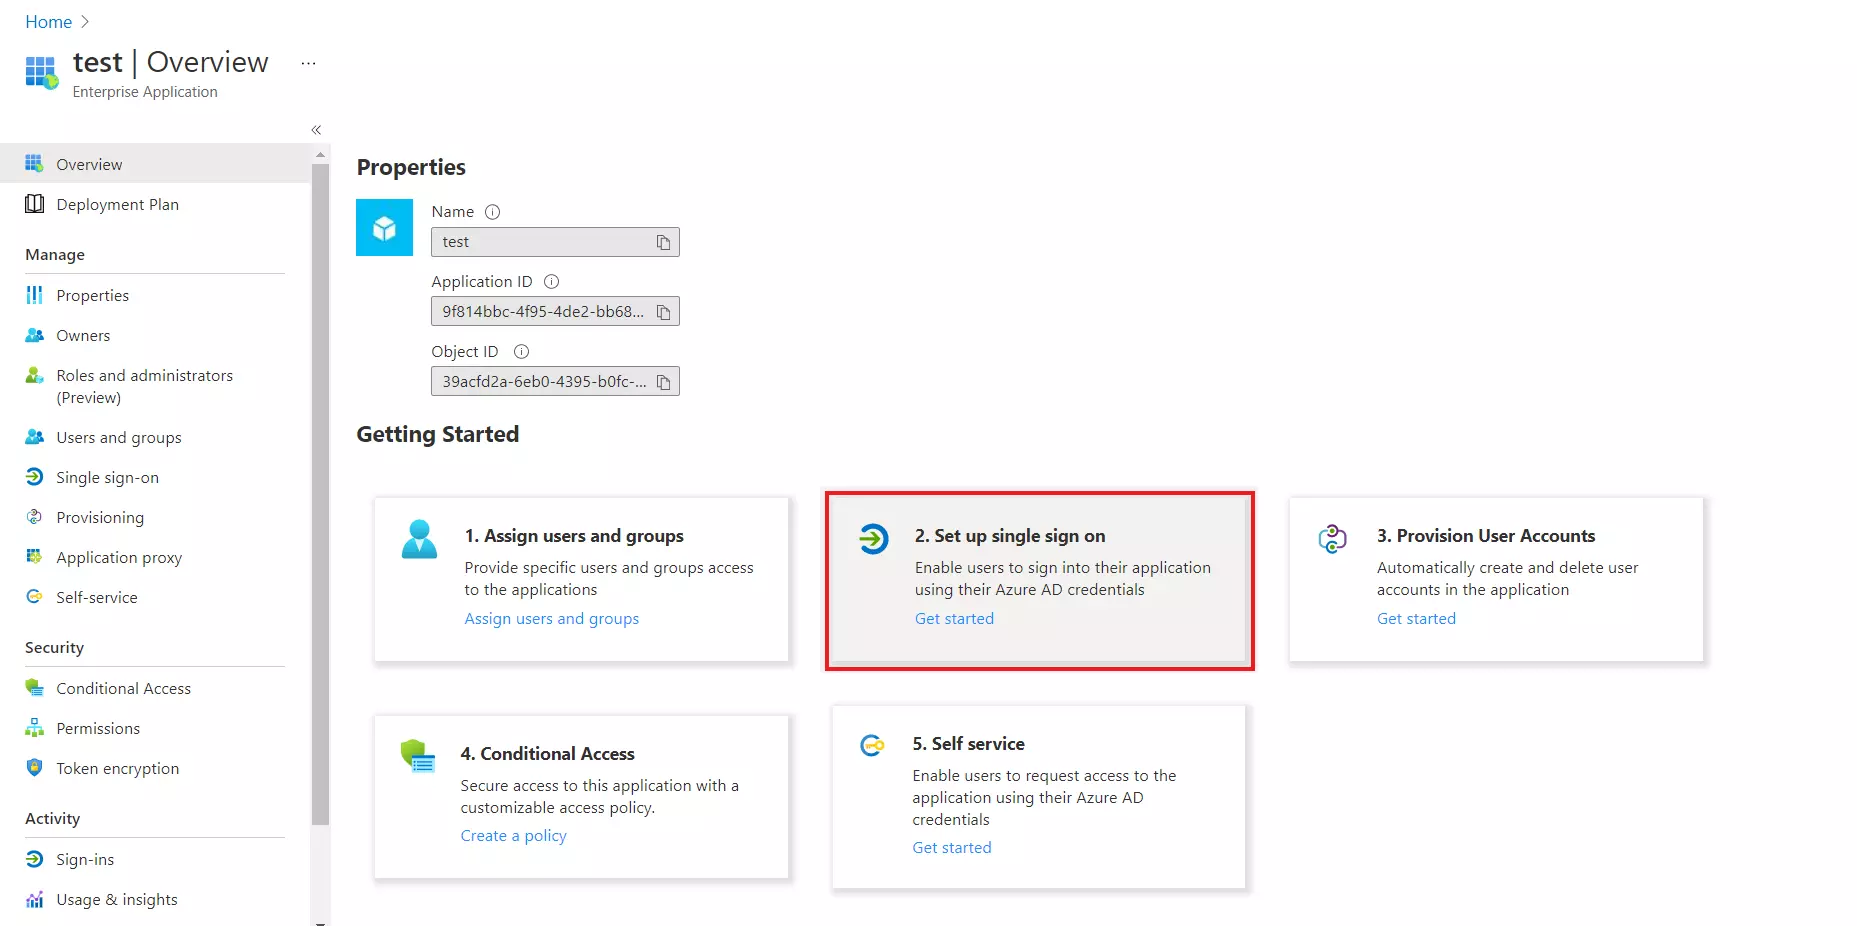
- Click on Setup Single sign-on .
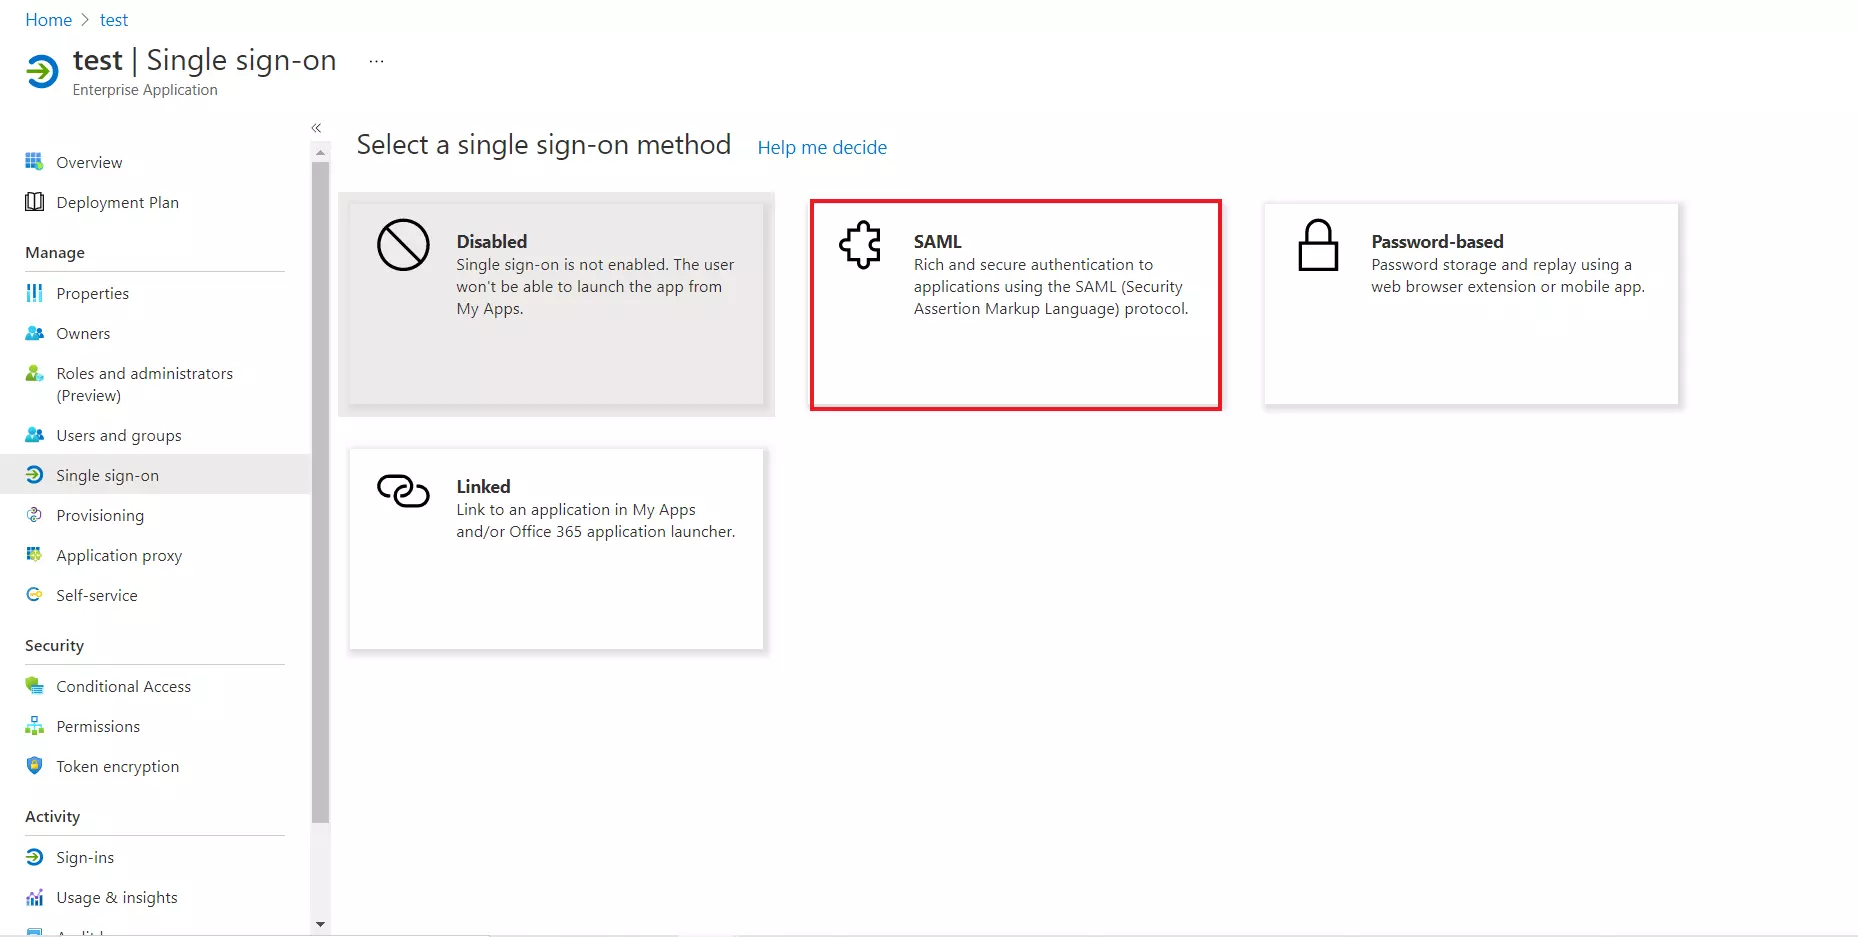
- Select the SAML tab.
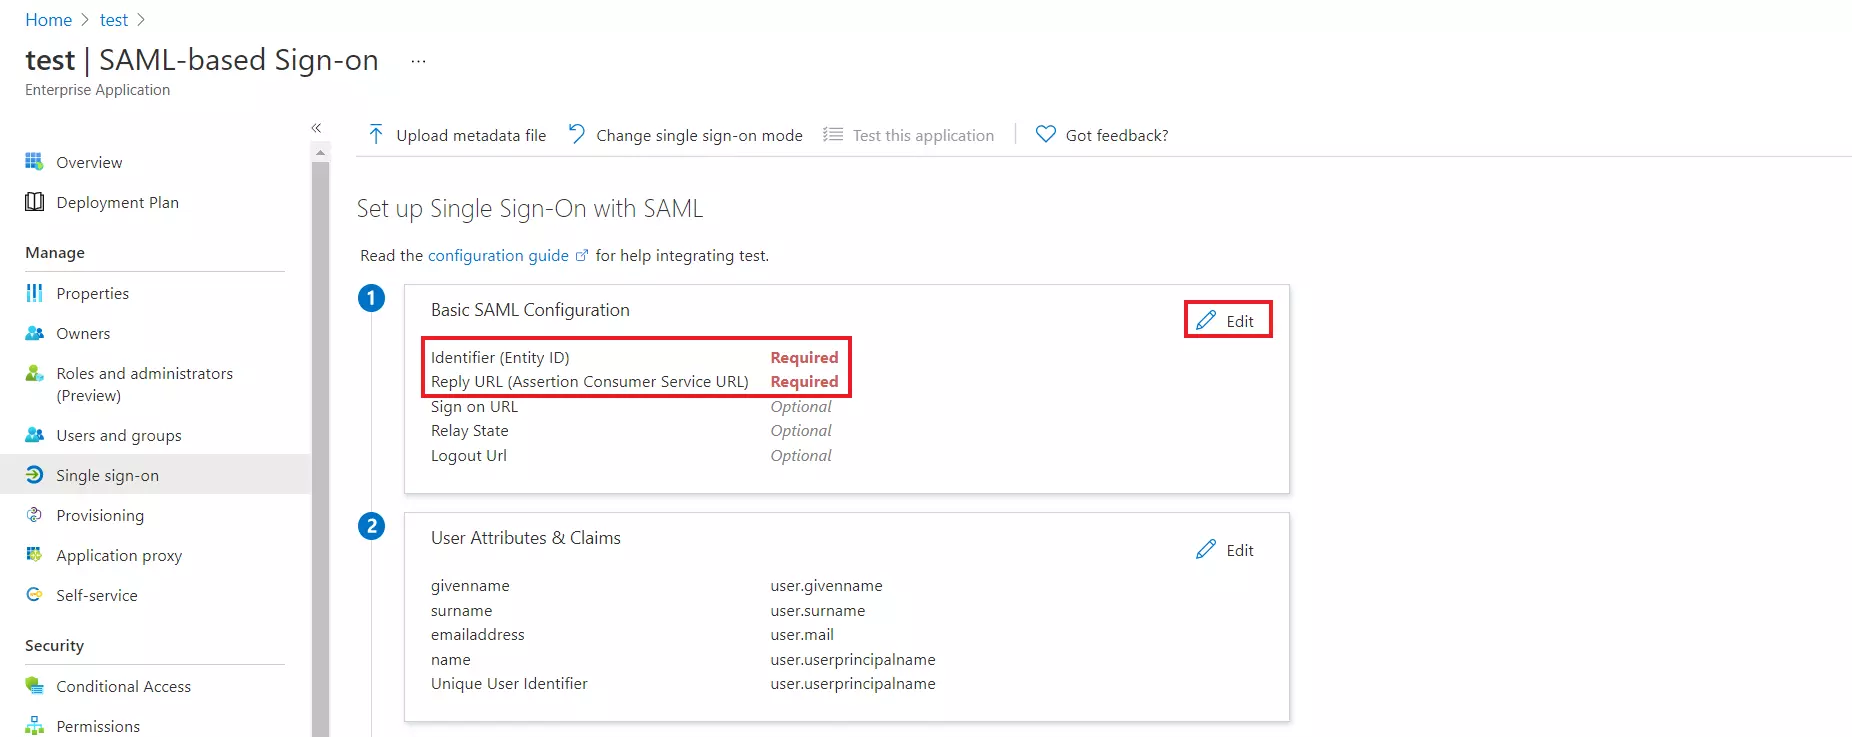
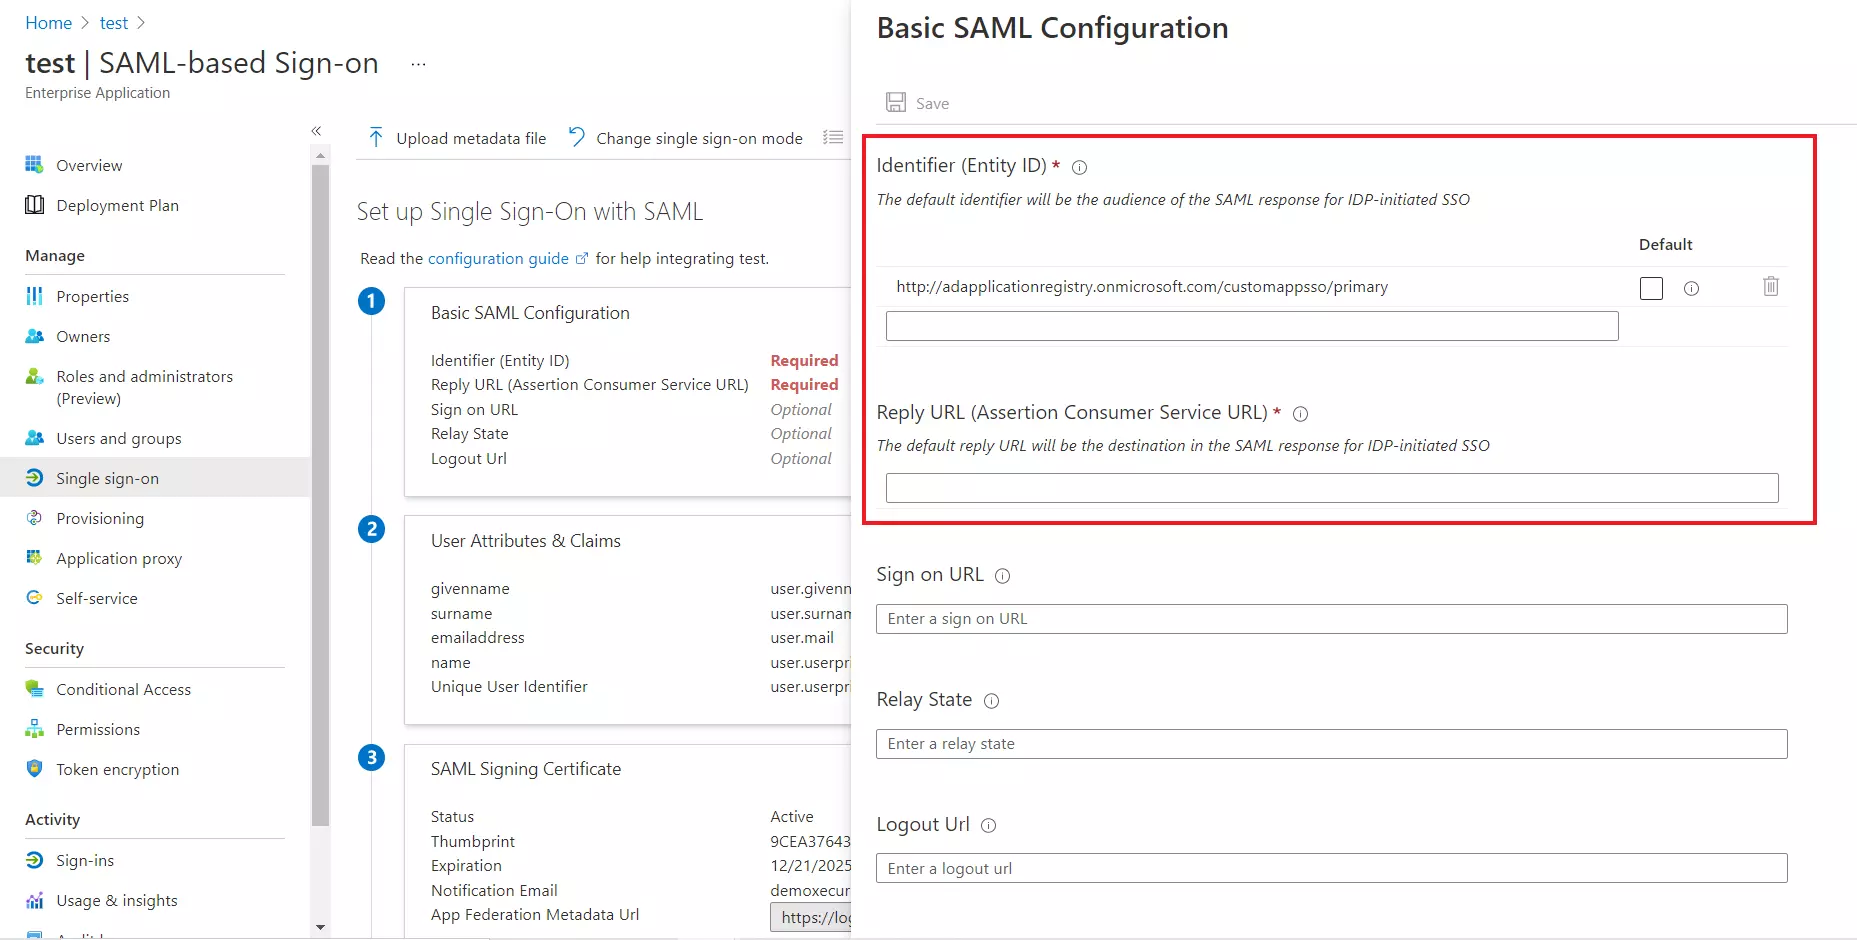
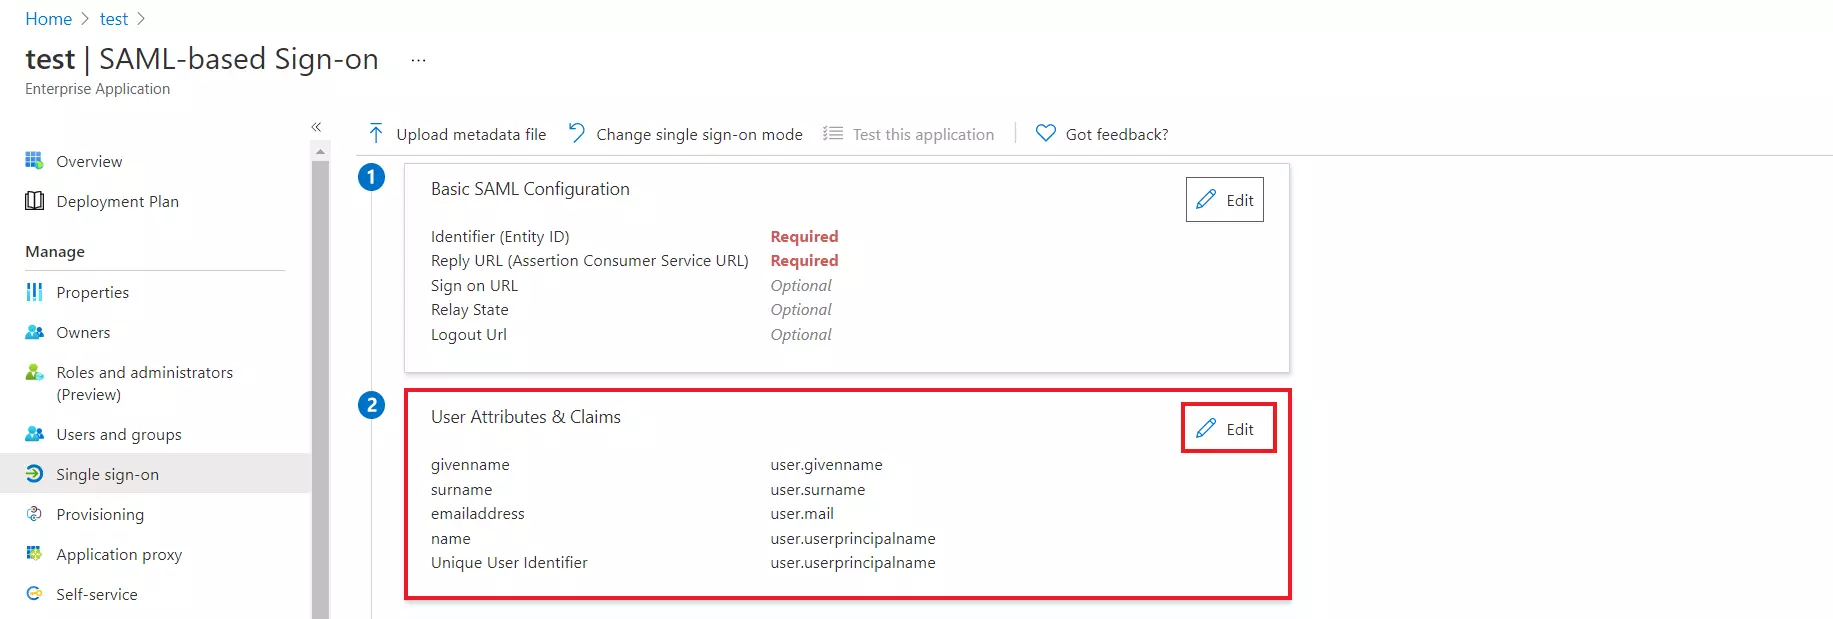
- After clicking on Edit, enter the SP Entity ID for Identifier and the ACS URL for Reply URL from Service Provider Metadata tab of the plugin.
- By default, the following Attributes will be sent in the SAML token. You can view or edit the claims sent in the SAML token to the application under the Attributes tab.
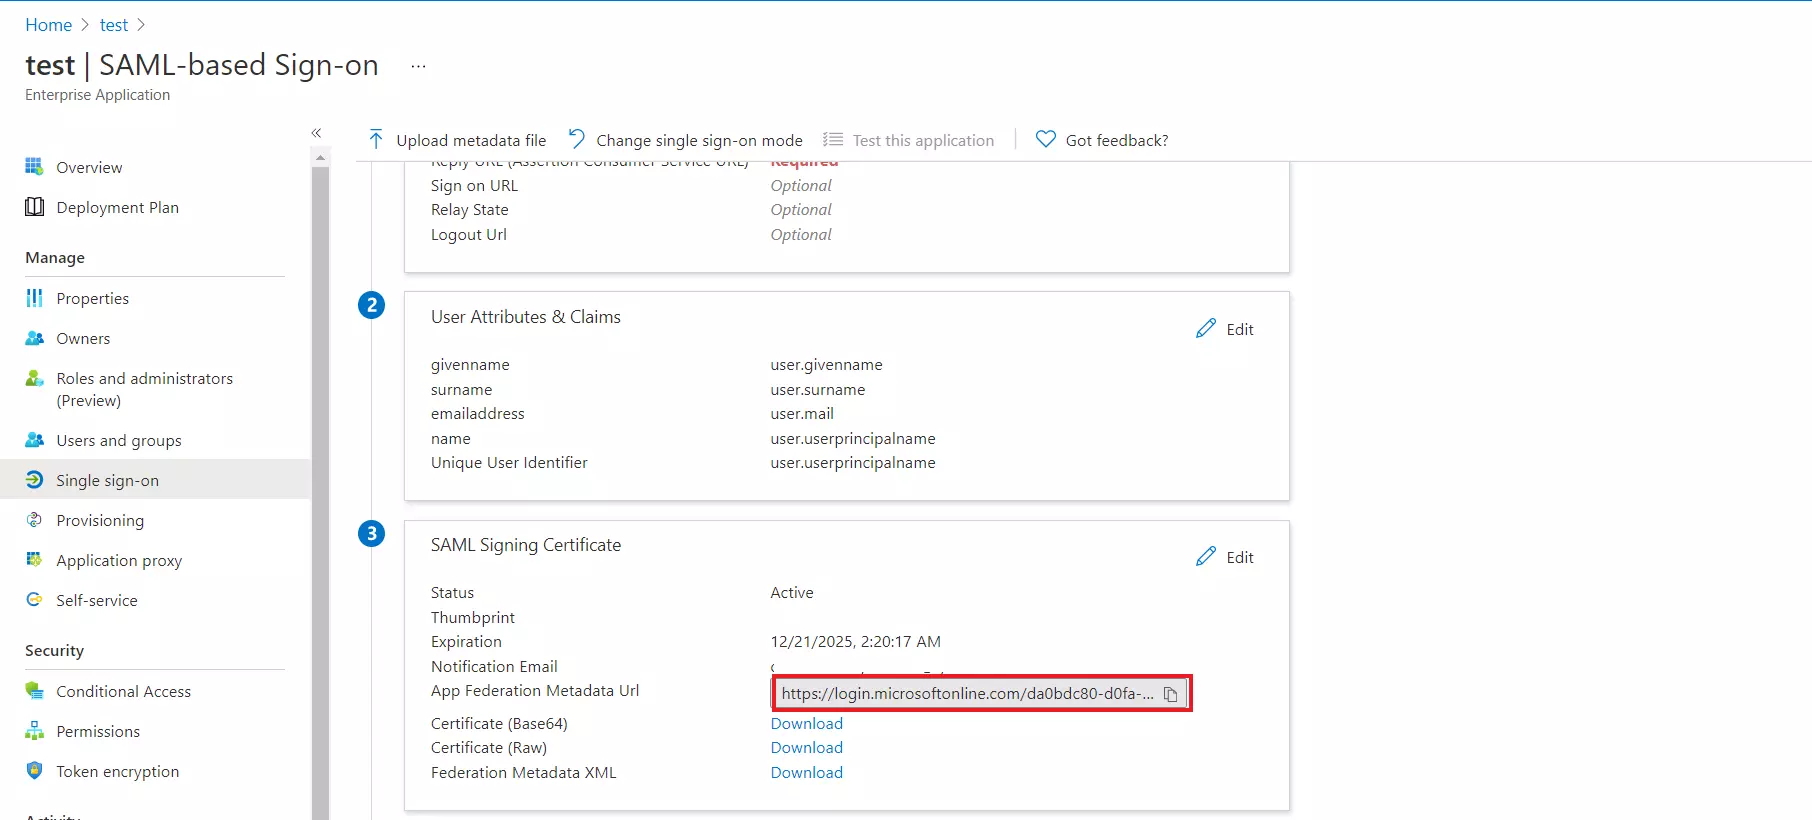
- Copy App Federation Metadata Url to get the Endpoints required for configuring your Service Provider.
- You have successfully configured Azure AD as SAML IdP ( Identity Provider) for achieving SSO login into your Service Provider Site.

- Log in to Azure AD Portal as admin
- Select Azure Active Directory.
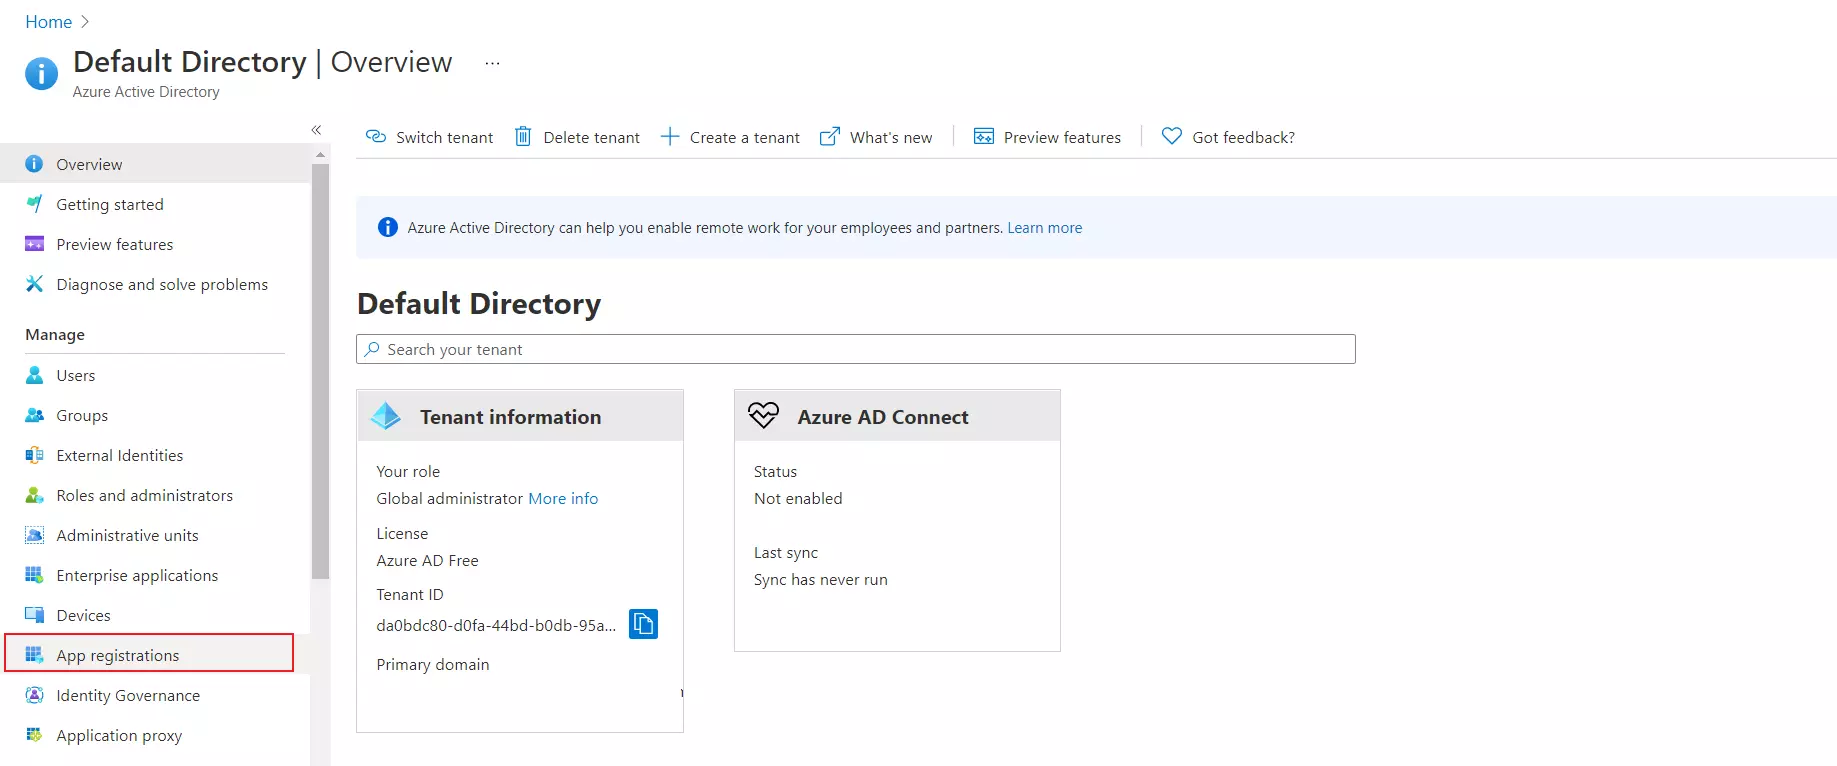
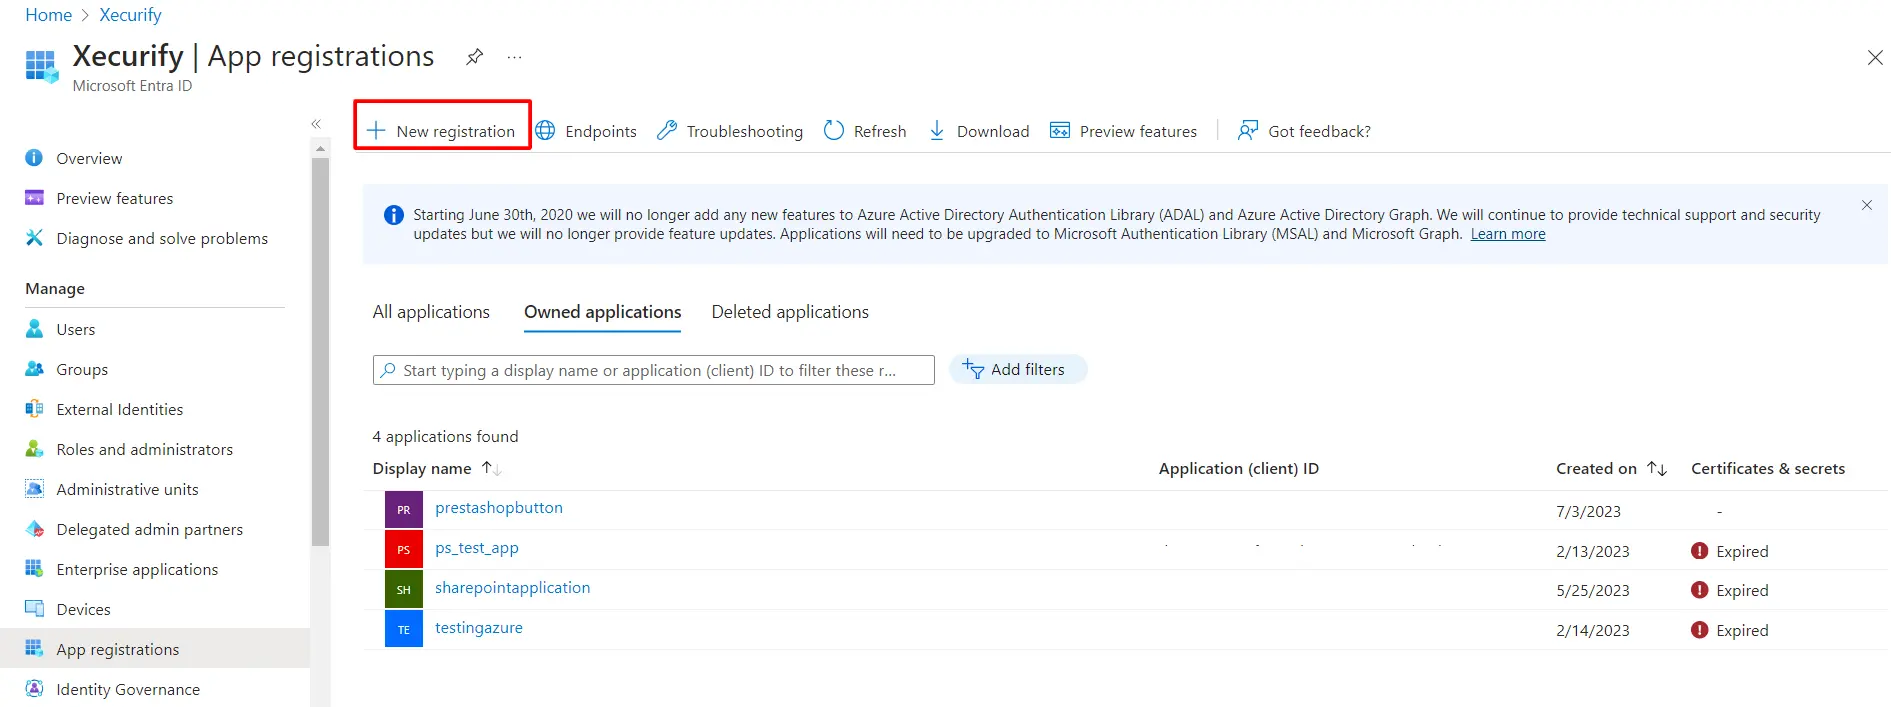
- Select App registrations.
- Click on New registration.
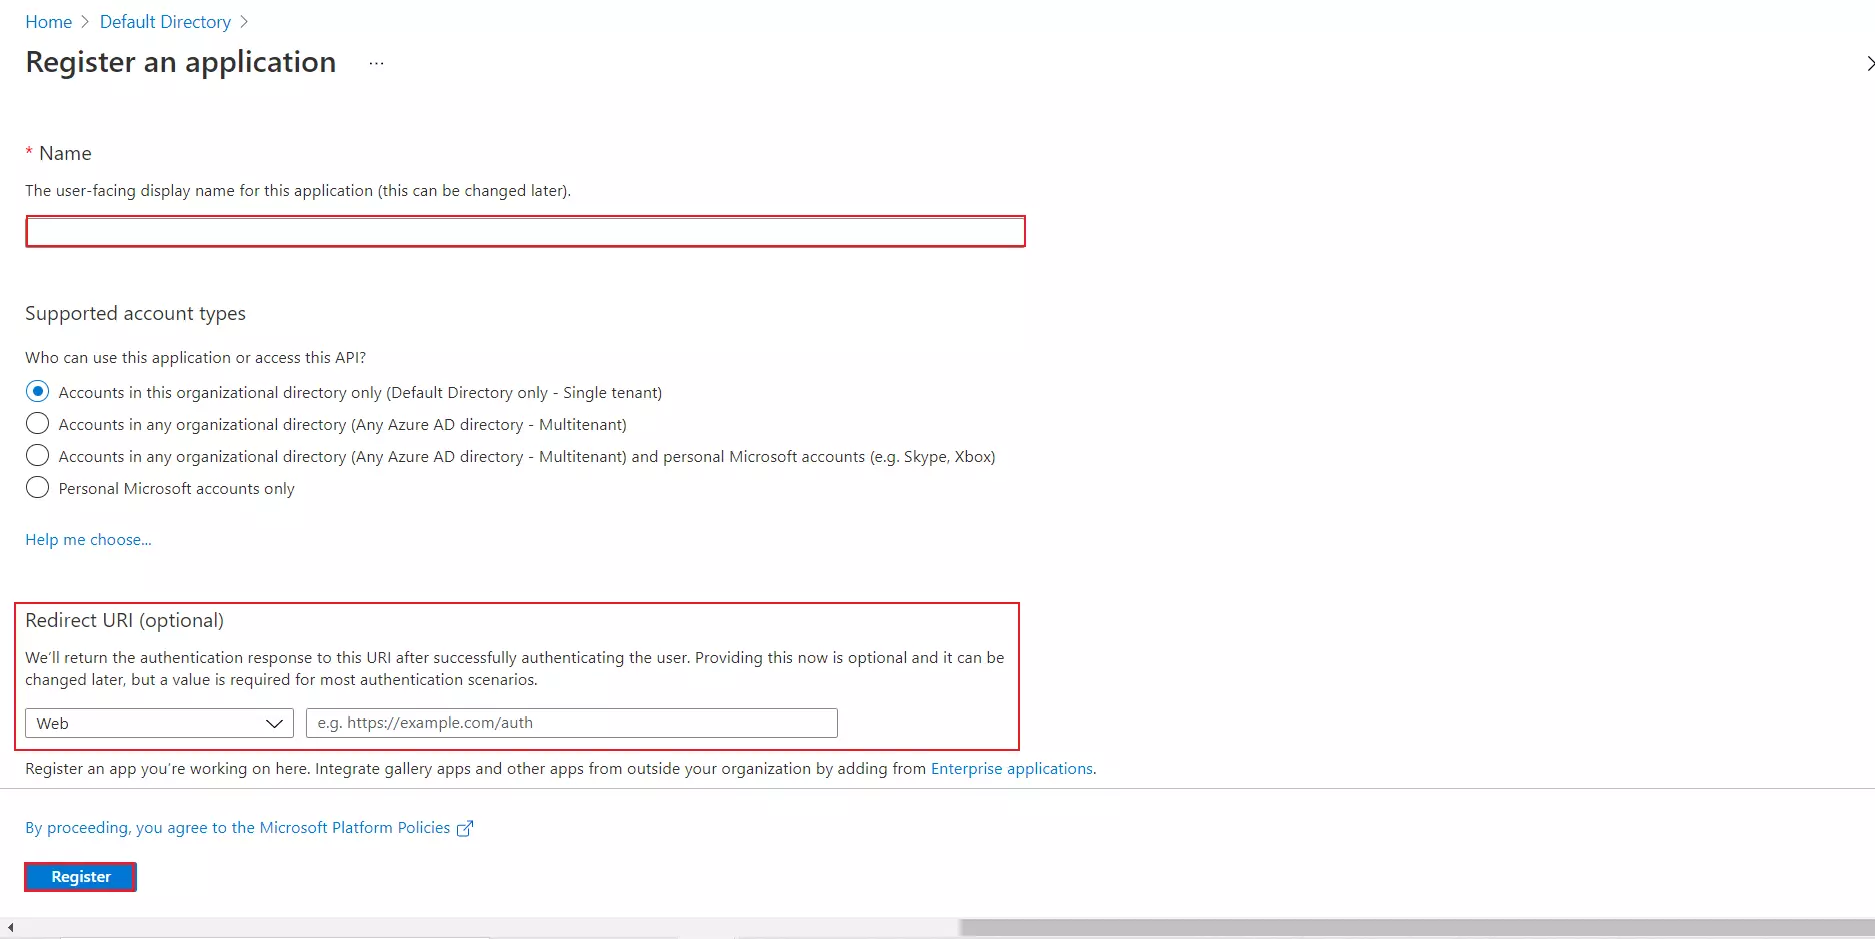
- Assign a Name and choose the account type.
- In the Redirect URL field, provide the ACS URL provided in Service Provider Metadata tab of the plugin and click on Register button.
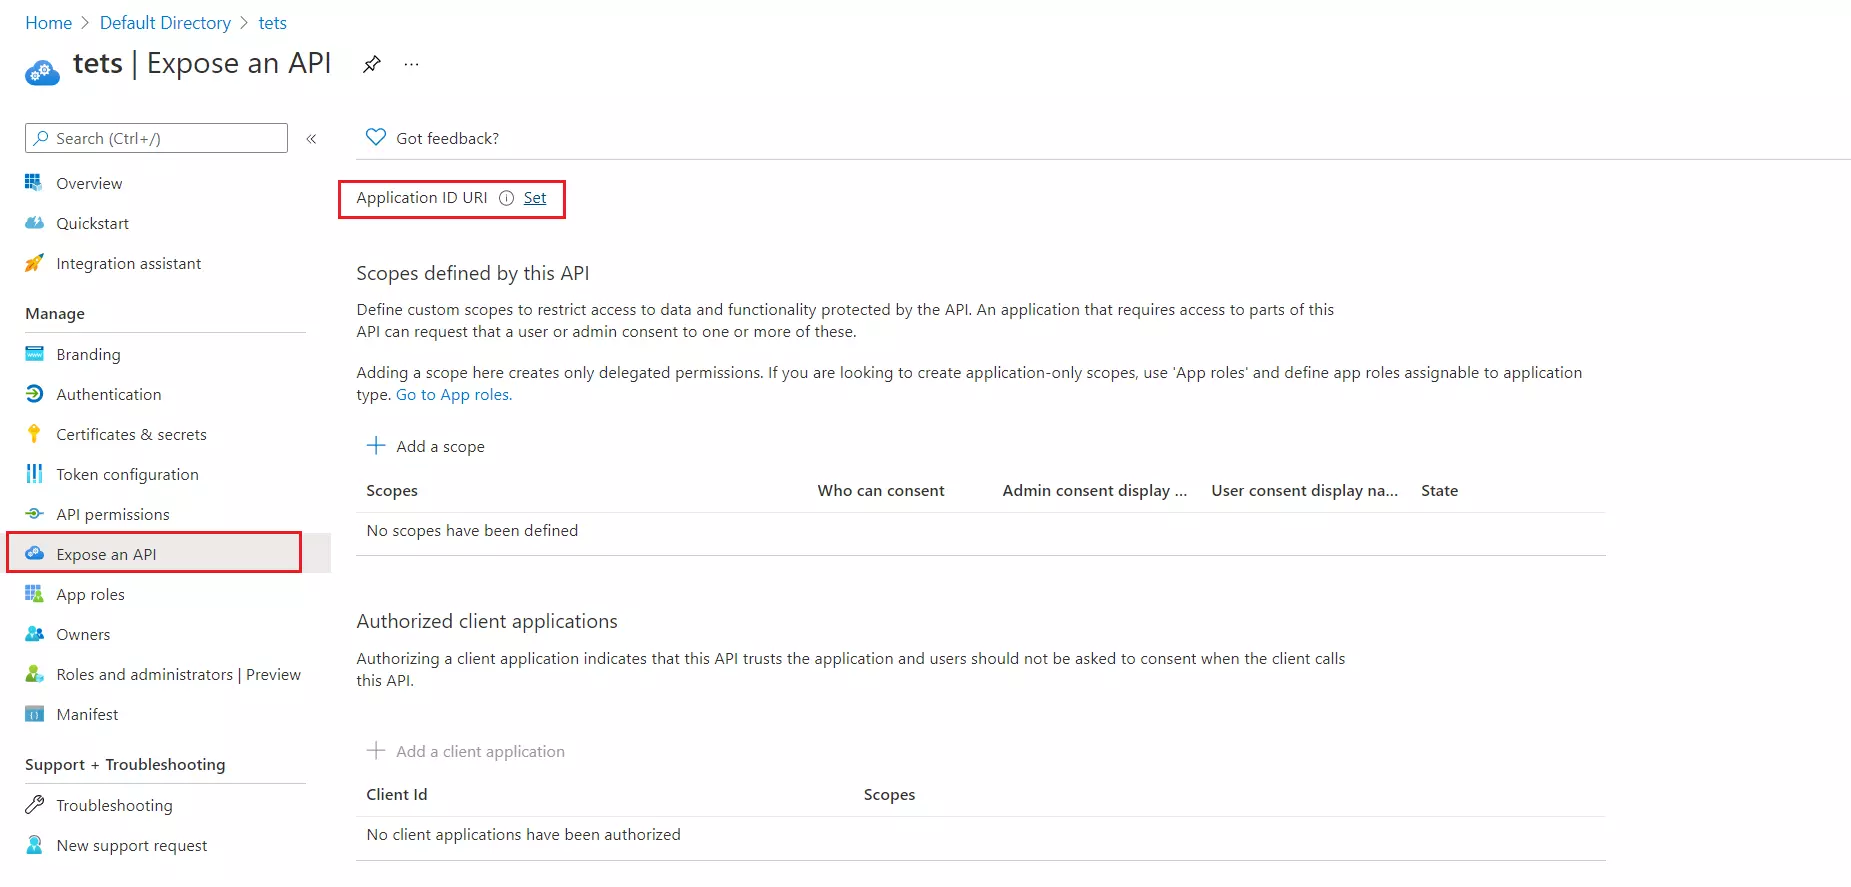
- Navigate to Expose an API from left menu panel.
- Click the Set button and replace the APPLICATION ID URL with the plugin's SP Entity ID.
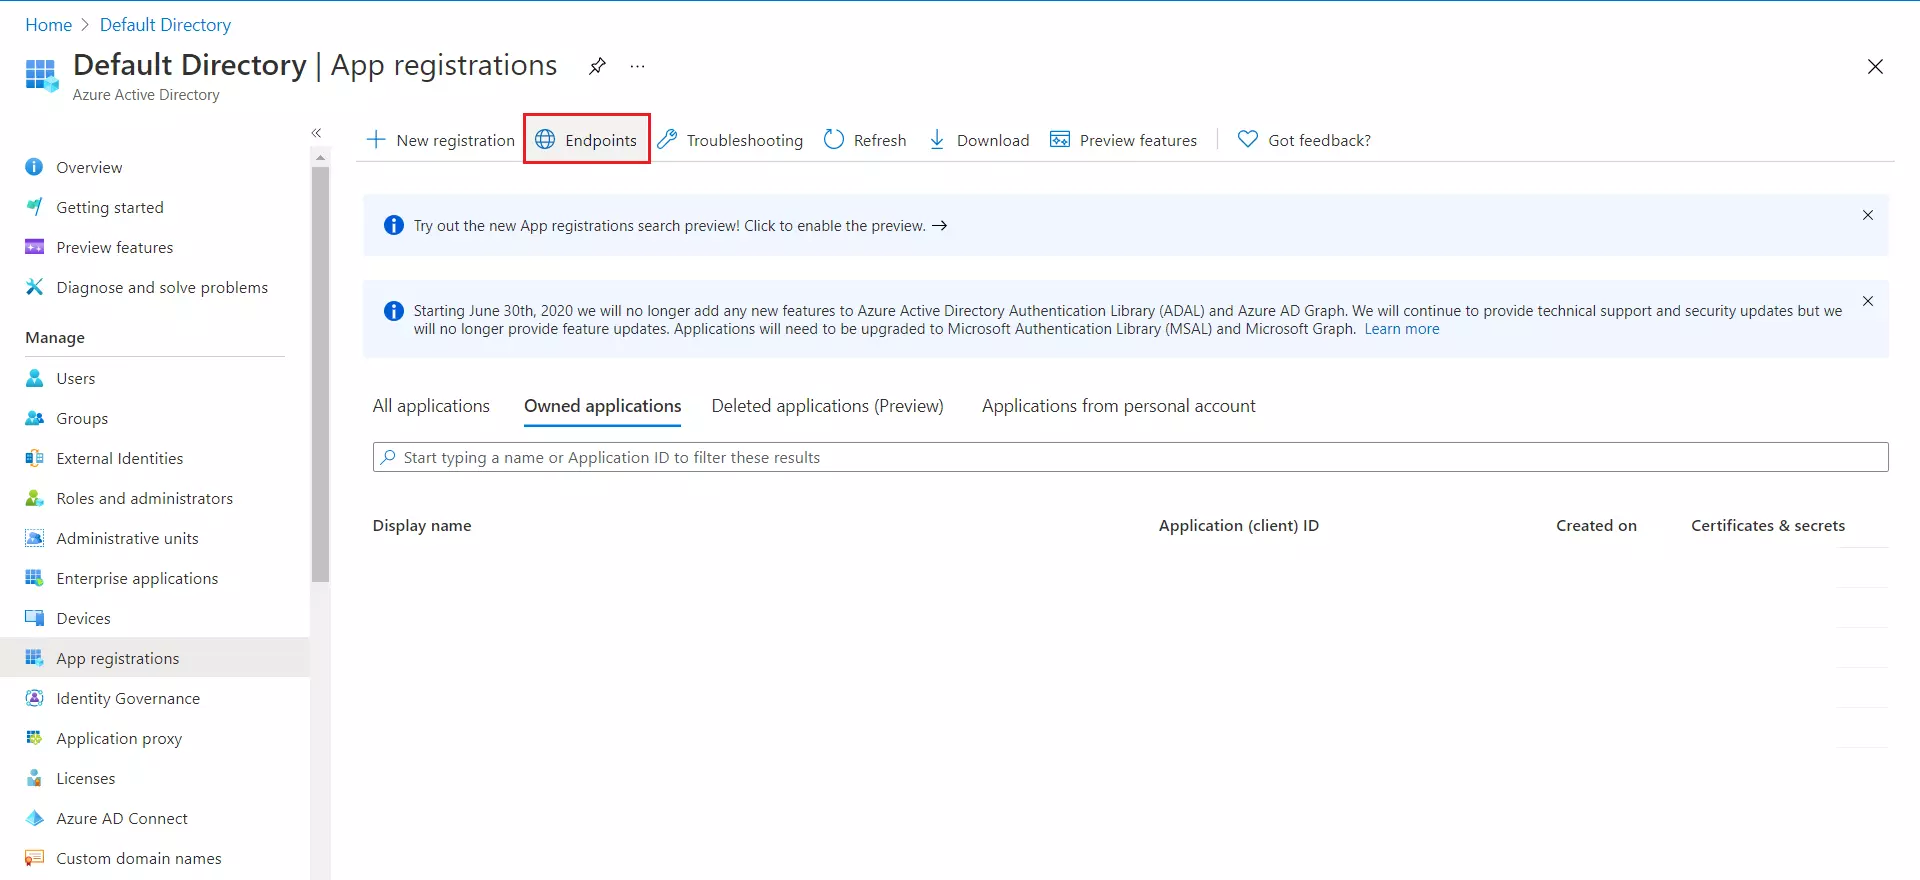
- Go back to Azure Active Directory ⇒ App Registrations window and click on Endpoints.
- This will navigate up to a window with multiple URLs.
- Copy the Federation Metadata document URL to get the Endpoints required for configuring your Service Provider.
- You have successfully configured Azure AD as SAML IdP ( Identity Provider) for achieving SSO login into your Service Provider Site.
NOTE: Please ensure that the SP Entity ID value from the Service Provider Metadata tab doesn't have a trailing slash('/'). If SP Entity ID has a trailing slash then update it by removing the trailing slash from the SP EntityID / Issuer field under the Service Provider Metadata tab of the plugin, enter the updated value at Azure and click on the Save button.

Trending searches:
Hello there!
Need Help? We are right here!
