Centrify as IDP
Step 1: Setup Centrify as Identity Provider
Follow the steps below to configure Centrify as an Identity Provider
 Login as Administrator
- Log into Centrify as an Administrator and go to Apps from the NavBar.
- Click on Add Web Apps
Configure SAML App
- In the pop-up, click on Custom tab and then click on the Add button next to SAML.
- In the new SAML App that you created under Application Settings section enter ACS URL as provided in the Step 1 of the plugin under SP Info tab.
- Under User Access section select roles that can access this app
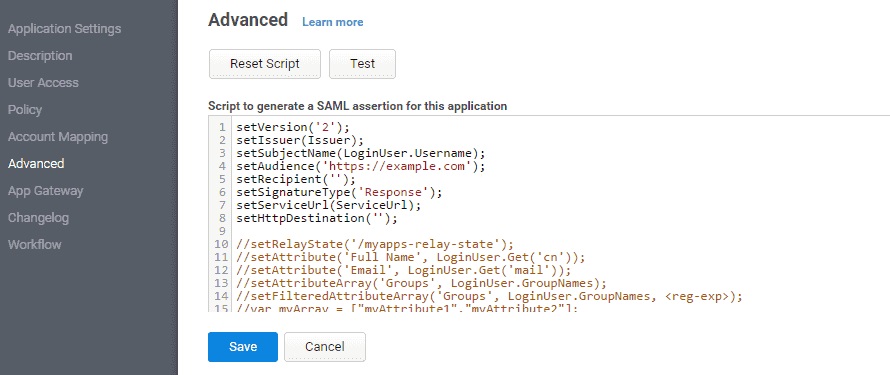
- Under Advanced section pass the following parameters to the functions in the code:
- Click on Save button.

| setAudience() | SP-EntityID / Issuer from Step1 of the plugin under SP Info Tab. E.g: setAudience('https://example.com') |
| setRecipient() | Recipient URL from Step1 of the plugin under SP Info Tab. E.g: setRecipient('https://example.com/plugins/servlet/saml/auth') |
| sethttpsDestination() | Destination URL from Step1 of the plugin under SP Info Tab. E.g: sethttpsDestination('https://example.com/plugins/servlet/saml/auth') |
×
![]()
Trending searches:
Hello there!
Need Help? We are right here!
