
Steps to Configure the ASP.NET SAML 2.0 Connector
Step 1: Setup Connector for application on IIS.
- Extract the downloaded asp-net-saml-sso-connector zip file to get ASP.NET SAML 2.0 Connector.
- Add the connector as separate application on IIS
- To Add Application in IIS Manager, copy the extracted folder to the following path: C:\inetpub\wwwroot.
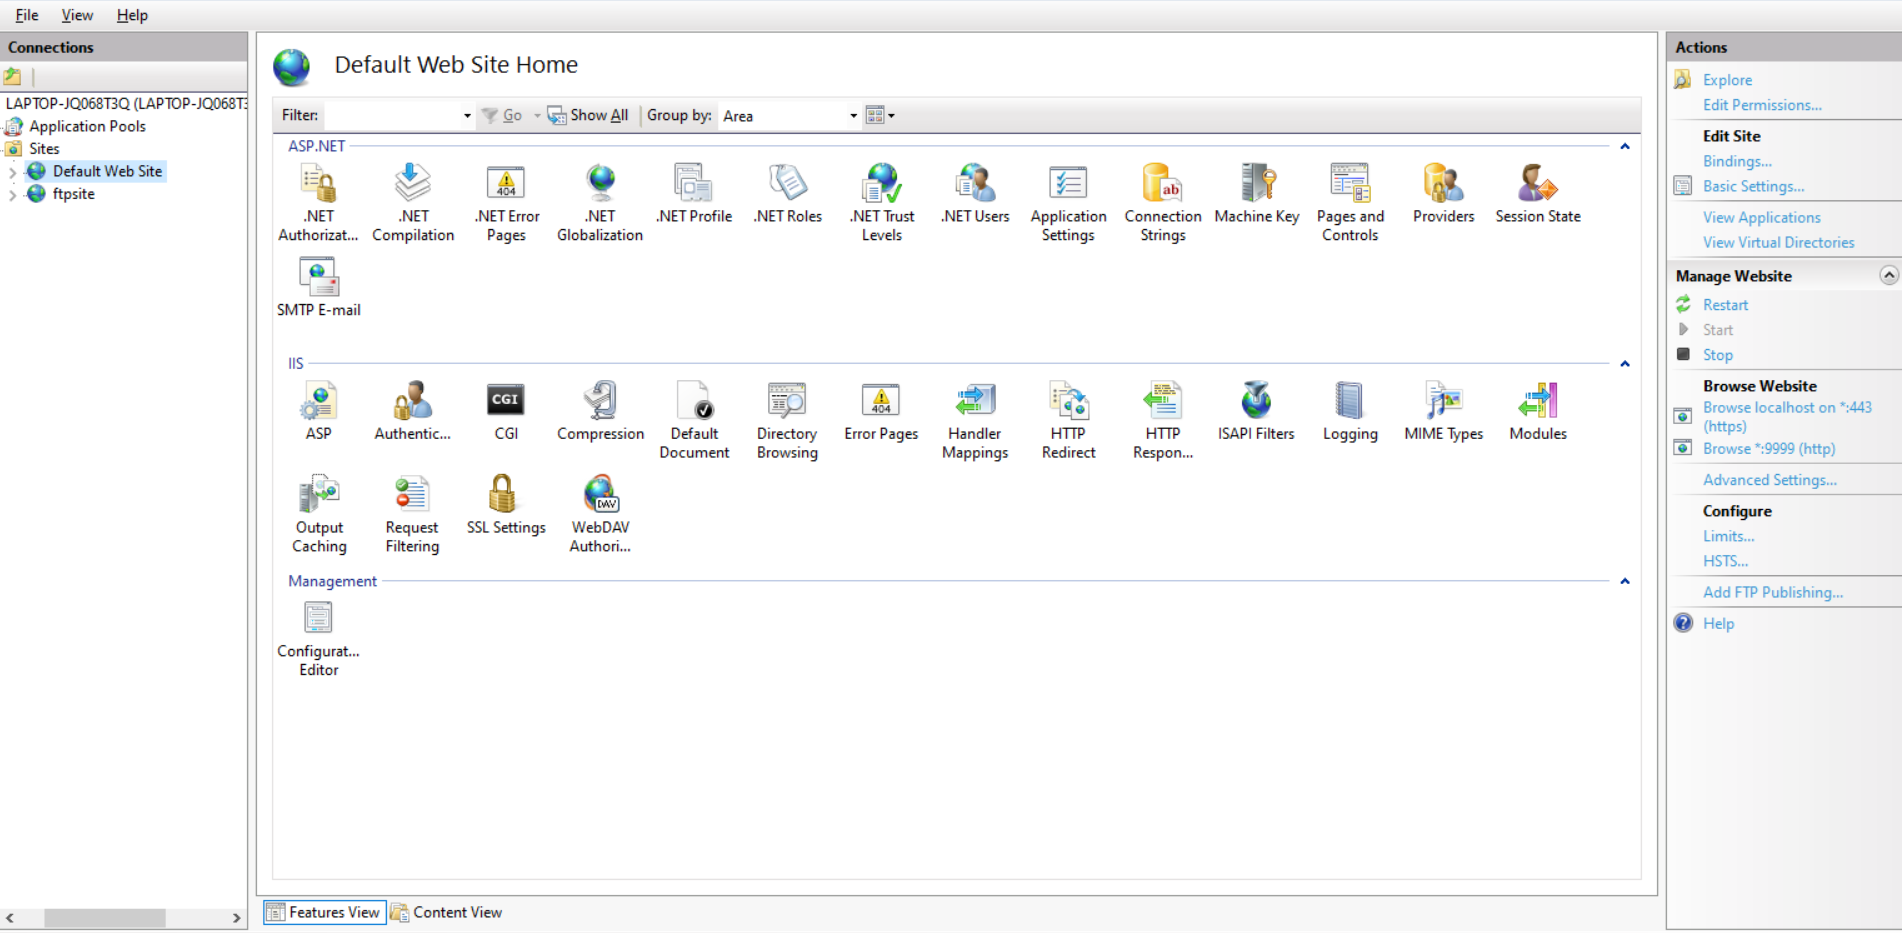
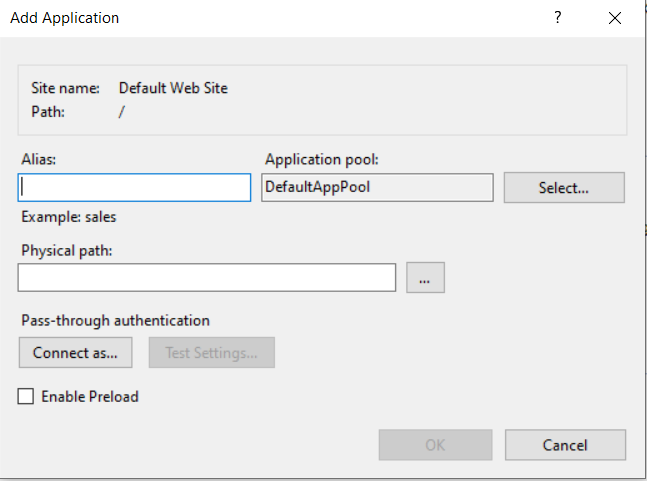
- Open IIS manager.In left panel right click on your site and click Add Application.
- Add Alias Name for your application. For example: ssoapp
- Give the Physical path where you have copied the Application: C:\inetpub\wwwroot\asp-net-saml-sso-connector-xxx.
Step 2: Steps to give authority/permission to users to use SAML Connector.
- Go to this path C:\inetpub\wwwroot\
- Right click the asp-net-saml-sso-connector-xxx and select Properties
- Select the Security tab and click the Edit button.
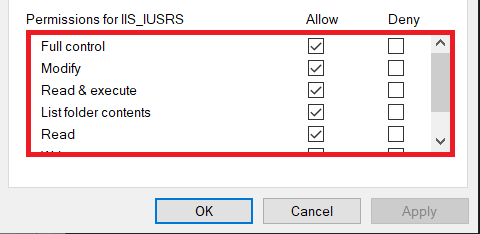
- Select IIS_IUSRS in under Group or Usernames option.
- Give Full Control permission for IIS_IUSRS container as shown in the figure below:
Step 3: Open miniOrange SAML ASP.NET Connector on Browser
- Open any browser and go to the following link: https://<new-application-base-url>/.
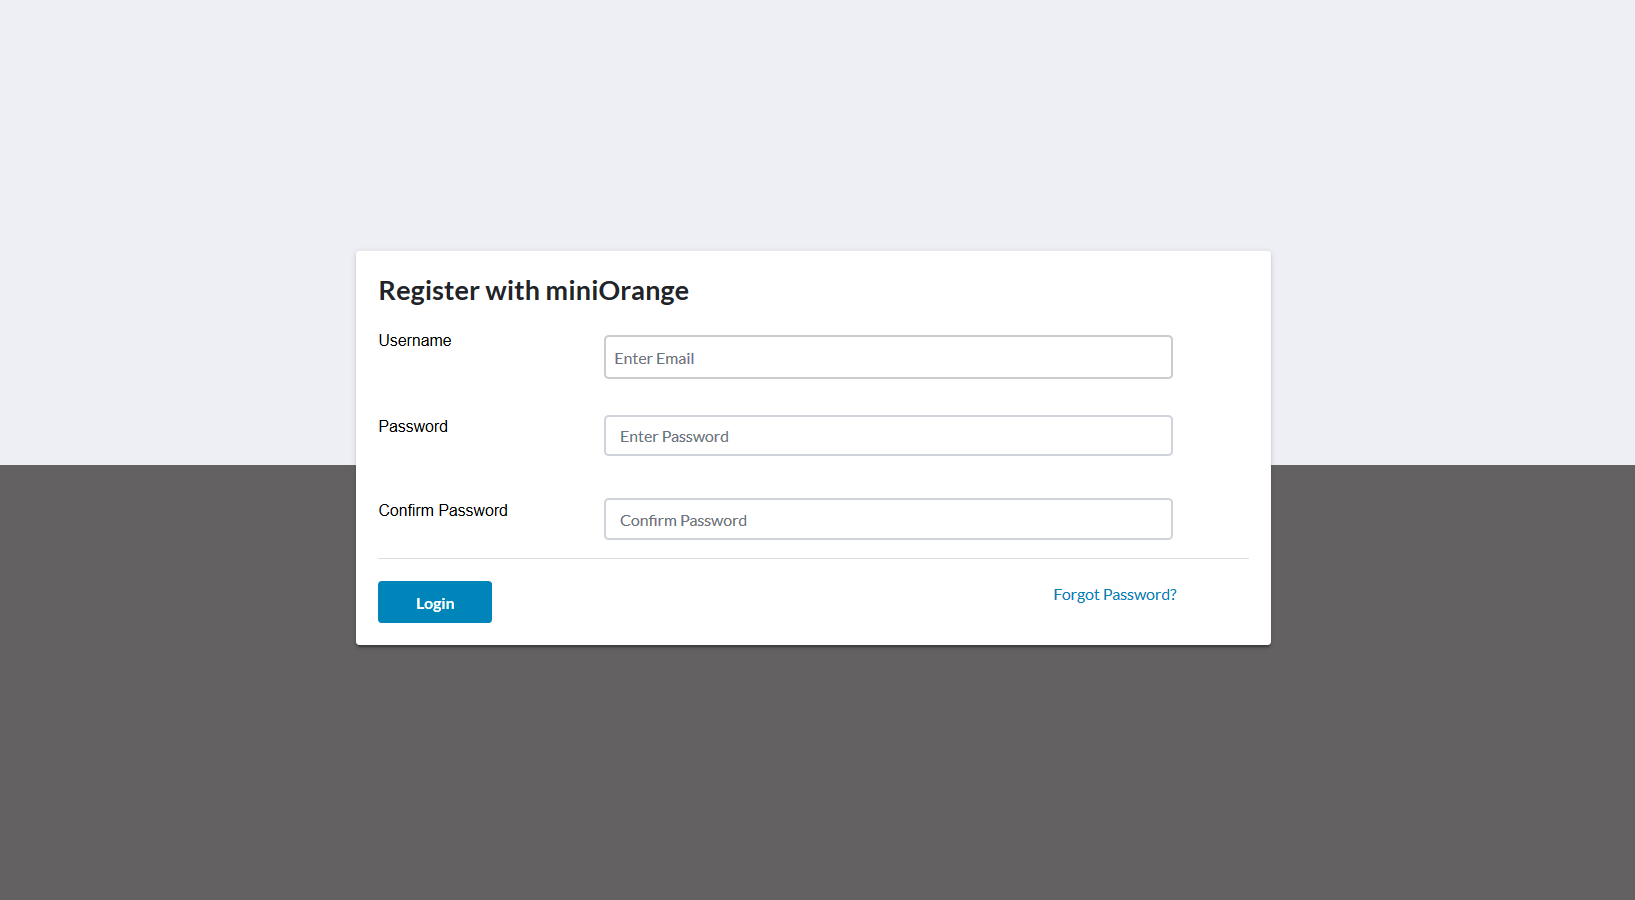
- Login or Register to SAML connector in order to access the connector's admin dashboard.
Step 4: Configure your Identity Provider
- You need to provide SP Entity ID and ACS URL values while configuring your Identity Provider. Just copy and paste the SP Entity ID and ACS URL from connector to your IdP configuration page.You can refer to the image below.
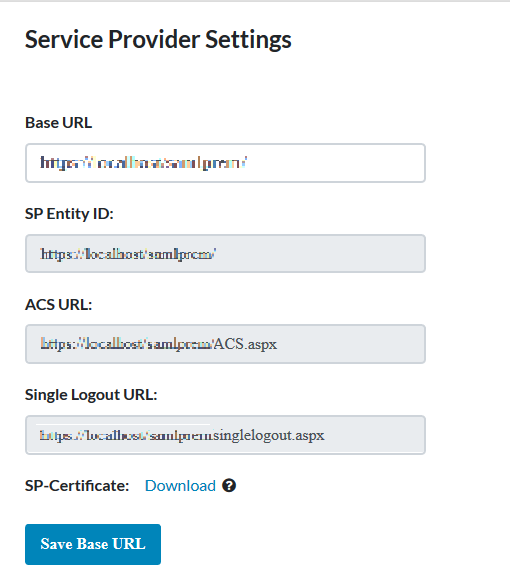
Step 5: Configure your Service Provider
- After configuring your Identity Provider, it will provide you with IDP Entity ID, IDP Single Sign On URL and x.509 Certificate. Configure these values under IDP Entity ID, Single Sign-On Url and SAML X509 Certificate fields respectively.
- Click Save to Save your IDP details.
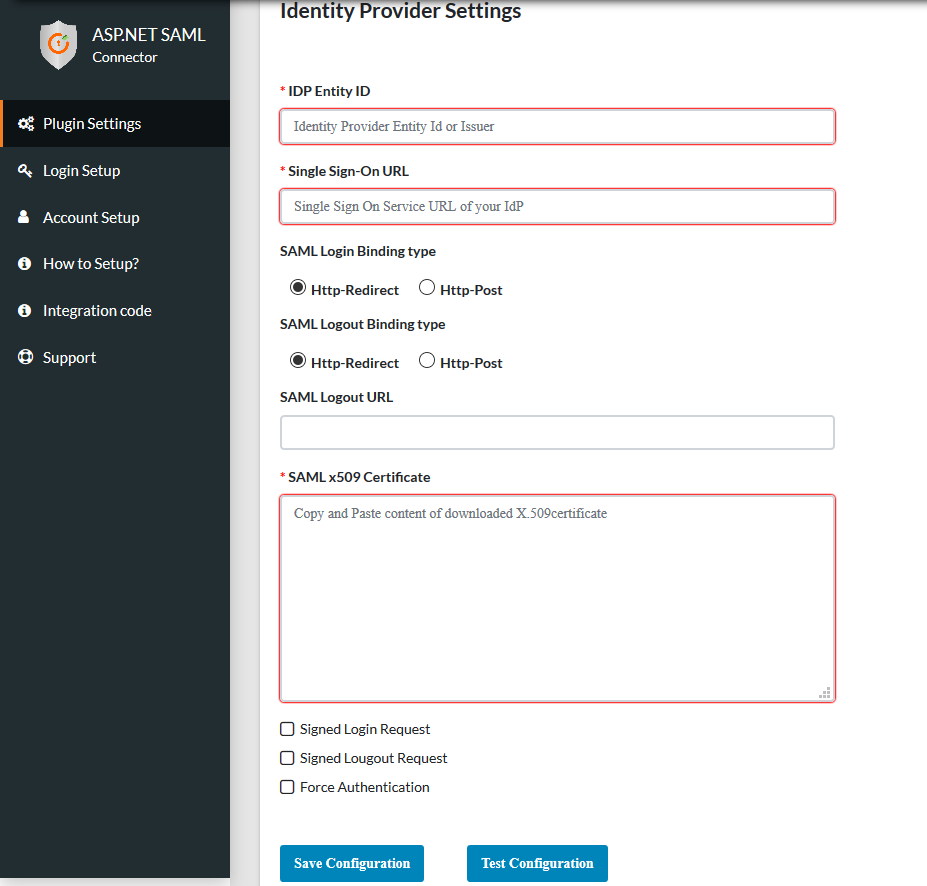
Step 6: Test Configuration
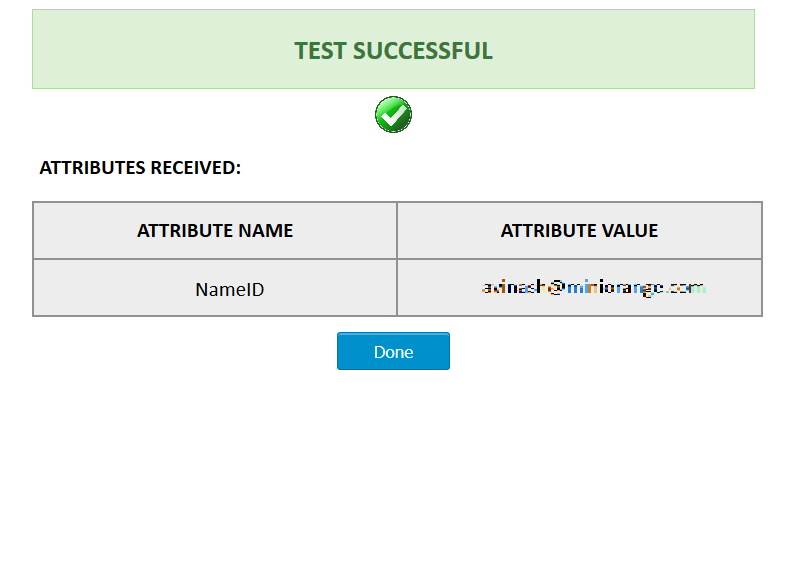
- Click on Test Configuration button to test whether the connector is configured correctly or not.
- The below Screenshot shows a successful result.
Step 7: Attribute Mapping
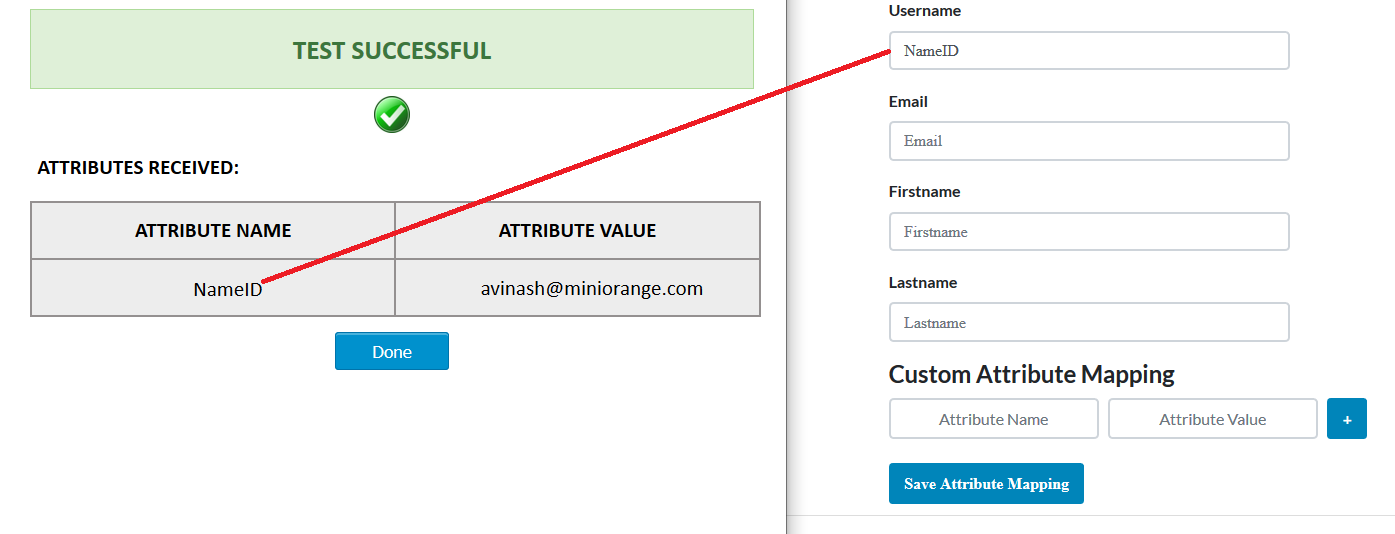
- Attribute Mapping helps you to get attributes in your ASP.NET application received from your IdP and map them to your user attributes in application.
- Attributes received in successful test configuration are used for attribute mapping.
- You can refer to the below image for attribute mapping:
Step 8: Integration Code
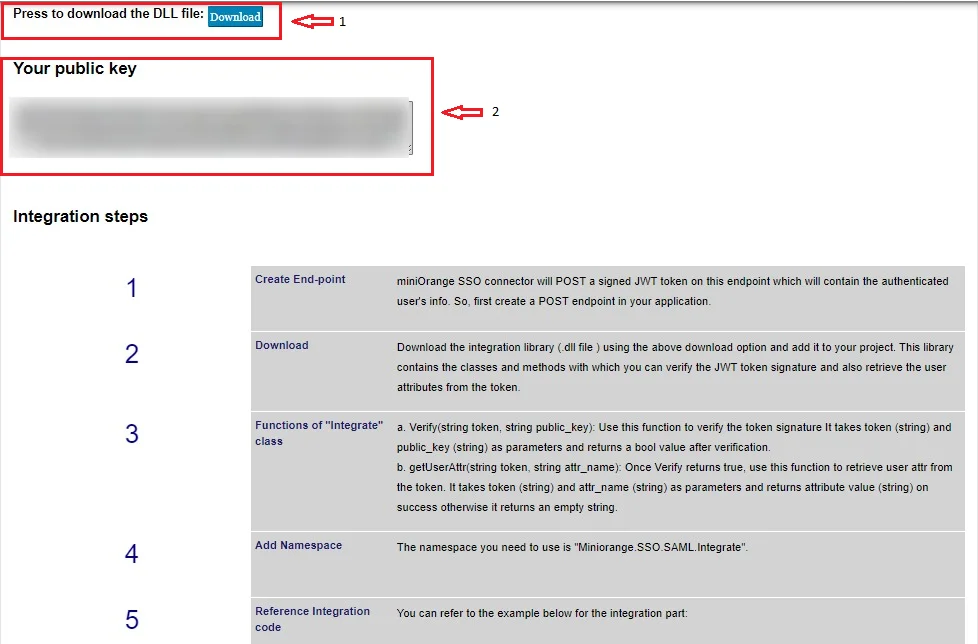
- miniOrange SSO connector will POST a signed JWT token on this endpoint which will contain the authenticated user's info. So, first create a POST endpoint in your application.
- Download the integration library (.dll file ) using the download option in the integration tab and add it to your project. This library contains the classes and methods with which you can verify the JWT token signature and also retrieve the user attributes from the token.
- Use string token, string public_key function to verify the token signature.It takes token (string) and public_key (string) as parameters and returns a bool value after verification.
- Once the verification returns true, then use getUserAttr(string token, string attr_name) function to retrieve user attributes from the token. It takes token (string) and attr_name (string) as parameters and returns attribute value (string) on success otherwise it returns an empty string.
- Add the namespace as "Miniorange.SSO.SAML.Integrate"
-
You can refer to the example below for the integration part:
Integrate intgtr= new Integrate(); // create instance for Integrate class
string public_key = "1wEaPr7h34Ts+DbgPytEqwkcJlybYwOTyBVD4GryebjSIF....................";
//Your public key displayed above.
string token = Request.Form["token"];
string username ="";
if (!String.IsNullOrEmpty(token)) {
// Verifying if the token is received from the trusted source. if ( intgtr.Verify(token, public_key))
{ username = intgtr.getUserAttr(token, "userid"); // retrieve the attribute value using getUserAttr method }
} // using the received attributes from token you can create the session for that user. - You can also refer the below image for DLL file and Public Key.
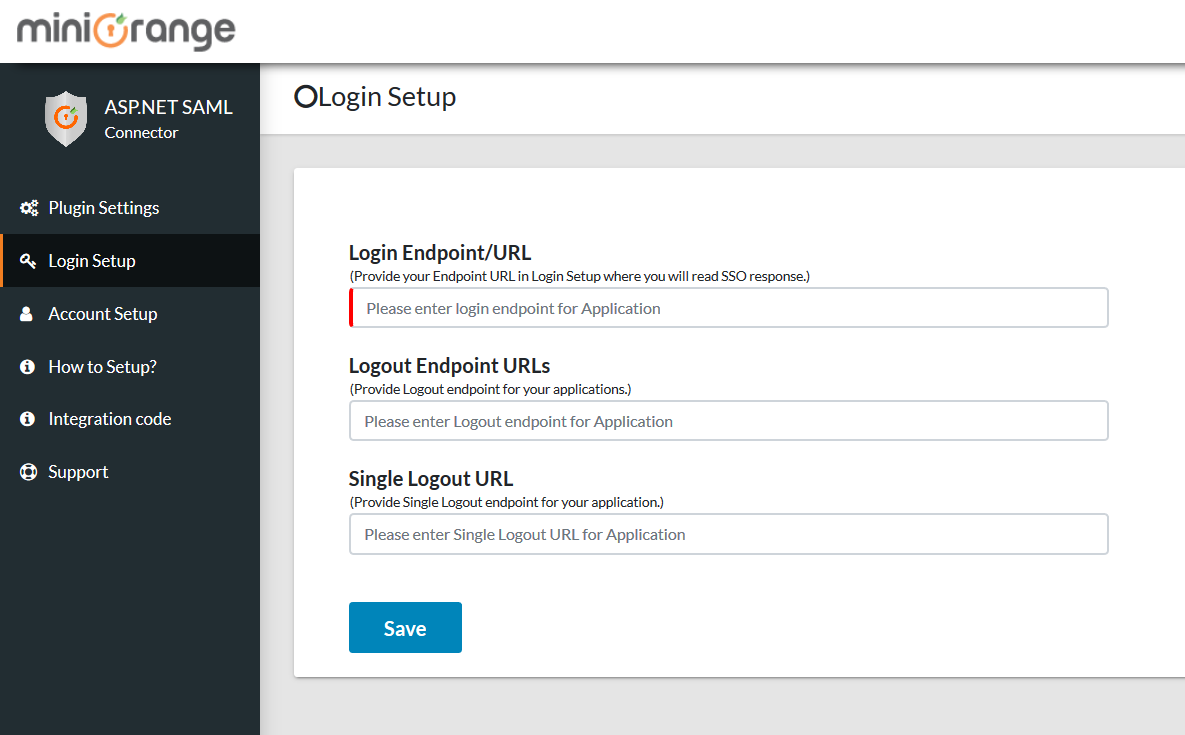
Step 9: Login Setup
- Provide the created endpoint URL for your ASP.NET application in Login Setup where you will read the SAML response.
- Click on the Save button.
Step 10: Add following link in your application for Single Sign-On (SSO)
-
Use the following URL as a link in your application from where you want to
perform SSO:
https://<application-base-url>/request.aspx -
For example you can use it as:
<a href="https://<application-base-url>/request.aspx”>Log
        in</a>"
Step 11: Add following link in your application for Single Logout (SLO)
-
Use the following URL as a link in your application from where you want to
perform SLO:
https://<application-base-url>/singlelogout.aspx -
For example you can use it as:
<a
        href="https://<application-base-url>/singlelogout.aspx”>Logout</a>"
You can configure the ASP.NET SAML Single Sign-On (SSO) module with any identity provider such as ADFS, Azure AD, Bitium, Centrify, G Suite, JBoss Keycloak, Okta, OneLogin, SalesForce, AWS Cognito, OpenAM, Oracle, PingFederate, PingOne, RSA SecureID, Shibboleth-2, Shibboleth-3, SimpleSAML, WSO2 or even with your own custom identity provider. To check other identity providers, click here. Secure your ASP.NET MVC applications by performing Single Sign-On (SSO) into them. The miniOrange ASP.NET SAML 2.0 Connector supports C# and Visual Basic languages.
We also provide DNN SAML Single Sign-On (SSO) Connector. Click here to know more.
miniOrange also has modules for integrating with legacy applications like Active Directory, SiteMinder, Radius, Unix, and others. Using SAML, OAuth, OpenID, ADFS, and WSFED protocols, we can help you add login/authentication to your ASP.NET site.
Additional Resources:
- ASP.NET OAuth Single Sign-On (SSO)
- Web3 login for ASP.NET Applications
- DNN SAML Single Sign-On (SSO)
- DNN REST API Authentication
- nopCommerce SAML Single Sign-On (SSO)
- nopCommerce OAuth Single Sign-On (SSO)
- Umbraco SAML Single Sign-On (SSO)
Need Help?
Not able to find your identity provider? Mail us on aspnetsupport@xecurify.comand we'll help you set up SSO into ASP.NET with your custom IDP. For quick guidance (via email/meeting) on your requirement, our team will help you to select the best suitable solution/plan as per your requirement.
Need Help? We are right here!
