Jboss Keycloak as IDP
Step 1: Setup Jboss Keycloak as Identity Provider
Follow the steps below to configure Jboss Keycloak as an Identity Provider.You can use 2 ways to configure the JBoss Keycloak as IDP.
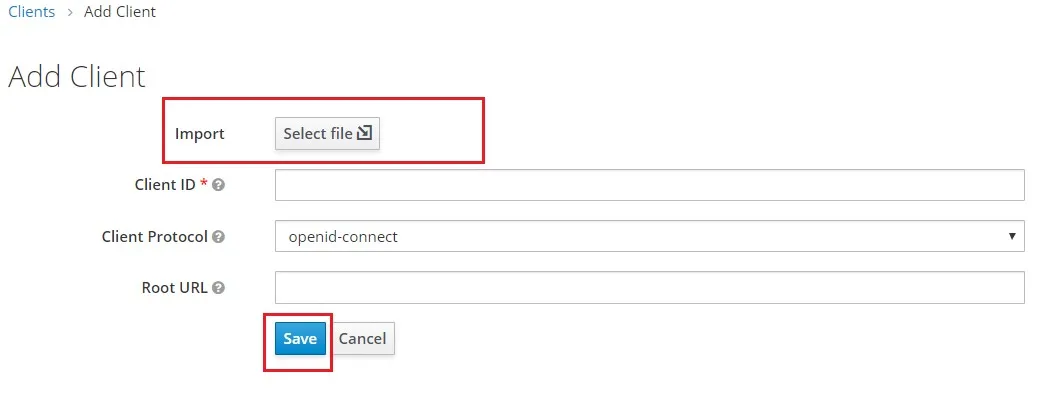
 Method 1: Upload SP Metadata
- In your Keycloak admin console, select the realm that you want to use.
- Click on the Clients from the left nav bar.
- Create a new client/application.
- Click Import File button.
- Upload plugin metadata. (To obtain it, go to the Service Provider Info tab of the plugin, and click on Download Metadata button.
Now, click on Select file from the Add Client tab of keycloak and browse the downloaded metadata file.) - Click on Save.
- Procced to set Mappers .
Method 2: Manual Configuration
- In your Keycloak admin console, select the realm that you want to use.
- Click on the Clients from the left nav bar.
- Create a new client/application.
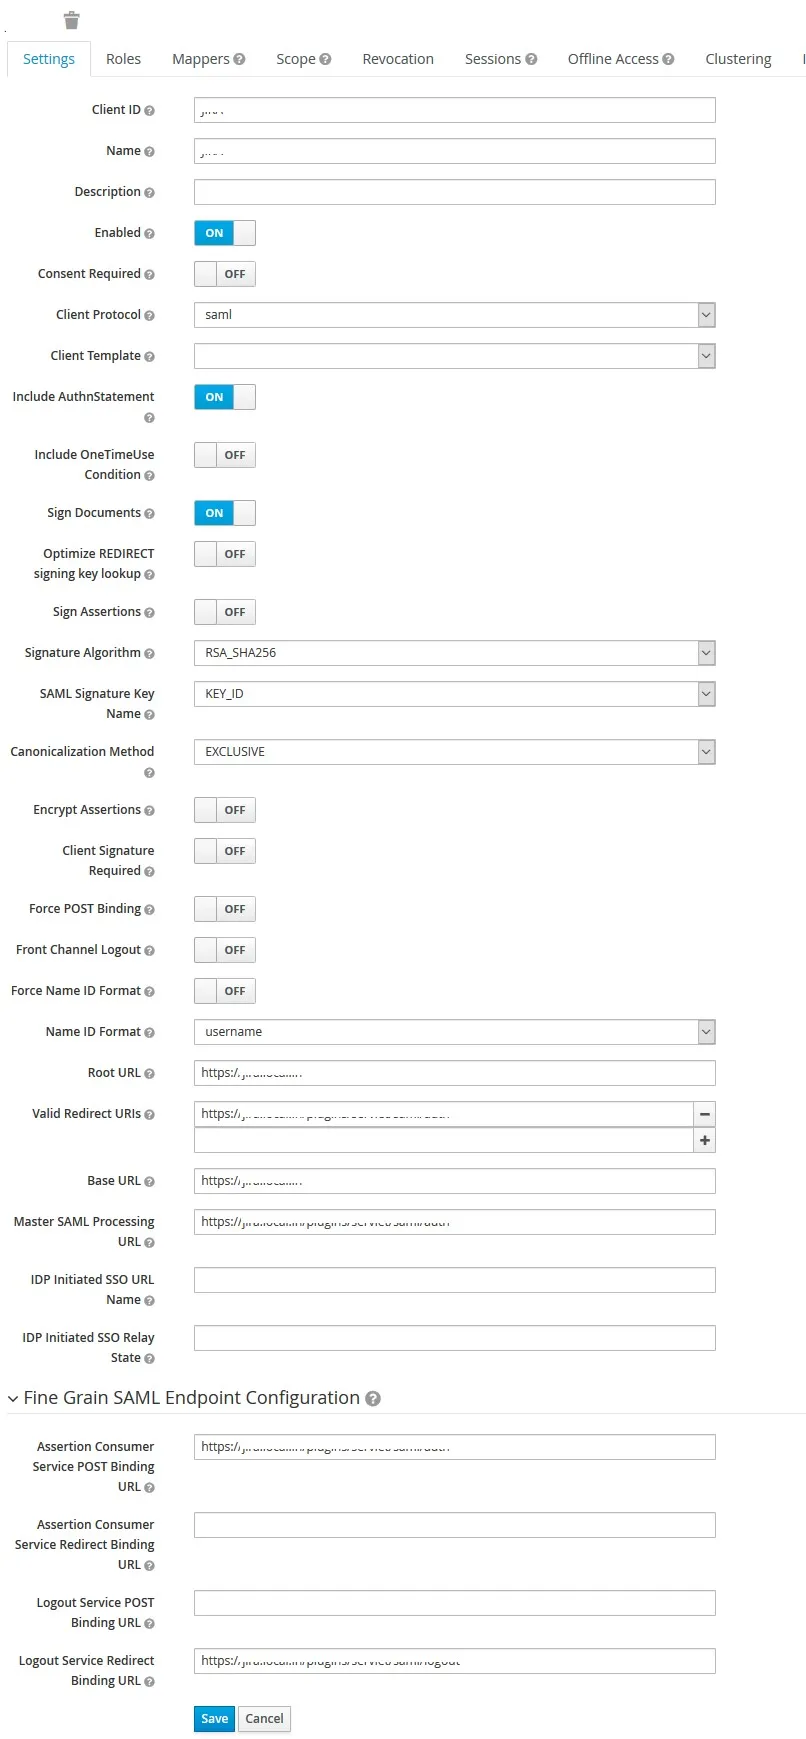
- Configure the following:
Client ID The SP-EntityID / Issuer from the step 1 of the plugin under Configure IDP tab. Name Provide a name for this client Description Provide a description Enabled ON Consent Required OFF Client Protocol SAML Include AuthnStatement ON Sign Documents ON Optimize Redirect signing key lookup OFF Sign Assertions ON Signature Algorithm RSA_SHA256 Encrypt Assertion OFF Client Signature Required OFF Canonicalization Method EXCLUSIVE Force Name ID Format ON Name ID Format Email Root URL Leave empty or Base URL of Service Provider Valid Redirect URIs The ACS (Assertion Consumer Service) URL from the step 1 of the plugin under configure IDP tab.
- Under Fine Grain SAML Endpoint Configuration, configure the following:
- Click on Save.
| Assertion Consumer Service POST Binding URL | The ACS (Assertion Consumer Service) URL from the step 1 of the plugin under Configure IDP tab. |
| Logout Service Redirect Binding URL | The Single Logout URL from the step 1 of the plugin under Configure IDP tab. |
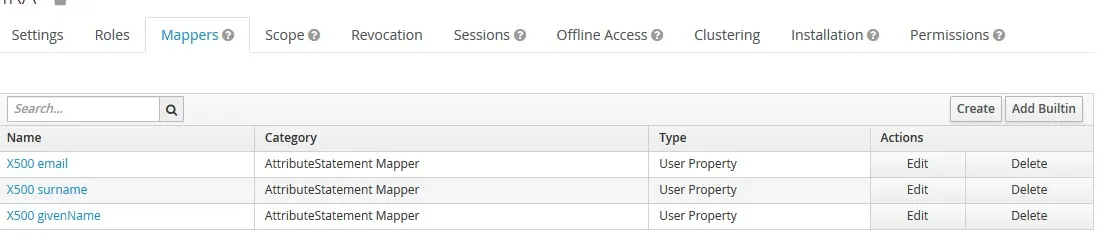
Add Mappers
- Add the following attributes in the Mappers tab.
- Click on Add Builtin and add the following option.
Download IDP Metadata
- Go to Realm Settings, click on SAML 2.0 Identity Provider Metadata endpoint link provided under Genaral tab.
- Download it and keep it handy. It will be used to configure the plugin.
×
![]()
Trending searches:
Hello there!
Need Help? We are right here!
