Jira OAuth/OpenID Server
The Jira OAuth/OpenID server app can be used to allow users to sign in to your client application with their Jira account. Here we will go through a guide to configure an OAuth/OpenID client on your Jira and by the end of this guide, users will be able to login to your application using the Jira credentials.
Pre-requisites
To integrate your OAuth/OpenID Client Application with Jira Server, you need the following items:
- Jira should be installed and configured.
- Admin credentials are set up in Jira.
Download And Installation
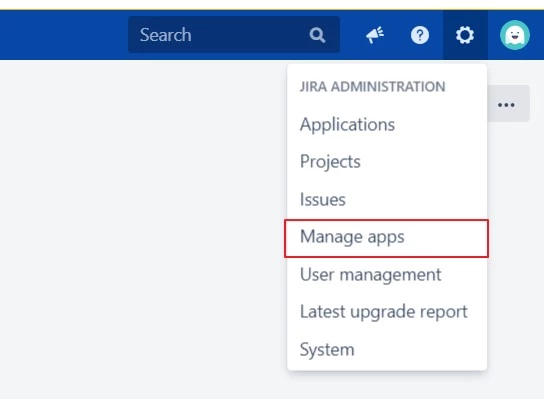
- Log into your Jira instance as an admin.
- Navigate to the settings menu and Click Manage Apps.
- Click Find new apps or Find new add-ons from the left-hand side of the page.
- Locate miniOrange OAuth/OpenID Server for Jira via search.
- Click Try free to begin a new trial or Buy now to purchase a license.
- Enter your information and click Generate license when redirected to MyAtlassian.
- Click Apply license.
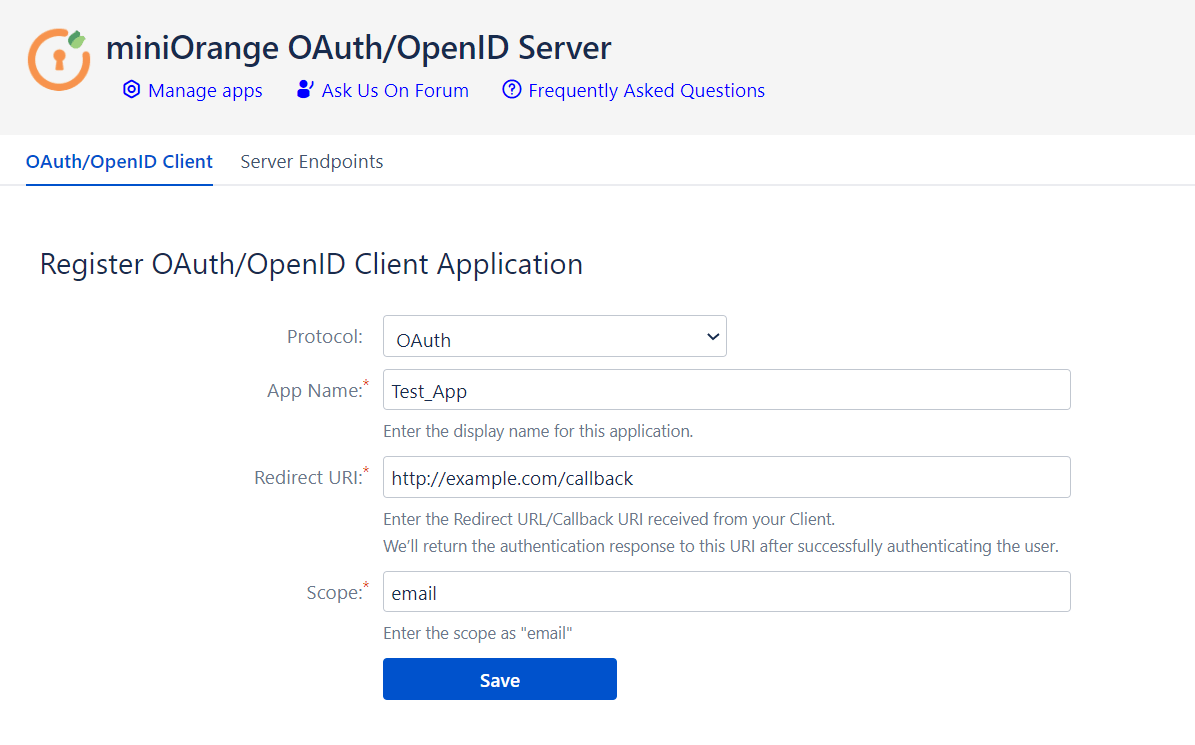
Step 1: Register an OAuth/OpenID client app:
- Open the plugin configurations.
- Go the OAuth/OpenID Client tab.
- Select the Protocol in the dropdown.
- Enter an App Name as you want.
- Copy Redirect / Callback URL from your OAuth/OpenID client and enter it under Redirect URI. It is the URL where users will be redirected after they are authenticated.
- Enter Scope as “email” (If you have selected OAuth protocol).
- Click on Save.
Follow the steps given below to register your client application on the Jira OAuth/OpenID server.
Step 2: Configuration on the Client Application:
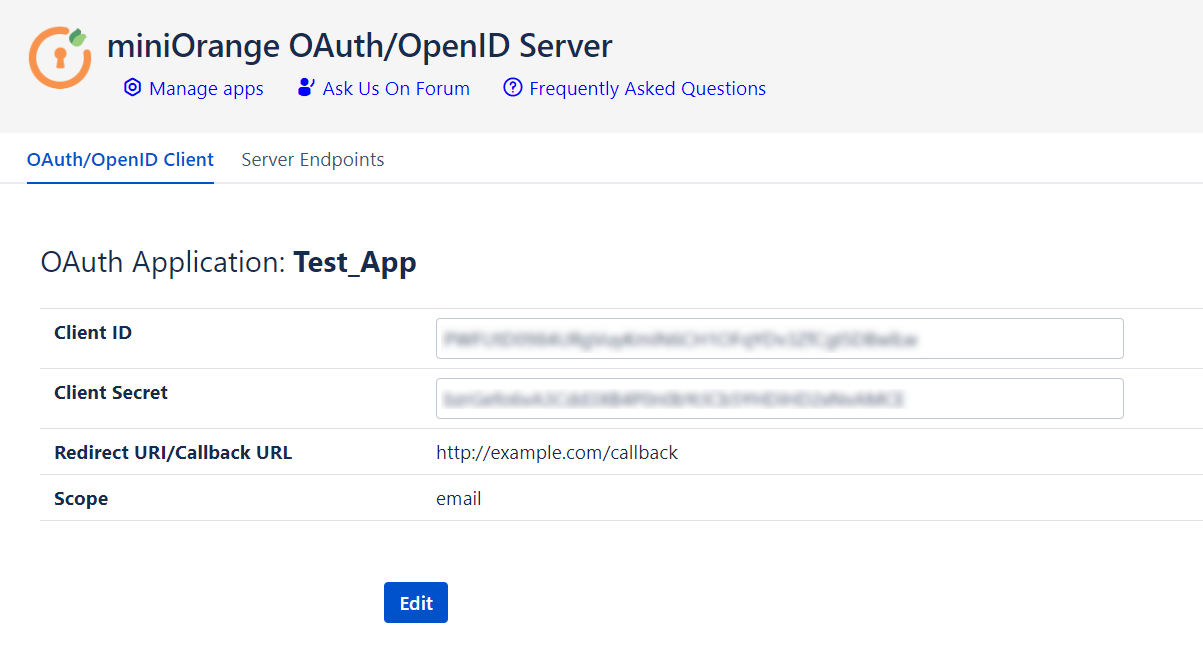
- After saving the client application, the server displays Client ID, Client Secret and Scope.
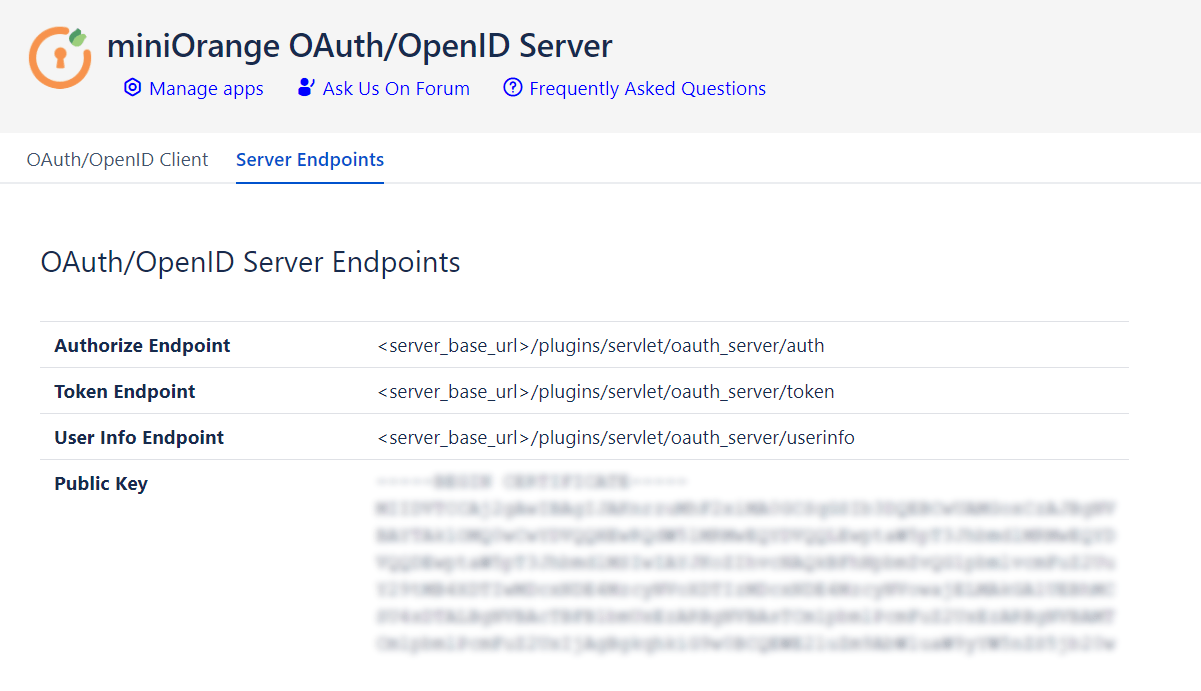
- Navigate to the Server Endpoints to get all the endpoints of the OAuth/OpenId provider and Public Key.
- Note down Client ID, Client Secret, Scope, all the endpoints and Public Key to configure in your OAuth Client.
-
Important Note:
Sending the client credentials parameters to the Token Endpoint in HTTP Body is required.
| Client ID | This is used to identify the client application on the server (Configure OAuth/OpenID Client tab) |
| Client Secret | This is used by the Client to authenticate to the server (Configure OAuth/OpenID Client tab) |
| Scope | email - for OAuth clients. openid - for OpenID clients. |
| Authorization Endpoint | This is used by client to receive authorization code. (Server endpoints tab) |
| Token Endpoint | This is used by the clients to receive tokens. (access token and ID Token) (Server endpoints tab) |
| User Info Endpoint | This is used by the Oauth clients to fetch user information.(Server endpoints tab) |
| Public Key | It is used by the client to verify the signature of the OAuth server. (Server endpoints tab) |
Additional Resources
Our Other Apps:
SAML SSO Apps
|
OAuth Apps
|
2FA Apps
|
Crowd Apps
|
REST API Apps
|
Kerberos/NTLM Apps
|
User Sync Apps
|
Bitbucket Git Authentication App | Jenkins SSO | SonarQube SSO
Bitbucket Git Authentication App | Jenkins SSO | SonarQube SSO
If you are looking for anything which you cannot find, please drop us an email on info@xecurify.com
×
![]()
Trending searches:
Hello there!
Need Help? We are right here!
