Setup Guide for Keycloak App
Step 1: Setup Keycloak as OAuth Provider
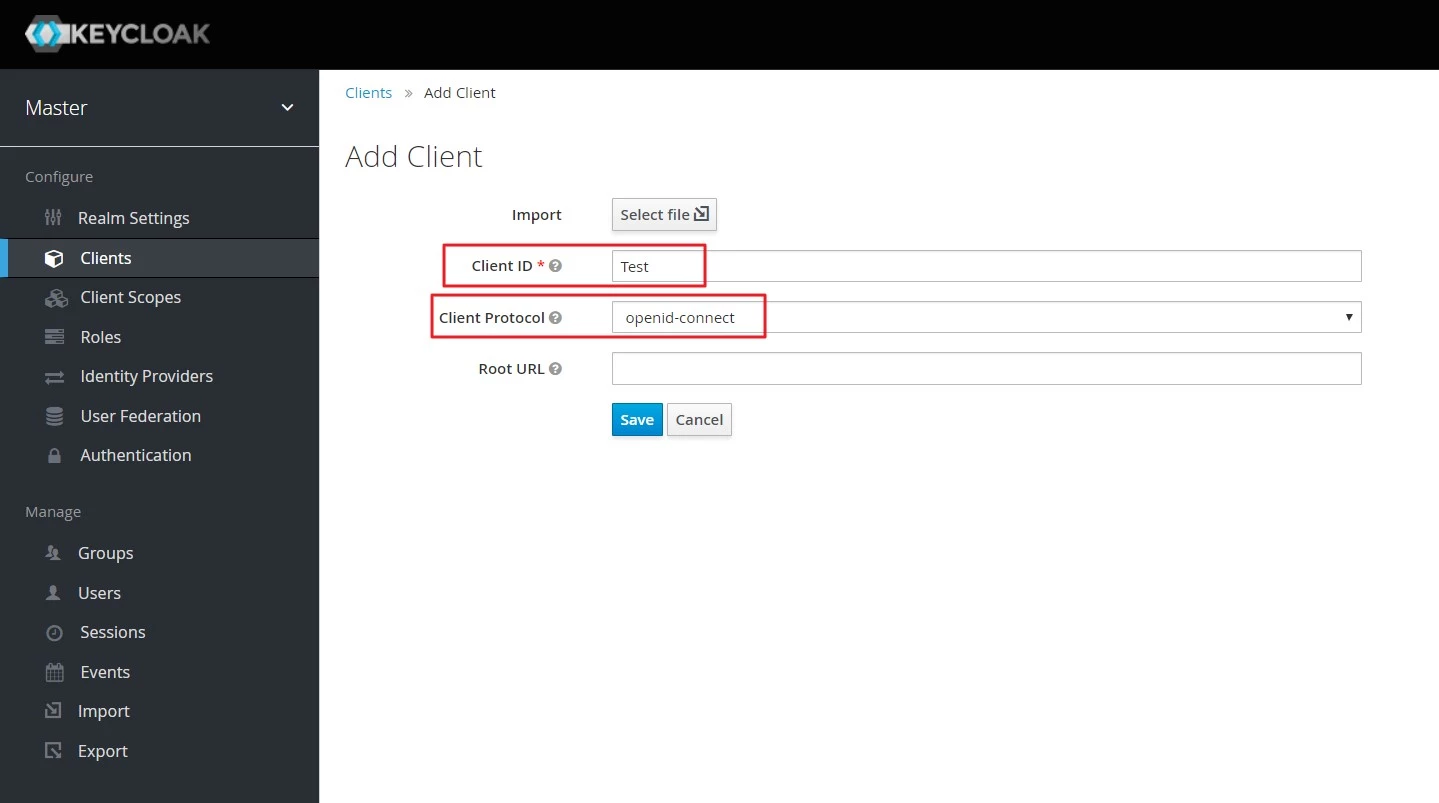
- Create openid client : Login to your Keycloak server. Go to the Clients and click on Create button. Enter client id and select openid-connect as client protocol and select Save.
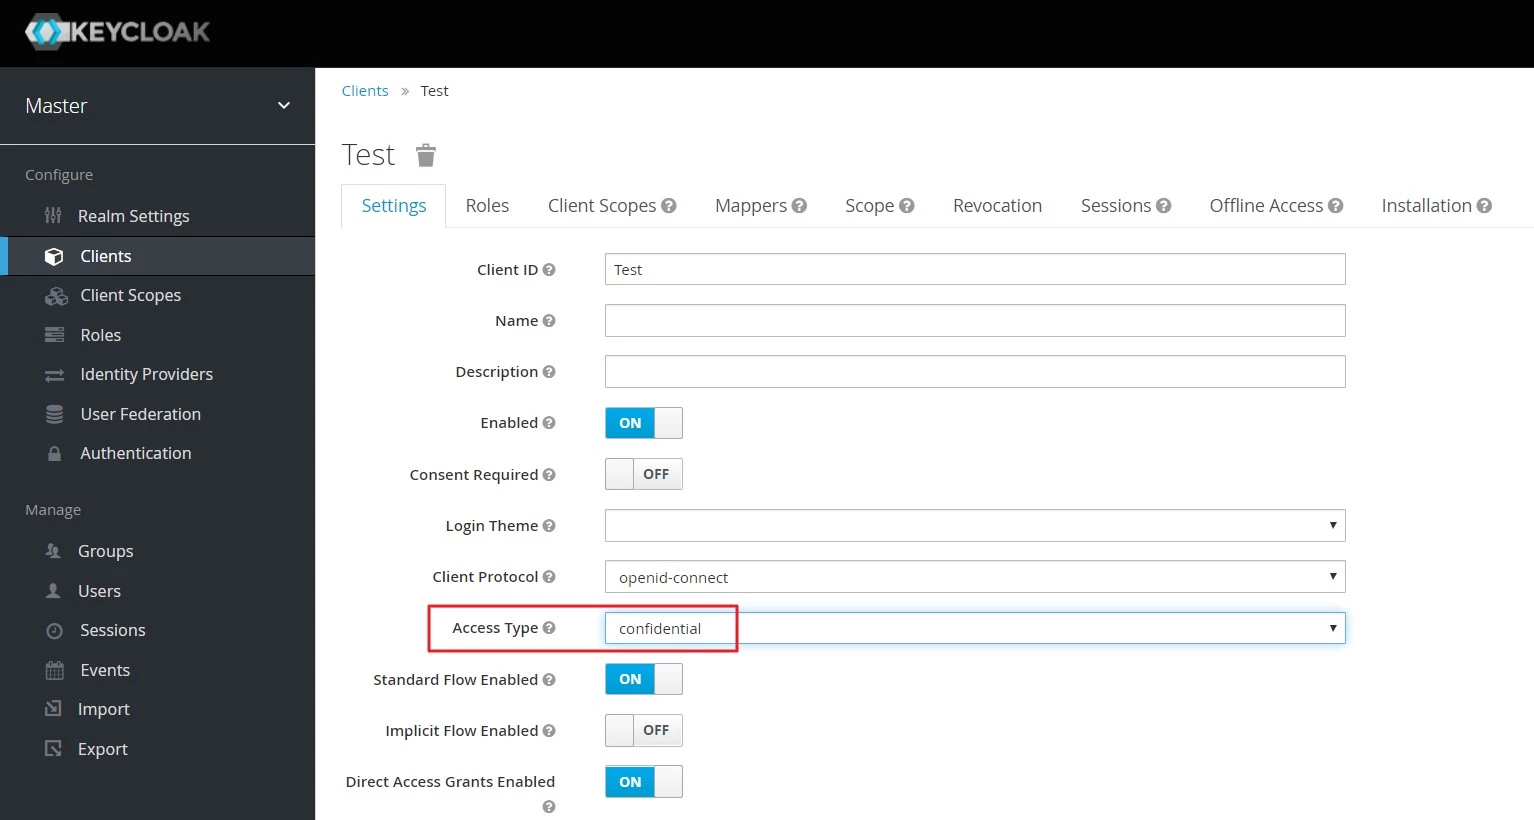
- Change Access type: After client is created change its access type to confidential.
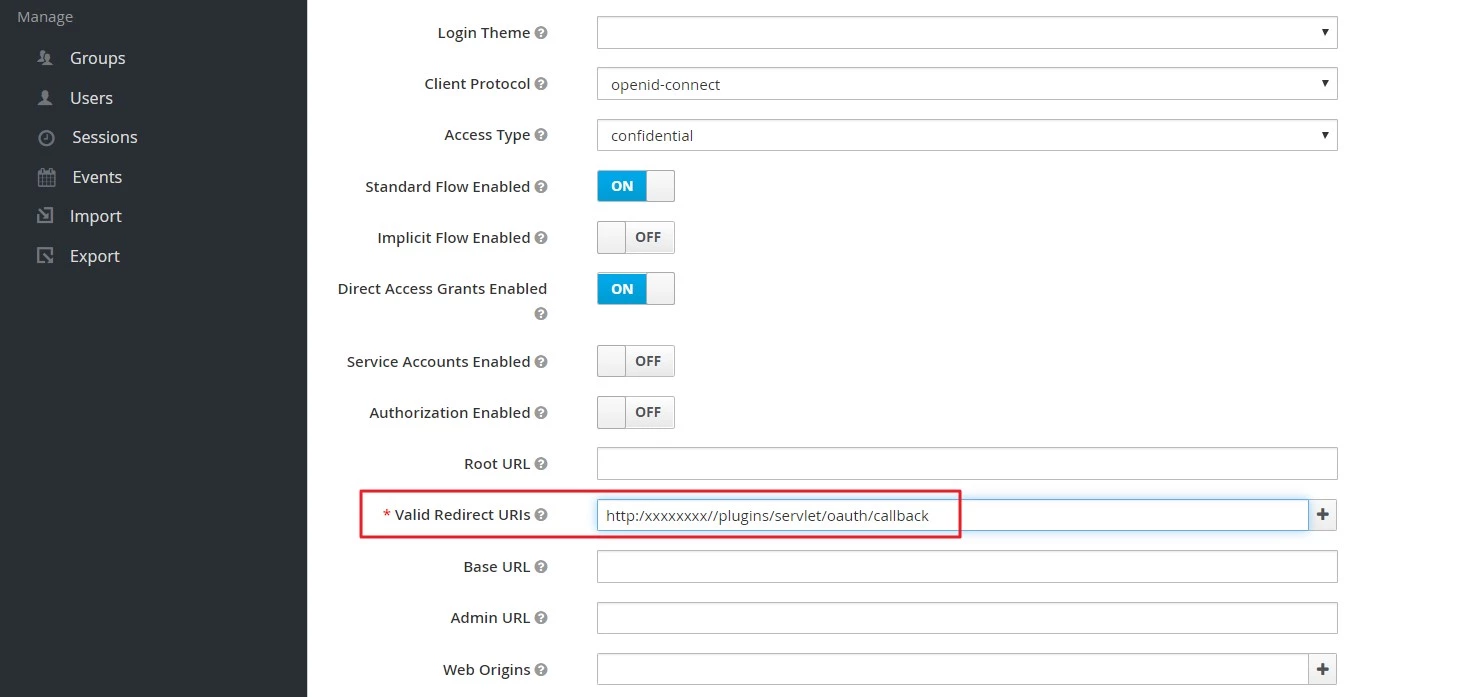
- Enter Valid Redirect URIs :
- Copy the Callback URL from plugin and insert into Valid Redirect URIs field.
- Click on SAVE.
- Keycloak Group Mapper:
- Now, if you want to fetch the user groups you will have to map the client and group membership.
- For that, navigate to the Clients and select the client Id you created, then go to the Mappers tab and click on Create.
- Provide Name, select Mapper Type as Group Membership and enter the Token Claim Name i.e attribute name corresponding to which the groups will be sent.
- Turn off Full group path else group mapping will fail. And then click on Save.
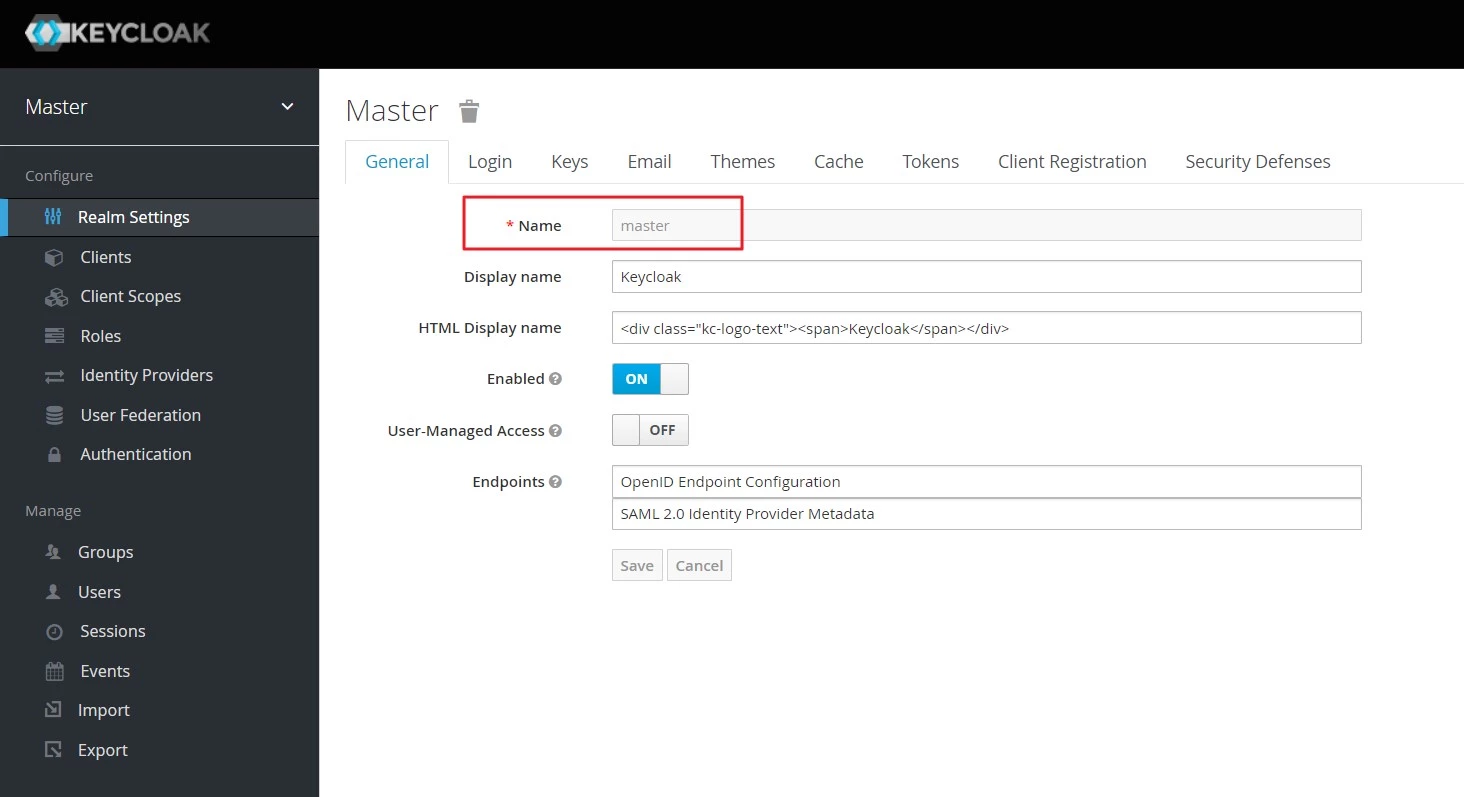
- Realm name: You need a realm name when you set up Keycloak as an OAuth provider, kindly copy it. For example in this case it is Master
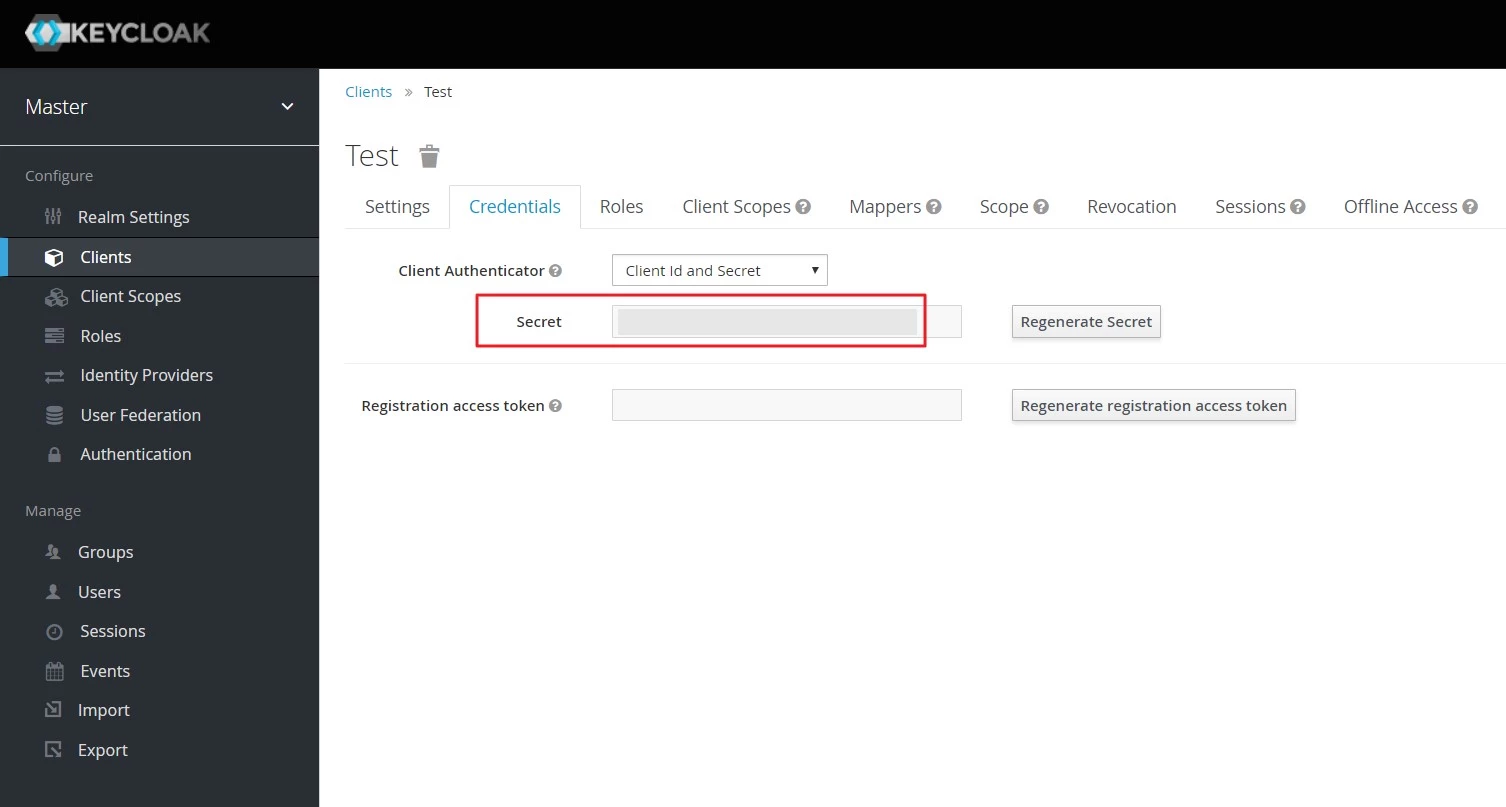
- Get Client Secret: To get Client Secret Navigate to Clients, select Client Id and navigate to the Credentials tab.

×
![]()
Trending searches:
Hello there!
Need Help? We are right here!
