Setup Guide for Salesforce App
Step 1: Setup Salesforce as OAuth Provider
- Login to your SalesForce account.
- Switch to the SalesForce Classic mode from profile menu, and then go to the Setup page.
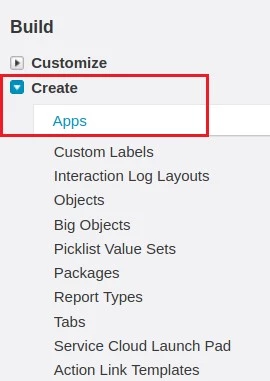
- From the left pane, under Build section go to Create > Apps.
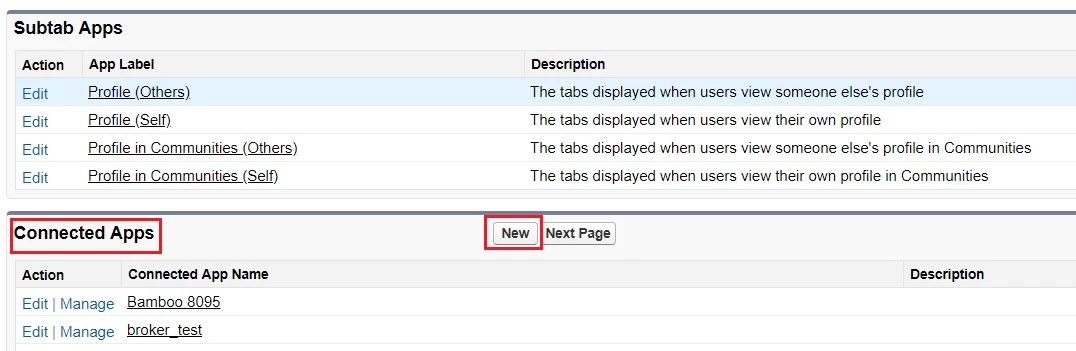
- Scroll down and click on the New button under Connected apps.
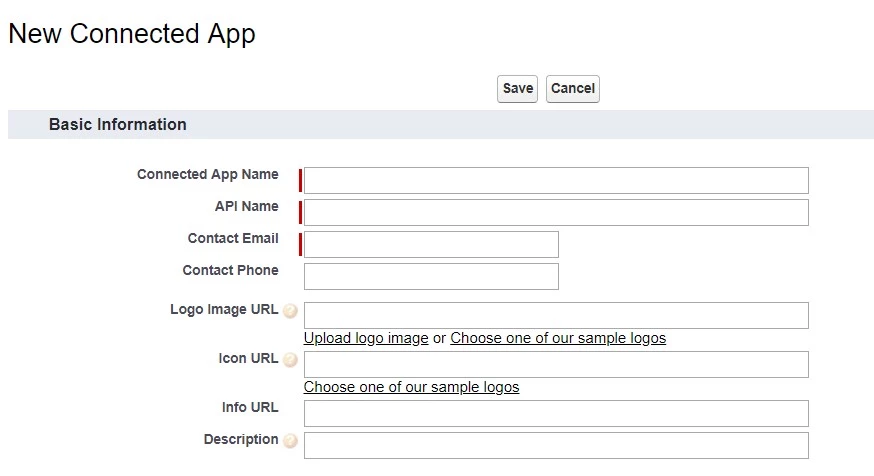
- You will be taken to the application settings page. Enter the required details such as Connected App Name, API Name and Contact Email.
- Check the Enable OAuth Settings checkbox under API(Enable OAuth Settings) section and you will be shown more options to configure.
- Enter the Callback URL (copy it from the plugin), select the Scopes as required and save the settings.
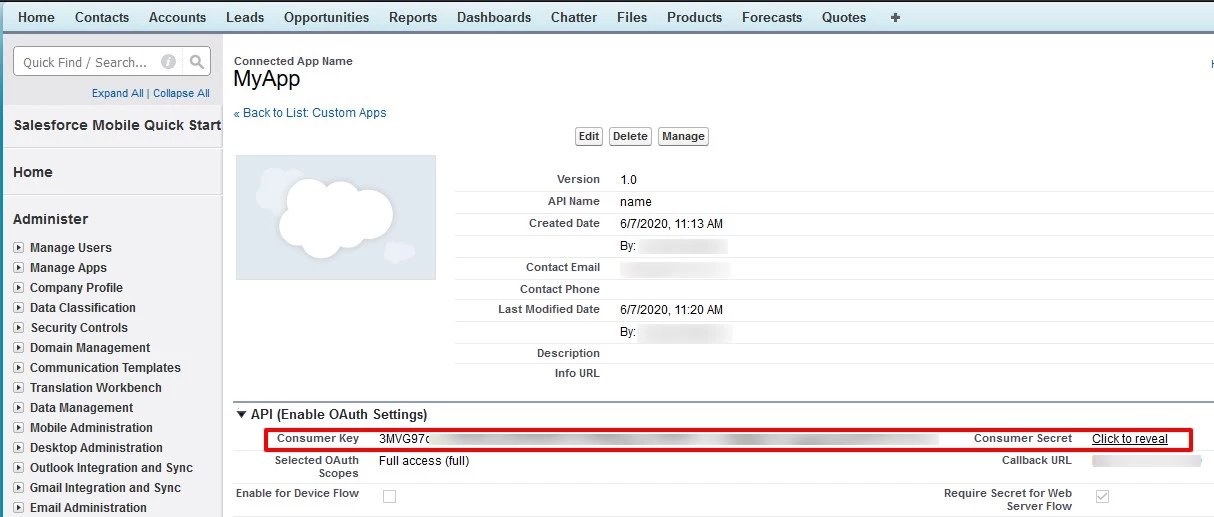
- You will be taken to the Application Management page. Here, you will find Consumer key(Client ID) and Consumer Secret(Client Secret).

×
![]()
Trending searches:
Hello there!
Need Help? We are right here!
