Okta as IDP template
Step 1: Setup Okta as IDP (Identity Provider)
Follow the steps below to configure Okta as IdP
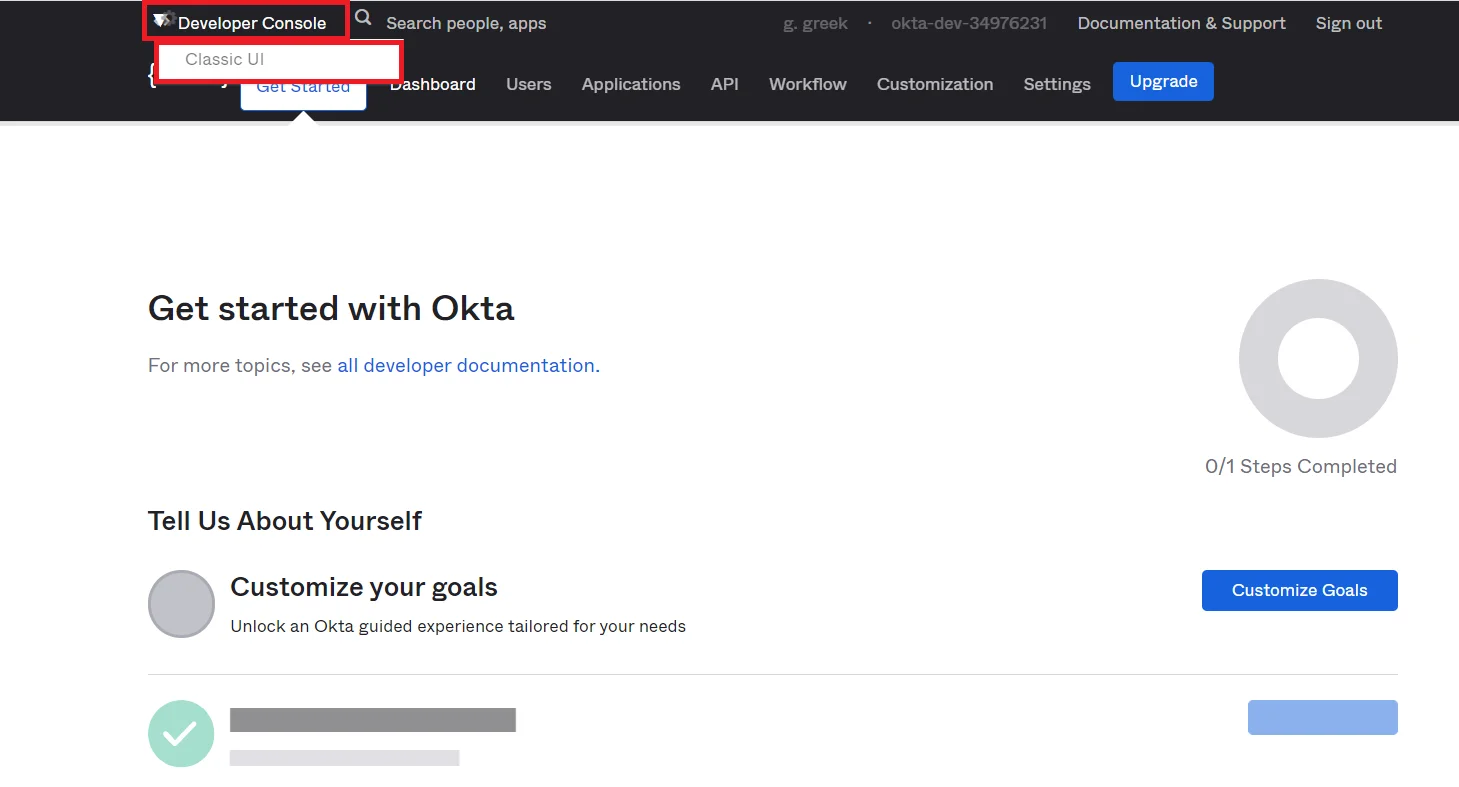
- Login into your Okta dashboard.
- In the Okta navigation bar Click on the Developer Console dropdown and select
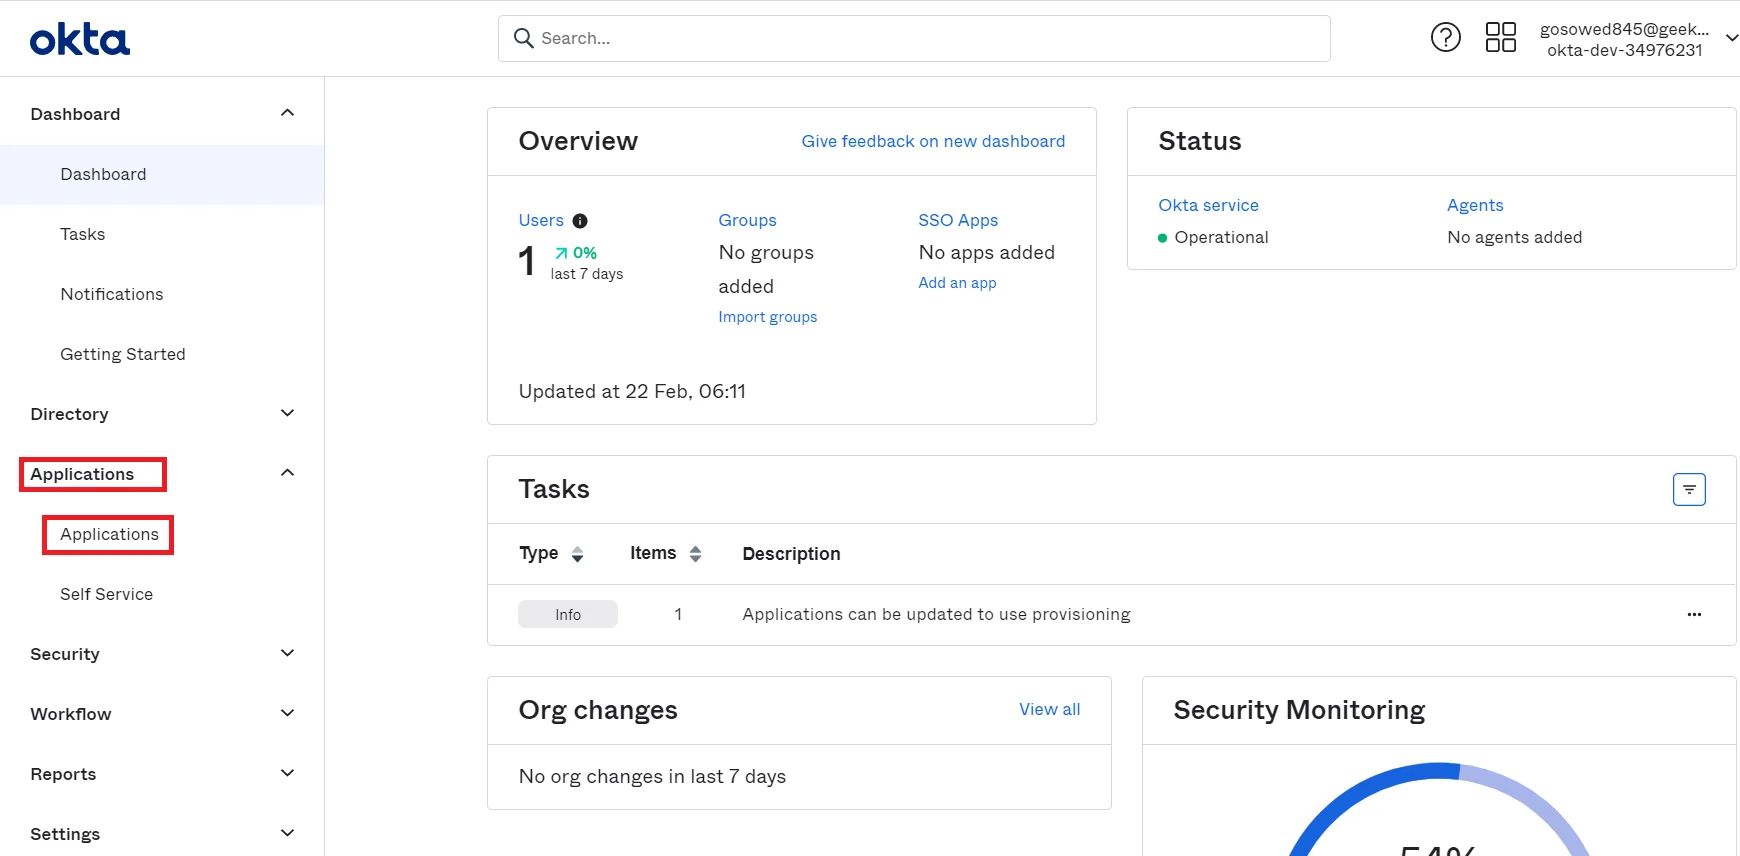
Classic UI . - In the Applications Tab select Applications.
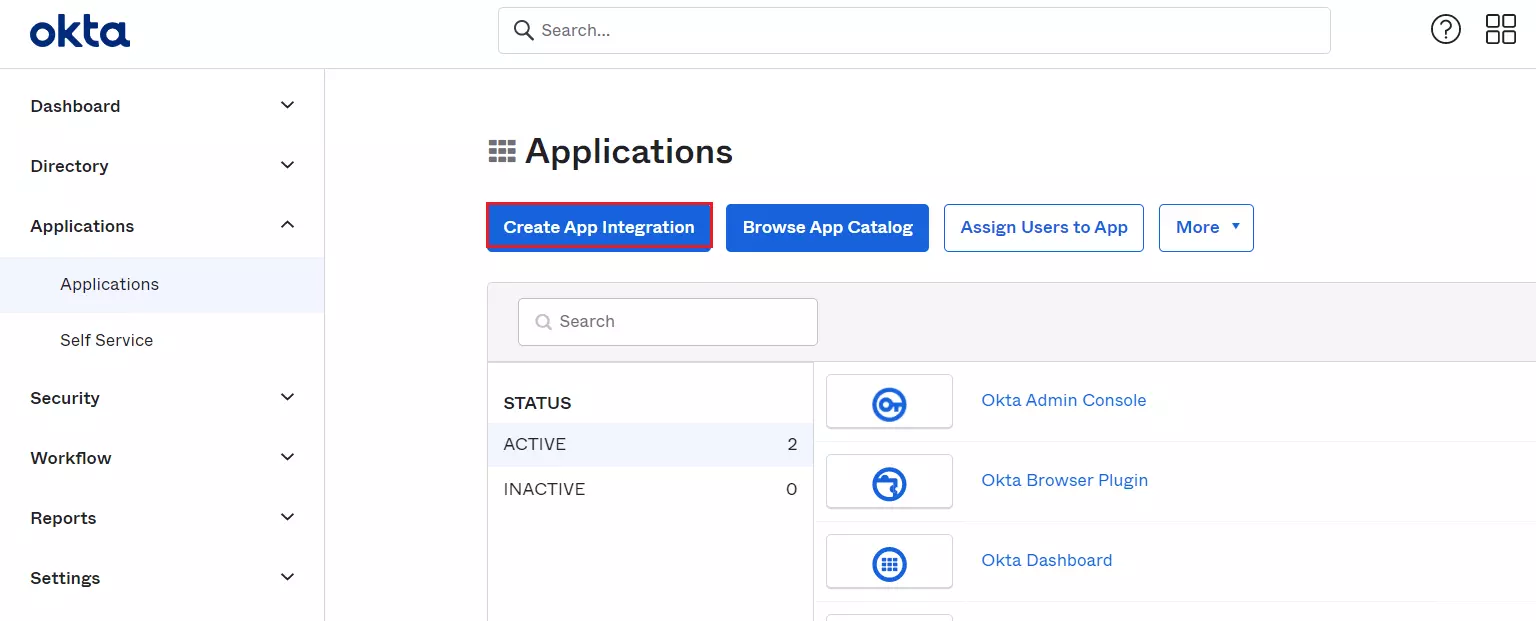
- Click on the Create App Integration button to create new app.
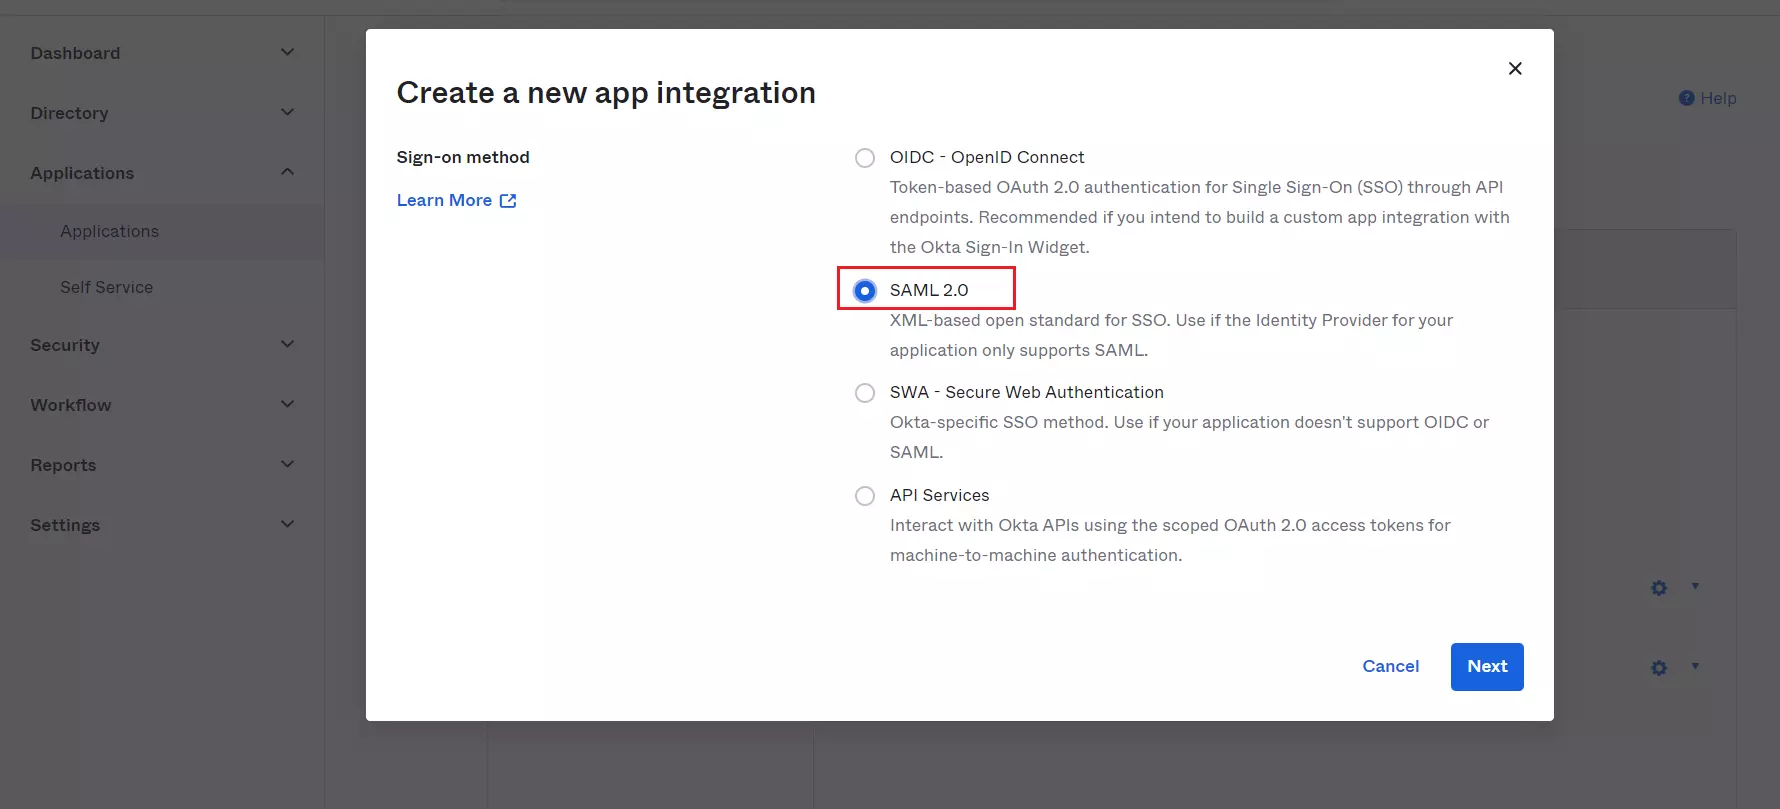
- Select SAML 2.0 as Sign-On method and Click on Next button.
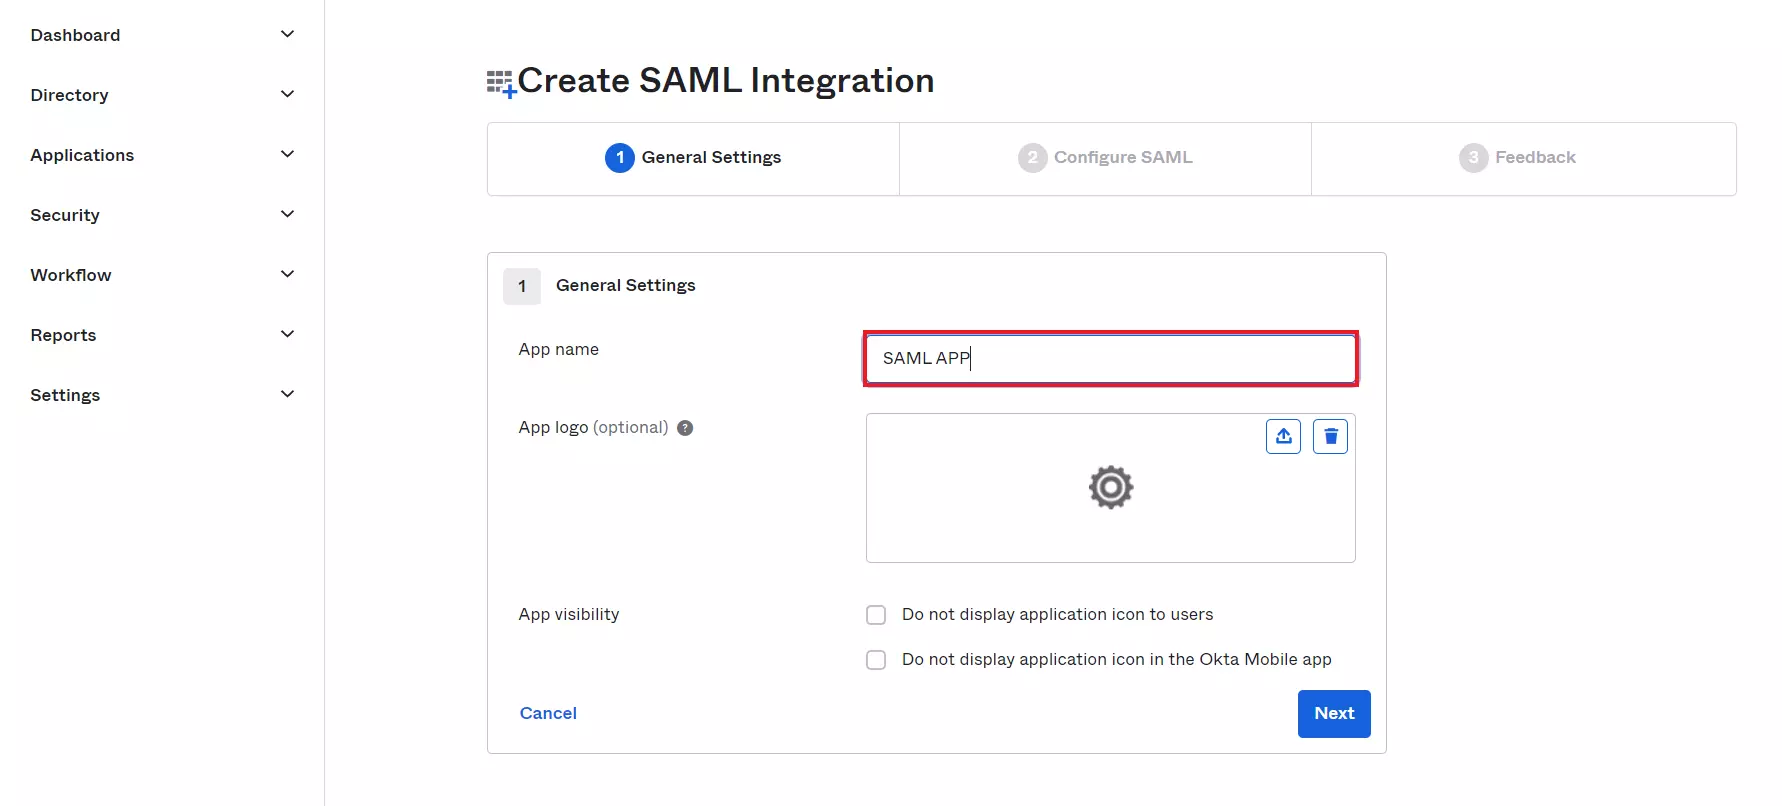
- In General Settings tab, enter App Name and click on Next button.
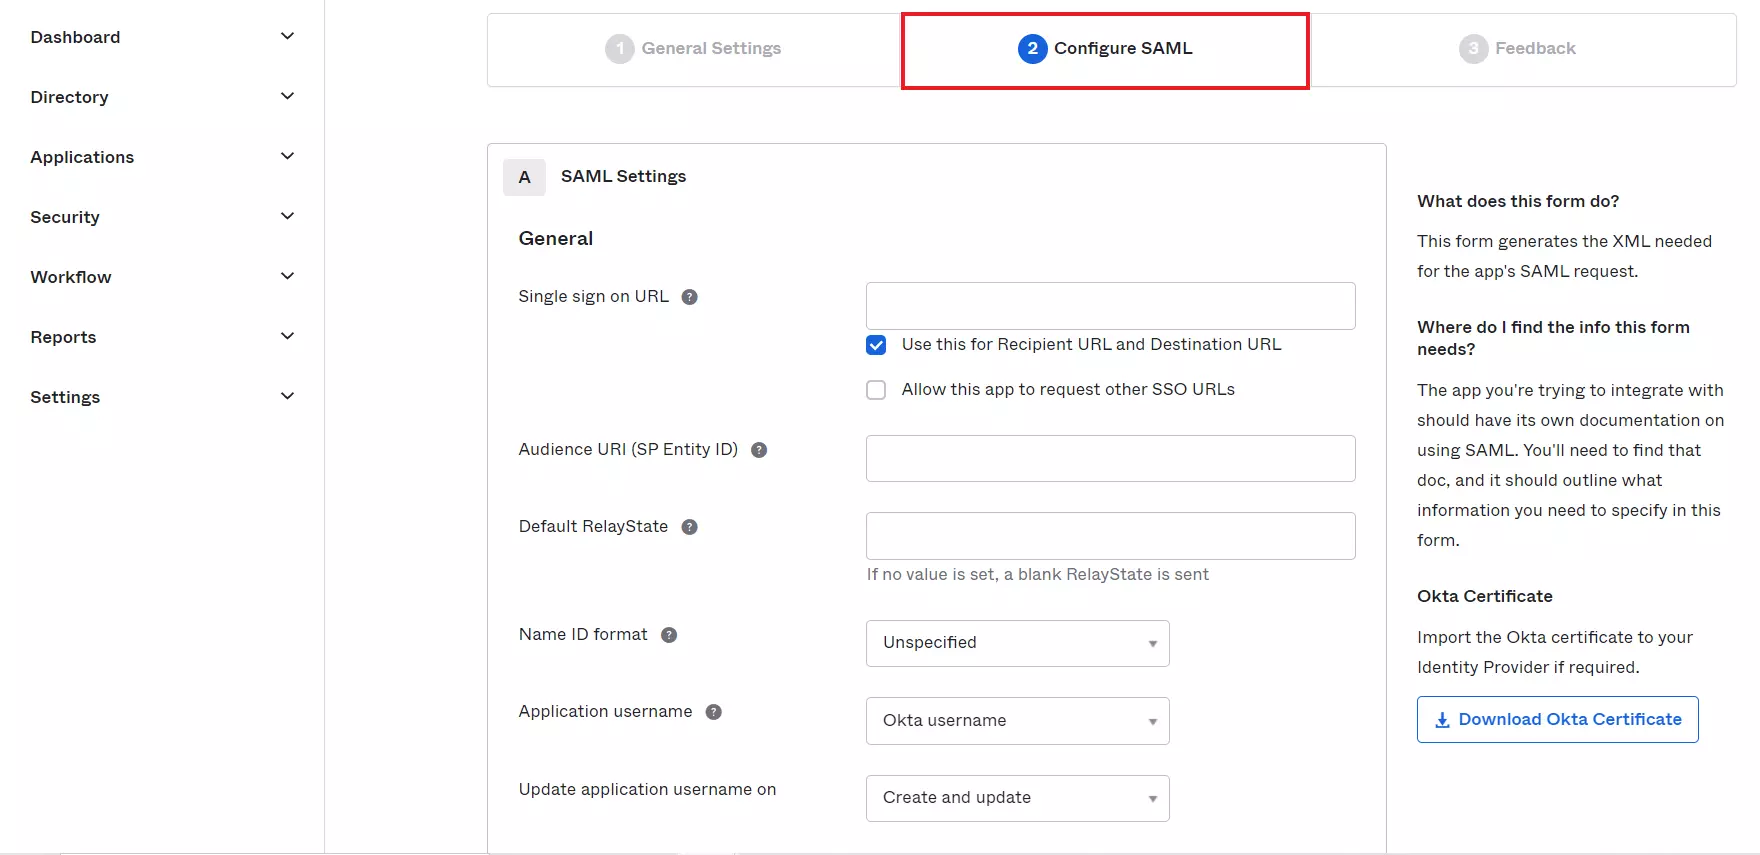
- In Configure SAML Tab, enter the required details:
- Configure Group Attribute Statements (Optional) and click on Next button.
| Single Sign On URL |
ACS (AssertionConsumerService) URL from the Service Provider metadata tab of the Plugin |
| Audience URL (SP Entity ID) |
SP Entity ID / Issuer from the Service Provider Metadata tab of the Plugin |
| Default Relay State |
Relay State from the Service Provider Metadata tab of the Plugin |
| Name ID Format |
Select E-Mail Address as a Name Id from dropdown list |
| Application Username |
Okta username |

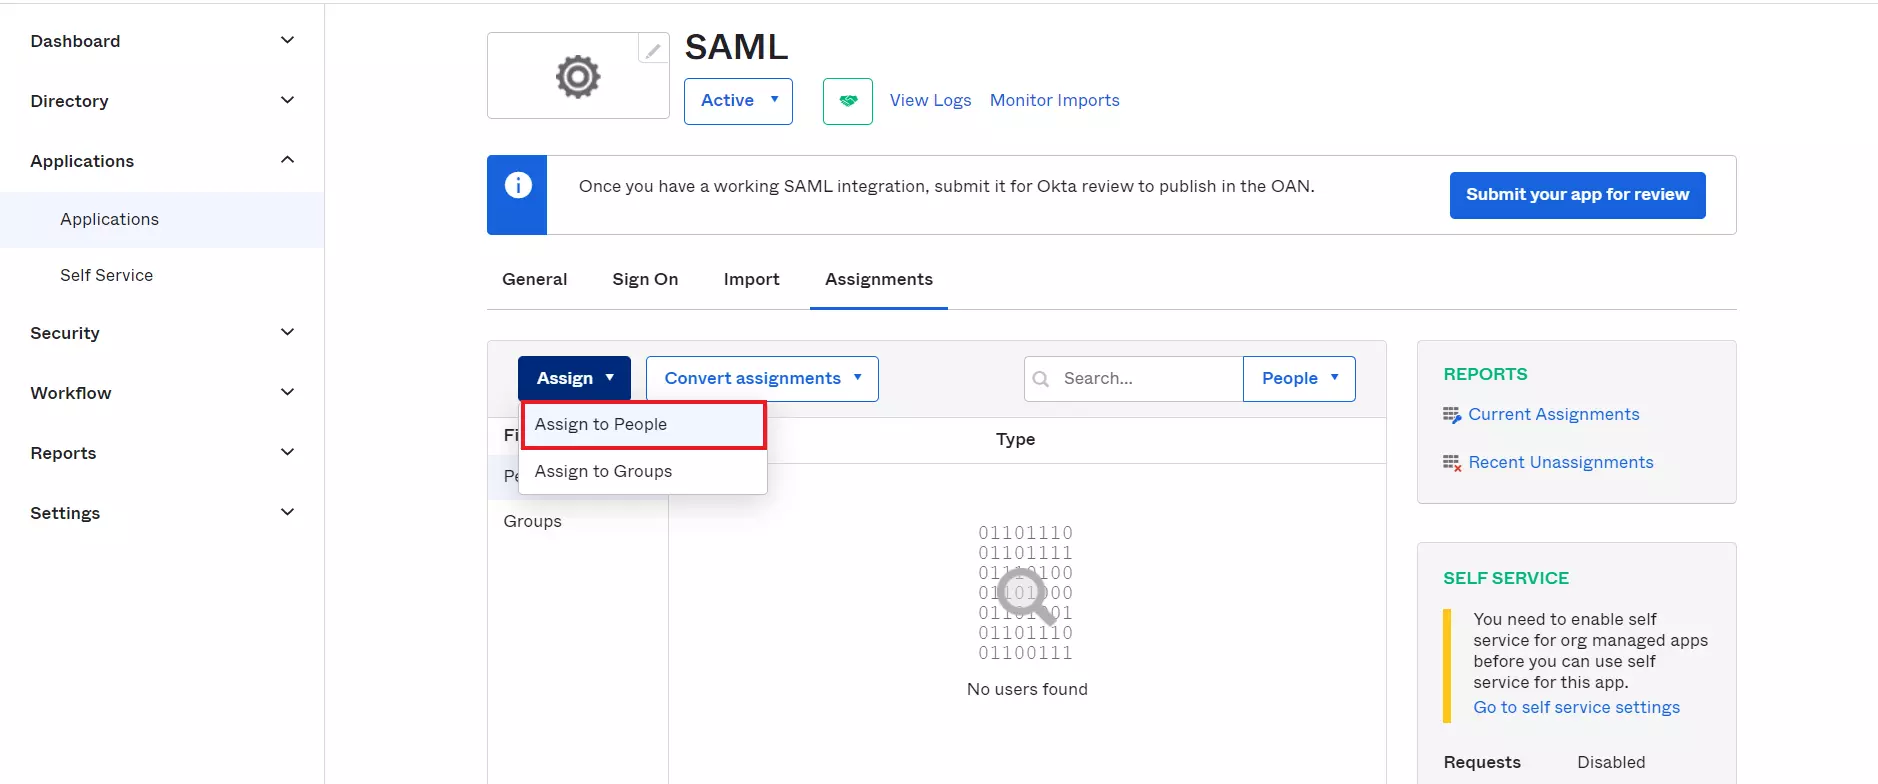
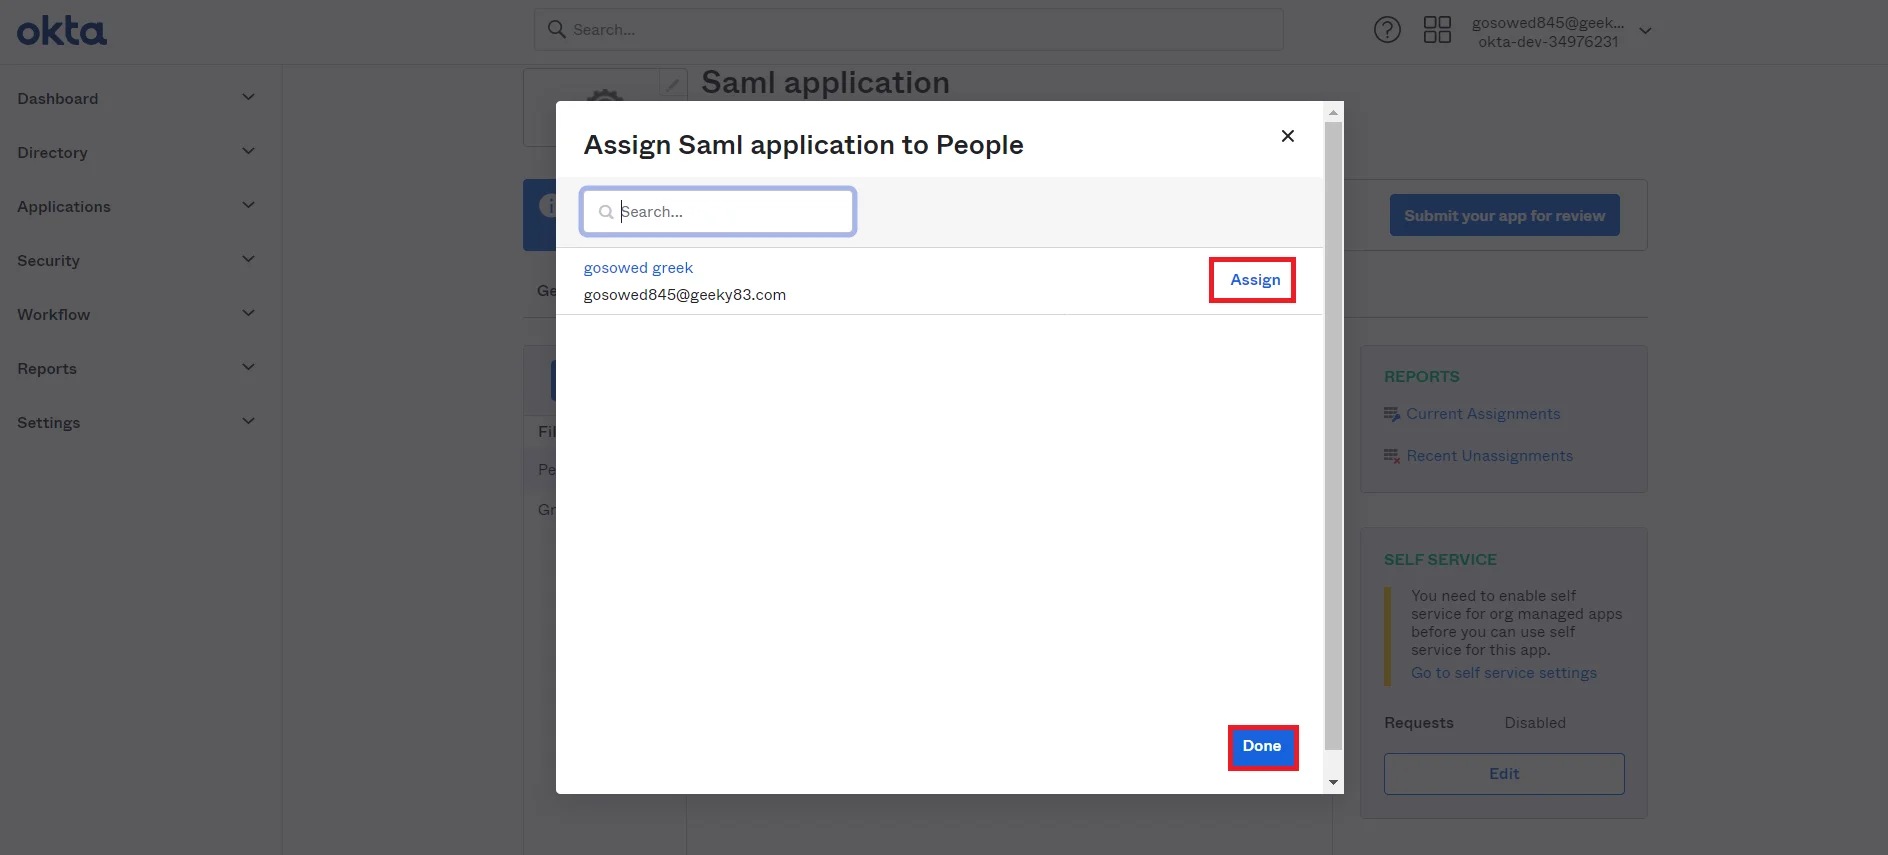
 Assigning Groups/People
- Navigate to the application you created and click on the Assignments Tab in Okta.
- Click on Assign button to Assign People and Assign Groups.
- Once you Assign the user, click on Done button.
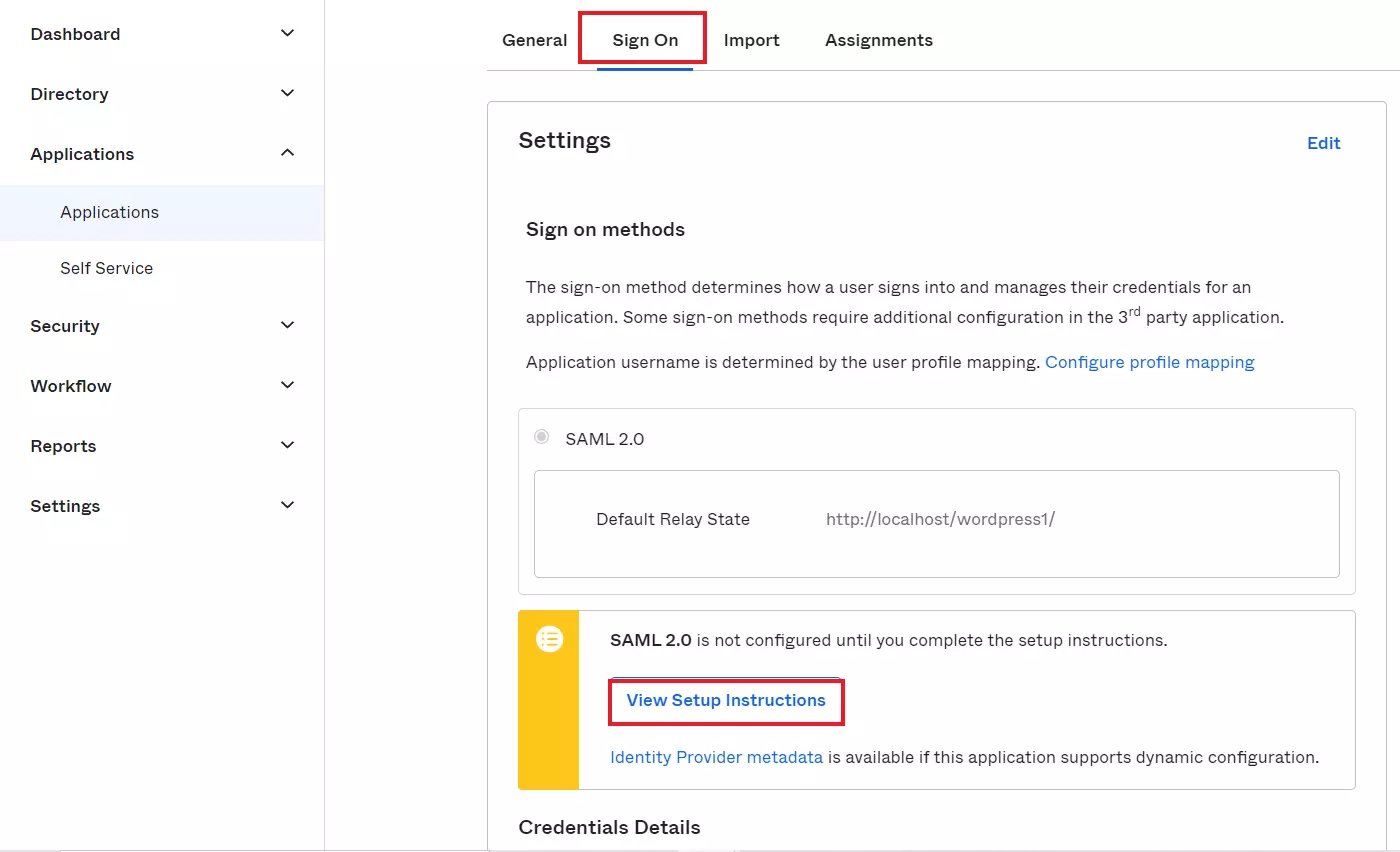
- Navigate to Sign On tab and Click on View Setup Instructions to get Okta Metadata.
- You will need this to configure the Service Provider.
- You have successfully configured Okta as SAML IdP ( Identity Provider) for achieving SSO login into your Service Provider Site.

×
![]()
Trending searches:
Hello there!
Need Help? We are right here!
