Salesforce as Idp for wordpress
Salesforce Single Sign-On (SSO) login for WordPress [SAML] can be achieved by using our WordPress SAML Single Sign-On (SSO) plugin. Our plugin is compatible with all the SAML compliant Identity Providers. Here we will go through a step-by-step guide to configure SSO login between WordPress site and Salesforce by considering Salesforce as IdP (Identity Provider) and WordPress as SP (Service Provider).
 Pre-requisites : Download And Installation
To configure Salesforce as SAML IdP with Wordpress, you will need to install the miniOrange WP SAML SP SSO plugin:
Steps to configure Login with Salesforce Into WordPress:
Step 1: Setup Salesforce as Identity Provider
Configure Salesforce Single Sign-On (SSO) Login into WordPress
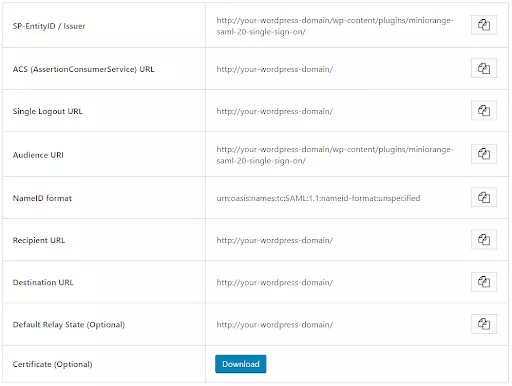
- In the miniOrange SAML SP SSO plugin, navigate to Service Provider Metadata tab. Here, you can find the SP metadata such as SP Entity ID and ACS (AssertionConsumerService) URL which are required to configure the Identity Provider.
- Log into your Salesforce account as admin.
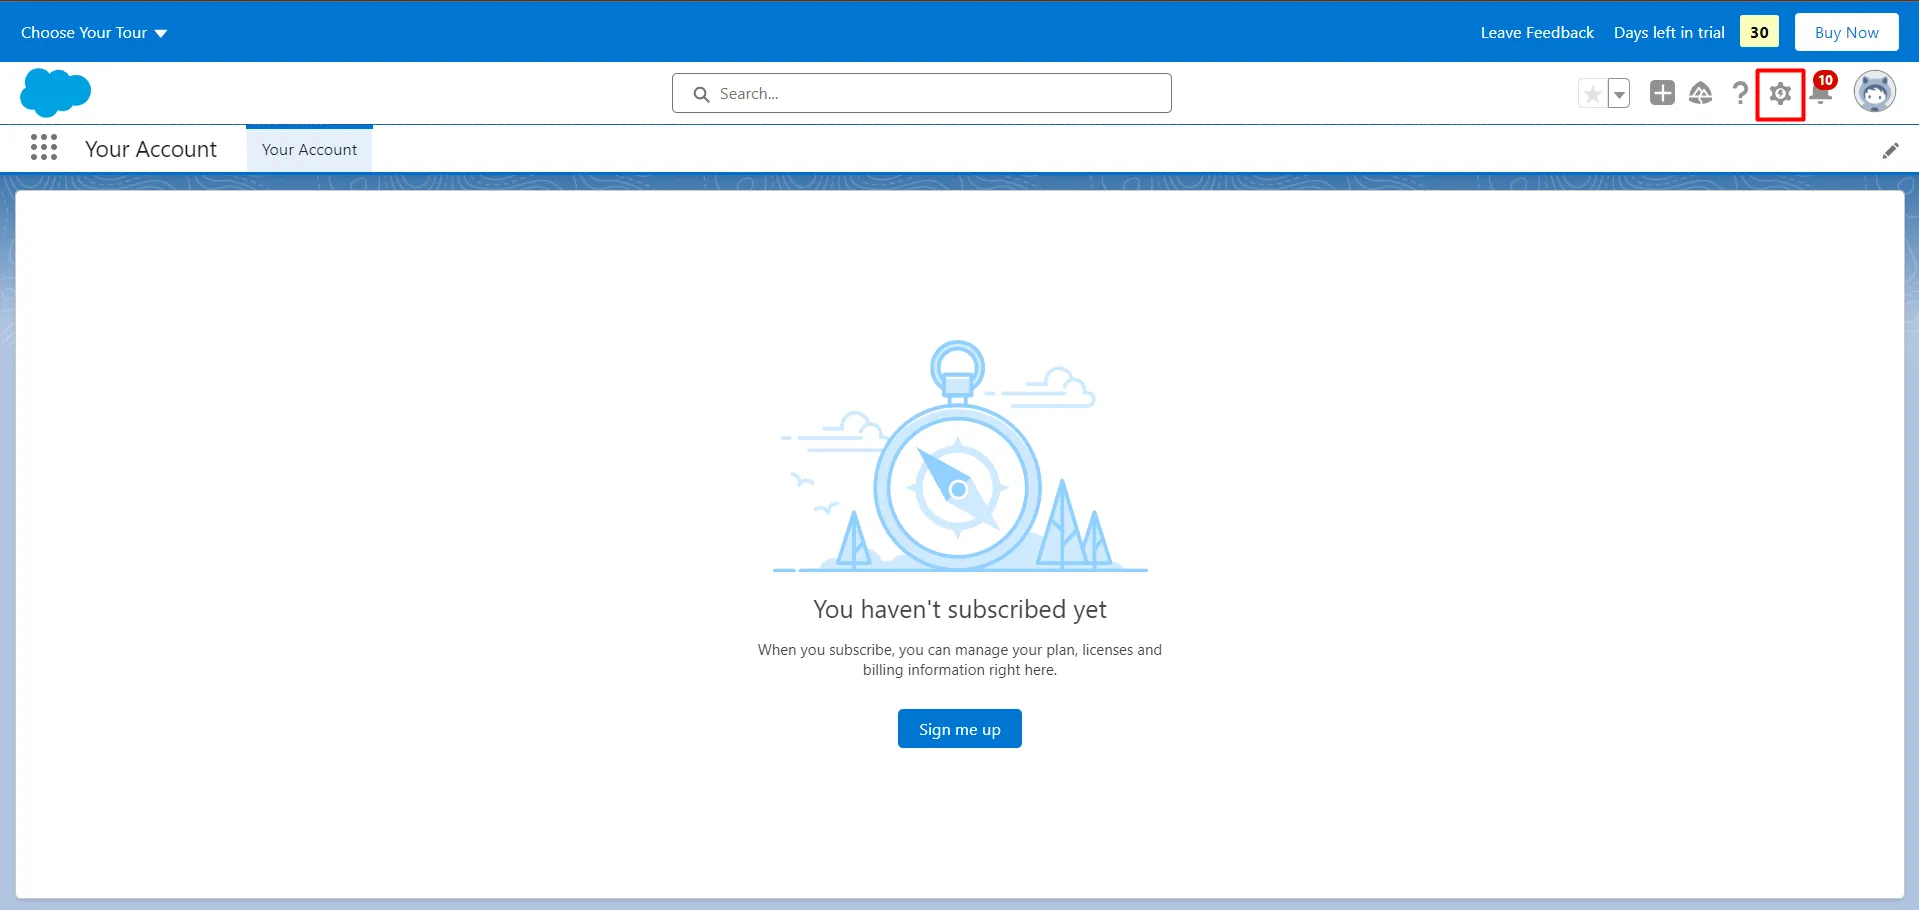
- Switch to Salesforce Lightning mode from profile menu and then go to the Setup page by clicking on setup button.
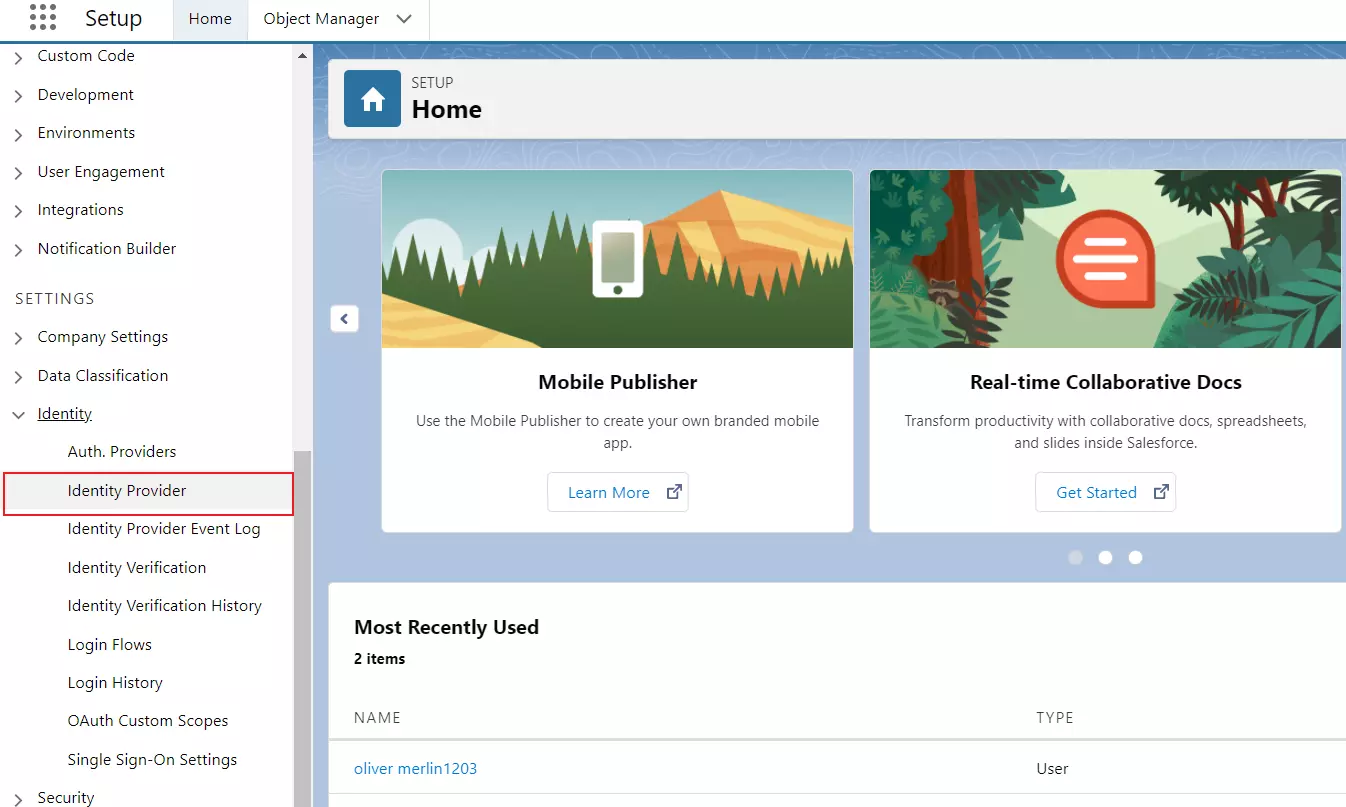
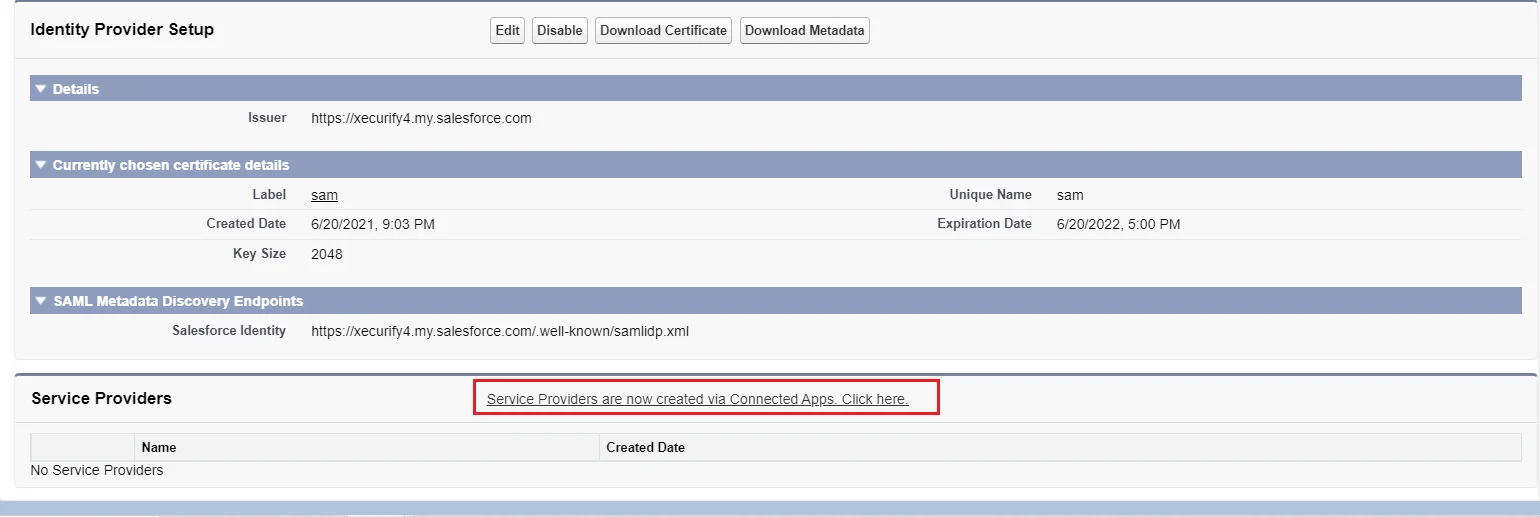
- From the left pane, select Settings Tab and click on Identity Provider.
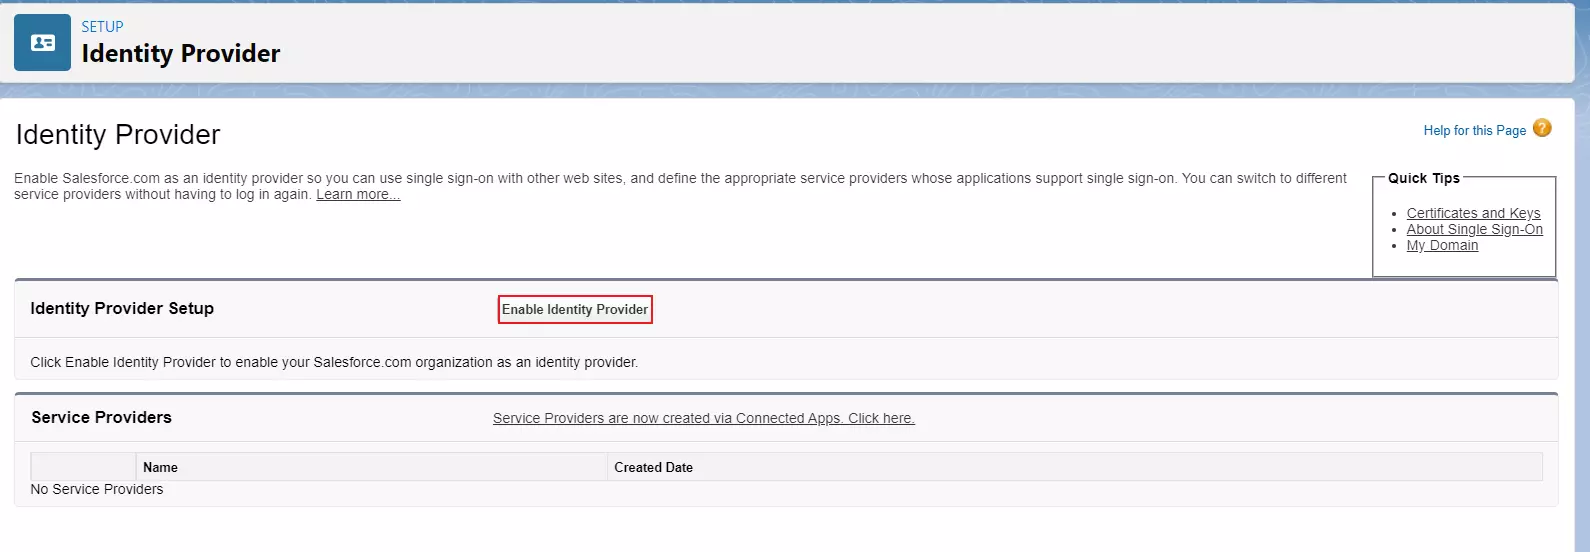
- Click on Enable Identity Provider.
- In the Service Provider section, click on the link to create the Service Provider using Connected Apps.
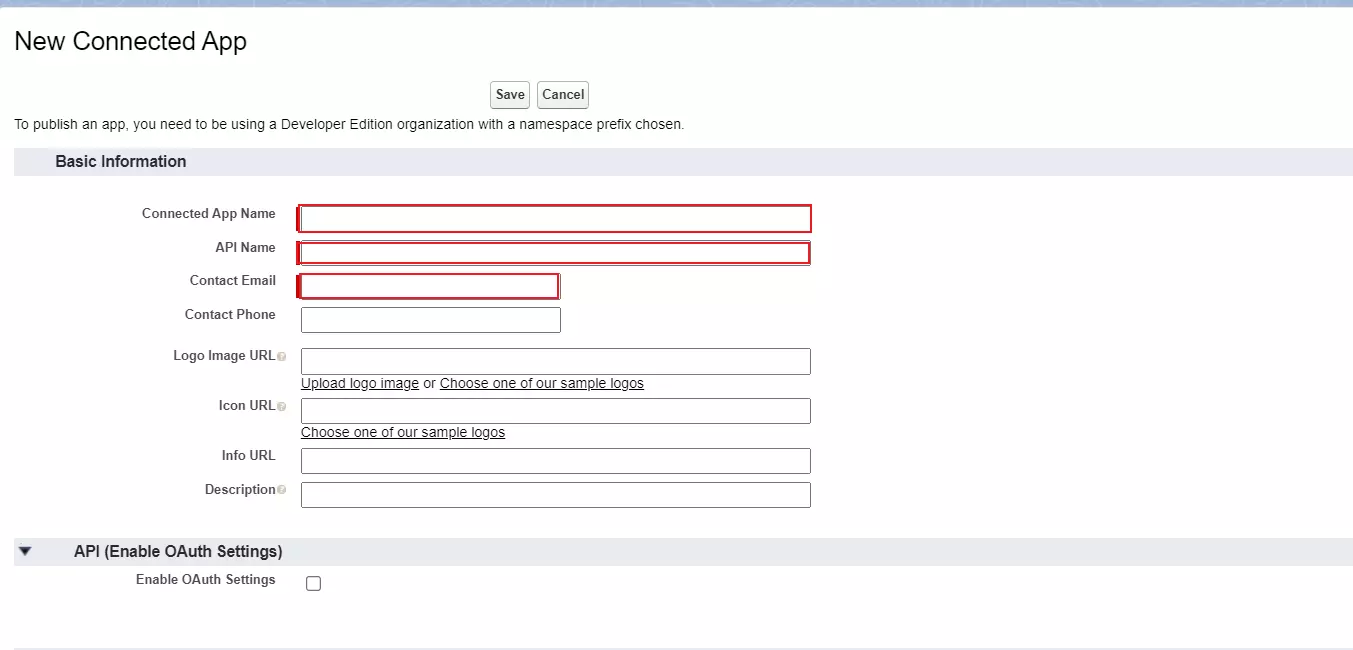
- Enter Connected App Name, API Name and Contact Email.
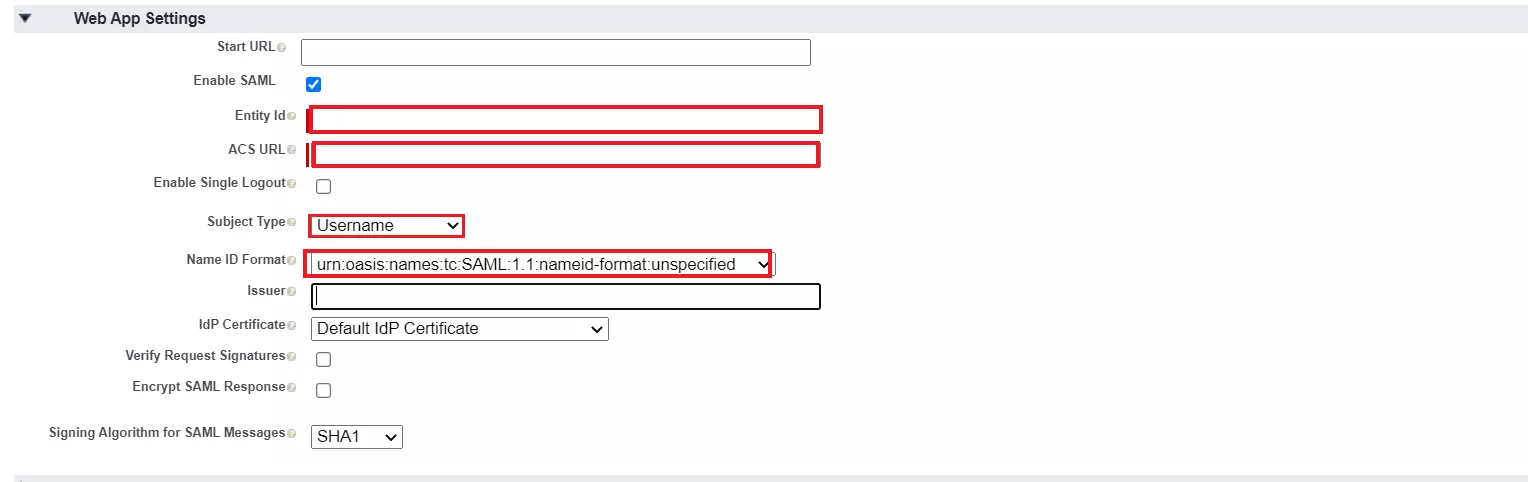
- Under the Web App Settings, check the Enable SAML checkbox and enter the following values:
- Click on Save to save the configuration.
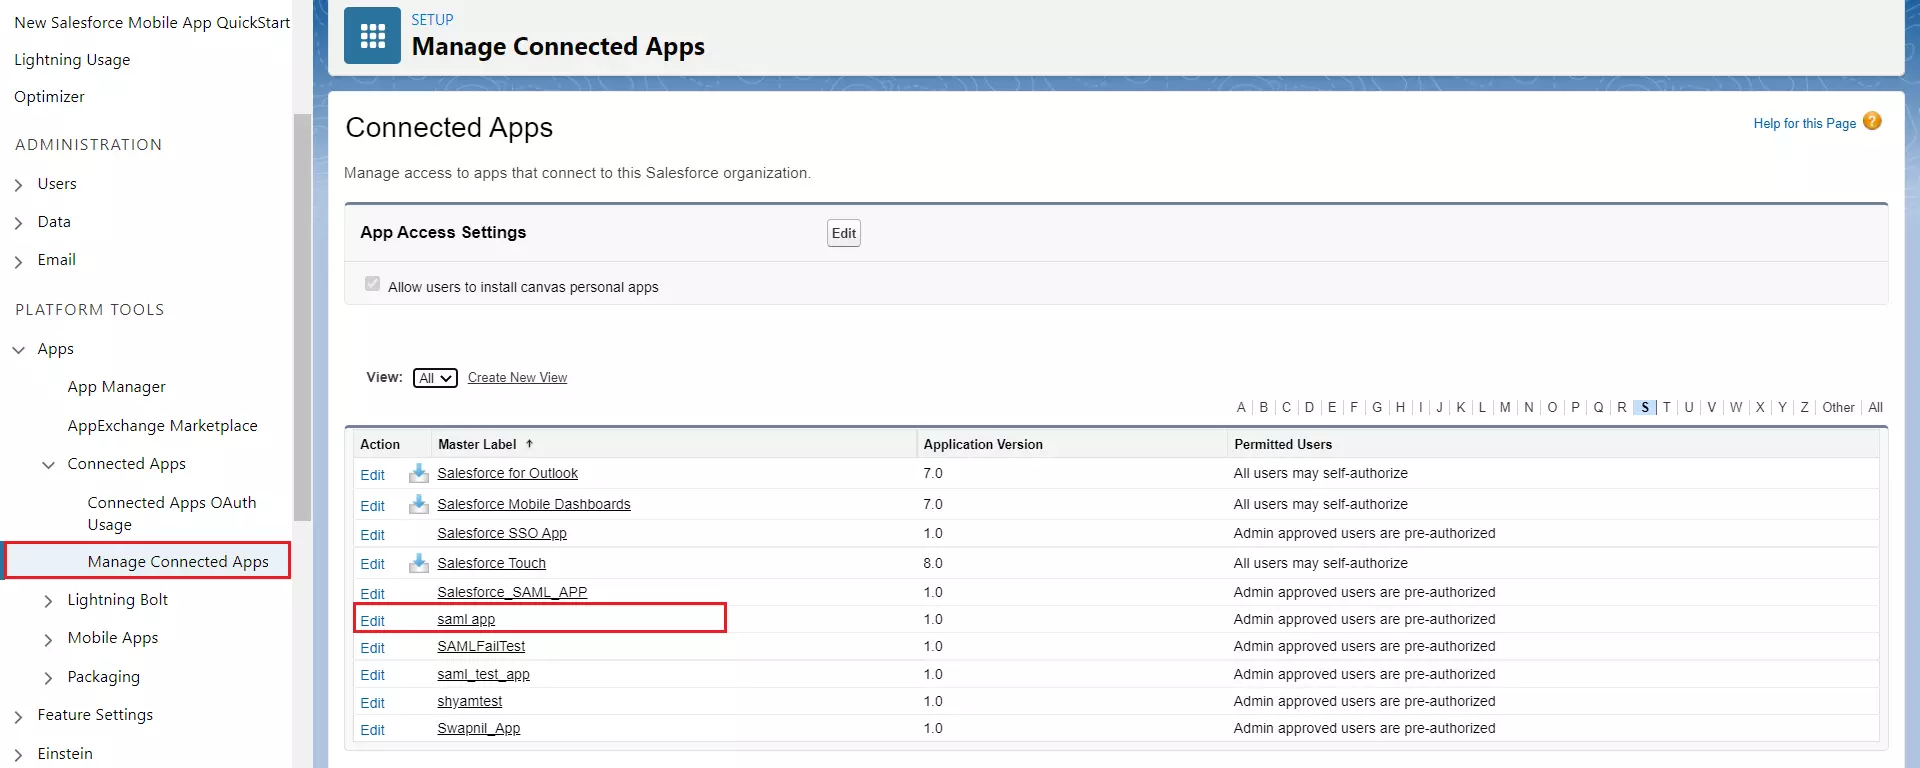
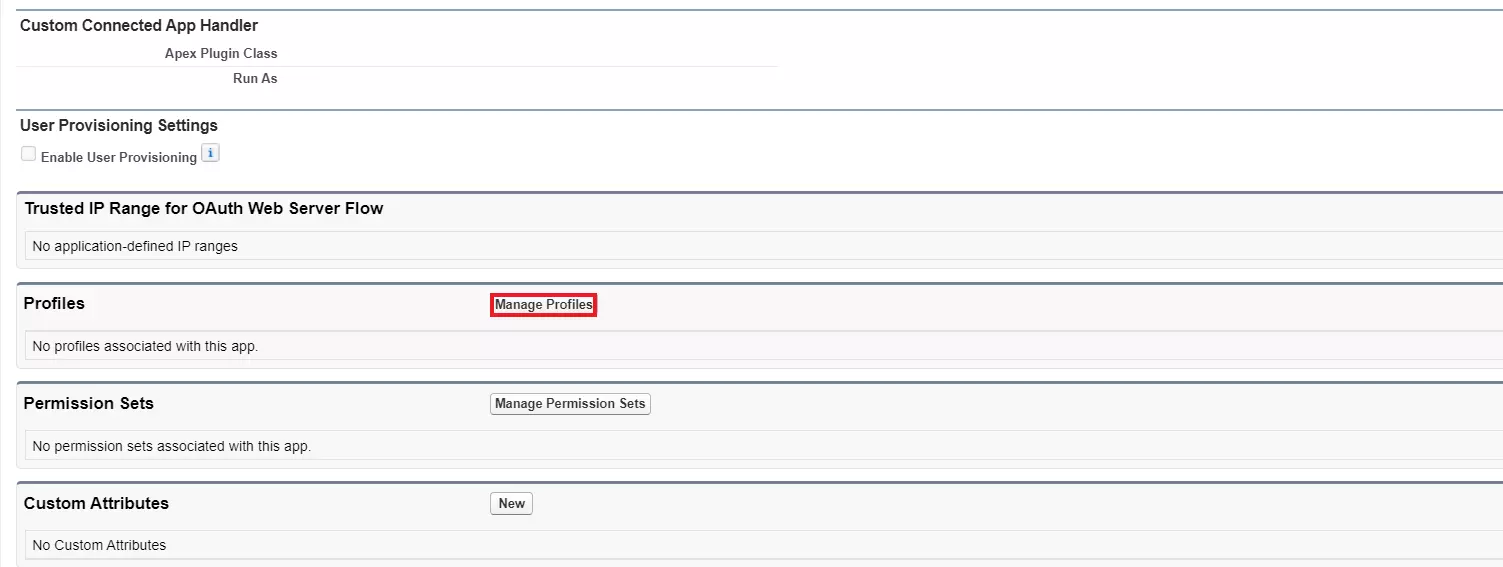
- Now from the left pane, under Platform Tools section select Connected Apps.
- Then select Manage Connected Apps and click on the app you just created.
- In the Profiles section click Manage Profiles button.
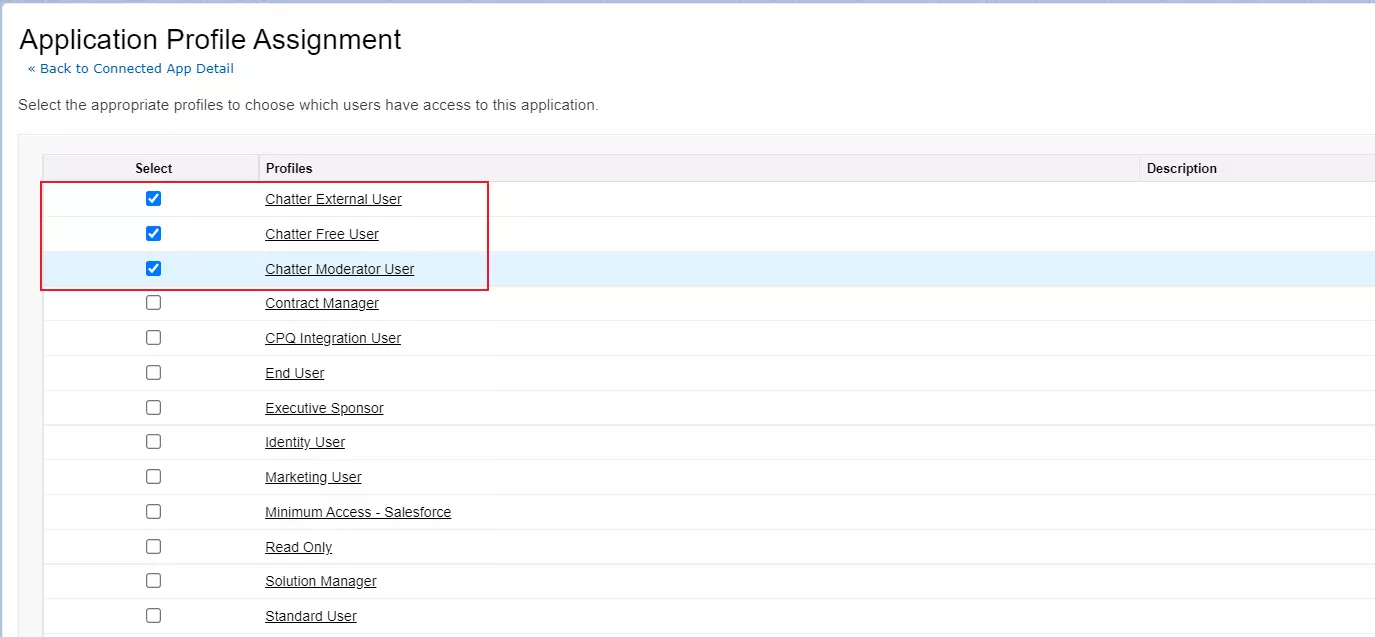
- Assign the Profiles you want to give access to log in through this app.
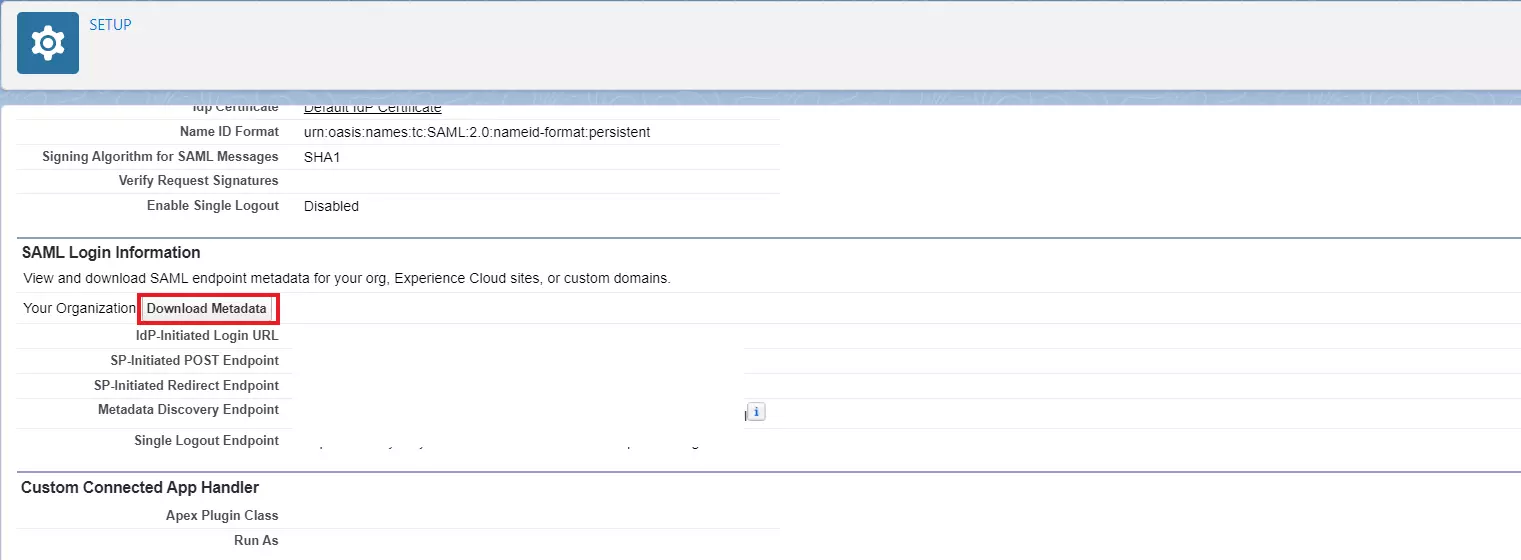
- Under SAML Login Information, click on Download Metadata.
- Keep this metadata handy for configuring the Service Provider.
| Connected App Name | Provide a name for Connected App |
| API Name | Provide a API name |
| Contact Email | Provide a Contact Email |
| Enable SAML | Checked |
| Entity ID | SP-EntityID / Issuer from Service Provider Metadata tab of the Plugin |
| ACS URL | ACS (AssertionConsumerService) URL from Service Provider Metadata tab of the Plugin |
| Subject Type | Username |
| Name ID Format | urn:oasis:names:tc:SAML:2.0:nameid-format:unspecified |
You have successfully configured Salesforce as SAML IdP ( Identity Provider) for achieving SSO login into your Service Provider Site.
Need Help? We are right here!
