SAML Single Sign-On (SSO) into October CMS Using AWS Cognito
SAML Single Sign-On (SSO) into October CMS Using AWS Cognito
October CMS Single Sign-On ( SSO ) plugin gives the ability to enable SAML Single Sign-On (SSO) for your October CMS sites. Our October CMS SSO plugin is compatible with all the SAML compliant Identity providers. Here we will go through a step-by-step guide to configure SAML SSO between October CMS site and your Identity Provider.
Pre-requisites
To integrate your Identity Provider(IDP) with October CMS, you need the following items:
- October CMS should be installed and configured.
- Download any Front-end user management plugins - RainLab/Buddies.
Download and Installation
- Login to your October CMS site’s backend: https://example.com/backend.
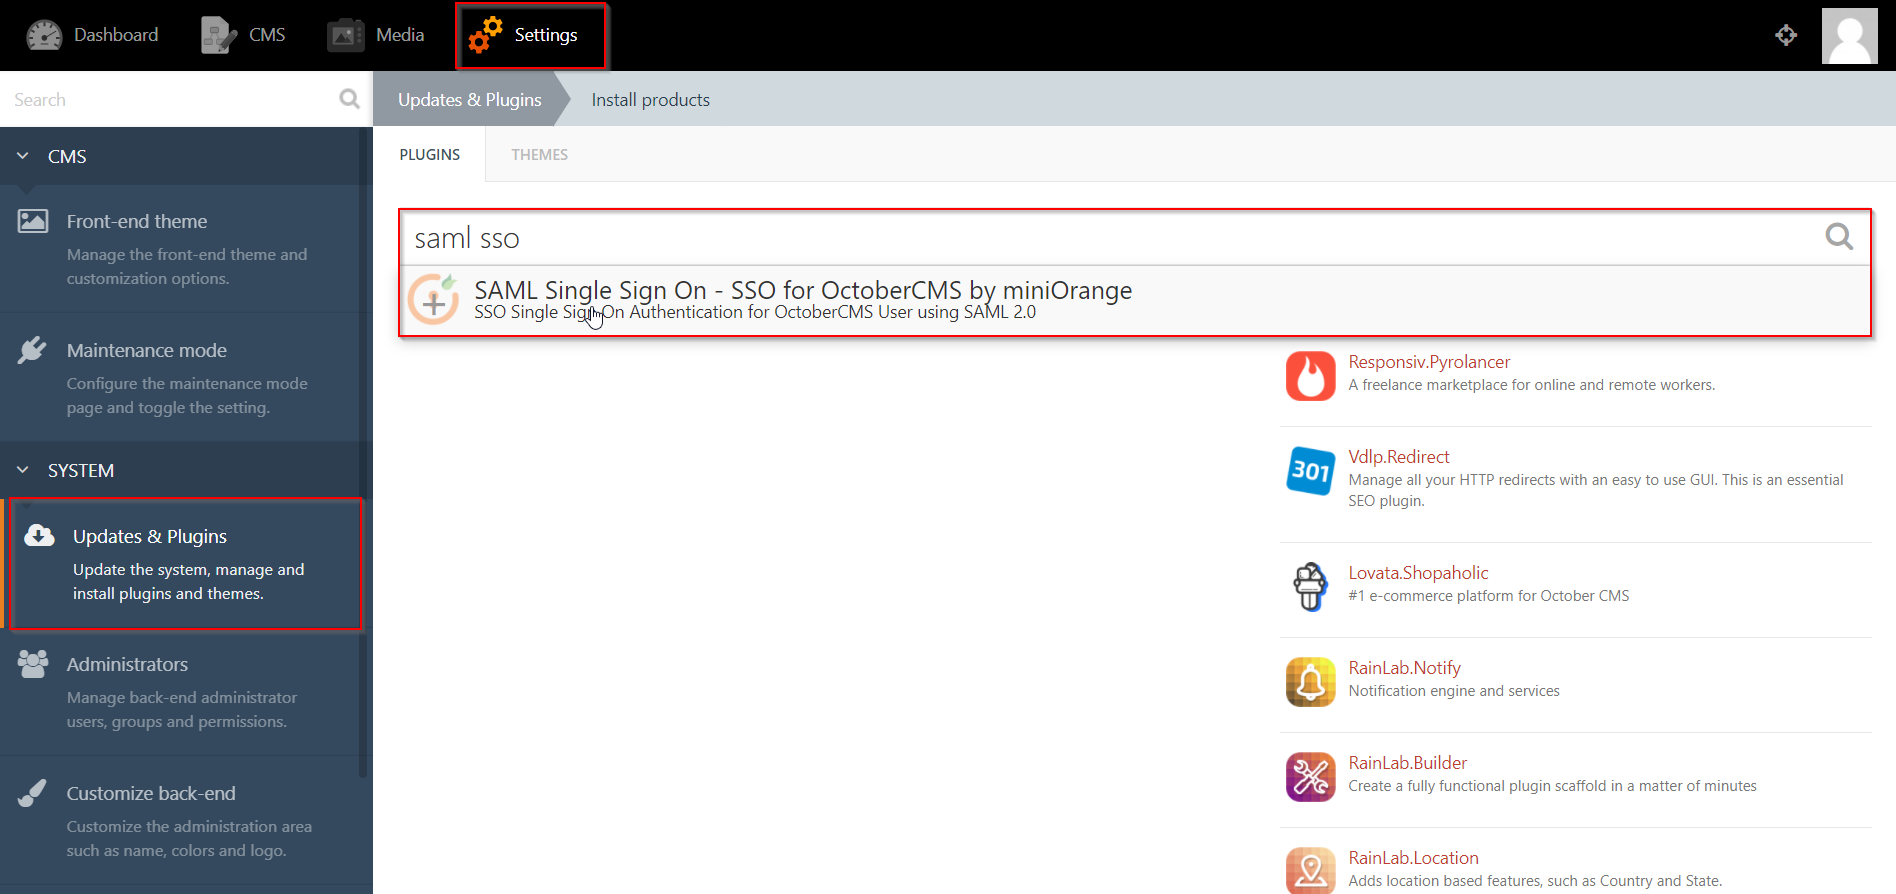
- From the admin dashboard, go to Settings from the main navigation bar and select Updates & Plugins.
- Click on Install plugins and in the search bar type “SAML SSO”.
- Click on the SAML SP Single Sign-On - SSO search result and the plugin will start installing.
Step 1: Setup AWS Cognito as OAuth Provider
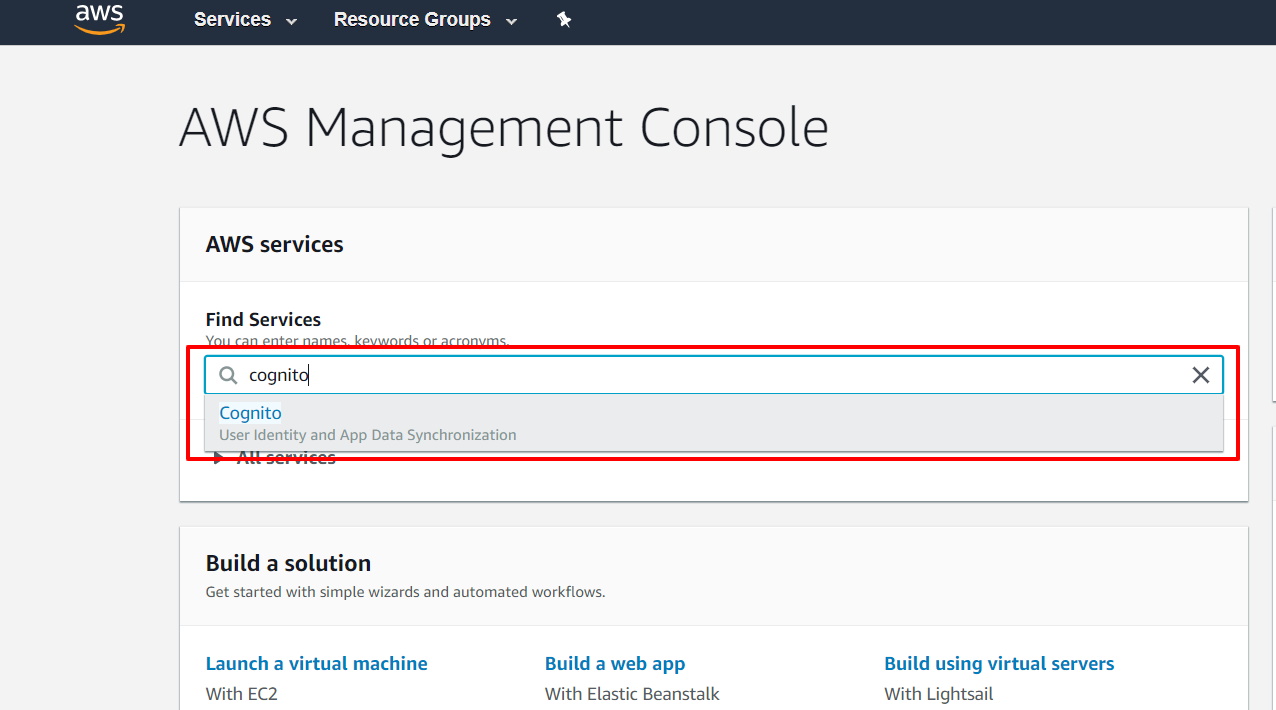
- Sign in to AWS Amazon.
- Now enter “Cognito” in search textbox & select Cognito from dropdown.
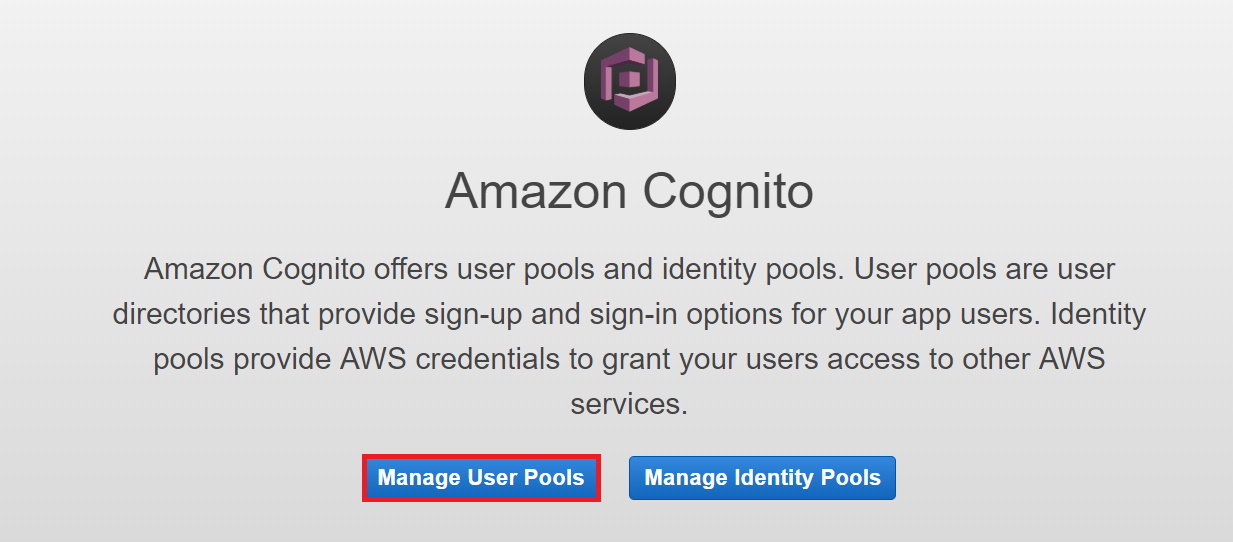
- Go to “Manage your user pools”
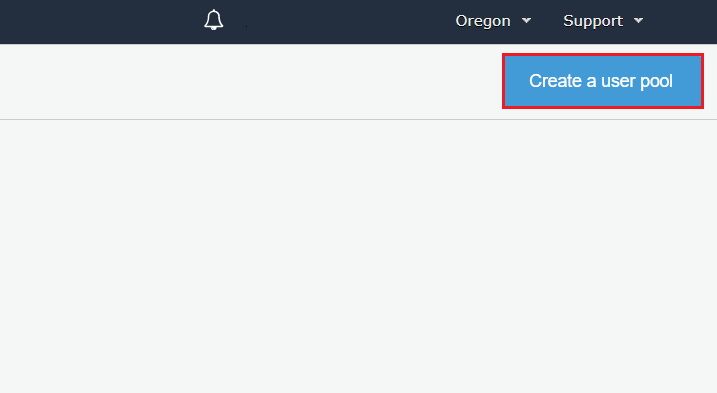
- Click on “Create a user pool”
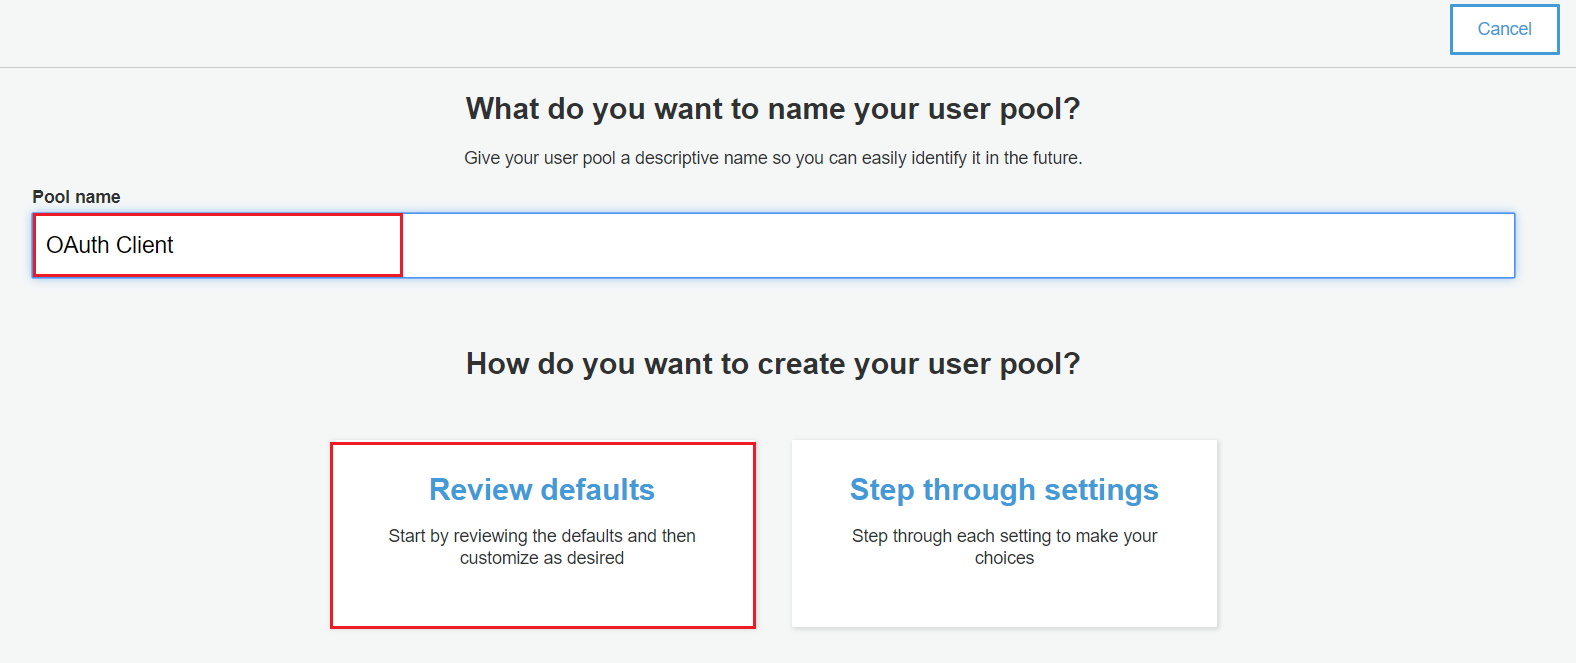
- Add pool name and select “Review Defaults”.
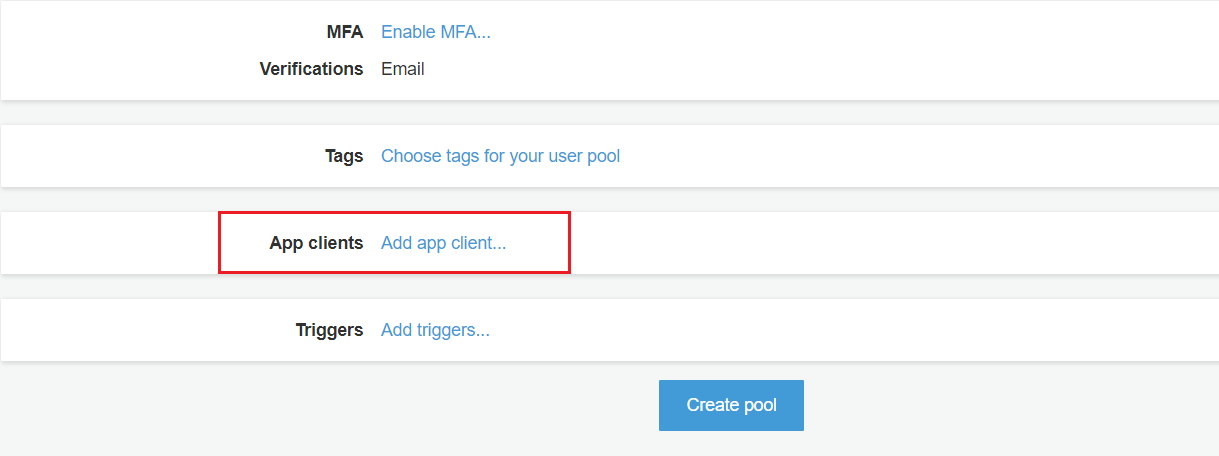
- Click on “Add app client” & then click on Add an app client
- Enter App client name & then Click on “Create app client”.
- Click on Return to pool details. After this click on “Create Pool”.
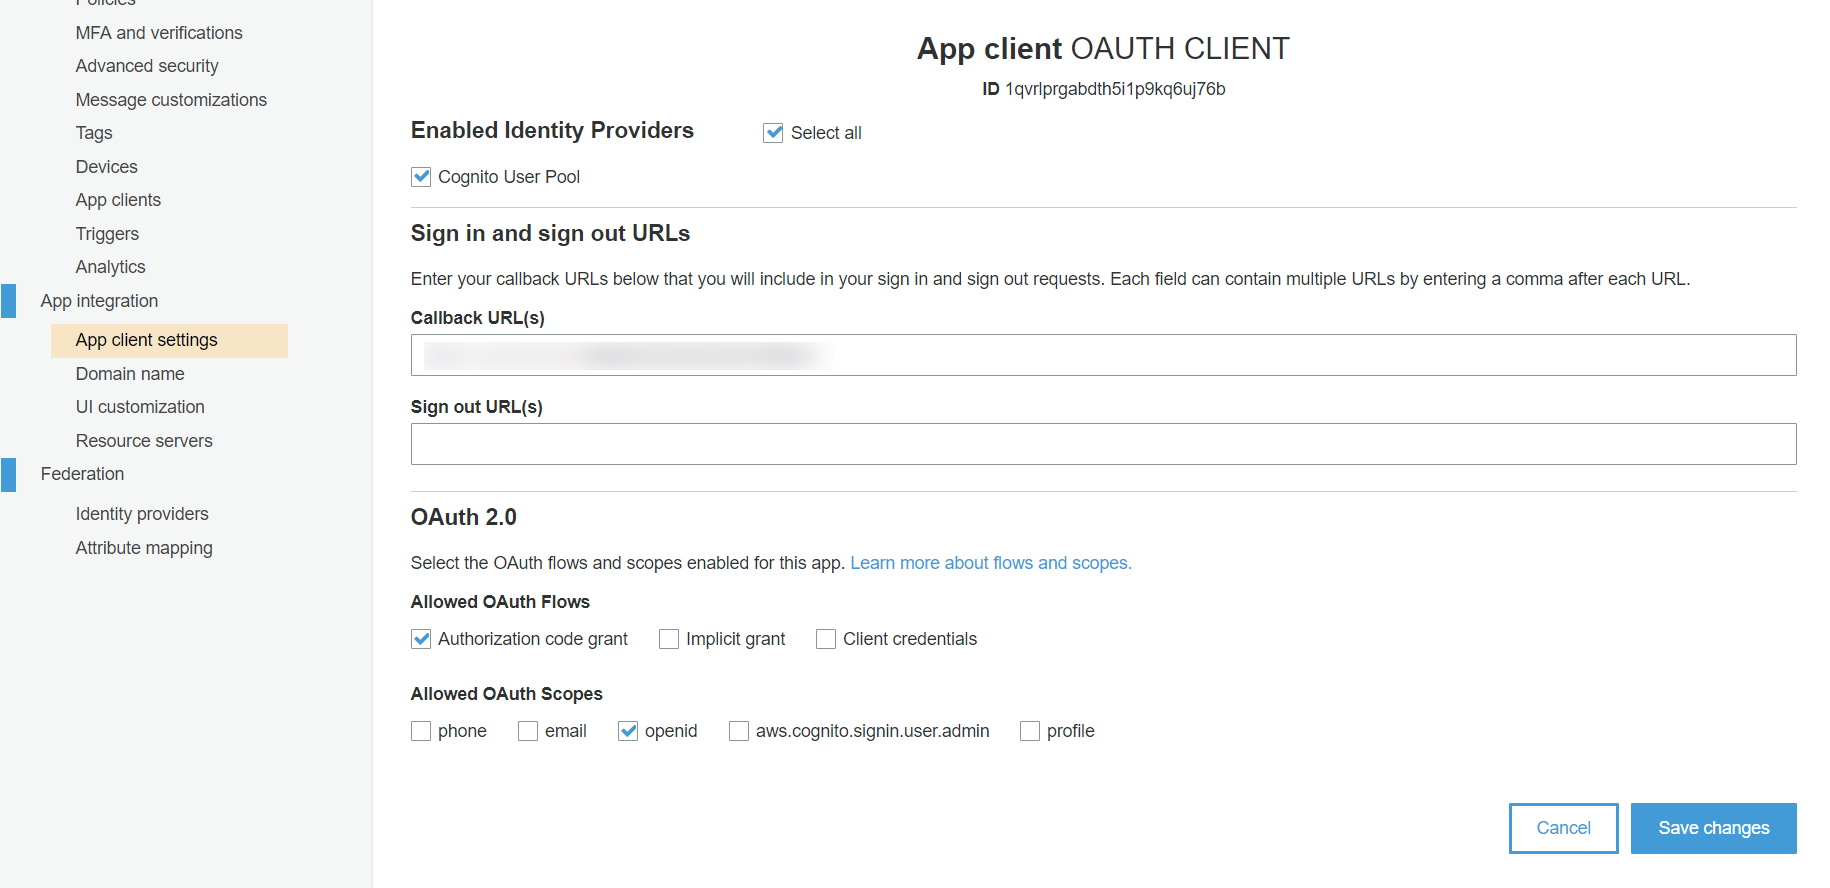
- Navigate to App client settings.
- Select “Cognito User Pool”, add callback URL. You will get this callback URL from the plugin.
- Add application home page URL has to Sign out URL.
- Also, select Authorization code grant as “Allowed OAuth Flows” & select OpenID as “Allowed OAuth Scopes”.
- After selecting all details click on Save changes button.
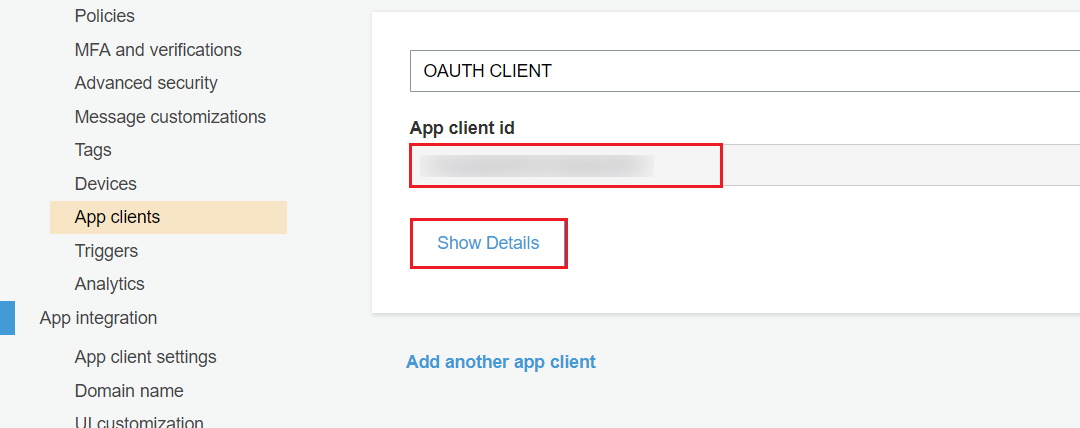
- Go to “App client” and click on “Show details” to get a client ID and client secret.
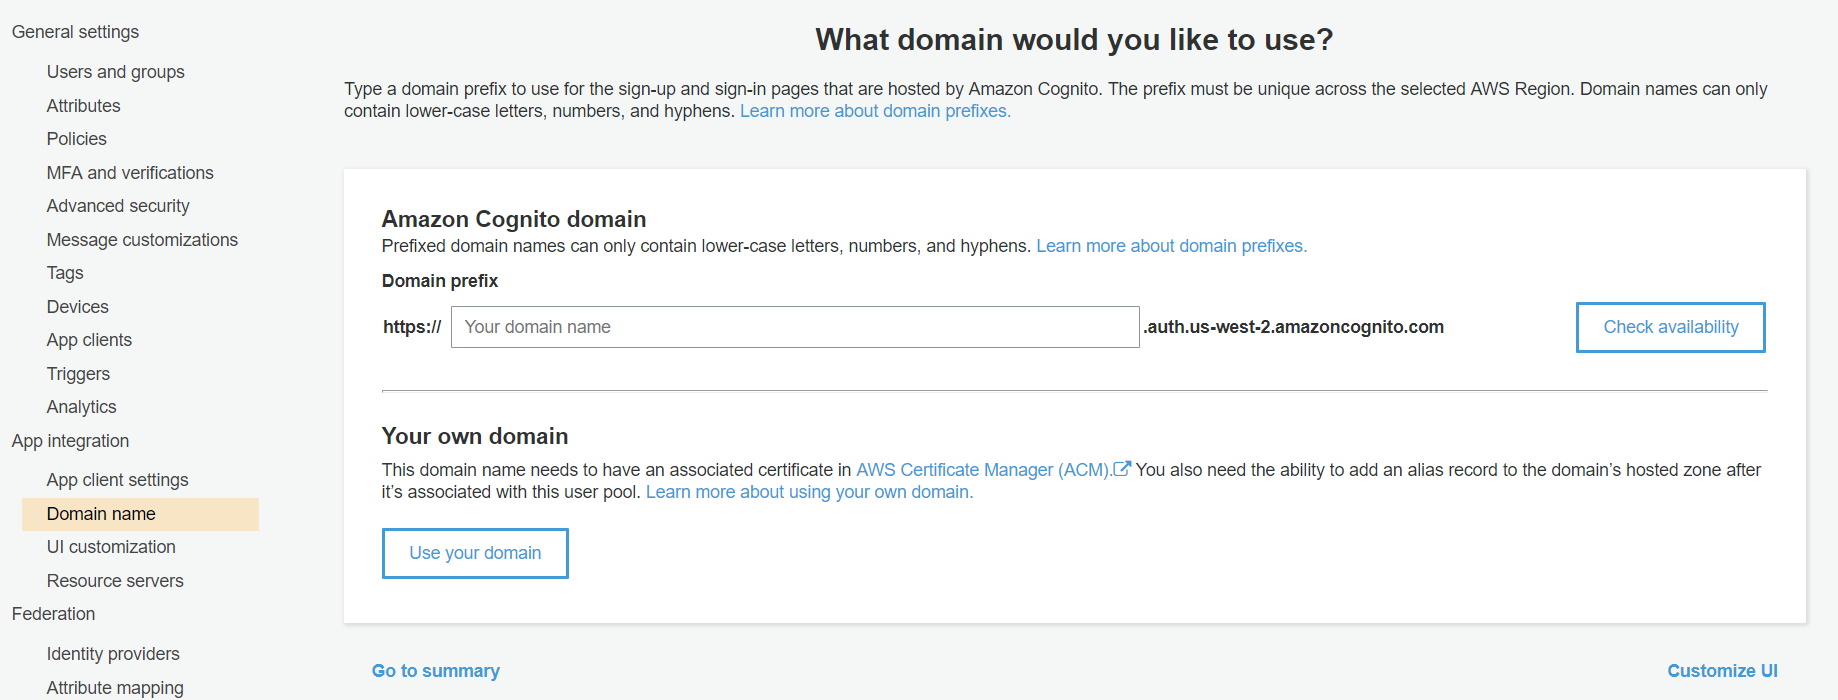
- Go to domain name and enter a domain name for your app. After adding domain name you can check its availability by clicking on “Check availability” button. After entering valid domain name click ”Save changes” button.
- Complete domain name: The complete domain name that you need to enter in plugin is {your domain name}.auth.{region name}.amazoncognito.com
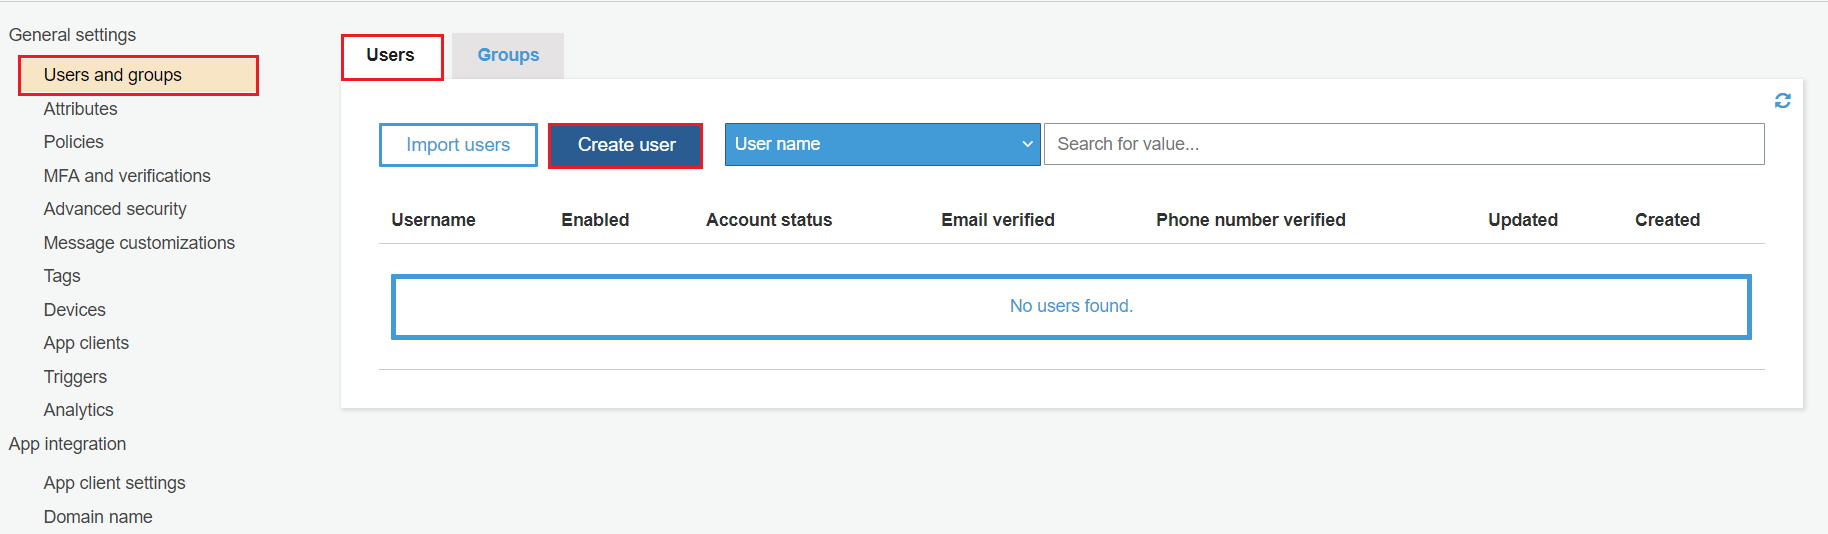
- Add Users / Groups to Cognito App : Go to Users and groups and then click on Users. After this click on Create user.
- Fill all required informations and click on Create user.
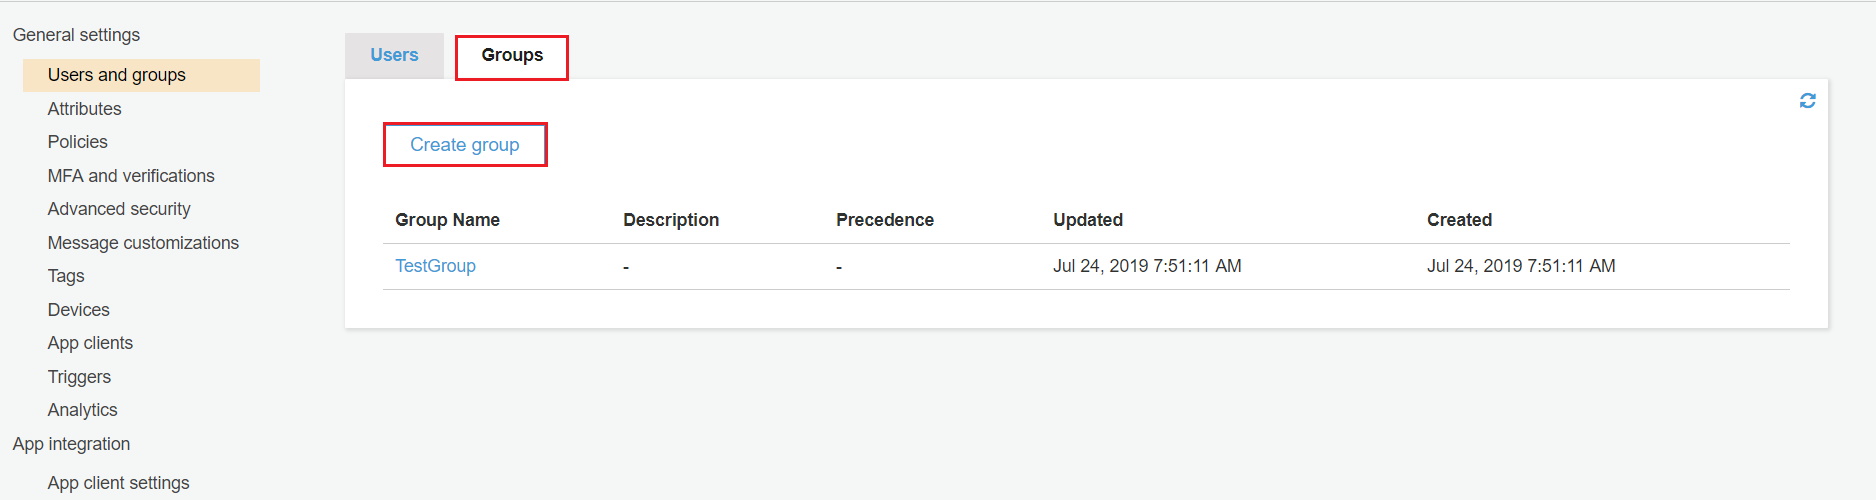
- Click on Groups and then click on Create group.
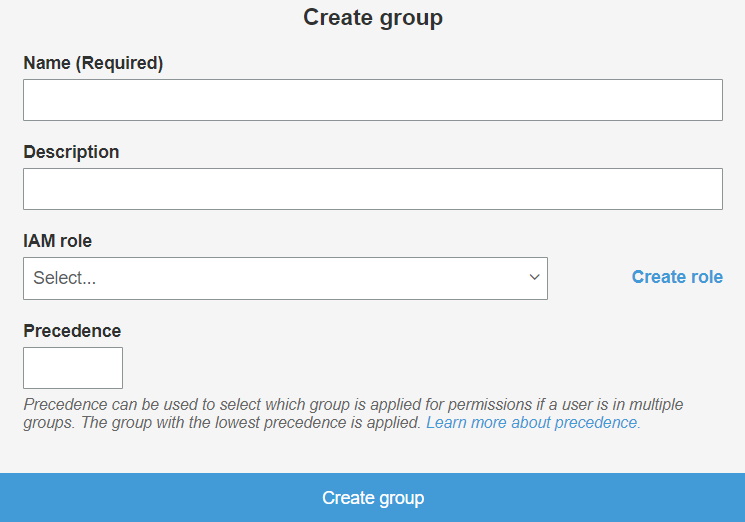
- Fill all required informations and click on Create group.


×
![]()
Steps 2 : October CMS as SP
- Click on Single Sign On menu option from the main navigation bar at the top of your page.
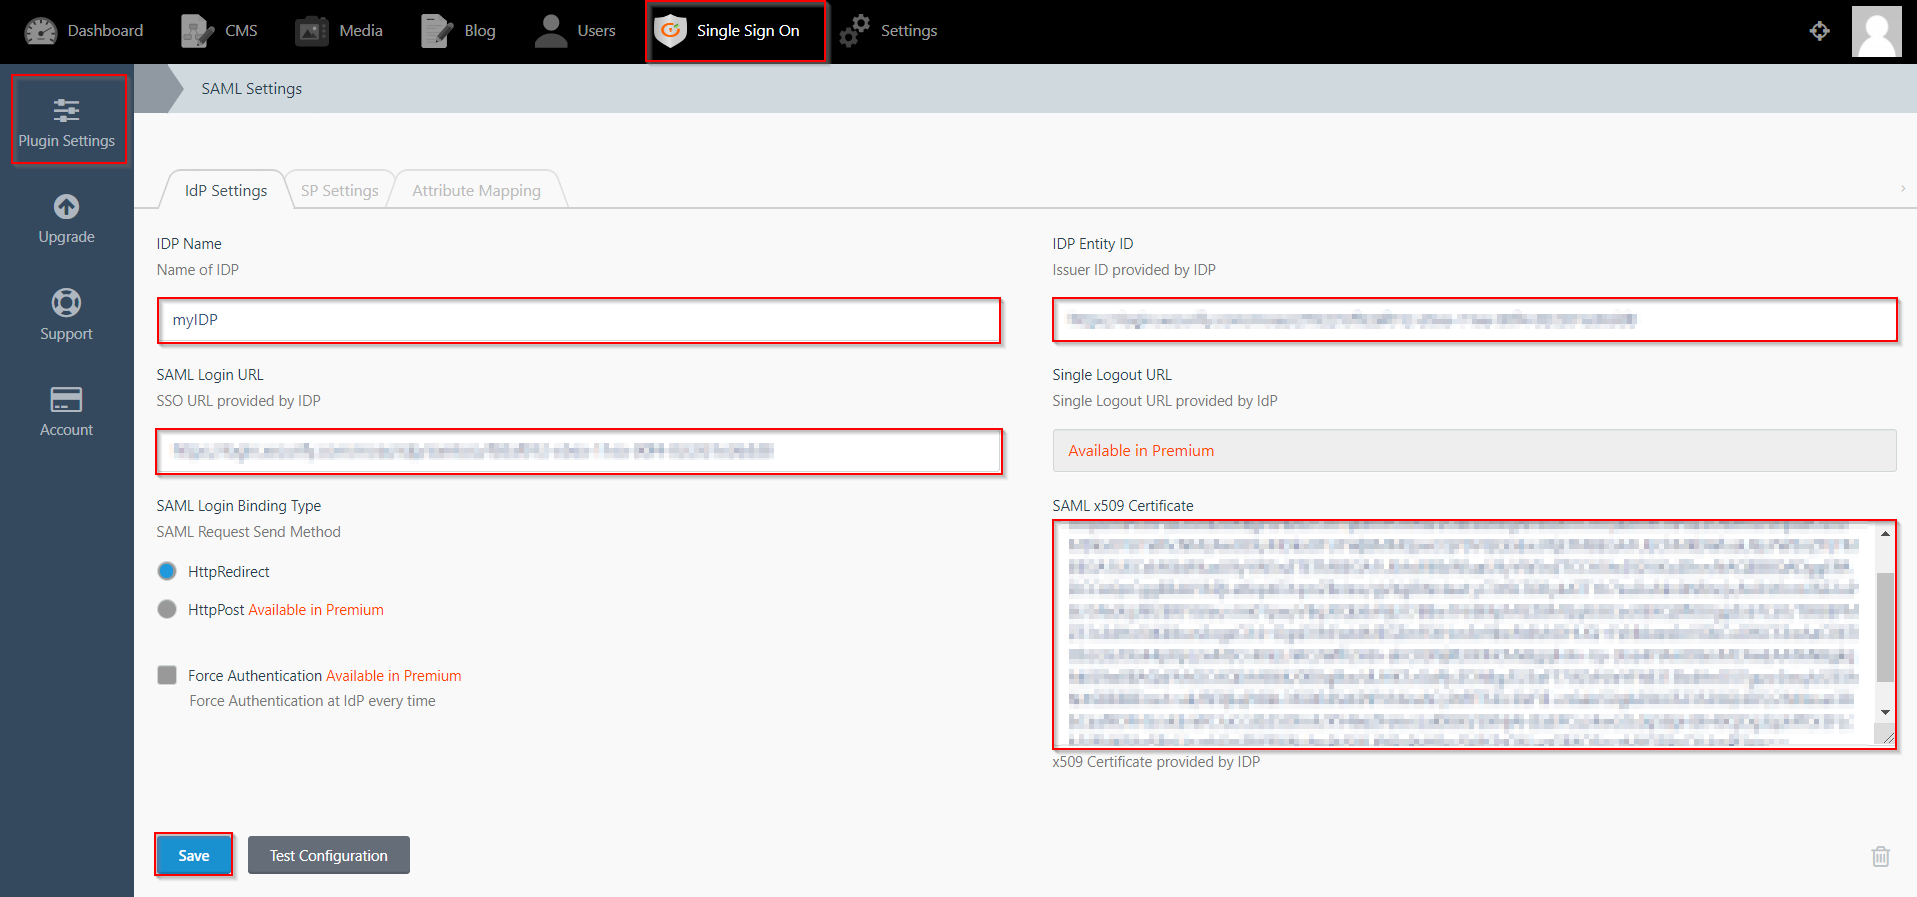
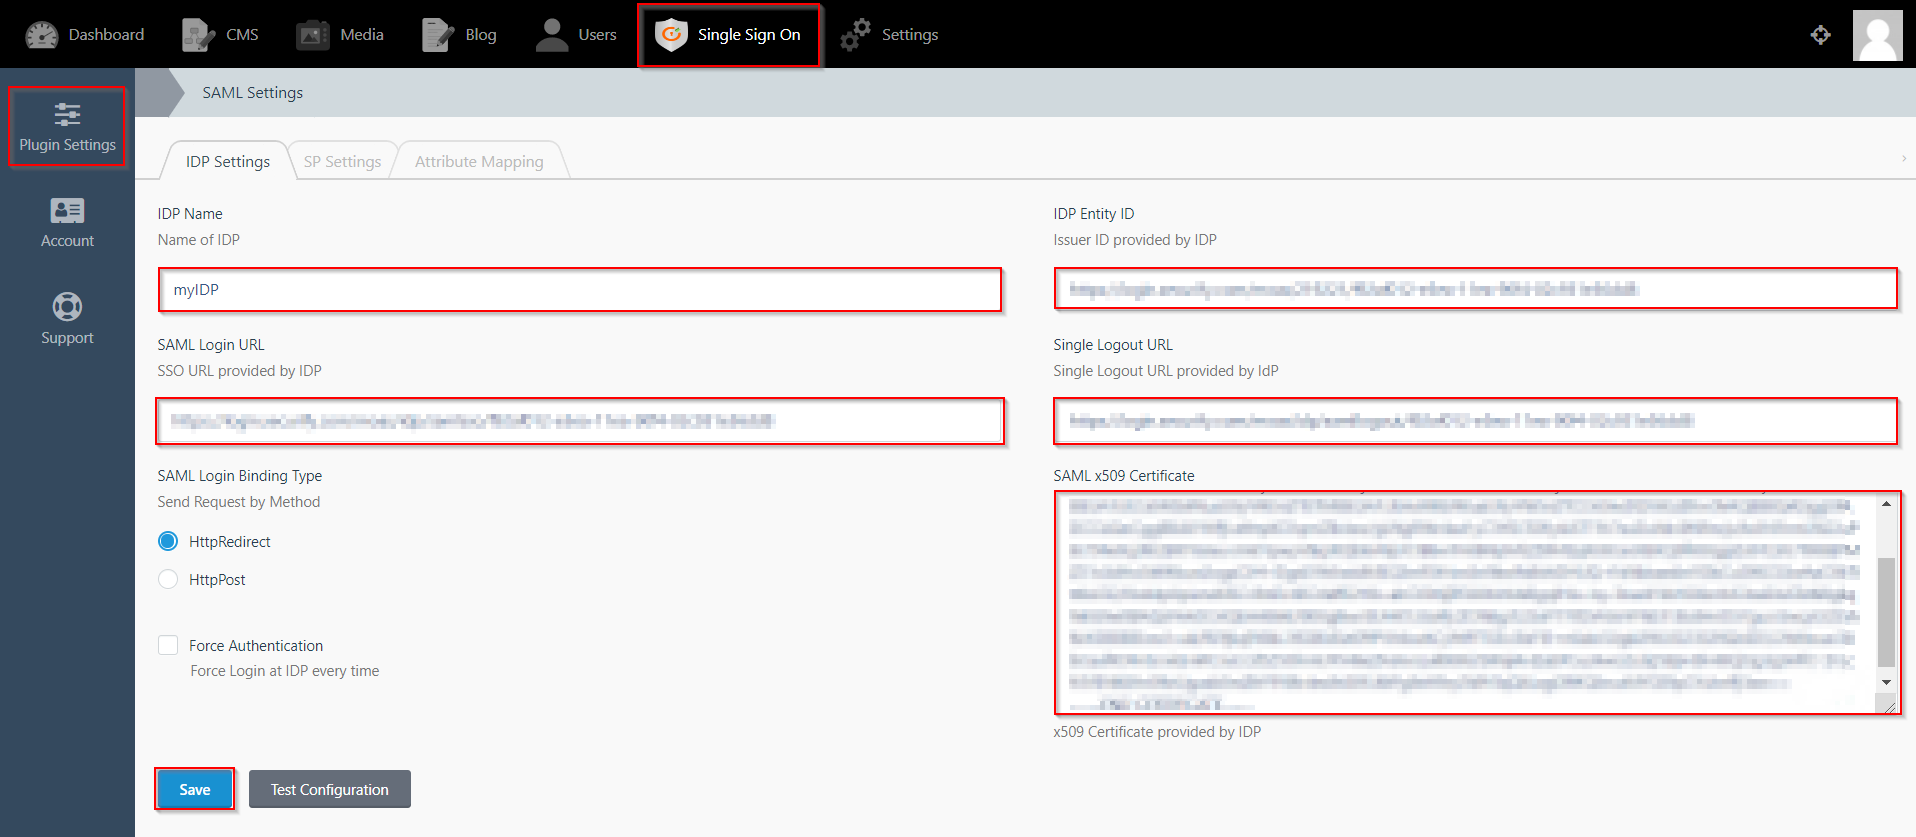
- You will see the Plugin Settings page. We will first configure the IdP Settings.
- Fill out the required fields according to the information provided by your Identity Provider. You can refer to the example given below.
- For Example:
- Click on Save button.
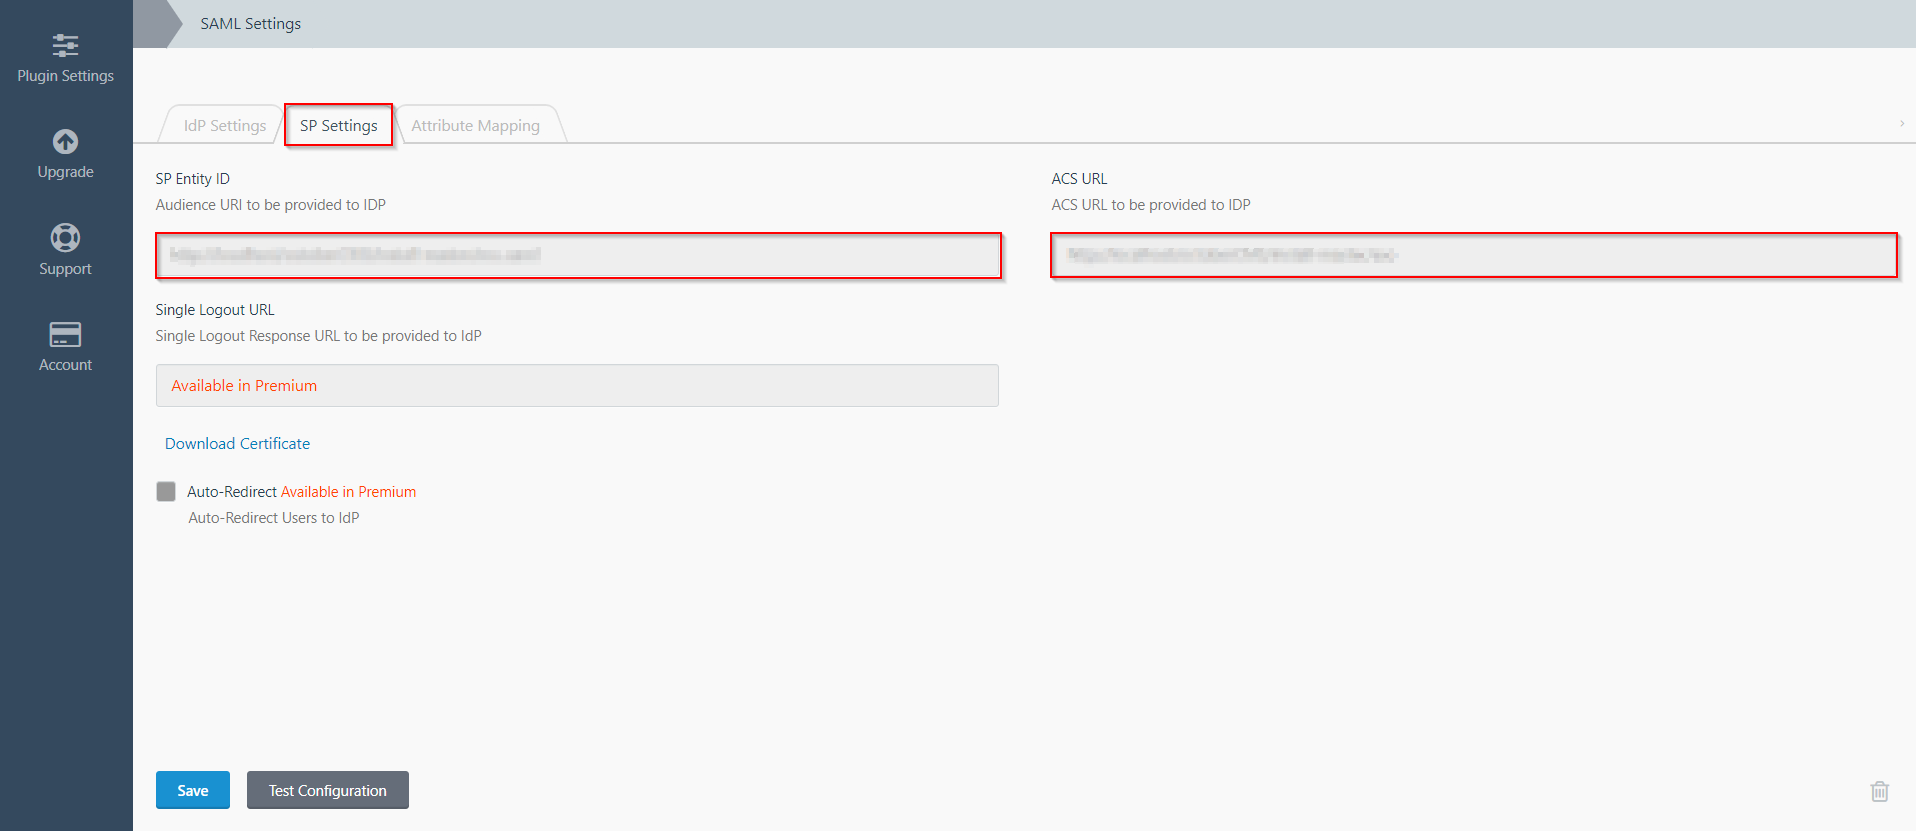
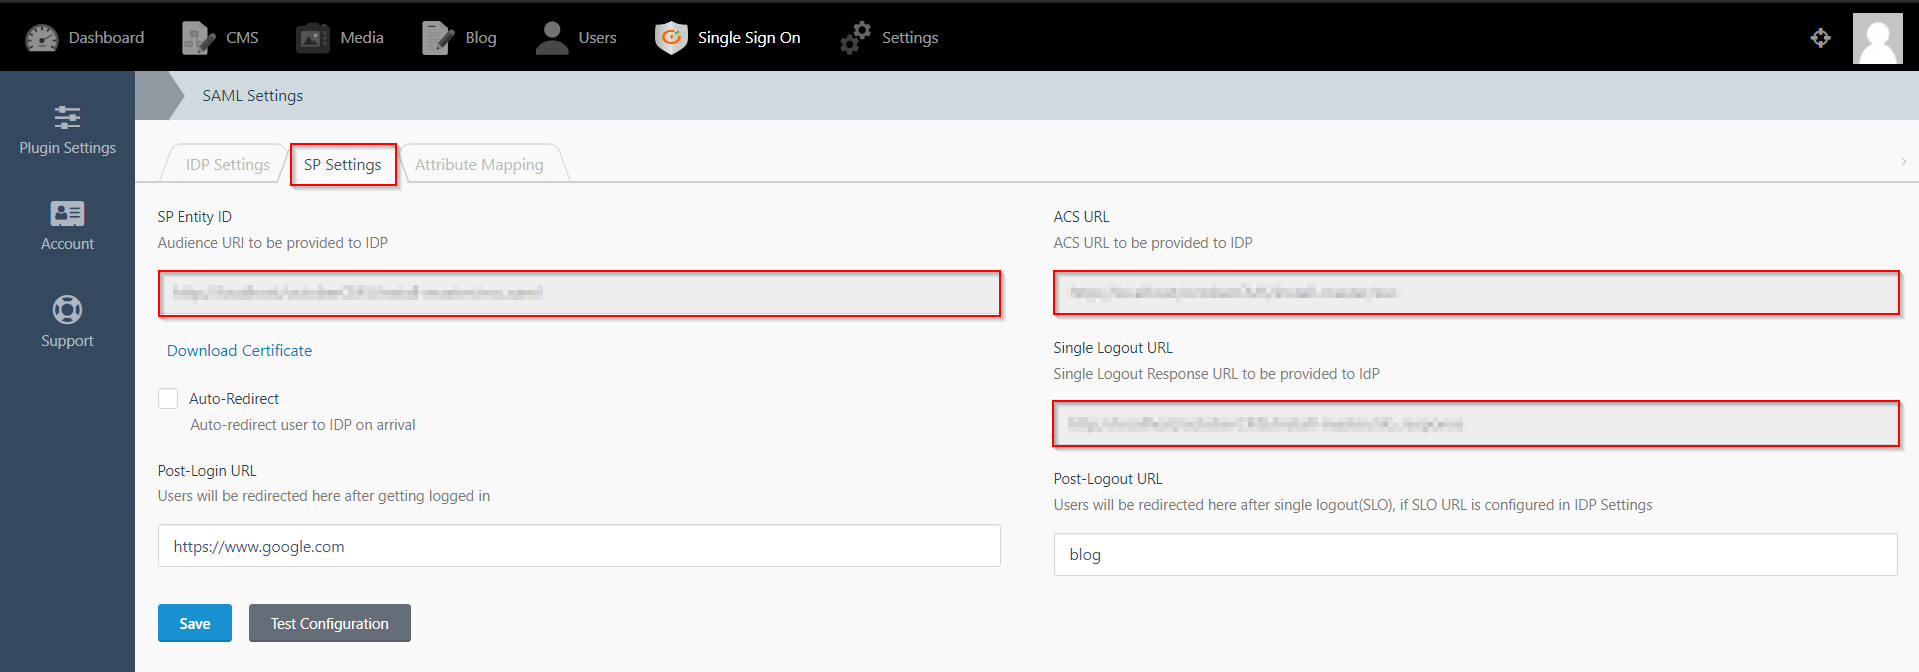
- The SP Settings tab has the data that you will need to provide to your IdP.
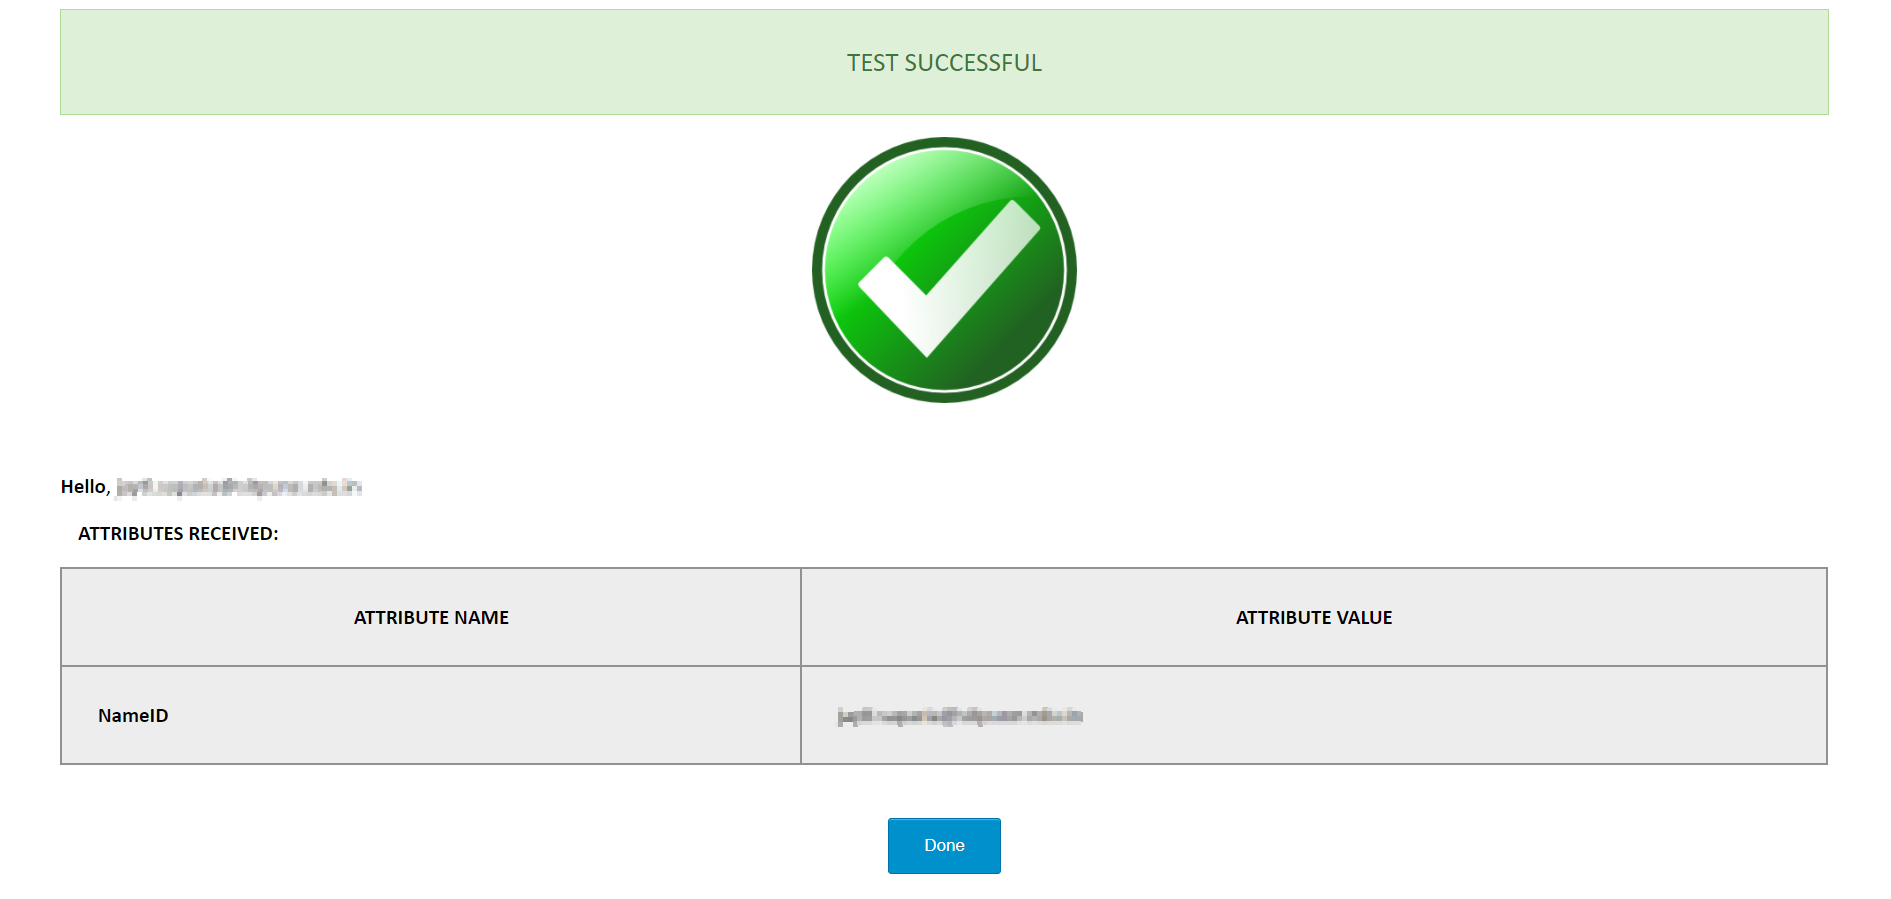
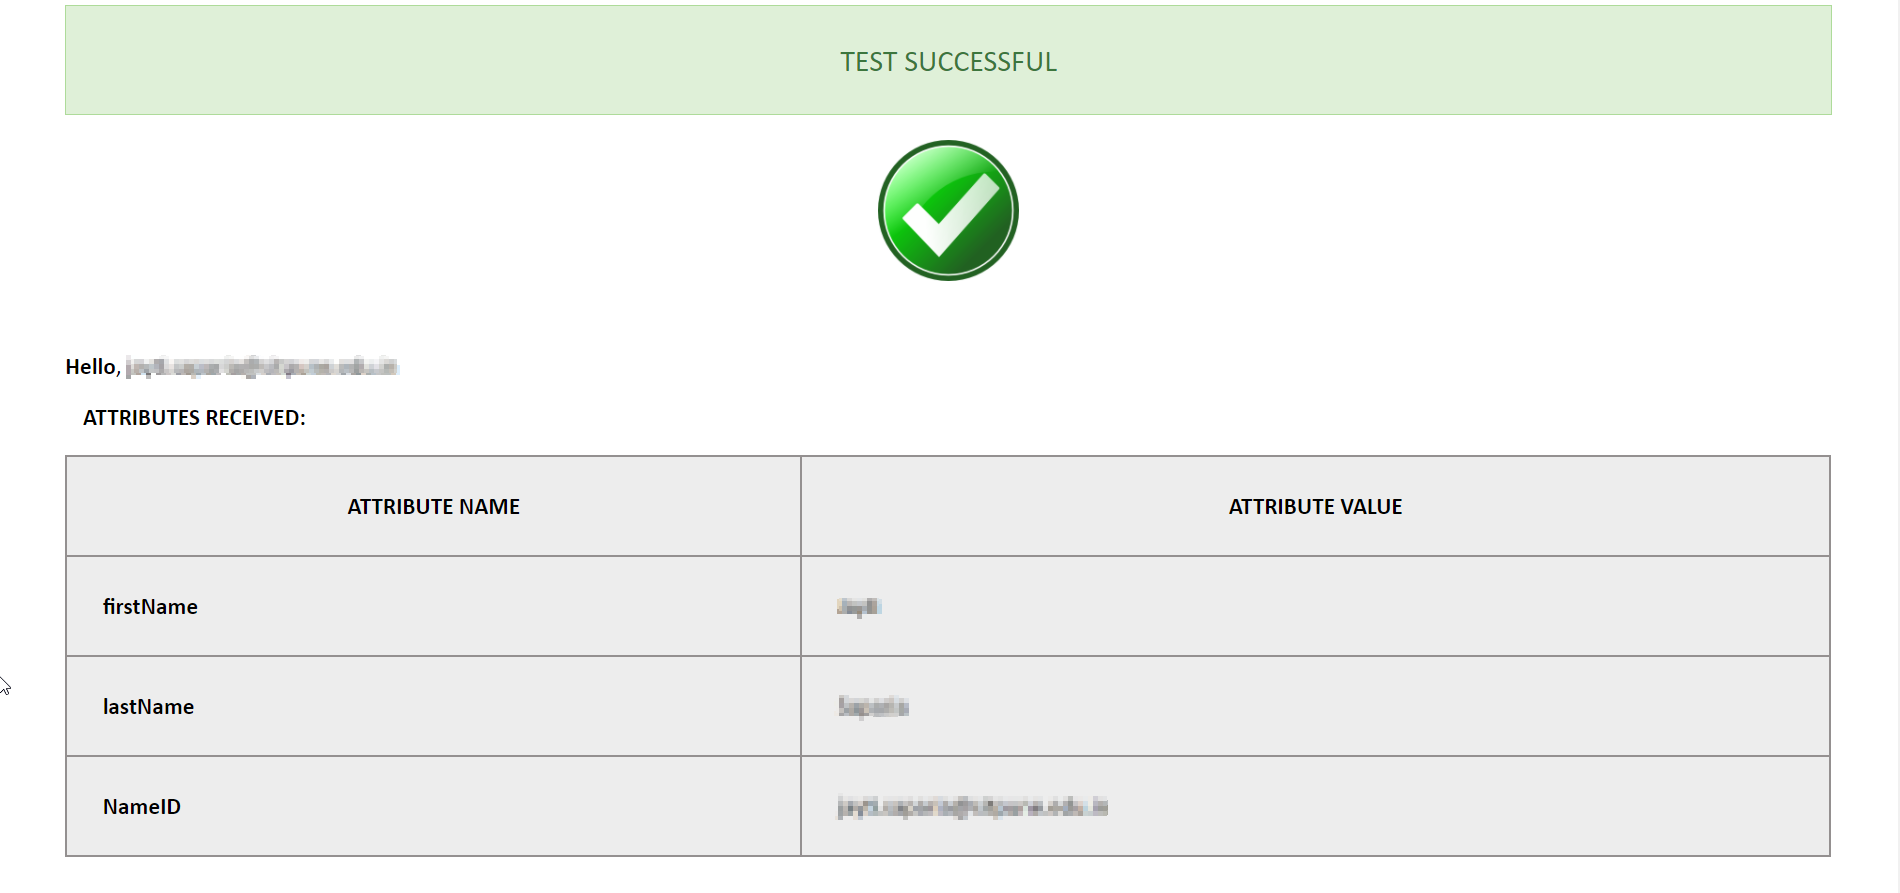
- Click on the Test Configuration button and the user details will be fetched. Test configuration will show the attributes that are received and are mapped by attribute mapping.
| IdP Name: | myIDP |
| IdP Entity Id: | https://login.xecurify.com/moas/ |
| SAML Login URL: | https://login.xecurify.com/moas/idp/samlsso |
| SAML x509 Certificate: | Certificate provided by your IdP. |
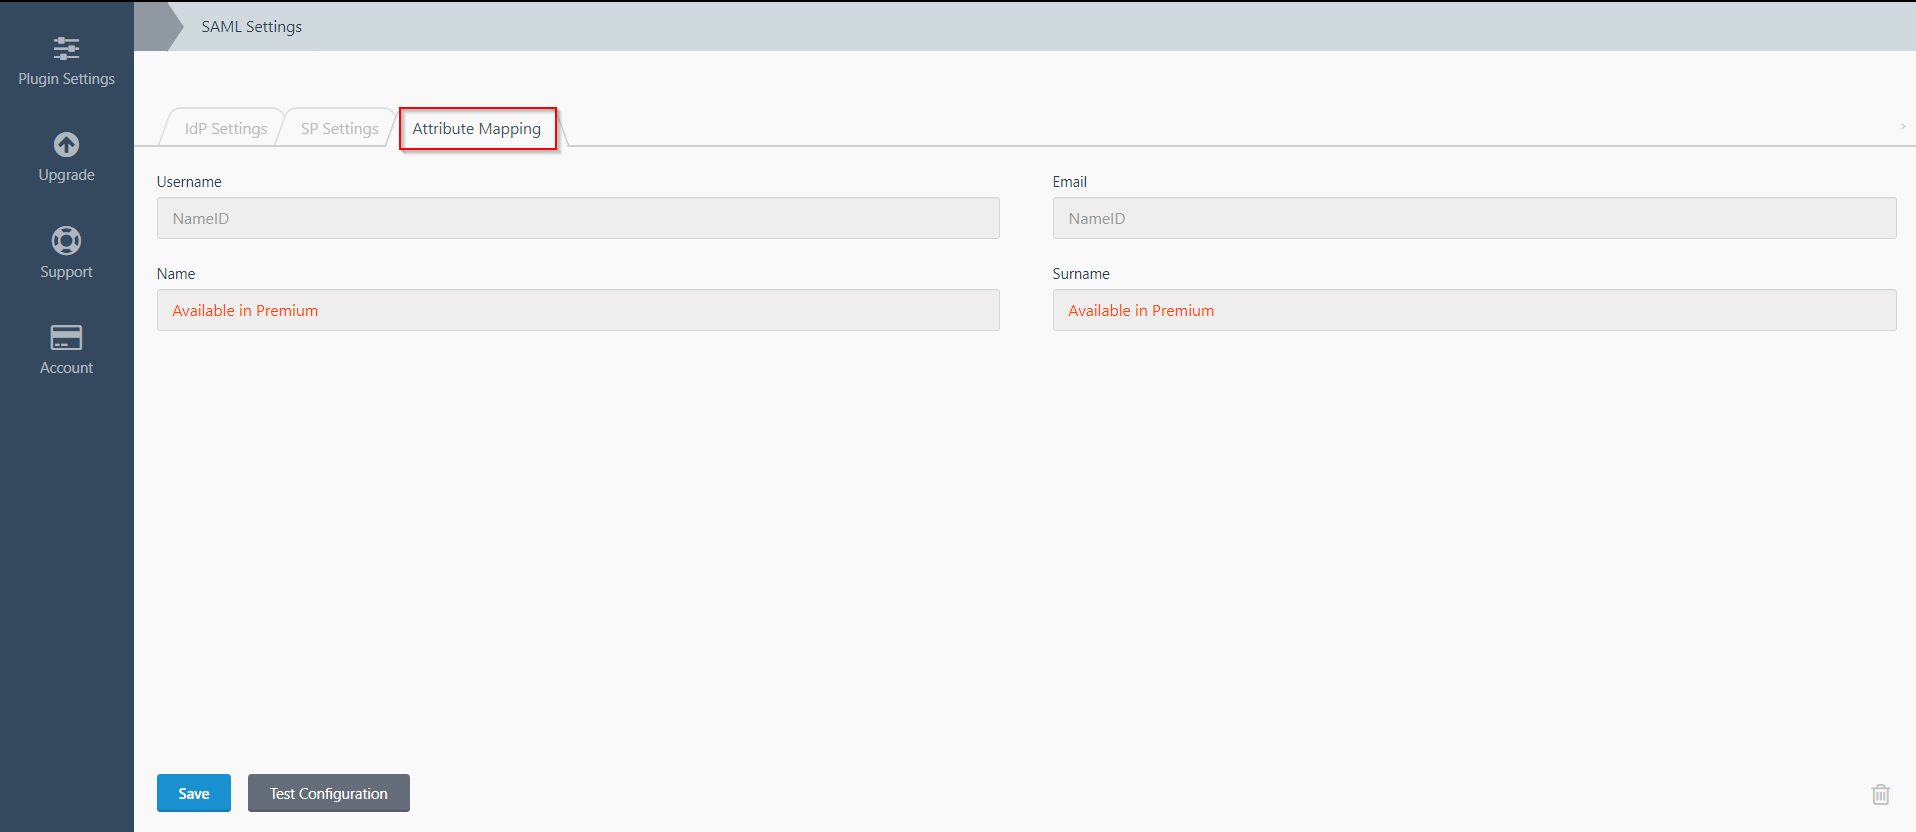
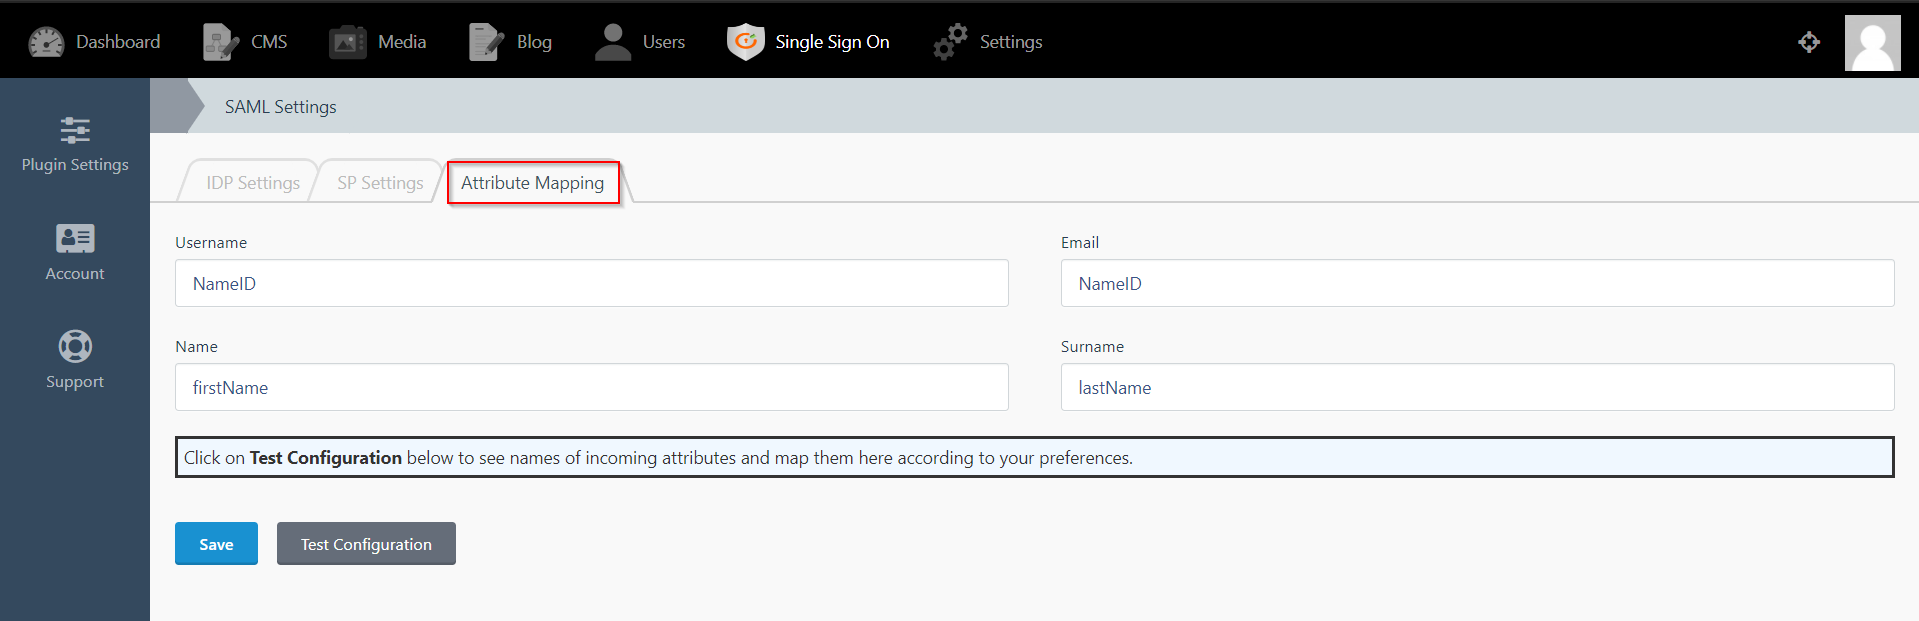
Step 3: Attribute Mapping
- Attribute Mapping feature allows you to map the user attributes sent by the IDP during SSO to the user attributes at October CMS.
- Go to Attribute Mapping menu option from the main navigation bar at the top of your page.
- It provides the Custom Atrribute Mapping feature in Premium plugin.
- Click on Single Sign On menu option from the main navigation bar at the top of your page.
- You will see the Plugin Settings page. We will first configure the IdP Settings.
- Fill out the required fields according to the information provided by your Identity Provider. You can refer to the example given below.
- For Example:
- Click on Save button.
- The SP Settings tab has the data that you will need to provide to your IdP.
- Click on the Test Configuration button and the user details will be fetched. Test configuration will show the attributes that are received and are mapped by attribute mapping.
| IdP Name: | myIDP |
| IdP Entity Id: | https://login.xecurify.com/moas/ |
| SAML Login URL: | https://login.xecurify.com/moas/idp/samlsso |
| SAML Logout URL: | https://login.xecurify.com/moas/idp/samllogout/ |
| SAML x509 Certificate: | Certificate provided by your IdP. |
Step 3: Attribute Mapping
- Attribute Mapping feature allows you to map the user attributes sent by the IDP during SSO to the user attributes at October CMS.
- Go to Attribute Mapping menu option from the main navigation bar at the top of your page.
- It also provide Custom Attribute mapping feature, which allows you to map any attribute sent by the IDP to the October CMS.
- You can map the attribute names received in Test Configuration to the user credentials of your October CMS users.
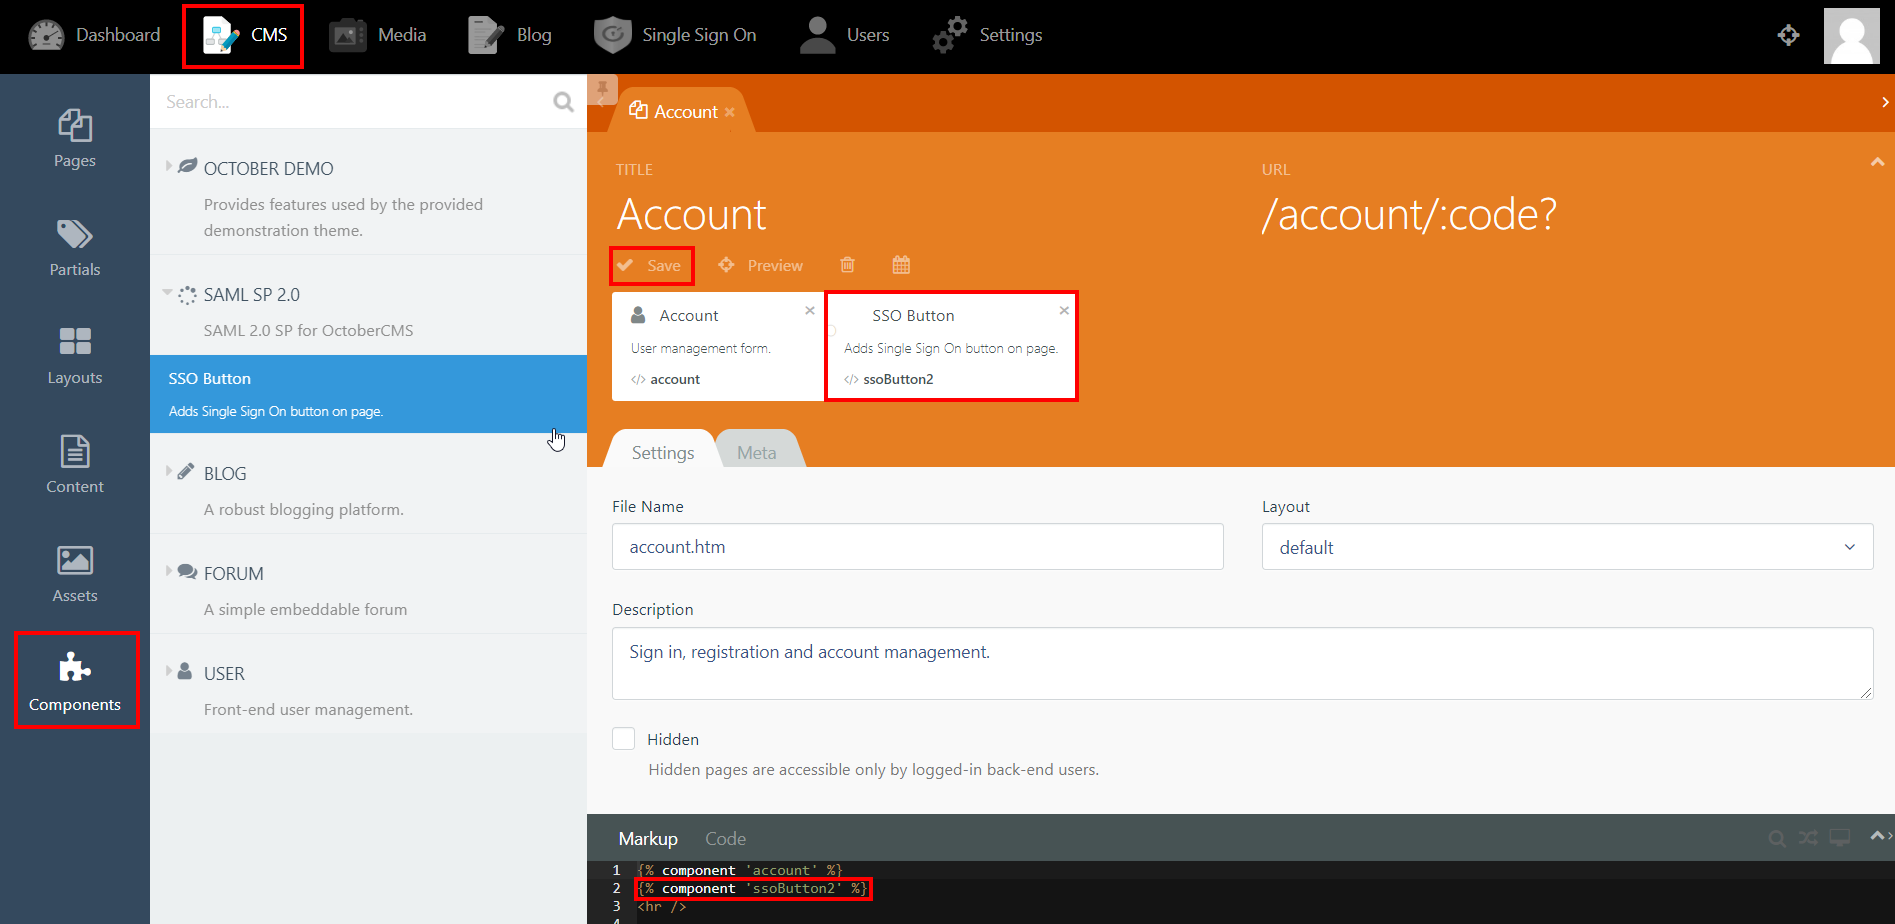
Step 4: SSO Button Component
- Click on CMS from the main navigation and select the page that you want to place the button on from the Pages menu on the left-hand side.
- Click on Components and click on SAML 2.0 SP to reveal the SSO Button component.
- Drag and drop the component on to your selected page. Hit save and preview.
- Click on the Single Sign-On (SSO) button to start the authentication flow for frontend users.
- The button for Backend login screen is generated automatically.
Step 5: SSO Options
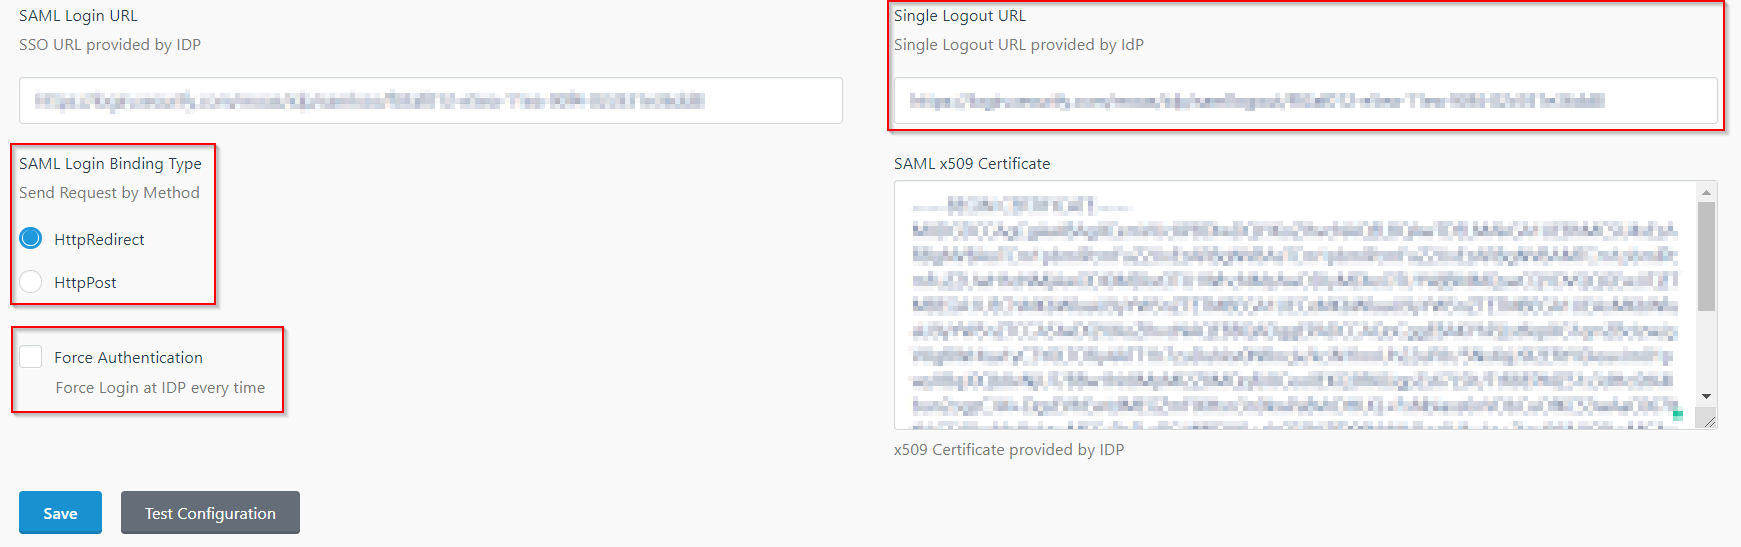
- In the IDP Settings tab, you can configure Force Authentication to force login screen at IdP every time your users are redirected for SSO.
- You can configure the Login Binding type to choose the method of sending the SAML request.
- You can configure the Single Logout URL to send a logout request to the IdP when a user logs out of your OctoberCMS site.
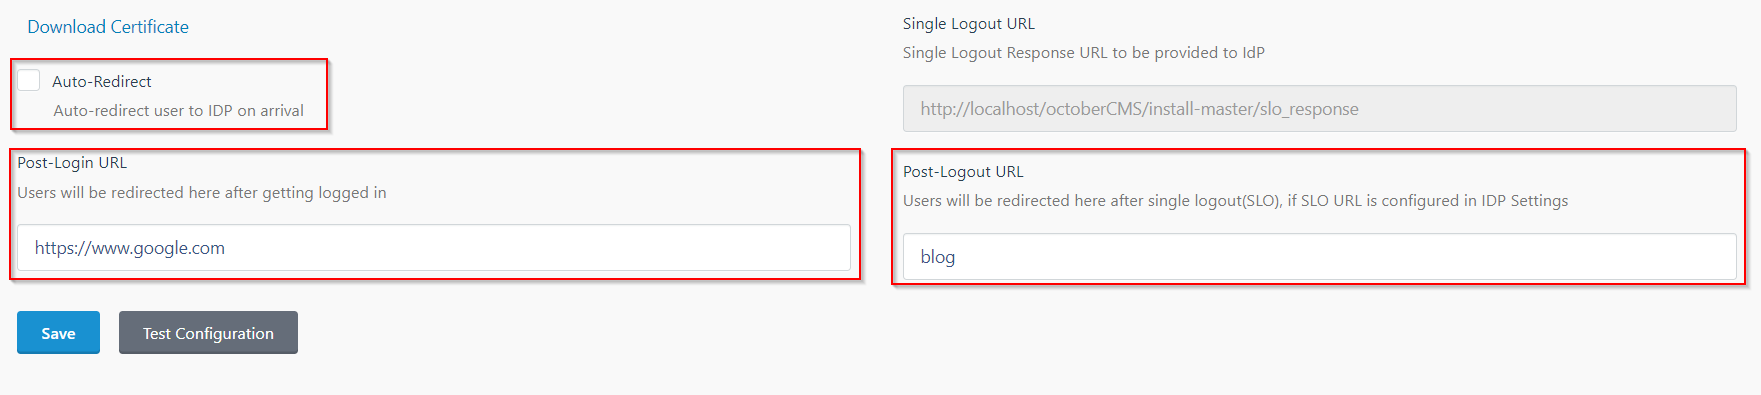
- In the SP Settings tab, you can configure Auto-Redirect to redirect users to IdP when they land on your site.
- You can configure the Post-Login and Post-Logout URLs to redirect users after they SSO and Single Logout.
- You can access the documentation for more details by going to Settings > Updates & Plugins > SAML 2.0 SP.
Additional Resources
If you are looking for anything which you cannot find, please drop us an email on info@xecurify.com
Trending searches:
Hello there!
Need Help? We are right here!
