SAML Single Sign-On (SSO) into October CMS Using SimpleSAML
SAML Single Sign-On (SSO) into October CMS Using SimpleSAML
October CMS Single Sign-On ( SSO ) plugin gives the ability to enable SAML Single Sign-On (SSO) for your October CMS sites. Our October CMS SSO plugin is compatible with all the SAML compliant Identity providers. Here we will go through a step-by-step guide to configure SAML SSO between October CMS site and your Identity Provider.
Pre-requisites
To integrate your Identity Provider(IDP) with October CMS, you need the following items:
- October CMS should be installed and configured.
- Download any Front-end user management plugins - RainLab/Buddies.
Download and Installation
- Login to your October CMS site’s backend: https://example.com/backend.
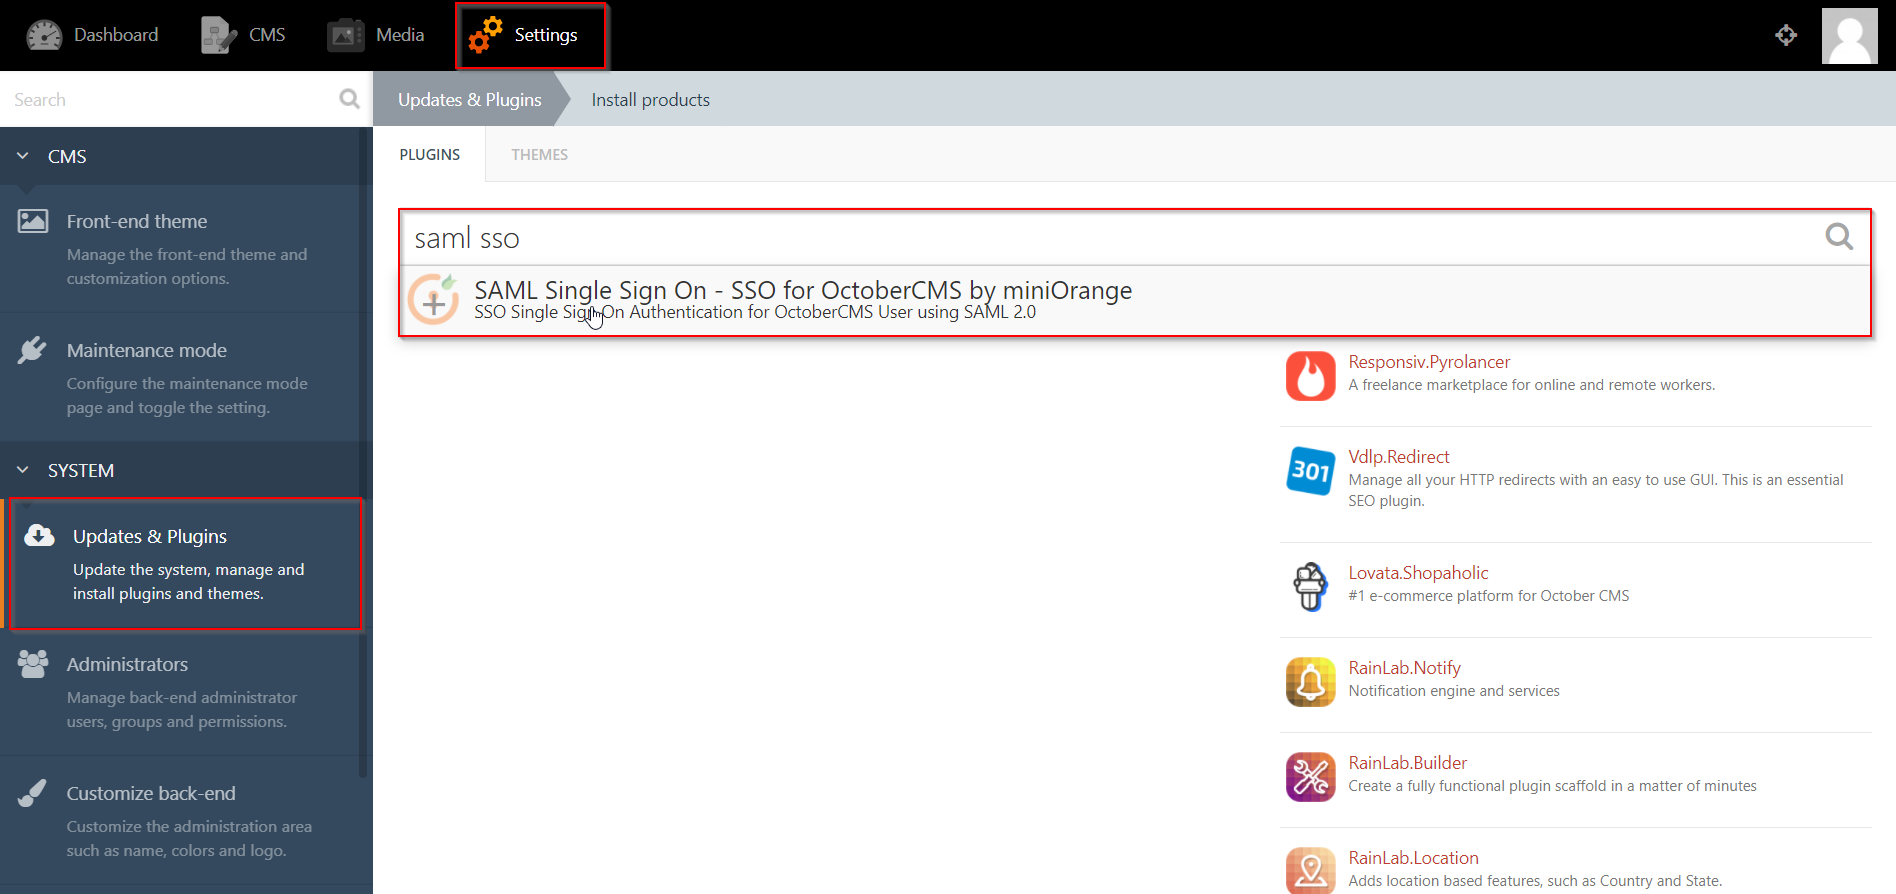
- From the admin dashboard, go to Settings from the main navigation bar and select Updates & Plugins.
- Click on Install plugins and in the search bar type “SAML SSO”.
- Click on the SAML SP Single Sign-On - SSO search result and the plugin will start installing.
Step 1: Setup SimpleSAML as Identity Provider
- In config/config.php, make sure that 'enable.saml20-idp' is true. Example: ‘enable.saml20-idp’ => true
- In metadata/saml20-idp-hosted.php, configure SimpleSAML as an Identity Provider by adding code below:
$metadata['__DYNAMIC:1__'] = array(

    'host' => '__DEFAULT__',

    /* X.509 key and certificate. Relative to the cert directory.*/

    'privatekey' => '<YOUR_PRIVATE_KEY_FILE_NAME>',

    //eg. RSA_Private_Key.pem 'certificate' => '<YOUR_PUBLIC_KEY_FILE_NAME>',

    //eg. RSA_Public_Key.cer

    /* Authentication source to use. Configured in 'config/authsources.php'. */

    'auth' => '<YOUR_AUTH_SOURCE_NAME>',

); - In metadata/saml20-sp-remote.php, register your Servider Provider like this:
/* Replace example.com with your atlassian domain name. */$metadata['https://example.com/plugins/servlet/saml/metadata'] = array(
'AssertionConsumerService' => 'https://example.com/',
'SingleLogoutService' => 'https://example.com/',
'NameIDFormat' => 'urn:oasis:names:tc:SAML:1.1:nameid-format:emailAddress',
'simplesaml.nameidattribute' => 'mail',
'simplesaml.attributes' => true,
'attributes' => array('mail', 'givenname', 'sn', 'memberOf'),
);
×
![]()
Steps 2 : October CMS as SP
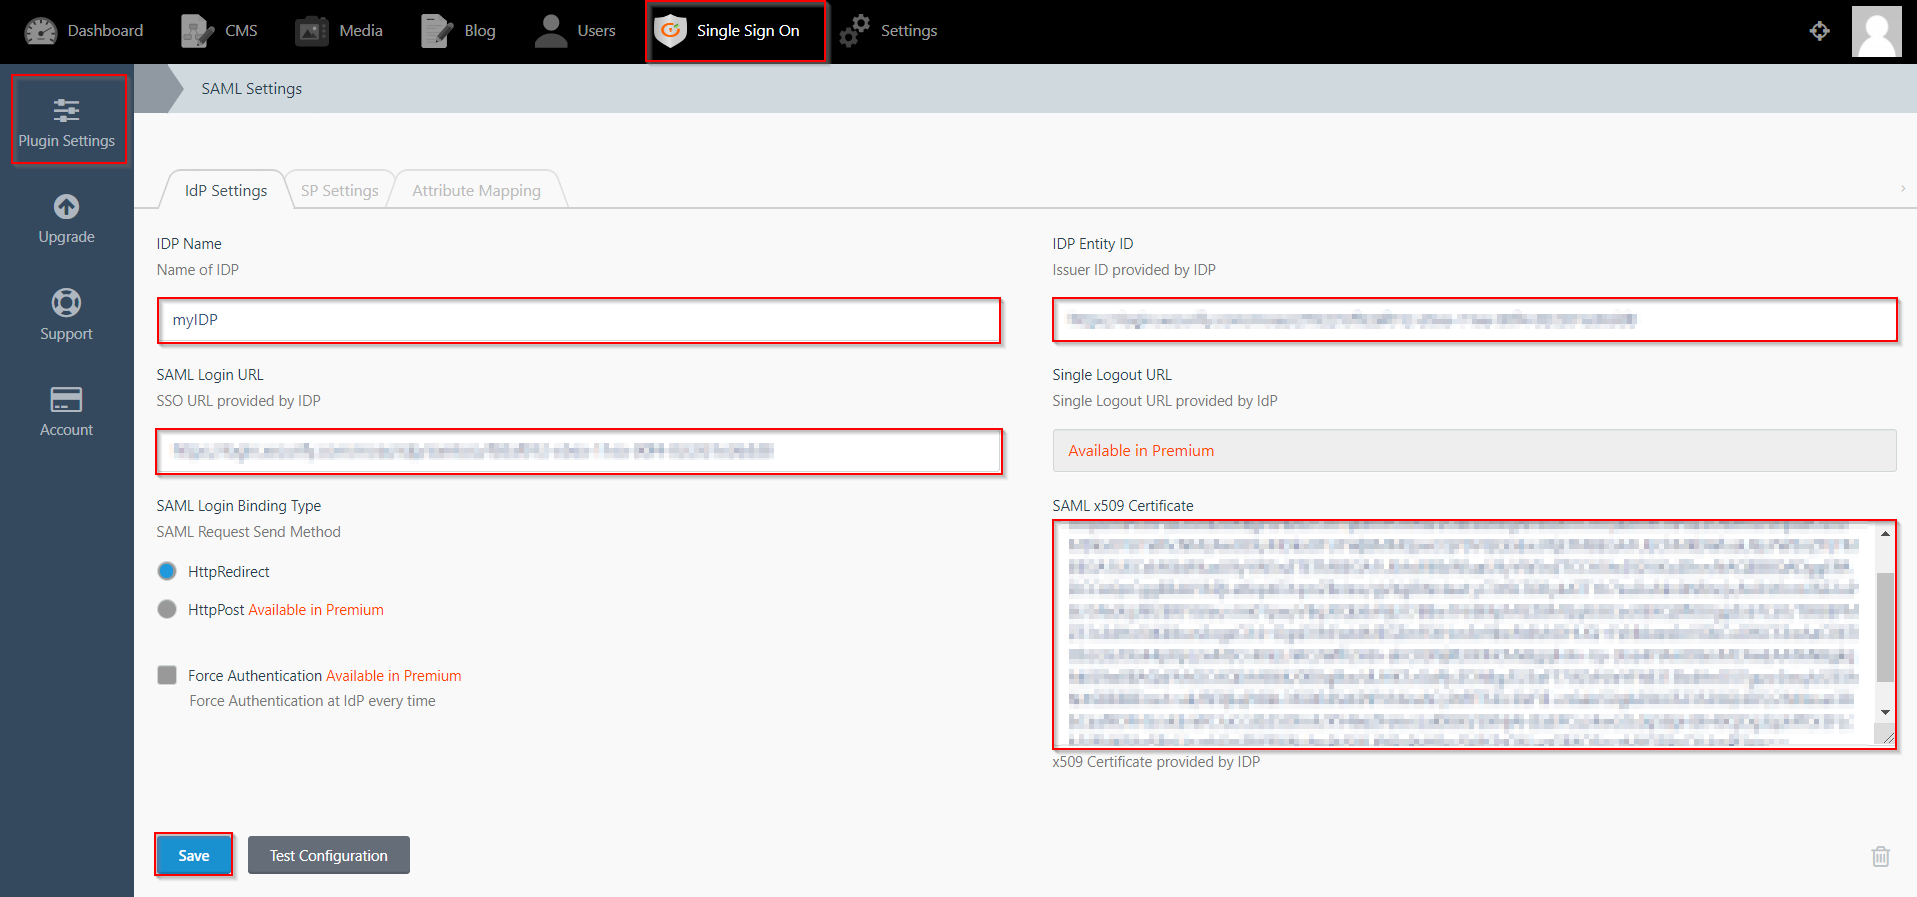
- Click on Single Sign On menu option from the main navigation bar at the top of your page.
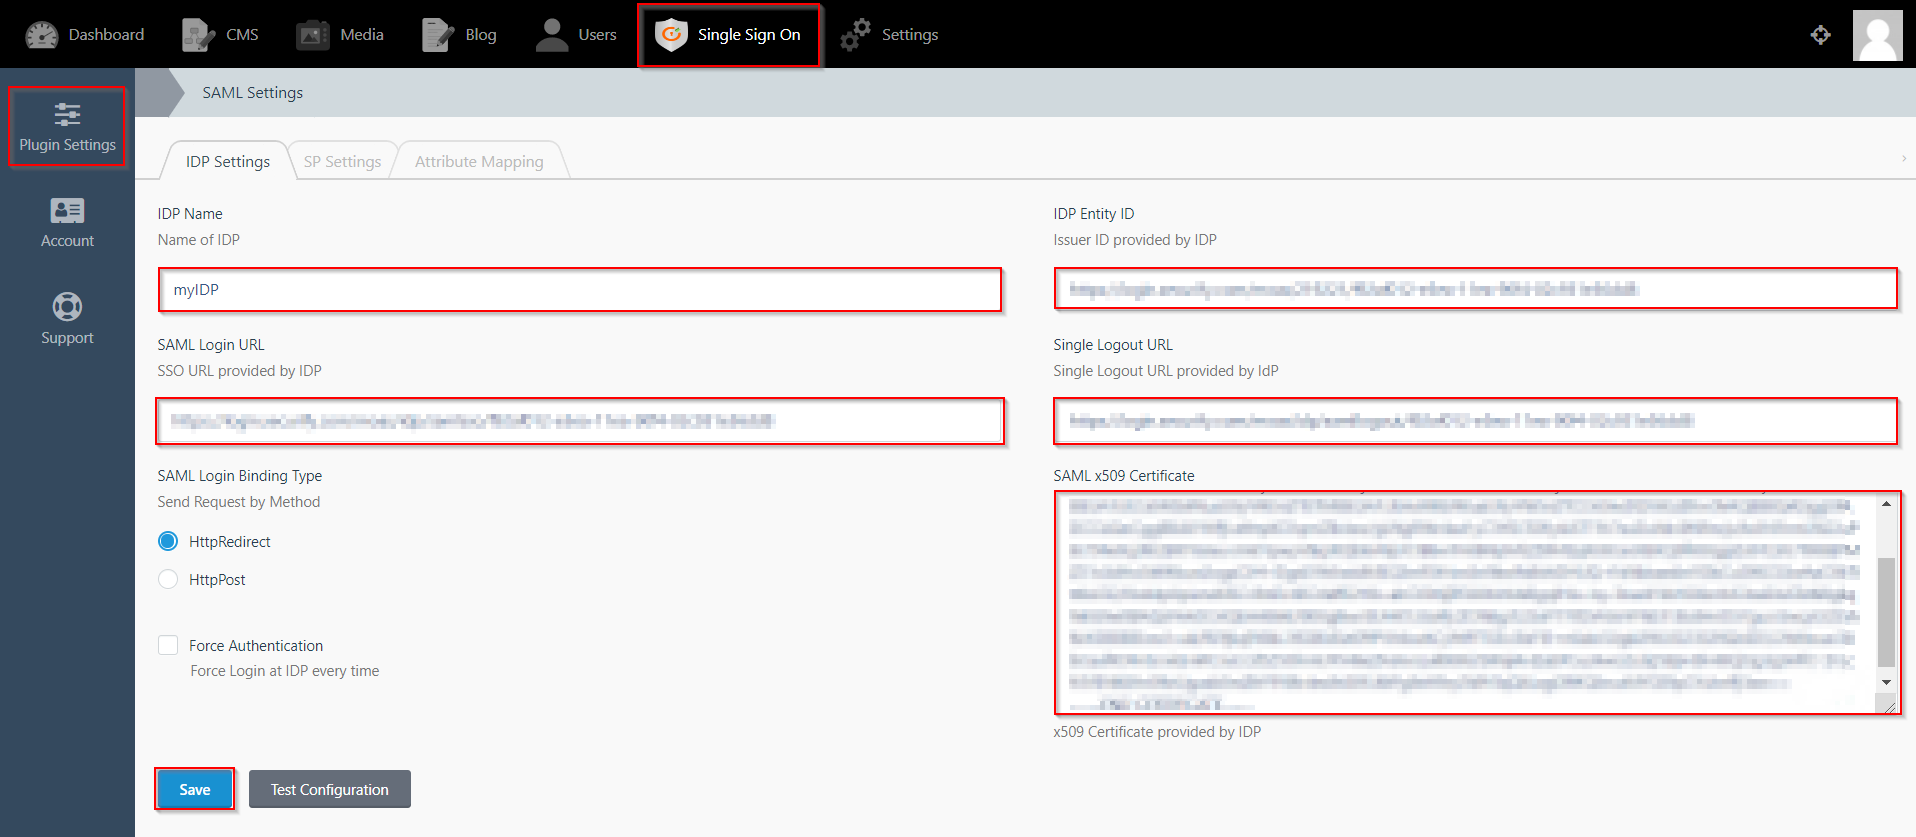
- You will see the Plugin Settings page. We will first configure the IdP Settings.
- Fill out the required fields according to the information provided by your Identity Provider. You can refer to the example given below.
- For Example:
- Click on Save button.
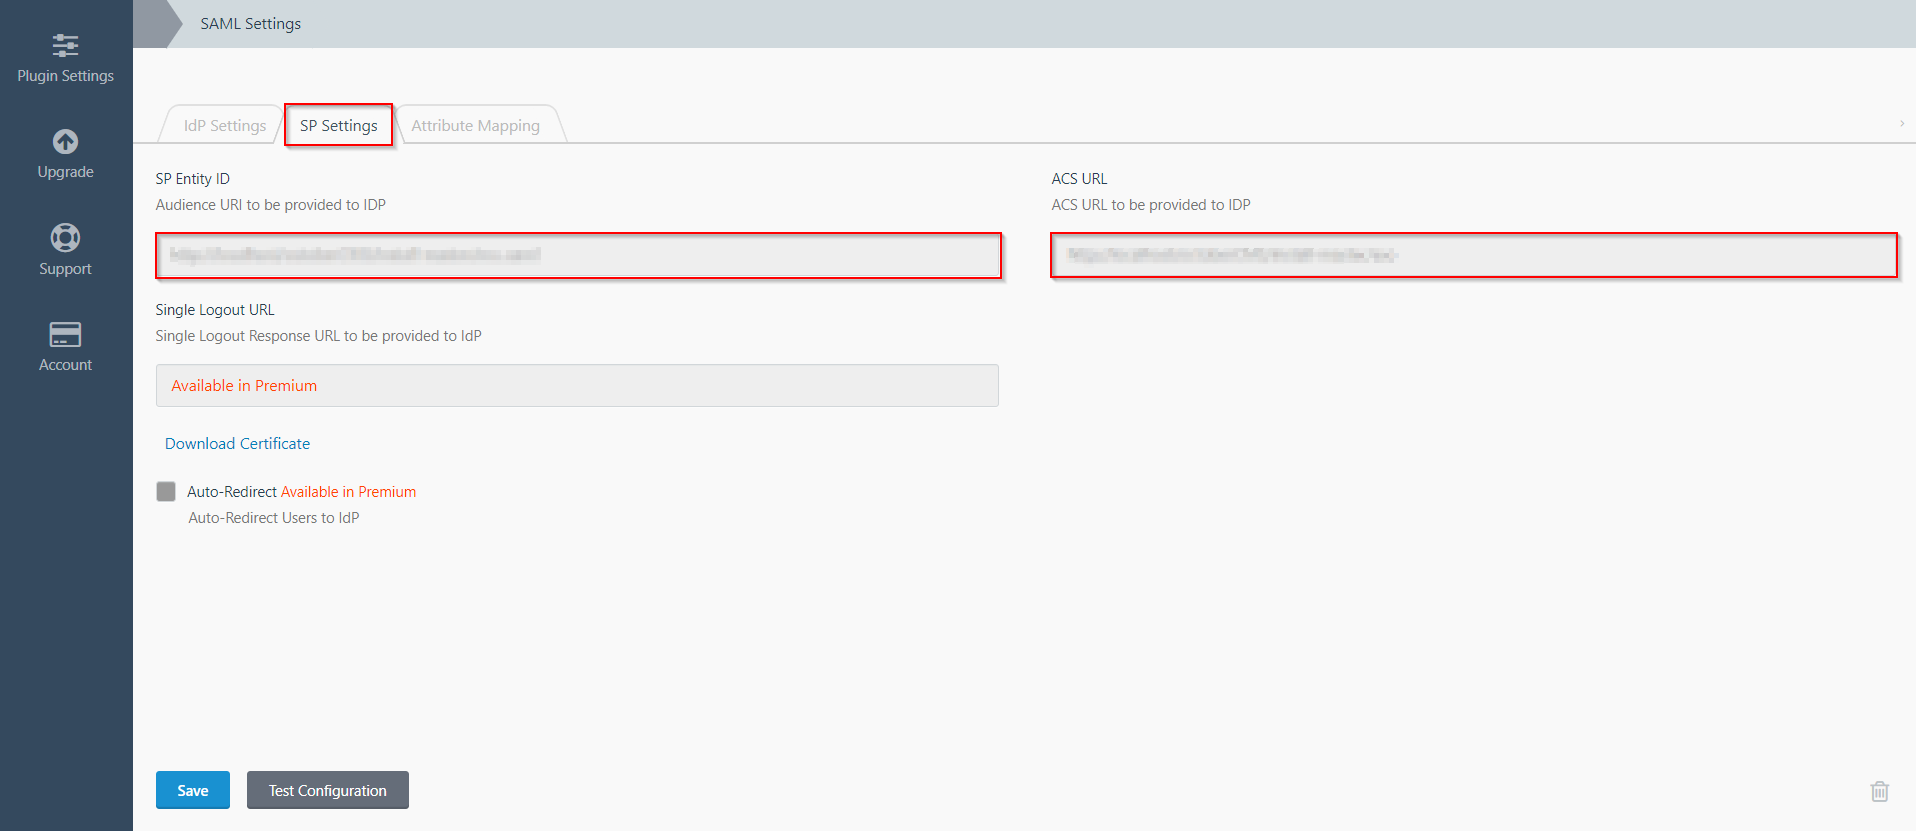
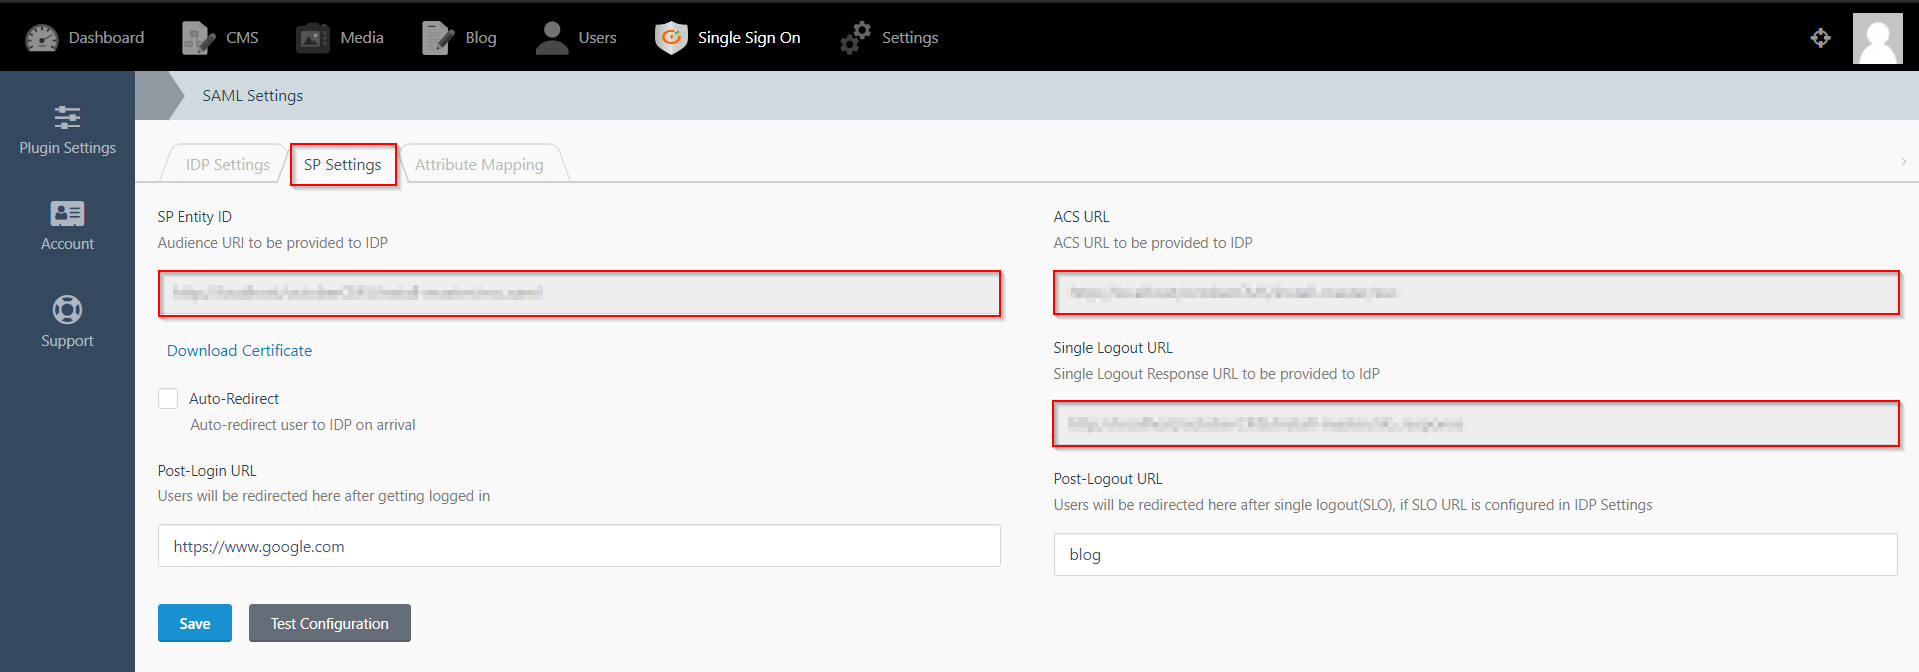
- The SP Settings tab has the data that you will need to provide to your IdP.
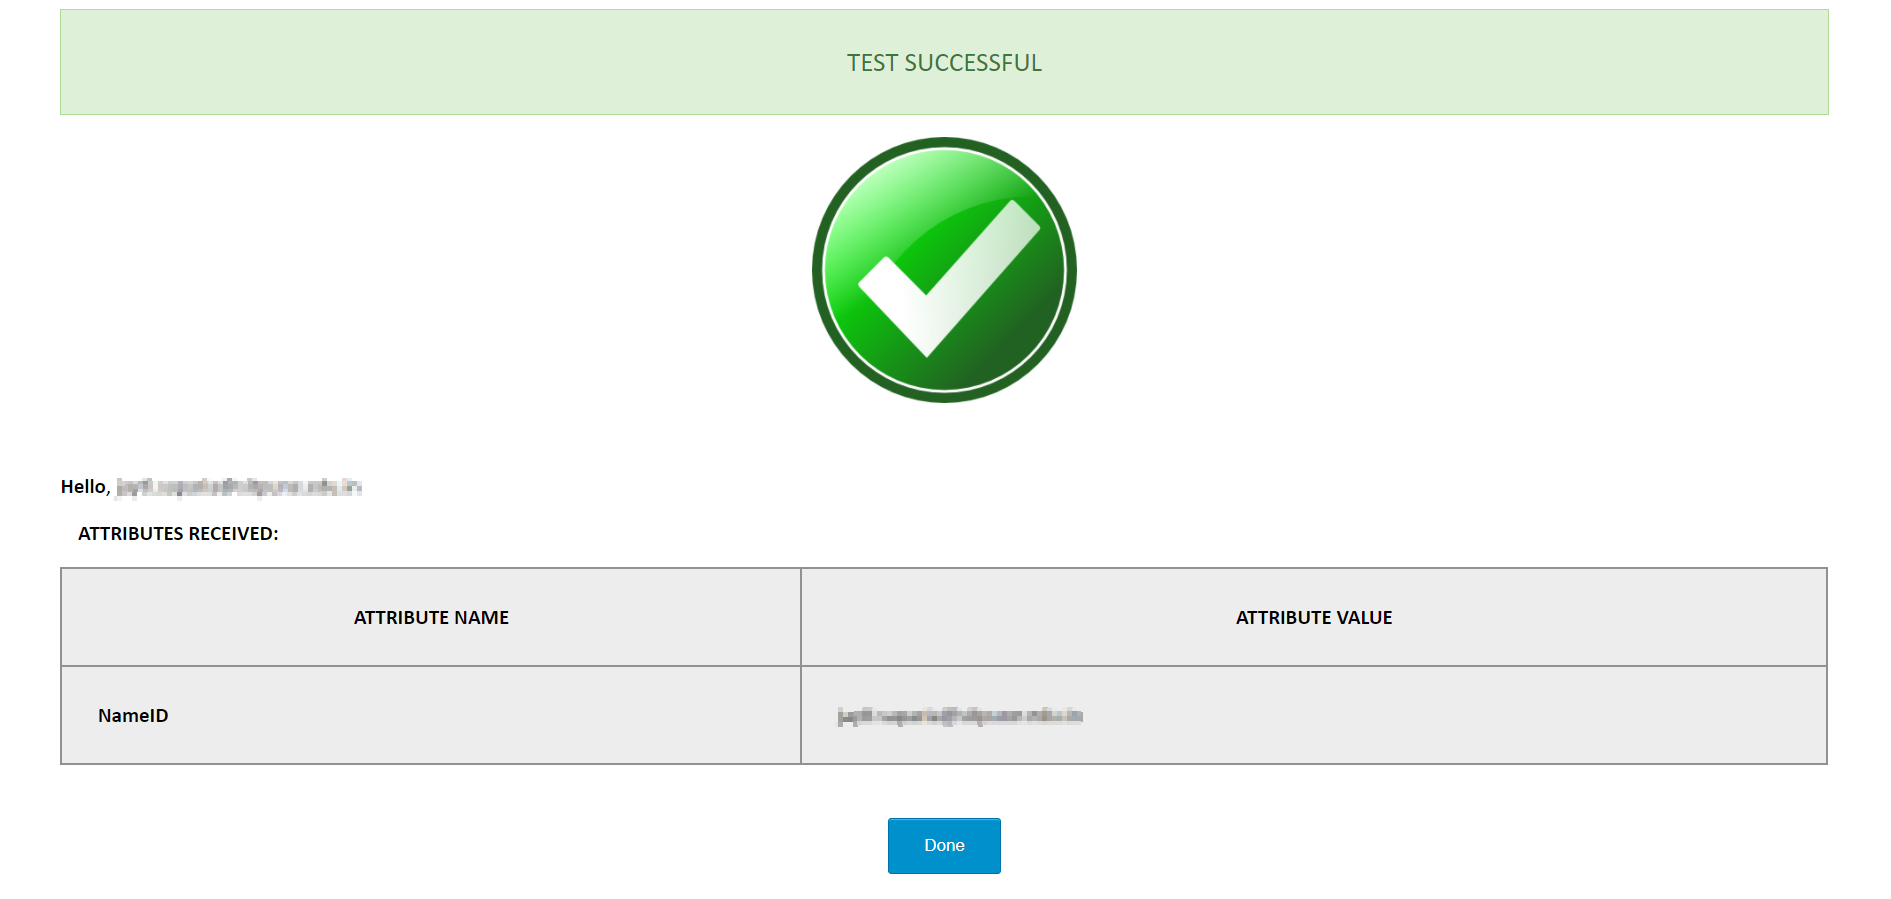
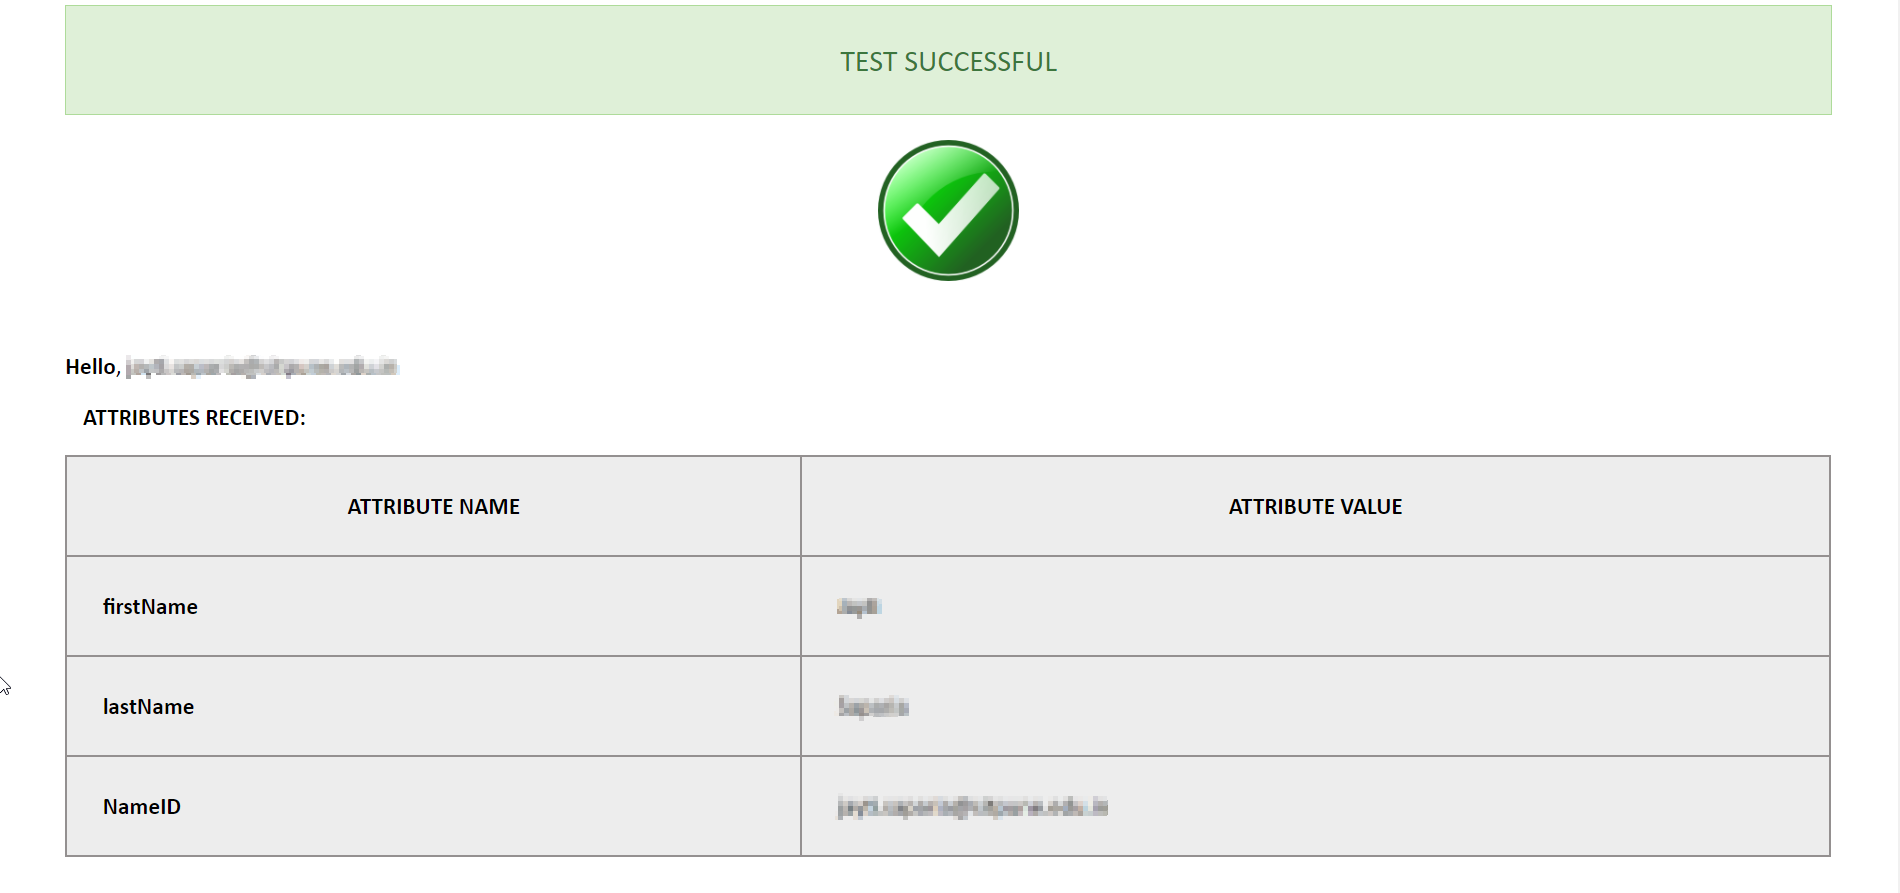
- Click on the Test Configuration button and the user details will be fetched. Test configuration will show the attributes that are received and are mapped by attribute mapping.
| IdP Name: | myIDP |
| IdP Entity Id: | https://login.xecurify.com/moas/ |
| SAML Login URL: | https://login.xecurify.com/moas/idp/samlsso |
| SAML x509 Certificate: | Certificate provided by your IdP. |
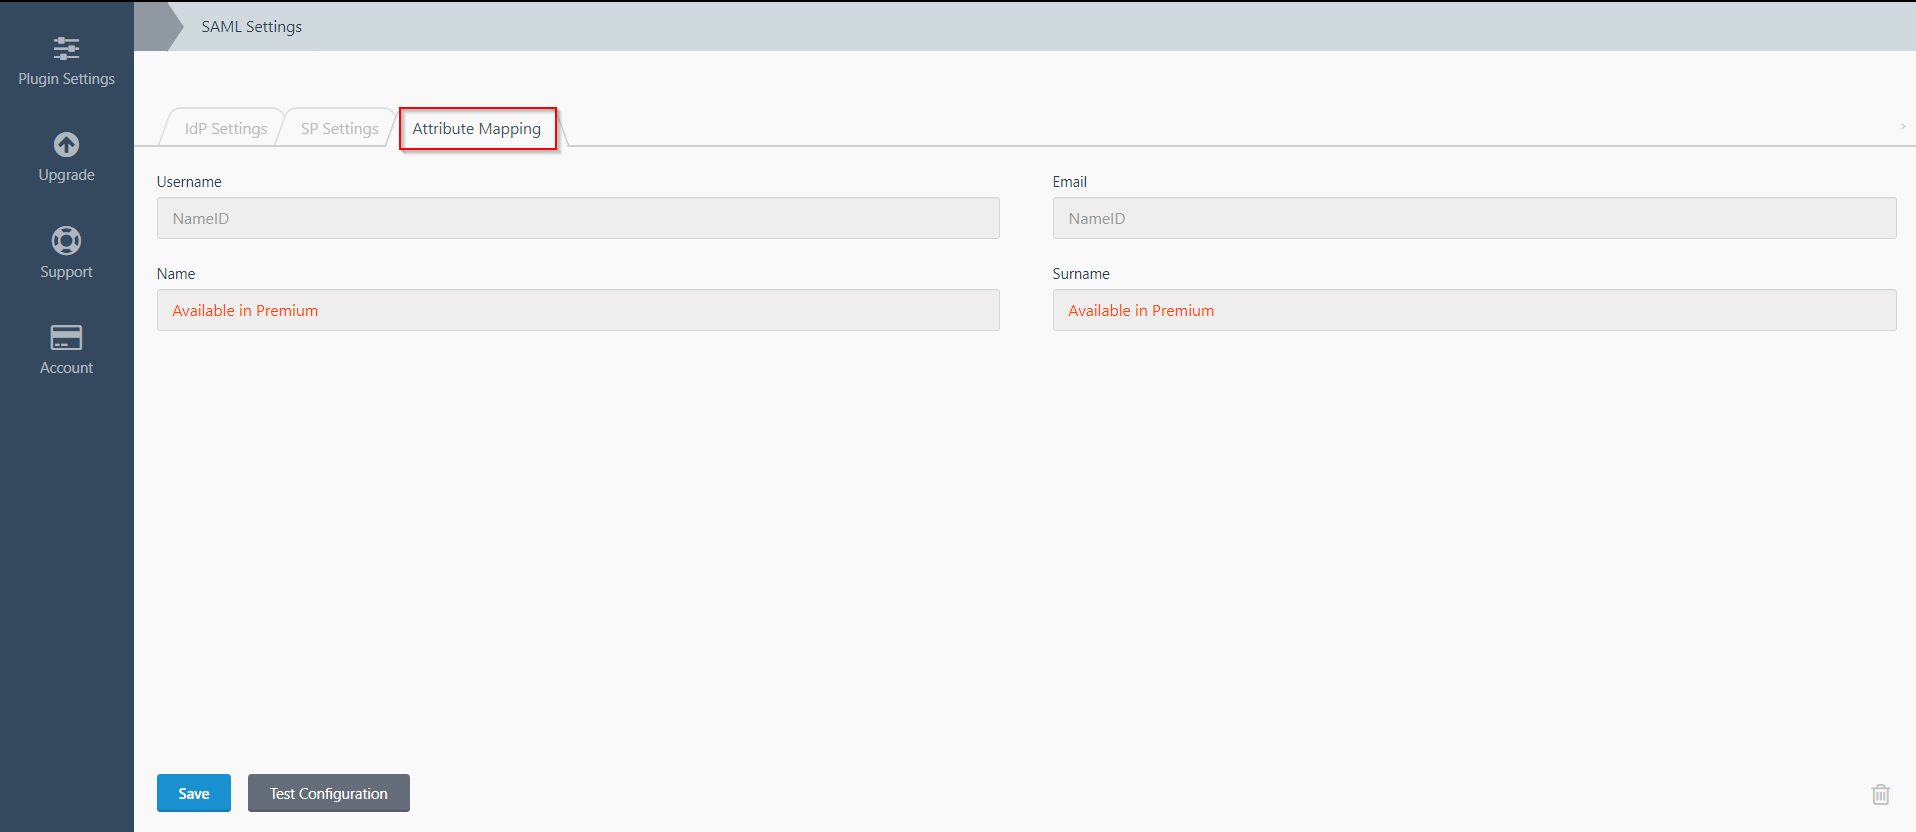
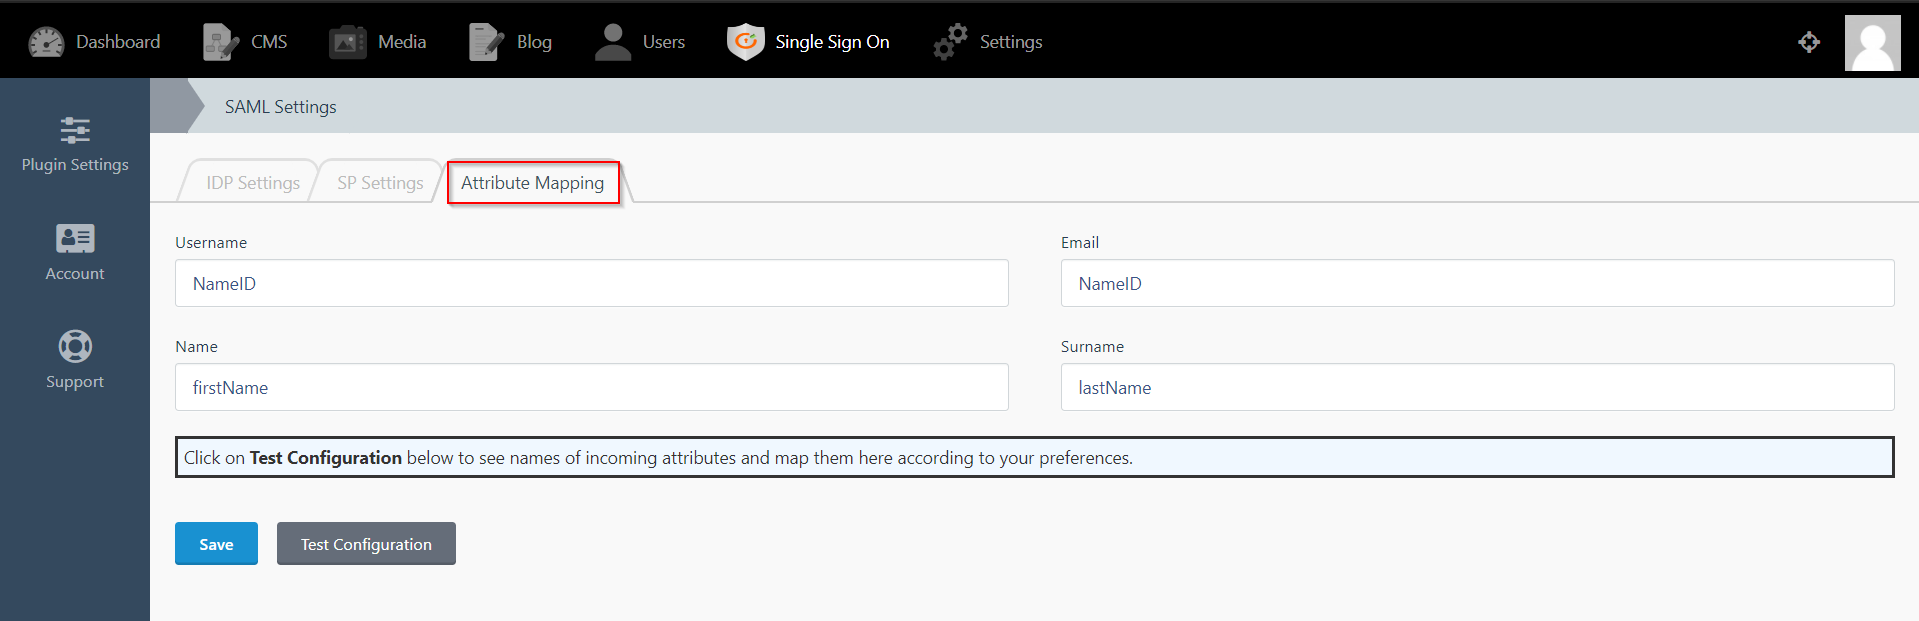
Step 3: Attribute Mapping
- Attribute Mapping feature allows you to map the user attributes sent by the IDP during SSO to the user attributes at October CMS.
- Go to Attribute Mapping menu option from the main navigation bar at the top of your page.
- It provides the Custom Atrribute Mapping feature in Premium plugin.
- Click on Single Sign On menu option from the main navigation bar at the top of your page.
- You will see the Plugin Settings page. We will first configure the IdP Settings.
- Fill out the required fields according to the information provided by your Identity Provider. You can refer to the example given below.
- For Example:
- Click on Save button.
- The SP Settings tab has the data that you will need to provide to your IdP.
- Click on the Test Configuration button and the user details will be fetched. Test configuration will show the attributes that are received and are mapped by attribute mapping.
| IdP Name: | myIDP |
| IdP Entity Id: | https://login.xecurify.com/moas/ |
| SAML Login URL: | https://login.xecurify.com/moas/idp/samlsso |
| SAML Logout URL: | https://login.xecurify.com/moas/idp/samllogout/ |
| SAML x509 Certificate: | Certificate provided by your IdP. |
Step 3: Attribute Mapping
- Attribute Mapping feature allows you to map the user attributes sent by the IDP during SSO to the user attributes at October CMS.
- Go to Attribute Mapping menu option from the main navigation bar at the top of your page.
- It also provide Custom Attribute mapping feature, which allows you to map any attribute sent by the IDP to the October CMS.
- You can map the attribute names received in Test Configuration to the user credentials of your October CMS users.
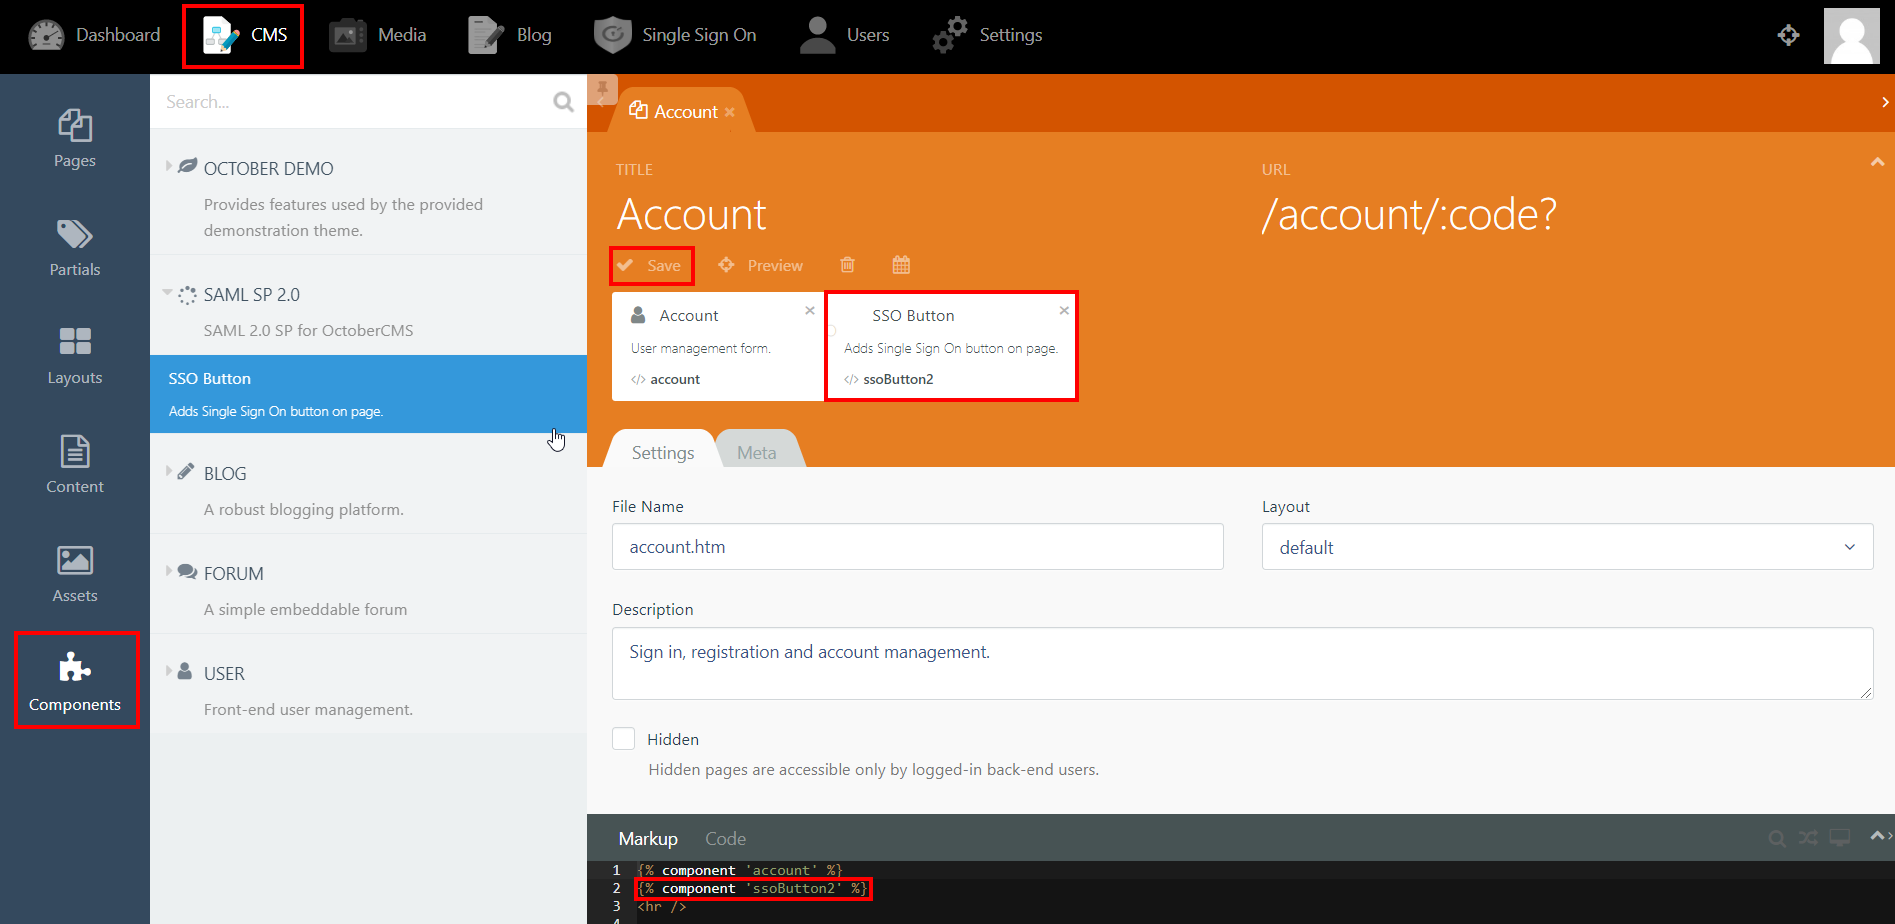
Step 4: SSO Button Component
- Click on CMS from the main navigation and select the page that you want to place the button on from the Pages menu on the left-hand side.
- Click on Components and click on SAML 2.0 SP to reveal the SSO Button component.
- Drag and drop the component on to your selected page. Hit save and preview.
- Click on the Single Sign-On (SSO) button to start the authentication flow for frontend users.
- The button for Backend login screen is generated automatically.
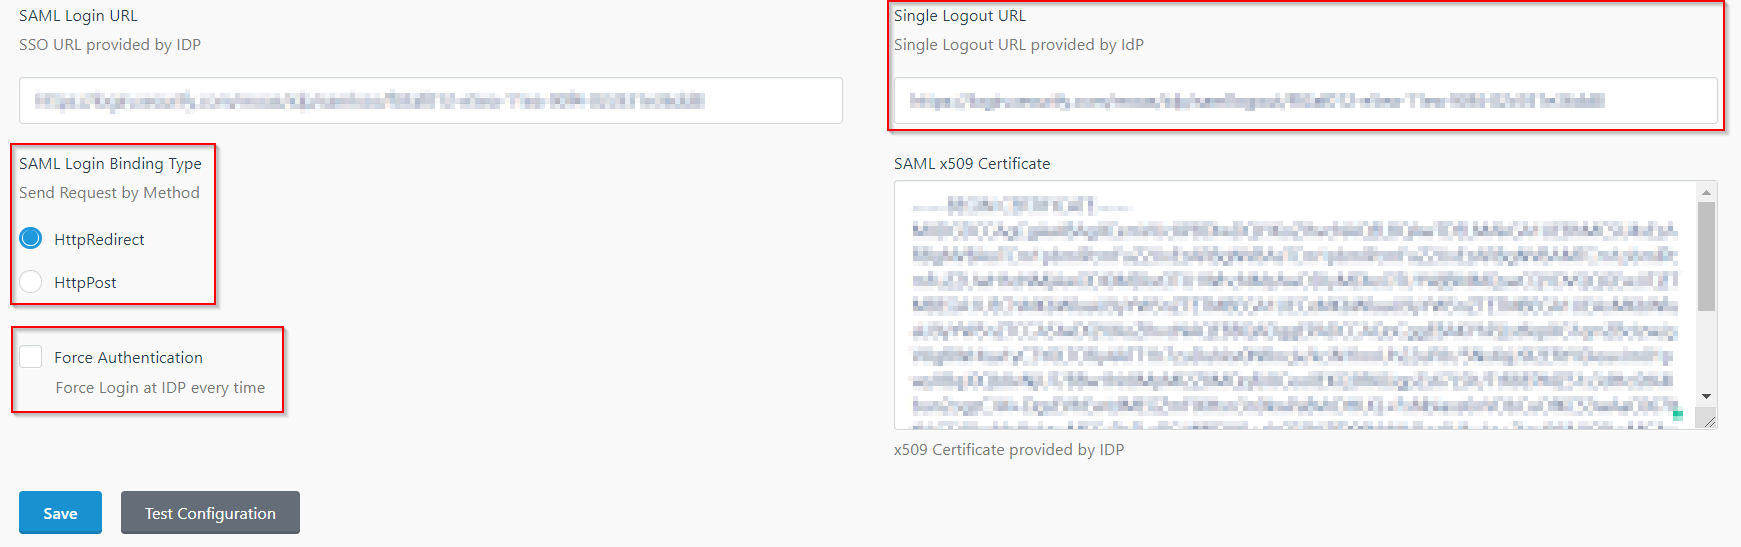
Step 5: SSO Options
- In the IDP Settings tab, you can configure Force Authentication to force login screen at IdP every time your users are redirected for SSO.
- You can configure the Login Binding type to choose the method of sending the SAML request.
- You can configure the Single Logout URL to send a logout request to the IdP when a user logs out of your OctoberCMS site.
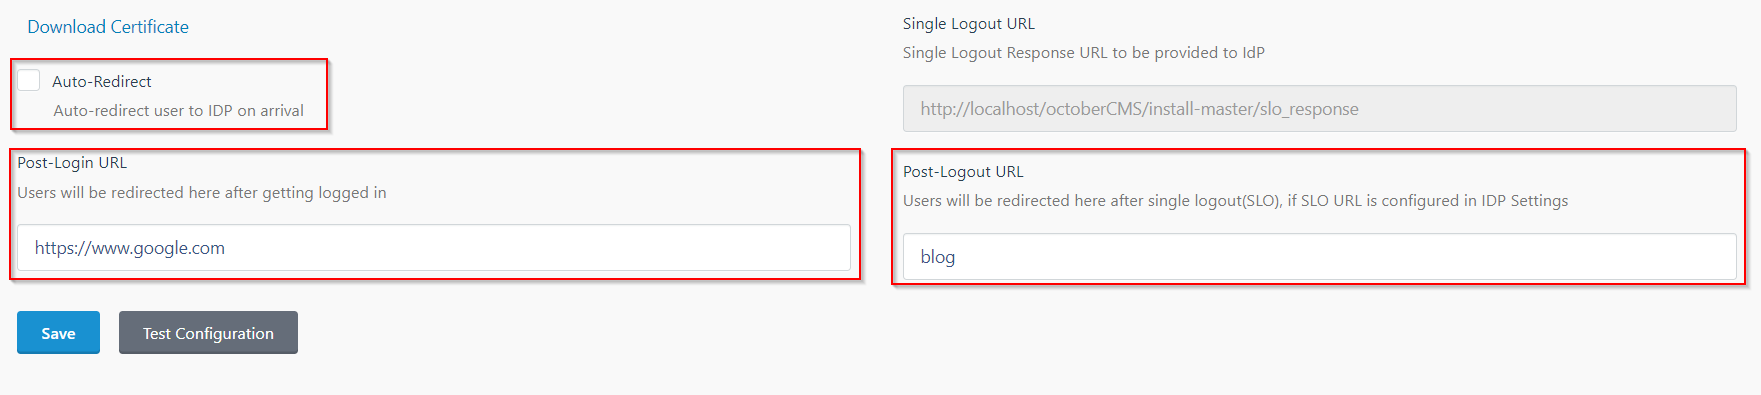
- In the SP Settings tab, you can configure Auto-Redirect to redirect users to IdP when they land on your site.
- You can configure the Post-Login and Post-Logout URLs to redirect users after they SSO and Single Logout.
- You can access the documentation for more details by going to Settings > Updates & Plugins > SAML 2.0 SP.
Additional Resources
If you are looking for anything which you cannot find, please drop us an email on info@xecurify.com
×
![]()
