SAML Single Sign-On (SSO) into October CMS Using PingFederate
SAML Single Sign-On (SSO) into October CMS Using PingFederate
October CMS Single Sign-On ( SSO ) plugin gives the ability to enable SAML Single Sign-On (SSO) for your October CMS sites. Our October CMS SSO plugin is compatible with all the SAML compliant Identity providers. Here we will go through a step-by-step guide to configure SAML SSO between October CMS site and your Identity Provider.
Pre-requisites
To integrate your Identity Provider(IDP) with October CMS, you need the following items:
- October CMS should be installed and configured.
- Download any Front-end user management plugins - RainLab/Buddies.
Download and Installation
- Login to your October CMS site’s backend: https://example.com/backend.
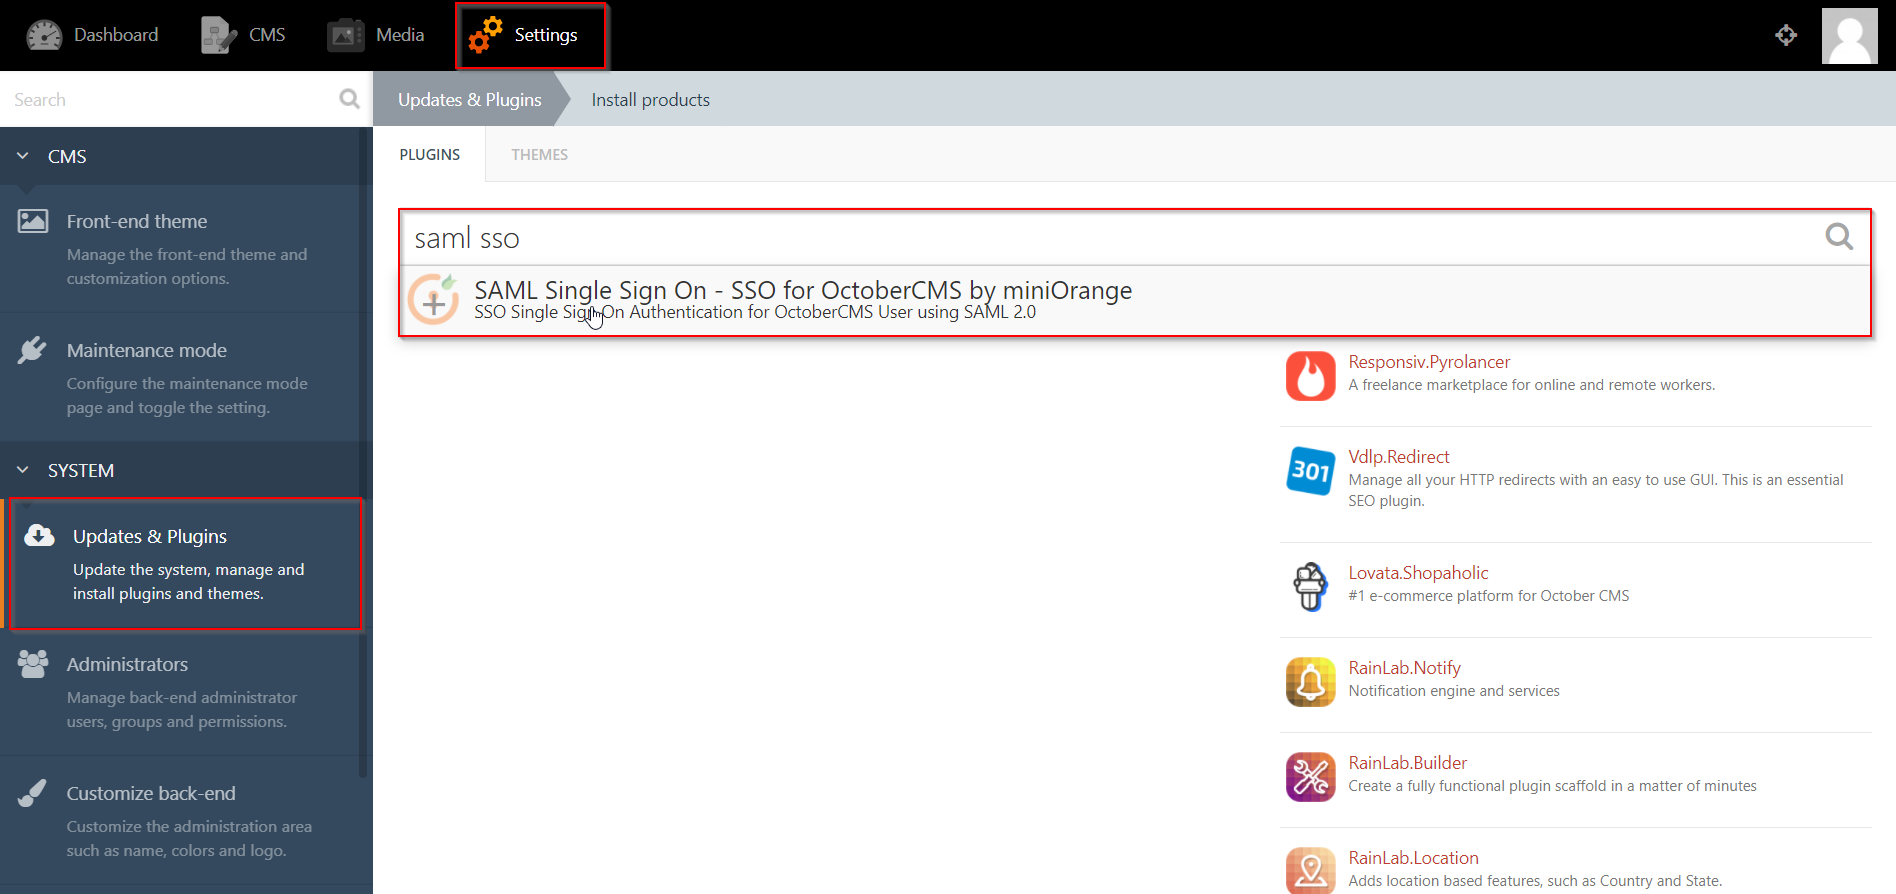
- From the admin dashboard, go to Settings from the main navigation bar and select Updates & Plugins.
- Click on Install plugins and in the search bar type “SAML SSO”.
- Click on the SAML SP Single Sign-On - SSO search result and the plugin will start installing.
Step 1:Setup PingFederate as Identity Provider
All the information required to configure the Ping Federate as SAML IDP i.e. plugin’s metadata is given in the Service Provider Info tab of the miniOrange plugin.
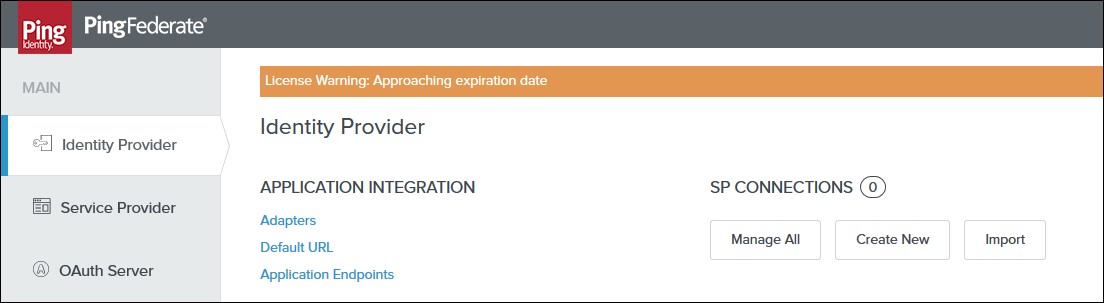
- Login to your Ping Federate user admin dashboard.
- Click on the Identity Provider in the left navigation menu.
- Under SP CONNECTION, click on Create New button.
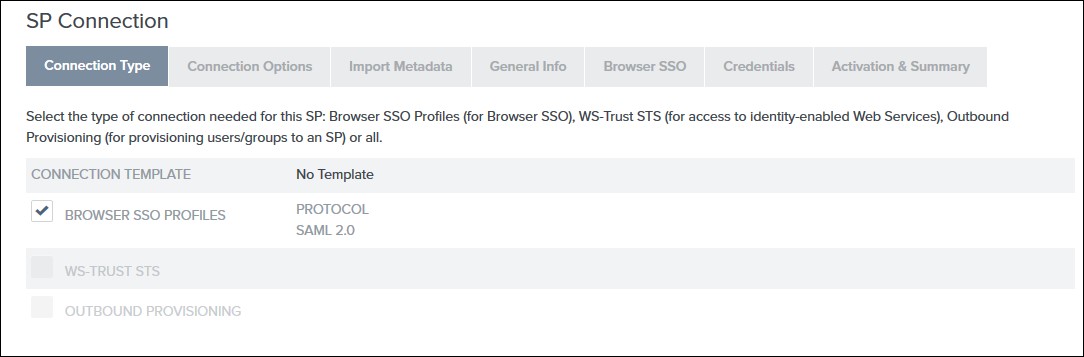
- Select the Browser SSO Profiles connection template on the Connection Type tab and click Next.
- Select Browser SSO on the Connection Options tab and click Next.
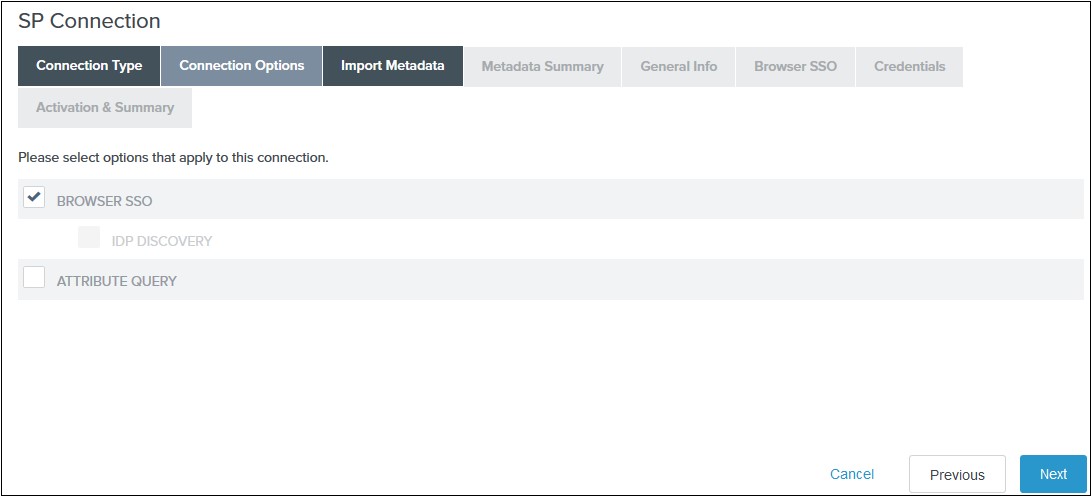
- Select File as the method for importing metadata and click Choose file to choose the miniOrange SSO plugin’s metadata on the Import Metadata tab. Click Next.
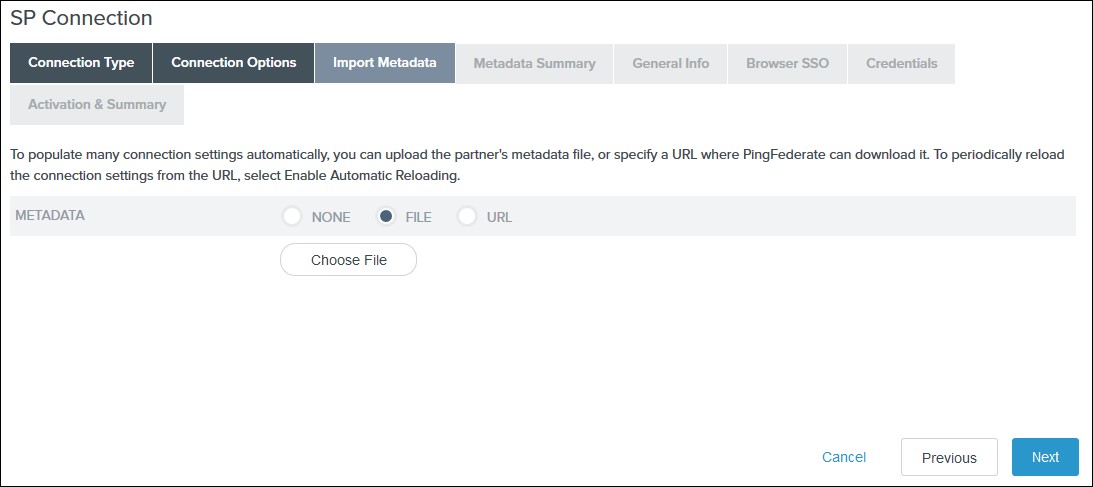
- Review the information on the Metadata Summary tab and click Next.
- In the General Info tab ensure that the Service Provider’s Entity ID, Connection Name, and Base URL fields pre-populate based on the metadata. Click Next.
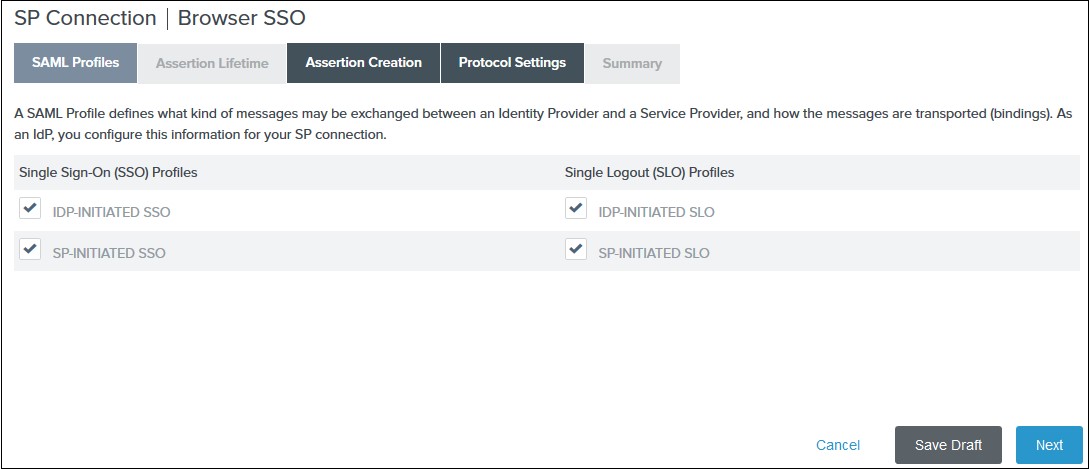
- Navigate to the Browser SSO tab and click on the Configure Browser SSO. You will be redirected to Browser SSO Setup wizard.
-
1) Select the IdP-Initiated SSO and SP-Initiated SSO options on the SAML Profiles tab and click Next.
 2) Enter your desired assertion validity time from on the Assertion Lifetime tab and click Next. By default, it is configured 5 minutes for both.
3) Navigate to the Assertion Creation and click on the Configure Assertion Creation. You will be redirected to the assertion creation setup wizard.
2) Enter your desired assertion validity time from on the Assertion Lifetime tab and click Next. By default, it is configured 5 minutes for both.
3) Navigate to the Assertion Creation and click on the Configure Assertion Creation. You will be redirected to the assertion creation setup wizard.
-
I. In the Identity Mapping tab select STANDARD and click Next.
II. Select a Subject Name Format for the SAML_SUBJECT on the Attribute Contract tab and click Next.
III. Click Map New Adapter Instance on the Authentication Source Mapping.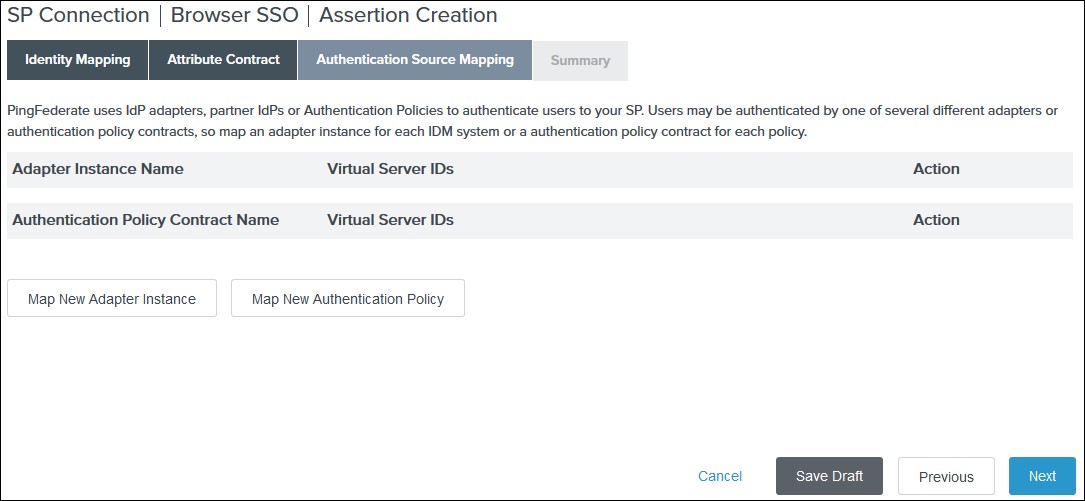 IV. Select an Adapter Instance and click Next. The adapter must include the user’s email address.
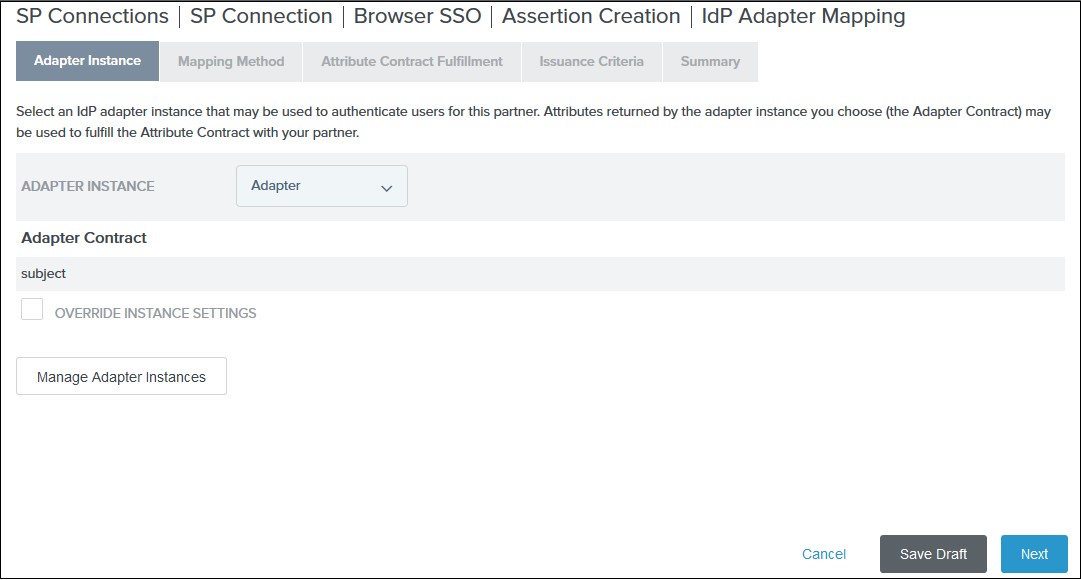 V. Select the Use only the adapter contract values in the SAML assertion option on the Mapping Method tab and click Next.
VI. Select your adapter instance as the Source and the email as the Value on the Attribute Contract Fulfilment tab and click Next.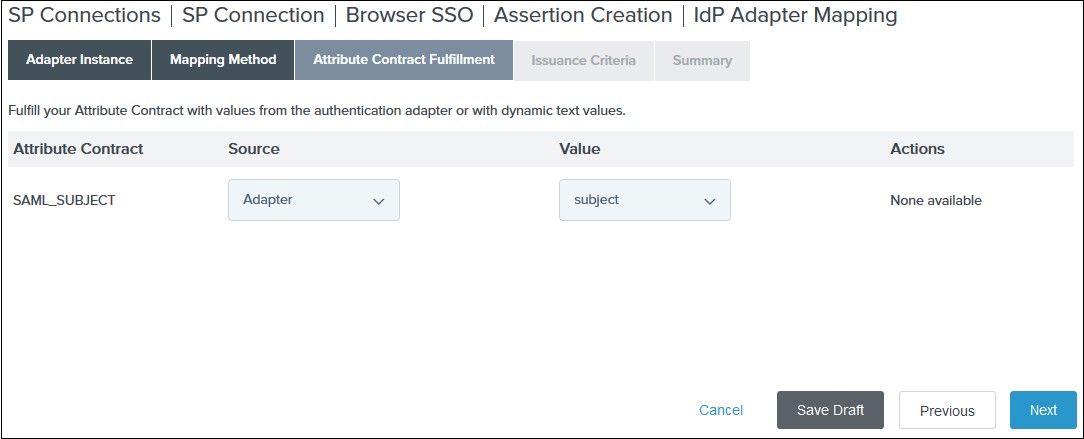 VII. (Optional) Select any authorization conditions you would like on the Issuance Criteria tab and click Next.
VIII. Click Done on the Summary. IX. Click Next on the Authentication Source Mapping tab. X. Click Done on the Summary tab. XI. Click Next on the Assertion Creation - Navigate to the Protocol Settings tab of the Browser SSO wizard and click on the Configure Protocol settings.
-
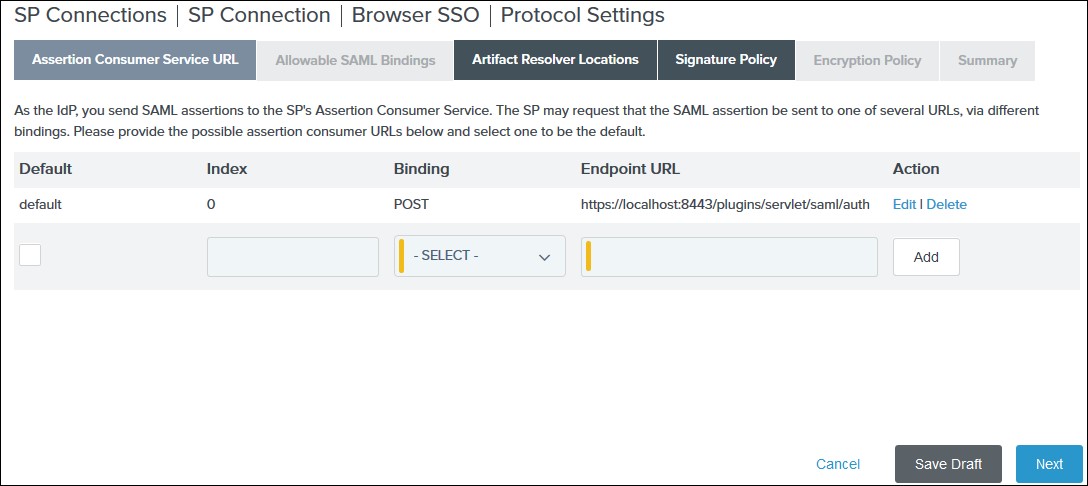
1) Select POST for Binding and specify the single sign-on endpoint URL in the Endpoint URL field on the Assertion Consumer Service URL. Click Next.
 2) Select POST on the Allowable SAML Bindings tab and click Next.
3) Select your desired signature policies for assertions on the Signature Policy tab and click Next.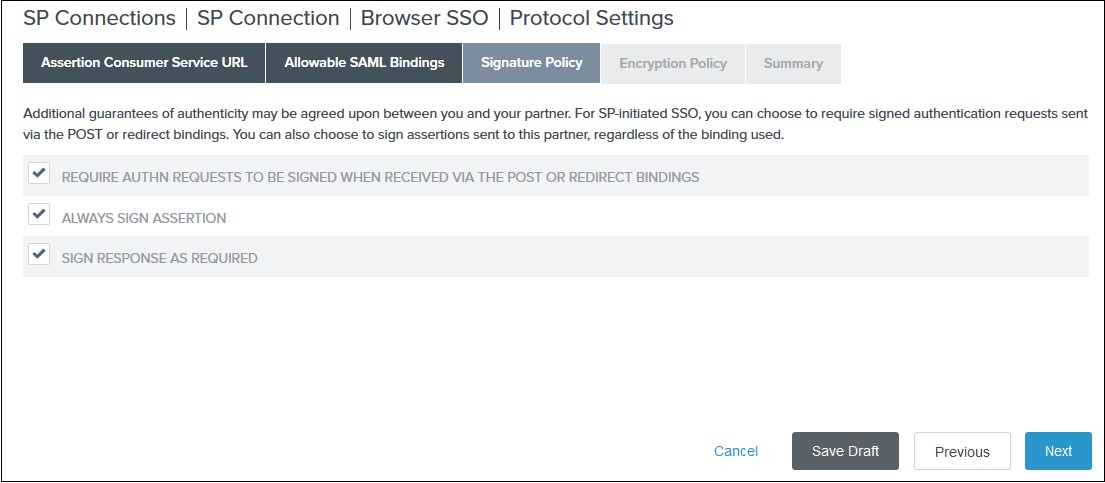 4) Select your desired encryption policy for assertions on the Encryption Policy tab and click Next.
5) Click Done on the Protocol Settings Summary tab.
6) Click Done on the Browser SSO Summary.
- Navigate to the Credentials and click on the Configure Credentials. You will be redirected to the Credentials setup wizard.
-
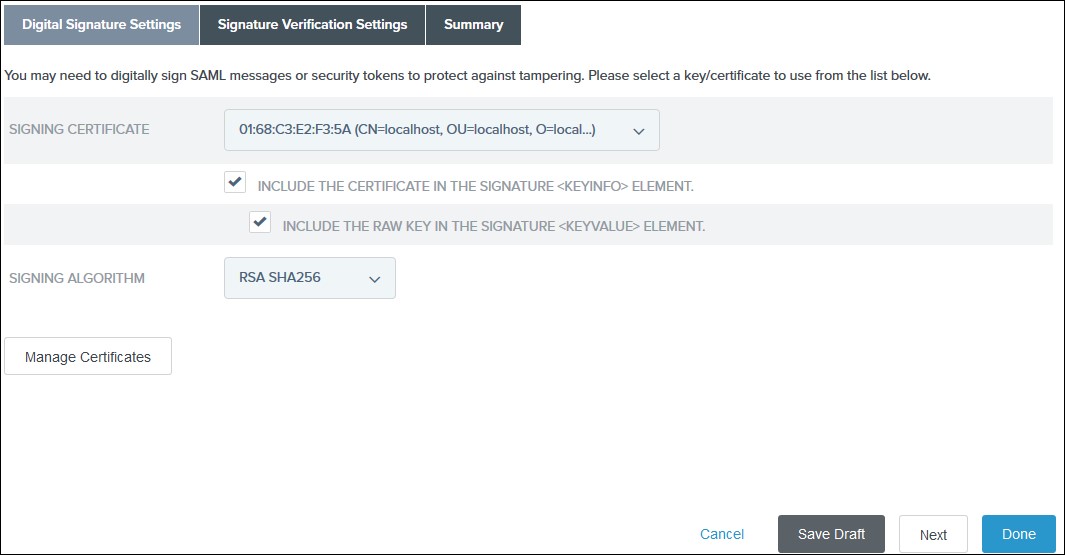
1) Select the Signing Certificate to use with the Single Sign-On service and select Include the certificate in the signature element in the Digital Signature Settings tab. Click Done.
 2) Click Done on the Summary.
3) Click Next on the Credentials.
- Select Active for the Connection Status on the Activation & Summary tab and click Save.
- Now, navigate to the Ping Federate User Admin dashboard Identity Provider.
- Click Manage All under SP Connections.
- Click Export Metadata for the desired service provider connection.
- Click Export on the Export & Summary tab and click Done.
×
![]()
Steps 2 : October CMS as SP
- Click on Single Sign On menu option from the main navigation bar at the top of your page.
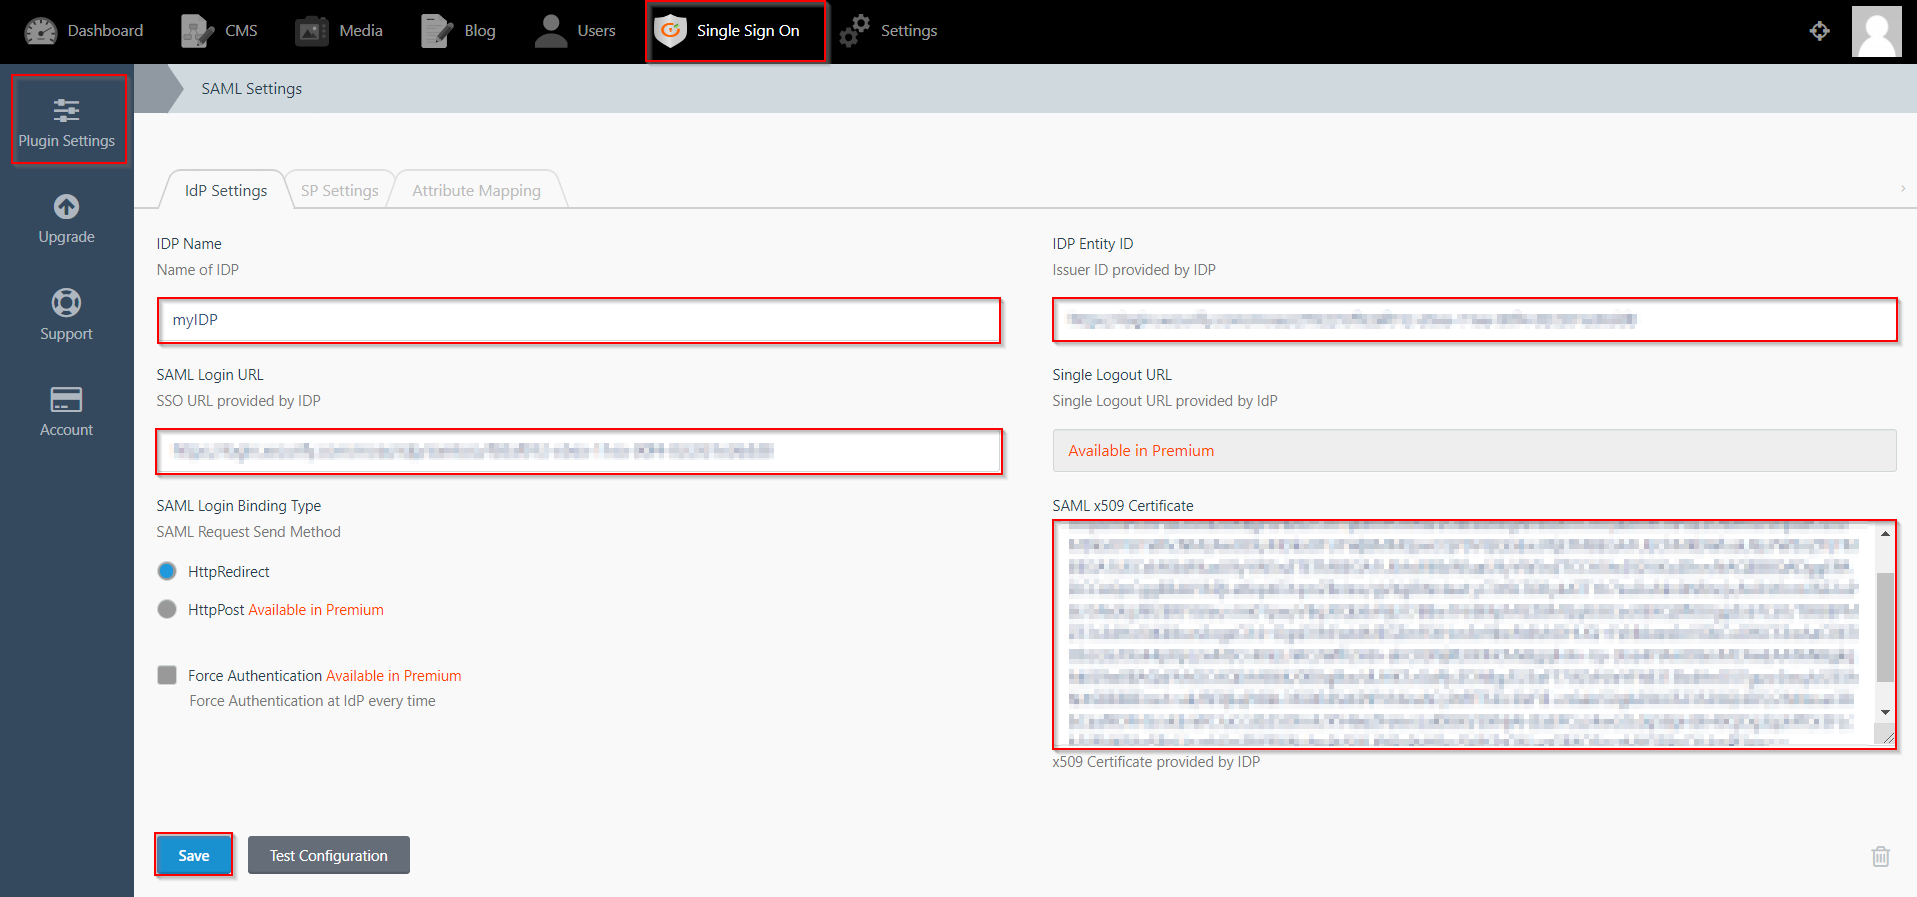
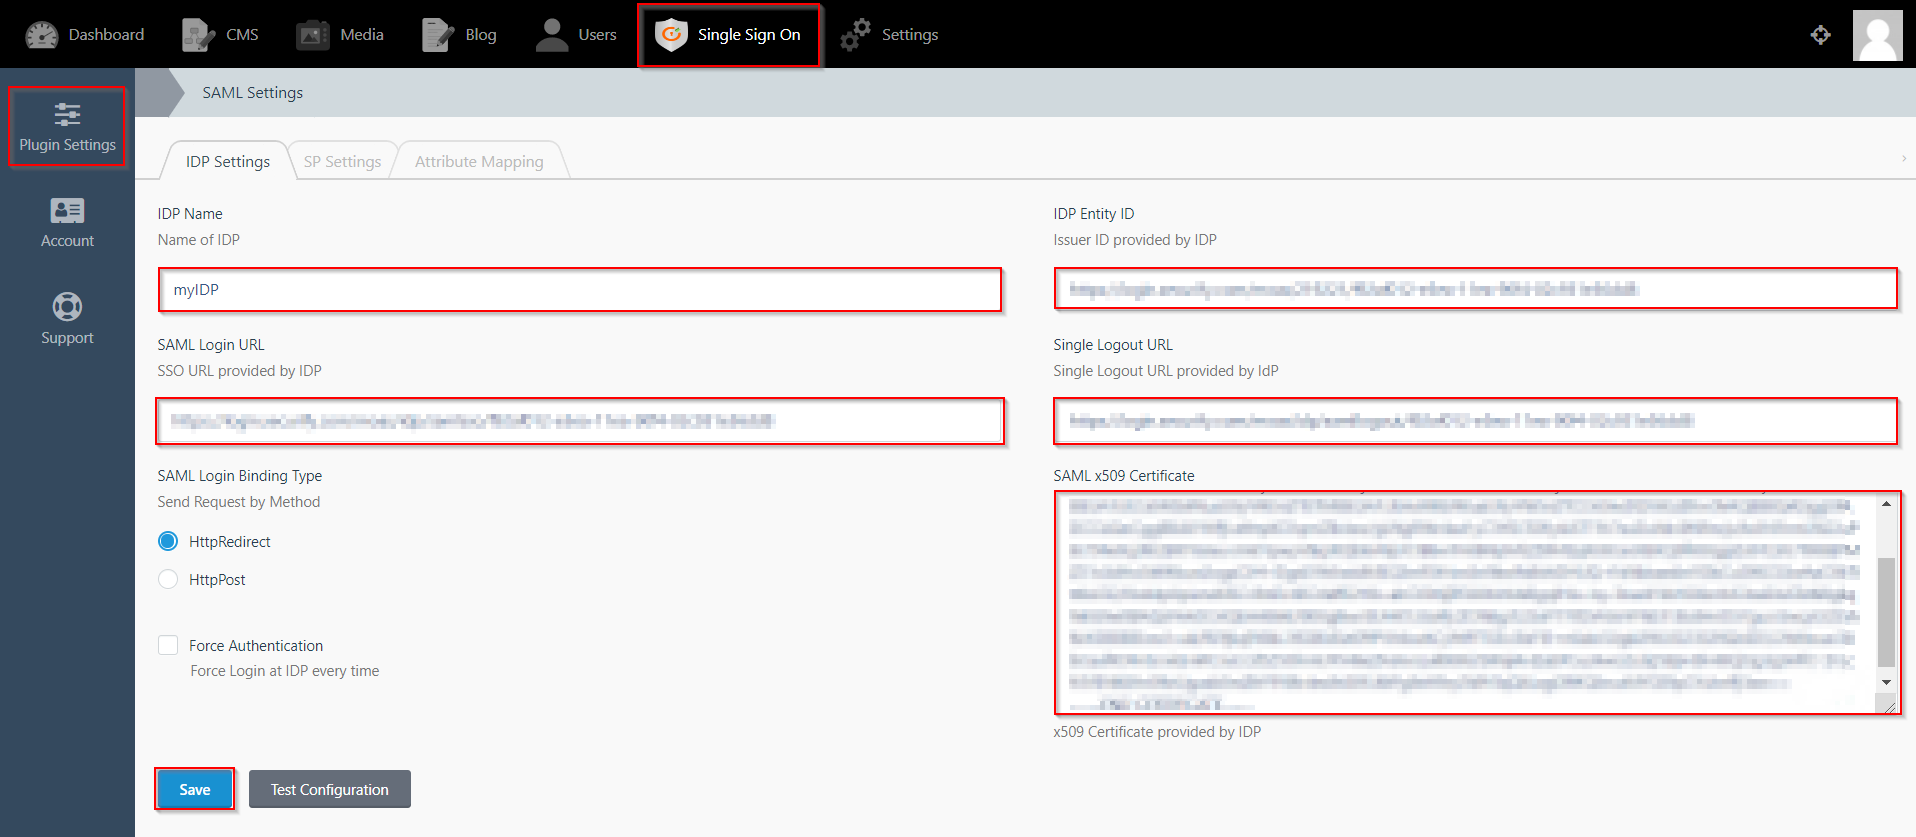
- You will see the Plugin Settings page. We will first configure the IdP Settings.
- Fill out the required fields according to the information provided by your Identity Provider. You can refer to the example given below.
- For Example:
- Click on Save button.
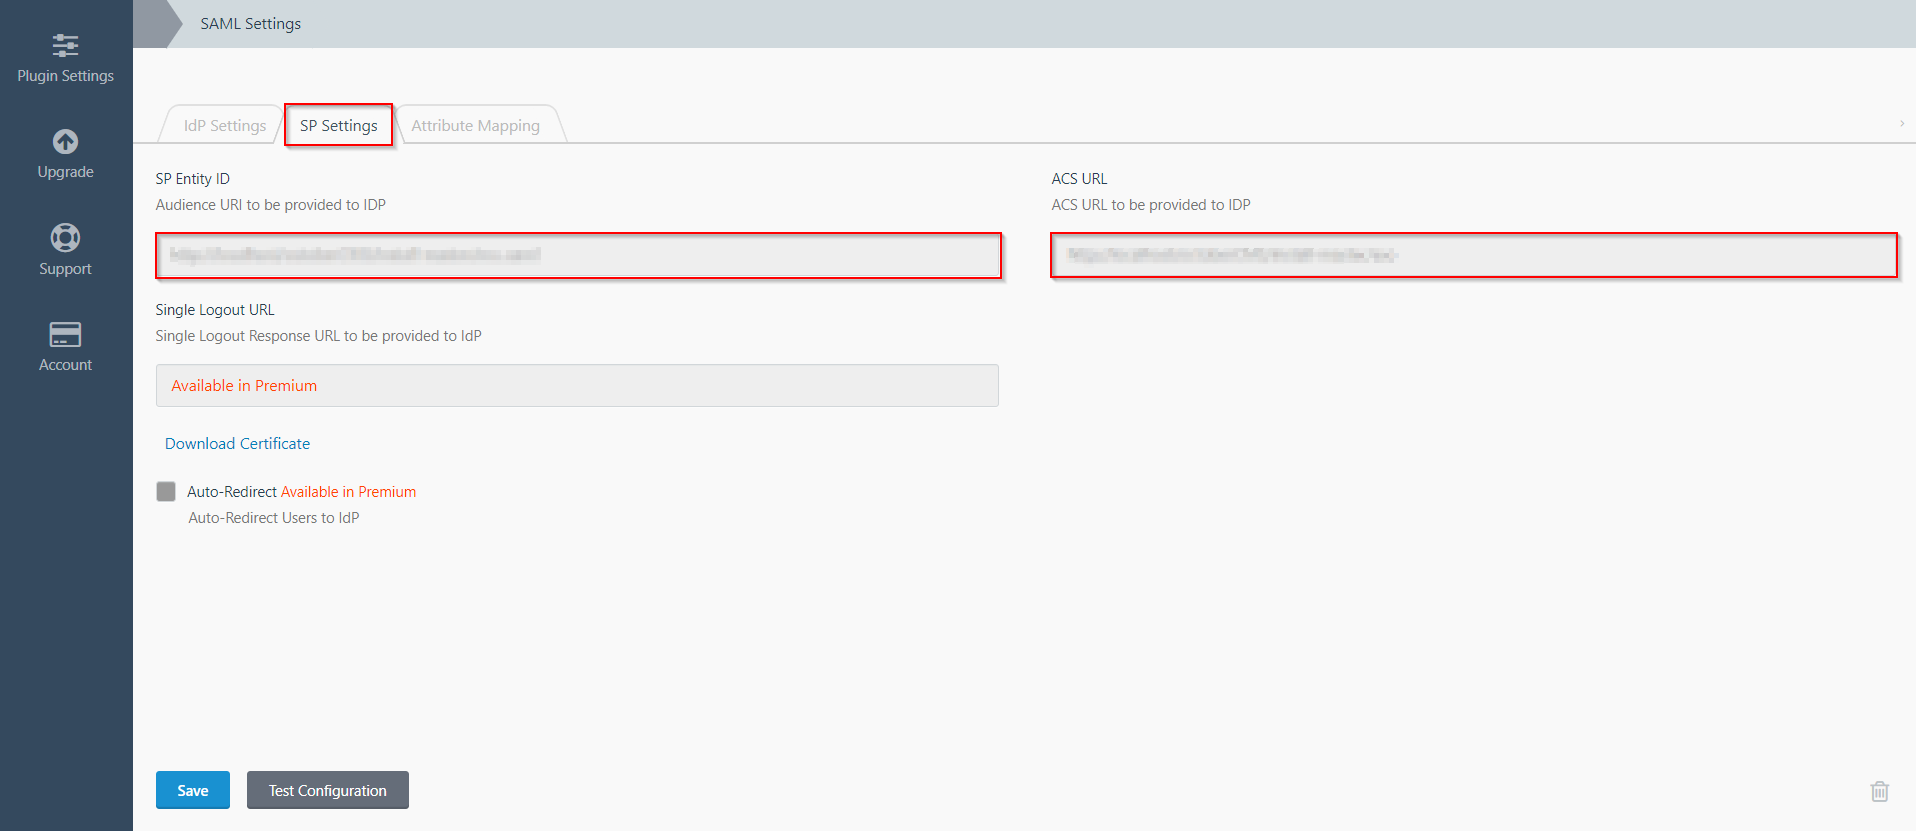
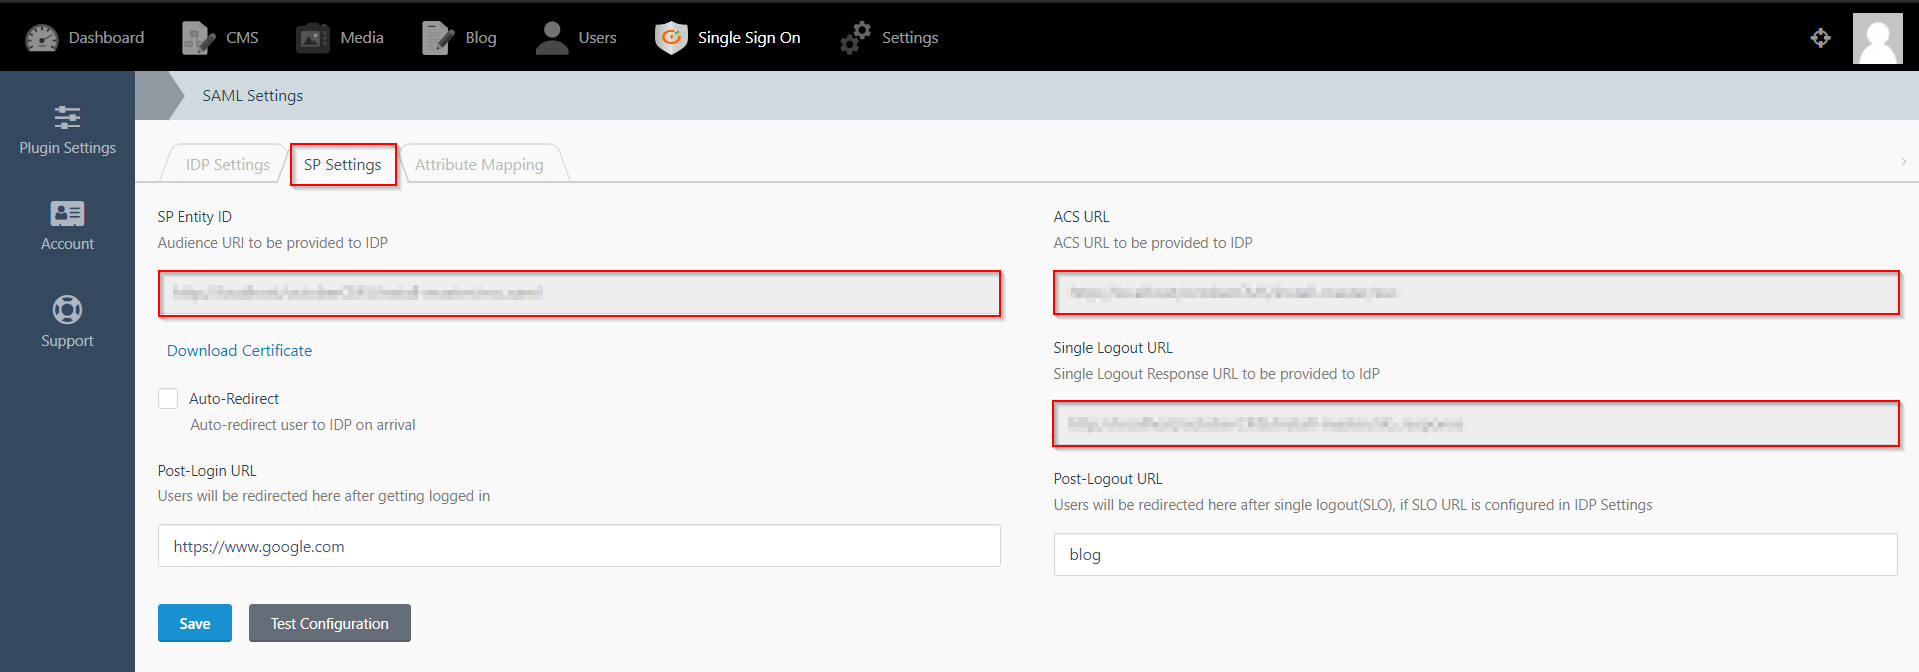
- The SP Settings tab has the data that you will need to provide to your IdP.
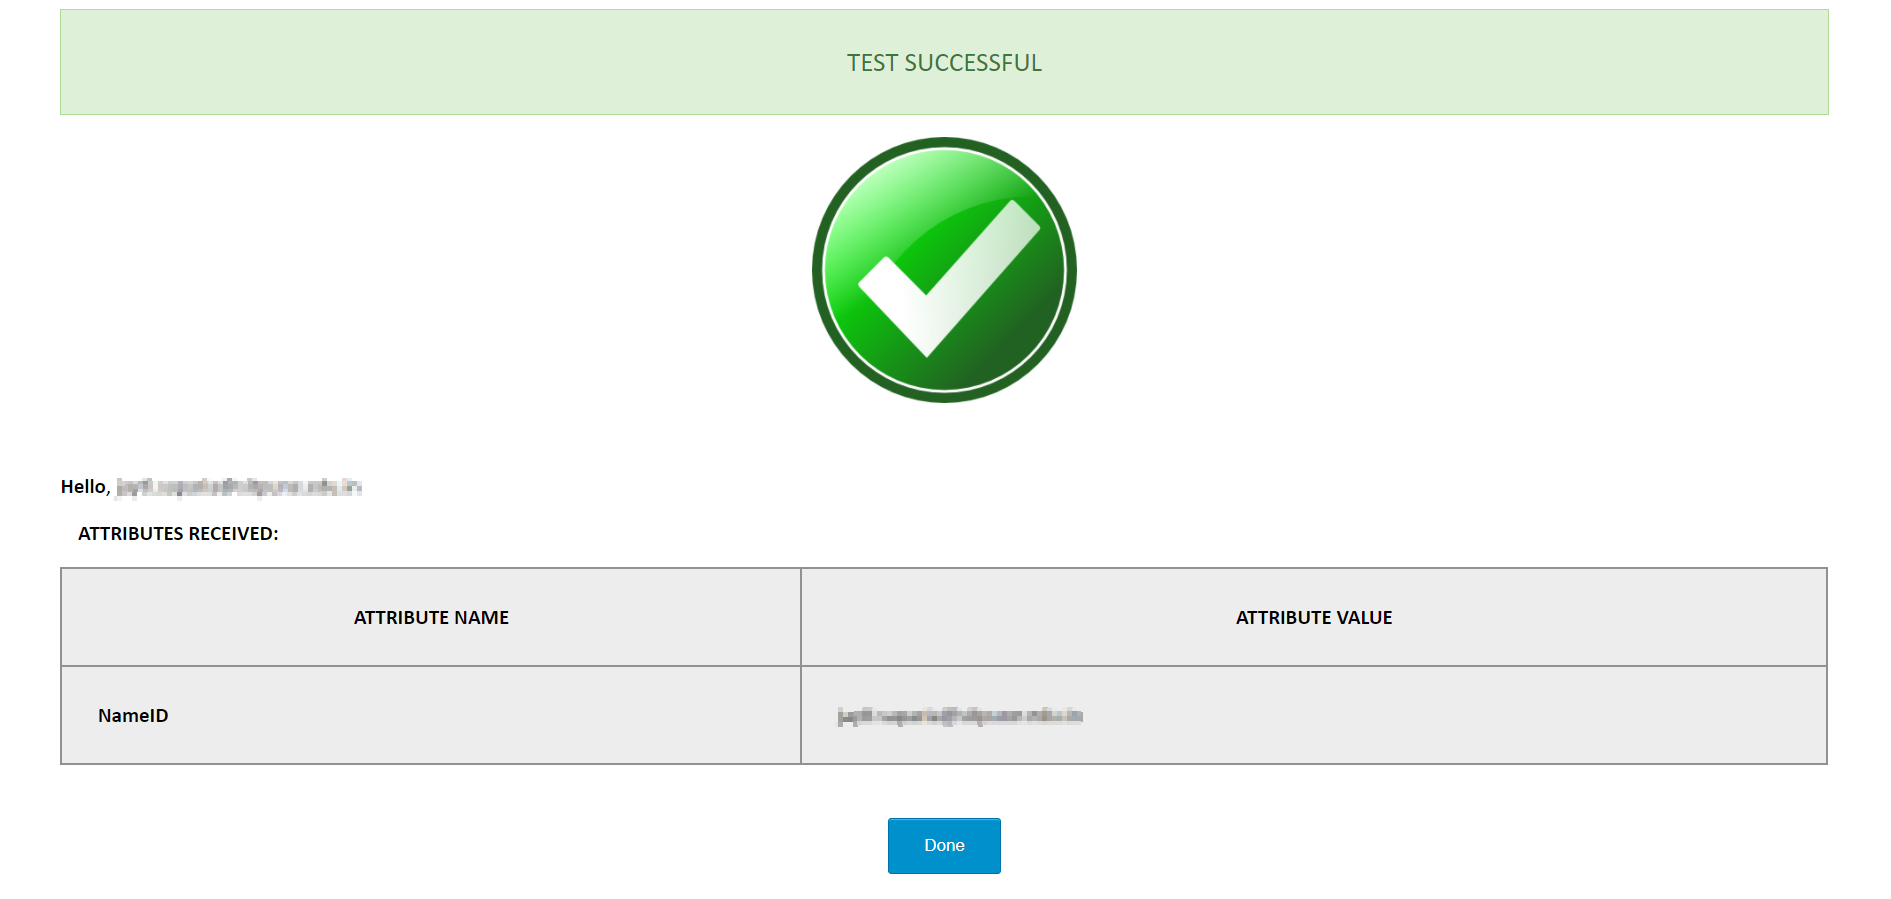
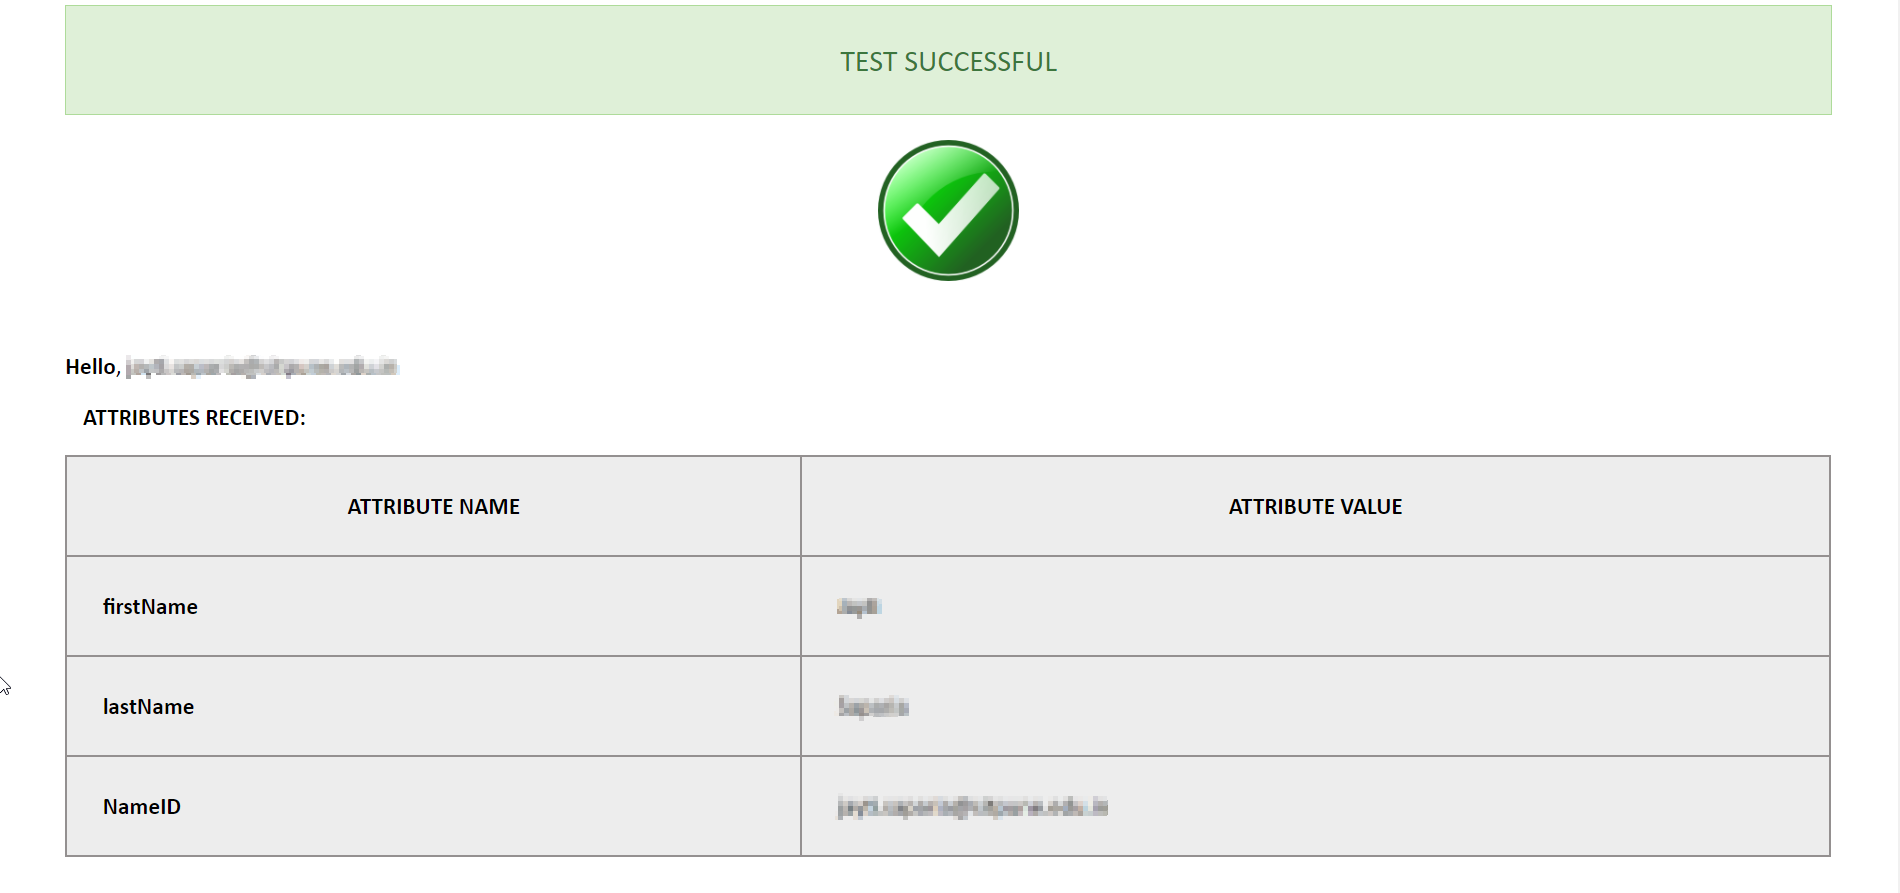
- Click on the Test Configuration button and the user details will be fetched. Test configuration will show the attributes that are received and are mapped by attribute mapping.
| IdP Name: | myIDP |
| IdP Entity Id: | https://login.xecurify.com/moas/ |
| SAML Login URL: | https://login.xecurify.com/moas/idp/samlsso |
| SAML x509 Certificate: | Certificate provided by your IdP. |
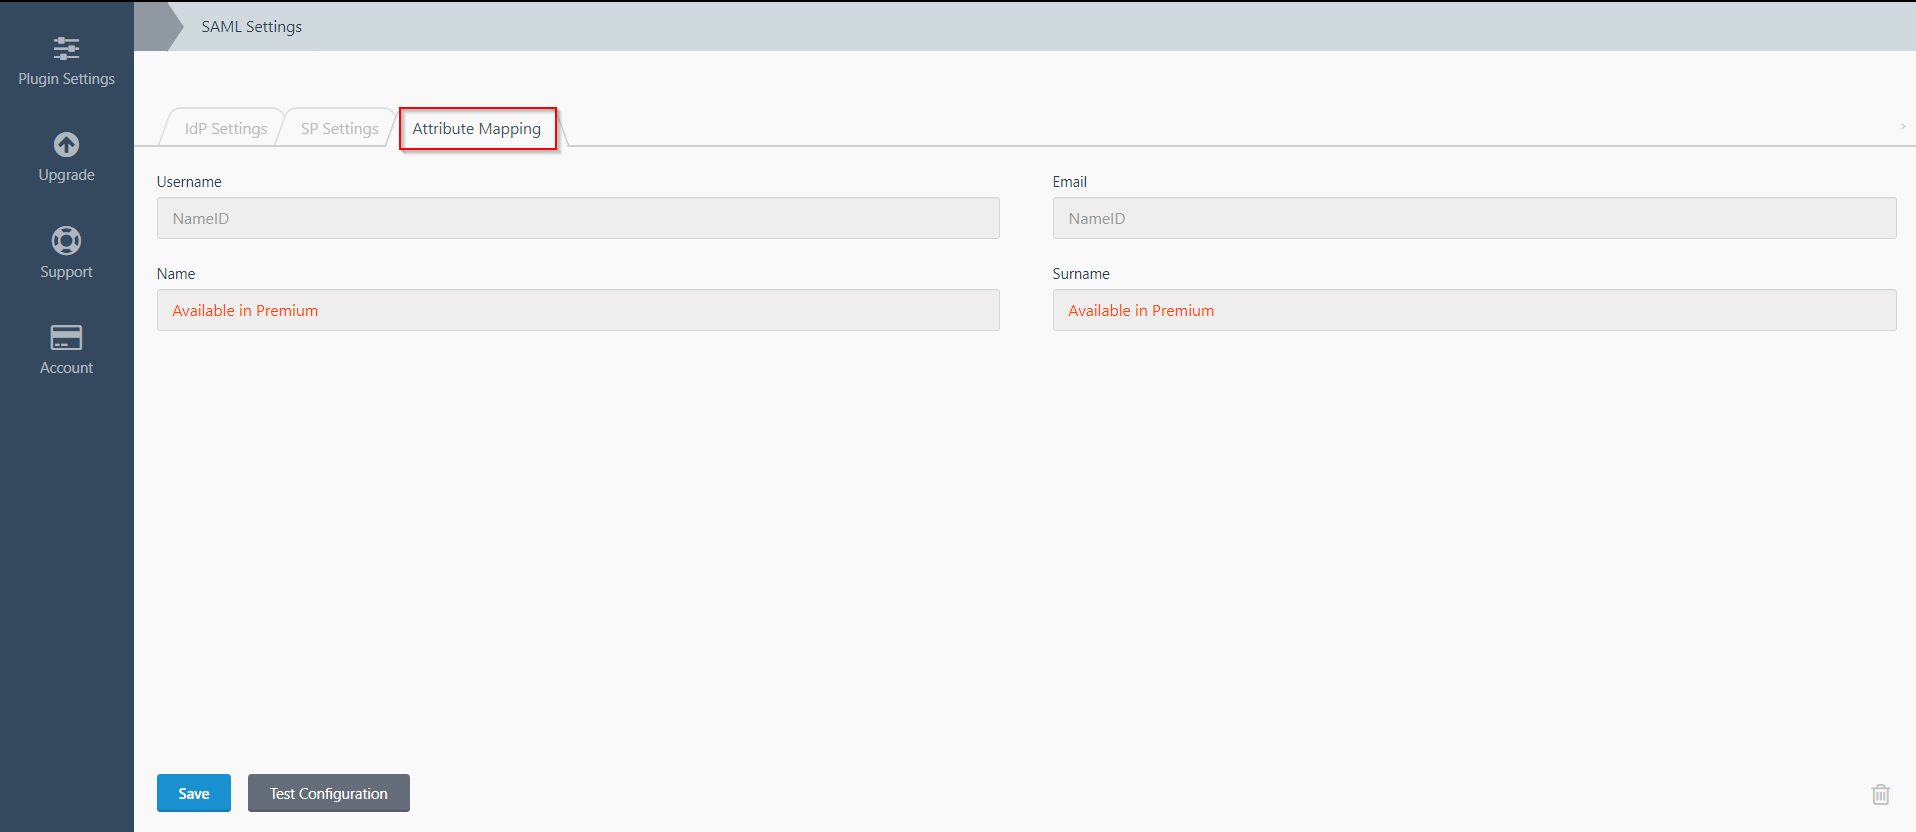
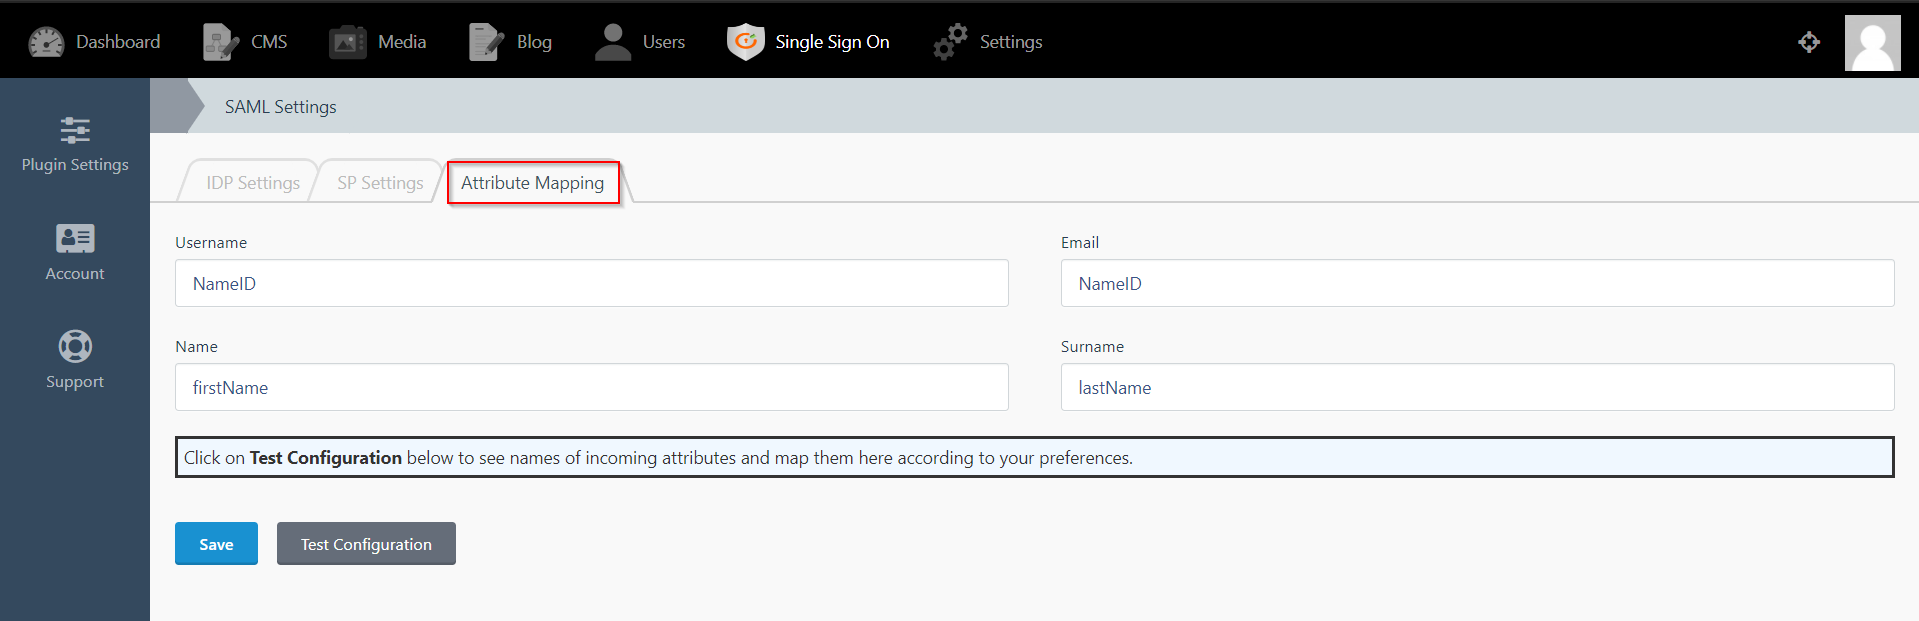
Step 3: Attribute Mapping
- Attribute Mapping feature allows you to map the user attributes sent by the IDP during SSO to the user attributes at October CMS.
- Go to Attribute Mapping menu option from the main navigation bar at the top of your page.
- It provides the Custom Atrribute Mapping feature in Premium plugin.
- Click on Single Sign On menu option from the main navigation bar at the top of your page.
- You will see the Plugin Settings page. We will first configure the IdP Settings.
- Fill out the required fields according to the information provided by your Identity Provider. You can refer to the example given below.
- For Example:
- Click on Save button.
- The SP Settings tab has the data that you will need to provide to your IdP.
- Click on the Test Configuration button and the user details will be fetched. Test configuration will show the attributes that are received and are mapped by attribute mapping.
| IdP Name: | myIDP |
| IdP Entity Id: | https://login.xecurify.com/moas/ |
| SAML Login URL: | https://login.xecurify.com/moas/idp/samlsso |
| SAML Logout URL: | https://login.xecurify.com/moas/idp/samllogout/ |
| SAML x509 Certificate: | Certificate provided by your IdP. |
Step 3: Attribute Mapping
- Attribute Mapping feature allows you to map the user attributes sent by the IDP during SSO to the user attributes at October CMS.
- Go to Attribute Mapping menu option from the main navigation bar at the top of your page.
- It also provide Custom Attribute mapping feature, which allows you to map any attribute sent by the IDP to the October CMS.
- You can map the attribute names received in Test Configuration to the user credentials of your October CMS users.
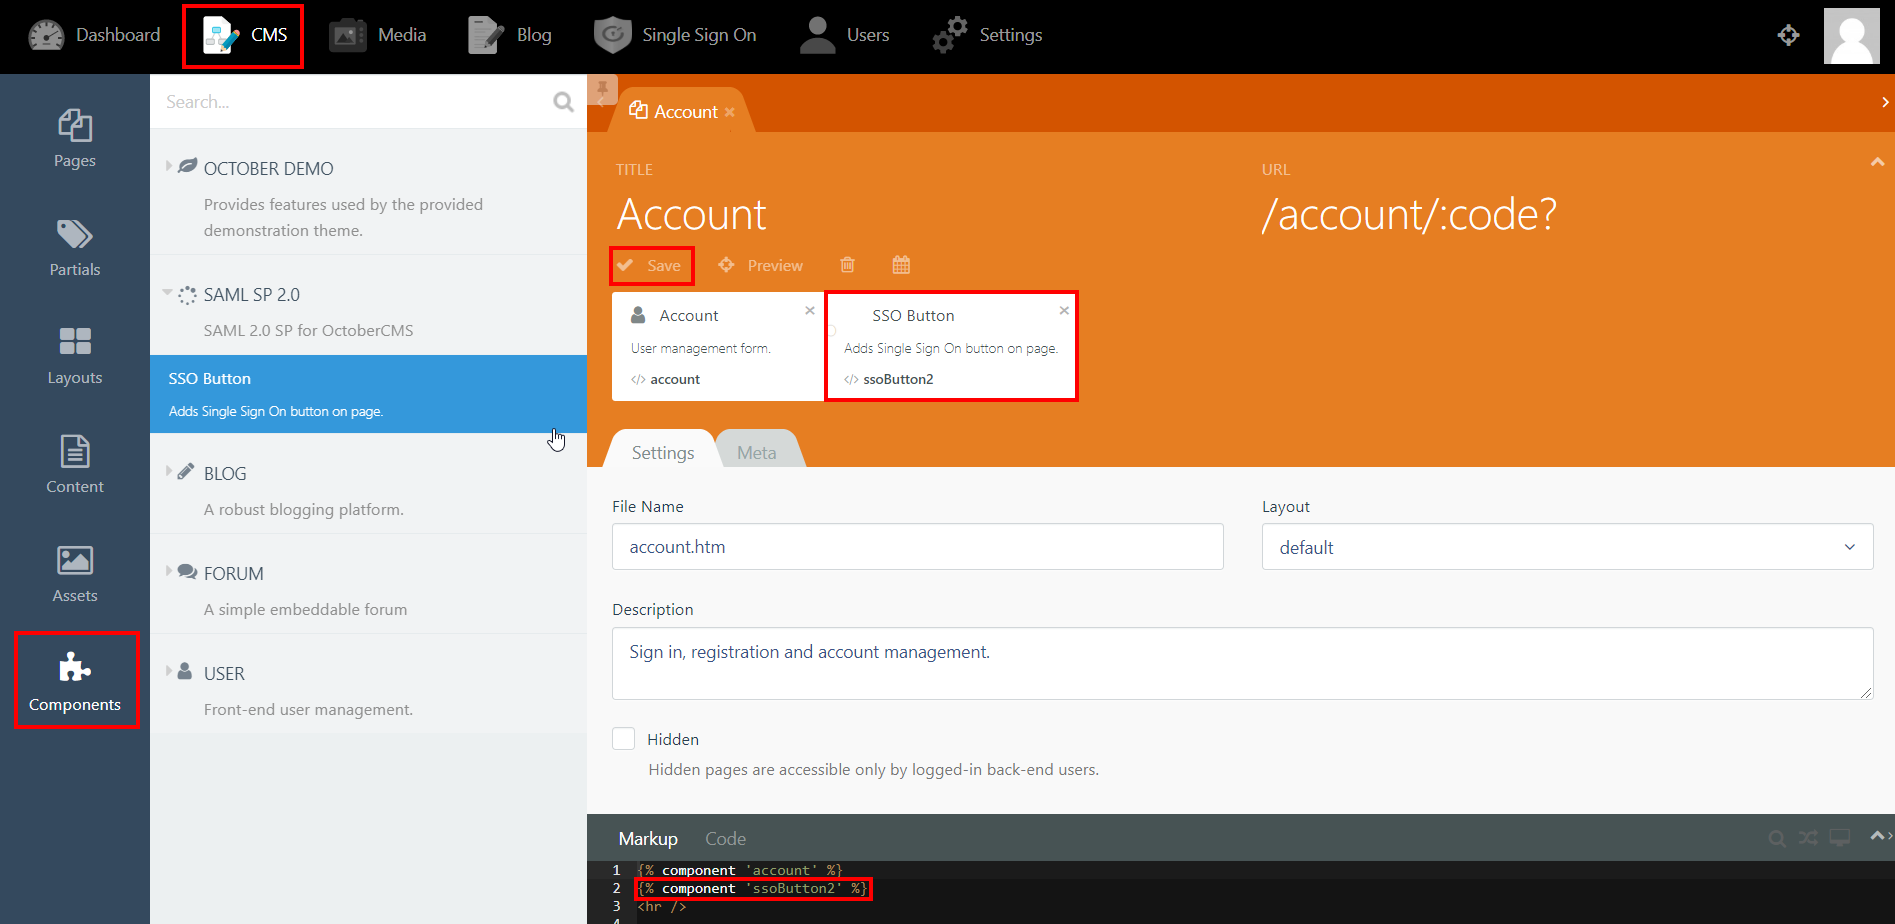
Step 4: SSO Button Component
- Click on CMS from the main navigation and select the page that you want to place the button on from the Pages menu on the left-hand side.
- Click on Components and click on SAML 2.0 SP to reveal the SSO Button component.
- Drag and drop the component on to your selected page. Hit save and preview.
- Click on the Single Sign-On (SSO) button to start the authentication flow for frontend users.
- The button for Backend login screen is generated automatically.
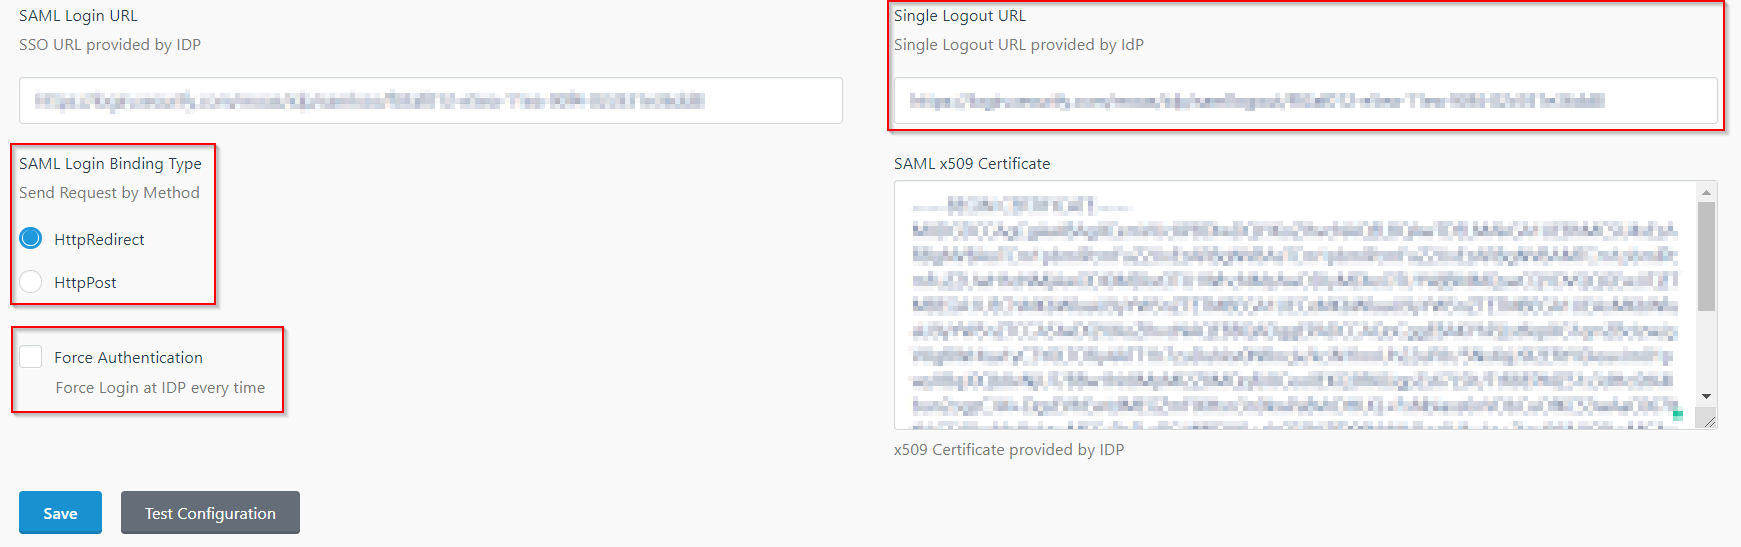
Step 5: SSO Options
- In the IDP Settings tab, you can configure Force Authentication to force login screen at IdP every time your users are redirected for SSO.
- You can configure the Login Binding type to choose the method of sending the SAML request.
- You can configure the Single Logout URL to send a logout request to the IdP when a user logs out of your OctoberCMS site.
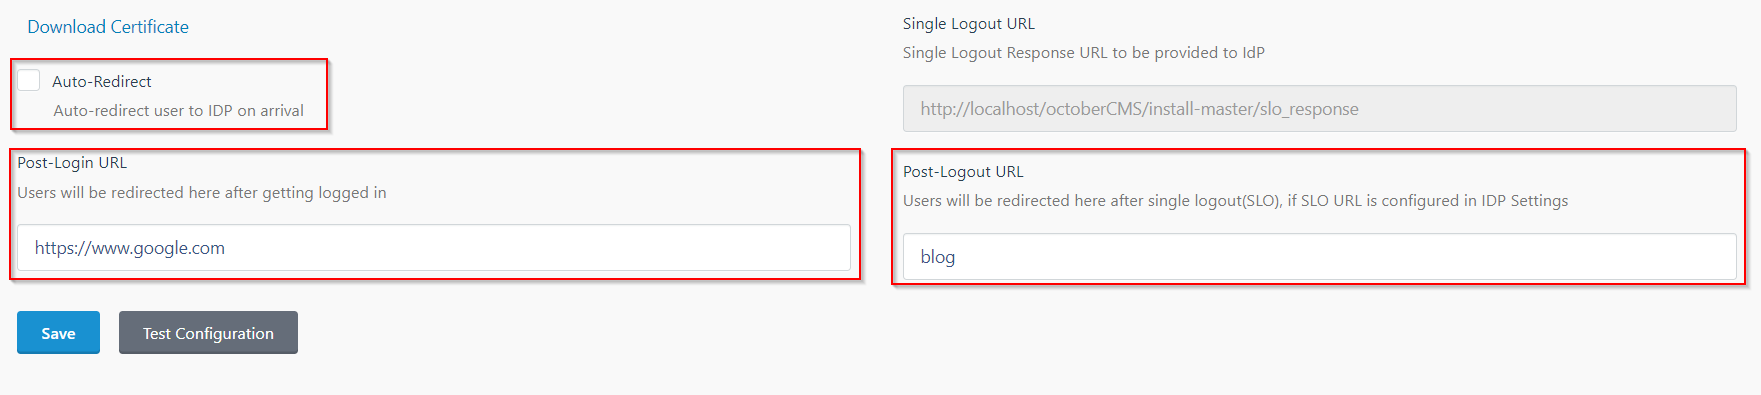
- In the SP Settings tab, you can configure Auto-Redirect to redirect users to IdP when they land on your site.
- You can configure the Post-Login and Post-Logout URLs to redirect users after they SSO and Single Logout.
- You can access the documentation for more details by going to Settings > Updates & Plugins > SAML 2.0 SP.
Additional Resources
If you are looking for anything which you cannot find, please drop us an email on info@xecurify.com
Trending searches:
Hello there!
Need Help? We are right here!
