Ping One as IDP
Step 1: Setup Ping One as Identity Provider
- Login to your Ping One environment as the administrator. Click on your ProfileAdmin.
- Go to ApplicationsAdd ApplicationNew SAML Application.
- Enter the application details and click Continue. Application Name, Application Description, and Category are required fields. For logos and icons, PNG is the only supported graphics format.
All the information required to configure the Ping One as IDP i.e. plugin’s metadata is given in the Service Provider Info tab of the miniOrange SAML plugin.

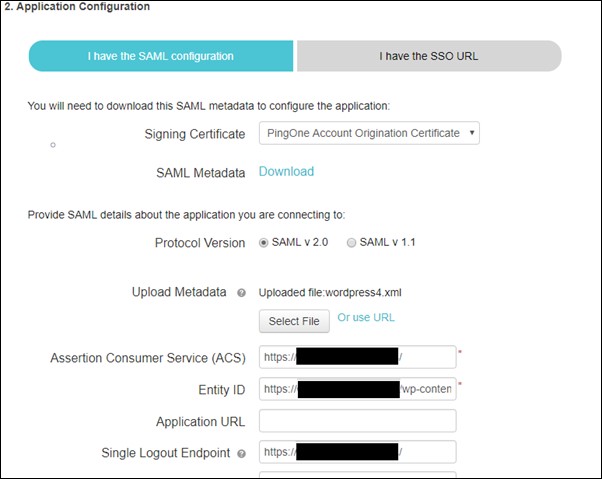
 Provide the SAML configuration details for the application.
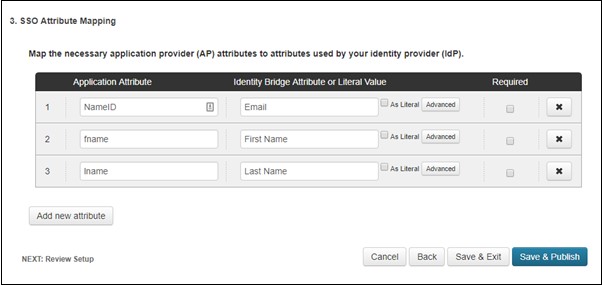
- Click Continue to Next Step. The SSO Attribute Mapping page is displayed.
- In the Attribute Mapping, Modify or add any attribute mappings as necessary for the application.
- The summary information for the application configuration is then displayed on a new page and the new SAML application is added to your My Applications list.
1.Signing. In the dropdown list, select the signing certificate you want to use.
2.SAML Metadata. Click Download to retrieve the SAML metadata for Ping One. This supplies the Ping One connection information to the application.
3.Protocol Version. Select the SAML protocol version appropriate for your application.
4.Upload Metadata. Click Choose File to upload the application’s metadata file. The entries for ACS URL and Entity ID will then be supplied for you. If you do not upload the application metadata, you will need to enter this information manually. When you are manually assigning an Entity ID value, the Entity ID must be unique, unless you are assigning the Entity ID value for a private, managed application (an application that is supplied and configured by a PingOne for Enterprise administrator, rather than by an SP.
5.Single Logout Endpoint. The URL to which our service will send the SAML Single Logout (SLO) request using the Single Logout Binding Type that you select.
6.Single Logout Response Endpoint. The URL to which your service will send the SLO Response.
7.Single Logout Binding Type. Select the binding type (Redirect or POST) to use for SLO.
8.Primary Verification Certificate. Click Choose File to upload the primary public verification certificate to use for verifying the SP signatures on SLO requests and responses.
9.Signing Algorithm. Use the default value or select the algorithm to use from the dropdown list.
Optional:
I.Encrypt Assertion. If selected, the assertions PingOne sends to the SP for the application will be encrypted.
II.Encryption Certificate: Upload the certificate from miniOrange plugin to use to encrypt the assertions.
III.Encryption Algorithm: Choose the algorithm to use for encrypting the assertions. We recommend AES_256 (the default), but you can select AES_128 instead.
IV.Transport Algorithm: The algorithm used for securely transporting the encryption key. Currently, RSA-OAEP is the only transport algorithm supported.
V.Force Re-authentication. If selected, users having a current, active SSO session will be re- authenticated by the identity bridge to establish a connection to this application.
Need Help? We are right here!
